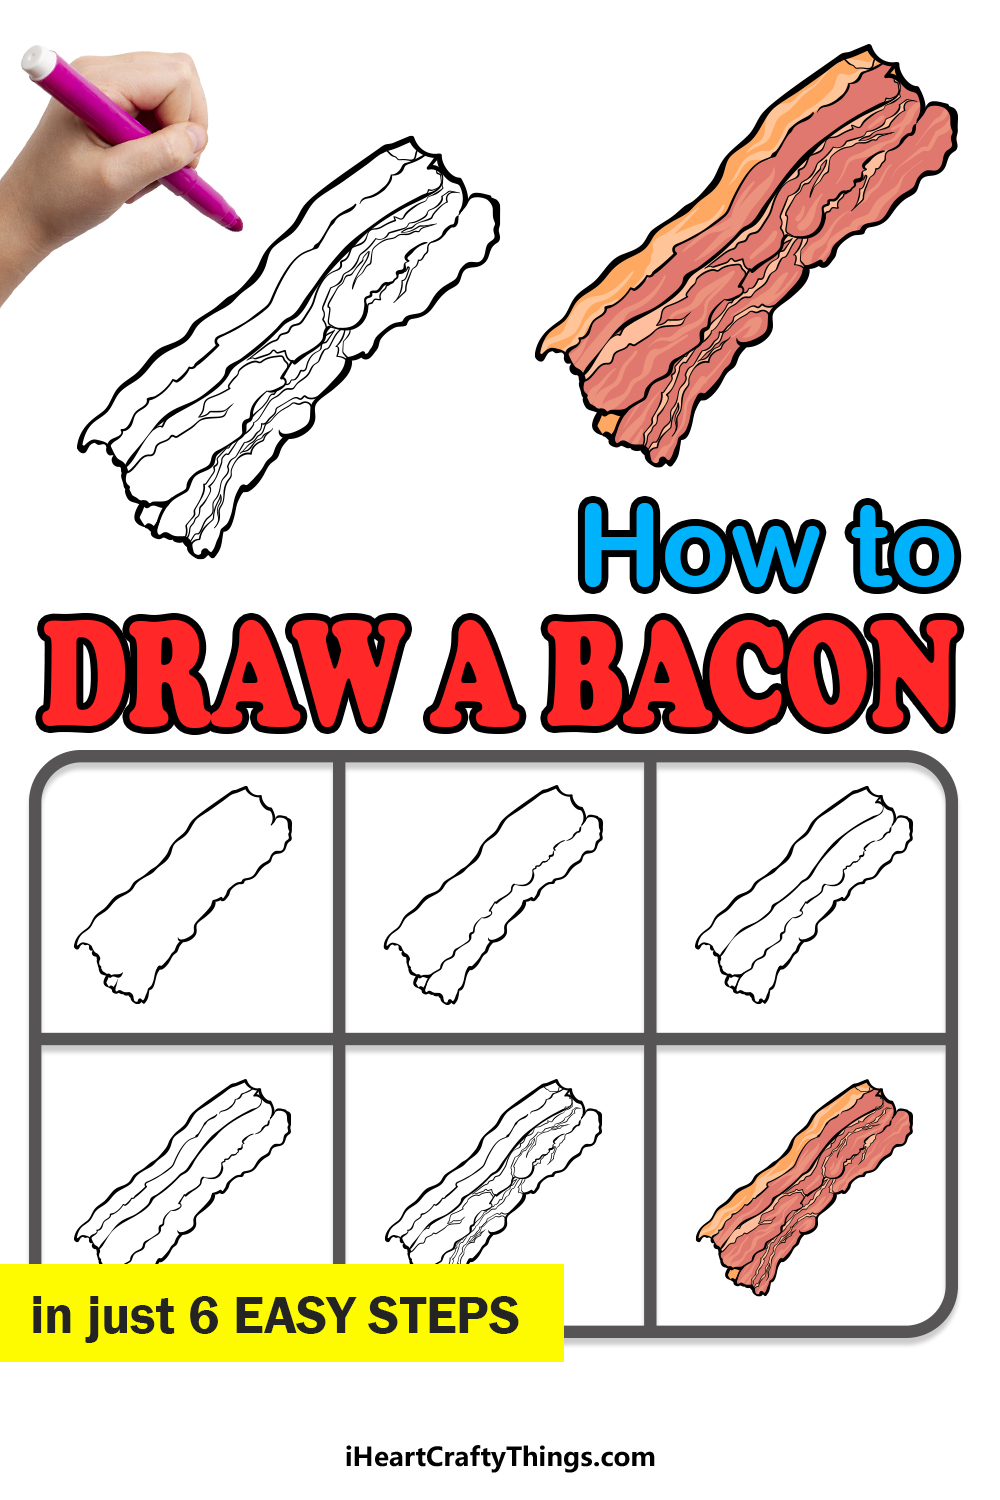
There are many kinds of food that have become closely associated with breakfast time. From pancakes to many kinds of cereal, there is a huge variety of different breakfast food to enjoy.
Perhaps the most beloved breakfast food is bacon, and millions of people tuck into this sizzling treat every day.
There are also many varieties of bacon from vegetarian to turkey, and learning how to draw bacon is a great way to imagine what kind you would like right now.
If you would like to know how you can create some artwork featuring this tasty food, then be sure to keep reading!
Our step-by-step guide on how to draw bacon will show you how to do it and have fun at the same time.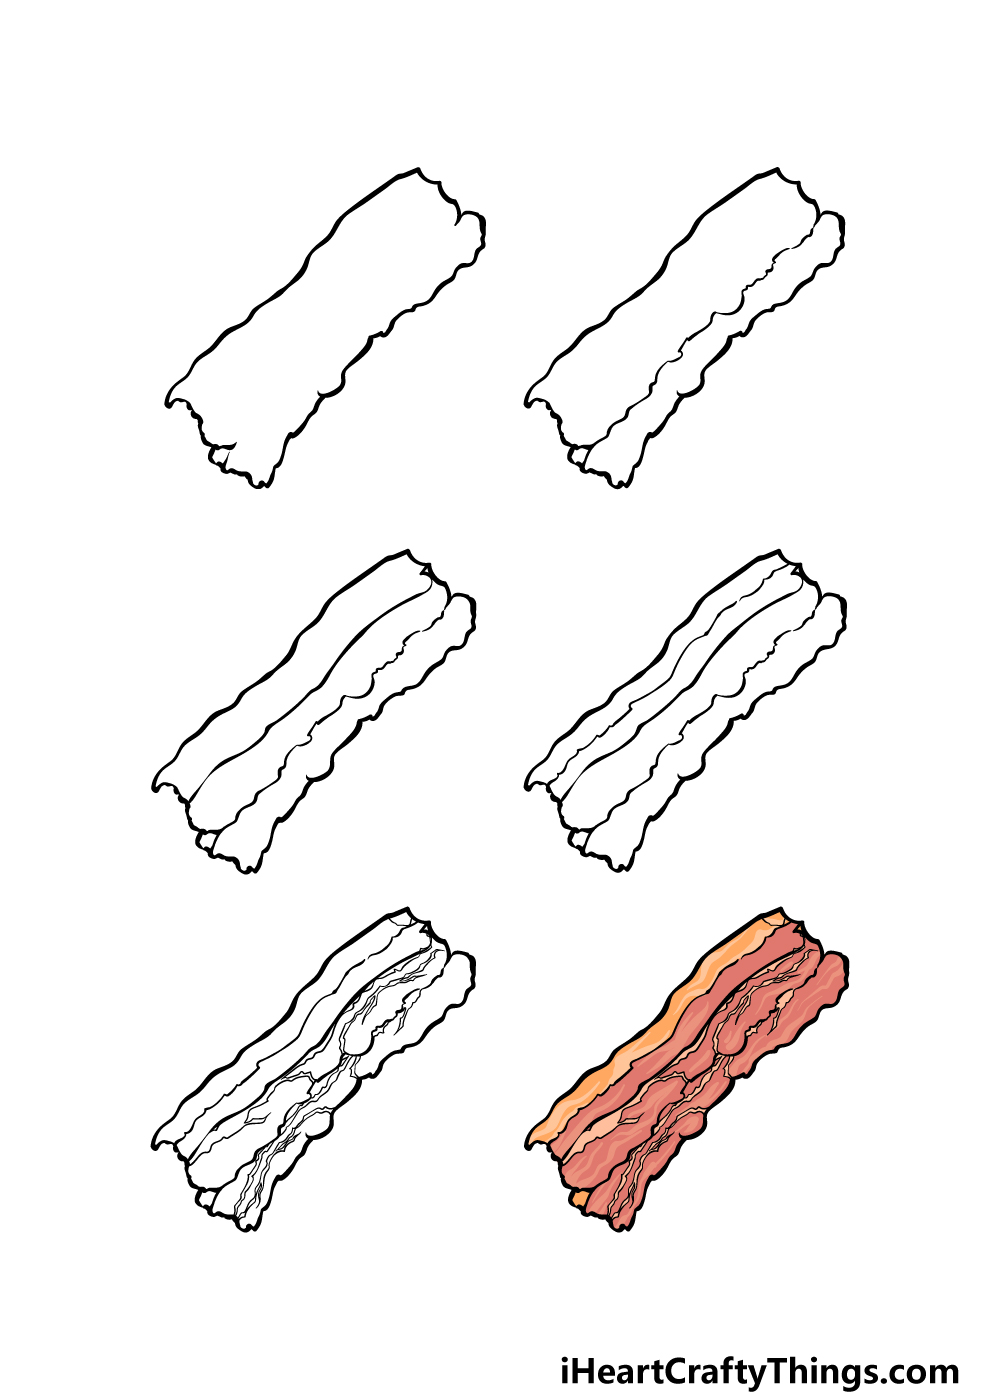
How to Draw Bacon – Let’s Get Started!
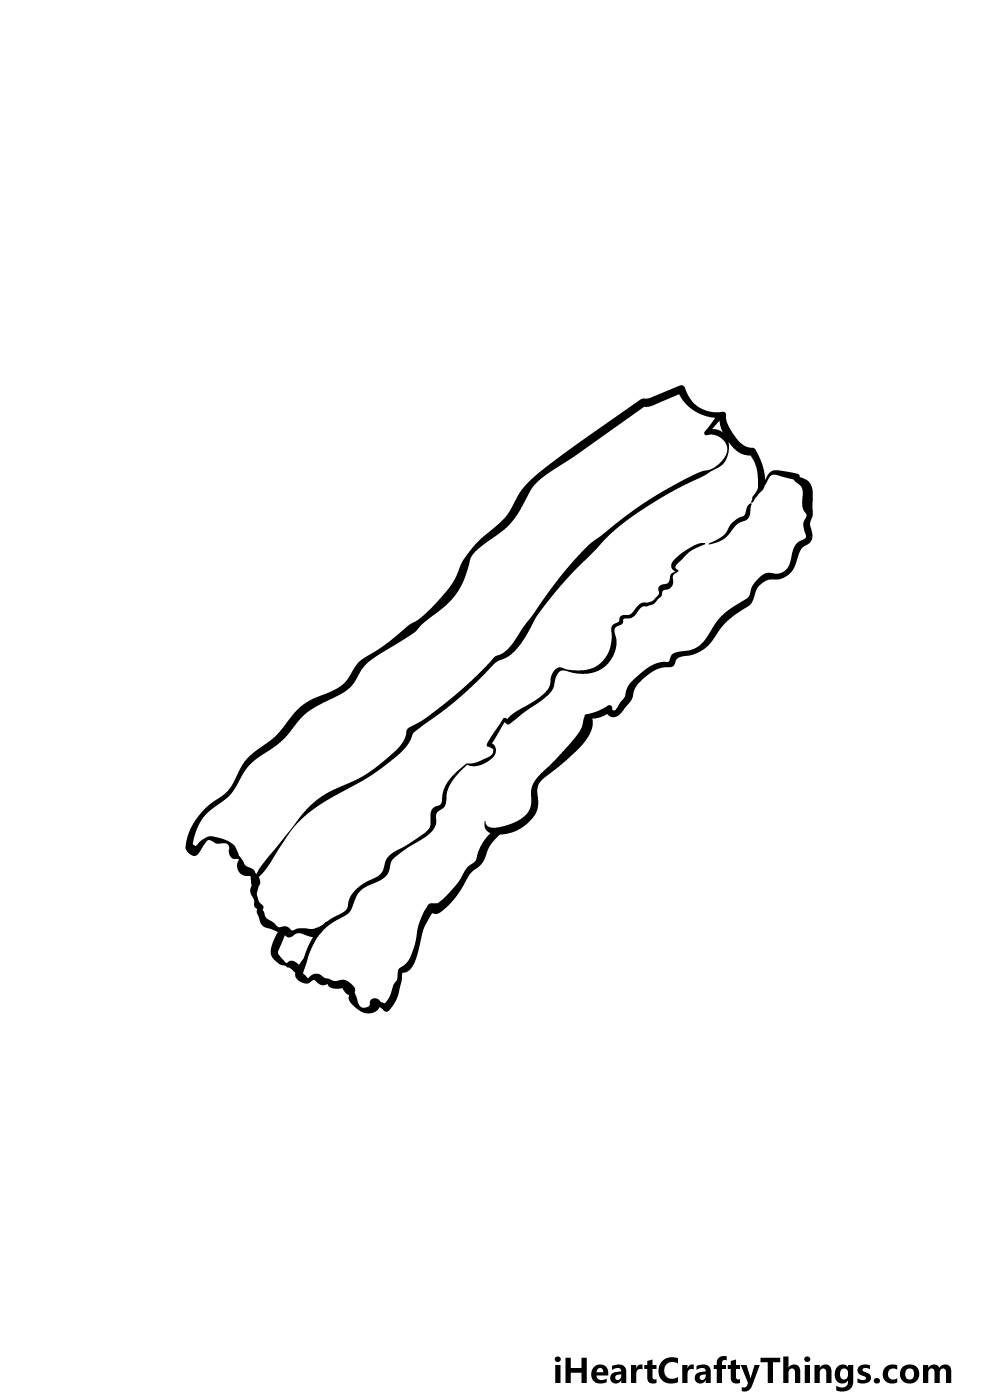
Step 1
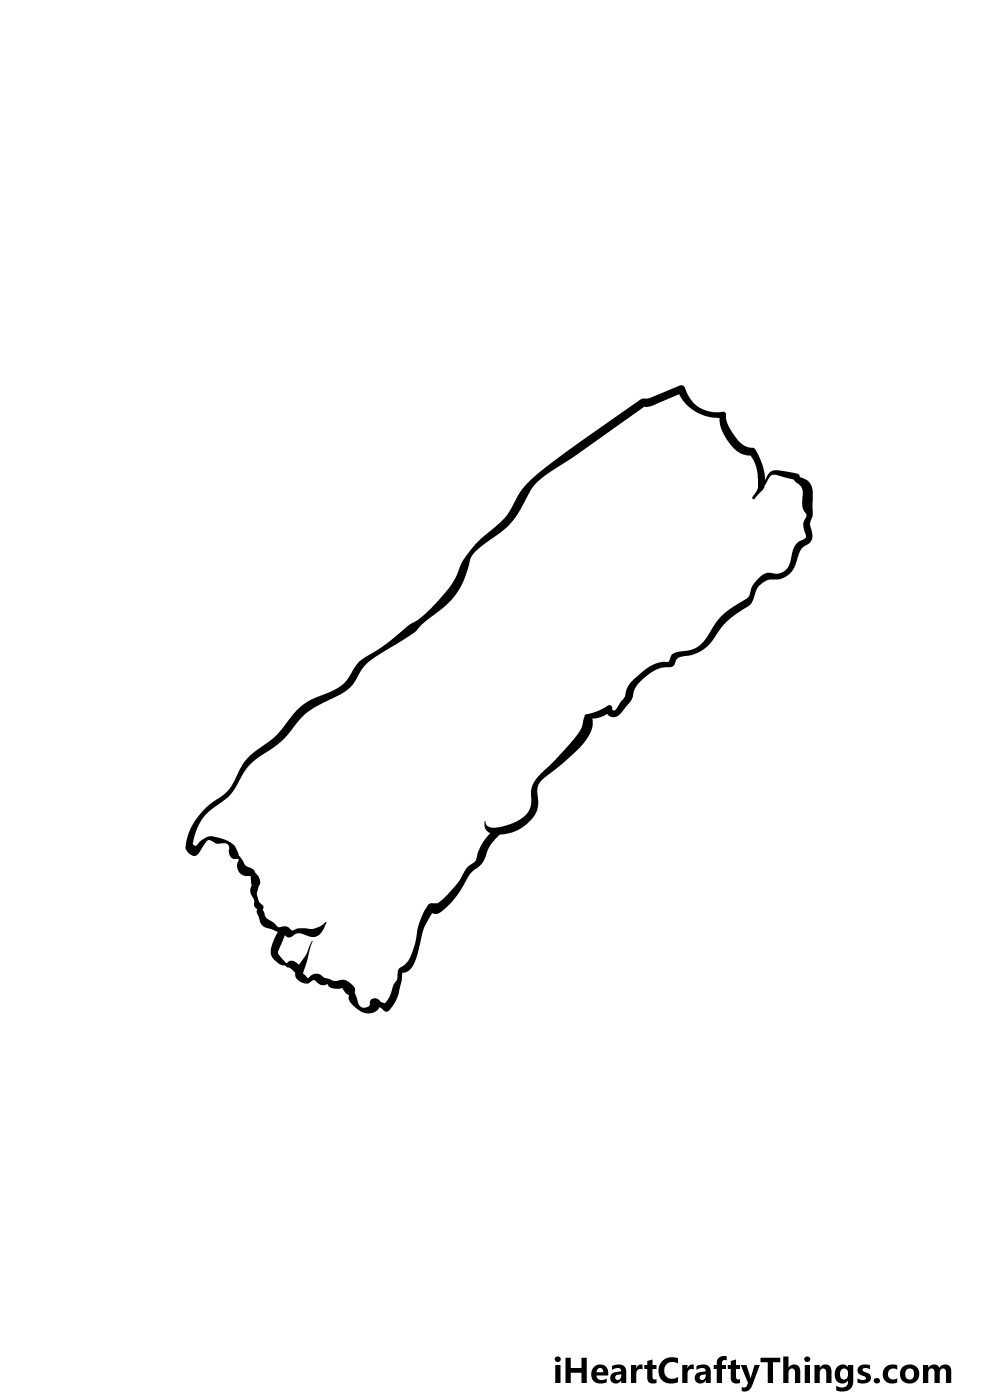
We will be starting with the outline of this delicious food in our first step of this guide on how to draw bacon!
Once cooked, bacon will typically shrink and distort a bit, and this prevents it from having a smooth outline.
That’s why for this outline, we will be using a rather bumpy, irregular line for the outline.
Using the reference picture to guide you in how the outline should look, you can draw the slightly diagonal rectangular shape while using this bumpy line style.
Once you have the outline of the bacon drawn, we can start to add some details to it as we proceed further into the guide.
Step 2 – Now, draw some inner details for the bacon
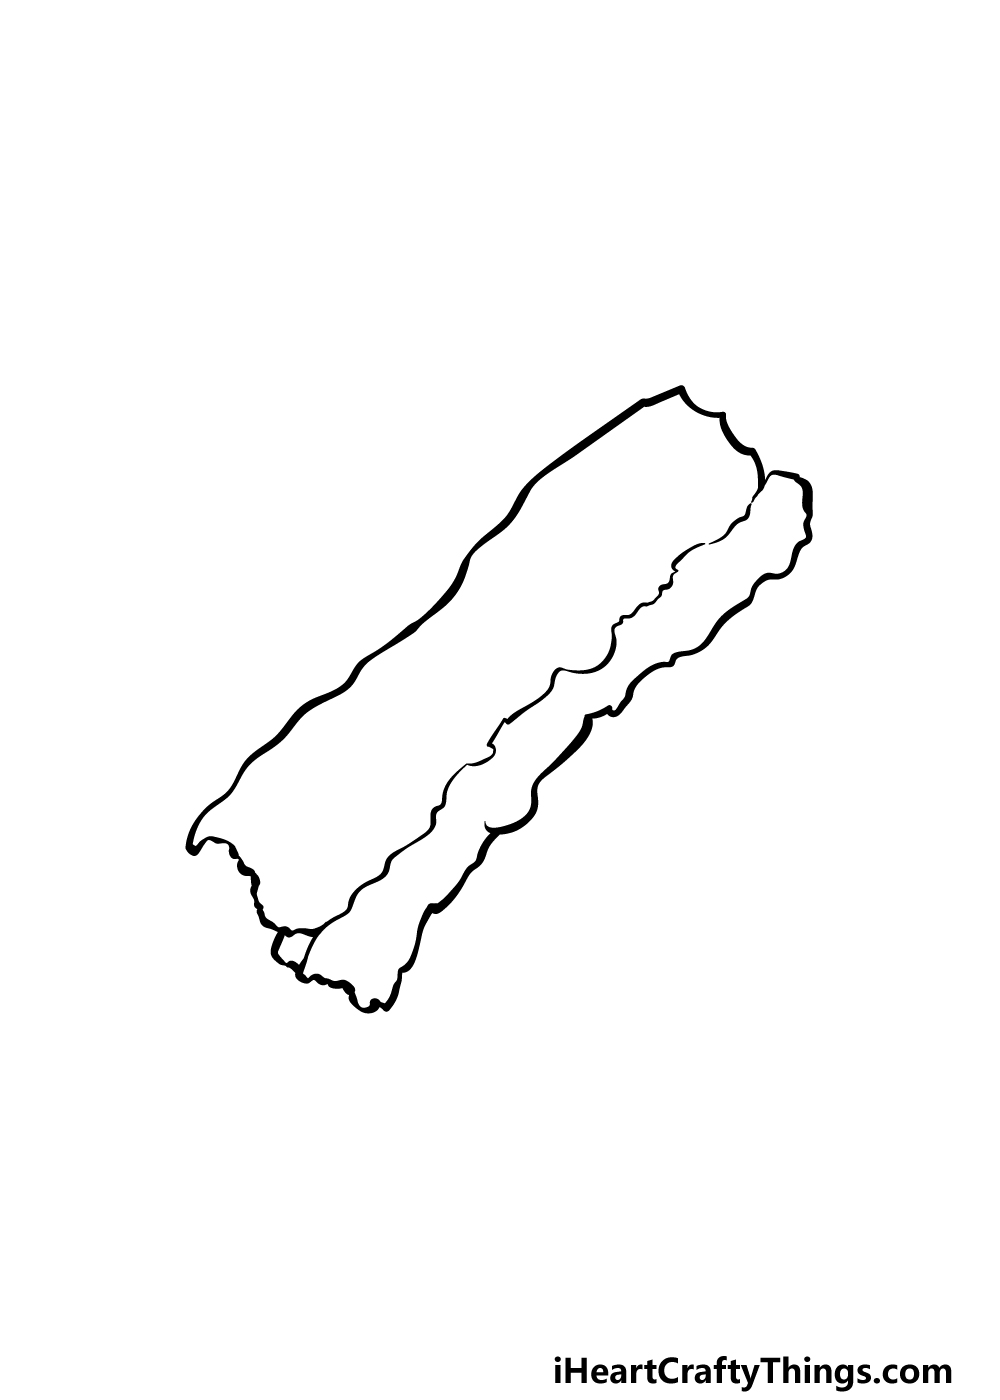
You have the outline of your bacon drawing done, so from this point on, we shall be drawing some inner details for it.
To start this process off, we will be keeping things rather simple. In this guide, we are portraying streaky bacon, and that means that it will look like this piece is separated into several sections.
We will be drawing the first of these sections in this step, and to draw this section we will be using a straight yet bumpy line similar to the lines you used for the bacon outline.
This line will go near the side of the bacon outline, and the reference picture will show you where to place it.
Then you will be ready to move on to the third step of the guide!
Step 3 – Next, draw another line for the next segment of the bacon
Now you’re ready to draw the next section of the bacon in this third step of our guide on how to draw bacon. This one will be closer to the left-hand edge of the bacon.
It will also be a bit different to the other lines that you have been drawing so far.
Those previous lines were bumpy and a bit irregular-looking, whereas the line that we will be drawing in this third step will be very slightly wavy but otherwise will be fairly straight and smooth.
We will then have just a few more sections and details to add in the next few steps!
Step 4 – Now, draw the final section of the bacon
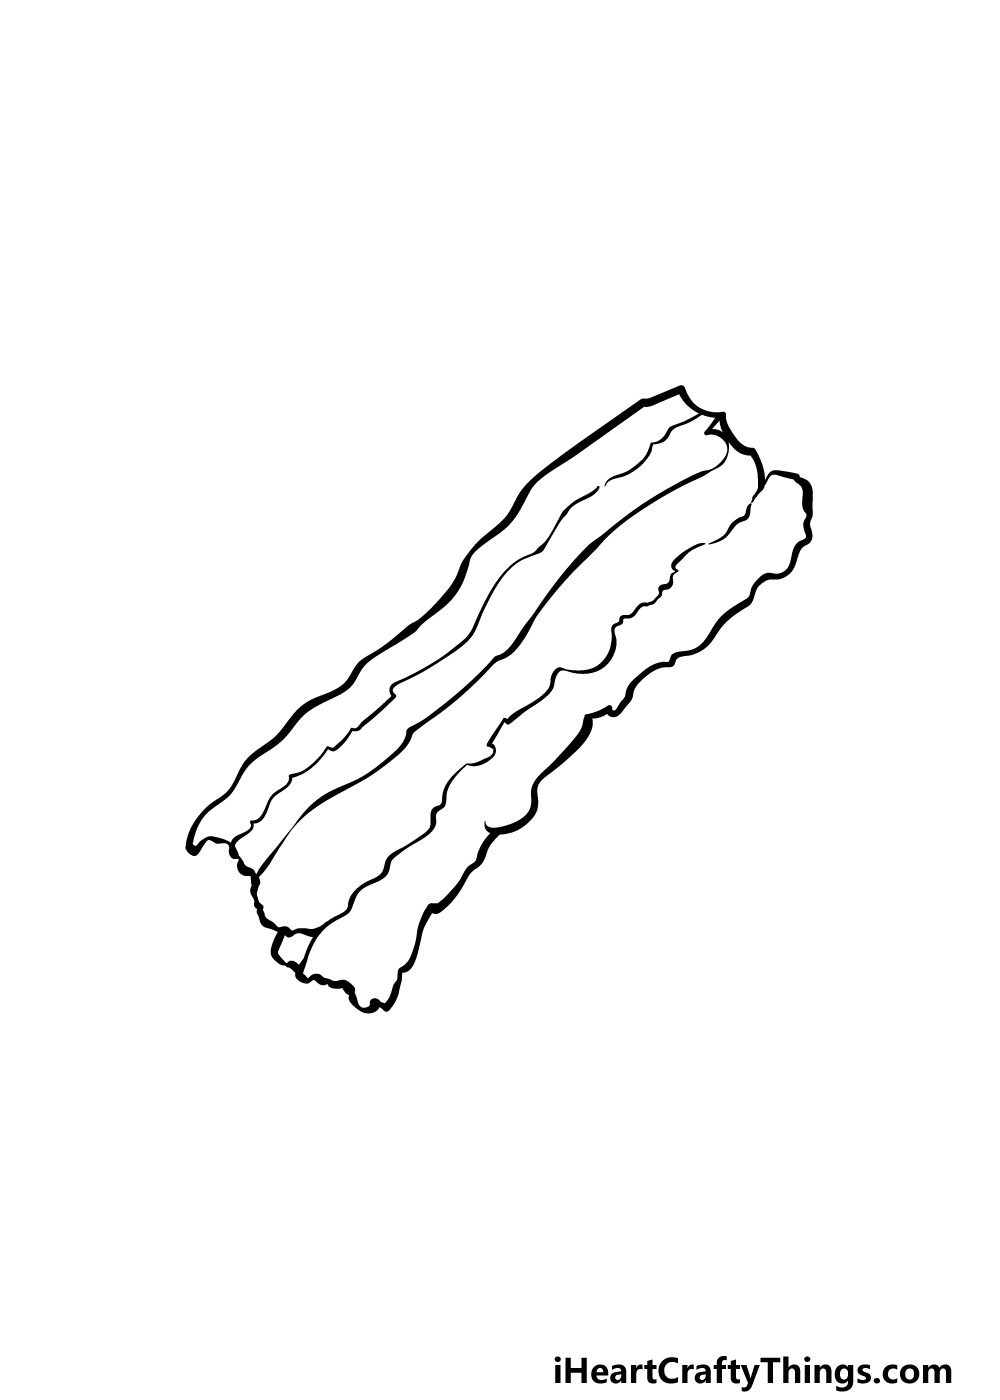
There’s just one last section to add to your bacon drawing in this next step.
This next line will follow the same trend as the first few lines that you drew, in that it will be another bumpy line as the outline and first section were.
This final section will go even closer to the left-hand side of the piece of bacon, and once it is drawn you will have the full outline for your bacon done.
Before you color your sizzling artwork in, we just have a few final details to add that will make it look even better than it does now!
Step 5 – Add the final details to your bacon drawing
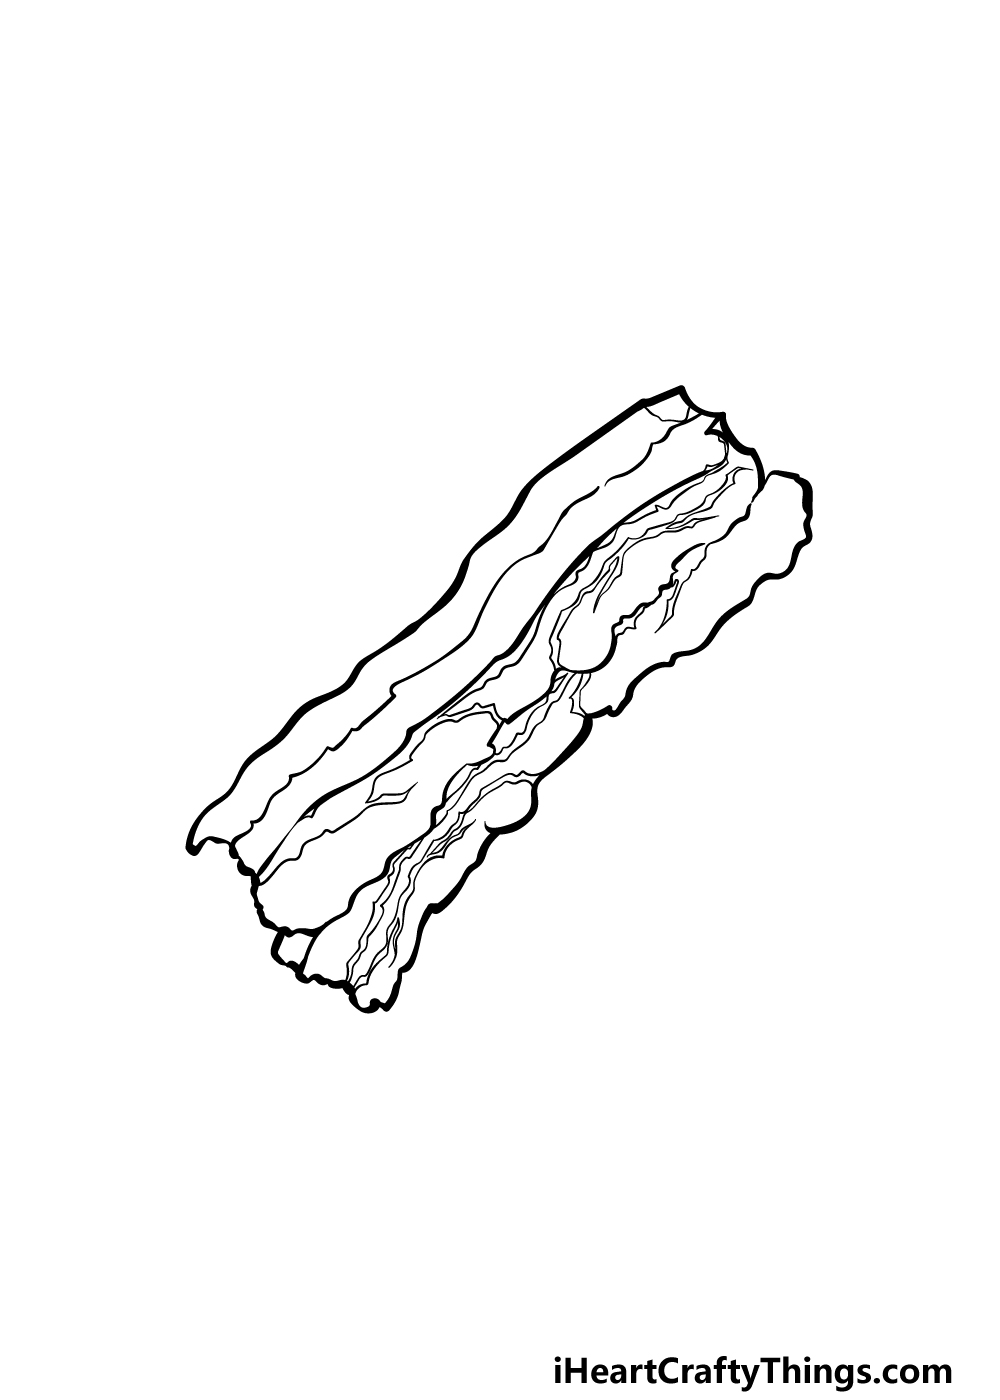
Bacon will often have fat streaking through it that gives it an almost marbled texture, and we will be drawing this streaky fat in this fifth step of our guide on how to draw bacon.
To draw these fatty sections, we will be creating some thin shapes snaking down the length of the bacon.
These long shapes will be thin and drawn with the same bumpy lines that you have been using for the rest of the bacon outline.
This is a step where you could also change things up by adding more of these fatty sections or by making them a bit thicker, depending on your preference.
Before you move on, you could also draw some additional details! One idea would be to draw this bacon on a plate with more of your favorite breakfast foods.
What would you like to enjoy with this delicious bacon?
Step 6 – Finish off your bacon drawing with color
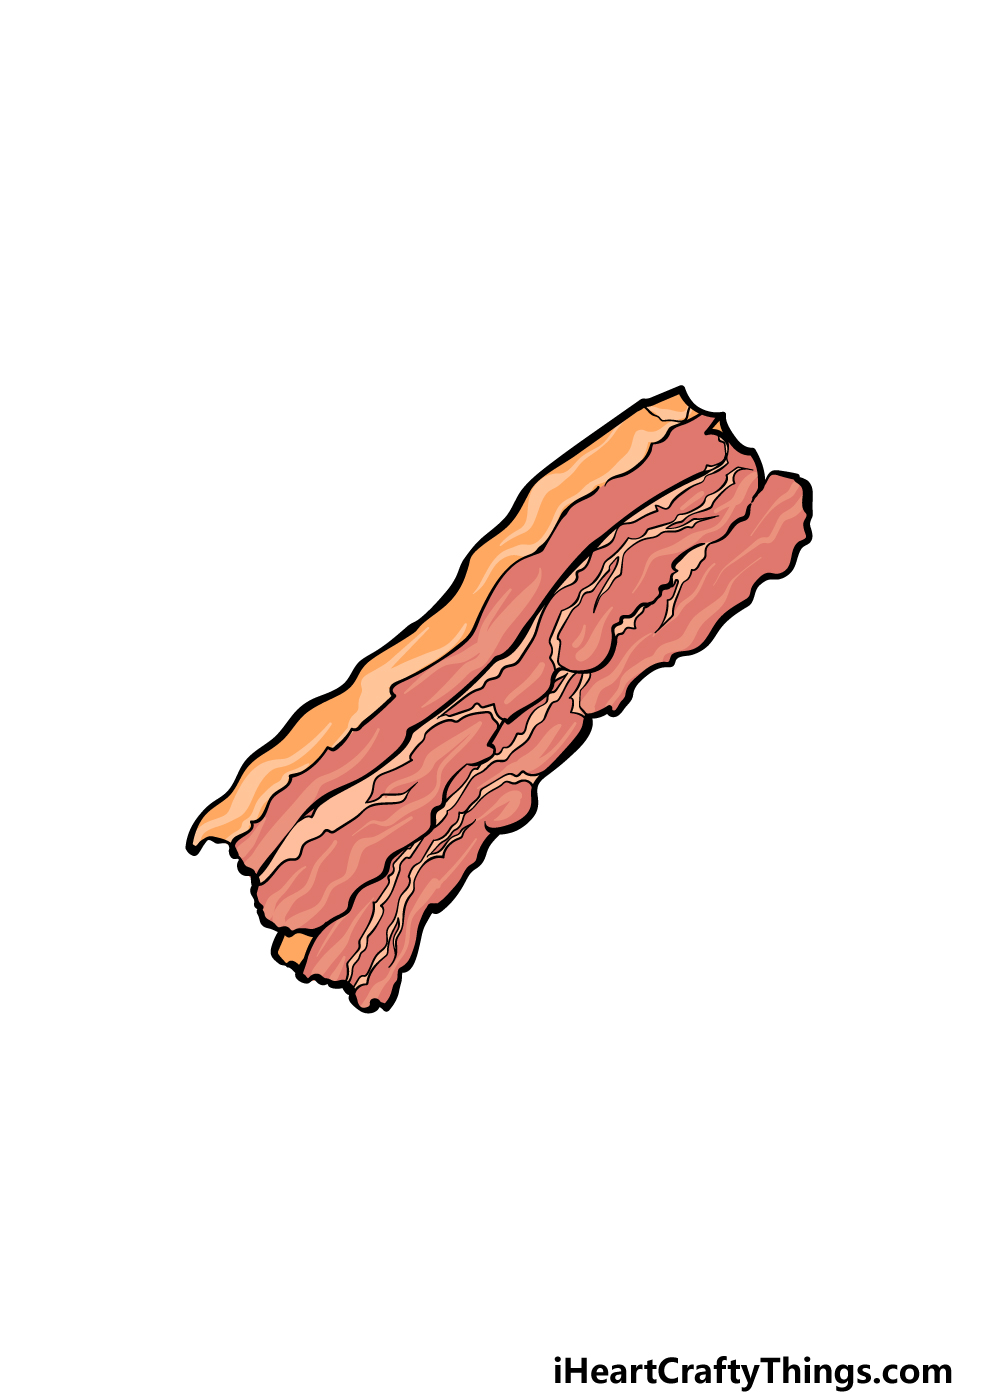
You have reached the final step of your bacon drawing, and in this one we shall finish it off with some color.
This is another step where you will have some freedom with how you choose to color it in.
In our reference image, we used some shades of pink and light browns to give it a less well-done appearance.
You could use darker shades of these colors to make it look more well done or use some lighter shades to make it look less cooked.
What kinds of colors and art mediums will you use?
4 More Ways To Make Your Bacon Drawing Unique
Enjoy these tasty tips for your awesome bacon sketch!
Anyone who loves bacon knows that it’s hard to stop at just one piece. For that reason, it would be great to add some more slices to your drawing of bacon!
The best part of this is that they could be drawn very similarly to this first piece, so all you need to do is follow the guide again.
How many pieces of bacon would you like to add to make this a more complete bacon breakfast?
When enjoying bacon, it’s best to have it with some other kinds of breakfast food. One of the most common ones to have with bacon is eggs in one form or another.
You would have many options for portraying eggs with this bacon. They could be more solid, or you may prefer having them scrambled.
For the scrambled option, using thick paint on the page could help to give them some texture. Are there any other kinds of food that you would like to add to this bacon?
Eggs are not the only thing you can add to this bacon drawing. There are also loads of beverages that you could have with such a breakfast.
Many people like to enjoy a cup of coffee or fruit juice with their breakfast, so those could be added as well. Toast, croissants and other sides would also not be amiss in such a display.
This is your chance to create your own perfect breakfast, so what else would you like to add?
Once you have added all of your desired sides to your bacon sketch, you could then create a background to really finish it off. There would be so many different backgrounds you could go for.
One idea would be to have a simple kitchen or living room setup where you could set the breakfast. Or, you could go for a diner scene and add all sorts of different fun details.
What background setting could you use for this tasty artwork?
Your Bacon Drawing is Complete!
That will finish off this guide on how to draw bacon! Even though you may have eaten bacon many times in your life, it can still prove tricky when you sit down to learn how to draw it.
The goal of this guide was to ensure that you would be able to draw it not only with ease but also while having fun at the same time!
When you’re finished with this drawing, remember that you can also add your own details and ideas.
We went through a few ideas you could go for, but you should be sure to add any additional cool details, colors and medium choices you can think of.
You can then visit our website where we have tons of amazing guides ready for you to enjoy. We upload new ones often, so be sure to check frequently for more!
We would love to see your tasty bacon drawing, so please share it on our Facebook and Pinterest pages for us to see when it’s done!