Glass is one of the most used substances in our everyday lives. It’s used for everything from windows and screens to glasses that help people to see.
While it is incredibly useful, it also has to be handled with care as glass can be quite prone to breaking.
It can be quite unfortunate when a big pane of glass shatters into many pieces, but there is also a kind of beauty to the pattern it creates. It can also be a fun challenge to learn how to draw broken glass!
This can also be quite tricky to do, making a tutorial such as this one essential when learning how to do it.
Our step-by-step guide on how to draw broken glass in just 6 steps will show you how to do it in a fun and easy way!
How to Draw Broken Glass – Let’s Get Started!
Step 1
Before you begin this guide on how to draw broken glass, to make things easier for yourself you may want to use a light pencil to draw a perfect rectangle.
This will help you to visualize what the pane of glass looked like before it shattered. When you’re ready, we can then start to draw the top left-hand side of the pane of glass.
The pieces will all be very close to one another, and while some will be angled away from the others next to them, they should all look like they would slot together like a puzzle.
Near to where the center will be, the broken glass will also be bunched up to show where the impact was.
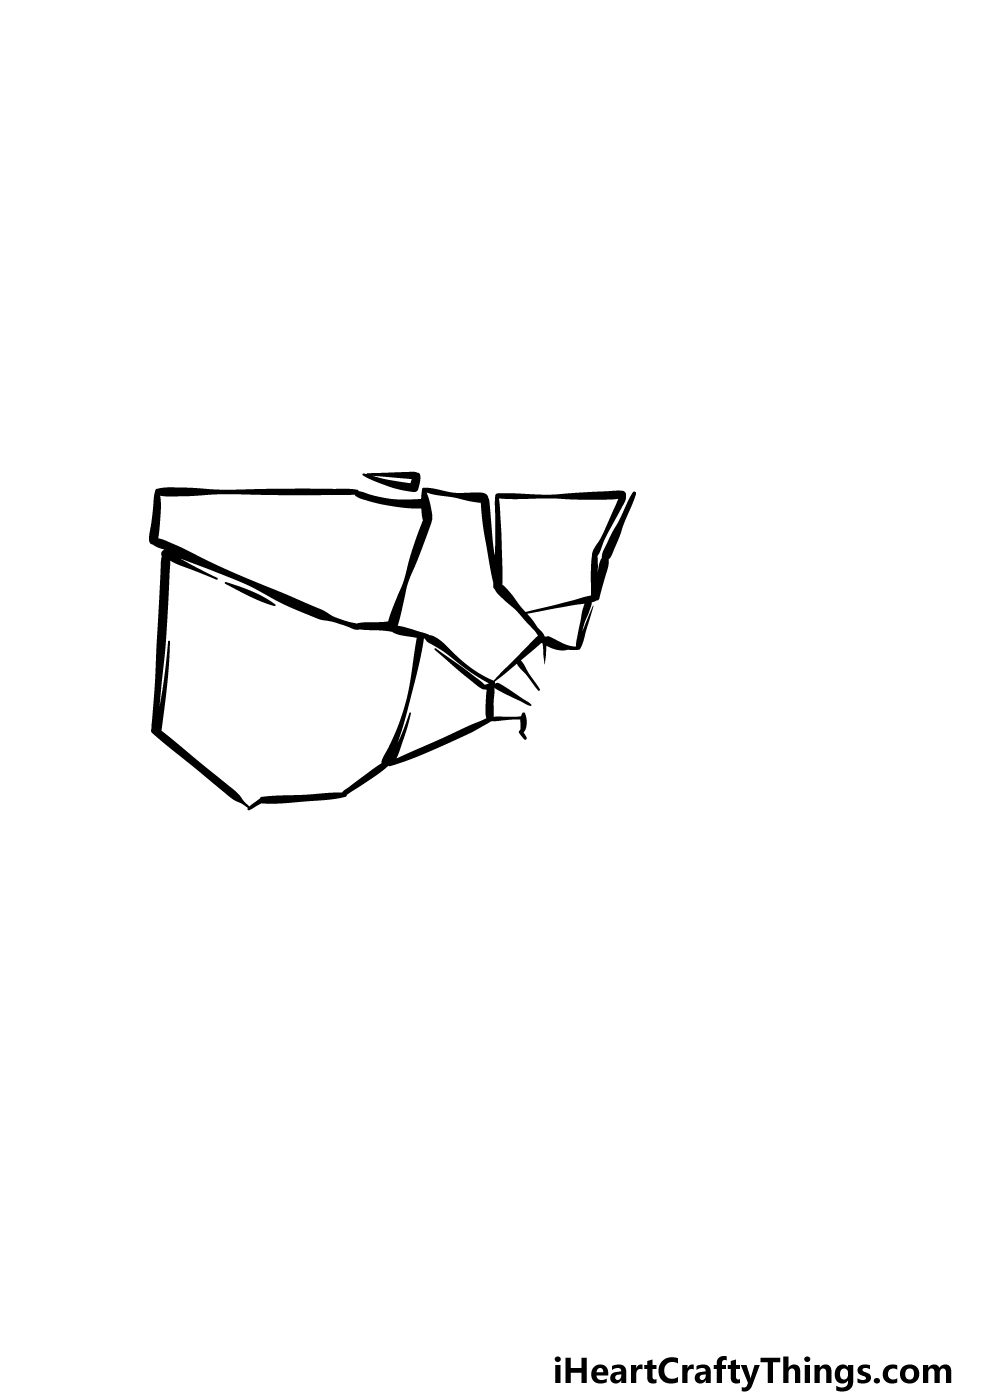
Step 2 – Next, draw the lower left-hand side of the glass
Now that you have drawn the top right side of the pane, you can draw the bottom left-hand side for your broken glass drawing in this step.
When drawing this next section, you will be doing it in a very similar fashion to how you drew the first section.
Once again, the pieces will be at jagged angles, but they will also look like they would slot together if pushed together.
Once you have drawn this section, we can begin adding some more as we move on to the next steps of the guide.
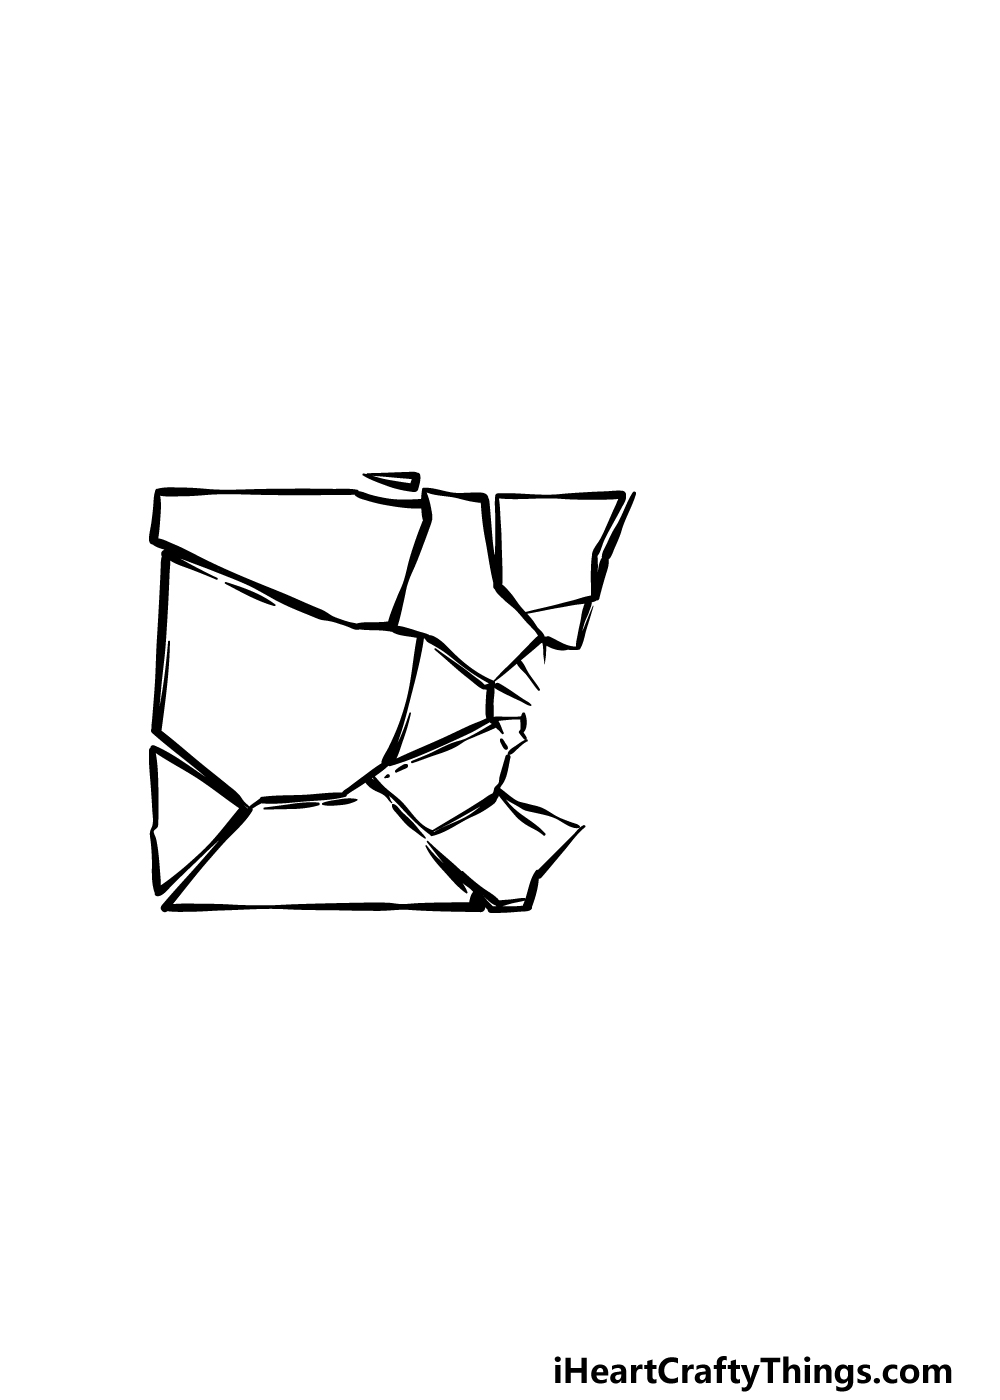
Step 3 – Now, draw the next section of the pane
This step of our guide on how to draw broken glass will see you drawing the bottom right-hand side of the pane. We will also be drawing more of the impact point of the glass.
This area of the glass will have cracks that from a rounded shape instead of the larger, more angular pieces that you have been drawing thus far.
Otherwise, the other pieces will all look fairly similar to the rest that you have been drawing, and will once again look as if they would fit together.
Once this part of the pane is drawn, we will be ready to draw the final section of the broken glass in the next few steps.
Step 4 – Next, draw the outline of the final section
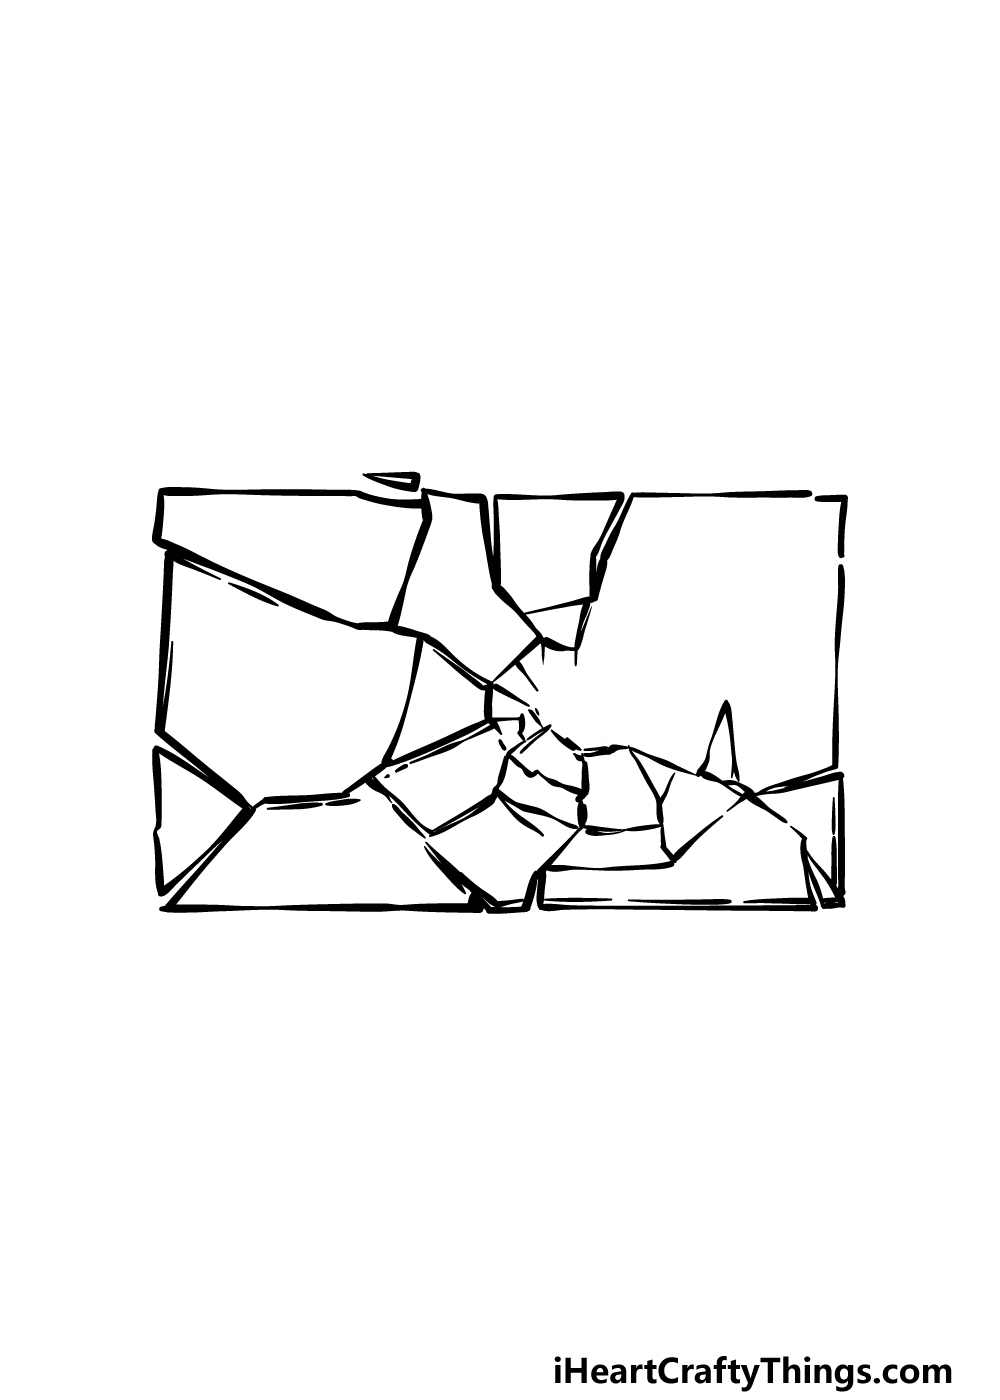
Now you’re ready to begin the final section of this broken glass drawing. To help make things easier, we will be drawing the outline for this final section before you start working on the finer details.
You can draw some straight lines to create a rough corner for the pieces that you will be drawing soon.
The lines for this corner will be a bit broken up into several sections, as each line will represent a separate piece.
Once you have drawn these lines as they appear in the reference image, you will be ready to add some final touches in the next step!
Step 5 – Add the final details to your broken glass drawing
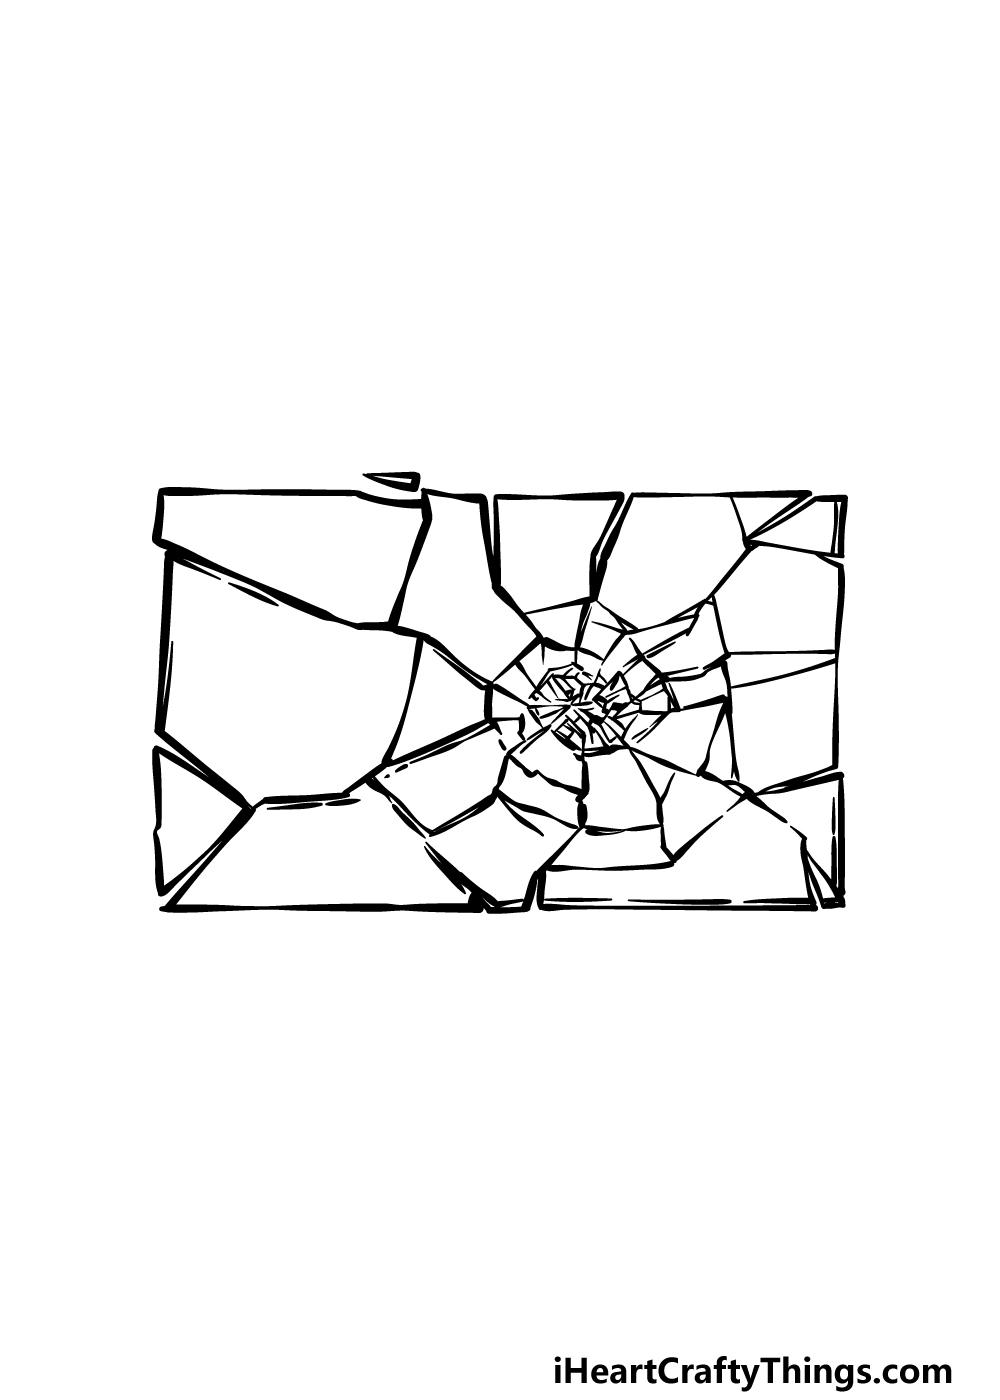
You have reached the fifth step of this guide on how to draw broken glass, and in this one we shall draw the final pieces.
In this step, we will also be drawing the point of impact that created the crack in the first place.
This section may be a bit trickier to draw, as there will be much smaller pieces that come together to form a rounded crack shape.
For this part, you may want to either use a fine-tipped pen or a very sharp pencil, as the details can get a bit fiddly.
Once that part is drawn, you can then finish off by drawing the rest of the larger pieces. When the drawing is complete, maybe you could draw the object that smashed it lying nearby!
Bonus: Get Creative With The Color Mediums You Use
We’re about to reach the final step of this guide on how to draw broken glass. In that step, we will cover some of the more conventional ways you can bring color to your drawing.
Before that, we wanted to quickly give you some ideas on how you can use some more unconventional tools to bring color to your drawing.
If you visit some art and craft stores, you can get a transparent colored paper. It could be fun to buy some sheets of that and then cut out a rectangle of the colored paper that is more or less the size of your drawing.
Carefully cut this rectangle into pieces in a way that makes it look like broken glass, and then you can stick them on a page in a similar fashion to how we drew this broken glass.
This would be quite an undertaking and would require some patience, but it would be worth it! If you want to stick to more conventional methods, there are ways to elevate it with crafts anyway.
For example, if you look at glass in the sun, it will often shine and reflect the light. You could show this with a light sprinkling of glitter glued over the glass in the picture.
This would be an effect that would be best to keep fairly subtle, as it may throw off the design if you use too much. Using different art mediums can help too.
For example, say you use watercolor for the glass, you could make the cracks stand out with some well placed pen lines. We hope these tips gave you some cool ideas as we move to the final step of this guide!
Step 6 – Finish off your broken glass drawing with color
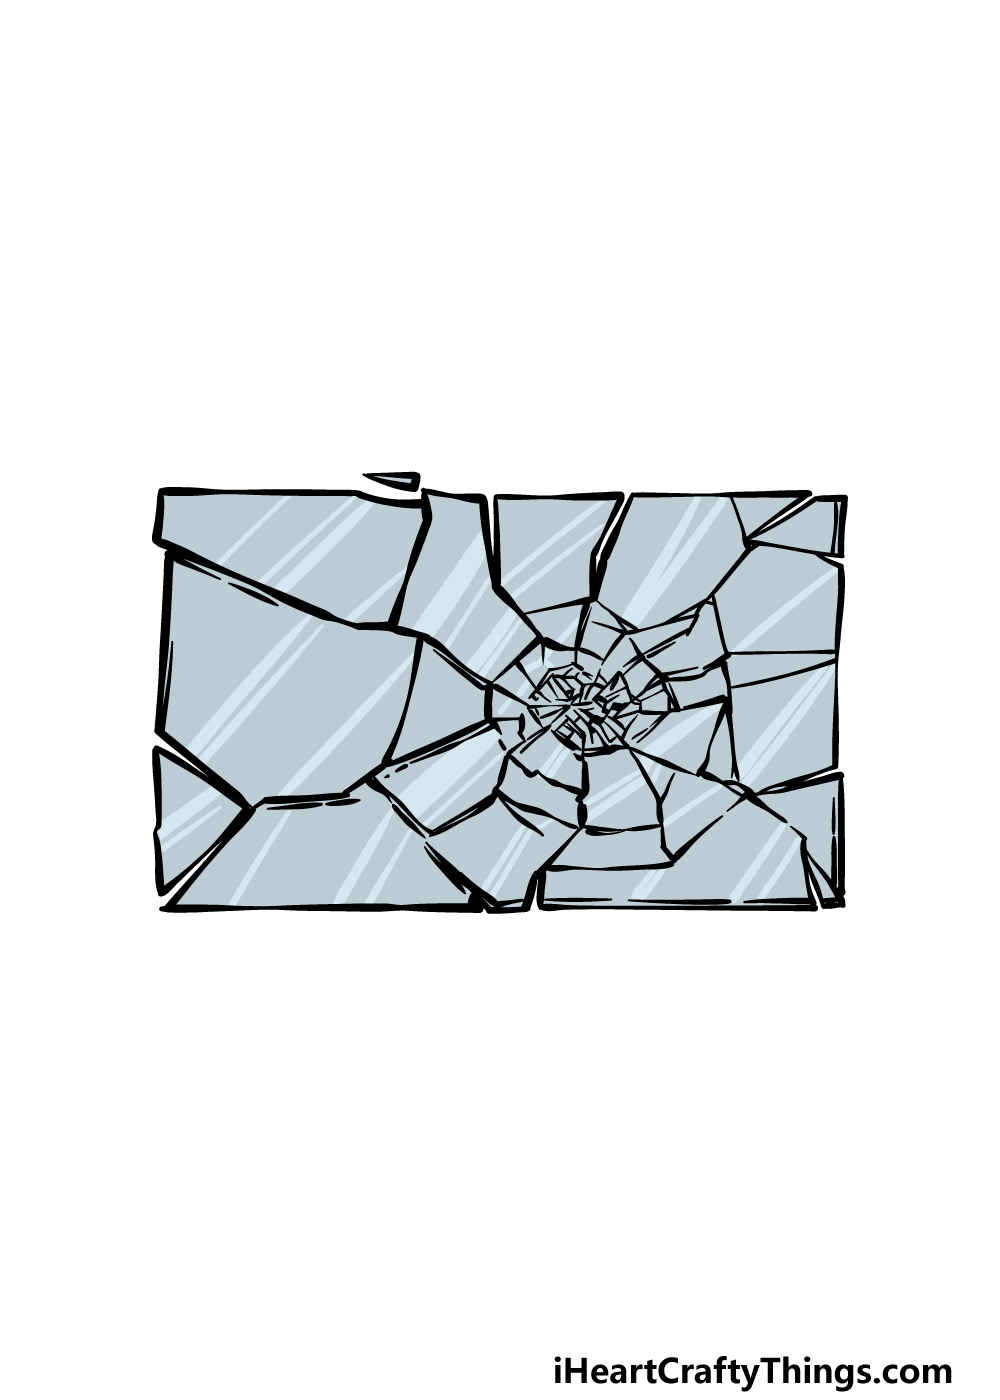
This is the final step of this broken glass drawing, and in it you will finish it off with some color.
In our reference image, we used various shades of greys and blues to create the shiny, transparent look of the glass.
You could use some similar colors for your own broken glass drawing, but you could also use some unique colors instead!
When coloring, you may want to use a softer medium such as watercolor paints or colored pencils to help create the transparent look, but anything you use will look great. We can’t wait to see what you choose!
Do this to take your broken glass drawing to the next level
Make this broken glass sketch even better with these fun tips!
Glass won’t normally just break on its own, so something must have caused this accident in this broken glass drawing! You could show what caused this to happen by adding some extra details.
There are quite a few objects you could draw to suggest what happened here. For example, you could have a baseball lying beneath the shattered glass.
Or, you could just have a baseball bat to show that someone purposefully smashed it. These are a few suggestions, but there are many more to try!
What else do you think could have broken this glass?
This next tip for your drawing of broken glass leads on from the previous one. To further create a scene, we think you should incorporate this pane of broken glass into a background scene.
The glass could look like it’s in a window, for instance. Or it could be a sheet of glass lying on the floor.
These are just some really basic ideas, but you could probably think of some more creative ideas for a background setting.
As we all know, glass is reflective, and it can even be decorated. That leads us to another way to improve this broken glass sketch.
For one idea, you could draw something reflected in the glass. This could just be the reflection of a face looking at it.
If you want to try this, you can look up pictures of faces reflected in glass to help! Or, you could decorate it to look like it was a stained glass window for another idea.
Once you have added all of your ideas, you can then finish off with your colors. Glass is transparent, so you may want to try and use softer art mediums to show this.
Examples would include watercolor paints or colored pencils. If you drew a reflection or made it into a stained glass pattern, then this would also allow you to work in all sorts of interesting colors!
Your Broken Glass Drawing is Complete!
There were loads of small parts and details to draw in this step-by-step guide on how to draw broken glass, so we hope that the guide made it fun and easy for you to do!
By following the steps we laid out and taking it slowly, you will definitely be able to complete this image in no time.
Once you have finished the guide, it will be up to you to complete it with your own details and ideas!
There is a lot that you could do to do this, and we mentioned a few ideas such as drawing additional objects or getting creative with your colors and art mediums. What else can you think of to finish it off?
When you’re finished with this guide, you can find many more to enjoy on our website! Be sure to keep visiting, as we upload new ones frequently.
We would also be thrilled to see how your broken glass drawing came out, so please show us by sharing it on our Facebook and Pinterest pages!