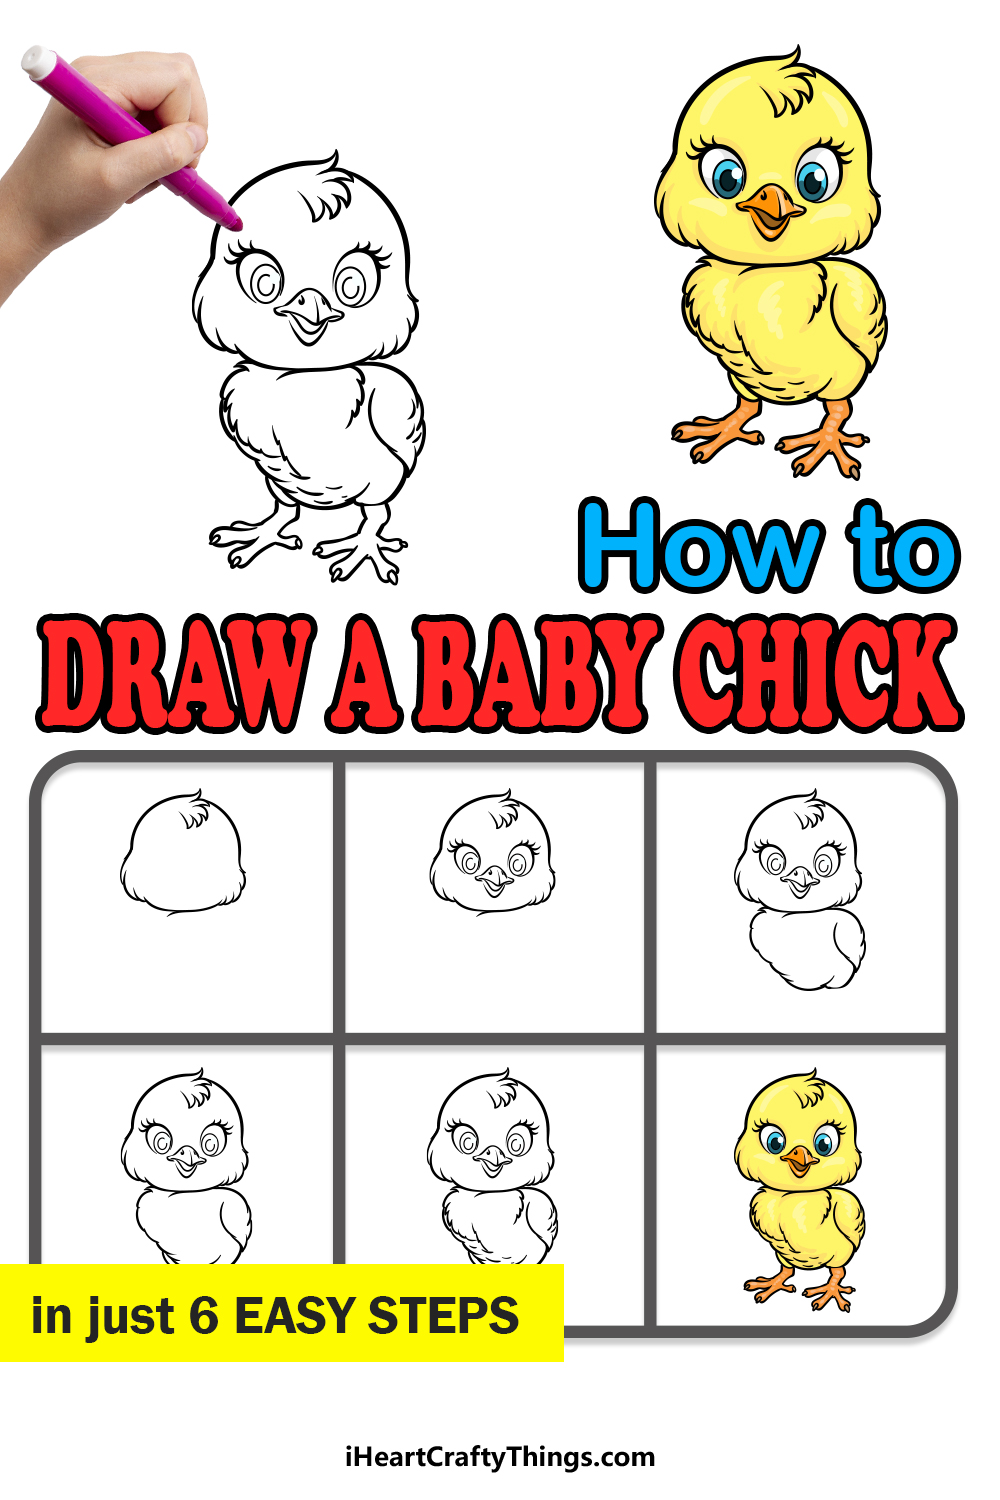
When you have a cute animal, the only way to make it even cuter is when you have a baby version of it! This is certainly the case with chickens.
Chickens are quite cute just generally, but that cuteness is increased a lot once you are dealing with a baby chick.
It’s hard not to be won over by one of these adorably fluffy little creatures, and many people like to recreate these cuties by learning how to draw a baby chick.
If you love these sweet little birds, then this will be a tutorial you’ll definitely want to see all the way to the end.
Our step-by-step guide on how to draw a baby chick in just 6 easy steps will show you just how fun and easy it can be!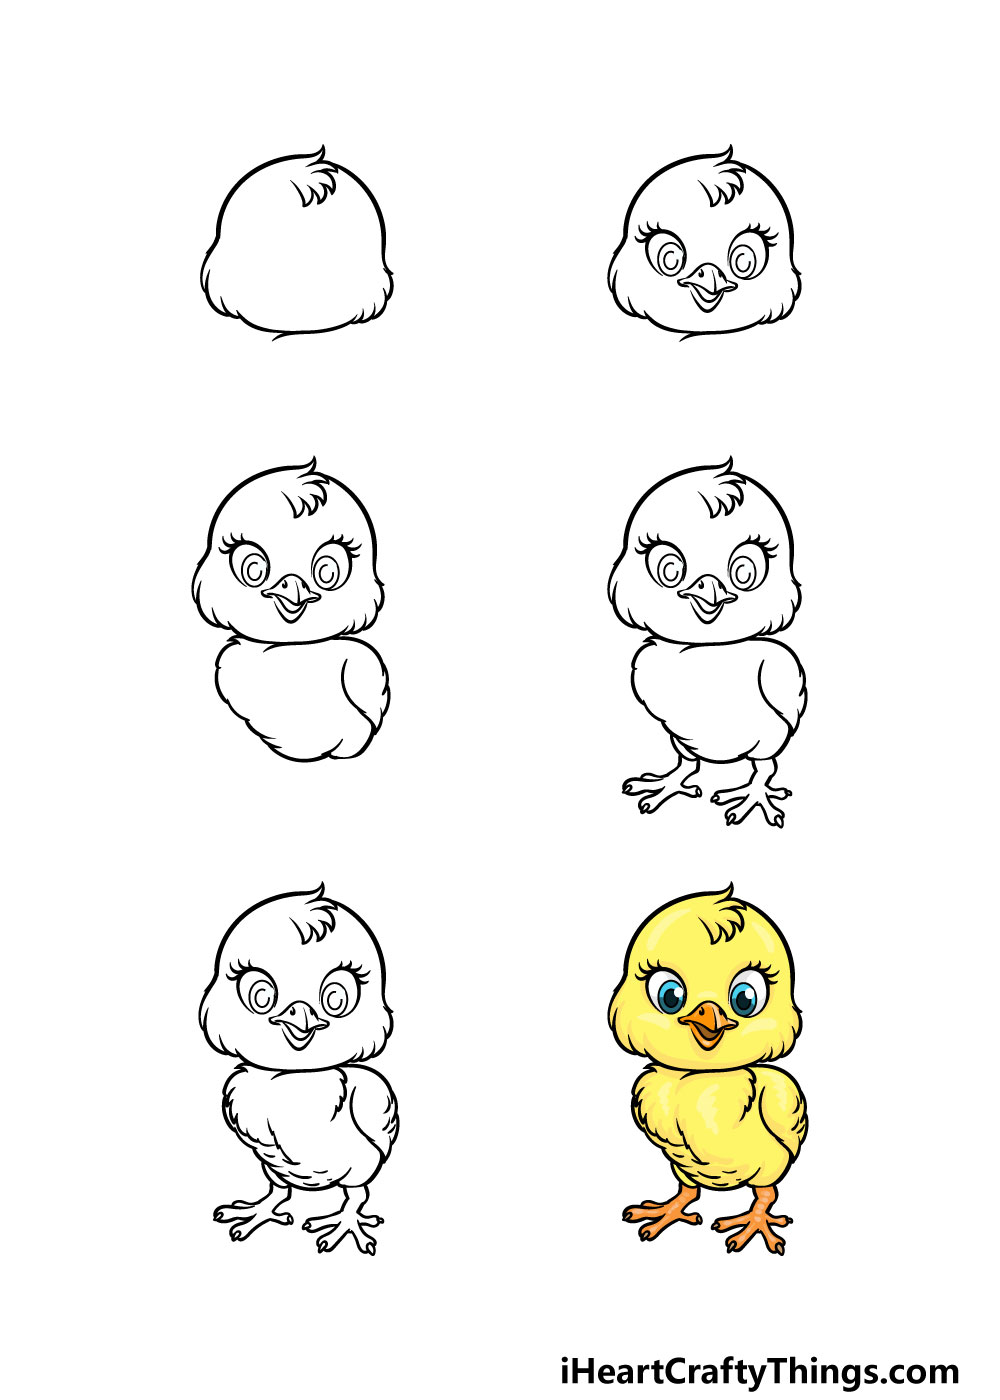
How to Draw A Baby Chick – Let’s Get Started!
Step 1
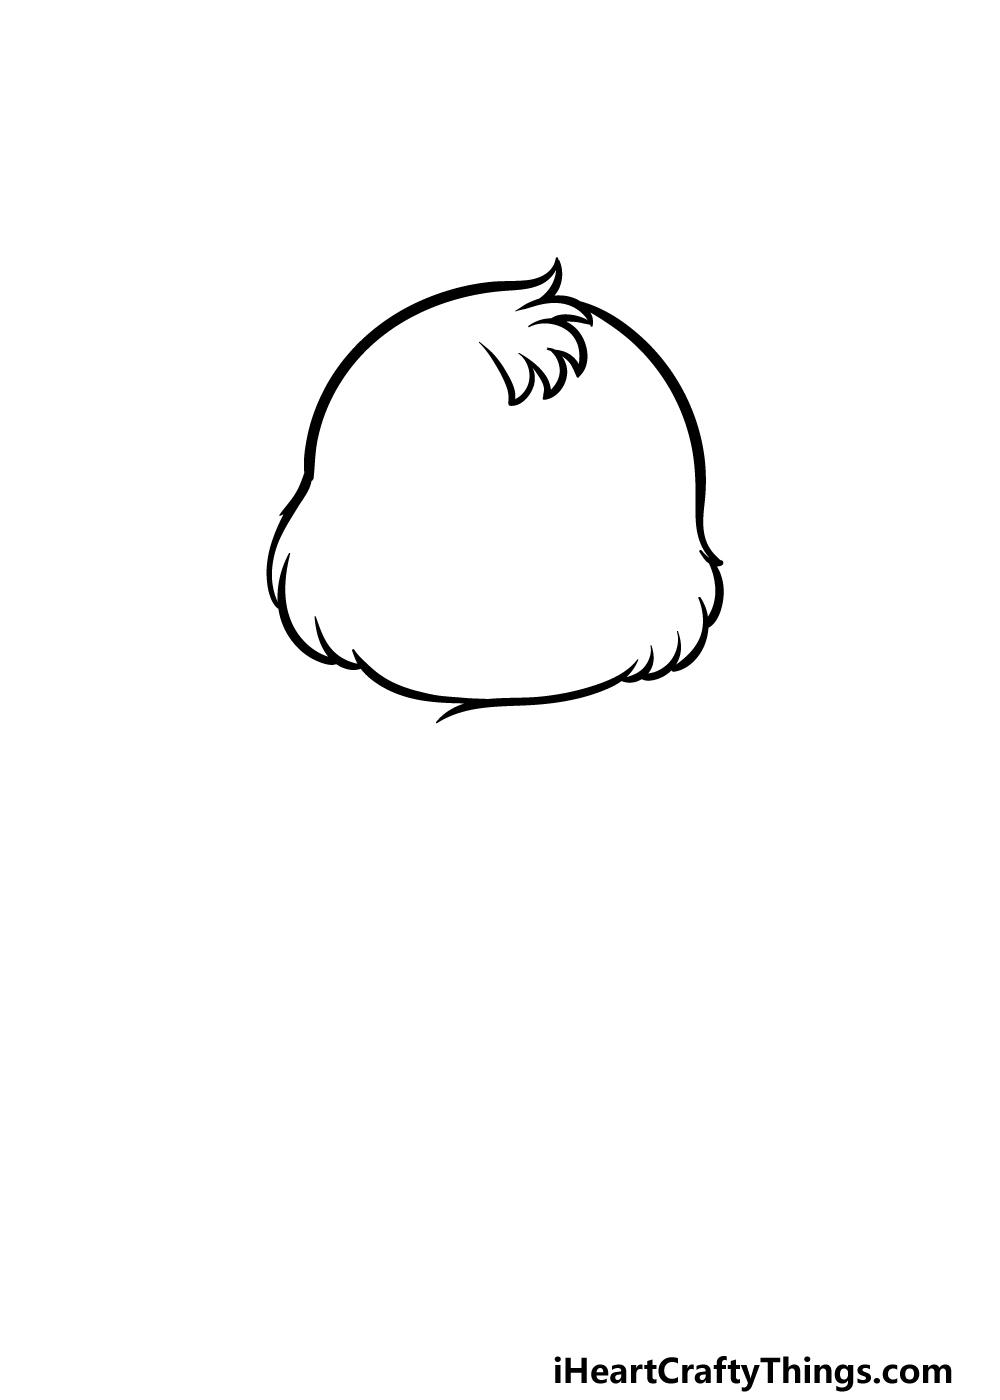
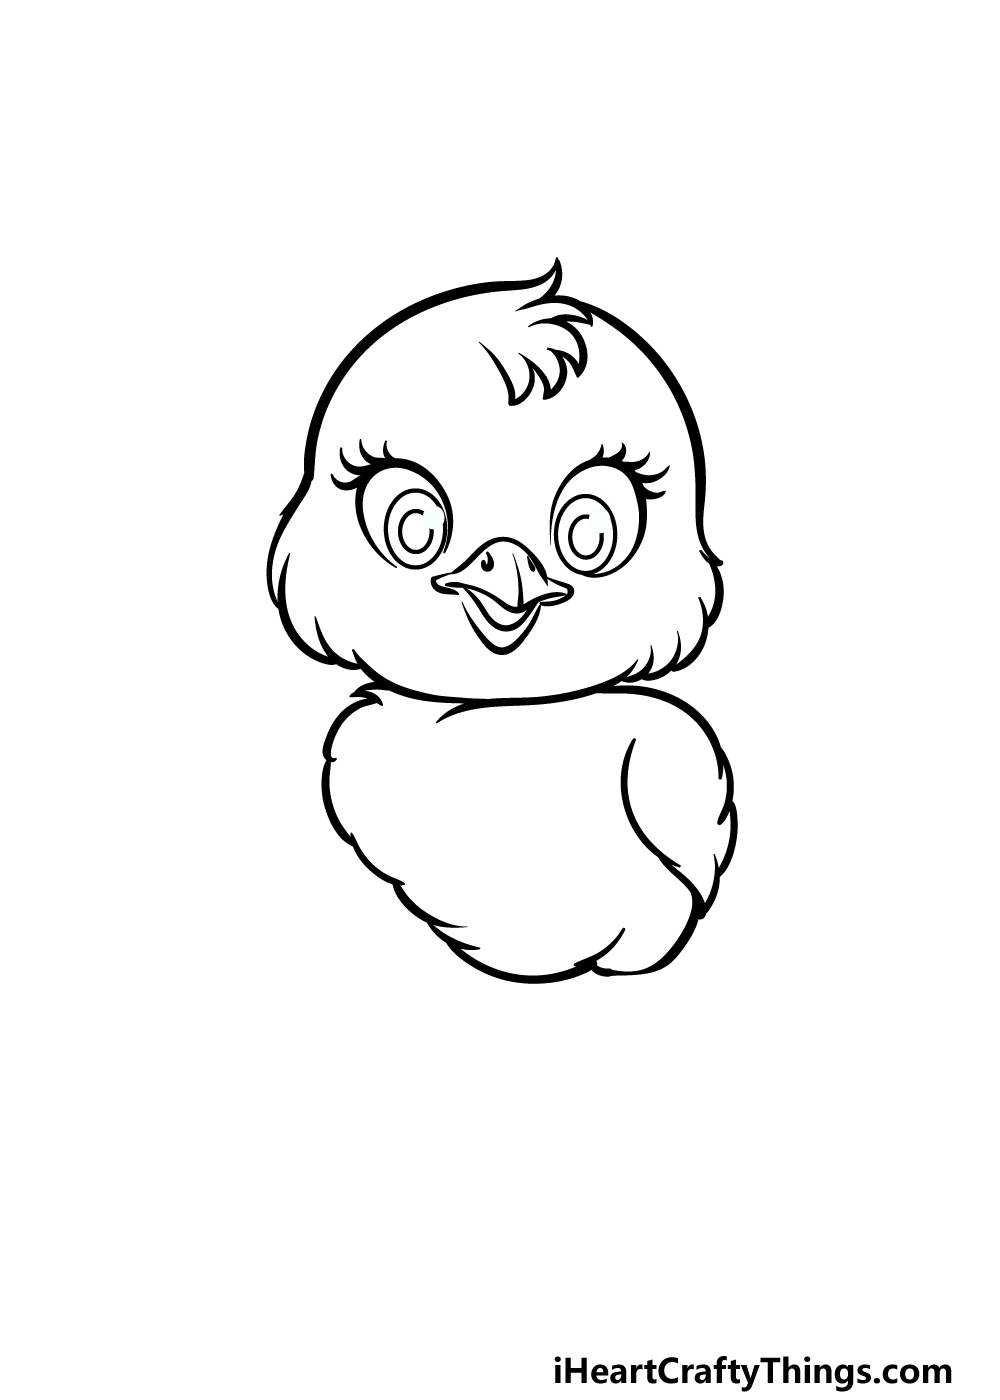
This first step of our guide on how to draw a baby chick will begin with the head outline of this little bird.
We will be using some curved lines connecting to each other for the sides of the head to make it look nice and fluffy.
Then, for the top of the head we will use some curved lines with pointy tips over the face. The face will be blank for now, but we will add some facial details very shortly.
With all of these elements drawn, we can then proceed to the second step of the guide.
Step 2 – Now, draw some facial details for the baby chick
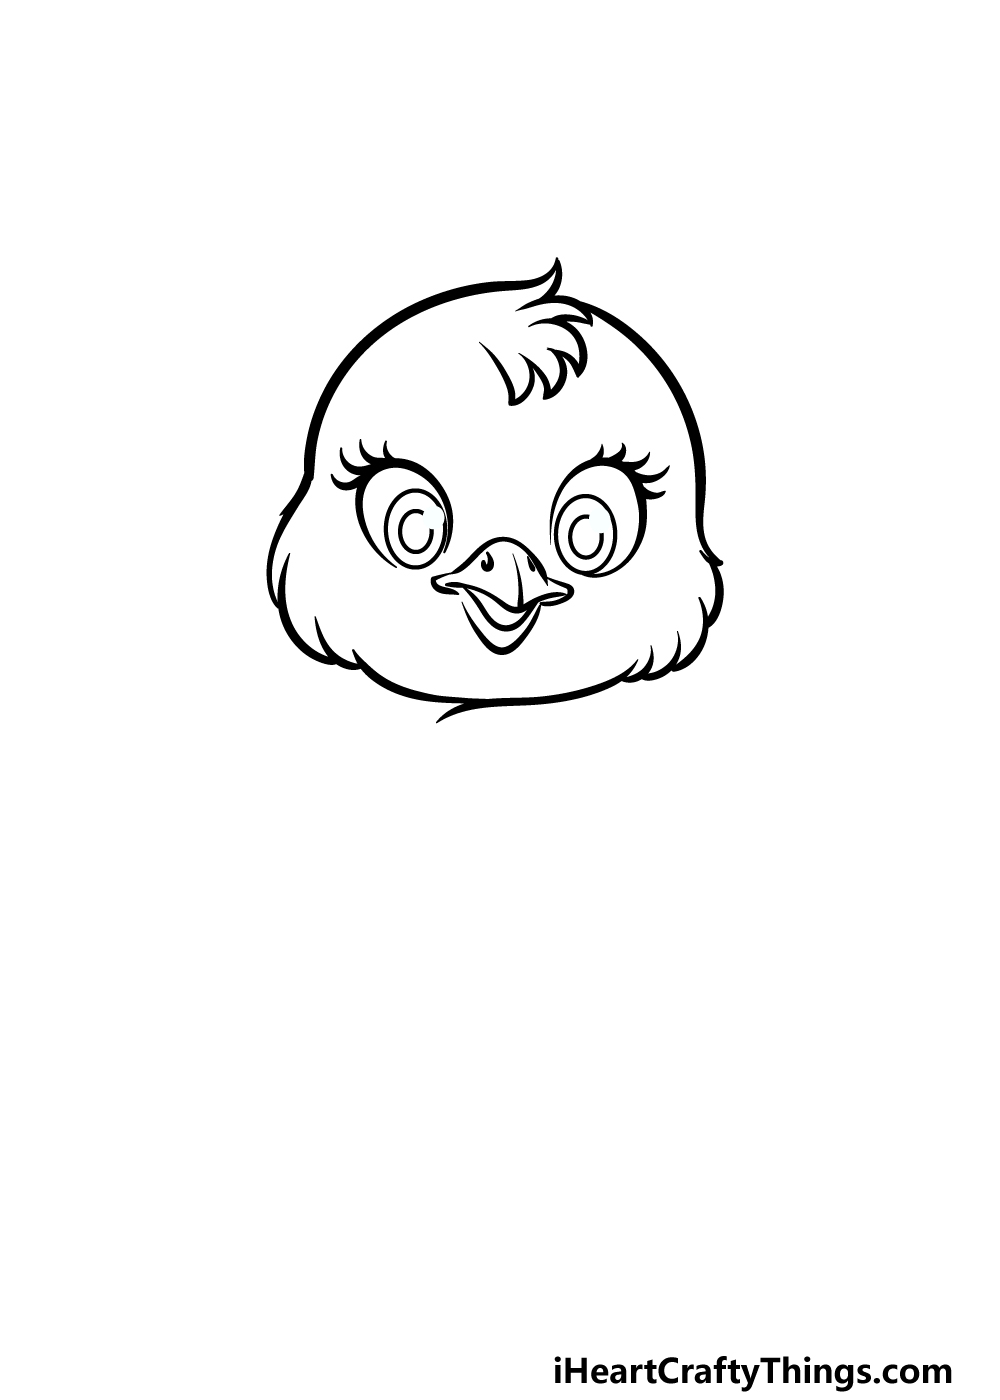
For the second part of this baby chick drawing, we will be adding some facial details. The eyes for the chick will be quite large, as this just adds to the cuteness of the image!
You can draw them as two large oval shapes, and then each one will have smaller ovals inside of the outline for the pupils.
Then, add some small curved shapes to the outer outline of the eyes for some cute eyelashes.
Next, we will be drawing the little beak of the baby chick. This beak will be drawn with some more curved lines to give a nice smiling expression to the baby chick’s face.
Then, it’s on to step 3 of the guide!
Step 3 – Draw the body outline for this baby chick
With the head completed, we can now work on the body outline in this third step of our guide on how to draw a baby chick.
For this body outline, we will be using some more curved and bumpy lines in order to give the feathers a nice fluffy look.
The top half of the body will be a bit thicker, and it will get thinner the more you move downward. Be sure to also add a little wing onto the side of the body as well!
Then, we will be ready to finish off the outline for the legs in the next step.
Step 4 – Next, draw the legs for this baby chick
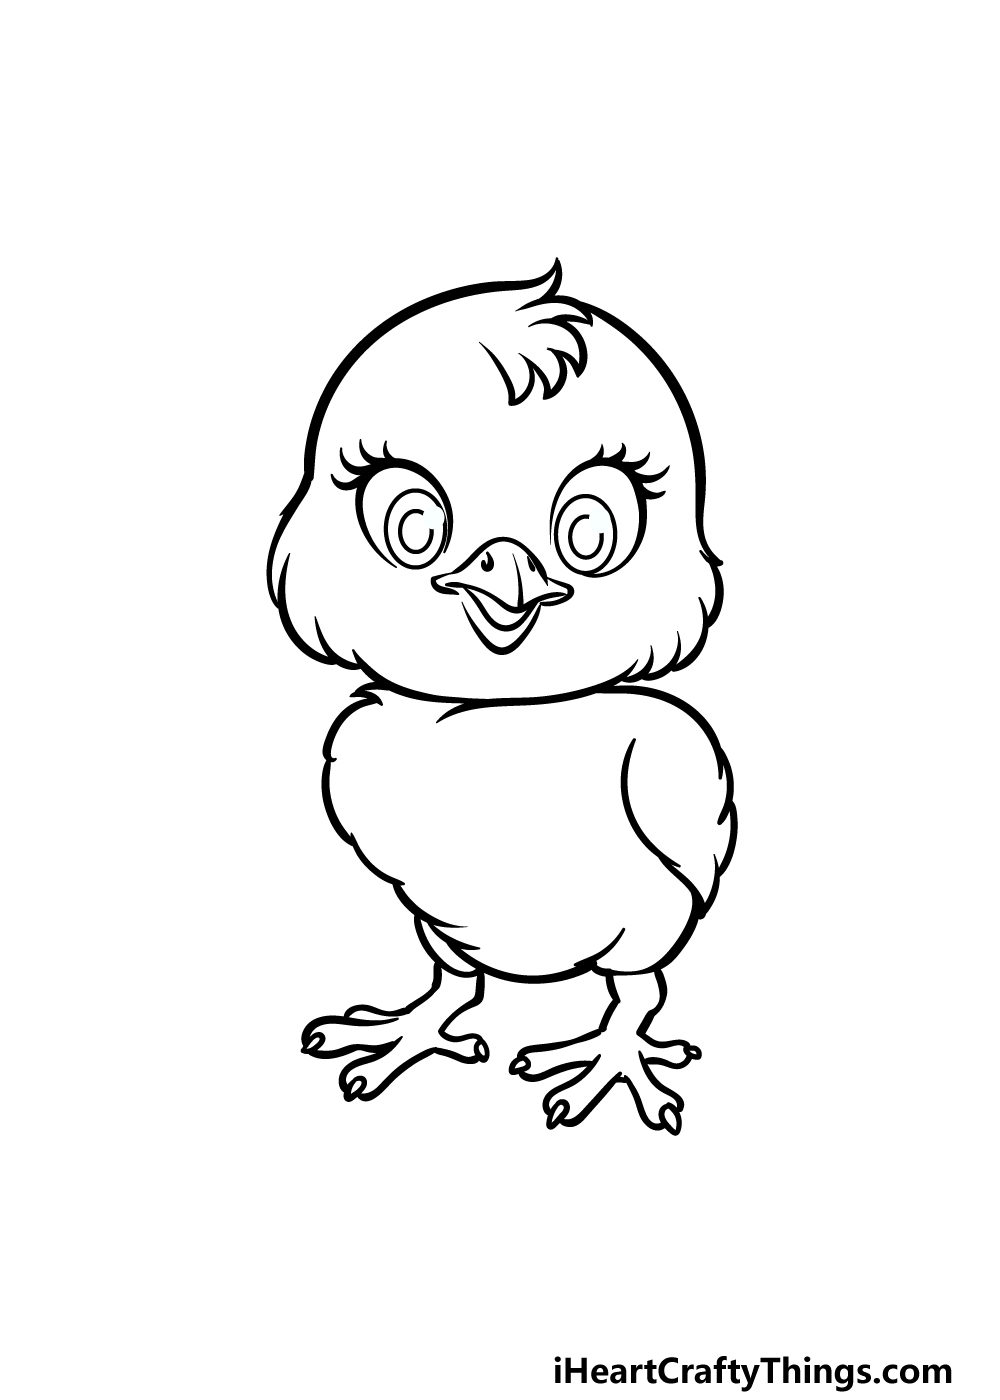
Before we add some final details to finish off this baby chick drawing, we will first be adding some legs for the little guy.
The legs will be fairly short and at a bit of an angle, and then there will be some long toes coming off the ends. Each toe will also have a small pointy nail at the ends.
That’s all there is to it for this step, and in the next one we shall focus on adding some smaller texture details to make this adorable baby chick look even better!
Then you will be able to really bring it to life when you color your creation in the final step of the guide.
Step 5 – Add the final details to your baby chick drawing
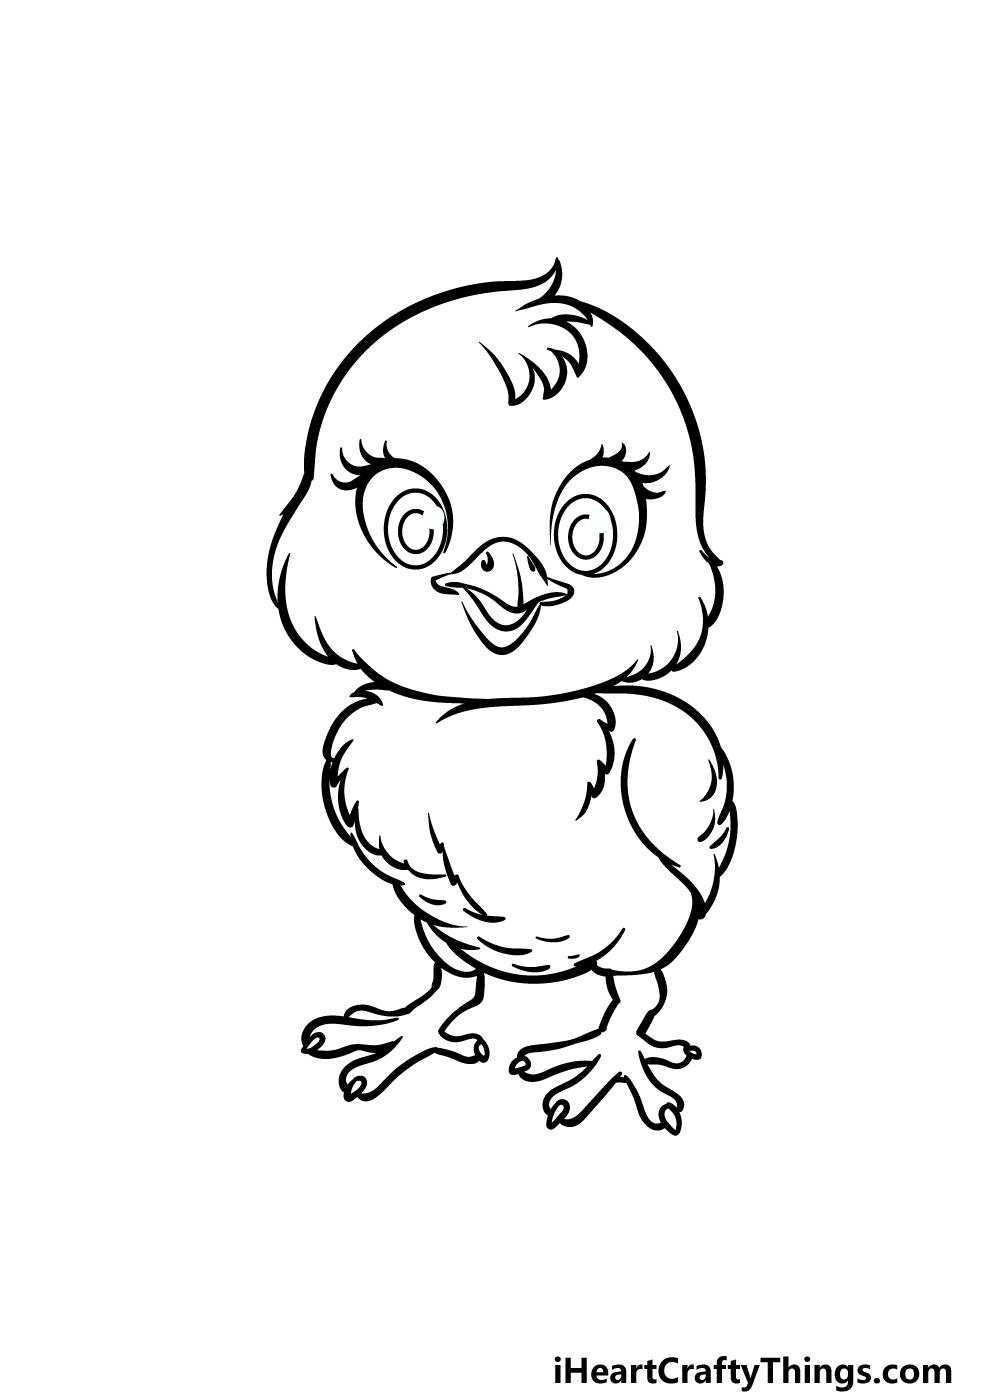
You finished the outlines for this picture in the previous step, and in this fifth step of our guide we will finish off the final touches and details.
These details will be pretty small and simple, but they will help a lot with making this a more dynamic image.
We added some bumpy, curvy lines inside of the body of this baby chick to make the feathers seem fluffier and puffier.
When finishing your own image off, you could also add even more details of your own! One fun thing to do when finishing a drawing is to add a background.
You could create a fun farm background or come up with a totally unique setting instead! How you finish off this adorable picture?
Step 6 – Finish off your baby chick drawing with color
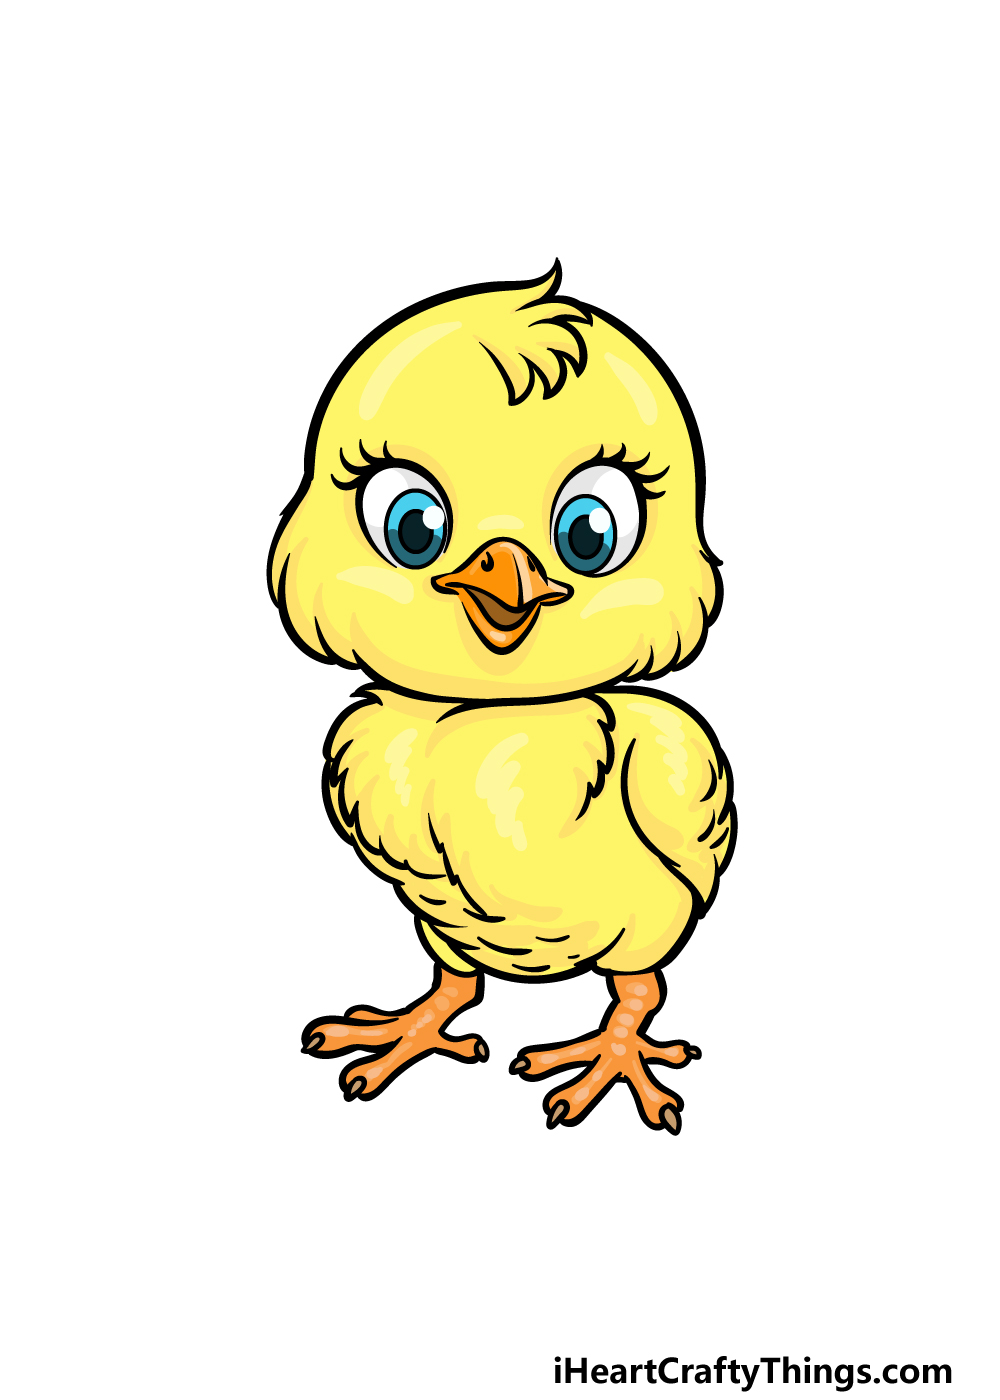
In real life, baby chicks can come in a few different colors, but they are most commonly found in a bright yellow color.
This is what we went for in our example image for this baby chick drawing, and if you would like this classic color scheme then you can refer to it to help you!
We also used some nice bright oranges for the beak and the legs of the baby chick to finish it off.
For both the feathers and these elements, we incorporated varying light and dark shades of these colors to create some depth and texture.
Will you go for similar colors for your own drawing, or will you pick a unique color scheme instead? We can’t wait to see what you choose!
Here’s how you can make your baby chick drawing even better…
Make this baby chick sketch look even more amazing with these tips!
Whenever you get to see a baby chick in real life, they will usually be surrounded by many brothers and sisters. You could show this in your own drawing of a baby chick!
Now that you have finished the guide, you can take what you have learned and add as many chicks to the picture as you want.
You could also change a few details for each one to make every little chick unique.
How many would you like to add to the picture?
Another way that you could populate your artwork would be by adding some adult chickens. These could be added whether you added additional chicks or not!
You could add chickens or even roosters, and they could be drawn in a similar style to this baby chick. Or, you may want to portray them in a different style!
It’s up to you, but no matter how you do it you can create a wonderful chicken family for this image.
You may also want to add some other animal characters that you could expect to see with chickens.
These could take on the form of several farmyard animals, and they would be a wonderful addition to your baby chick drawing!
For some ideas, you could add some cute pigs, goats or maybe even some ducks. Once again, they could be drawn in a similar style to the one you used for this baby chick.
What other animals could you add?
Finally, you could also add a background to really finish off your baby chick sketch. The most obvious choice would be to add a farmyard background to this image.
That would work especially well if you added other farm animals to the image. You could also go for something more out there for the background.
For example, you could show this baby chick at an animal birthday party. What other ideas can you think of for some creative backgrounds for this image?
Your Baby Chick Drawing is Complete!
That brings you to the end of this adorable guide on how to draw a baby chick!
In this guide, we wanted you to see that drawing this wonderful baby chicken can be not only really fun but also easier than you could have expected.
As long as you work slowly through all of the steps we laid out we know you will nail it in no time!
When you have finished this picture, you can keep the fun going with your own additions as well.
We spoke about a few ideas you could go for to do this, but this is also your chance to show off your creativity!
When you would like a new drawing challenge, you can find your next drawing guide on our website to enjoy. We have many more we will bring out soon, so keep on the lookout for those!
You can also show off your awesome baby chick drawing by sharing it on our Facebook and Pinterest pages for us to see!