Since the dawn of mankind, we have been fascinated and captivated by the vast expanse of space.
Once space travel began to become more viable, this fascination turned to exploration, and many brave and intrepid astronauts have ventured into the frontier of space.
When doing so, they are protected not only by their spacecraft but also by the innovative spacesuits that allows for more mobility.
These are usually quite detailed and specific in their design, and it can make learning how to draw an astronaut a bit of a challenge.
That’s why this tutorial in front of you is here, as you will learn everything there is to know about drawing an awesome astronaut!
This step-by-step guide on how to draw an astronaut will provide some out-of-this-world drawing fun for you to enjoy!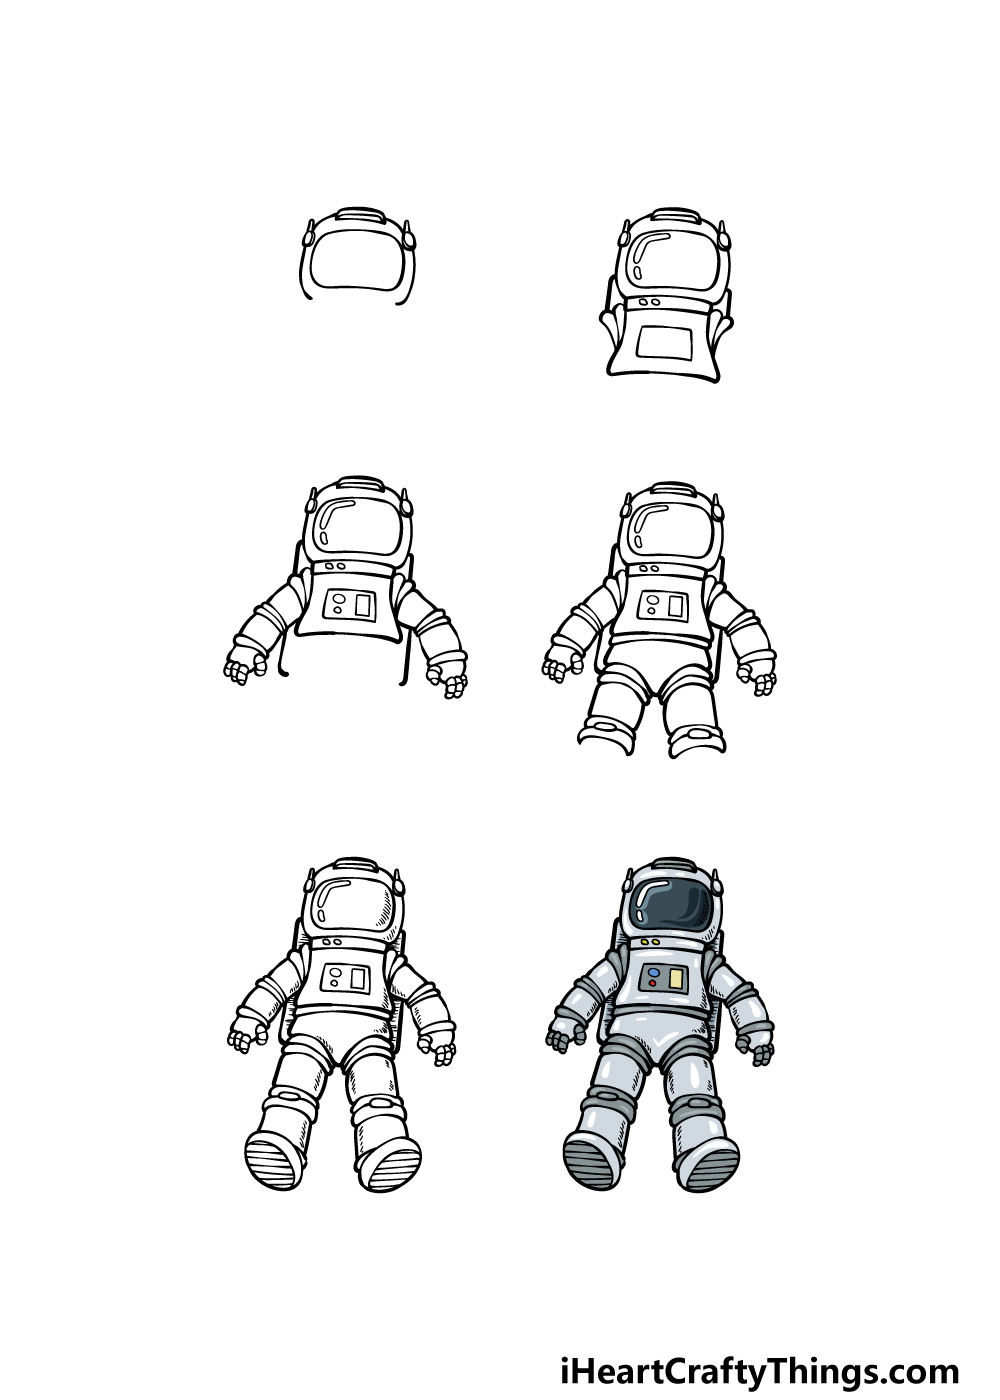
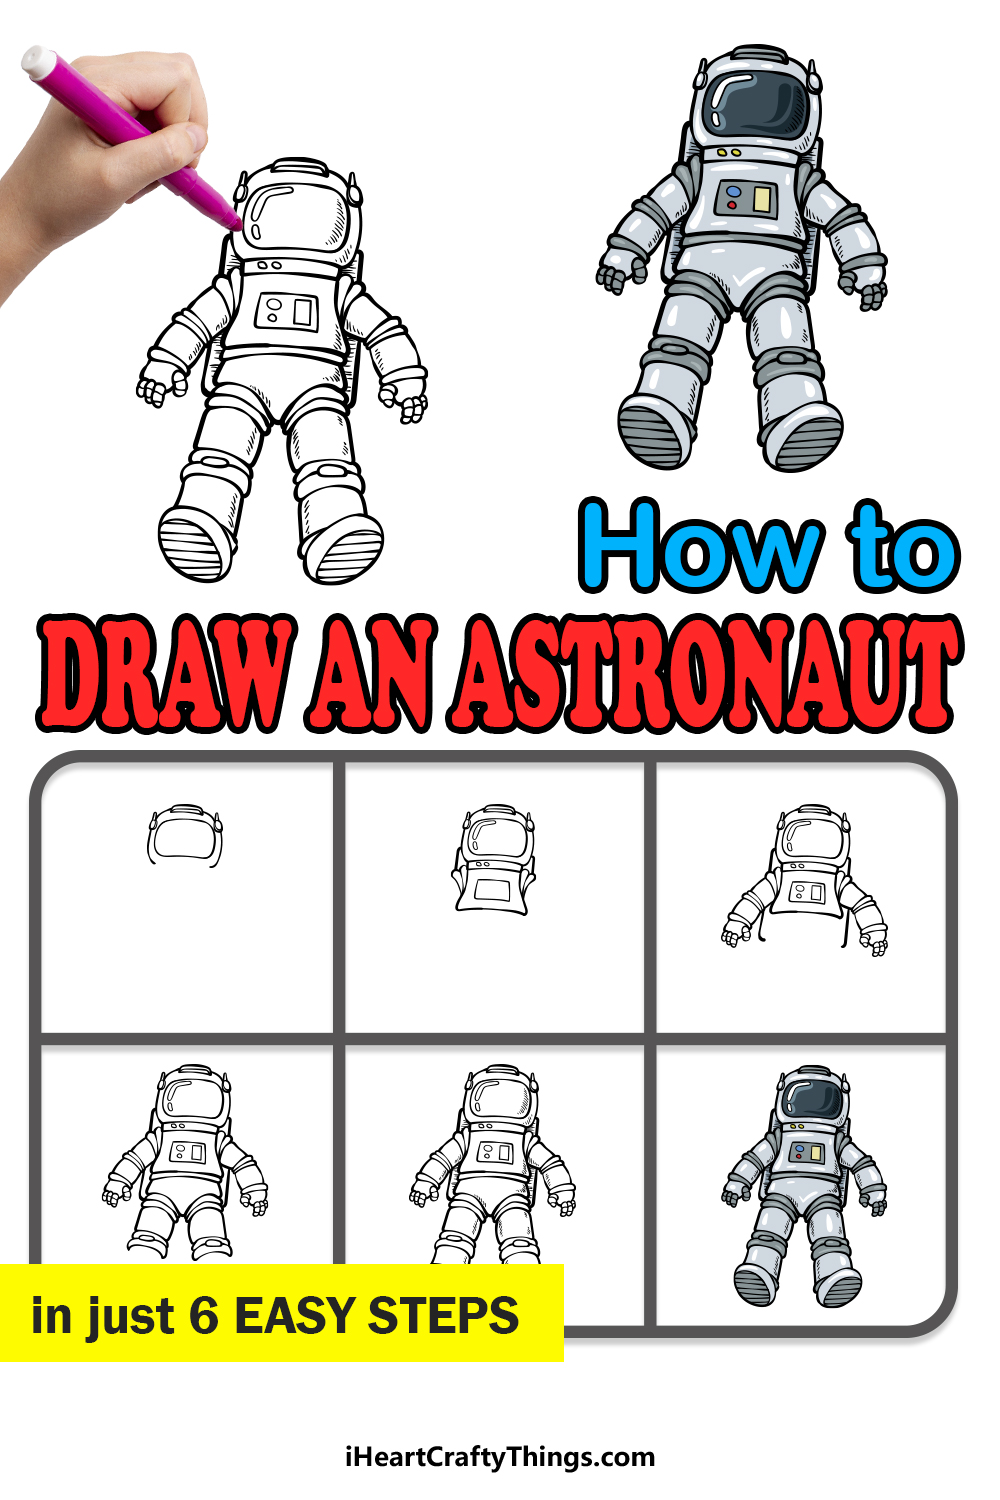
How to Draw An Astronaut – Let’s Get Started!
Step 1
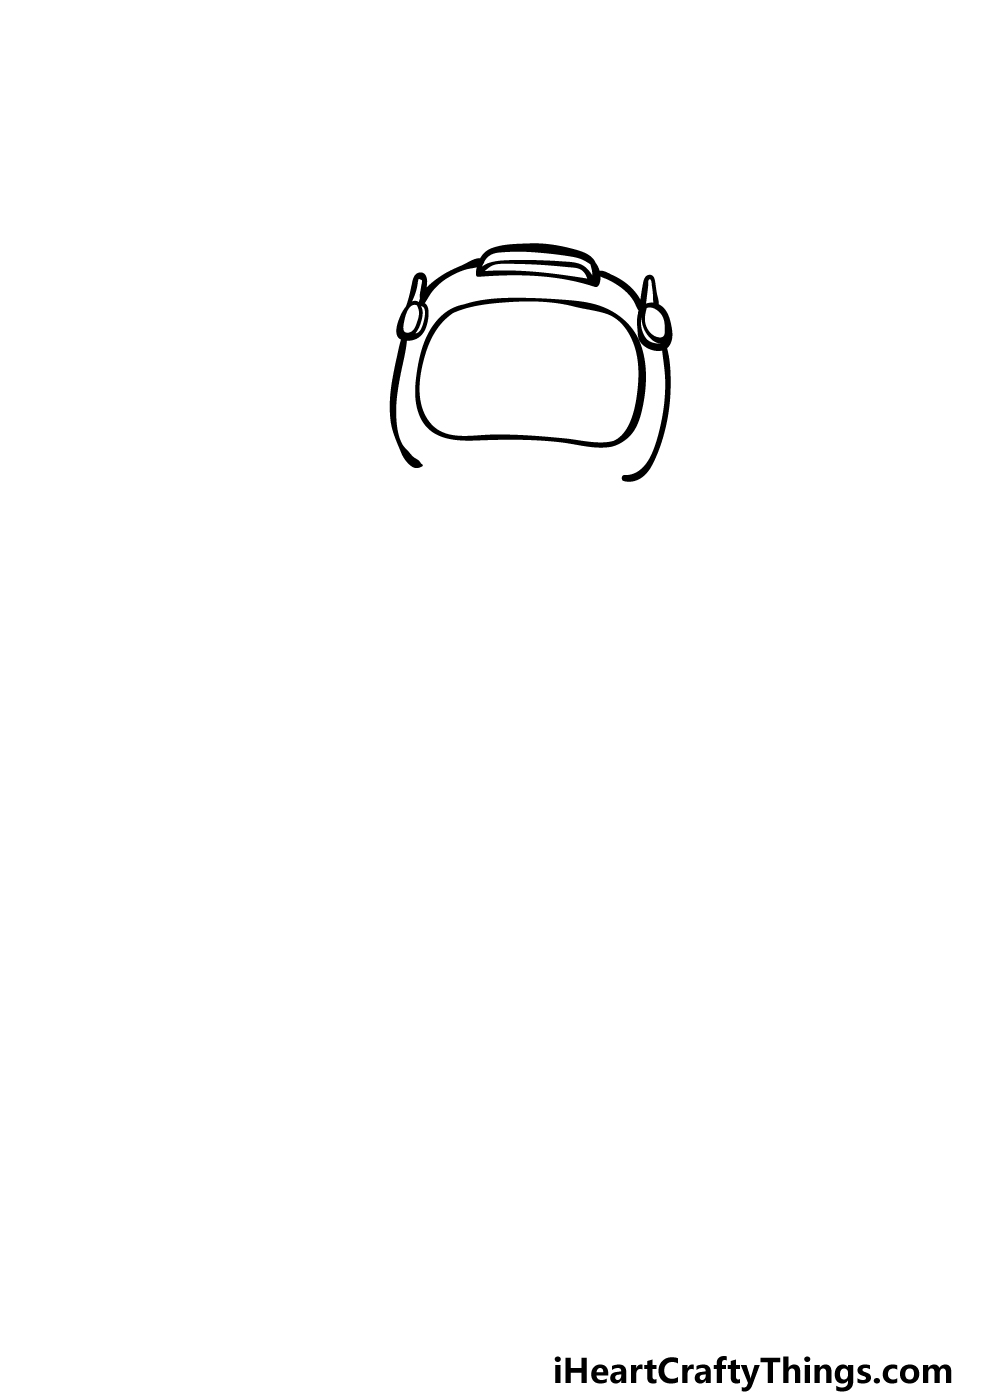
One of the most important parts of an astronaut’s suit is their helmet, as it allows them to see what they’re doing when taking on their various tasks.
This is the part that we will be starting with in this first step of our guide on how to draw an astronaut. To begin, we will be drawing the window section at the front of the mask.
This window section can be drawn as a rounded square shape, and then we will draw the rest of the helmet around it.
Use some more curved lines and then add some small antennae onto the top corners of the helmet.
Then, finish off with a small flat shape at the top of the helmet. Once these parts are all drawn, we can move on to the second step of the guide.
Step 2 – Now, draw the chest of the astronaut’s suit and add details
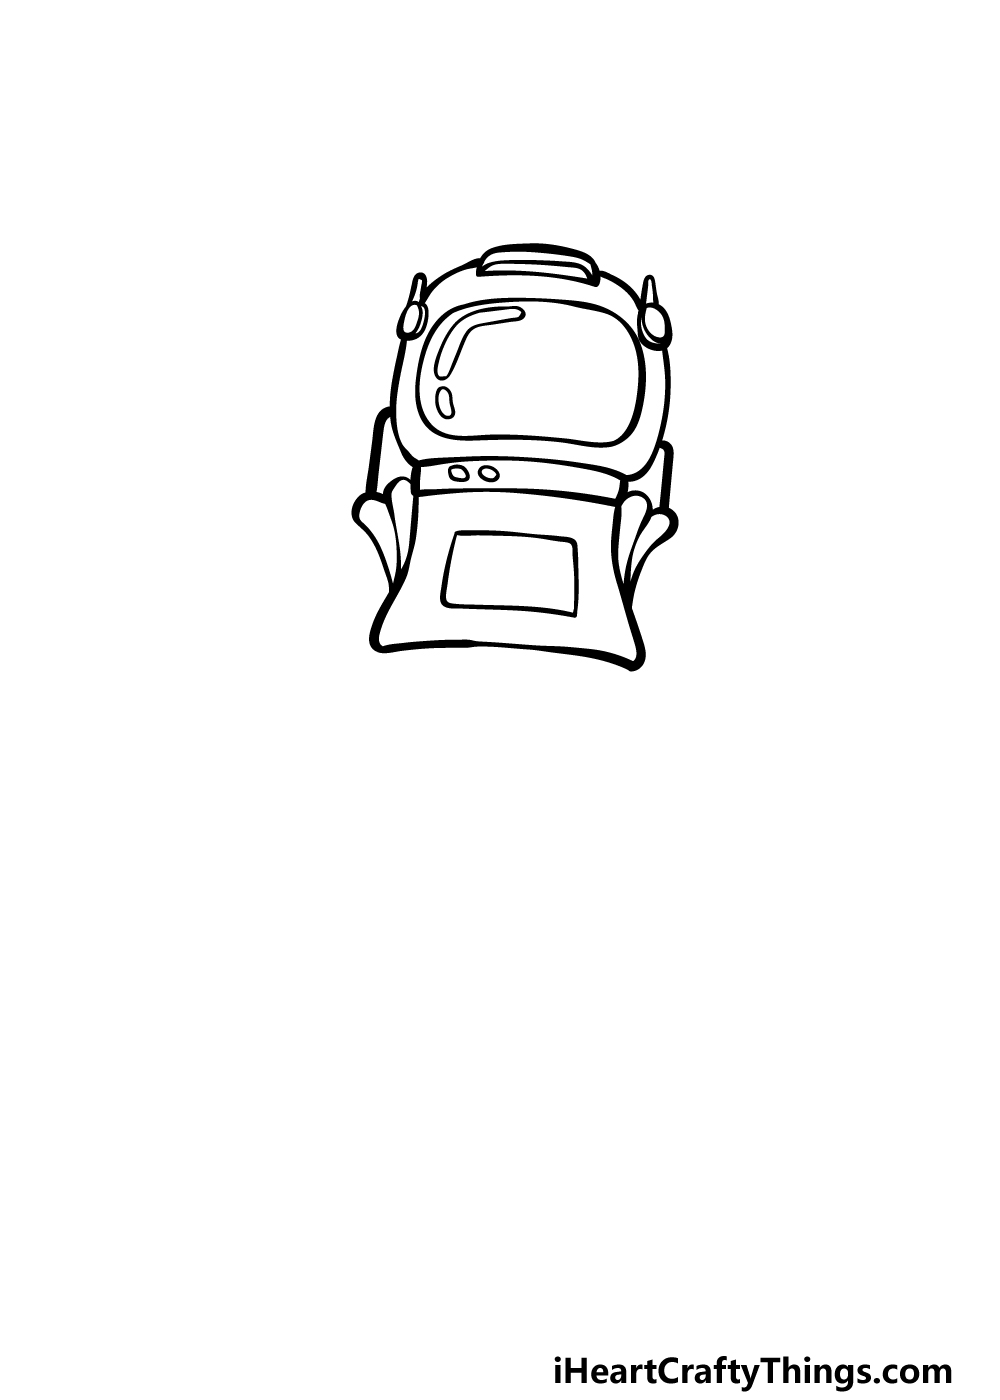
The helmet outline of this astronaut drawing is complete, and now you can add some details to it along with the chest section of the astronaut suit.
For the helmet, we will be adding some thin, curved shapes onto the window section to make it look a bit more reflective.
Then, we shall begin the chest section of the suit. You can begin by drawing a thin rim at the base of the helmet.
Then, draw some curved lines coming down from this rim to form a rounded square shape for the chest.
Finish this off by drawing another square inside of the chest and then add some thin shapes where the arms will be going later.
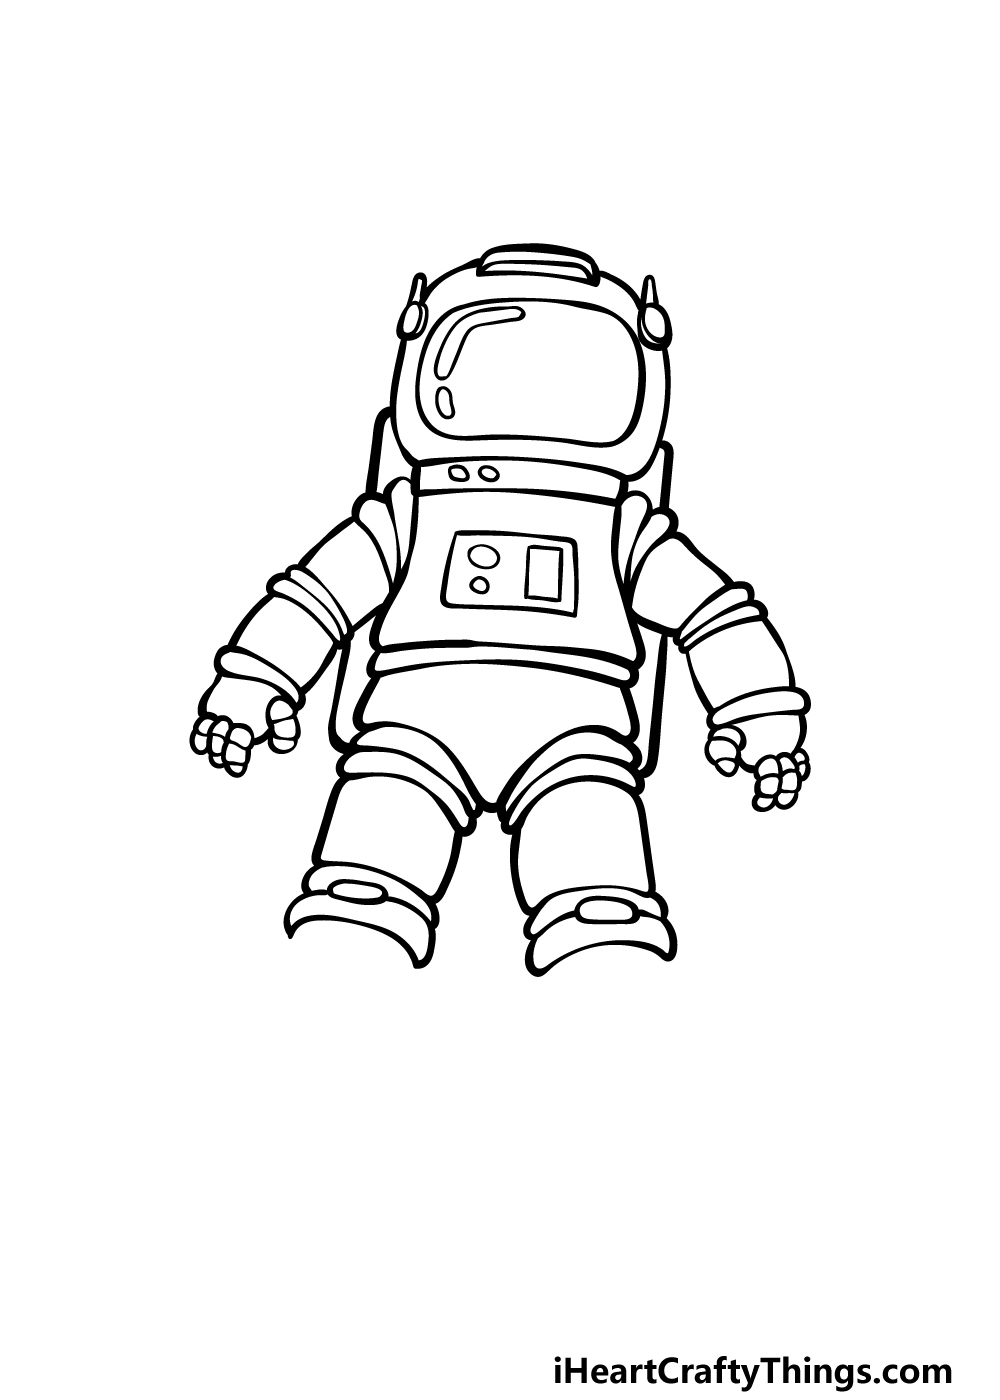
Step 3 – Draw his arms extending out

For this next part of our guide on how to draw an astronaut, we will be drawing the arms of the astronaut.
The arms of a spacesuit are made up of several sections, as this gives them more mobility. The sections will be small and squared with thin, rounded shapes between the sections.
At the ends, you can draw a small rounded section that would go over the wrists and then draw the fingers separately attached, as shown in the reference image.
Even the fingers will be separated into smaller sections to give them more bendability.
That’s all there is to it for this step, and now we can proceed to step 4!
Step 4 – Next, draw the start of his legs
Now we can begin the legs of this astronaut drawing in this step. Much like the other sections, the legs will be separated into various sections.
Much like the arms, these sections will be thin and rectangular with smaller rounded shapes between them. We will be drawing up until the knees of the astronaut for now.
In the next step of the guide, we will finish off the legs and any final details to have you ready for the step of the guide!
Step 5 – Add the final details to your astronaut drawing
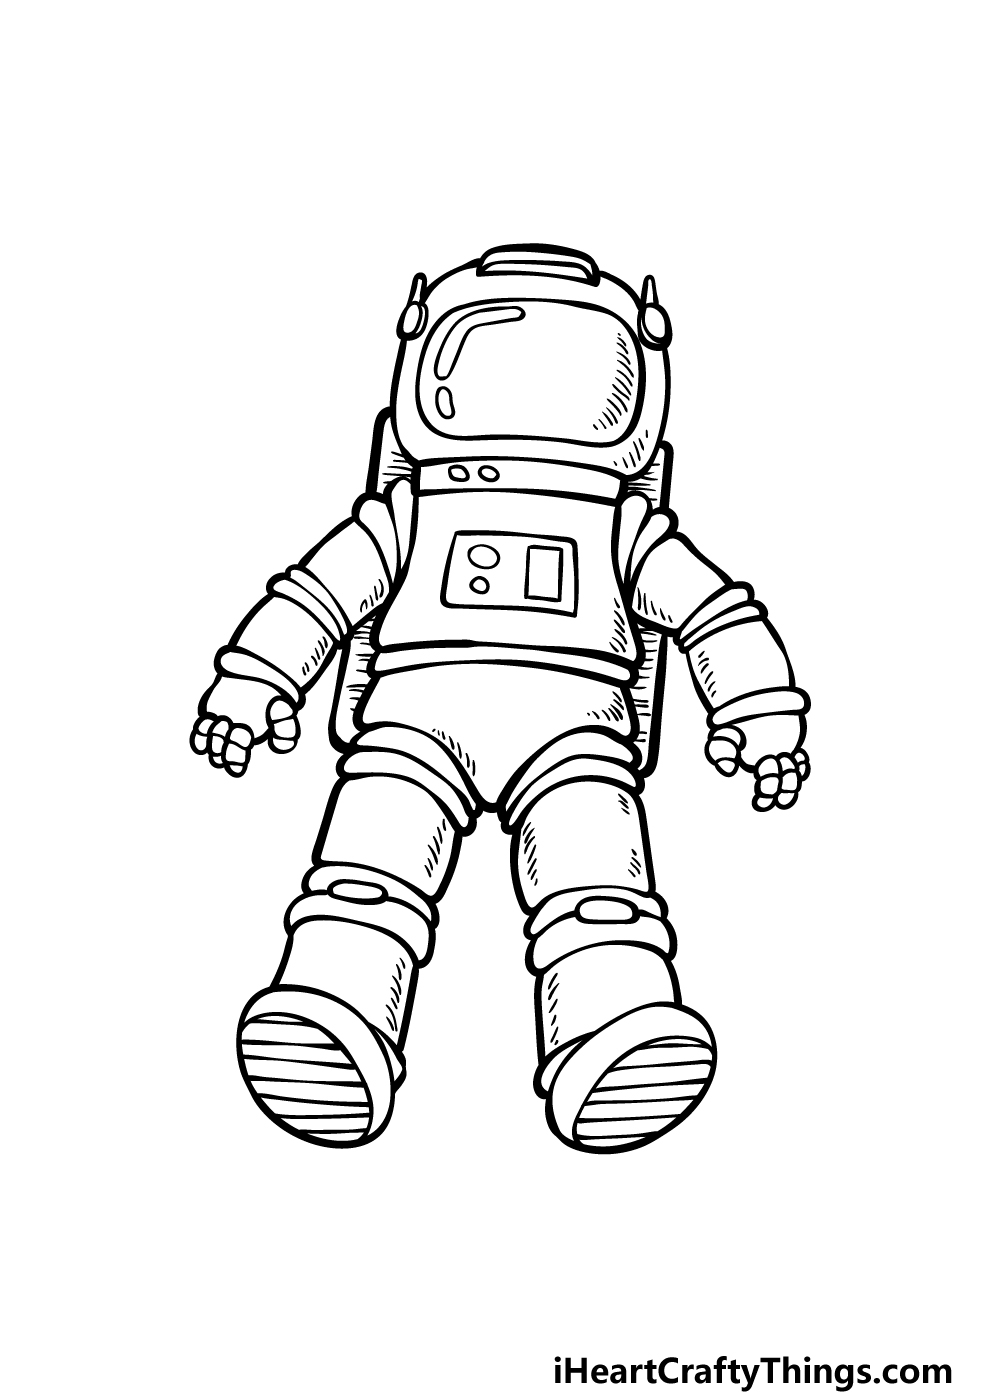
You’re almost all set for some coloring fun, but first we have some final details to add in this step of our guide on how to draw an astronaut.
The main aspect will be to finish the legs of the astronaut. To do this, add some more rectangular sections underneath the knees.
Then, use some rounded lines for the tops of his boots. The undersides of the boots will be oval-shaped with horizontal lines across them.
You can also add some simple line details throughout the suit, and then draw the bottom of his backpack beneath his arms.
When this is done, you can then finish off with your own details and ideas!
One idea would be to draw a background, and if you did this you could design an incredible space setting for the astronaut.
Will you go for a background like that or create a new one of your own?
Step 6 – Finish off your astronaut drawing with color
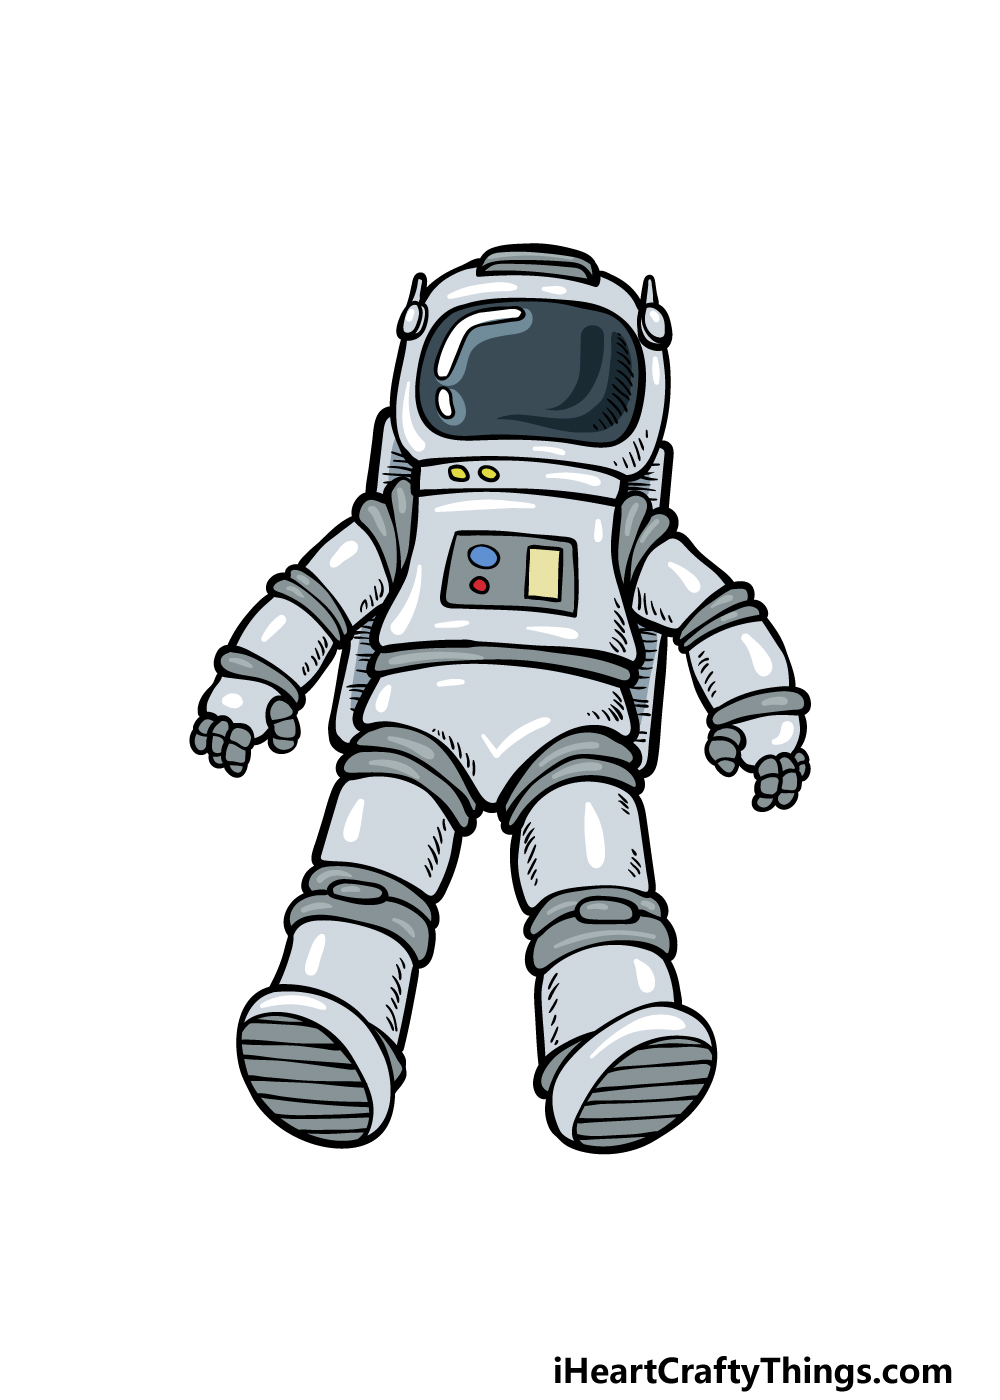
This is the final step of this astronaut drawing, and in it you can finish off your creation with some colors. In our reference image, we went with a more muted and realistic color scheme.
We kept the colors mostly to shades of grey, and then we incorporated some blues as well. You could go for the same colors or you could change things up entirely by using some unique colors!
It’s up to you, and this is your chance to show off how creative you can be as you choose your colors and art mediums. We can’t wait to see how you finish off this image!
5 Tips To Make Your Astronaut Drawing Even Better!
Take this astronaut sketch to new heights with these 5 fun tips!
It’s fair to say that an astronaut has a pretty tough job to perform. They use many tools in their profession, and you could add some to this astronaut drawing.
For instance, you could draw a twisty pipe attached to the astronaut’s suit. This would be used to tether the astronaut to the spacecraft and provide oxygen.
That’s one example of an extra element you could add attached to the suit, but what others could you think of?
Another way you could build on the previous tip would be to add a spaceship to this drawing of an astronaut. It could be a portion of the craft, or it could be the whole thing if you have enough space!
If you added the pipe in the previous tip, then it could attach to the ship.
There are other background elements that you could add apart from the ship. To start with, you could add some twinkling stars to the background.
Then, you could maybe add some planets, asteroids or other spaceships. Space is filled with interesting things, so what details could you add to this artwork?
Now that you have created this astronaut sketch, you would be ready to add another one for them to have by their side. This would be easy, as you merely need to follow the steps again!
Then, you can change certain smaller details such as the pose and elements of the suit. What sorts of activities could they be engaging in if you were to add a second one?
You could even add more than one if you wanted!
The final tip we have for this astronaut drawing would be to personalize it a bit. We left the glass on the helmet mostly blank, but you could draw a face into that space!
If you were to do this, it could be the face of a friend or a family member. You could even use your own face to show what it would look like if you were an astronaut!
Your Astronaut Drawing is Complete!
That brings you to the end of this guide on how to draw an astronaut! The spacesuits that astronauts wear are incredible and complex technological marvels, so that can make them intimidating to draw.
That’s why we wanted to break it down into smaller steps to make the whole process more manageable.
Now that you have completed this guide, you can still keep it going with your own awesome details and ideas!
We mentioned a few ideas that you could try, but this is your chance to show off your incredible creativity.
If you had fun recreating this astronaut, then you will have plenty more fun waiting for you on our website! We have many amazing guides to enjoy, and we bring new ones out frequently.
We would love to see how you finished off this incredible astronaut drawing, so please be sure to share your creation on our Facebook and Pinterest pages.
Here Is An Astronaut Drawing To Inspire You!
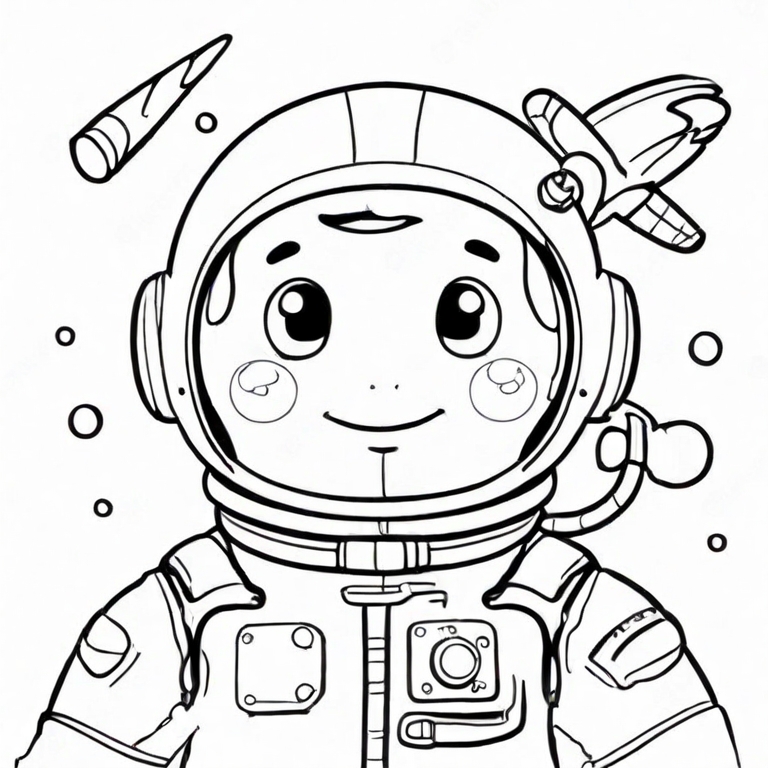
This astronaut sketch that our talented artist Amanda created is definitely out of this world! She has really captured the wonder and excitement of space exploration through the facial expression of the astronaut.
She has also shown that you can have a wide range of details on the drawing while keeping it whimsical and cartoony. Adding all of these details would give you loads of opportunities for lots of colors.
When you make your own drawing, you can also add some of your own extra details and ideas, such as drawing a background. Of course, you can also closely follow Amanda’s design if you like it as is.
If you were to make a background, you could create all kinds of amazing space adventures for your astronaut drawing! Now it’s up to you, so what will you do for this awesome drawing?