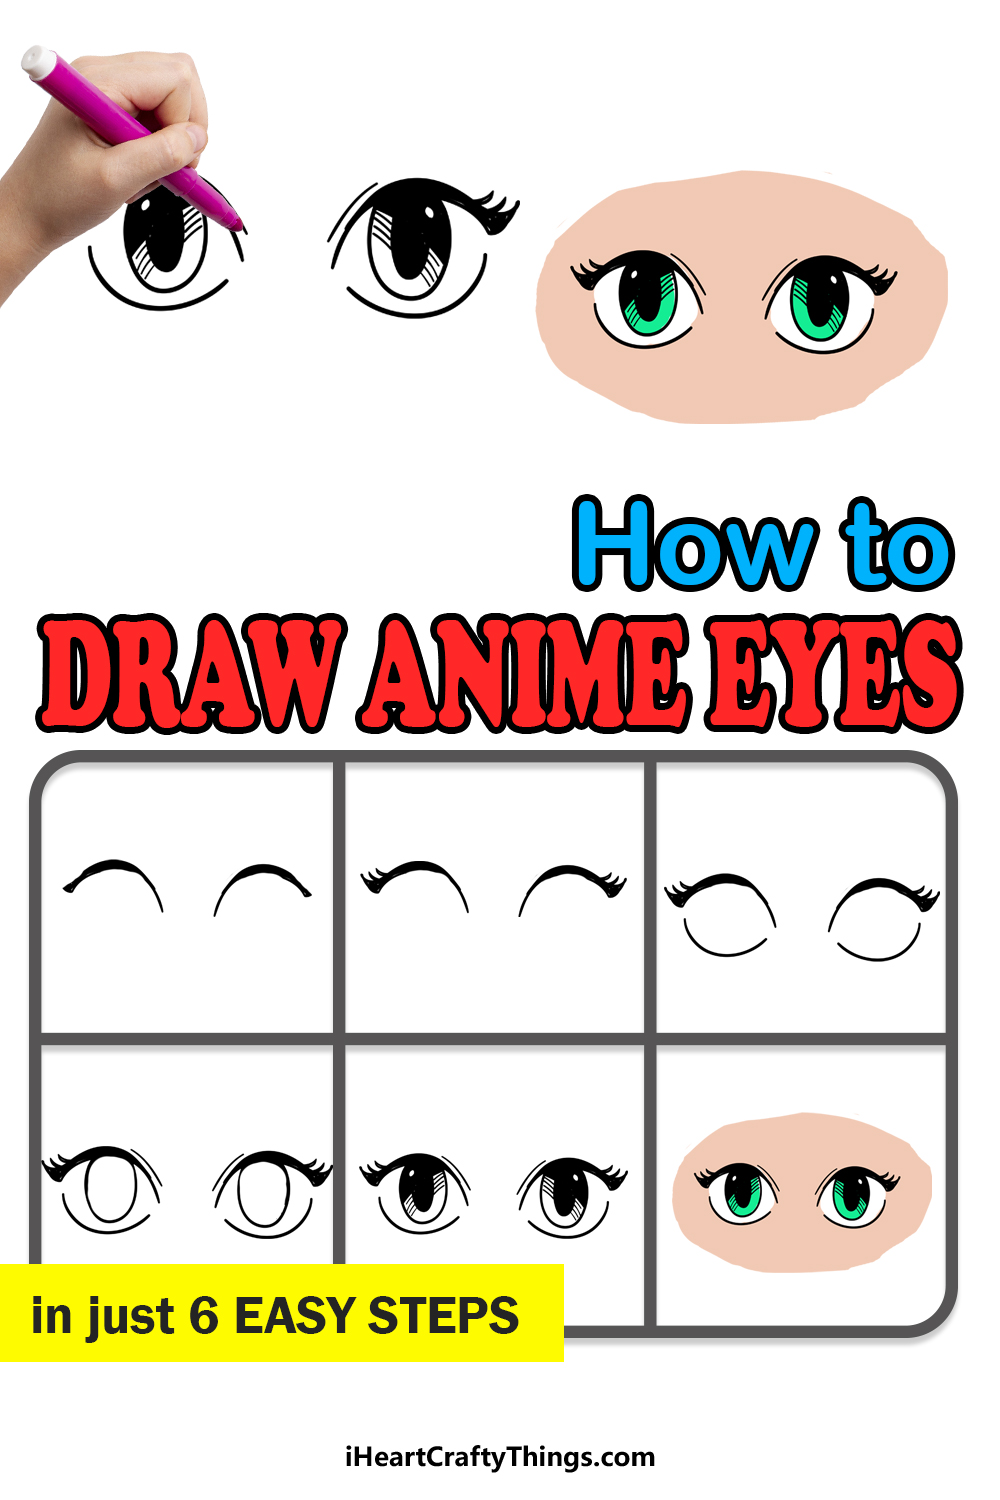
Find out how to draw anime eyes with ease by following these simple steps! This guide for kids is perfect for anyone wanting to begin the process of making their own anime drawings.
While anime can come in many different styles, there is a certain one that we tend to associate with it. While the ‘anime style’ is very recognizable, it can be deceptively tricky to draw.
Starting with the eyes is a good idea, as you can build the rest of the drawing from there. By learning how to draw these basic anime eyes, you can then adapt what you learn to create different expressions and styles.
It may seem hard at first, but I will take you through each step so you can see how it all comes together. It’s easier than you think, so let’s get started on this anime adventure!
Create Your Anime Eyes Drawing By Watching This Guide
How to Draw Anime Eyes – Let’s get Started!
Step 1

When it comes to anime eyes, there are actually many different styles. They do tend to be quite large on the faces of the characters, but there are exceptions to that rule.
They do tend to be rather rounded and expressive, and that’s the case with these particular eyes. Before you start drawing these eyes, we would recommend planning out the drawing with a light pencil first.
You can start imagining what the drawing will look like by looking at the later images in the guide, and then you can draw a rough outline with your pencil.
It doesn’t have to be perfect, it’s just to give you an idea of how to draw the final lines. If you’re planning on drawing more of the face later, then you could map this out now as well.
Then, we will draw the actual first lines of the eyes. For now, we will keep it simple with two curved lines for the tops of the eyes.
The lines start off quite thin, get fairly thick at the center and then end thin again. Try your best to make it look like our reference image, and then we can proceed!
Step 2: Draw the eyelashes
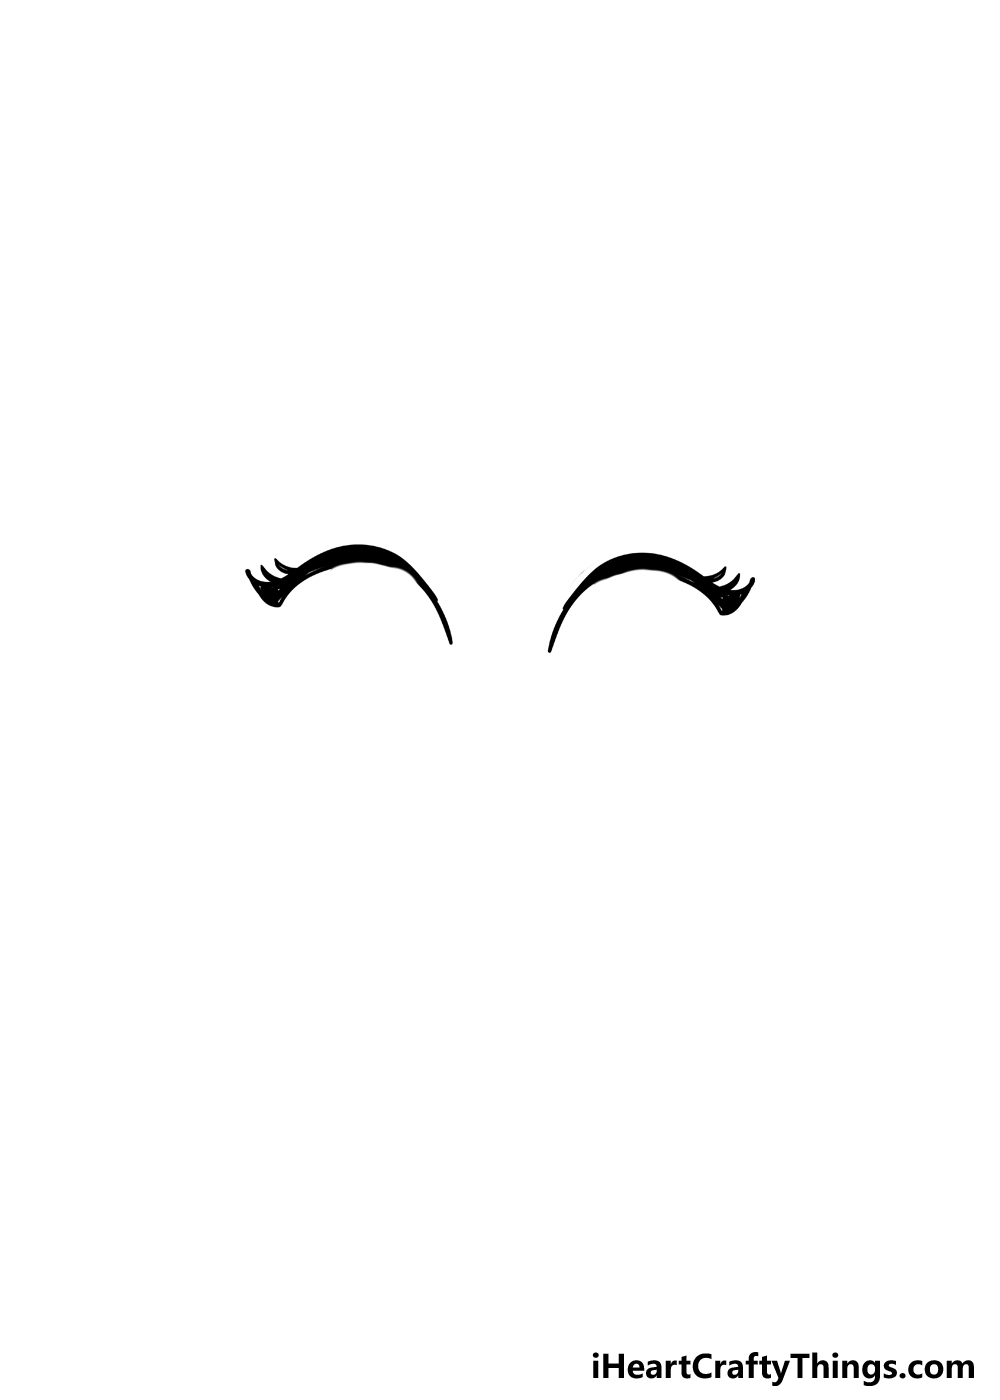
The second step of this drawing will be another simple one, as this is the step where we will add the eyelashes. While it may be technically simple, it’s still an important step.
The eyelashes can help to add a lot more personality and expression to the drawing. You could also make them a lot more exaggerated in your own drawing if you have a particular style in mind.
For now, we will go with the simple style that we have in our example image. These will be composed mainly of three small lines on each eye.
As you can see in the reference image, these will go on the outer edge, and they will be rather small and thick. The line on the outer edge will be the longest, and each one going in will be a little smaller, but not by much.
It’s a step where you shouldn’t worry too much about getting it exactly the same as our example, and you could even leave these out entirely if that suits your design more.
This is your drawing, after all, so you should feel free to add your own touches or changes. When you’re happy with how the eyelashes look, we can move on to the next step of the guide and draw the rest of the outline.
Step 3: Add the lower side of the eye outline
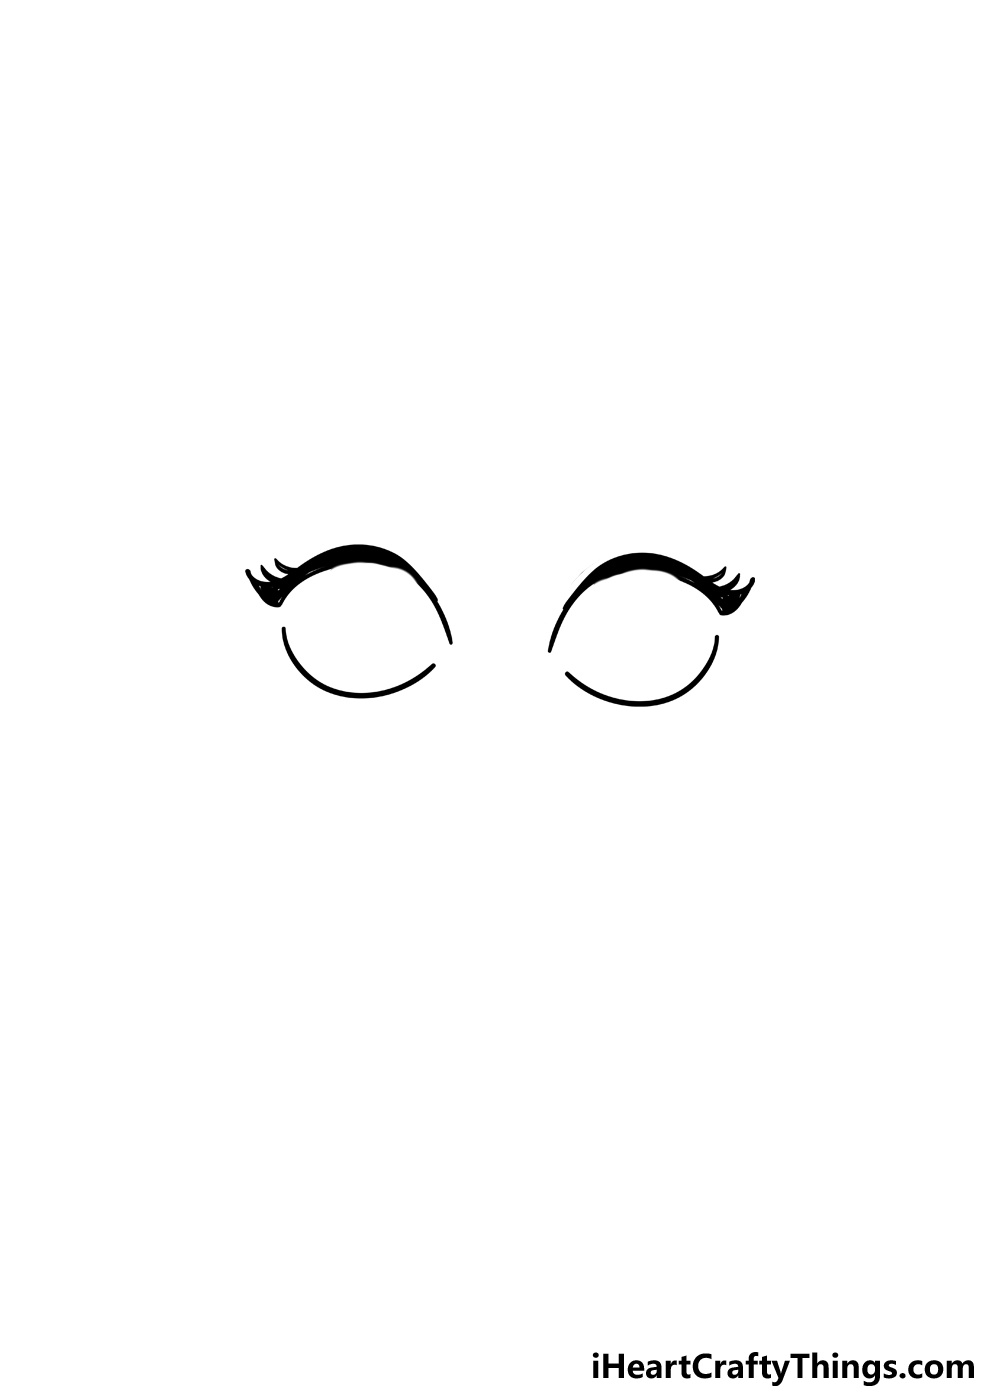
Now we’re ready to draw the rest of the outline for this anime eyes drawing. This is another step that is simple yet important, and it may not go the way you’re expecting.
You may assume that the outline of the eyes will all be connected, but that’s not what this particular design will look like. Instead, these bottom outlines will have a small gap between them and the lines you drew for the top of the eyes in the first step.
These may look simple, and while they shouldn’t be hard to draw you may find it trickier than you may imagine.
That’s because we want these lines to ideally be thin and smooth, and this can take a steady hand.
Don’t be shy to take this step slowly, as it can be surprisingly easy to make a mistake! We also want as close to symmetry as possible here, so try your best to make these lines match one another.
When you’re happy with how the outlines look, we will be done with the outlines for now. In the next few steps, we will add the pupils of the eyes before adding some color to your drawing, so let’s move on when you’re ready.
Step 4: Now draw the start of the pupils
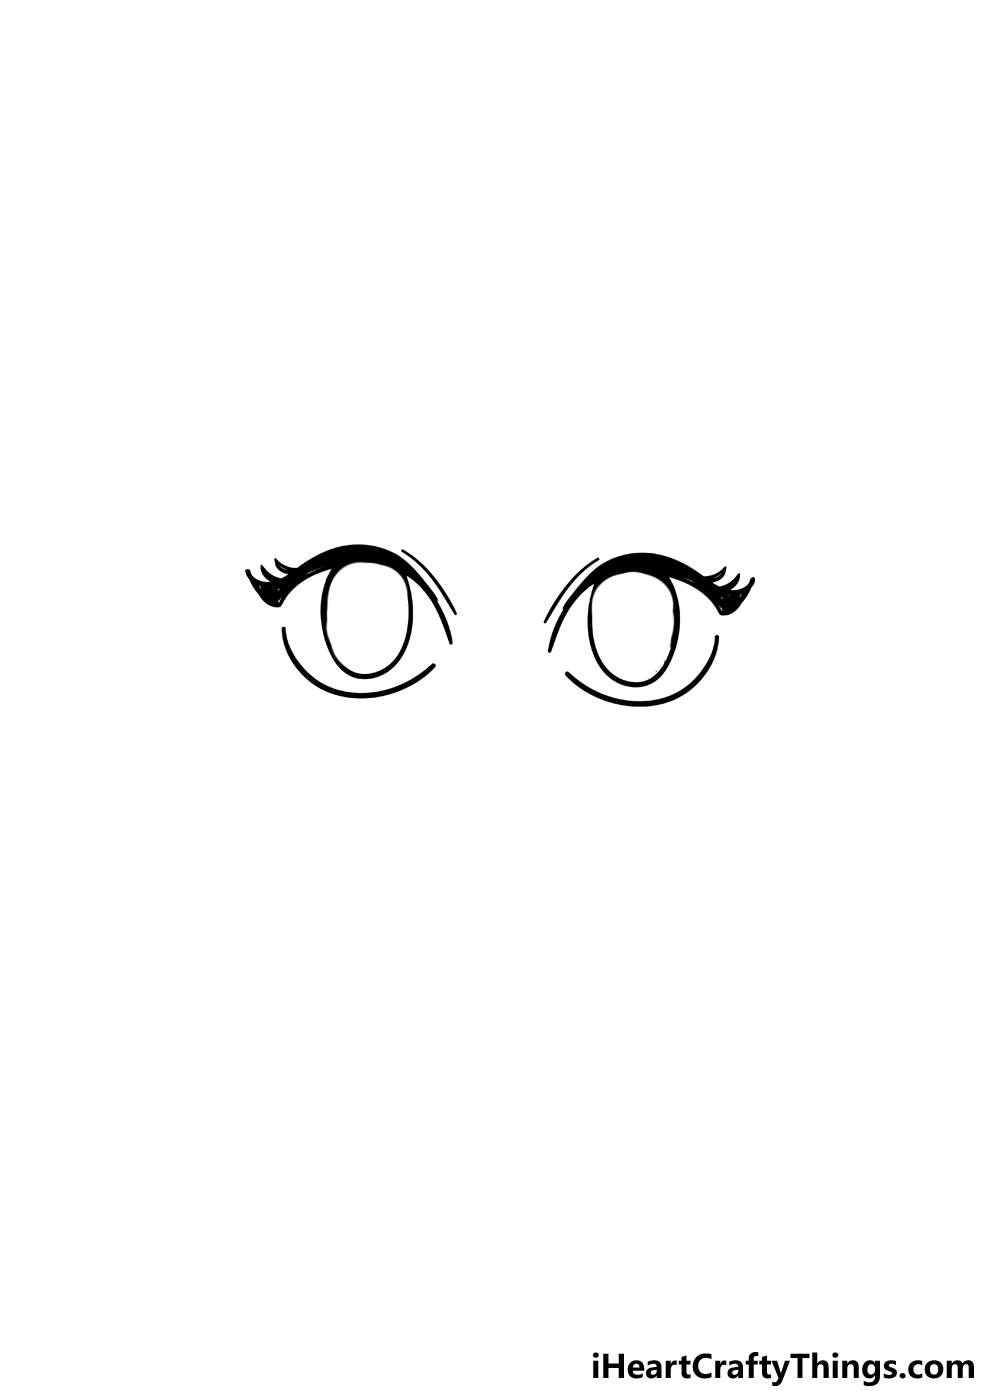
Now we have arrived at the part of this drawing where we start to add the pupils and irises. This is an incredibly important part of the drawing, as the eyes would look a bit weird without them!
If you look at your own eyes, you will see that the irises and the pupils are fairly small. That won’t be the case for these eyes, however! In fairly typical anime style they will be really big and expressive.
Before we start drawing the outlines of the irises, we will first add some small line details around the outlines you have drawn already. These will go on the upper outlines of the eyes, as shown in our example.
It’s s subtle touch, but it helps to make the eyes a little more expressive and realistic. Once those are drawn, we can start the iris outlines.
This is another step that may look simple, but it can require a steady hand once again. These outlines will be oval-shaped, and the upper parts of these ovals will touch the top of the eye outlines.
This is how we chose to position them, but you could place these ovals elsewhere if you want to have the eyes looking in a different direction. If you decide to do this, remember to keep it consistent.
So, if you wish to have the eyes looking to the left, both irises should be on the left side.
This is something you can experiment with, but the general shape of these irises will be the same no matter where you place them.
When you have placed them where you want them, we can finish off the drawing in the next step to get you ready for the final coloring stage of the drawing.
Before moving on, you can go ahead and remove your pencil lines if you used them to plan out the shape of the eyes. If you drew the final lines with a pen, be sure to wait a minute or two to let the ink dry before you erase the pencil.
If you erase too soon, you may smudge ink all over your hard work!
Step 5: Draw the final details
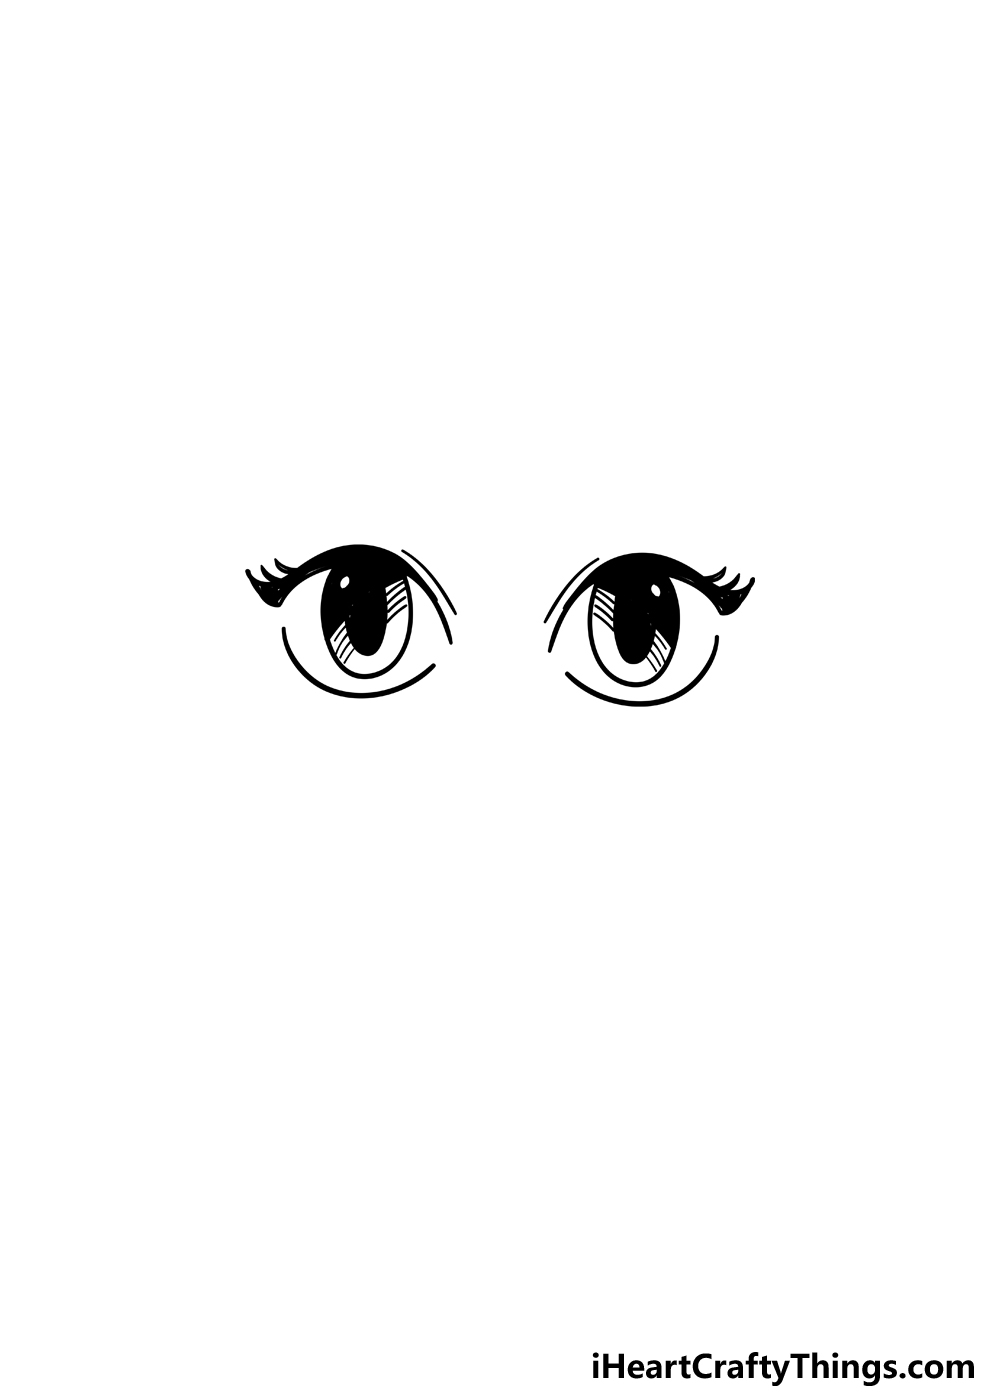
Now you’re ready to finish off this drawing of anime eyes with some final details! This will prepare you for the final step where we will color in your creation.
The previous steps have all been rather small and simple, but this step will see you adding quite a lot. That’s no problem, however, as you can take it as slowly as you like!
Start by drawing a single thin oval shape at the center of each eye. These will be the pupils, and you will notice that they look very different from your own!
Our pupils are small and round, but these are a lot more stylized and expressive. You can color in the pupils with solid black to finish them off.
Now, things get a little trickier, so be sure to follow the reference image and guide closely. We will be filling in the upper sides of each iris, but the section we fill in will be mirror images instead of on the same sides.
If that sounds confusing, merely refer to the reference image and you will see what we mean! These sections will each have a small white dot as well, to show a spot of light on each eye.
Finally, draw a series of thin lines slashing across the pupils to add even more life to the eyes. This was rather tricky, but when you break it down it becomes much easier!
When you’re satisfied with how it looks, you will be ready to relax with some coloring fun in the next step of the guide.
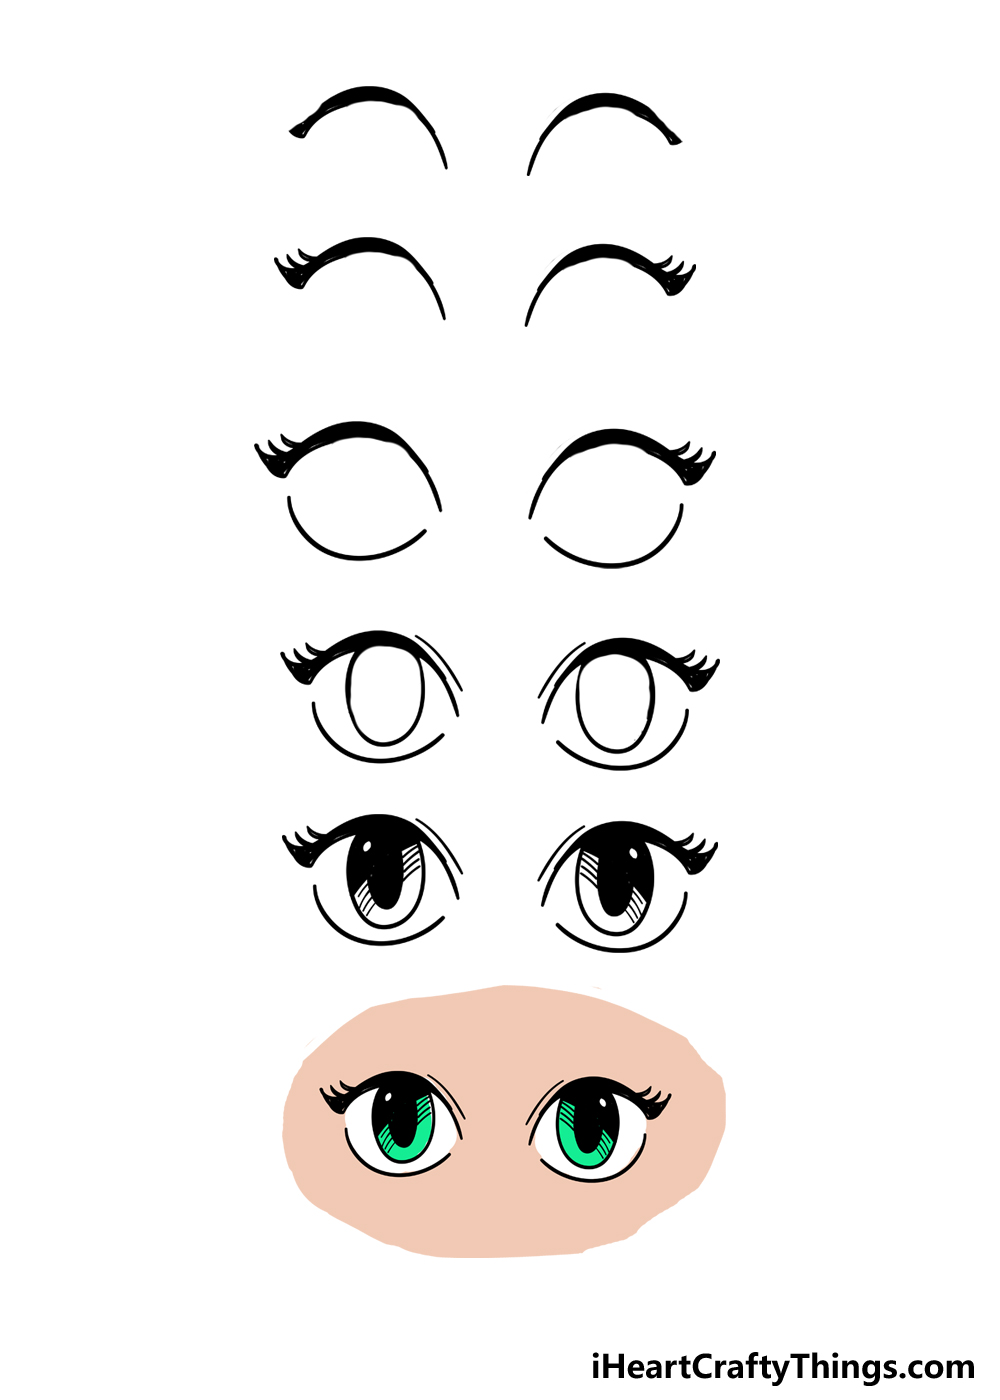
Step 6: Now, finish off with some color
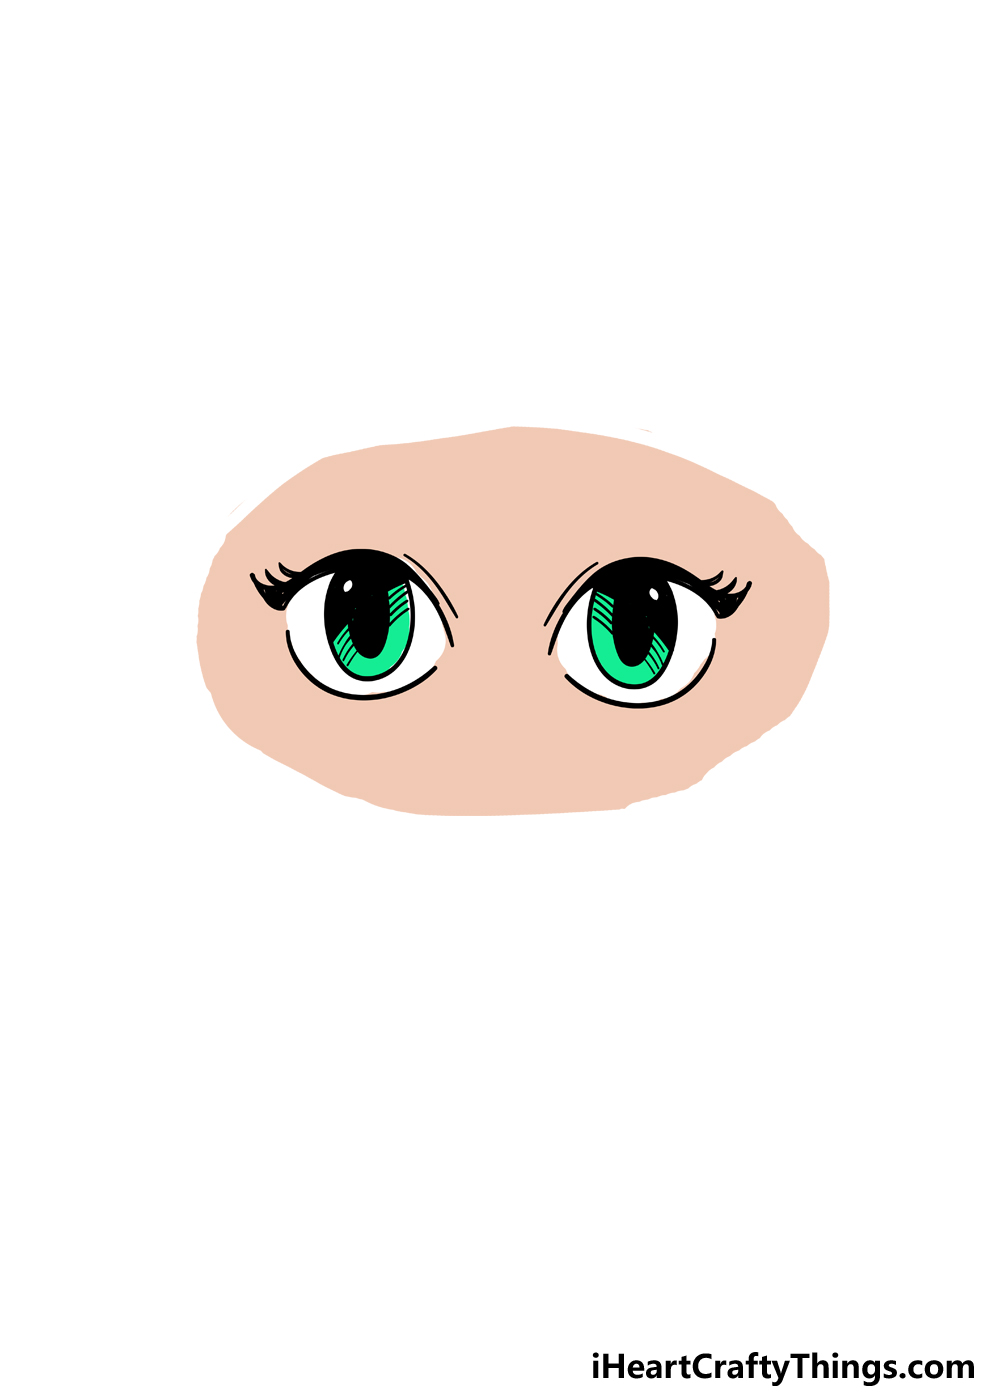
You worked hard on this drawing, and now you can relax with some coloring fun! We do show you one way that you can color the drawing, but this is a step where you can let loose and experiment a bit.
In our example, we surrounded the eyes with a light skin tone. Then, we used some bright green for the irises to really make them pop.
We think this looks great, but there are so many ways that you could color in your drawing. When coloring, remember to not only think about the colors but also the art tools that you use to create them.
You may want to stick to old standards like crayons or colored pencils, but there are so many art tools to use.
For example, let’s say that you want a bright green color for the eyes like the one in our example.
If you wanted a similarly bright color for your own drawing, then you could use colored markers or pens to achieve a similar effect.
Some paints would also work well, and some craft paints can even have cool effects like glowing in the dark!
You can also add to the drawing and draw the entire face and hair of your character. The sky is the limit, and you can really get creative with it.
We know that whatever you do will look amazing! When you really have the hang of this drawing, you could use what you learned for other styles of anime eyes as well.
What sorts of expressions would you like to create with these eyes?
Make Your Anime Eyes Drawing Even Better With These Ideas!
Now that you have made it through all six steps of this guide, you have an amazing drawing of anime eyes! If you’re sad that it’s all over, we have good news for you as there is still fun to be had.
When interpreting emotions of other people, the eyes are what we will often look at first. For that reason, you could portray all sorts of emotions with these anime eyes.
We kept the emotion a bit neutral to make it easy for you to learn, but now you can play around with the composition. It could be as simple as making the eyebrows lower or the eyelids narrowed.
If you’re stuck with how to portray your chosen emotion, then you could get out a mirror and make the most extreme facial expressions you can. Then use those as references for your drawing.
When you really have the hang of the design, you could try to draw different kinds of anime eyes. Using existing anime characters as examples can help you as you draw.
Then when you’re happy with how the eyes look, you could draw the rest of the face around them. This is another case where you may want to use existing characters as as reference.
You could also base it on people you actually know! Using pictures or someone posing, you could convert someone into an anime style using these eyes.
If you can’t think of anyone you would like to use, then you could use yourself as a model using a mirror or a selfie of your face. This would make it possible to portray all sorts of cool emotions.
What emotions would you like to portray with these anime eyes?
Your Anime Eyes Drawing is Complete!
That brings us to the end of this guide on how to draw anime eyes! We hope that you had lots of fun working with us on these 6 steps and that they showed you how easy it can be.
There were certainly some challenges to be had with this drawing, but with some practice you will find it to be easier than you could have previously imagined!
When you have mastered it, you can then experiment with different styles, expressions and then even facial features.
As as special challenge, why not take some photos of yourself or people you know and then adapt them to this style?
That would be a great way to test your skills with this drawing, even though it would be quite a challenge! Or, you could try out some new art tools and mediums that you’re not so familiar with.
Incorporating crafts such as beads or stickers can also add extra depth to your artwork, so don’t be shy about trying out those kinds of crafts.
When your drawing is complete, be sure to show it off on our Facebook and Pinterest pages so we can see how it turned out!