Conveying emotion in a drawing is not always an easy thing to do. The more extreme the emotion being conveyed, the trickier it can be to get it looking right.
This can be because there are some subtleties that look unnatural if not conveyed properly.
Learning how to draw an angry face is a great example of this, as it is arguably one of the hardest emotions to get right when drawing it.
Just because it may be hard to do, doesn’t mean that it has to be impossible, however! In fact, it can be made much easier when you have the right steps to follow.
That’s what this step-by-step guide on how to draw an angry face is here to do, and by the end of it you will be able to convey this extreme expression with ease!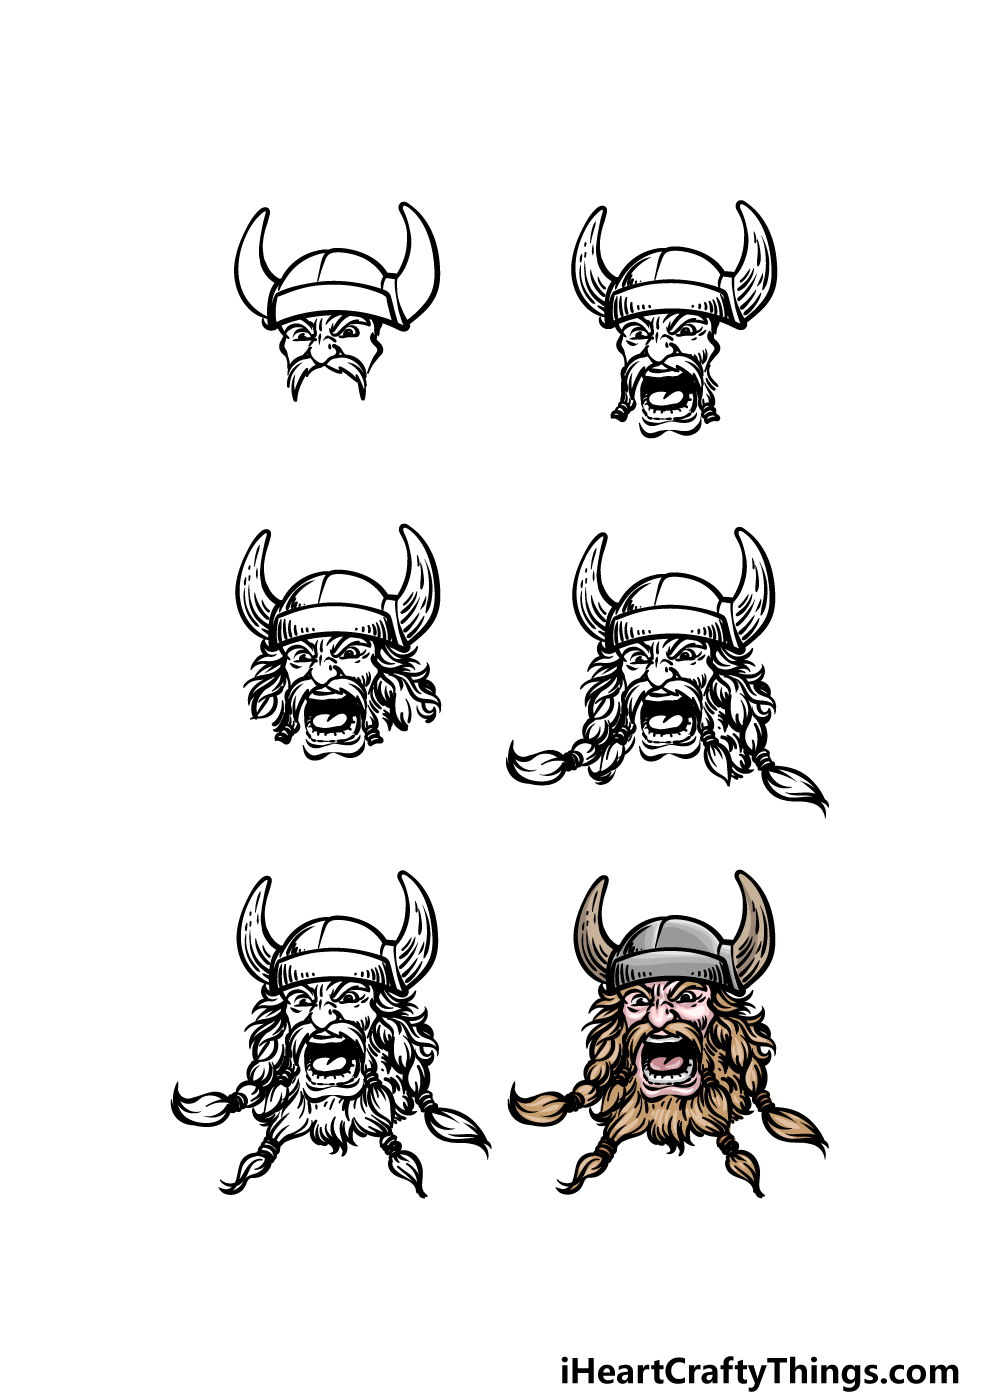
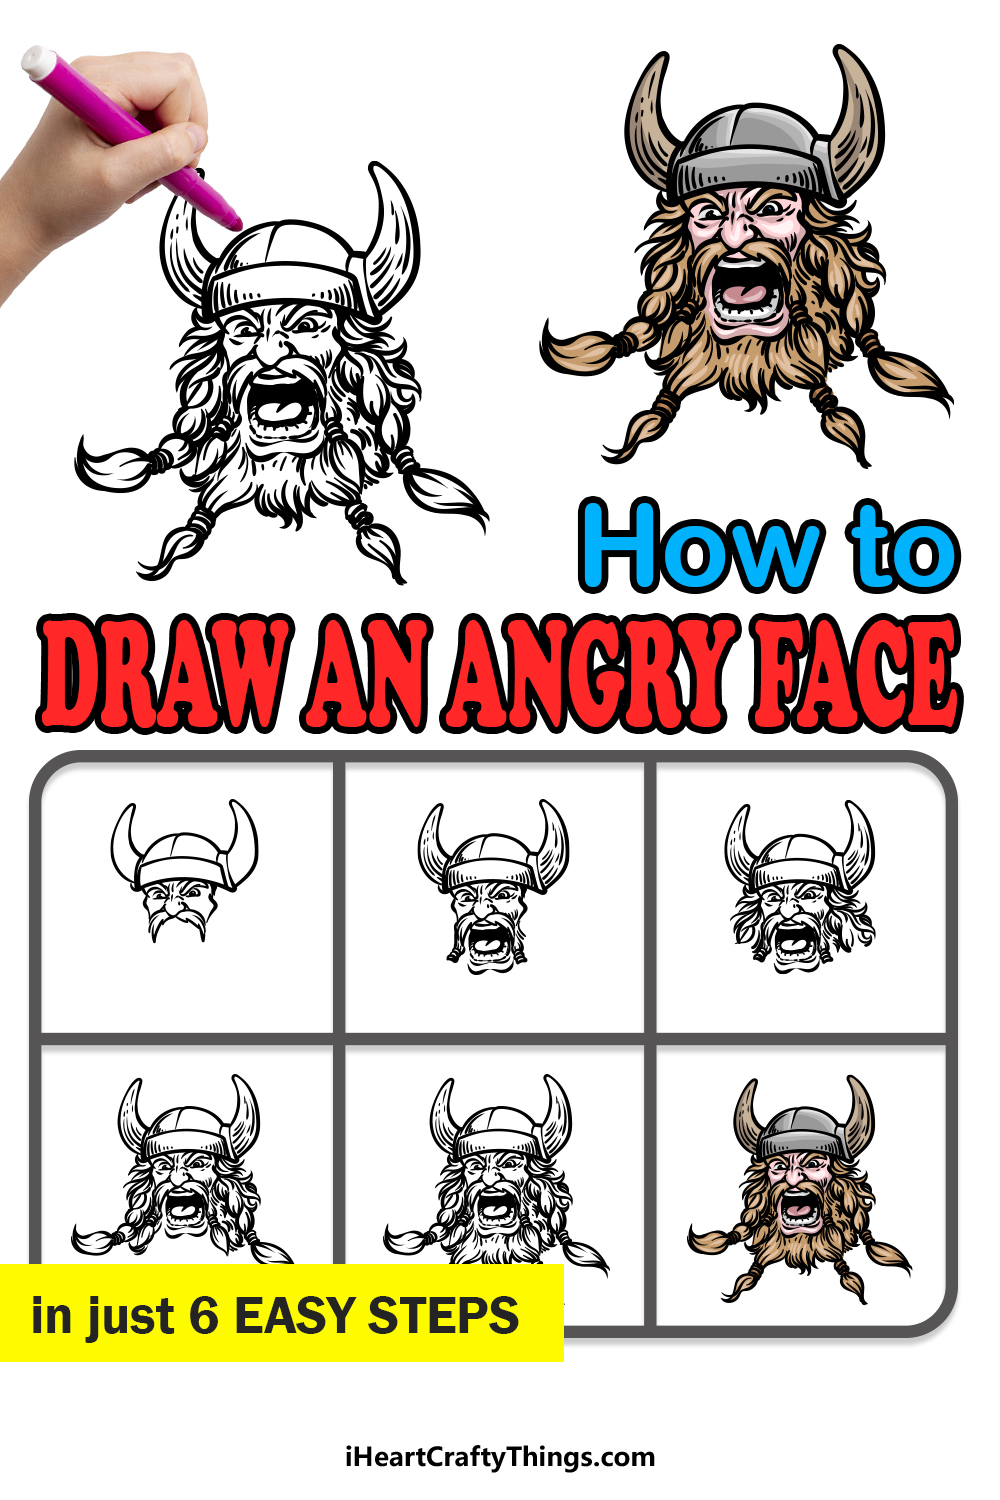
How to Draw An Angry Face – Let’s Get Started!
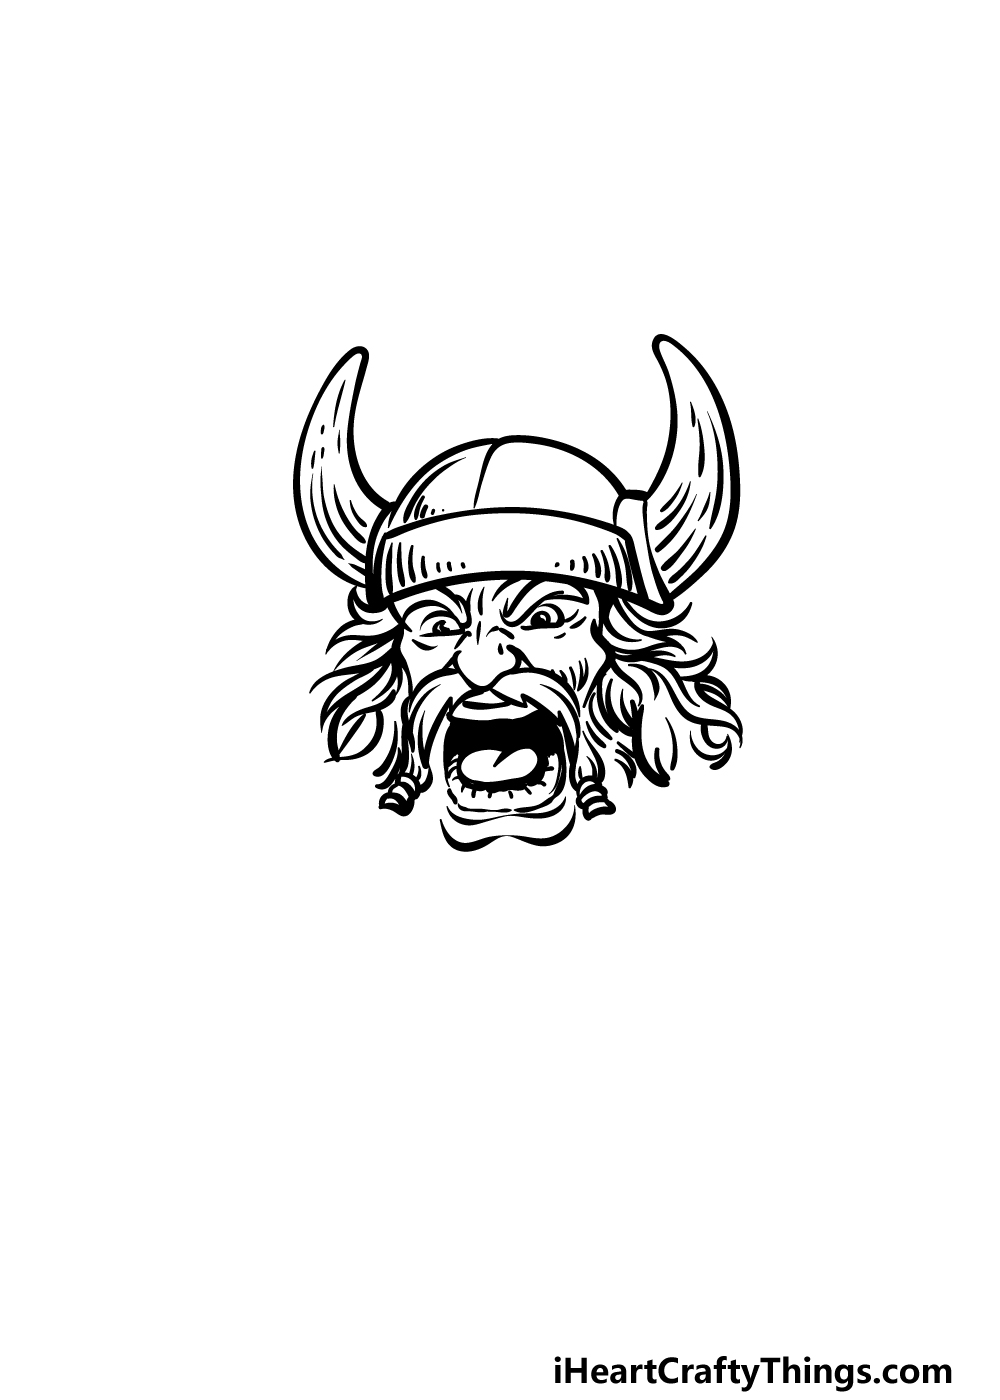
Step 1
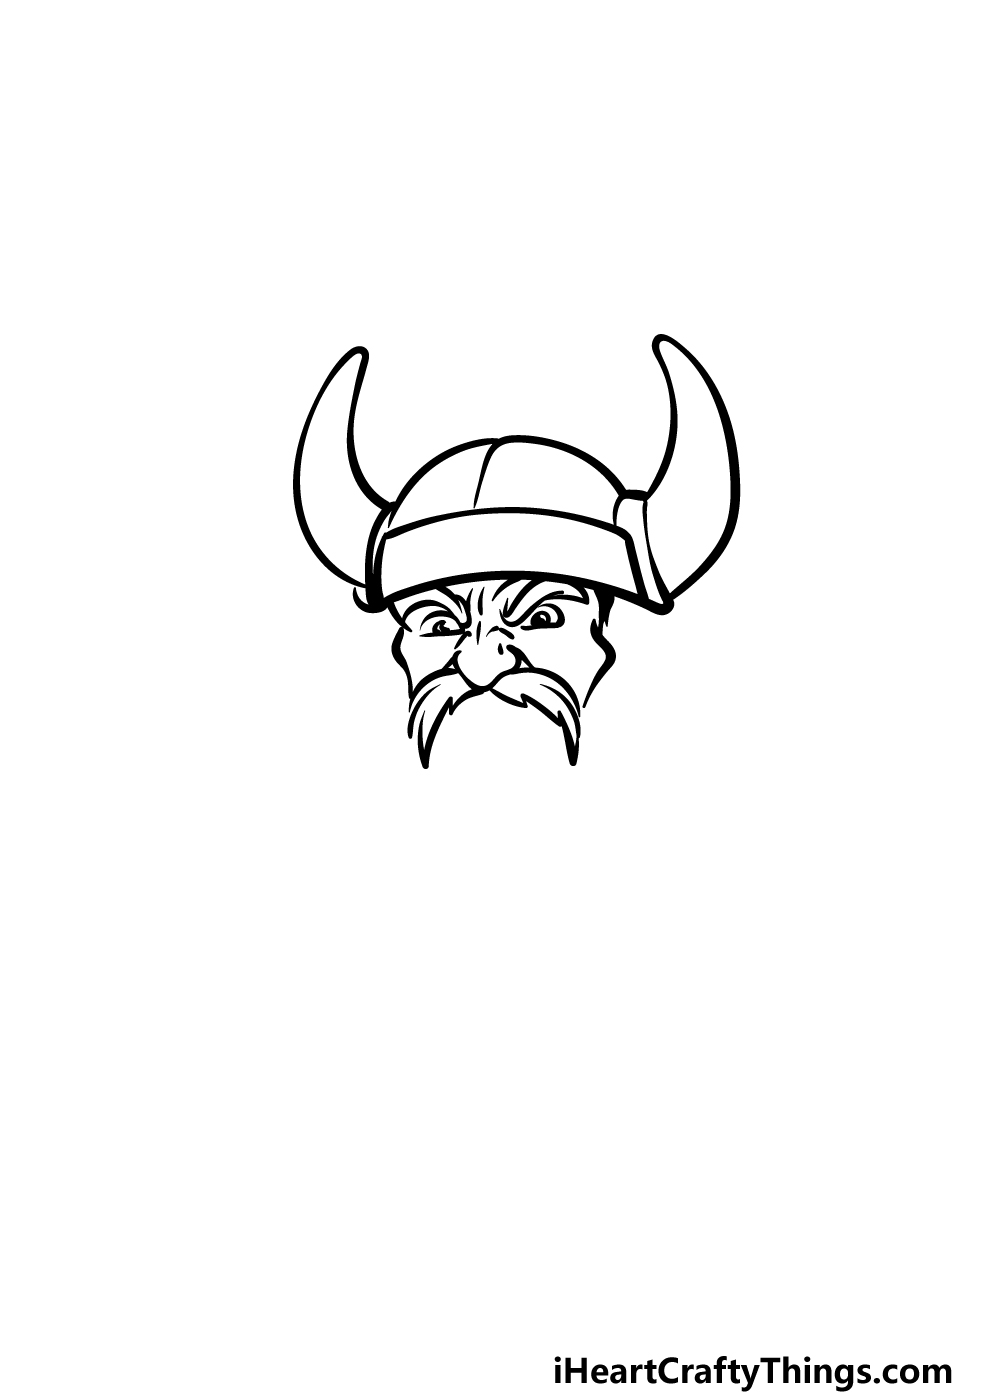
In this guide on how to draw an angry face, we will be making the image even more fun by portraying an angry Viking warrior!
To start this off, we will first draw his horned helmet on top of his head. Start this by drawing a slightly curved rectangle for the band of the helmet that goes around his head.
Then, we will draw two more curved lines over this part that connect to form the dome on top.
Then you can draw the thick, curved horns coming off of the sides. Once the helmet is complete, we can then draw some of his facial features.
You can add his eyebrows, eyes, nose and the start of his mustache before we move on to step 2 of the guide.
Step 2 – Now, draw some more facial features of the face
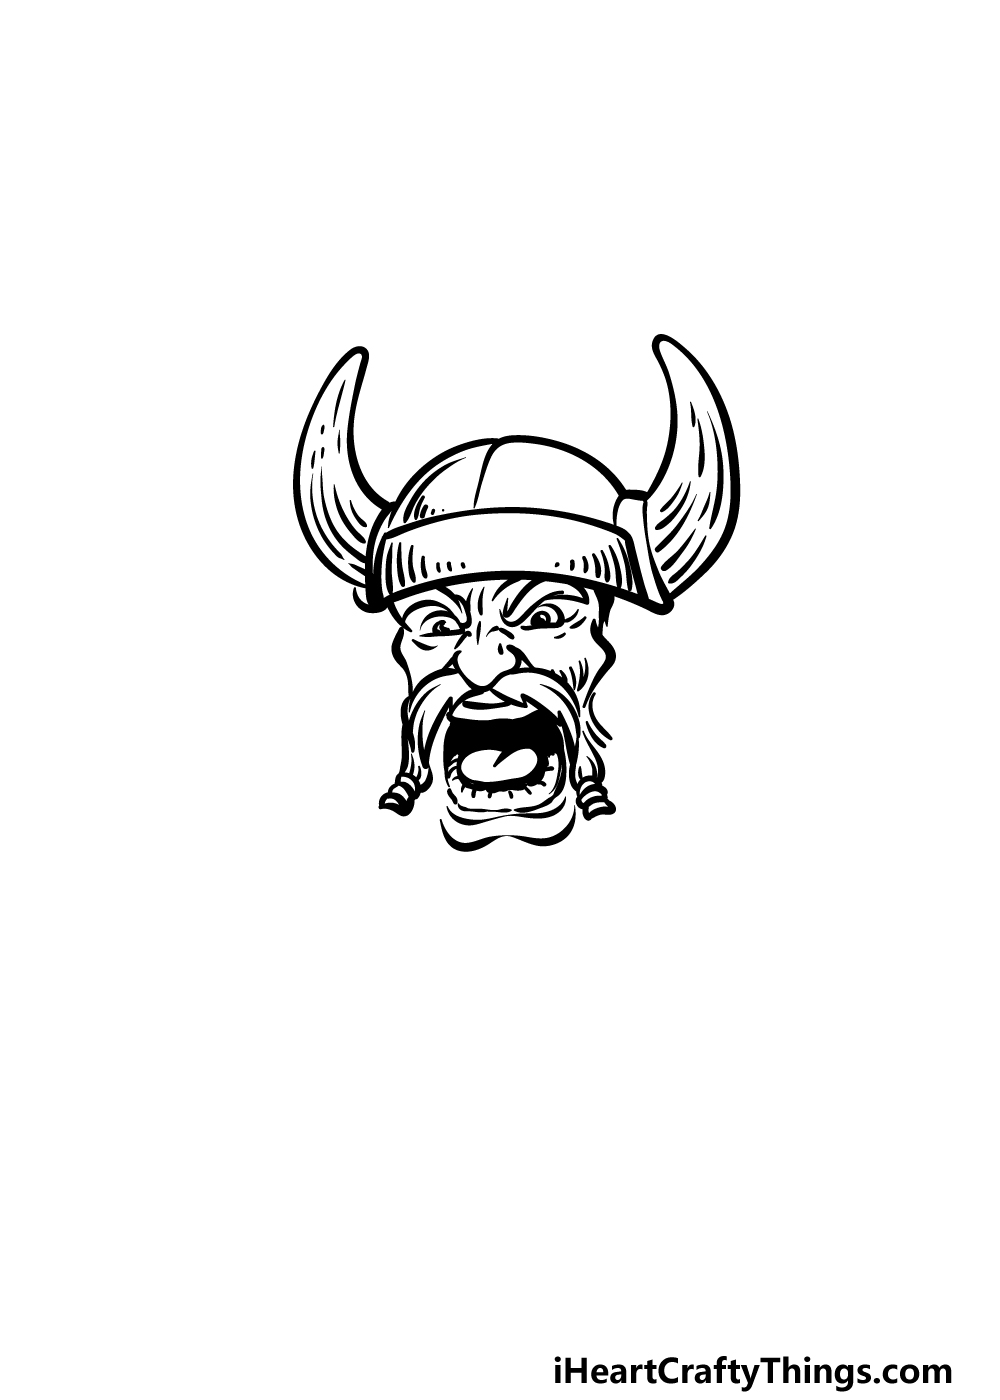
We will be adding some more facial features to your angry face drawing in this second step.
This step will also see you adding the mouth for the face, and this may be the most vital part of achieving this facial expression.
You can use some curved lines to draw the rows of teeth at the top and the bottom of the mouth. Then, you can draw the outline of the mouth and then add the tongue.
It can then be finished off by coloring the mouth in with solid black.
Finish off this step by drawing the bottom lip, and then you can add some texture details to the helmet. You can also add some of the first braids of his beard sticking out to the sides.
Step 3 – Next, draw some more of his hair
For the third part of this guide on how to draw an angry face, we will be adding some more hair to his head.
His hair will be rather long and curly, and it will extend out the sides and from under his helmet.
To draw this hair, we will be using lots of thick, curly and wavy lines extending out from the base of the helmet and off the sides of his face. Once you have drawn this hair, we shall proceed to step 4!
Step 4 – Now, draw some more hair and braids

Continuing on with this angry face drawing, we will be adding more hair and braids to his hair and his beard.
First, you can use some curved lines with sharp points at the ends for the tufts of hair poking off of the braids that you drew coming off of his beard earlier.
Then, once you have drawn these, you can add some more shapes to create some larger braids coming out from his hair.
These will end in some bands tying them together near the ends, and finally will have some similar tufts of hair at the ends as the other ones had.
Then you can move on to the final details in the next step.
Step 5 – Add the final details to the angry face drawing
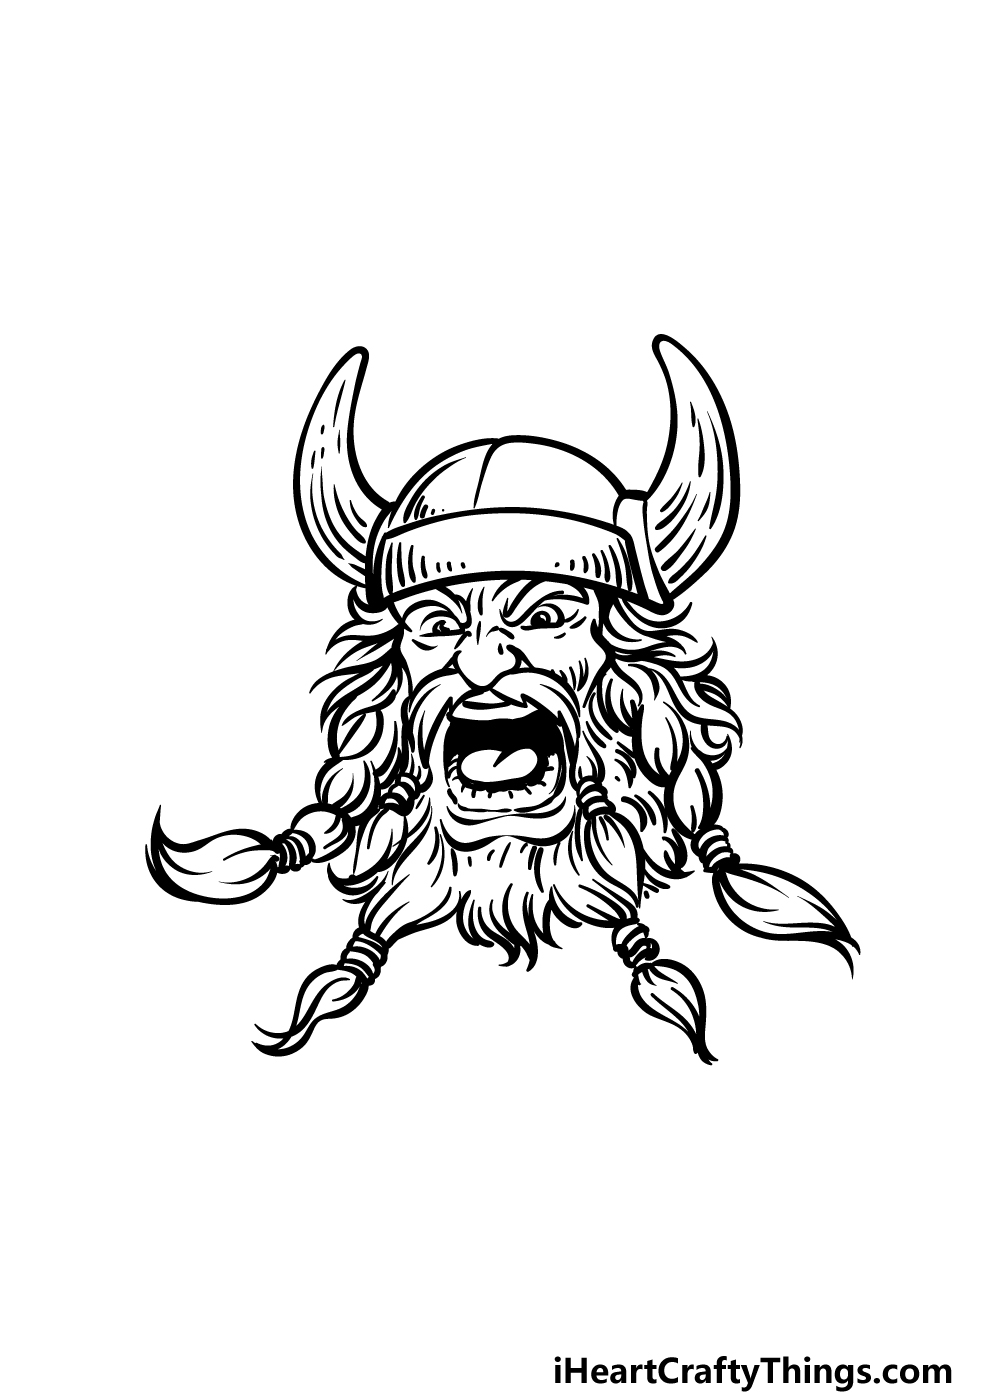
Now you’re ready to add the final details before you move on to the last step in this guide on how to draw an angry face.
For this fifth step, we shall be focusing mainly on the lower portions of his beard.
Use some sharply curved lines for strands of his beard poking down, and then you can add some more thick braids at the lower portions of his beard.
Be sure to add some more minor details throughout the drawing, and then you’re ready for the final step!
Before you move on, you could also take this drawing even further by adding some more details of your own.
Maybe you could draw some more of this warrior to show him charging into battle! How will you finish off this image?
Step 6 – Finish off your angry face drawing with some color
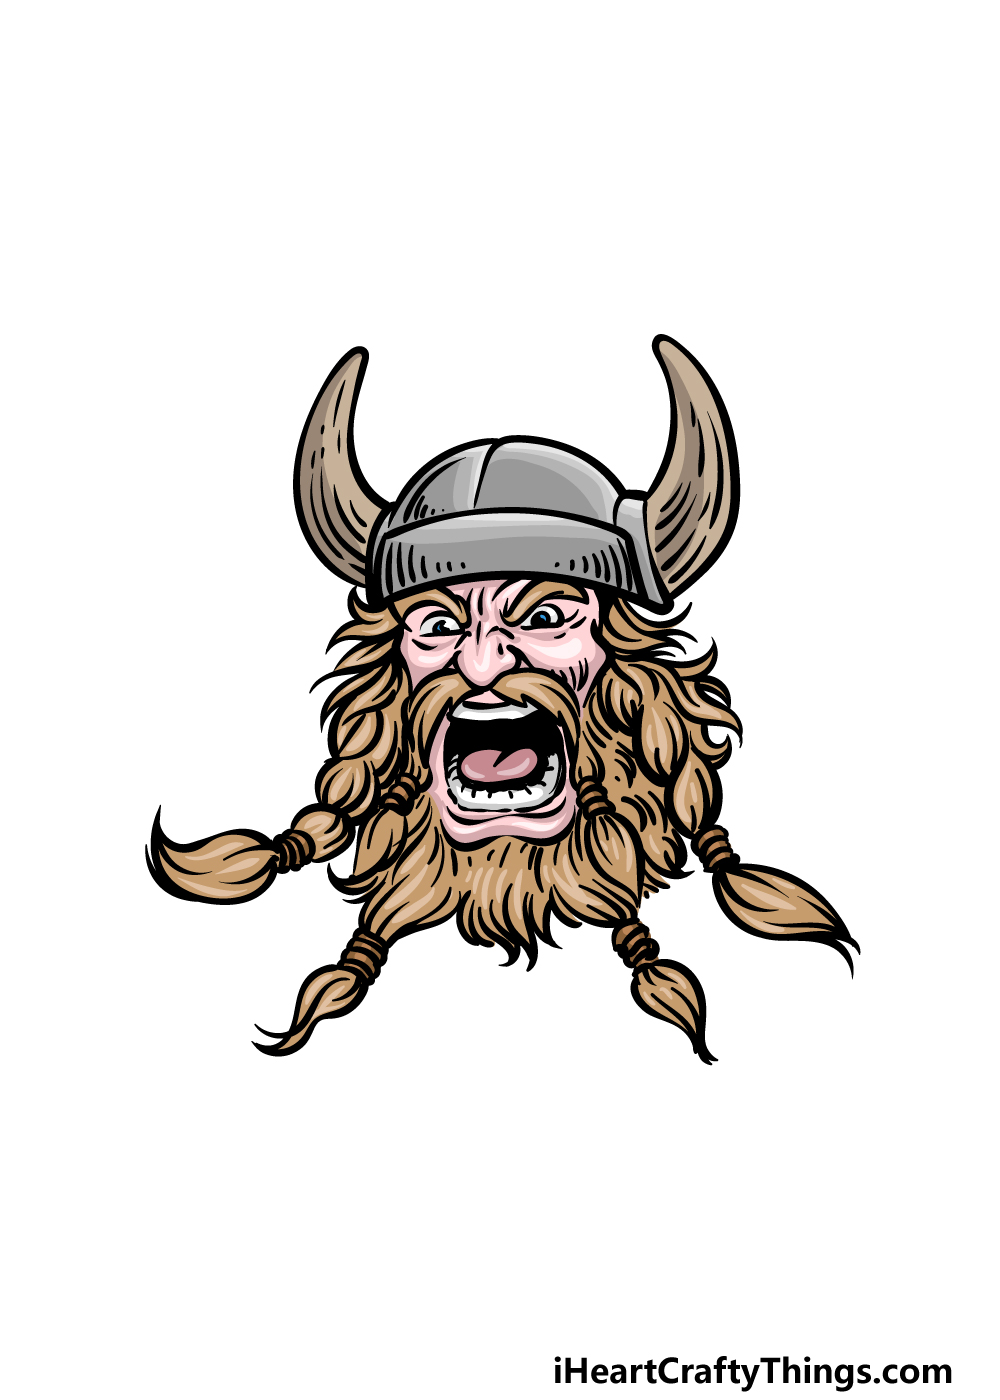
This is the final part of this angry face drawing, and in it we shall finish off by incorporating some color.
In our reference image, we showed you one of the ways that you could go about coloring in this angry warrior.
We used some browns for his beard, hair and helmet horns and then used some greys for the metal of his helmet.
You could use some similar colors if you like how this looks, but you should also feel free to use any other colors that you may like for it!
This is your chance to have fun being creative, so what colors and art mediums will you use to finish it off?
4 More Ways To Make Your Angry Face Drawing Unique
You won’t be angry once you have tried these tips for your angry face sketch!
We kept the focus of this angry face drawing on the face itself so that we could focus on the details.
Now that you have finished the drawing, you could add some more of the body.
This person looks like a Viking warrior, so you could give him clothing and armor that matches that theme. You could find some pictures online to help you if you’re having a hard time imagining it!
You don’t have to stick with the Viking theme though, so what other appearances could you use?
The Viking appearance used in this drawing of an angry face is pretty cool. Even so, you could change a few details for a different take on this artwork.
For instance, if you remove the helmet and the braids, you could have a normal guy looking angry. As we mentioned in the first tip, you may even have a different theme you would like to portray.
Who could you turn this angry guy into?
Hair and beards can come in many different styles and colors. That brings us to the next suggestion for this angry face sketch!
You would have lots of different colors and art mediums at your disposal when coloring his hair and face. Maybe he could have red or blonde hair, or you could go for something stranger like blue.
Try playing with different art tools you have available as well, you may be surprised with what you end up with!
Finally, whether you go with our other tips or not, you could add a background to this angry face drawing. That is a great way to finish off the scene you have in mind!
For example, if you want to stick to the Viking design then you could show him in the middle of a grand battle. He could also be in a hall about to dig into a feast.
These are a few Viking-themed backgrounds, but what else can you think of?
Your Angry Face Drawing is Complete!
Hopefully your expression while working on this guide on how to draw an angry face was one of happiness and not anger and frustration!
We mentioned how drawing expressions like this is not always easy, but as long as you follow the steps and try your best then we are sure that you will master it easily!
Then you can take over and show off your creativity by adding your own details, elements and color choices to finish it off.
When you are ready for more, you can find some more amazing guides on our website to enjoy. This list of guides grows all the time, so keep checking in!
We would also love it if you would share your finished angry face drawing on our Facebook and Pinterest pages so we can see how it turned out.