As humans, there are many things that divide us. There are also lots of things that pretty much everyone shares in common, and one of these is that most of us wear pants at one point or another!
Pants can come in many different styles, shapes and sizes, and there is a style of pants to fit any taste or fashion sense.
With so much variety, learning how to draw pants can be a fun way to imagine what your perfect pair of pants may look like.
If you would like to know how you can do that, then you’re on the right tutorial!
Our step-by-step guide on how to draw pants will show you how fun and easy it can be.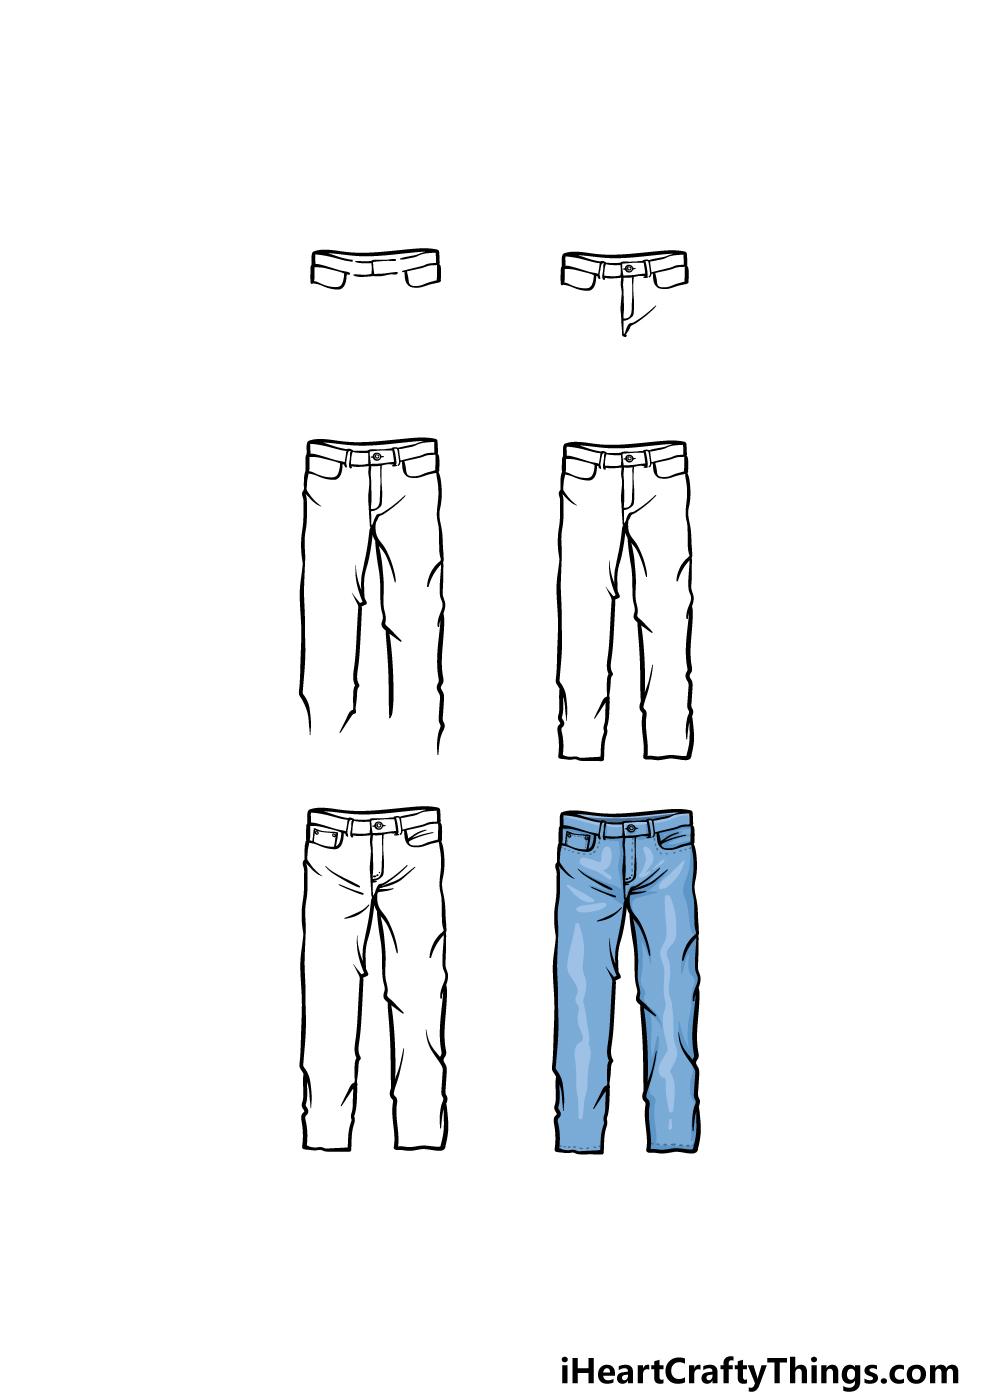
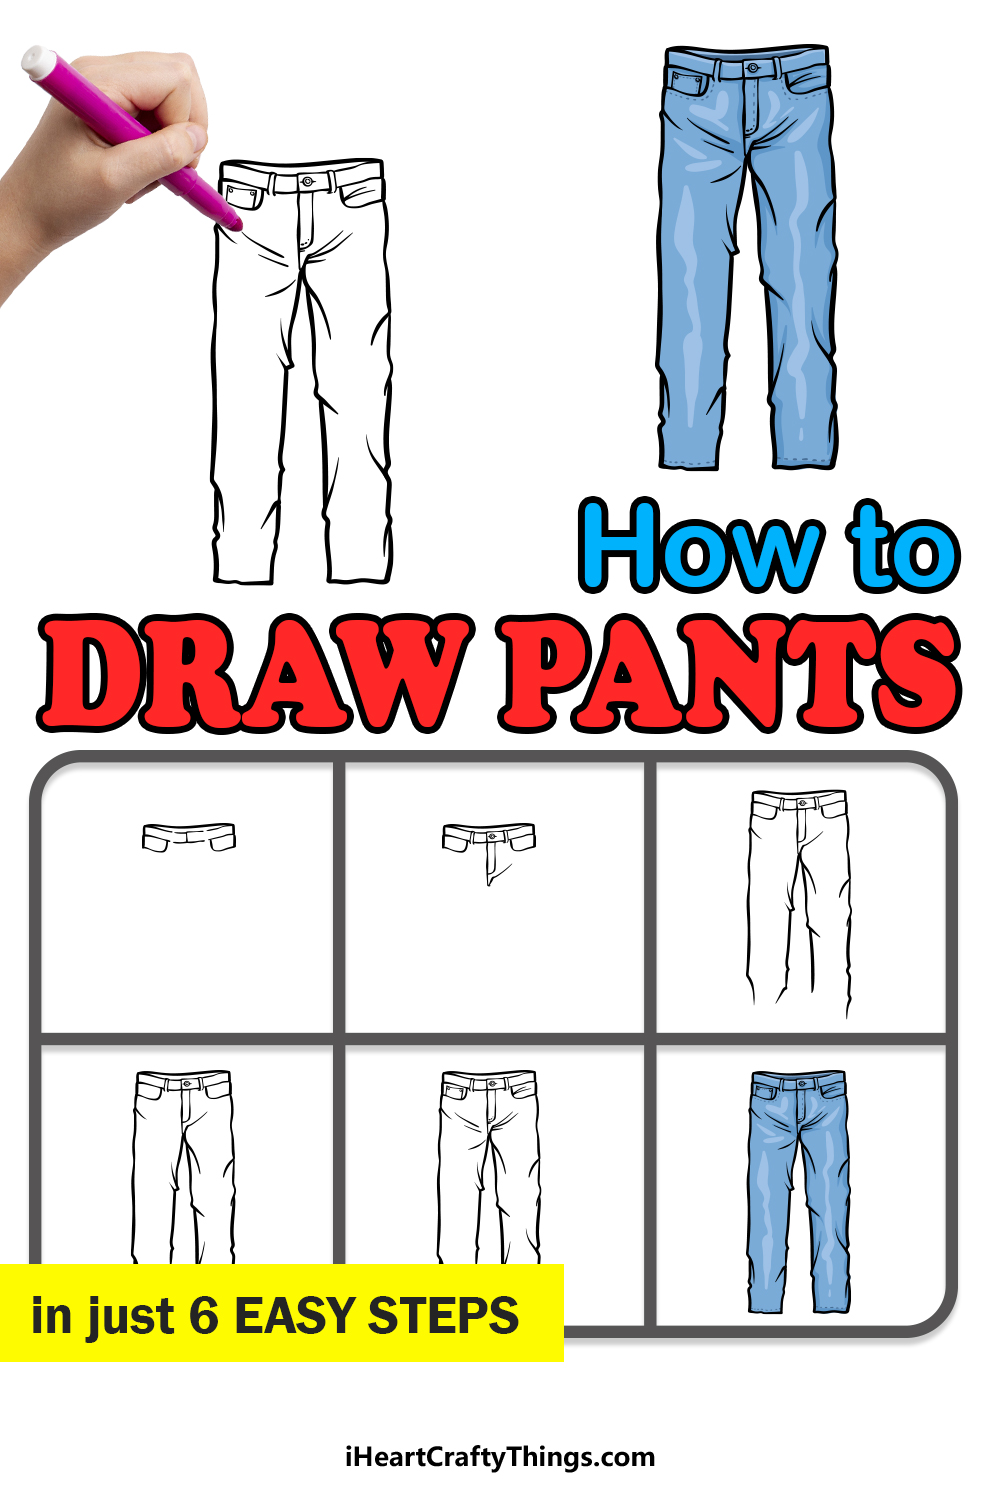
How to Draw Pants – Let’s Get Started!
Step 1
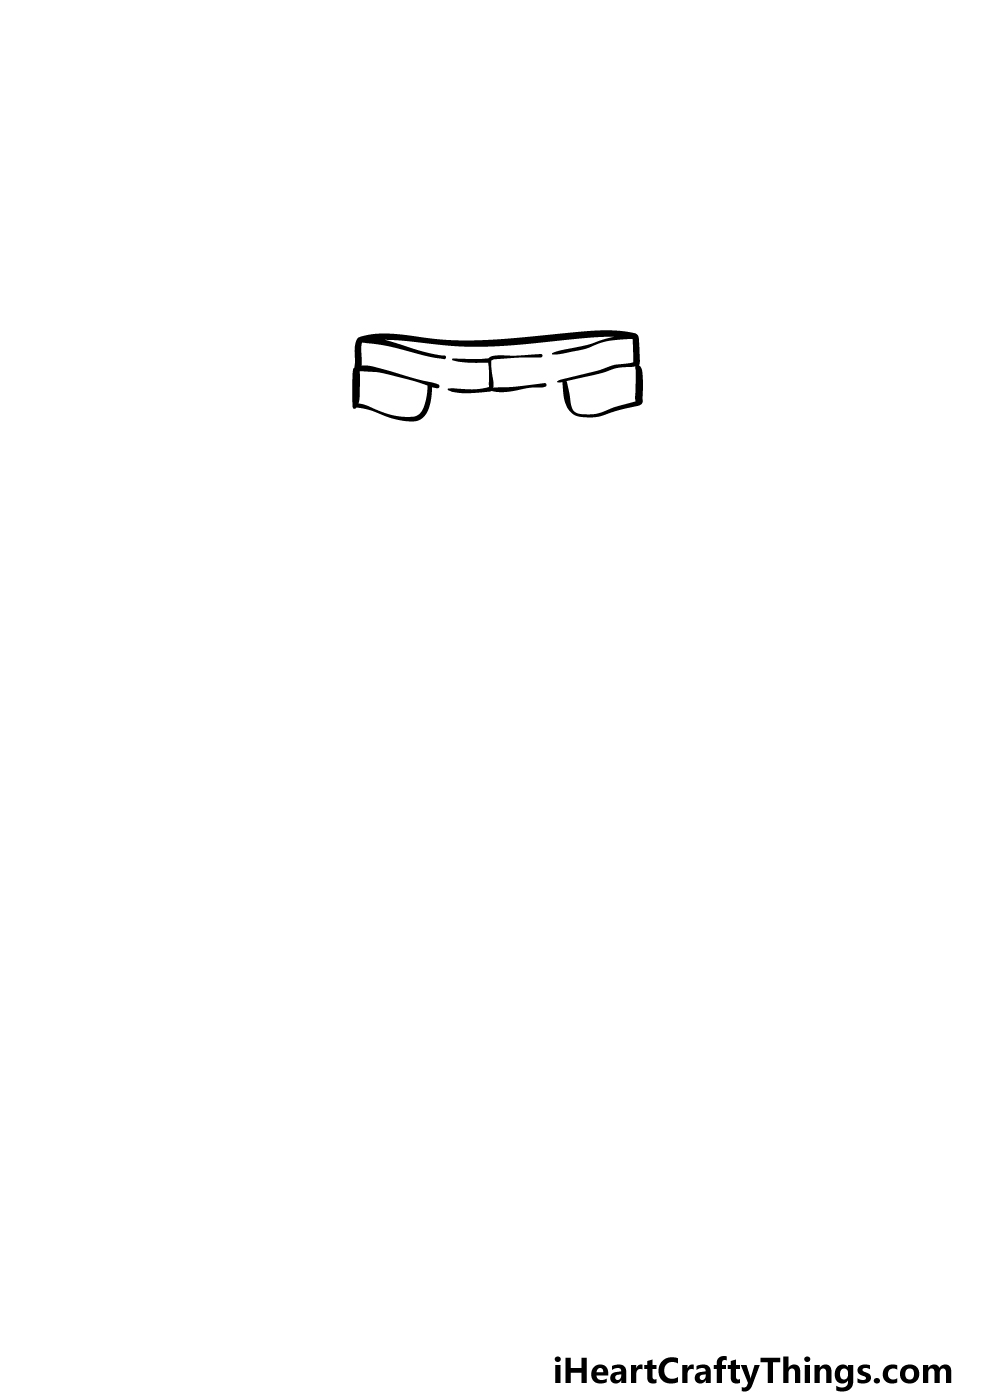
The pants that we will be drawing in this guide on how to draw pants will be a pair of jeans, as this is one of the most popular types of pants around the world.
We will be taking it from the top as we draw the opening of the pants. This part of the pants may look quite simple, but there are a few details that need to be taken note of.
First, start by drawing the very center of the pants by drawing two thin, rectangular shapes connecting to one another.
These shapes will have open spaces on their outer edges, however. Then, after leaving a very small space you can draw a long thin shape on either side.
This will form the rim of the pants, and the small space will be filled by a belt loop soon.
Finally, use some rounded lines for the tops of the pockets and then draw a final line over the shapes that you just drew for the back of the top of the pants.
Step 2 – Next, draw some details for the section of pants that you just drew
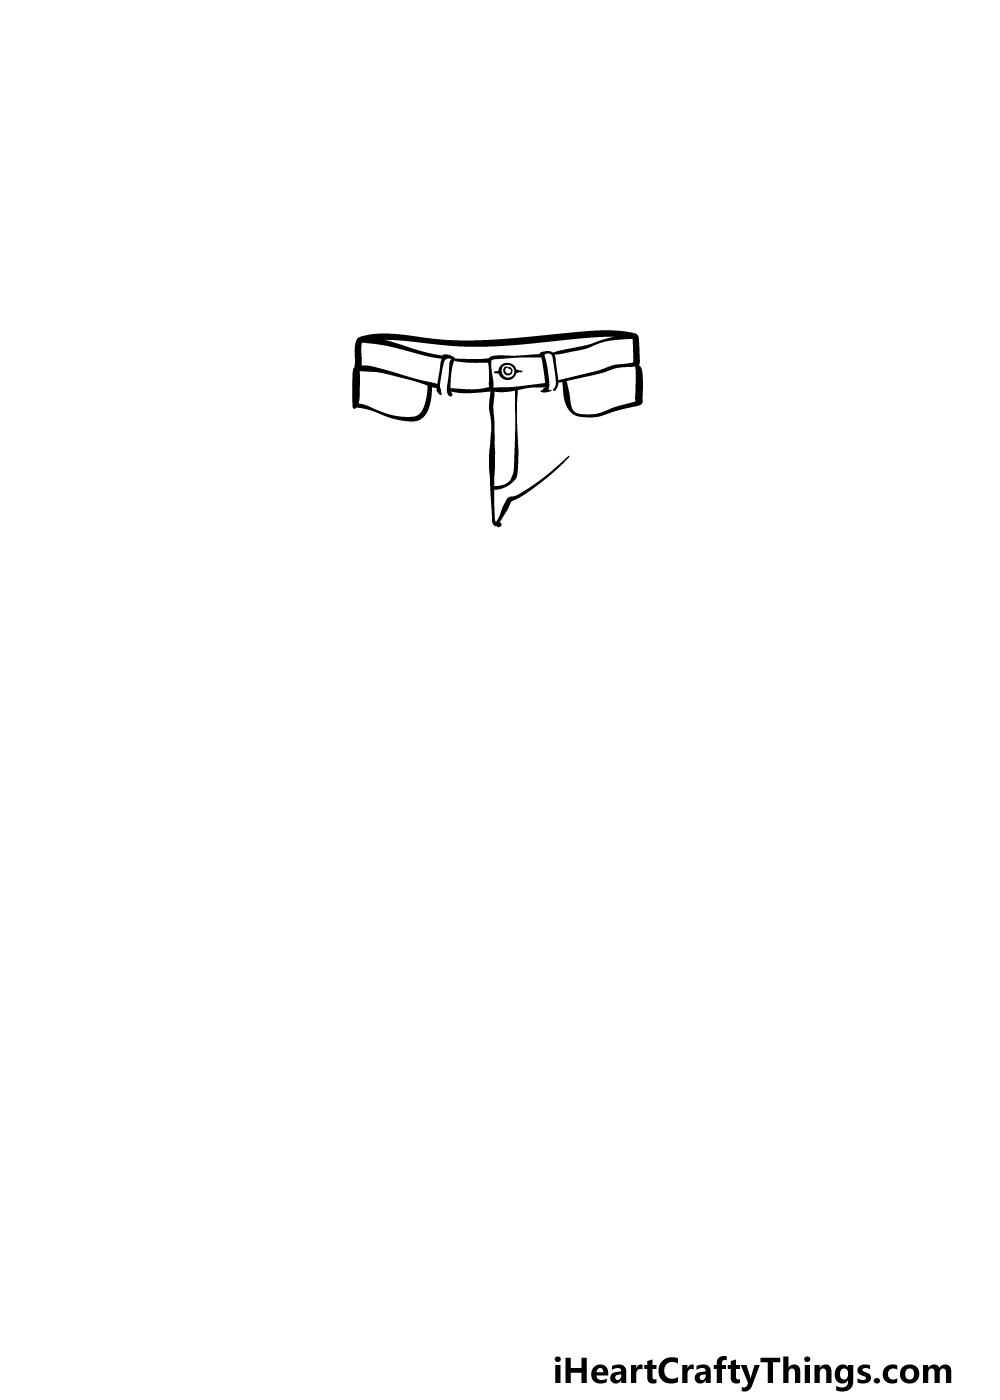
We will be building on to what you drew in the previous section of your pants drawing in this next step.
First, we will fill in those small spaces that you left by using some curved lines to create the belt loops.
Then, once that is drawn we shall then add the fly for the pants. This will be drawn with some more curved lines to create the thin shape that you see in our reference image.
The final thing that we will be drawing in this step will be a button for the top of the opening of the pants. Then you will be ready to move on to step 3 of the guide!
Step 3 – Now add the sides of the pants
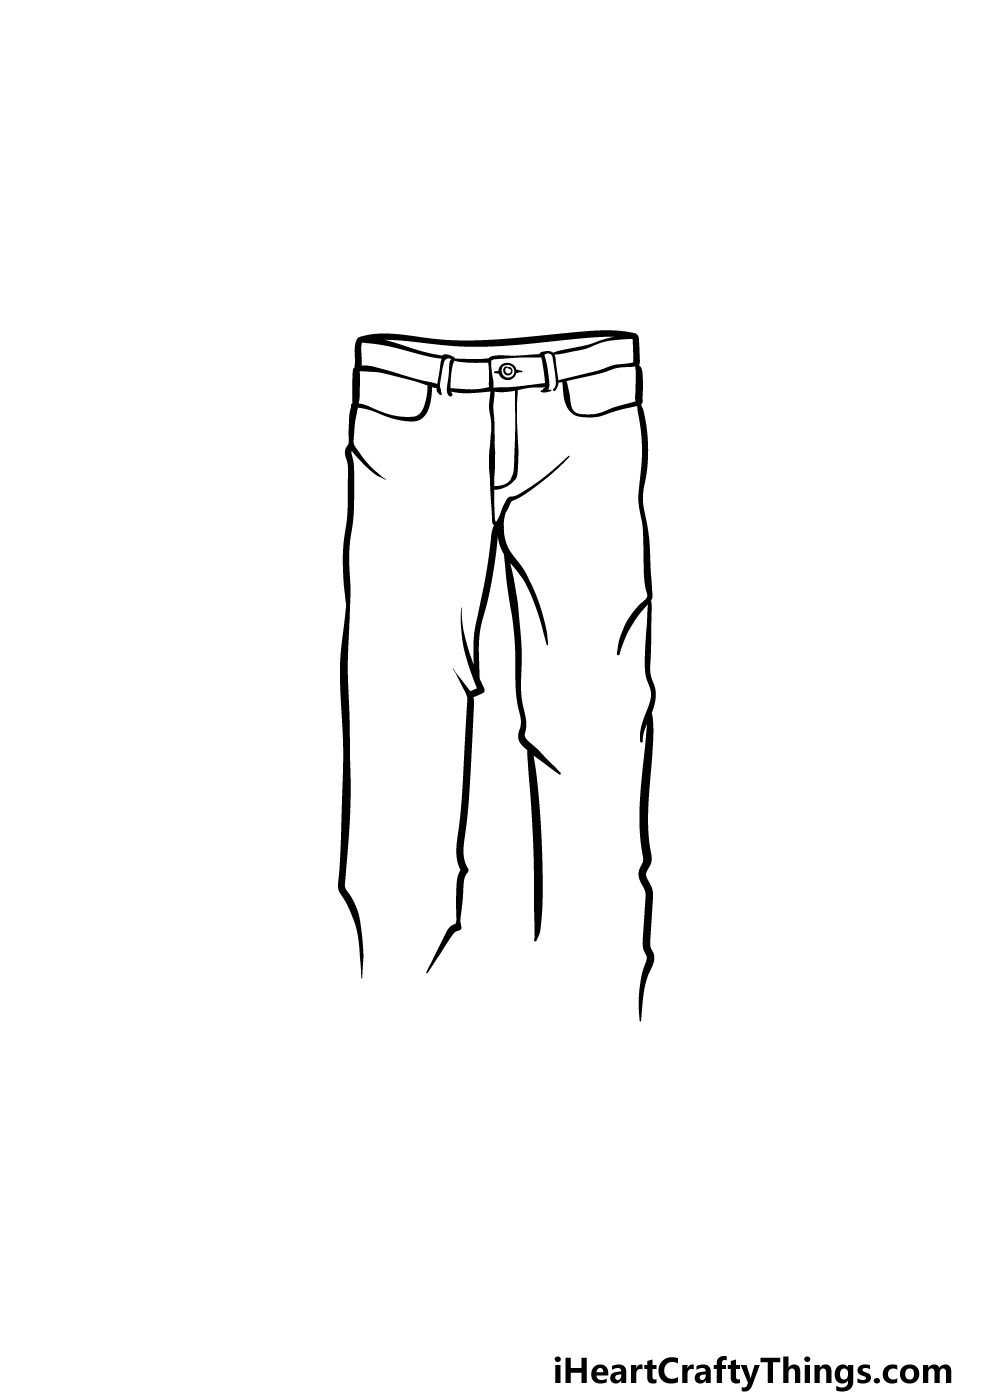
In this third step of our guide on how to draw pants, we will be adding quite a lot to the pants.
For the most part, we will be focused on the sides of the pants, and you can draw these sides of the pants using some slightly bumpy lines.
We will also be extending some straight lines into the interior of the pants, and these will function as crease lines for the pants.
The bottom of the legs for the pants will be blank for now, but we will fill those spaces in soon.
Step 4 – Draw the rest of the outline for the pants
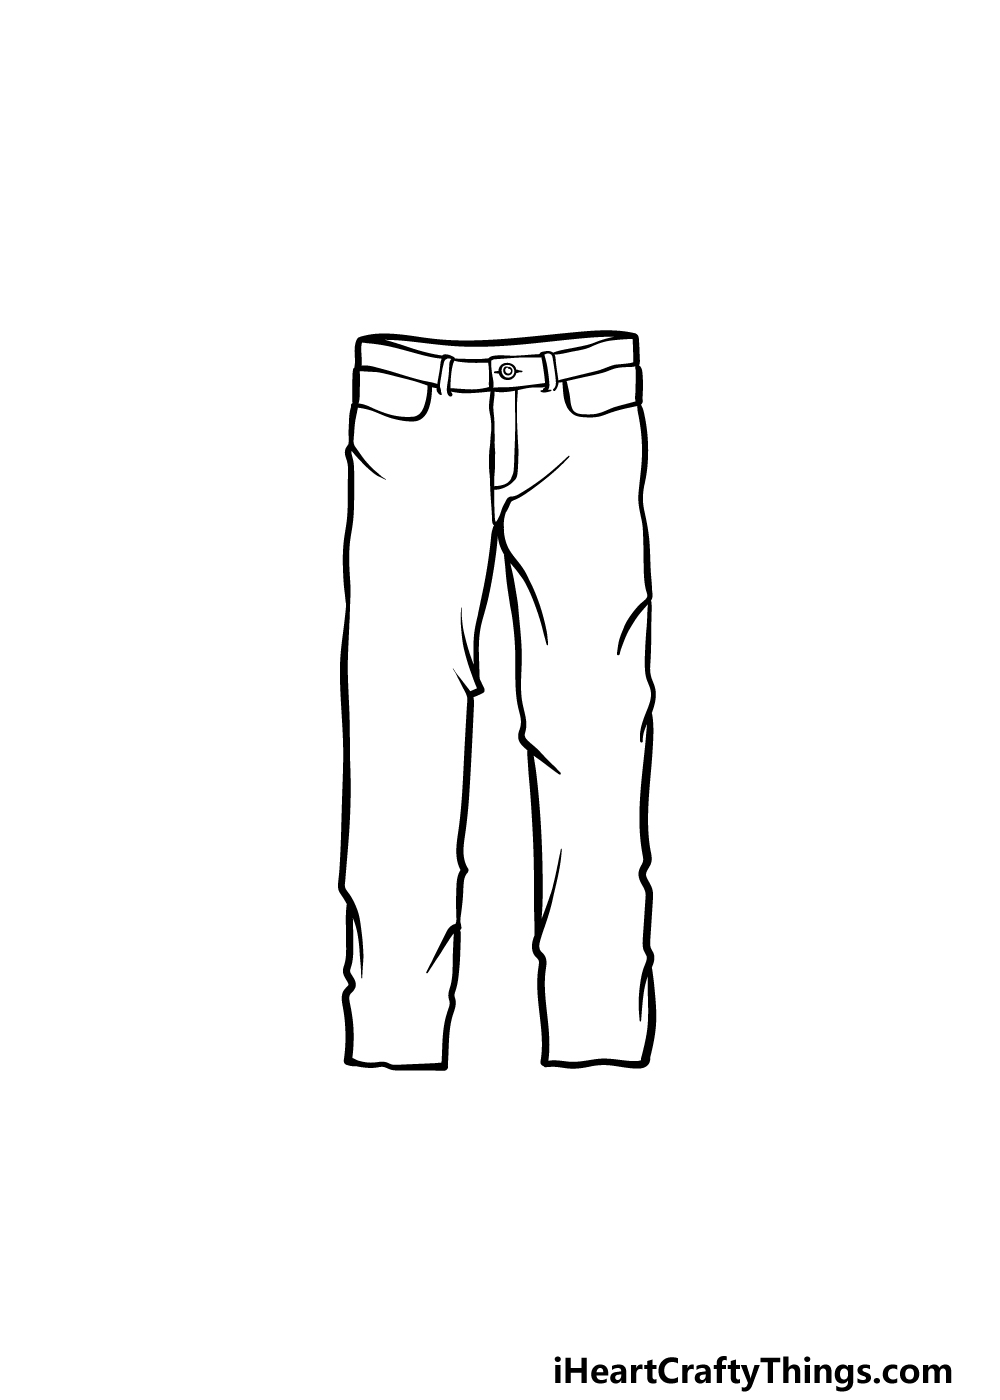
Now you are ready to finish the outline for the pants in this step of your pants drawing.
We mentioned that you will be filling in the bottom of the pant legs in the last step, and that is what we will be doing here.
You can finish off these parts by drawing the last, flat section of the pant legs. There will also be some more crease lines drawn extending into the interior of the pants.
Then, it will just be a matter of filling in the final details and touches in the next step!
Step 5 – Add the final touches for your pants drawing
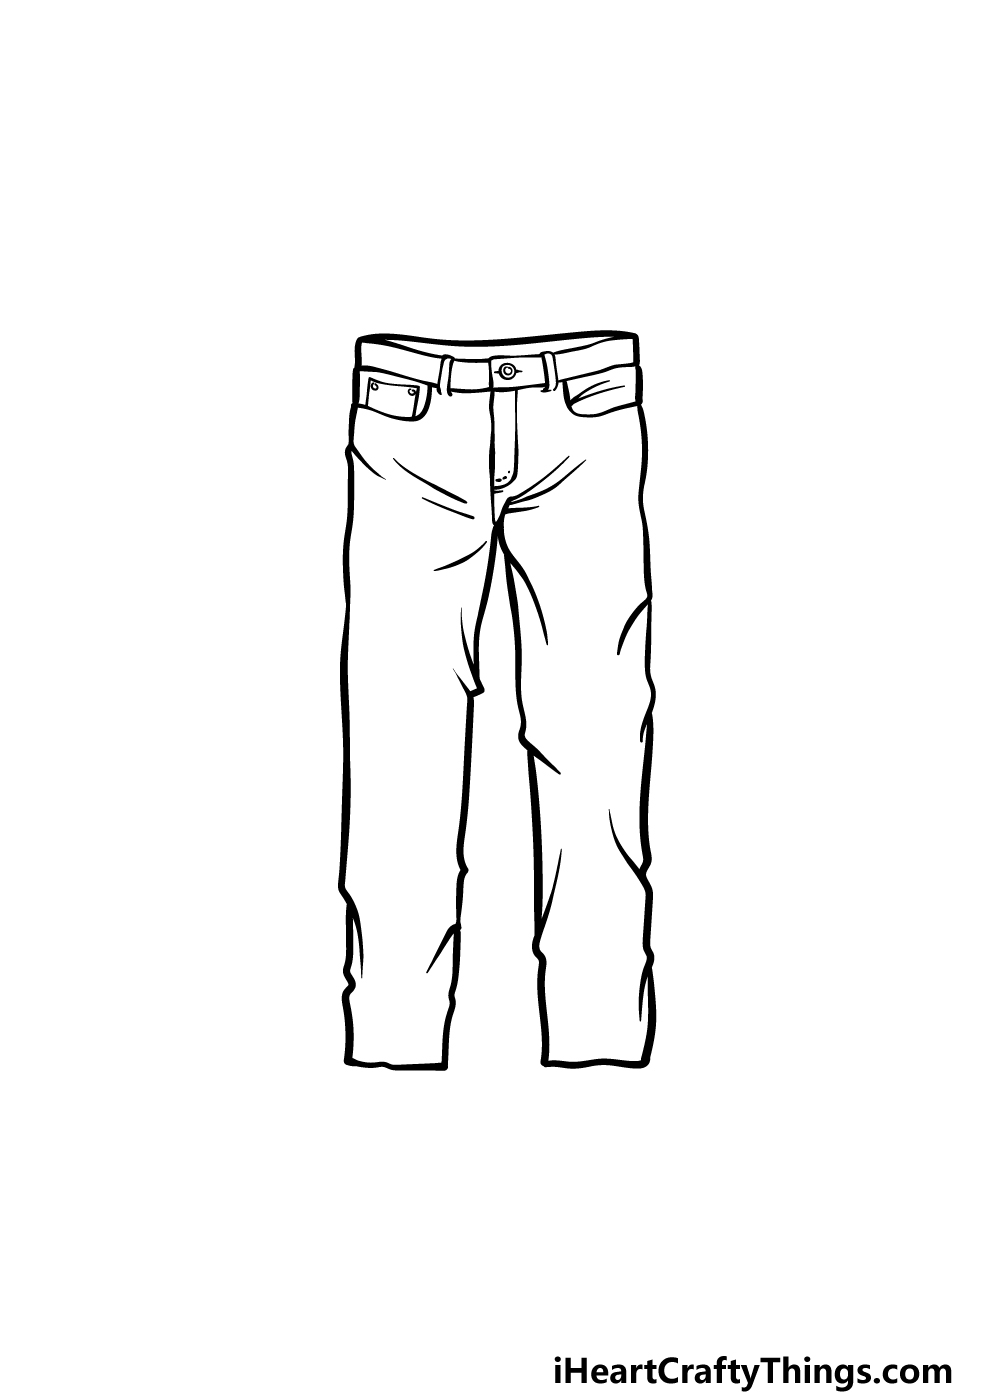
Before you color your picture in, we must first add some final details and touches to it in this step of our guide on how to draw pants.
These details will be small yet effective in making these pants look more realistic.
The first details will go into the pocket on the left-hand side, and you can draw this with some small, straight lines and two dots.
The final touches will be to add some more crease lines throughout the pants. You could add even more of these creases if you wish to make the pants look more weathered!
Before you move on to the final step, you could also add some details and elements of your own.
You could draw someone wearing the pants, create a background or even change the details to make them a different style of pants! How would you put your own spin on these pants?
Step 6 – Finish off your pants drawing with some color
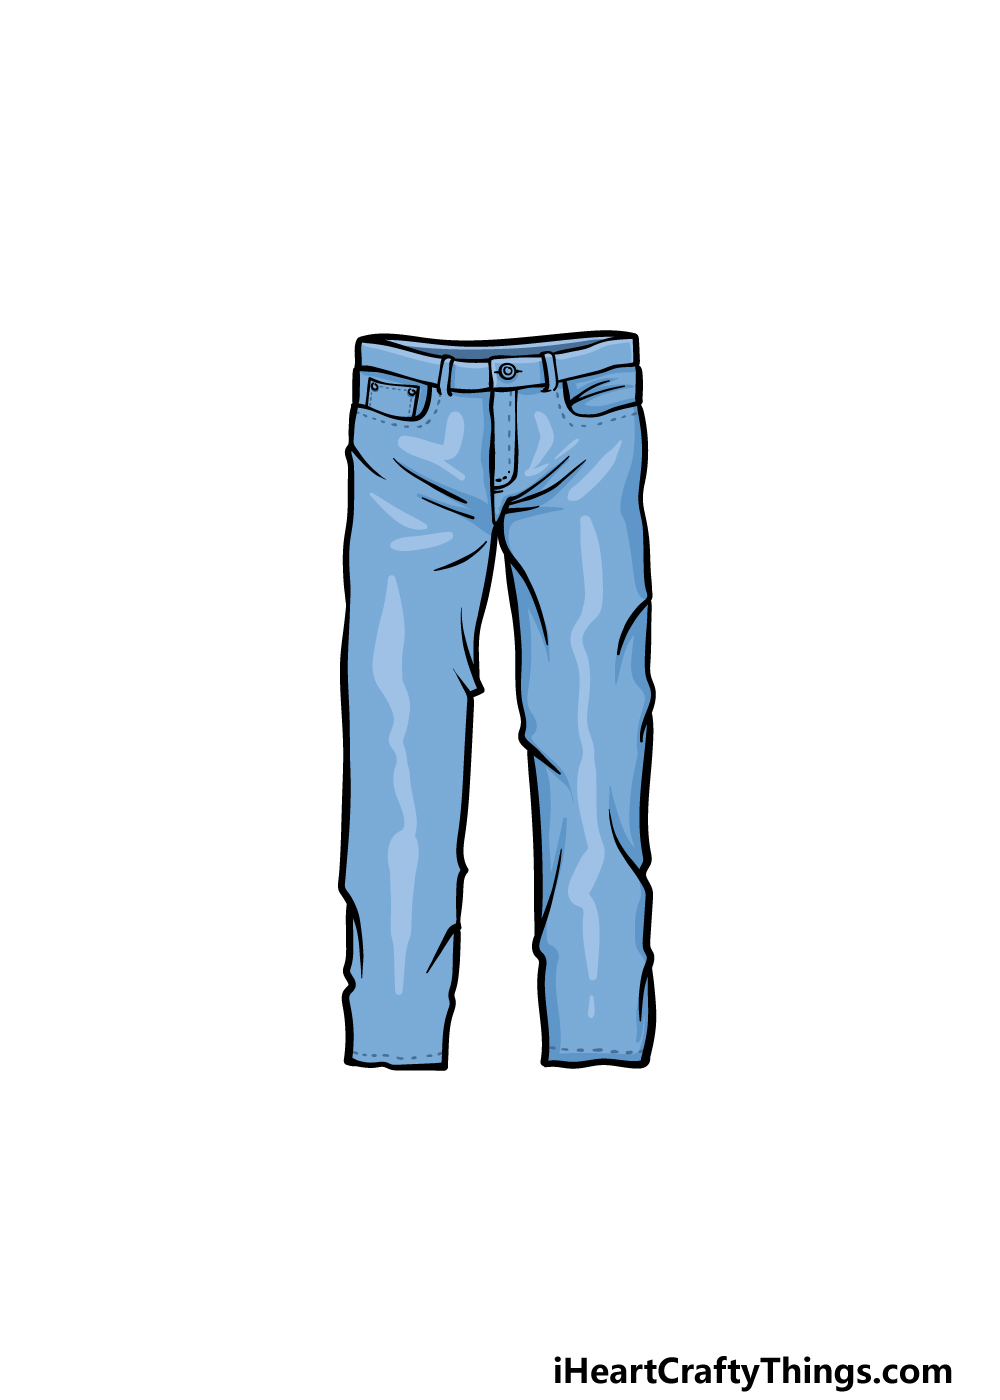
For this final step of your pants drawing, you can finish it off by coloring your creation in! In our reference image, we used some shades of blue to further highlight that these pants are styled as jeans.
This doesn’t limit you to these same color shades, however, as you could use any colors that you love to create your very own unique pants design.
Choosing the colors is just one half of the equation, however, and you can also achieve some color complexity with the art mediums that you choose for it.
How will you express your creativity with your colors as you finish off this picture?
3 More tips to make your pants drawing easy!
These 3 tips we have for your pants sketch could make it much easier!
This drawing of pants shows a pair of jeans. This type of pants is famous for being simple and functional, but they can still be surprisingly tricky to draw.
One aspect of these pants we have in this guide that could cause frustration would be the creases in the fabric. These make the pants look more realistic, but these details could be removed if need be.
By removing these creases and other details, you may end up making the pants look more cartoony. That is not necessarily a bad thing, especially if you have the added benefit of making it easier.
You could also maybe make your pants drawing easier by drawing someone wearing them. While this would mean there is more to draw, it would allow you to employ a few tricks that would make it easier.
For example, you could draw the person at a different angle to the one we used for the drawing. That may help you to hide parts of the drawing that are a bit tricky for you to do.
The person could also be holding things or standing near objects that could obscure parts of the drawing that you are less comfortable with drawing. What kinds of characters and poses would you add for this drawing?
Finally, you could use a real pair of pants to make this pants sketch a bit easier. Most households will have at least one pair of jeans, so chances are you have some that you could use.
On the off chance that you don’t have any real pairs of pants to use, you could look up some pictures online. No matter what you end up using as an additional reference, you can use them to help.
These real pants could help with the shape and finer details of the artwork you’re creating. Plus, you could use them to help you draw different poses and positions for the pants.
Your Pants Drawing is Complete!
That will finish off this guide on how to draw pants, and we hope that you enjoyed working on it alongside us!
This guide aimed to show you that it can be fun and easy to draw these pants, and it was also designed to give you some freedom to add your own final touches and ideas.
We can’t wait to see how you finish it off!
We have many more amazing drawing guides just like this one on our website for you to enjoy. You can also expect many more to come out very soon, so keep checking in!
Please also share your completed pants drawing on our Facebook and Pinterest pages, as we would be thrilled to check out how your artwork turned out!