


Vines are quite a fascinating plant, as they can take on many forms depending on their surroundings and the objects around them.
They are closely associated with jungles, and they will be a common fixture in any media setting featuring a tropical jungle.
The complex forms they can take can make it a bit tricky for anyone wanting to learn how to draw vines, however, and this can lead to a lot of frustration,
Luckily, you’re on the right tutorial if you would like to know how it’s done, so be sure to read all the way to the end!
This step-by-step guide on how to draw vines in just 9 easy steps will show you how it can be done easily.
How to Draw Vines – Let’s get Started!
Step 1

To get things started in this guide on how to draw vines, we will start very simply.
For the first few steps of the guide, you would benefit from using a pencil to draw the lines as we plan the drawing out. We will be sure to mention later on when you should start using your pen!
With that in mind, use that pencil to draw a curved, horizontal line like the one that appears in the reference image. Then you’ll be ready for step 2!
Step 2 – Draw another curved line
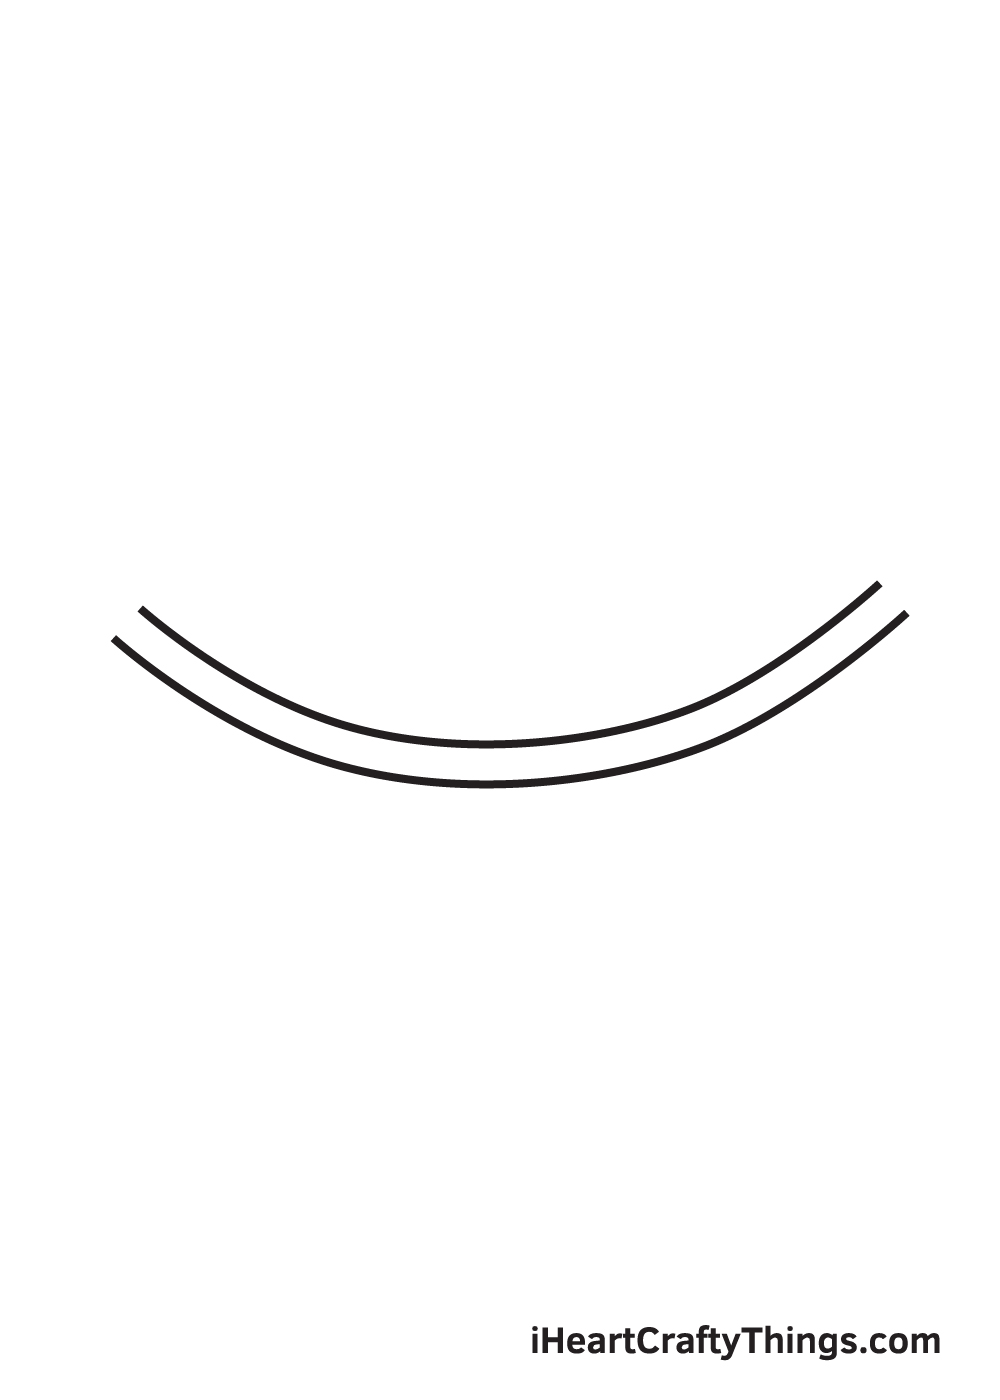
We shall continue adding to the planning of your vines drawing in this next step.
To do this, simply use your pencil to draw an identical curved horizontal line beneath the one that you drew previously.
That’s all there is to it for now, so when it’s drawn you can proceed to the next part.
Step 3 – Next, draw a curvy planning line
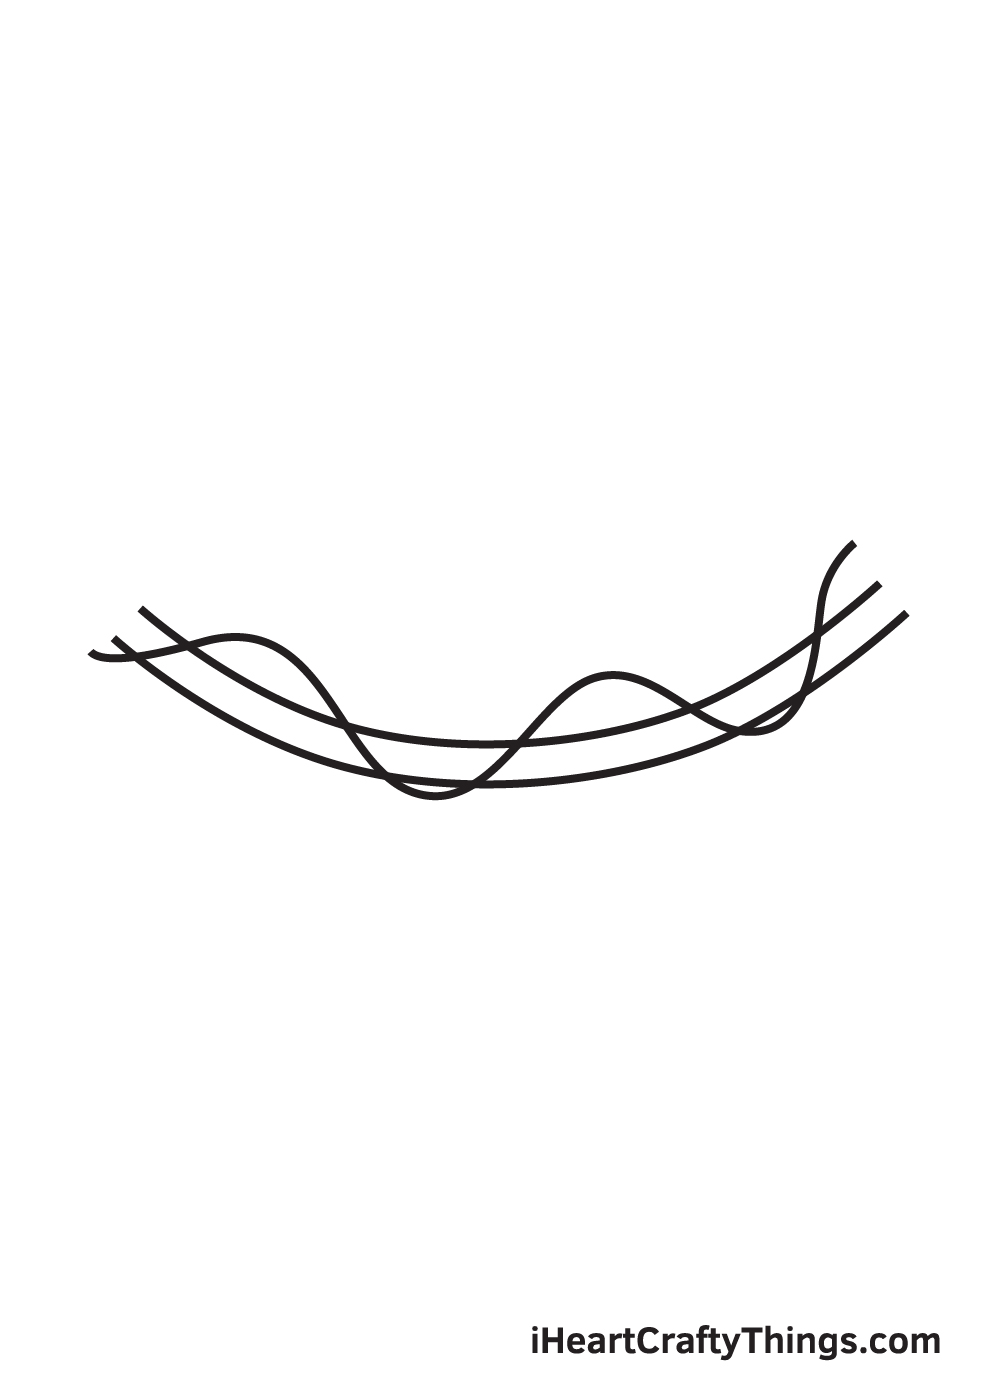
This third step of our guide on how to draw vines will be shaking things up a bit.
We will still be using a pencil for now, and all you have to do is draw a wavy line over the previous two that you drew. This will be part of the vine that will be twisting around the other parts later on.
Step 4 – Now finish off the curvy planning line
For this fourth part of your vines drawing, you will be using your pencil for the last time before we start using a pen for the final lines.
Using your pencil, all you need to do is draw another curvy line running parallel to the previous one. Try to refer to the reference image as you draw, as it will aid you in the placement for the lines.
Then you will be ready to start erasing and adding some final lines!
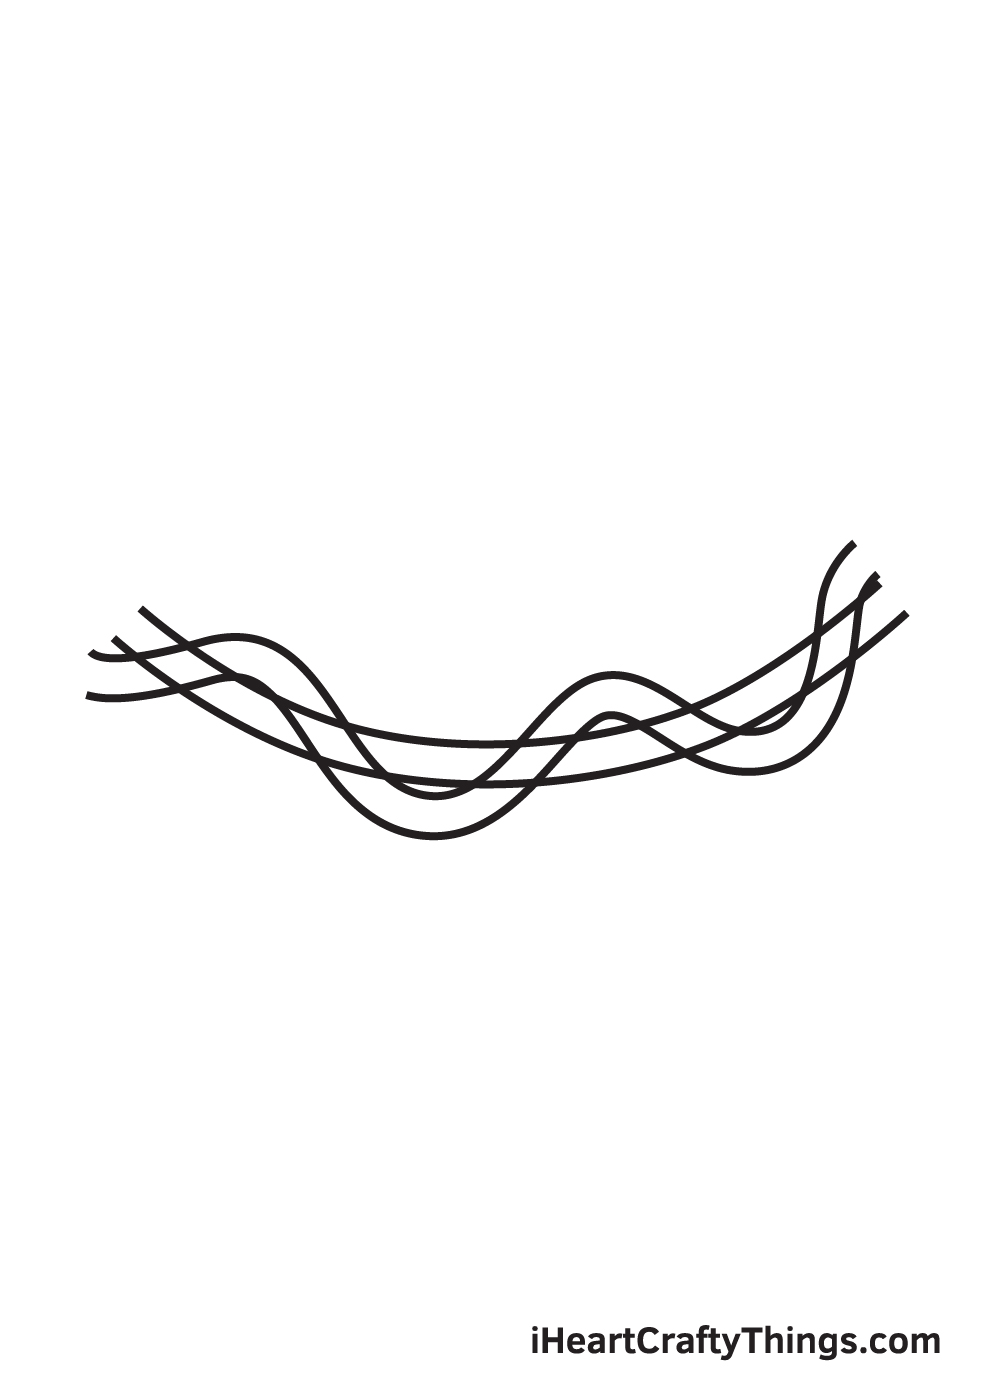
Step 5 – Next, start erasing the planning lines

In this fifth step of our guide on how to draw vines, we will start erasing the pencil lines to get you ready for some final pen lines.
To do this, refer to the reference image and use a small eraser to rub out some of the lines inside the vines.
The goal here is to make it look like there are two twisty sections snaking over each other, so the parts you erase will need to be fairly specific.
Once they are erased, take your pen and go over all the remaining lines until it looks as it does in our reference image.
Step 6 – Start drawing some leaves
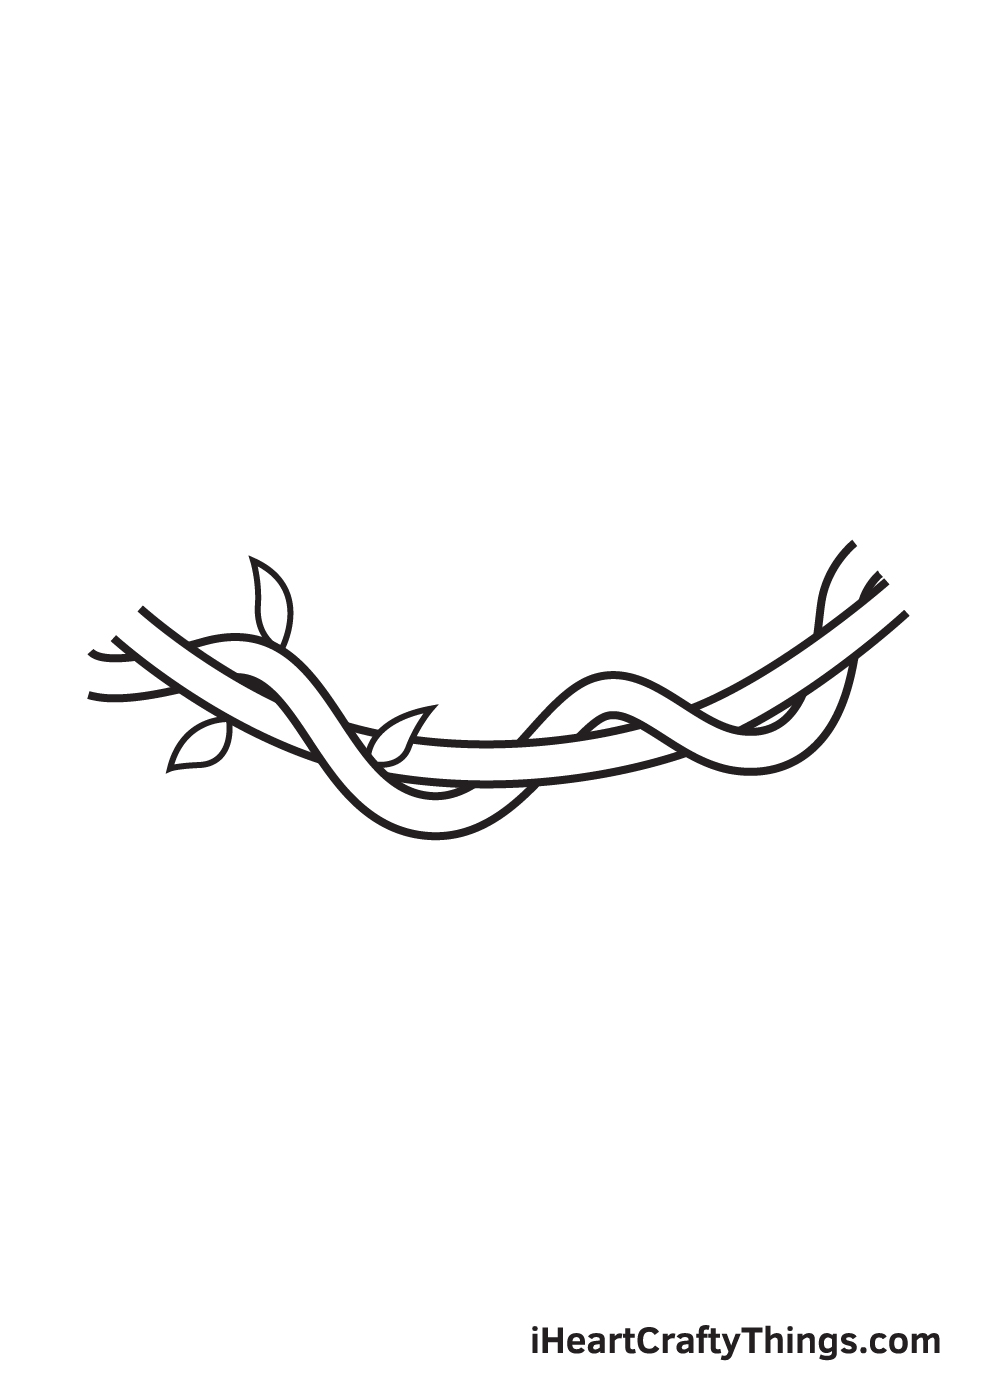
Now that you have the vines drawn, we can start adding some smaller details to the image.
To do this in this step, simply draw some small, pointy leaves onto the section of vines on the left-hand side. We will continue adding these little leaves as we move on as well!
Step 7 – Now, draw the rest of the leaves
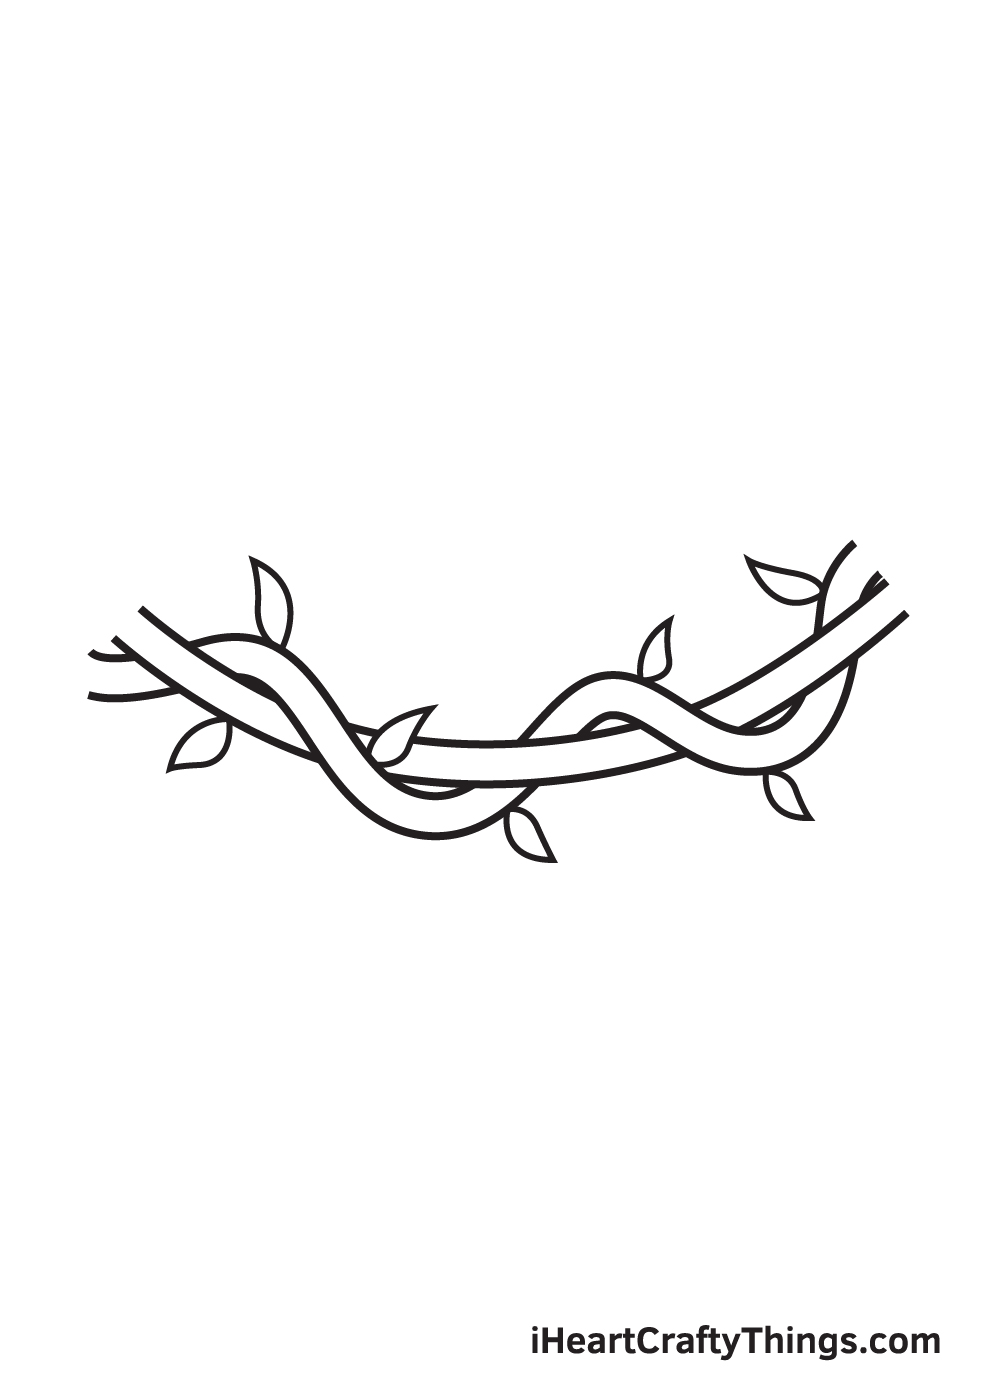
This step of our guide on how to draw vines will be a direct continuation of the previous step.
That means that you will be drawing some leaves onto the vines, but this time they will go more on the right-hand side of the drawing.
You could also add a few more if you would like a fuller look to the image!
Step 8 – Add some smaller details
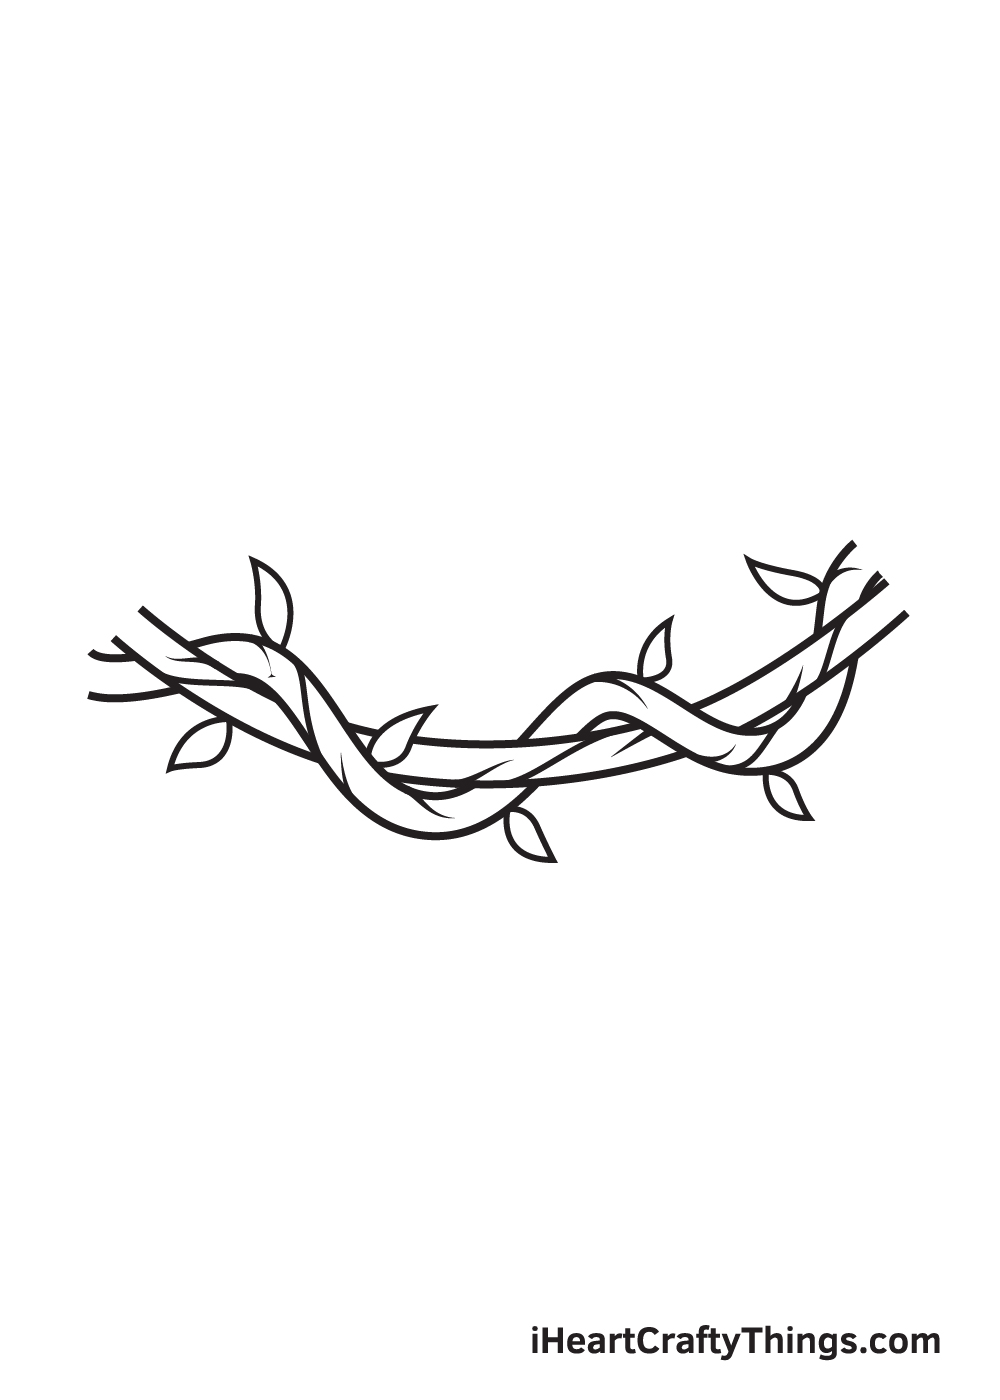
There are just a few more small details to add before you color your artwork in the final step of your vines drawing.
For this part, simply draw some small, curved lines inside the outlines of the vines themselves to make them look a bit more textured and twisty.
Then you’ll be ready for some final details in the next step!
Step 9 – Finish the final details
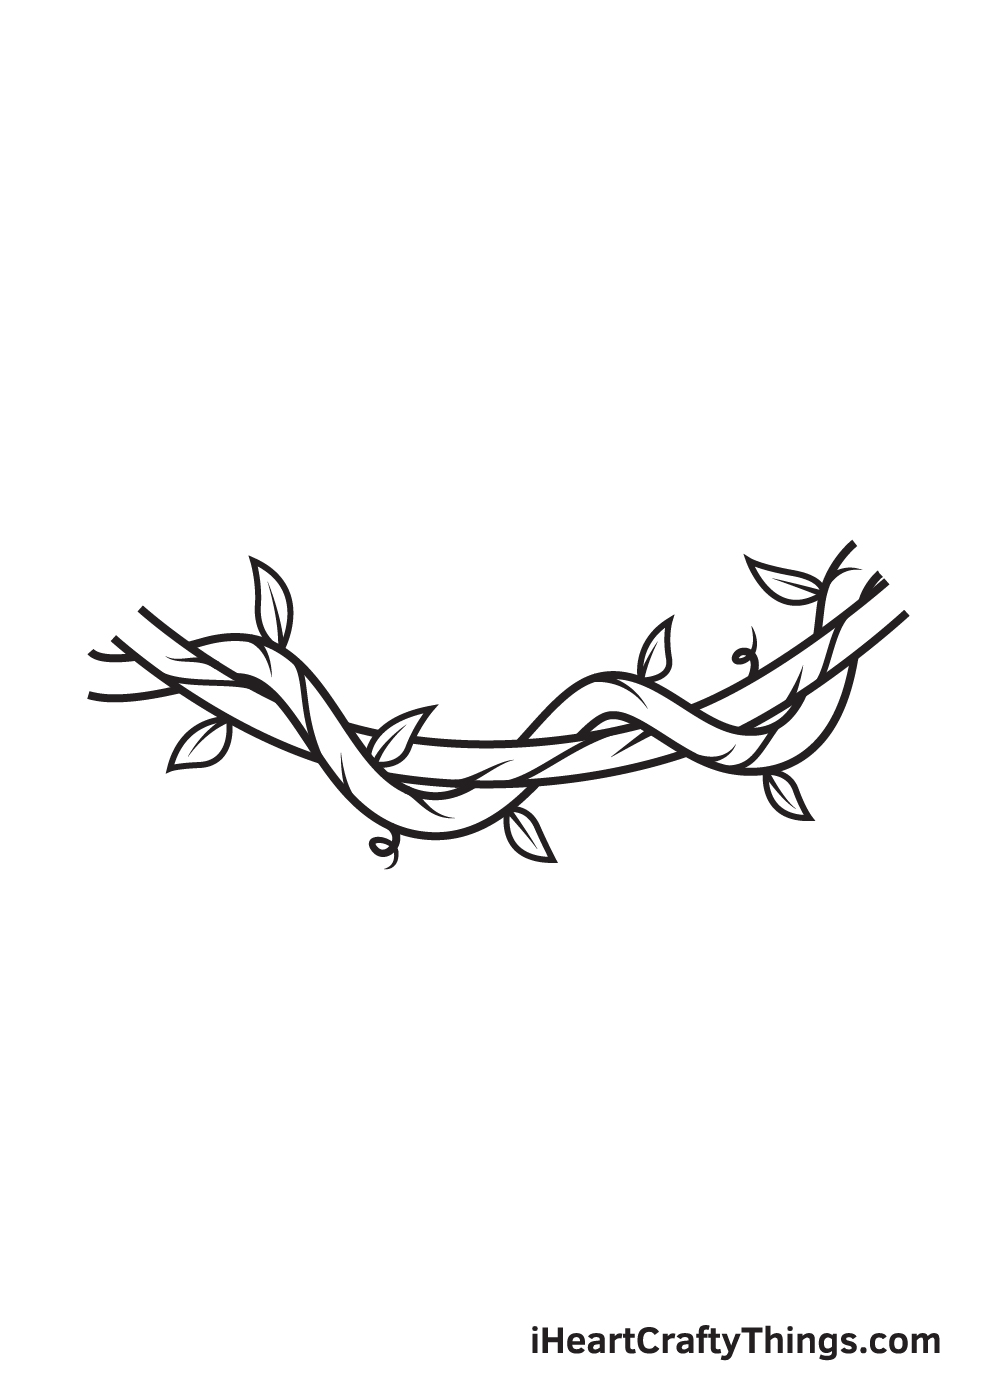
You’re ready for some final details in this step of our guide on how to draw vines. In our example, we added some small twisty lines coming off of the vines along with some vein details on the leaves.
Once these are added, you could also draw some additional details of your own!
A few ideas would be to add more vines or even have some creatures on or hanging from the vines. What else can you think of to finish off this image?
Now finish it off with some color!
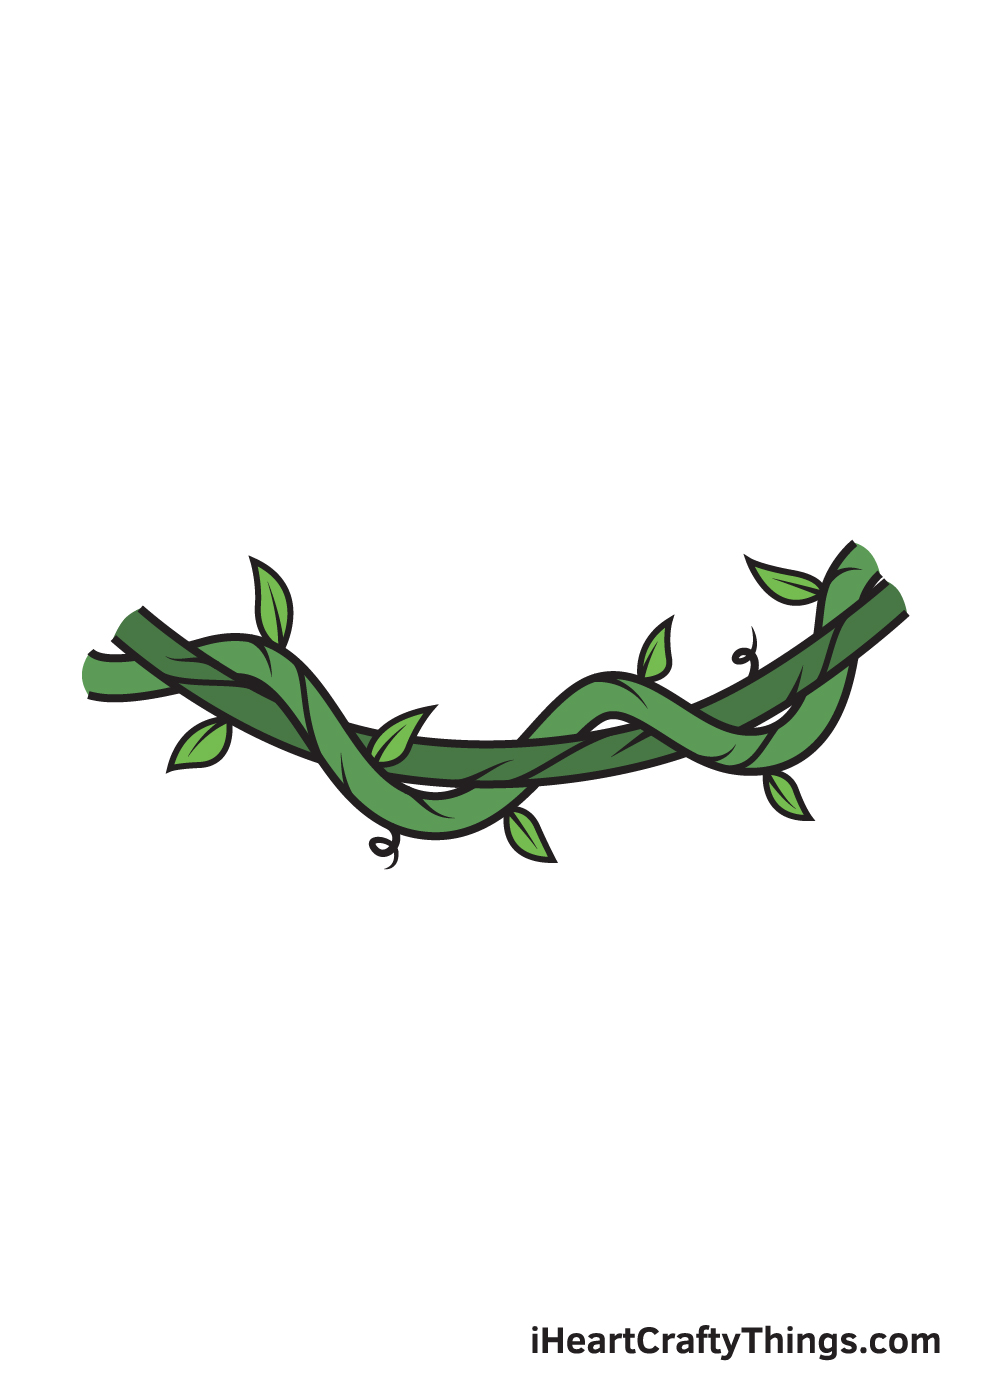
This step of your vines drawing is all about finishing it off with some color! In our reference image, we used some shades of green for the sections of the vines, but you should use any colors that you would like for it!
We would also recommend using art mediums that allow for more precision such as colored markers, pens or thin-tipped brushes. What will you use for your picture?
4 More Ways To Make Your Vines Drawing Unique
Navigate the twists and turns of making your vines sketch even better with these tips!
In this guide for this vines drawing, we focused on one small section of the vines. This was to make it easier for you to get the hang of the drawing, but now that you have finished it you can draw some more of the vines.
Vines can grow to astonishing lengths, so you could make the vines as long as the page allows. You could also make them even twistier to make it look even cooler!
If you want to fill the page with vines, you may want to get a nice big piece of paper.
Vines will often grow up on different objects and other plants, and you could draw some of these.
You would have many options if you wanted to show this drawing of vines growing up on something else.
It could be a tree or maybe a garden wall. You could even have the vines growing up on a creepy mansion fence for a spookier feeling.
What else could the vines be growing on?
If you made it look like the vines are growing up on something else, you could take it even further by adding a more involved background setting.
This is a great way to make your vines sketch even more interesting to look at! For instance, in the previous step we mentioned drawing the vines on a creepy gate or fence.
If you were to go with that idea, then you could draw a creepy mansion in the background. Or you could incorporate the vines into a lush jungle setting!
When it comes to bringing color to your vines drawing, you will want to use the best tools for the job. Picking the colors is just one half of the process.
The vines are quite thin and twisty, so you may want to use some mediums such as colored pens or markers to give yourself some more precision.
It can be fun to mix various mediums and techniques as well!
Your Vines Drawing is Complete!
That will finish off this guide on how to draw vines, and we hope that it was a fun and twisty experience!
Learning to draw them can be as twisty and complex as the vines themselves, so that’s why we aimed to show you how it can be easy.
Be sure to also express your creativity by adding some more details, elements and color choices of your own!
When you’re ready for more fun, be sure to visit our website for more drawing guides. We have more on the way soon, so stay tuned for those!
We would love to see your twisty vines drawing, so please share it on our Facebook and Pinterest pages for us to admire.