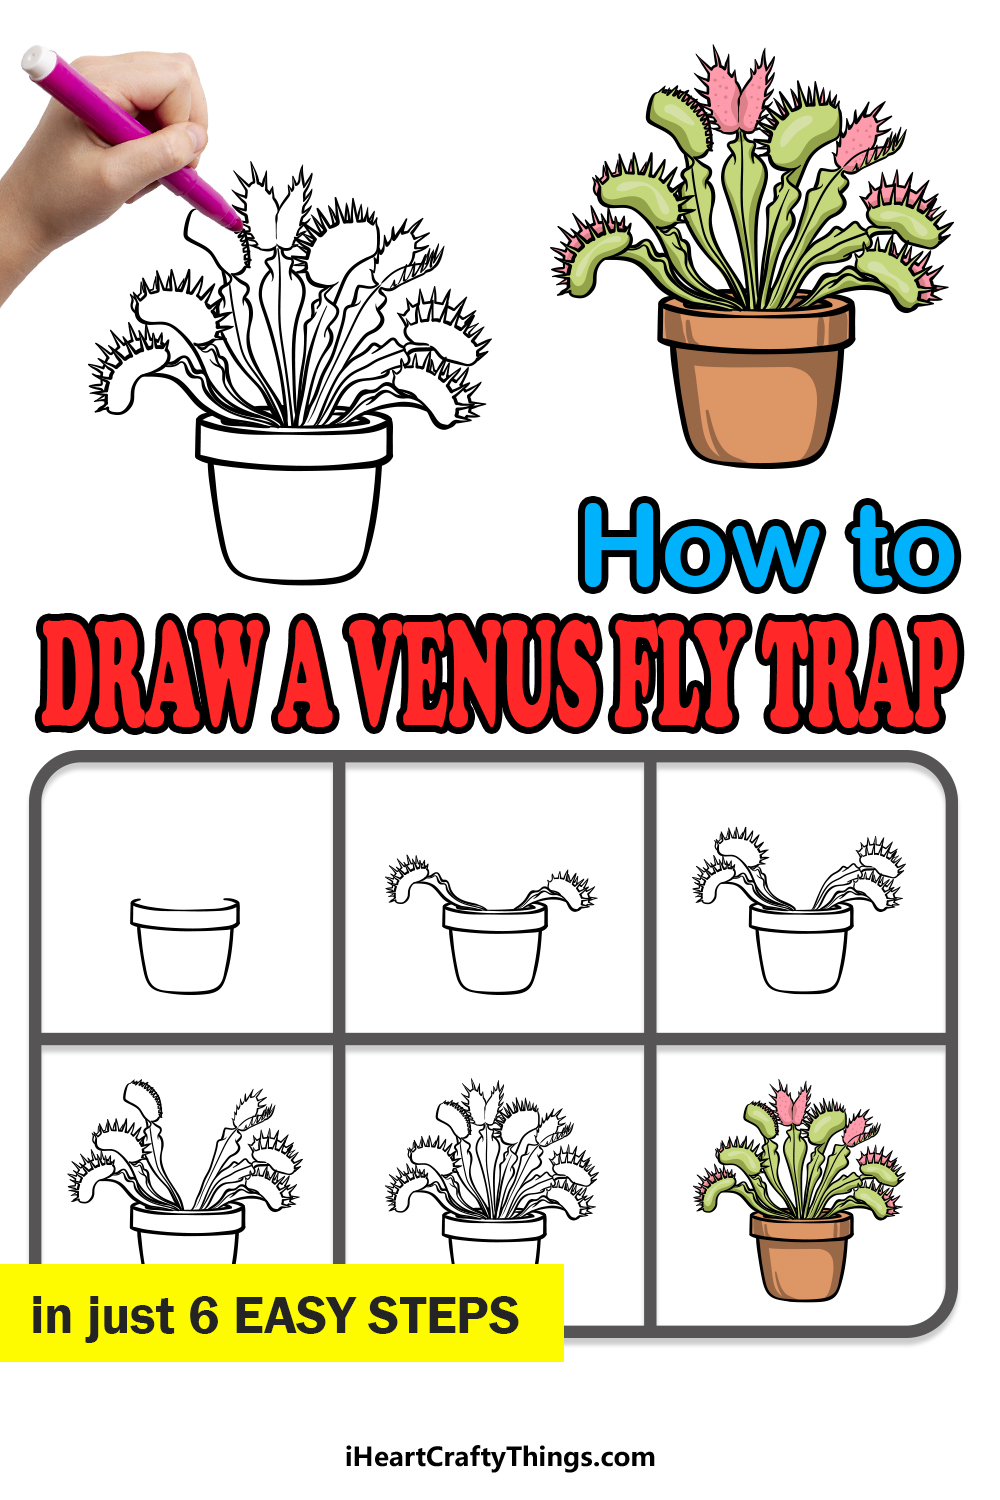
With most plants found in nature, you will find that what you see is what you get. Few plants have hidden tricks or features to them, but the venus fly trap is certainly an exception to that!
This plant has a rather intimidating appearance, but it is also considered a carnivorous plant that will clamp down on small insects and bugs to digest them.
This has made them popular to own, and it also means that it can be really fun to learn how to draw a venus fly trap.
If you love this incredible plant, then this tutorial should prove to be perfect for you when recreating it in some artwork!
Our step-by-step guide on how to draw a venus fly trap will show you how you can draw it while also having a lot of fun doing so.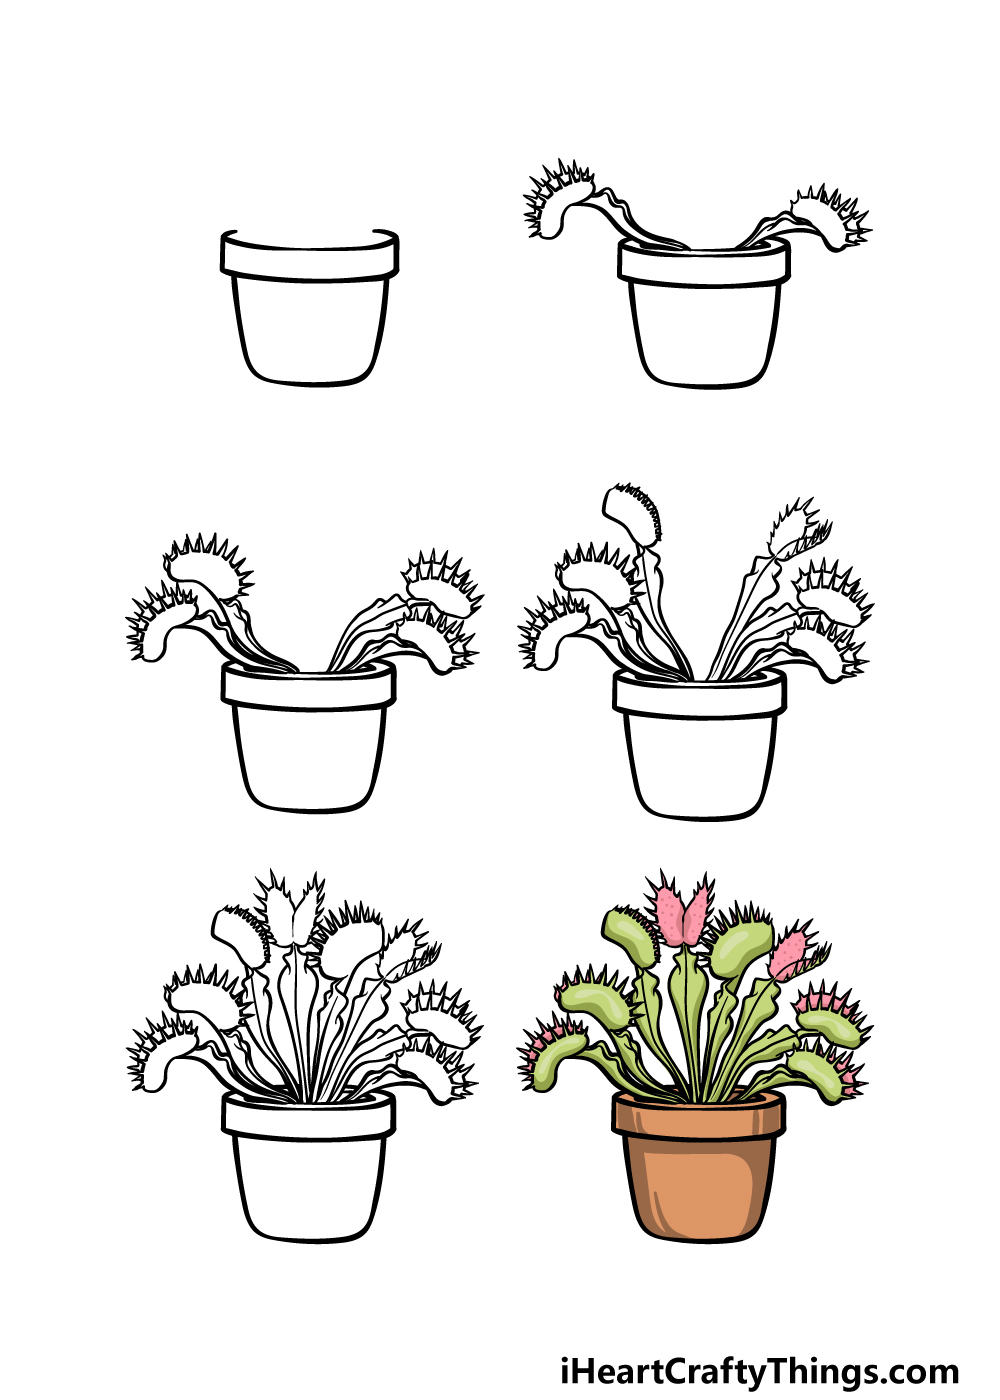
How to Draw A Venus Fly Trap – Let’s Get Started!
Step 1
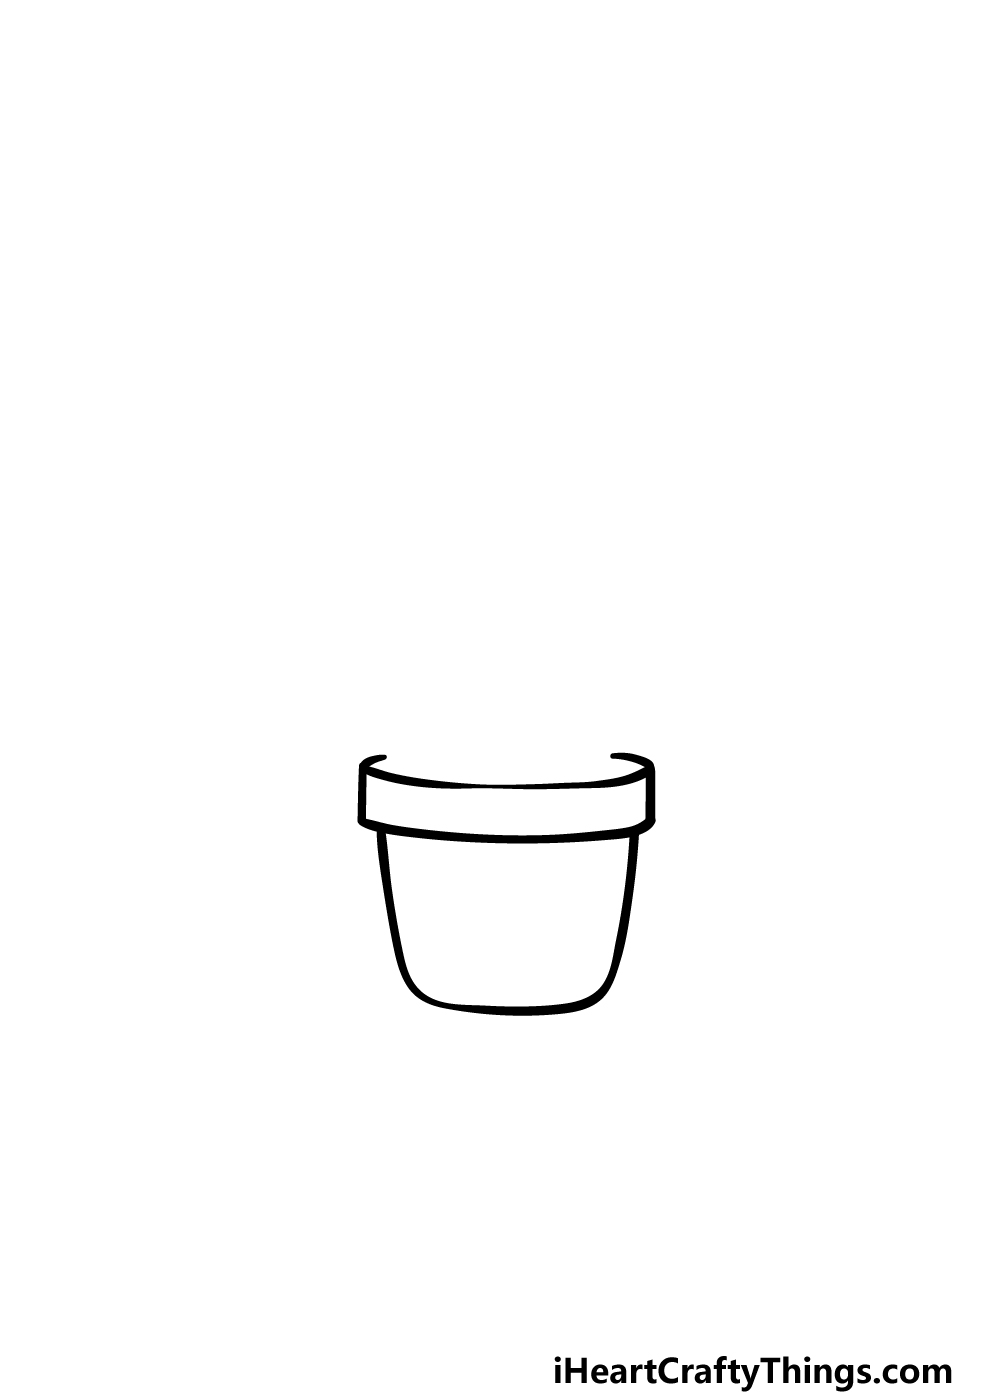
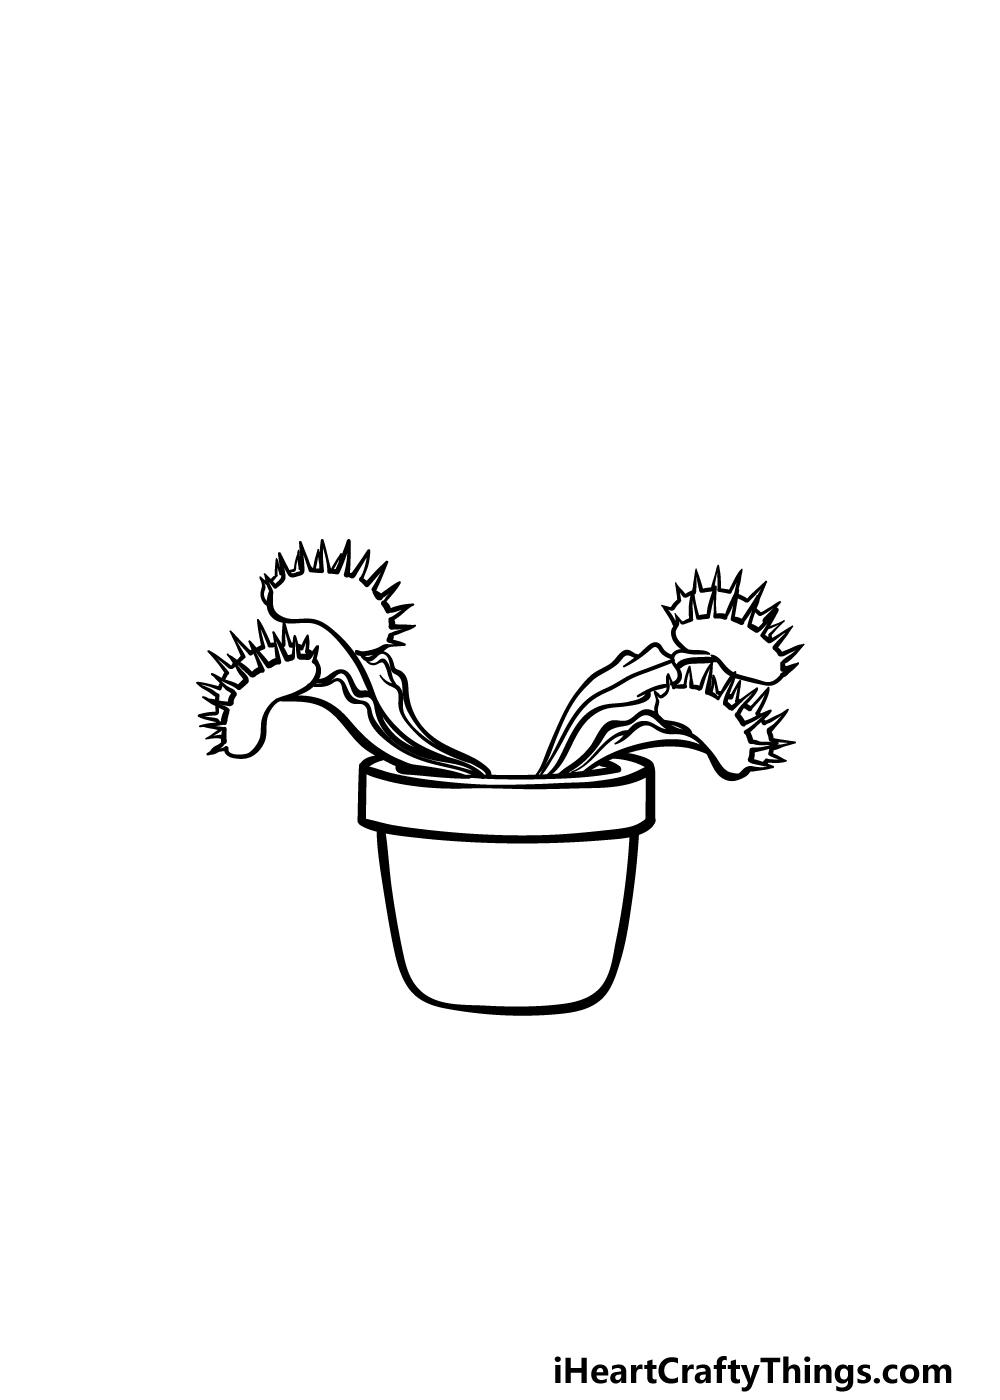
To begin this guide on how to draw a Venus fly trap, we will not be drawing the plant itself but rather the pot that it is sitting in.
This pot will have a fairly short, rounded base that is displayed in the reference image that we have provided.
Then, we will be adding a thick rim to the pot, and this can also be drawn with some rounded lines with straight edges on the sides.
The tops of the far sides will curve inward a bit, but be sure to keep these lines short as we will be adding the Venus fly trap plants into that empty section soon.
Once you have finished this step, we can then move on to the second part of the guide.
Step 2 – Now, draw the first actual plants of the Venus fly trap
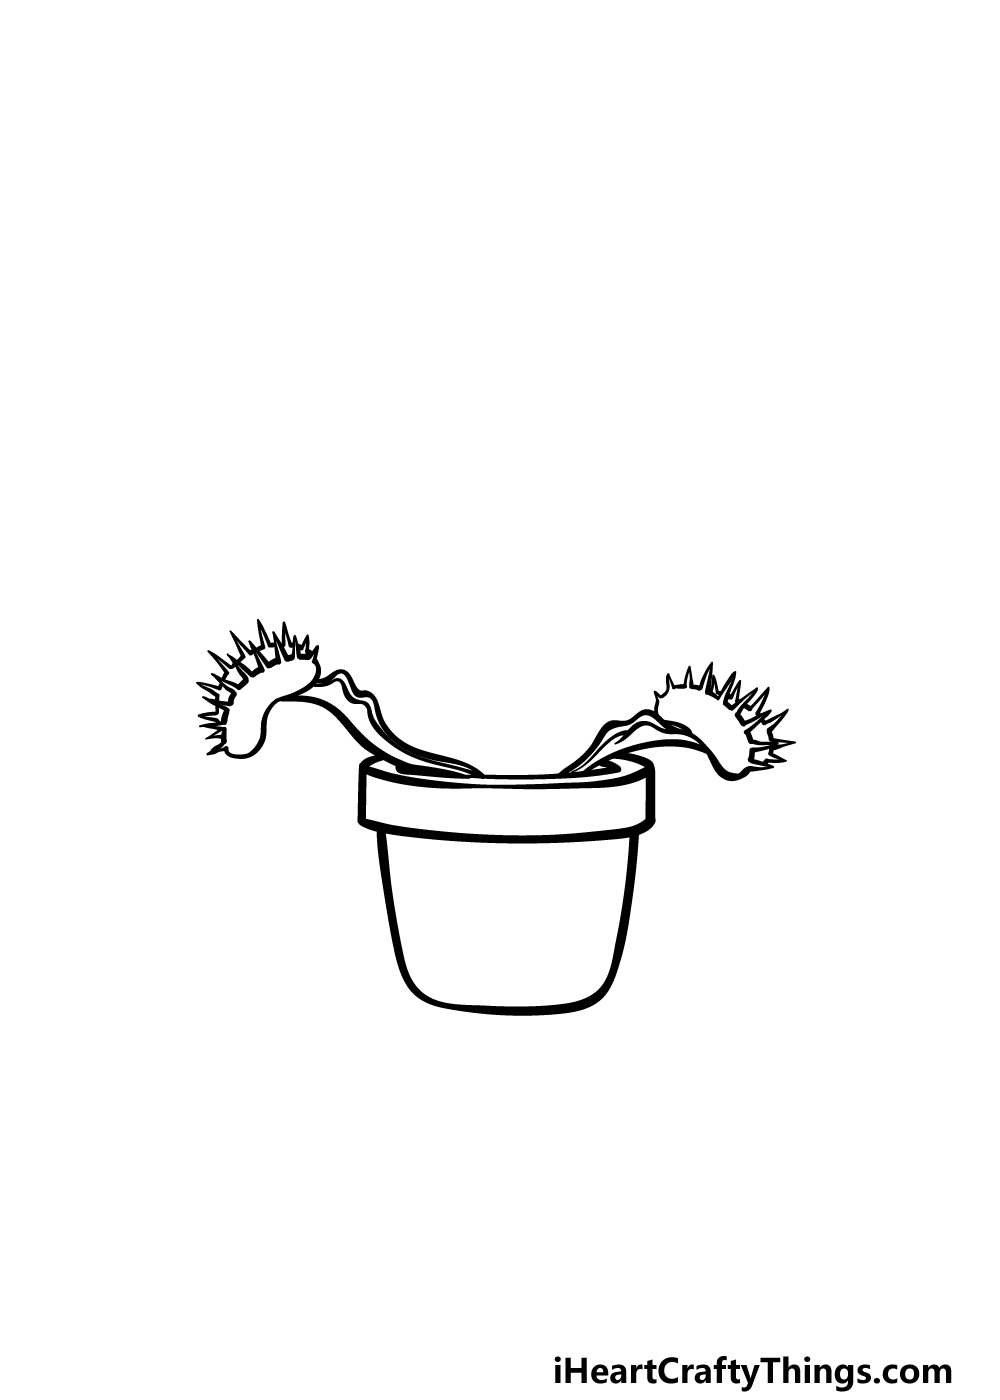
Now that you have the pot for your Venus fly trap drawing, you can start drawing the Venus fly trap plant itself.
Each stalk of the plant will be fairly long and thick, and they will be drawn with some curved and wavy lines.
Then, we will be drawing the ‘head’ of the venus fly trap. The base of each head will be drawn with a rounded, curved line, and the top will be drawn with lots of pointy, spiky lines.
Draw two of these plants, one on each side, and then we can move on to the third step of the guide.
Step 3 – Next, draw some more plants into the pot
For this third step of our guide on how to draw a Venus fly trap, we will be adding two more of the plants to the collection.
Each one of these will go over the previous two that you have drawn already.
They will also look very similar in structure to those ones, and the only difference is that they will have longer stalks seeing as they are higher. The stalk on the right will also be a bit thicker.
Step 4 – Draw some more plants
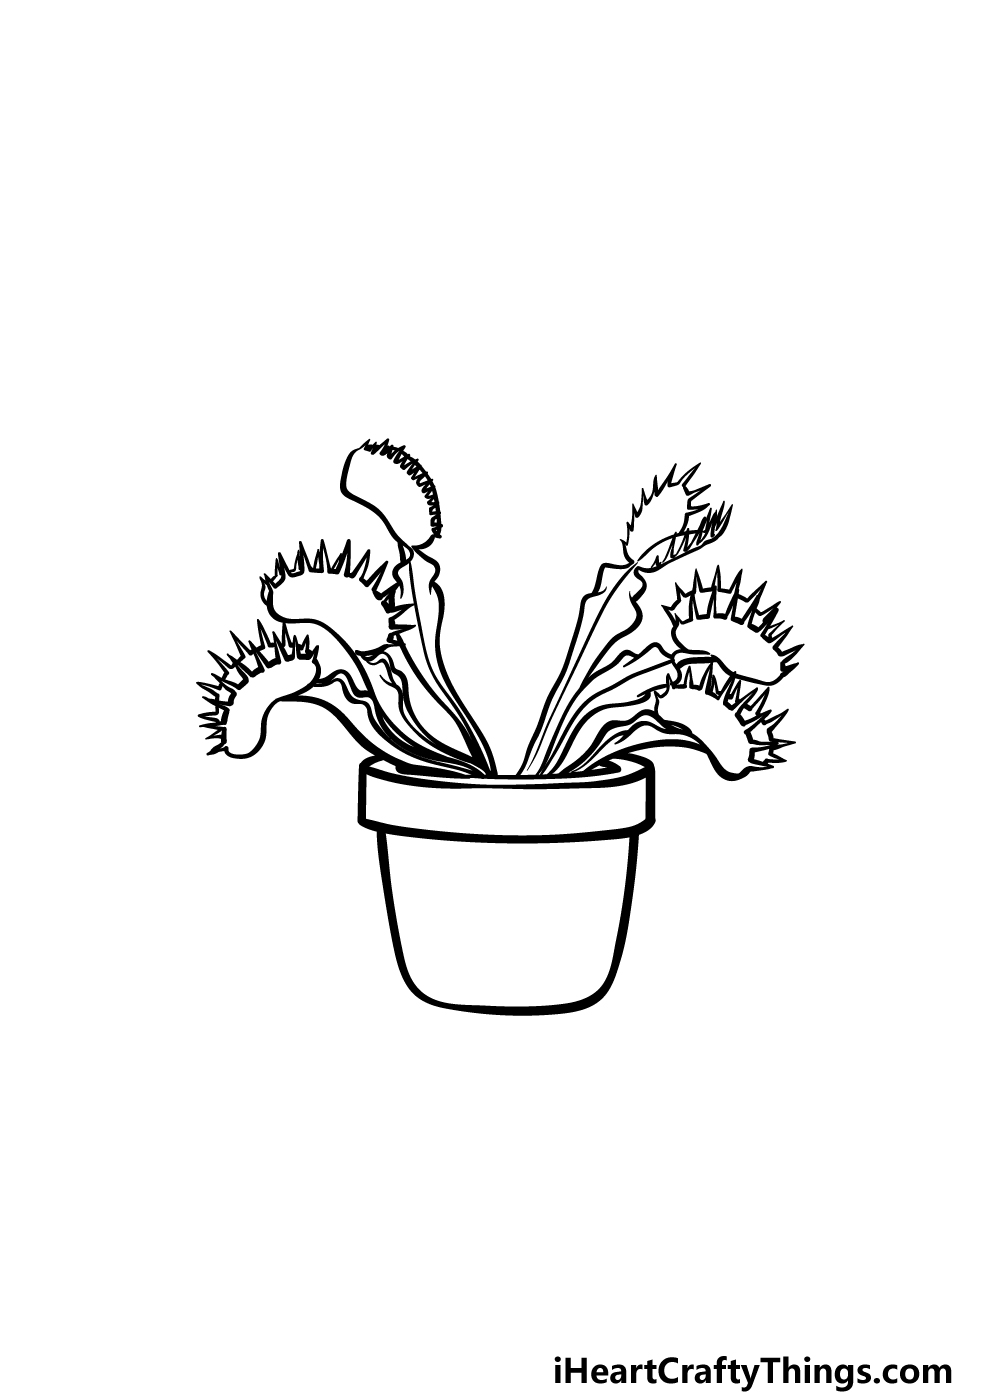
Continuing with this Venus fly trap drawing, we will be adding two more of the stalks again. These ones will follow a bit of a different trend, however.
The previous four were drooped over a bit, but these next two will stand more upright. Other than that change, they will be more or less the same again.
The one on the right will be open, however, and the reference image will show you how to structure that one so that it looks different from the closed ones.
Once these two have been drawn, we will then be ready to move on to some final details in the next one.
Step 5 – Add the final plants to your Venus fly trap drawing
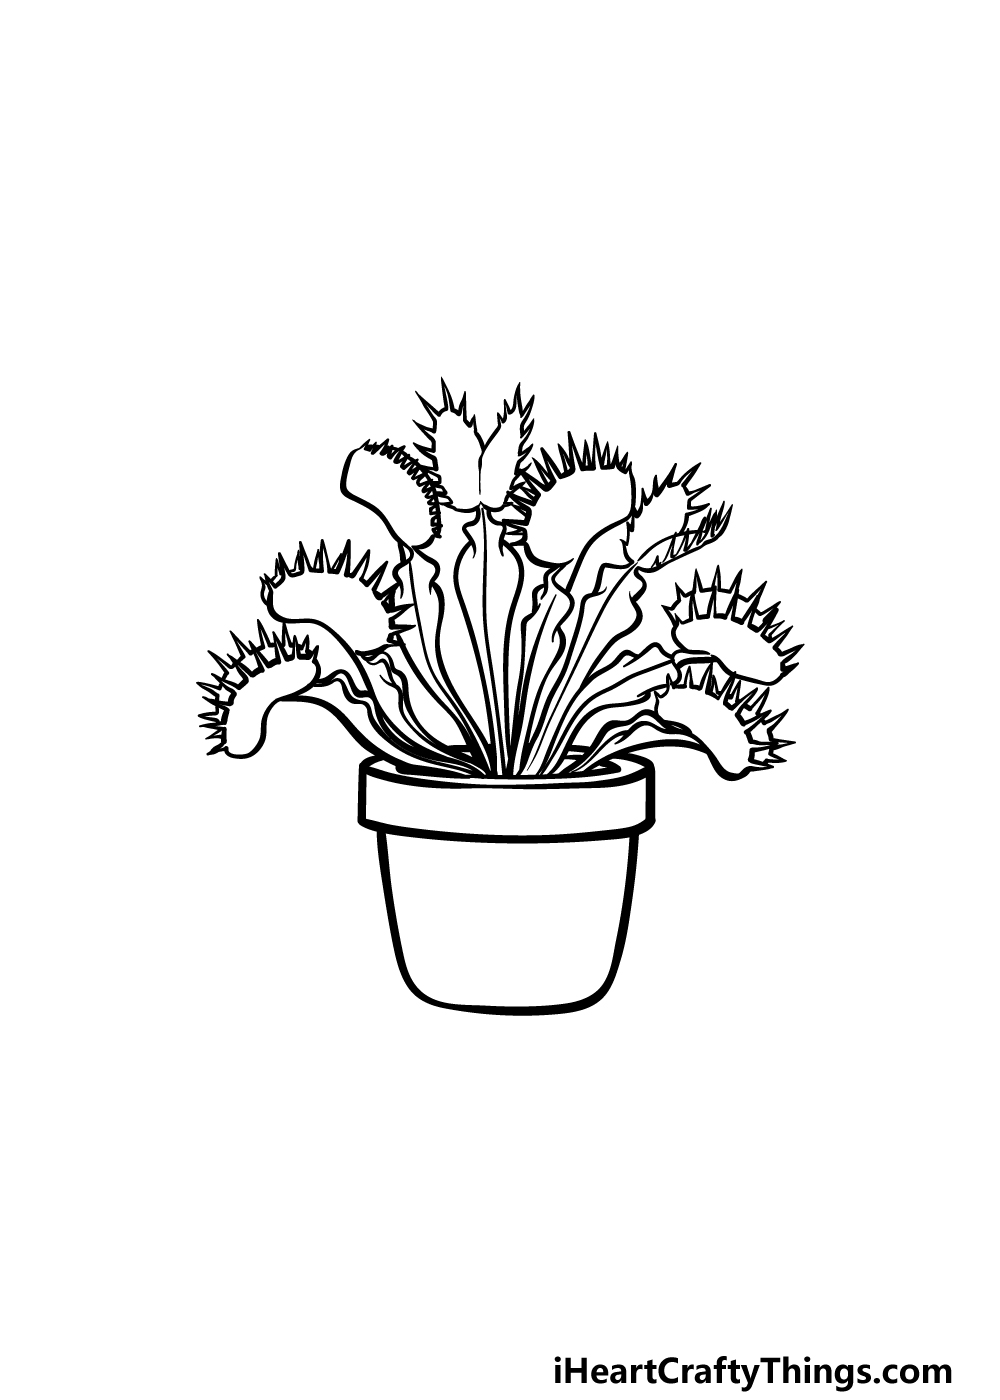
This fifth step of our guide on how to draw a Venus fly trap will see you adding the final plants to the image. Once again, we will be adding two more plants in this step.
The one on the right will also be upright and closed, but the one on the left will be a bit different again.
This one will be wide open, and the inner portion of the ‘mouth’ will be facing us. We will further distinguish this open portion when we start adding color later.
You could also add some details of your own to really finish it off! One idea would be to draw some unfortunate bugs buzzing towards the gaping maws of the Venus fly trap.
This is just one idea, but what else can you think of to add to this drawing?
Step 6 – Finish off your Venus fly trap drawing with color
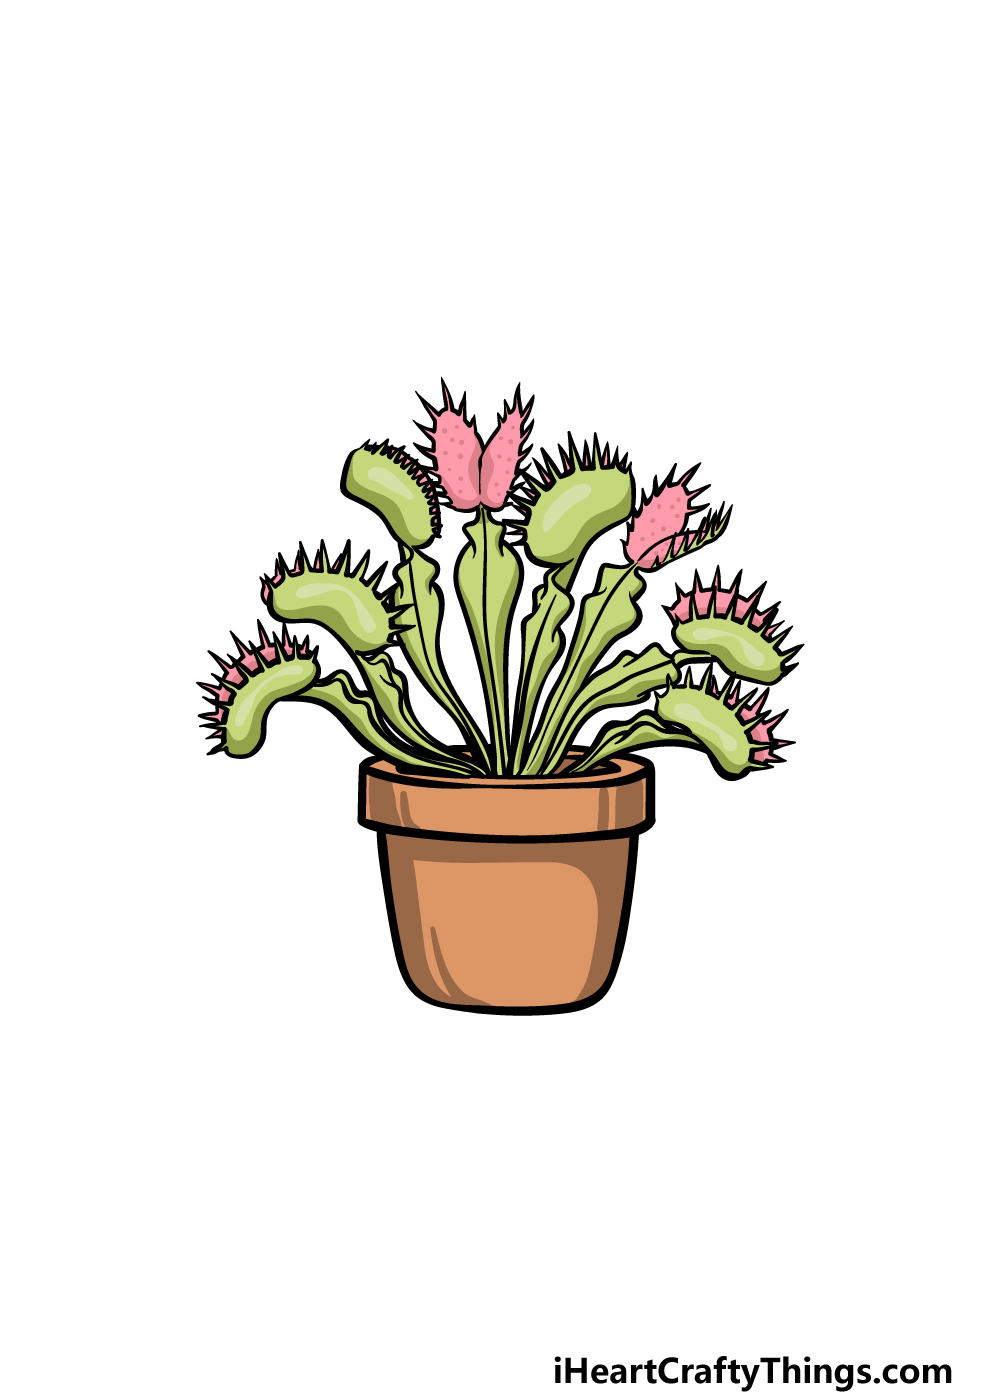
You have almost finished your Venus fly trap drawing, and now you can finish off with some amazing colors! In our reference image, we showed you how we would color this image in.
We used some browns for the pot, and by using some darker shades on the sides you can add some shading details.
Then, we used various greens for the stalks and heads of the plants, and then we finished off with some pink with dark pink dots for the insides of the mouths.
These are the colors that we chose, but you shouldn’t feel limited by these choices.
This is your chance to show off which colors you think would look great for this image, and we can’t wait to see what you choose!
4 More Ways To Make Your Venus Fly Trap Drawing Unique
Get ready to catch some amazing tips for this Venus fly trap sketch and make it greater!
The Venus fly trap is one of the most unusual plants in the world. This is not only because of what it can do, but also with how unusual it looks!
They can come in many variations, and you could create one of them for this Venus fly trap drawing. This could be done by changing just a few small details and elements.
As we mentioned, Venus fly traps can look really weird, so don’t be afraid to change it in any way you like!
You can also make this drawing of a Venus fly trap look more unique by adding some fun elements to the pot. This could be as simple as a ribbon tied around the pot, it could also take the form of a painting on the pot.
These are a few ways that you could decorate the pot, and you could incorporate any colors and styles you like. How would you like to decorate this Venus fly trap pot?
The Venus fly trap is one of many plants we have, and you could surround it with some other plants and flowers. If you have some favorite flowers and plants, you already have a place to start!
You could decorate this Venus fly trap sketch with any of these plants and flowers to make it look even more bright and vibrant.
Whether it’s a big sunflower or a delicate daisy, they would really elevate this unusual plant.
Finally, once you have all your additions and changes, you may want to finish off with a background. There are so many possibilities, and all would make your Venus fly trap drawing even better!
It could be on a windowsill or maybe in a wild and vibrant garden. You could especially combine this suggestion with the other tips we have suggested, and the background can be themed with these additions.
What kinds of backgrounds could you use to finish this off?
Your Venus Fly Trap Drawing is Complete!
All 6 steps of this guide on how to draw a Venus fly trap have been completed, and you have ended up with a great drawing of this weird and wonderful plant!
This guide was designed to break down all elements of this plant into smaller sections, and hopefully this made it easier and more fun for you to take on!
Once you have finished the guide, you don’t have to stop there. You can also keep adding your own extra details, elements and ideas to really finish it off!
There are no wrong ways to go about it, so let your creativity flow and see what you come up with.
Then, when you’re ready for more drawing fun you can check out our website for more amazing drawing guides. We have more coming soon, so keep checking in to catch those!
Remember to also share your finished Venus fly trap drawing on our Facebook and Pinterest pages for us to see!