It’s so easy to learn how to draw a TV when you follow these steps. Follow along to make your own fun TV designs by enjoying this tutorial for kids.
TVs have become a daily part of our lives. We use them to watch shows and movies and can use them to play video games as well.
They come in all manner of shapes, sizes and resolutions and it’s fun to imagine all of the TVs you could own. It’s not practical to get all of those TVs in real life, but you can always draw them!
This guide will show you how to make an older model of a TV, but once you have the hang of the design you can draw other kinds of TVs with more details
Find Out How To Make Your TV Drawing By Watching This
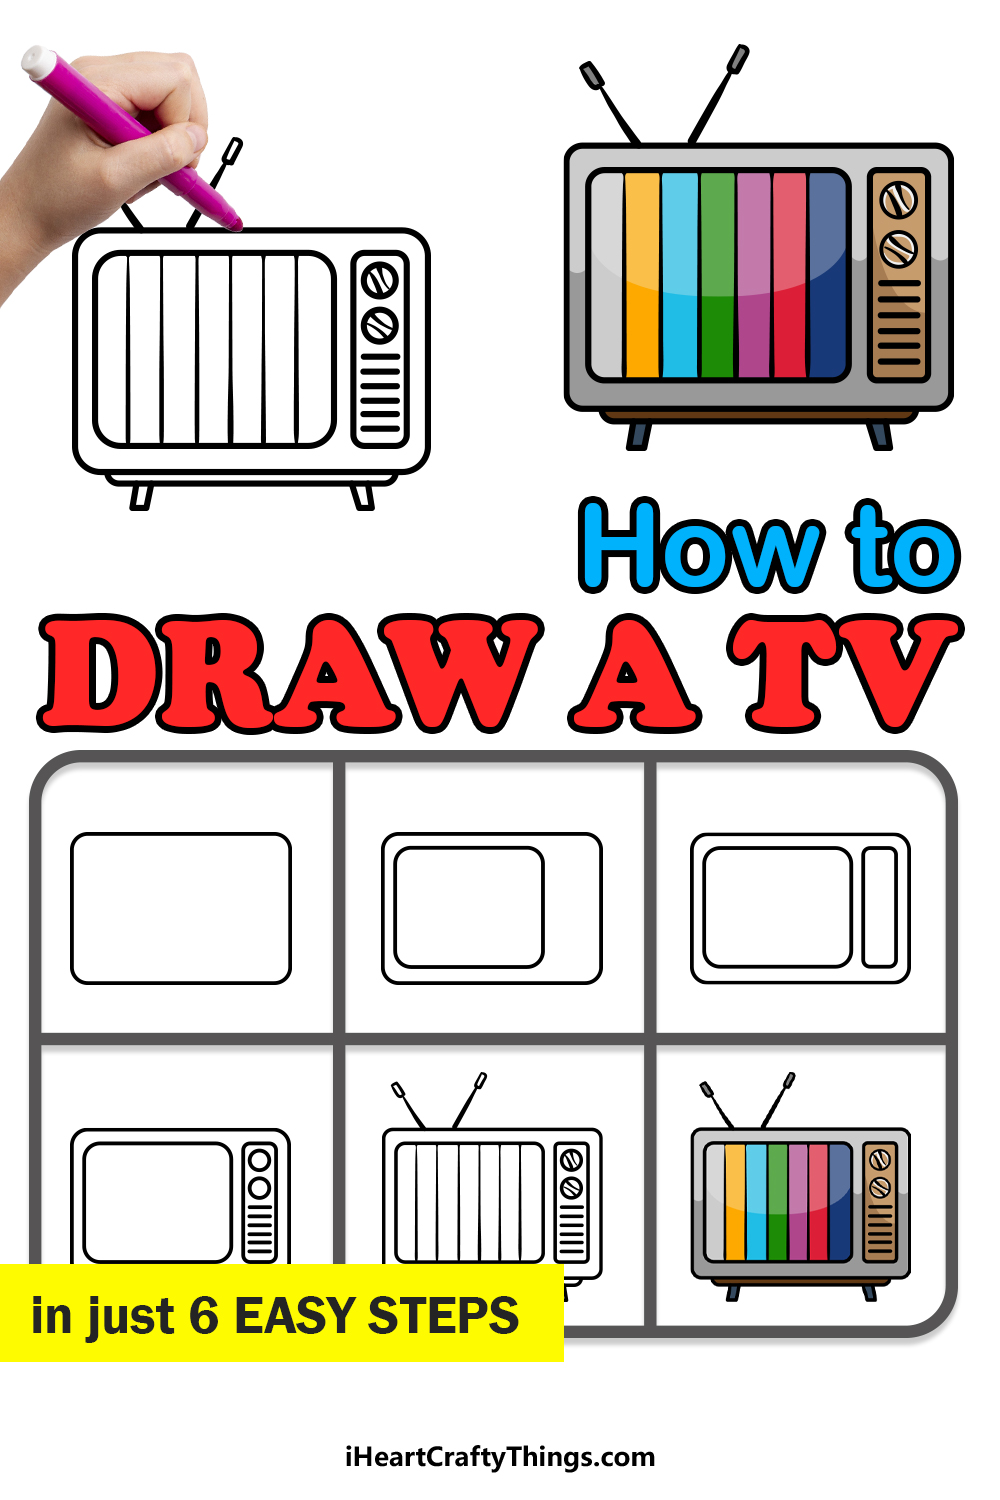
How to Draw A TV – Let’s Get Started!
Step 1
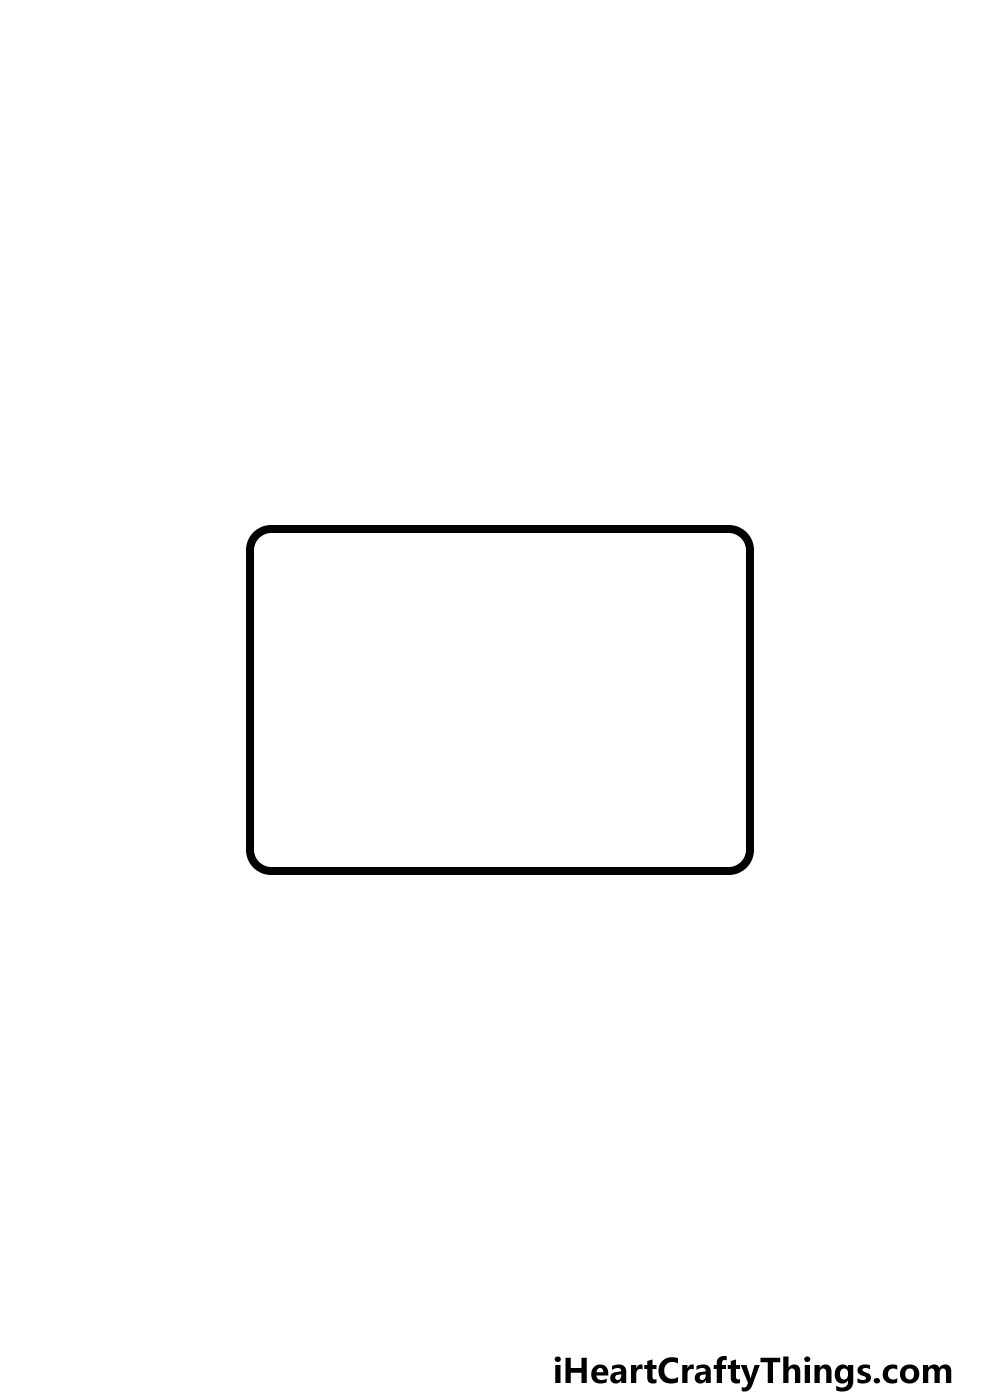
We will be drawing a pretty retro set in this guide on how to draw a TV! For this and the next few steps, you will find it much easier if you have a ruler on hand to help you draw.
With that ruler handy, you can then start to draw the rectangular outline of the TV set. Instead of being a standard rectangle, however, we will be rounding off the corners a bit.
You could also have the corners be pointy if that’s easier, but having them rounded will give it a little more personality!
Once you have drawn this outline, you’re ready for step 2!
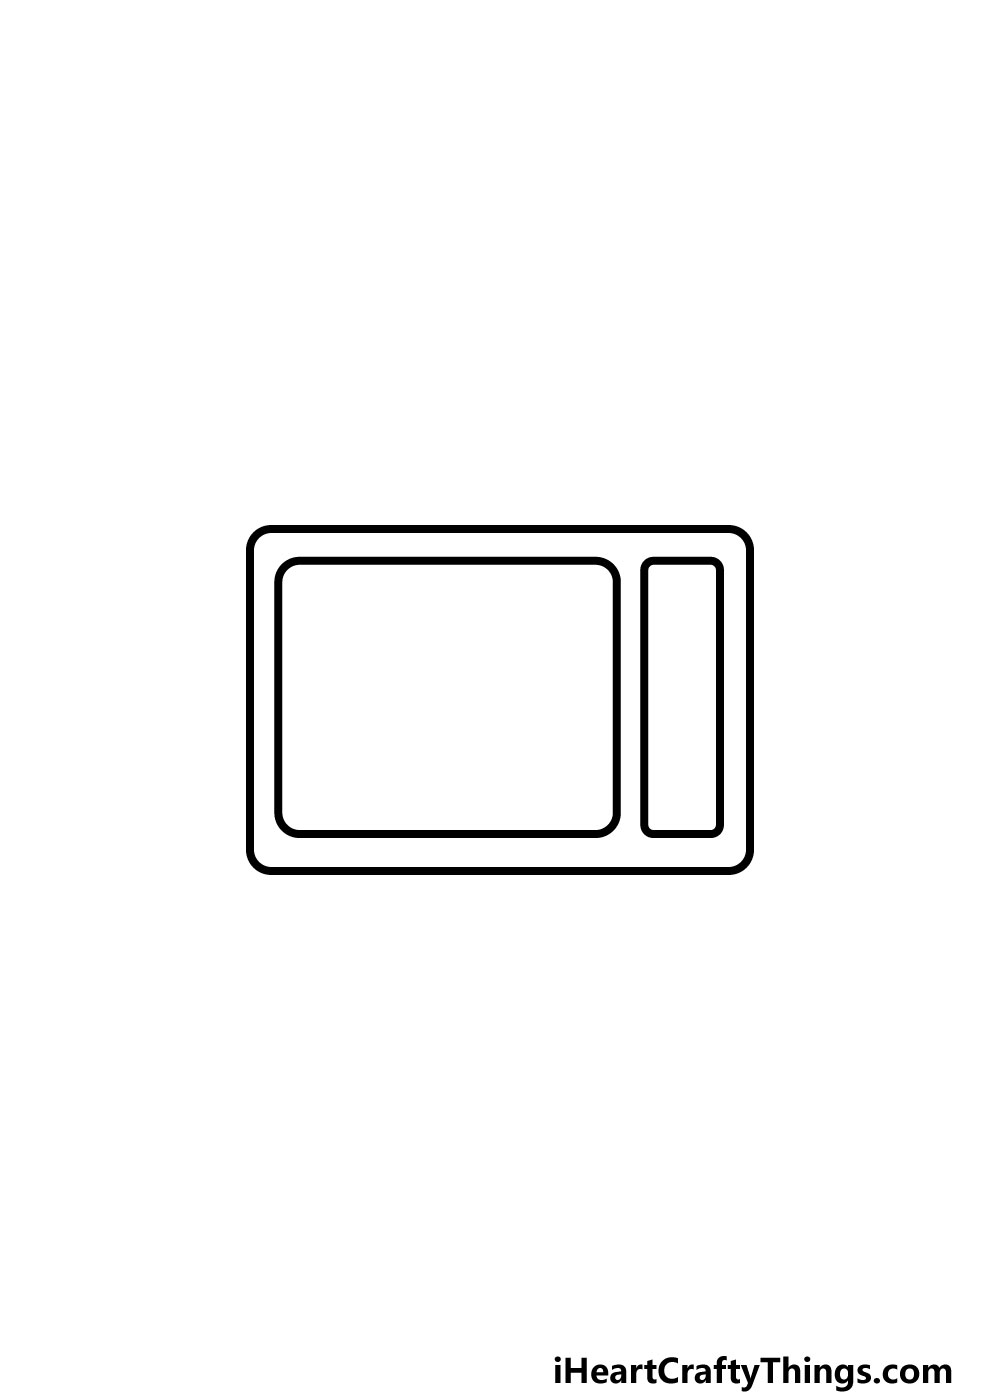
Step 2 – Next, draw the screen of the TV
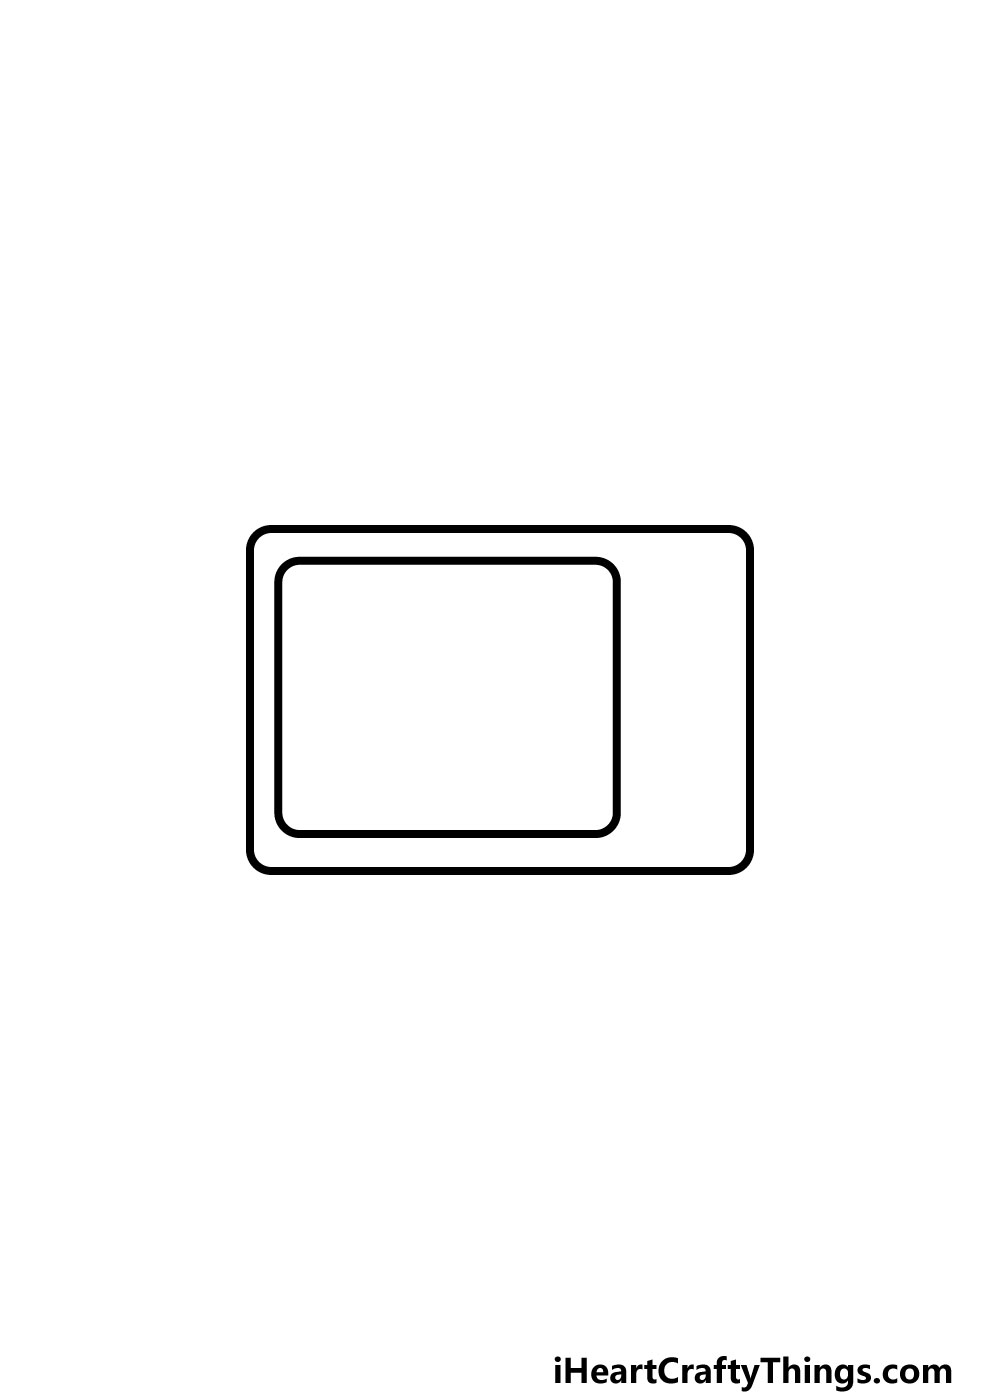
You have the frame of your TV drawing complete, but it wouldn’t be much good without a screen to view your favorite shows!
For that reason, we will add the screen in this step. Using your ruler again, we will add a square to the frame.
This is an older TV, and because of that the screen only takes up about three-quarters of the TV, unlike most modern sets.
This square will go on the left-hand side of the frame, and it will also have some curved corners. When you have the screen drawn, you will be ready to add more details to the TV in the third step.
Step 3 – Draw the buttons for the TV
We’re used to being able to control modern TVs with remote controls or even our smartphones, but back in the day you had to get up and change the channel or volume on the TV itself!
We will be drawing the outline of the panel that had all the buttons on it in this third step of our guide on how to draw a TV.
To do this, we will be drawing another rectangle shape, except this one will be thin and vertical on the right-hand side of the set.
It will also have some rounded corners like the other shapes that we have been drawing. Once that is drawn, we can start adding some of the buttons and details in the next few steps.
Step 4 – Now, draw some buttons and a stand for the TV
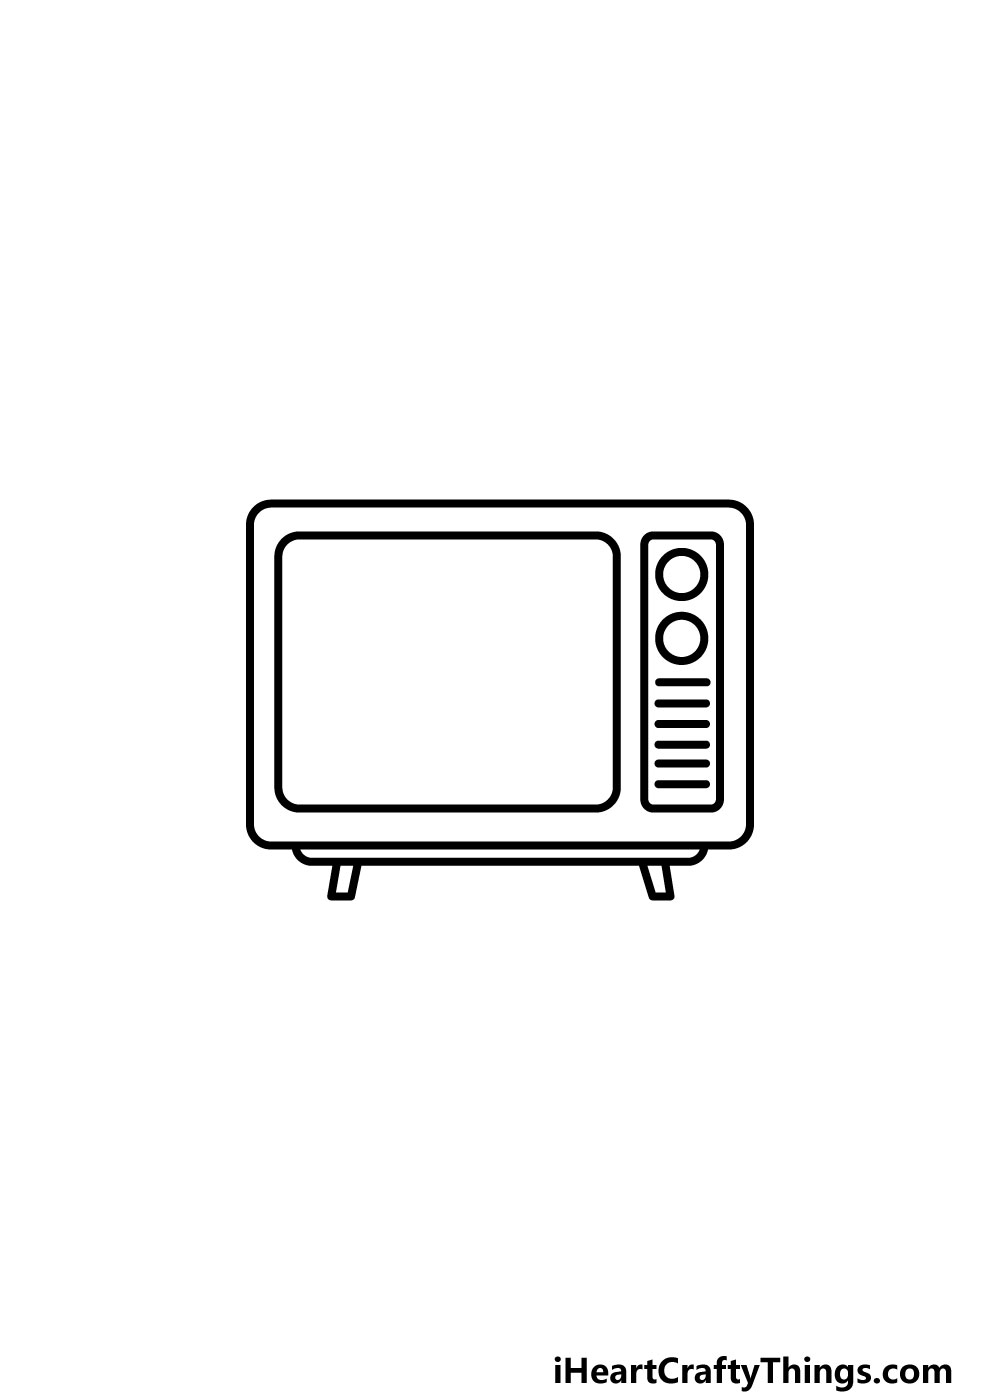
We mentioned the buttons for the TV in the previous step of this guide, and now we shall start to add some for this part of your TV drawing.
We will be drawing these into the long rectangle on the right, and you can start with two circles for the dials.
Then, you can use your ruler to draw a series of smaller straight lines going beneath the buttons.
We will be adding some more details to these buttons soon, so let’s move on to step 5 to finish off the final touches.
Step 5 – Finish off the final details and touches
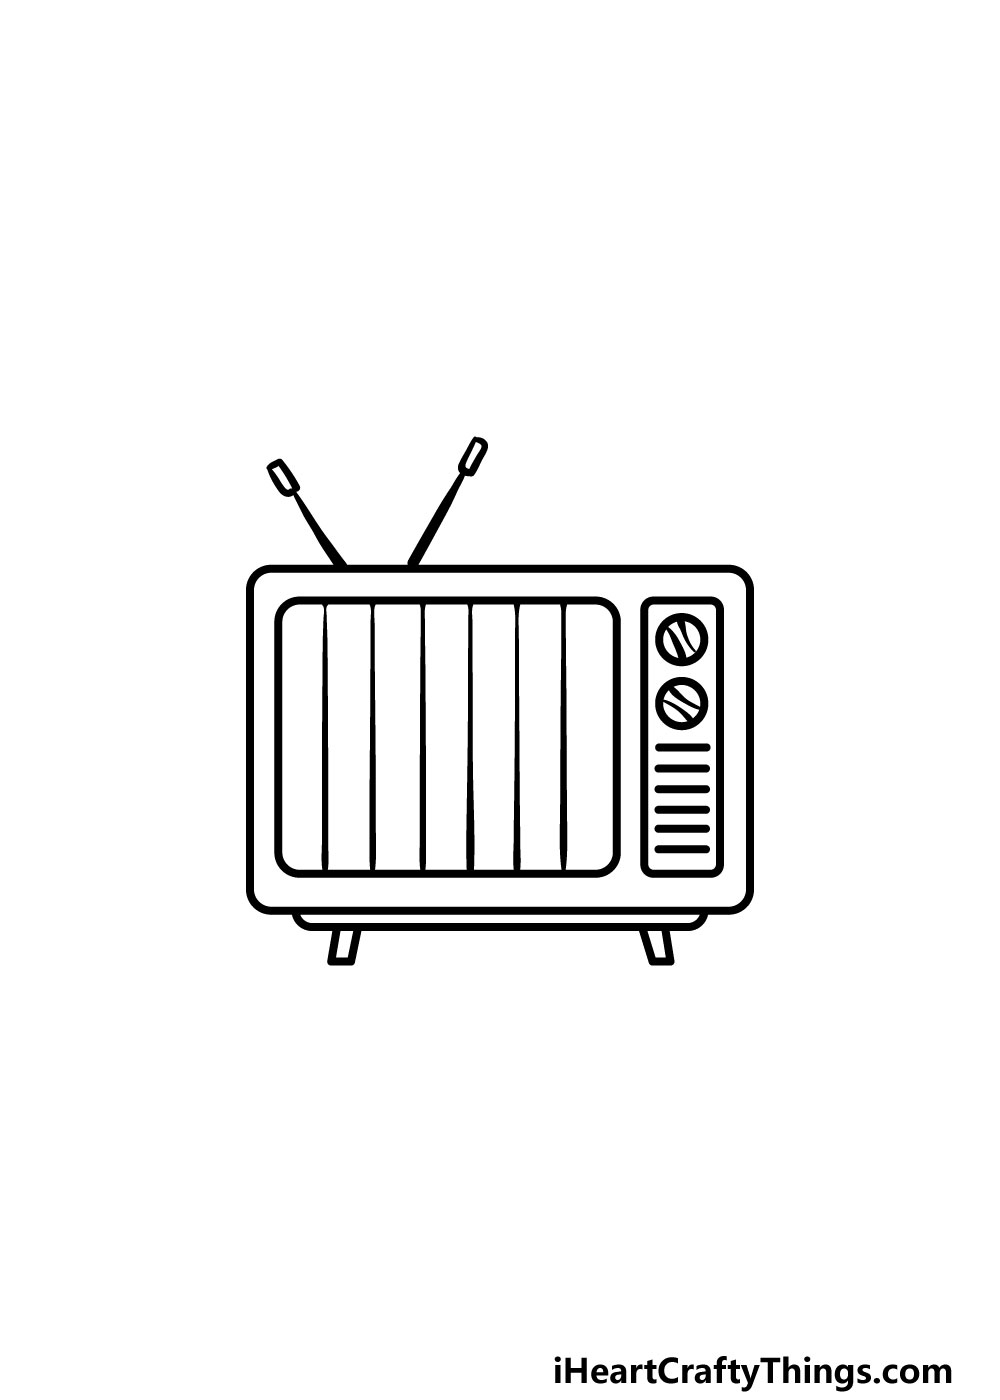
This part of our guide on how to draw a TV will see you adding all of the final touches before you finish it off with some colors!
First, add some small curved lines onto the dials that you drew in the previous step for where you would grab them to adjust them.
Then, you can use some straight lines beneath the TV for the base that it’s sitting on. Perhaps you could draw a TV cabinet around it for something extra too!
Then, add some more straight lines poking out from the top of the TV for the antenna.
To finish off, we drew some color bars using some straight lines on the TV screen to really capture a bygone era of TV! If you prefer, you could also draw something else instead.
Perhaps you could draw a still from your favorite show to give us a glimpse of what you would be watching on this television. We can’t wait to see how you finish off this drawing for the final step!
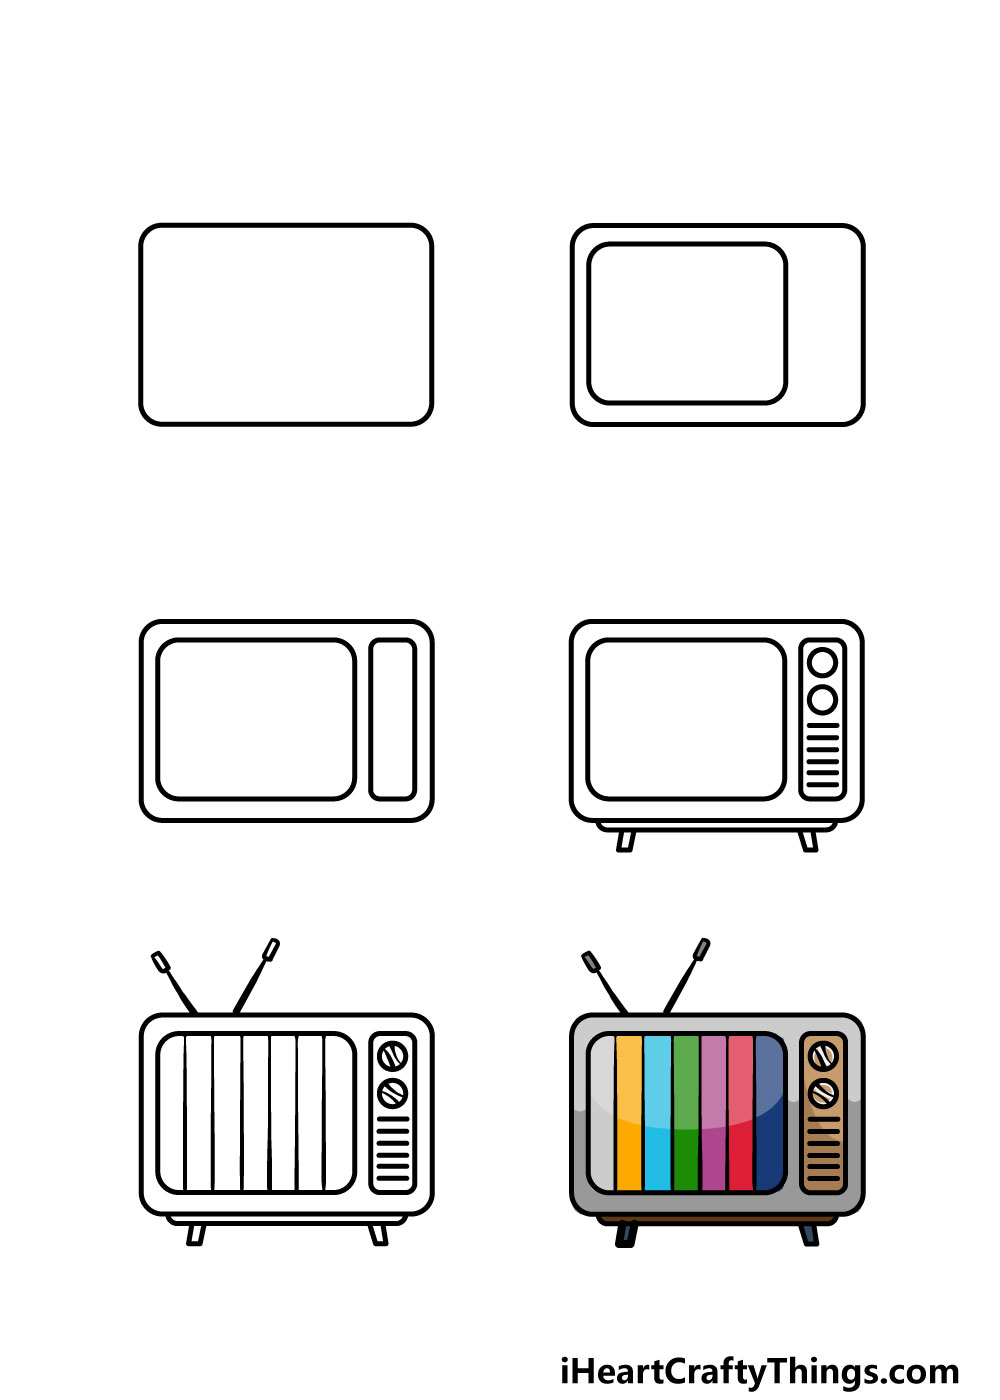
Step 6 – Finish off your TV drawing with some color
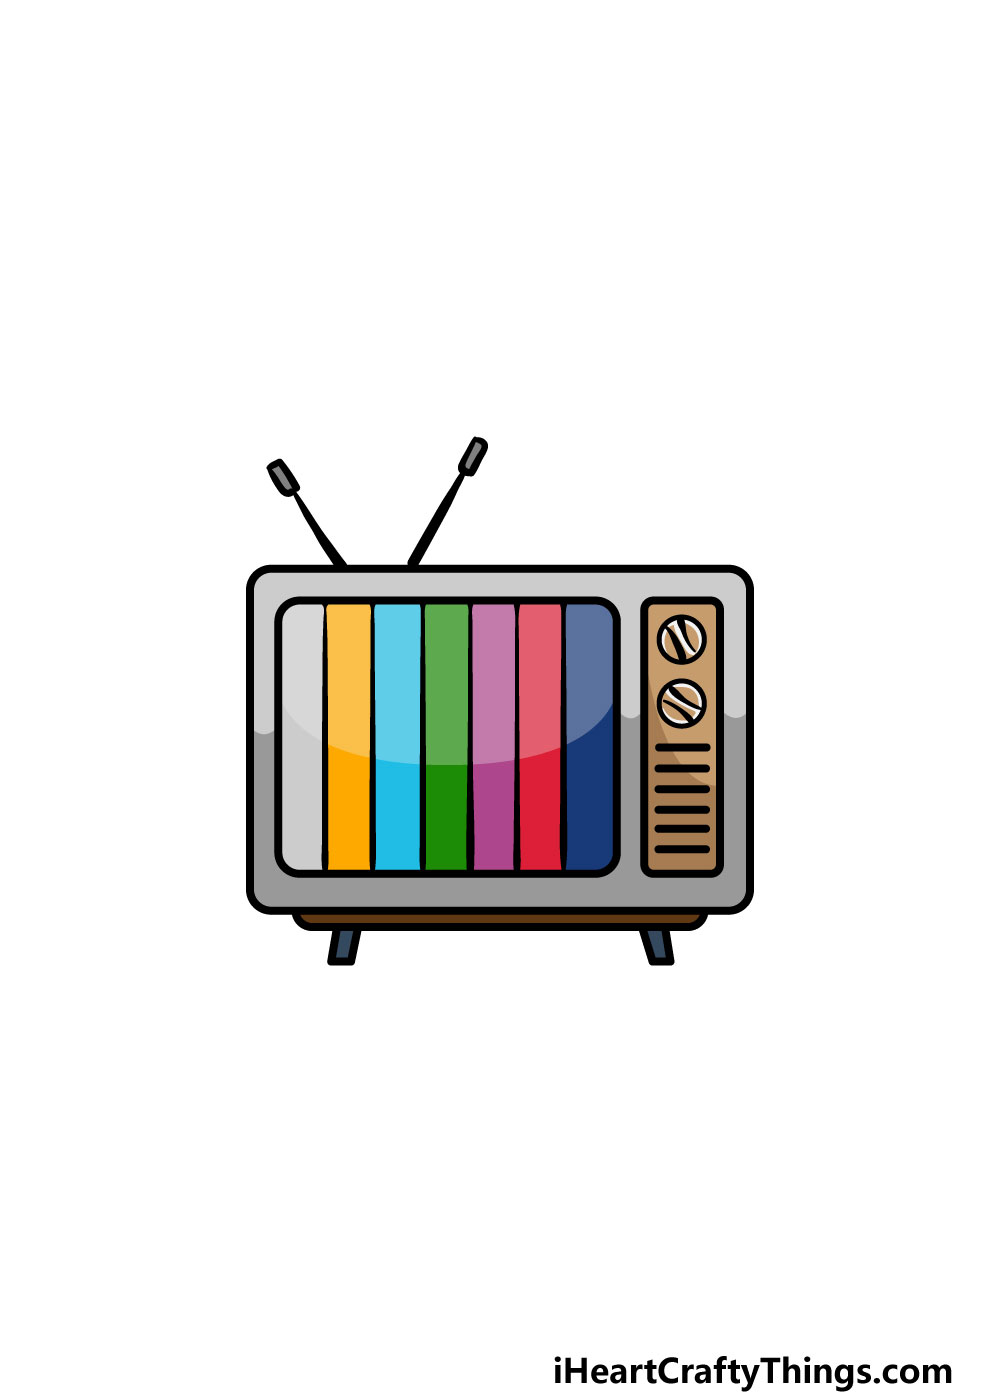
We are at the final step of this TV drawing, and now you can finish off with some incredible colors.
For our example, we used some more muted colors for the TV itself, but then used some bright colors for the color bars. You could go for a similar approach, but feel free to use any colors you want for it!
If you drew a different image on the screen, then you can also color in those aspects as well. What colors, art mediums and tools will you use to finish off this image?
Here’s how you can make your TV drawing even better…
Tune in for some fun and easy tips for making your TV sketch even better!
For this TV drawing we created together, we went with a design that is a bit old-fashioned. It does look cool, but TV’s come in many different forms these days.
You could easily change the design of this TV to match one that you know of. If you have a TV in your house, you could use that to help you as you change the design!
What kind of TV would you like to create?
You could also enhance this drawing of a TV by adding some objects around it to create a background setting. For some obvious ideas, you could add a TV cabinet or some coffee tables.
Once again, you could use your own living room in your house if you need some inspiration! You may be surprised by how much a few objects can create a complete background scene.
What kinds of additions do you think would finish off this TV room scene in style?
A TV is pretty useless if no one is there to watch it. For that reason, you may want to add some human characters to this TV sketch!
If you wanted to add some human characters, you could also draw them in any style you like. They could be lying on the floor watching the TV or maybe sitting on a sofa.
If you need some inspiration, you could use your own family as characters in this image. Who else could be watching this TV?
We filled the screen of this TV drawing with color bars, but you could take those out and add something else. There is so much that you can watch on TV these days, so you would have infinite options!
For example, maybe you could draw a scene from your favorite show or movie onto the screen. Or, you could create the logo of a show you would like to create.
These are a few ideas, but what else could be on the screen?
Your TV Drawing is Complete!
You have completed all six steps of this guide on how to draw a TV!
We hope that you had a lot of fun recreating this retro television set alongside us, and hopefully these simple steps made it not only fun but also really easy for you!
Now you can take this even further with your own details and elements. We mentioned a few ideas that you could go for like drawing something that you would be watching on the screen.
You could also change some of the details to make different kinds of TV sets that you may have seen before. Be sure to get creative and have fun with it!
When you’re ready for more, we have some awesome guides for you to enjoy on our website! We upload new ones often, so be sure to visit us there frequently to never miss out.
Once your TV drawing is complete, we would love to take a look at it! Please be sure to share it on our Facebook and Pinterest pages for us to enjoy.