


The Winnie the Pooh series in its various incarnations is beloved for many reasons. Perhaps the main one is the cast of varied and lovable characters, and there is a character to suit every personality and disposition.
The character of Tigger is one of Pooh’s best friends, and he is a happy, bubbly and optimistic character that always has a ton of energy.
For this reason, he is one of the most popular characters, and many fans like to show this by learning how to draw Tigger.
If you love the lovable stripy stuffed tiger, then you will have a great time with the tutorial we have planned for you.
This step-by-step guide on how to draw Tigger in 6 steps will show you how to recreate this classic character.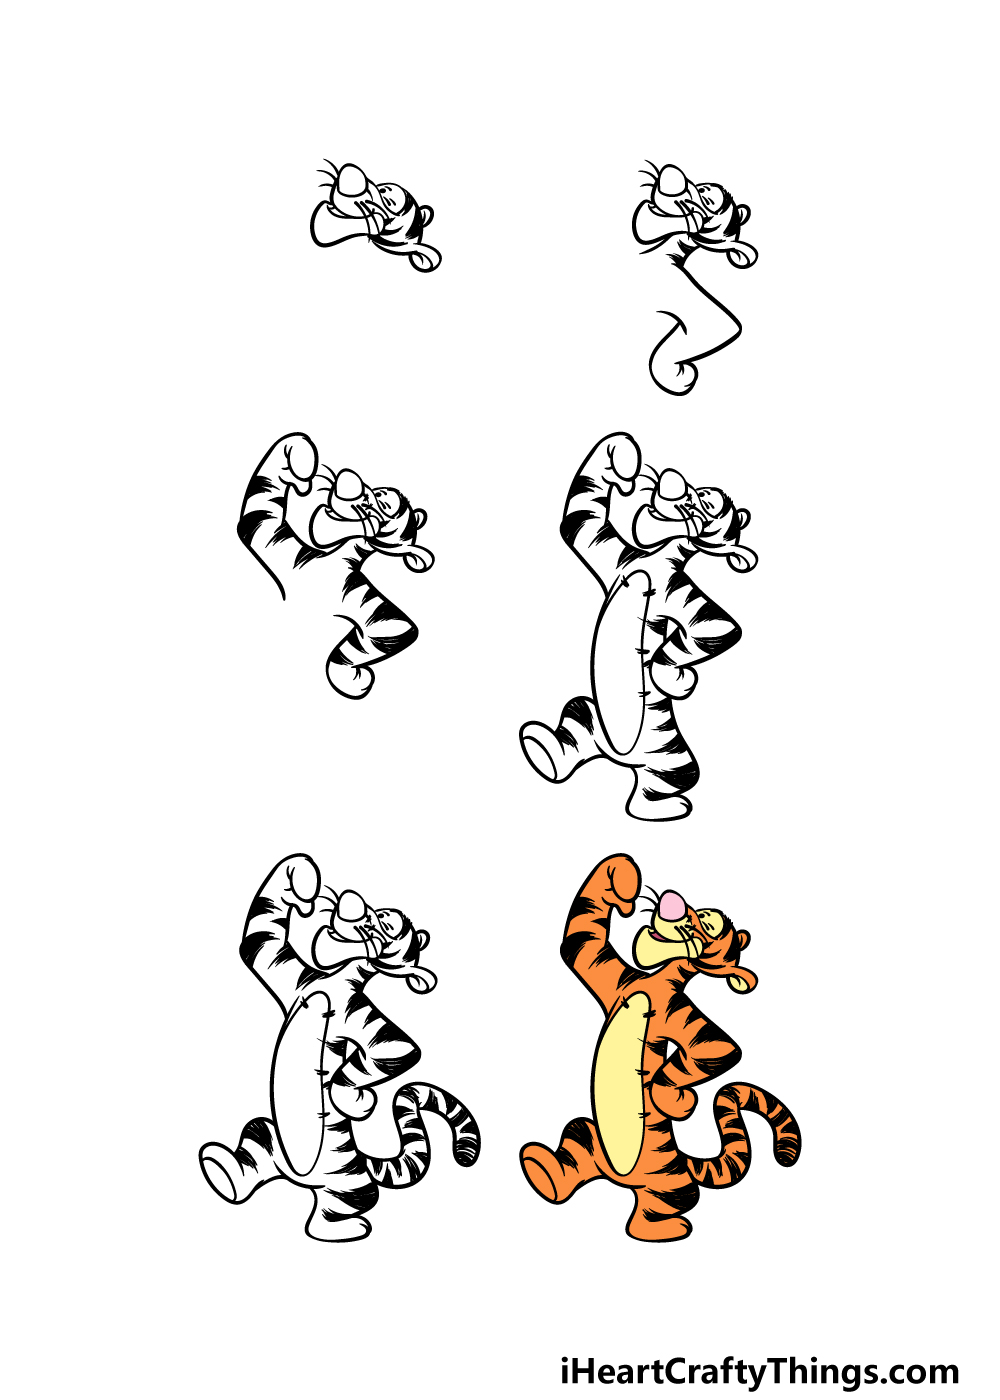
How to Draw Tigger – Let’s Get Started!
Step 1
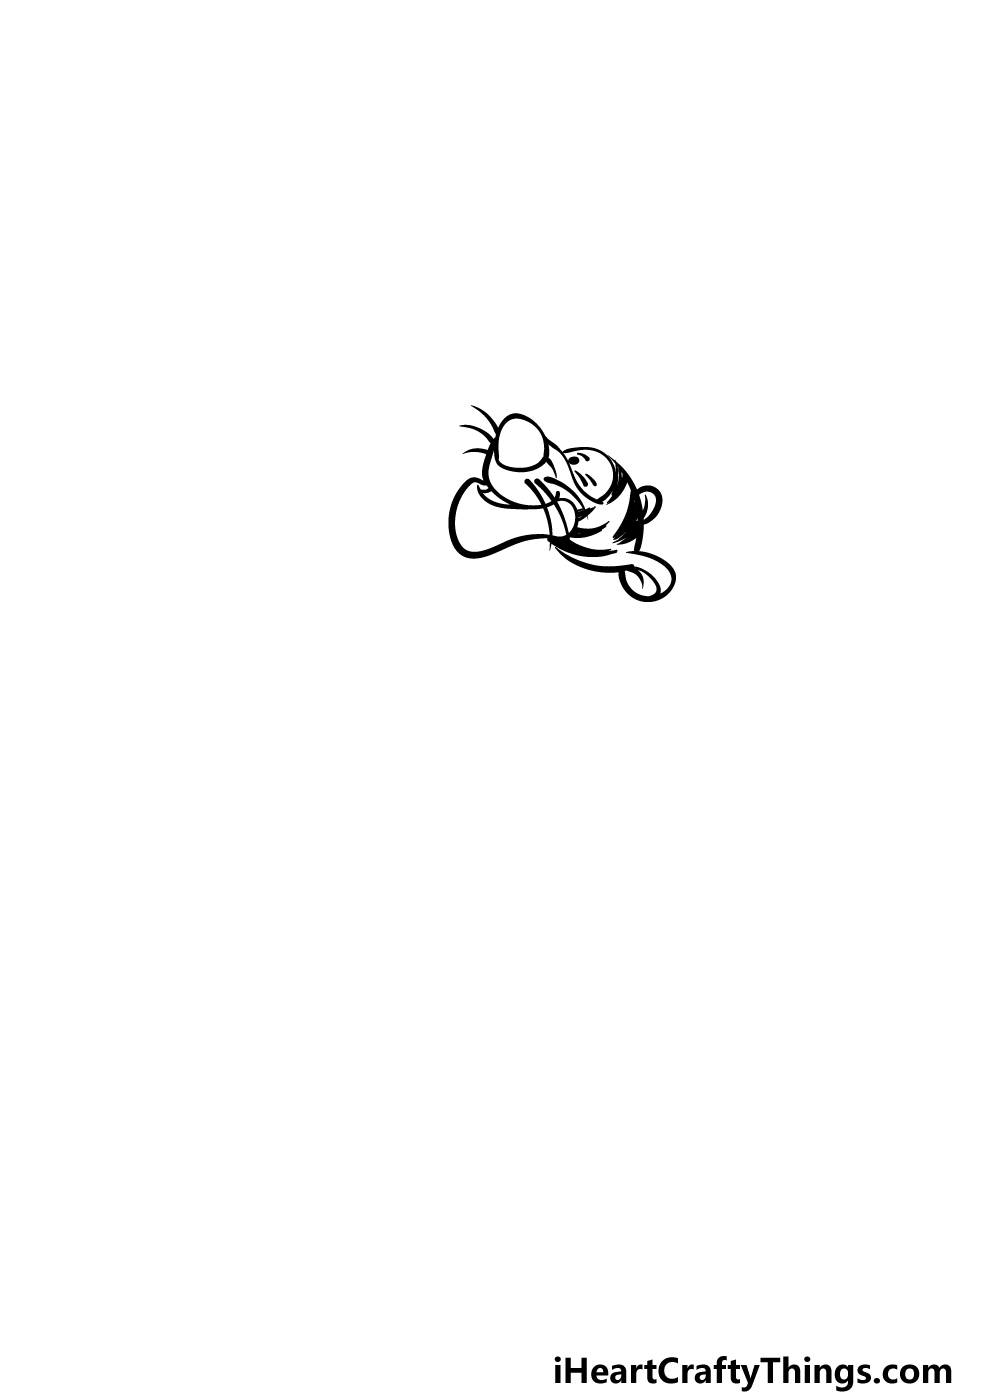
In this guide on how to draw Tigger, we will be drawing him in a vibrant, confident pose that represents his personality perfectly!
To get this process started, we will begin with his head and face. Start by drawing a large rounded triangular shape for his nose.
Then, use some curved and rounded lines to create his smiling mouth attached to the nose.
Next, we will draw his head outline attached to his nose and muzzle, and this will have his little round ears on it as well.
Draw some sharp black shapes for his stripes and then add his eyes, and then you can finish off by drawing some whiskers onto his muzzle.
That’s all there is to it with this step, and then we’re ready for step 2!
Step 2 – Now, add his neck and then draw his first arm
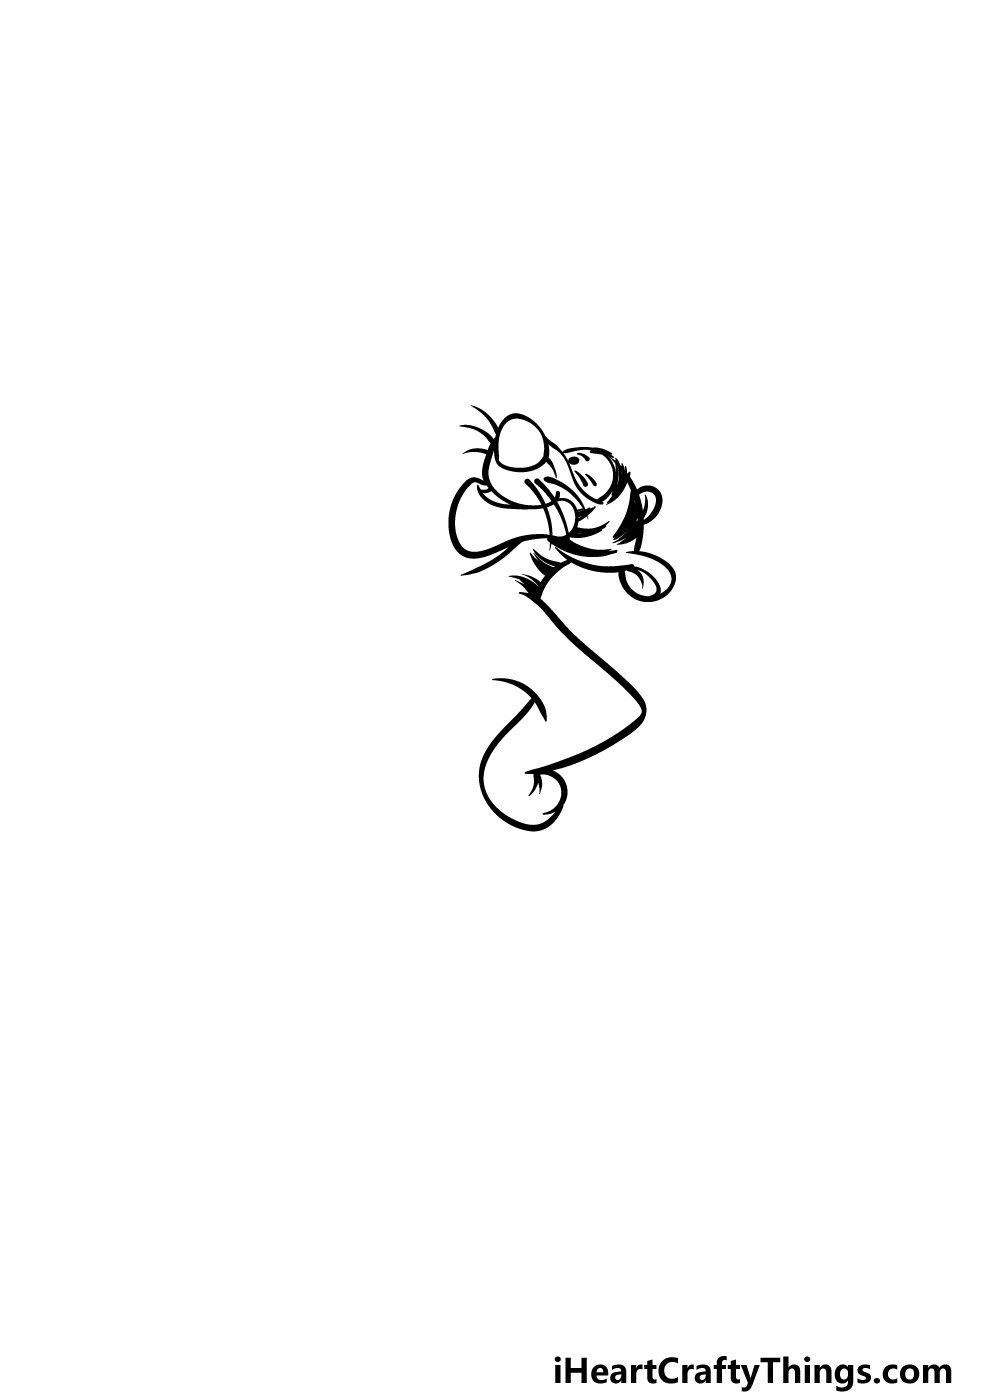
Continuing with your Tigger drawing, we will be drawing his neck and adding his first arm. For the neck, extend two small curved lines down from the bottom of his head.
His neck is fairly thin, and then his arm will connect directly to it. As shown in the reference image, this arm will jut out at an angle and will be bent downward.
Before you move on to the third step of the guide, you can also draw some more stripes onto his neck.
Step 3 – Next, draw another arm and add more stripes
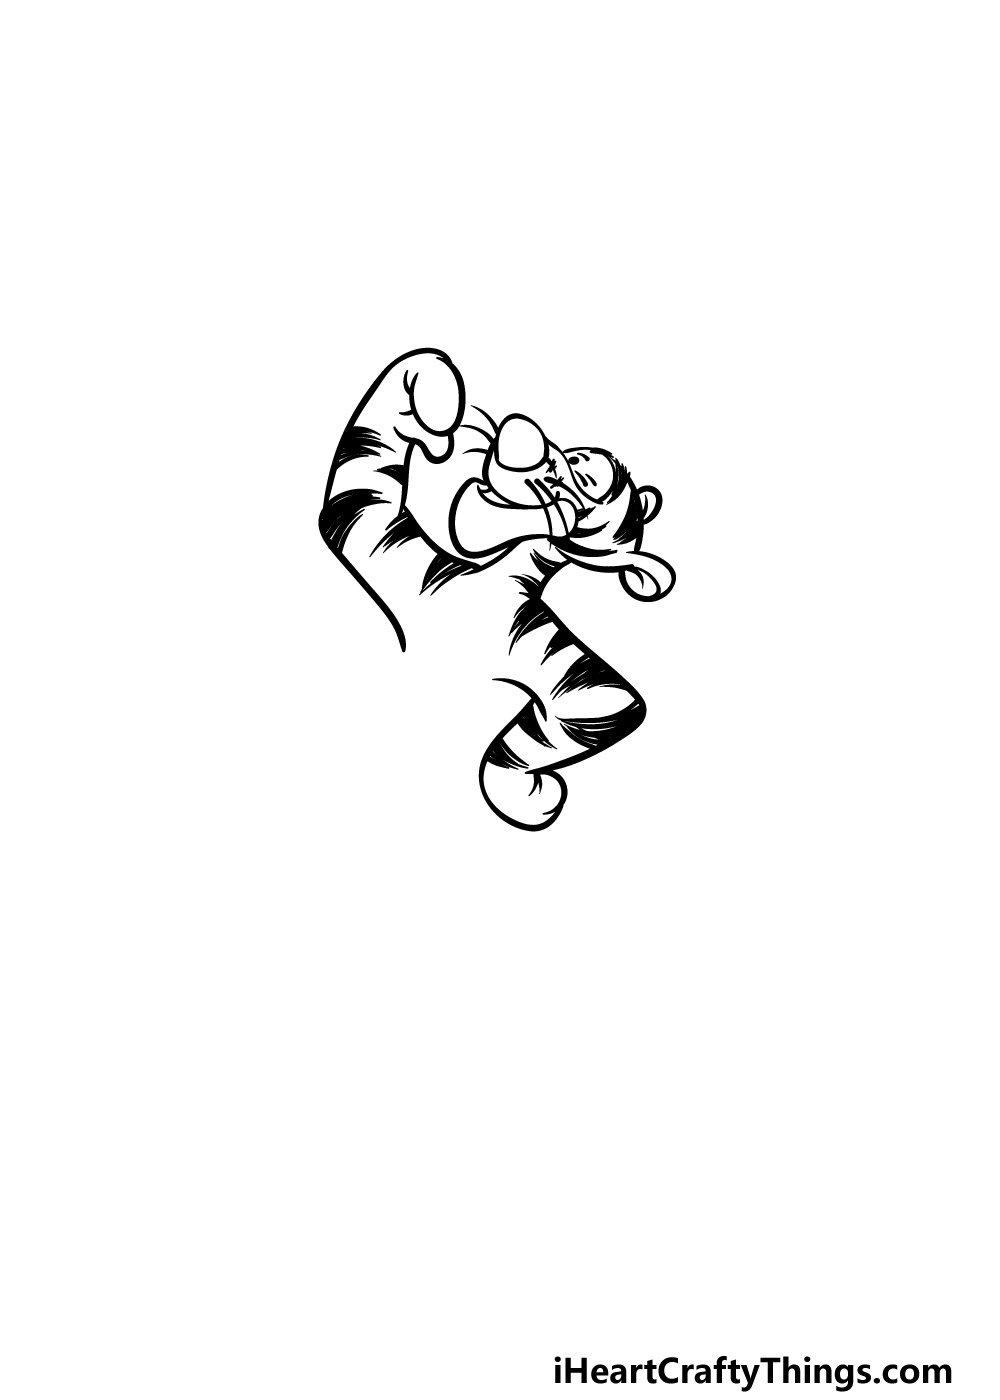
In this third step of our guide on how to draw Tigger, we will be adding another arm to his body.
We mentioned how we have Tigger in a confident pose in this guide, and the way that this arm is positioned will reinforce that.
This second arm will also connect directly to his neck, but this one will angle upward instead of down. The hand will also be closed, almost as if he were triumphantly punching the air.
Finally, to finish off this step we will draw more thick black lines close to one another to create some more thick stripes onto both of his arms.
You can also add some small stitching details onto his muzzle, and then we’re ready for step 4 of the guide.
Step 4 – Now, draw the rest of his body outline
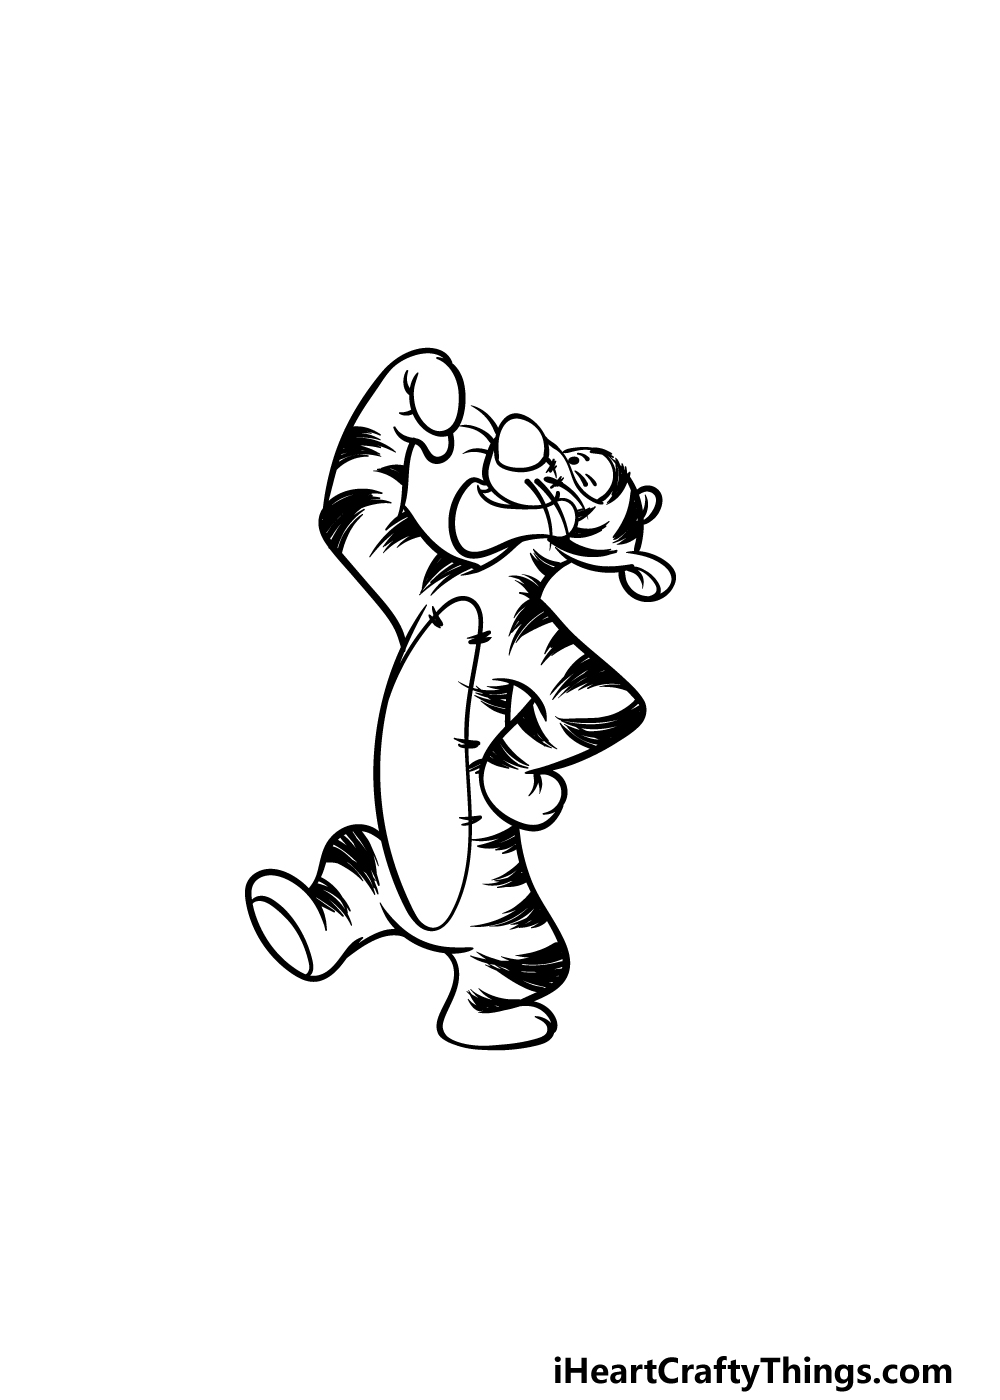
For this part of your Tigger drawing, we will be drawing the rest of the outline for his body. First, draw a long, large oval shape for the outline of his stomach.
This outline will also have little small lines drawn on it to show where it is stitched on. Then, draw some more curved lines around this belly section for his chest and back.
We will then draw his legs, and they will be fairly short. The first leg on the left will be raised up, whereas the other one will be the one that he’s standing on.
Before you move on, don’t forget to add some more stripes onto his back and legs.
Step 5 – Add the final details to your Tigger drawing
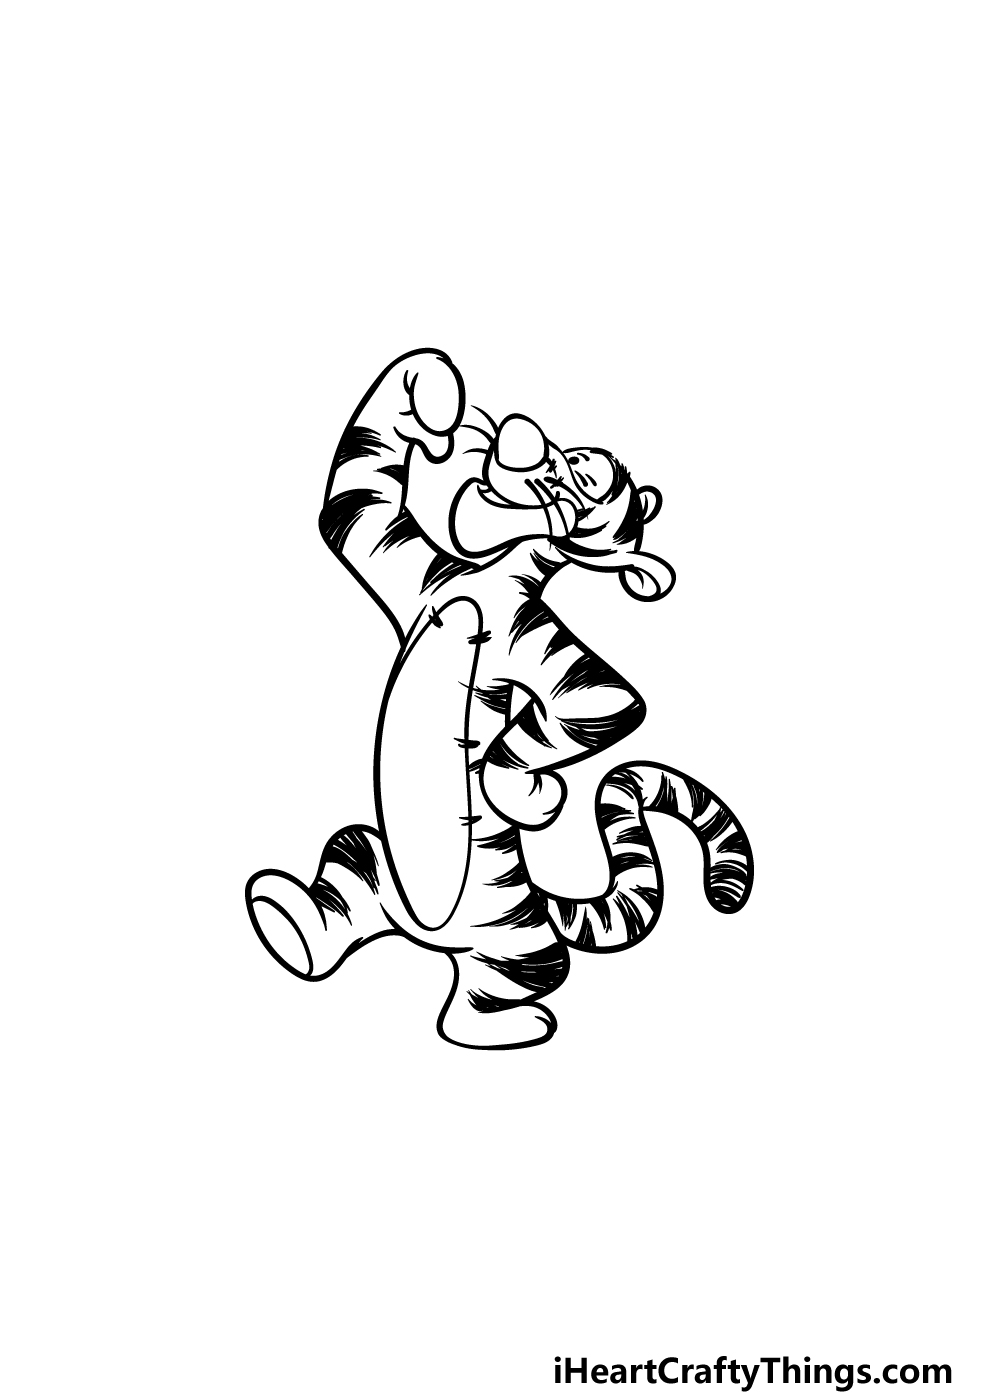
To finish off the picture, we shall add a tail to him before you finish off with some colors. This tail will be long and twisty, and it really helps to add to the personality of the image.
Once you have drawn this tail, be sure to add some more stripes onto it and color in the tip of the tail as well.
Once you have drawn the tail, your picture is ready for coloring! You don’t have to be done with it just yet, however. Before moving on, you could also add some details of your own.
One idea could be to draw a background, and if you did this then you could even draw some more characters from the Winnie the Pooh series. How will you finish off this picture before the final step?
Step 6 – Finish off your Tigger drawing with color
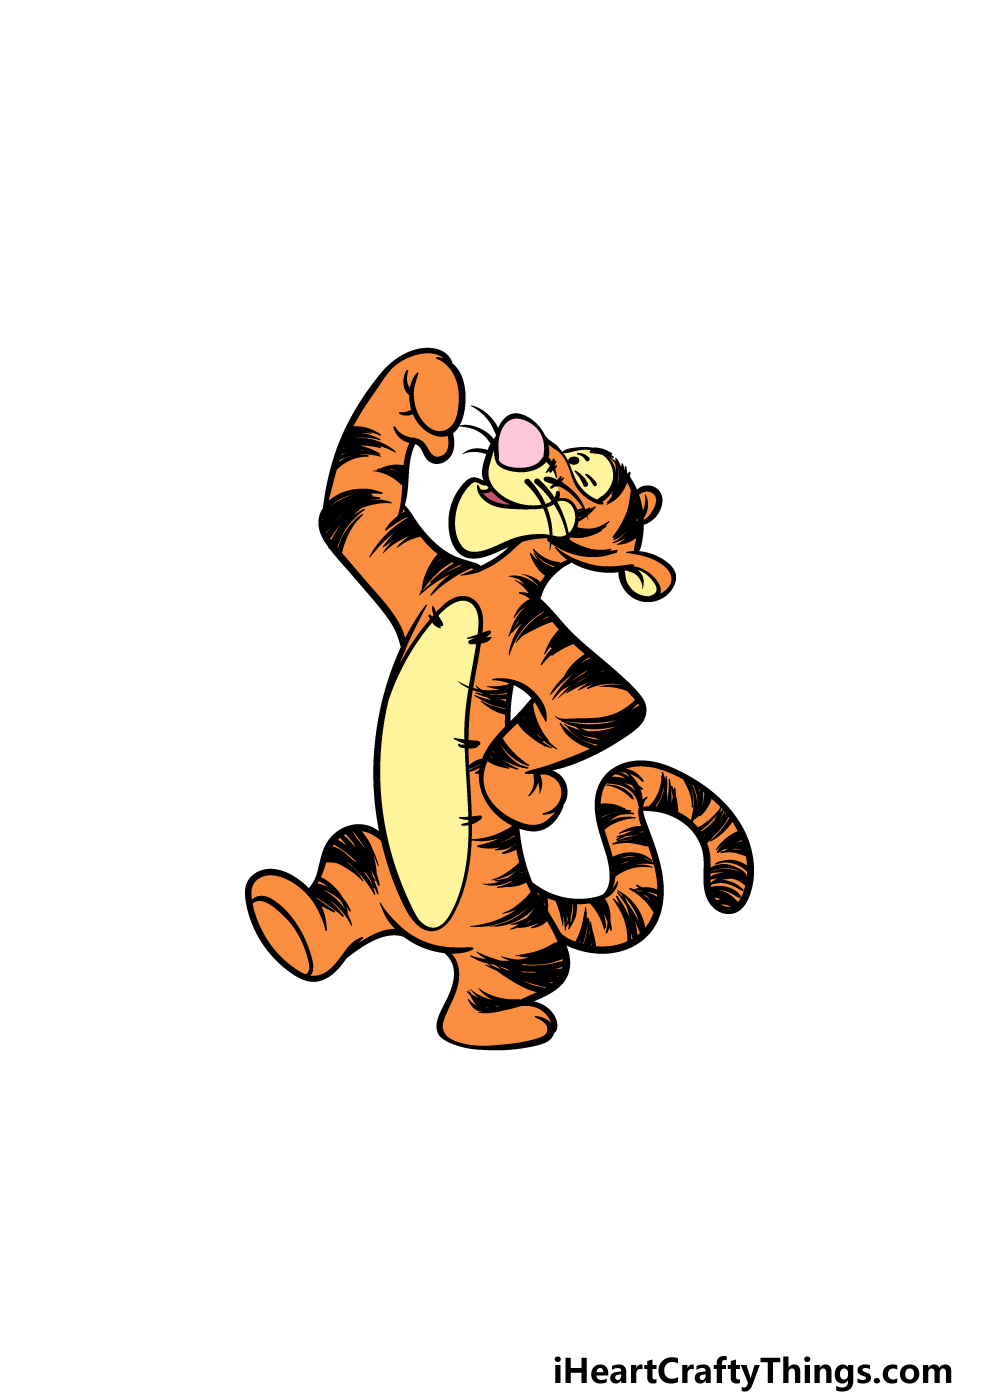
Now you’re ready to complete your Tigger drawing with some color!
Tigger is one of the most brightly colored characters out of all his friends, and we went with his typical coloring in our reference image.
That means that we used a yellow for the space around his eyes as well as some bright orange for the rest of his body.
If you would like to use the typical colors for him, then our image gives you a good blueprint to work from.
You can also experiment with your favorite art tools and mediums as you color, as this is a great way to bring some variety to the colors you choose. Have fun getting creative and see what happens!
5 Tips To Make Your Tigger Drawing Even Better!
These tips for your Tigger sketch are sure to make you jump for joy!
This drawing of Tigger that we created in this guide shows him in a fun, relaxed pose. It’s a great look for him, but you could also portray him in all manner of different poses!
One classic pose for Tigger would be to show him jumping on his tail as if it were a big spring. Or, you could show something else that is simple like him running or pouncing.
Tigger has many friends that he joins on adventures, and these would be perfect to add to your drawing! Winnie the Pooh would be a perfect choice, seeing as he is the main character.
Other characters like Piglet, Owl, Kanga and Roo would also be great additions to the image. Which other favorite characters could you add to the image?
If you wish to populate your Tigger drawing with other characters, you don’t have to stick to characters from the Winnie the Pooh series. It could be fun to add some characters from other series that you love!
These could be other animated Disney characters, or you could even go for characters from video games or other media. This would be a fun way to really get creative!
Another way to make this drawing more complete would be by adding a background. The Winnie the Pooh stories have many memorable environments and locations, and any of them would be great as a background.
You don’t have to stick to established locations, however! For example, you could show what it would look like if Tigger were to visit your house.
The version of this character that we created for this Tigger sketch is based on how he appears in the Disney movies and cartoons. In the original Winnie the Pooh books, he has a very different look.
It would be fun to show where Tigger started by adding this older version of him to the image! You can look up pictures to help you draw the comparison.
Your Tigger Drawing is Complete!
You have completed all of the steps in this guide on how to draw Tigger, and you should be very proud of the incredible drawing you have ended up with!
Drawing classic characters like this can often be harder than expected, so we hope that this guide helped to make it fun and easy for you.
Be sure to keep it going by also adding your own ideas, color and art medium choices. There are lots of ways to do this, so let your creativity flow and see what happens!
Our website is full of many more drawing guides for you to enjoy, so be sure to visit us there! We have more on the way soon, so checking in often is the best way to never miss out.
We would be thrilled to see your Tigger drawing, so when it’s done please share it on our Facebook and Pinterest pages for us to enjoy.