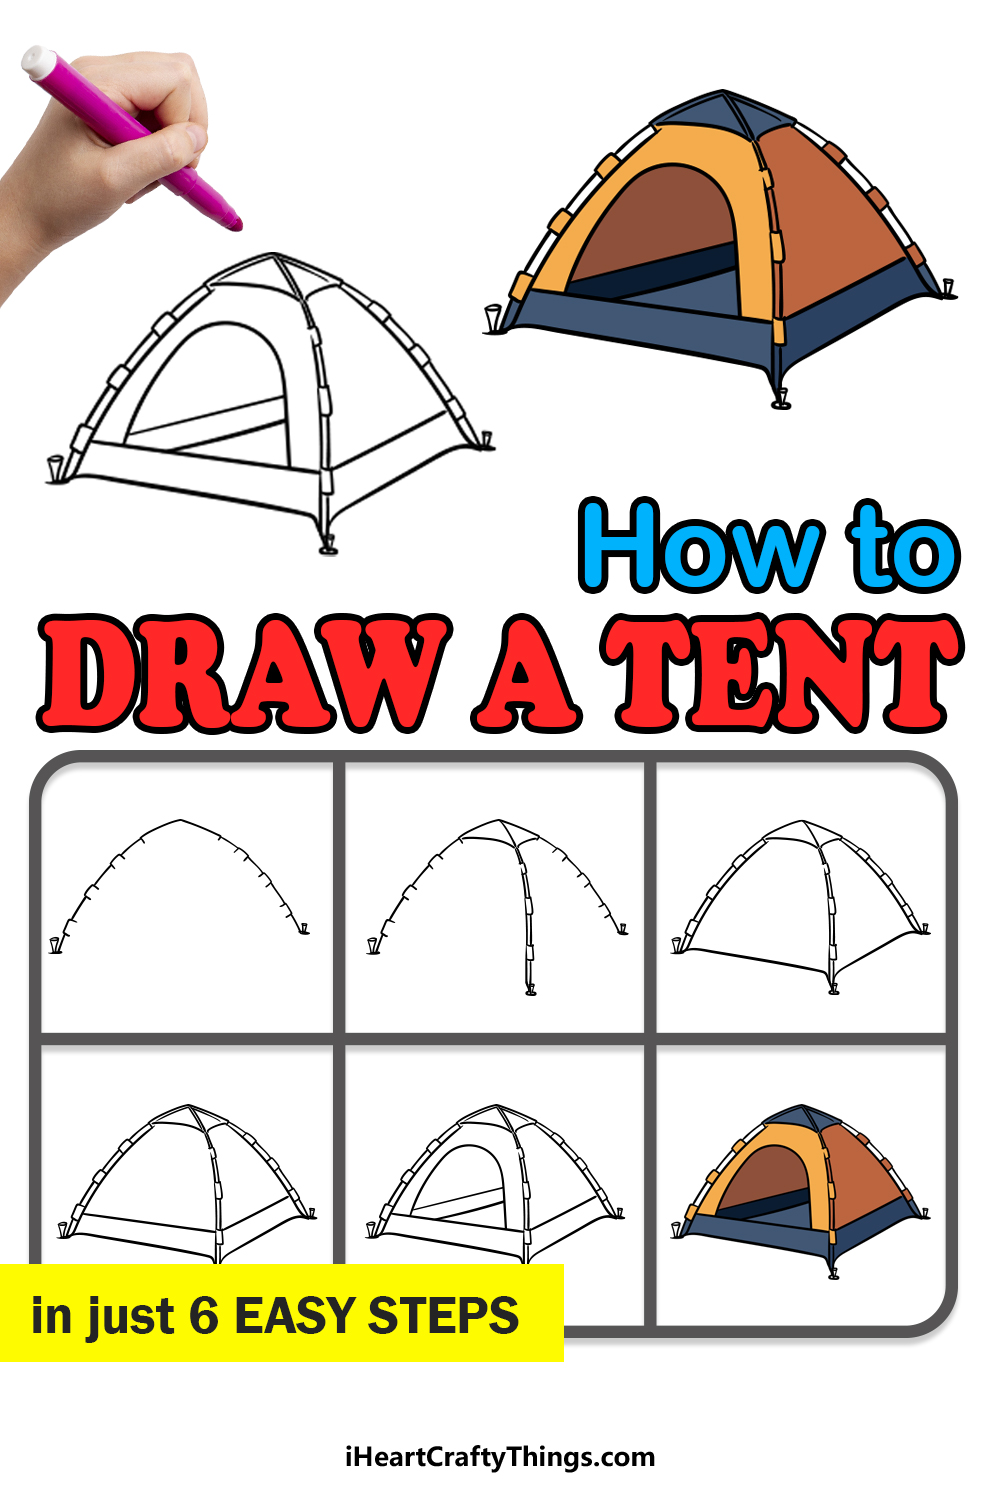
Sometimes it can be great to venture out into the great outdoors and get away from it all with some camping fun!
If you are planning to do that, then a tent will be the most valuable tool that you can bring along. This mini home away from home can help to protect you from the elements, wild creatures or the mythical Bigfoot!
While camping can be lots of fun, it’s also a great time to design your own tents, and learning how to draw a tent is very helpful for this.
We hope that you have a ton of fun doing just that in this step-by-step guide on how to draw a tent!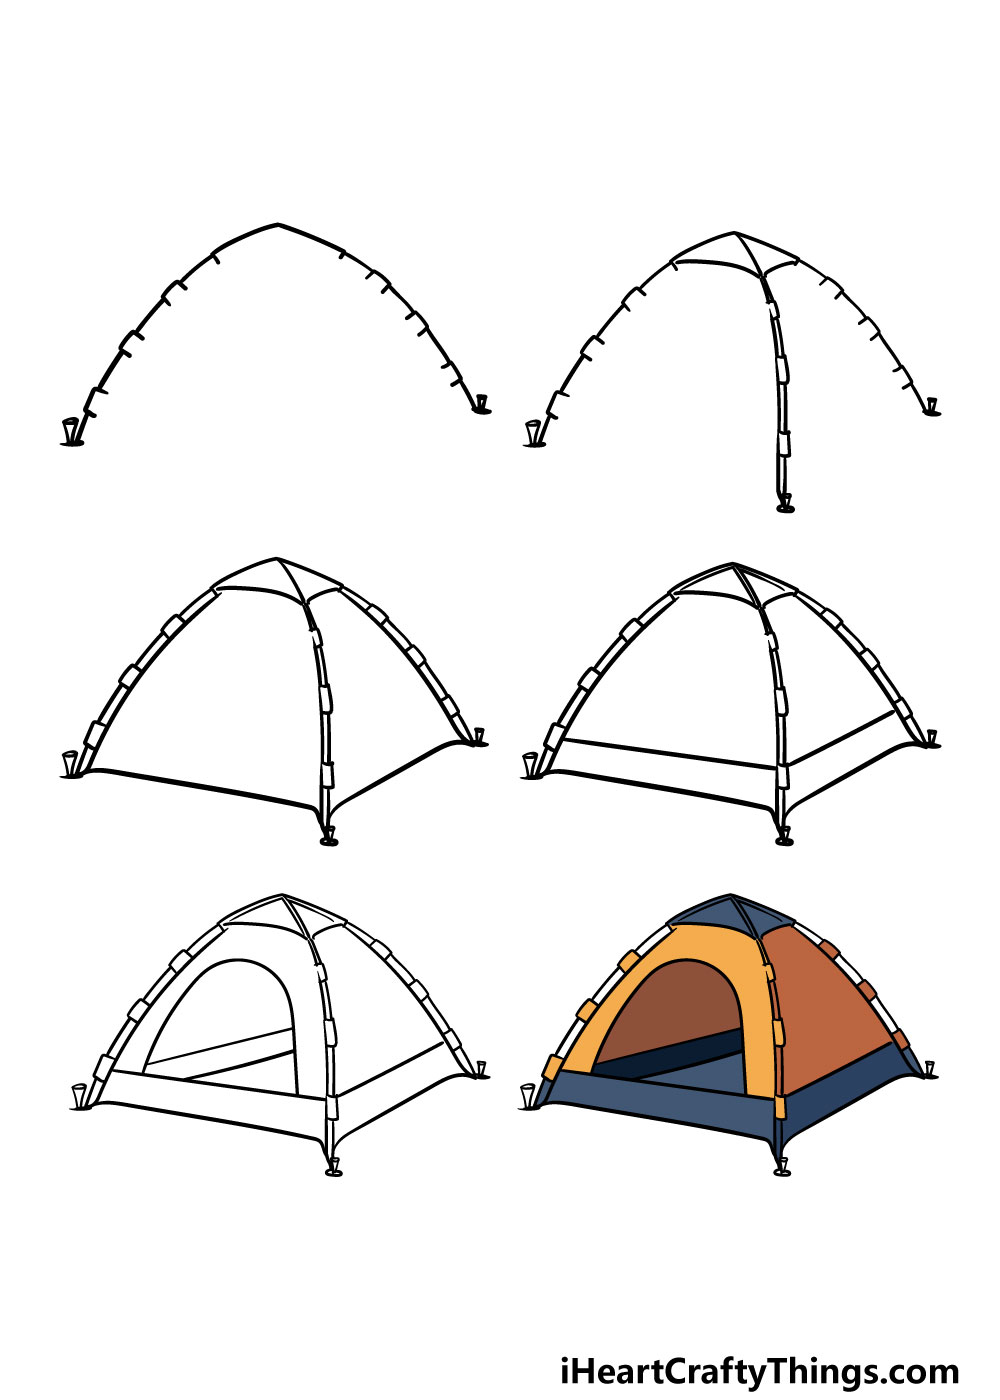
How to Draw A Tent – Let’s Get Started!
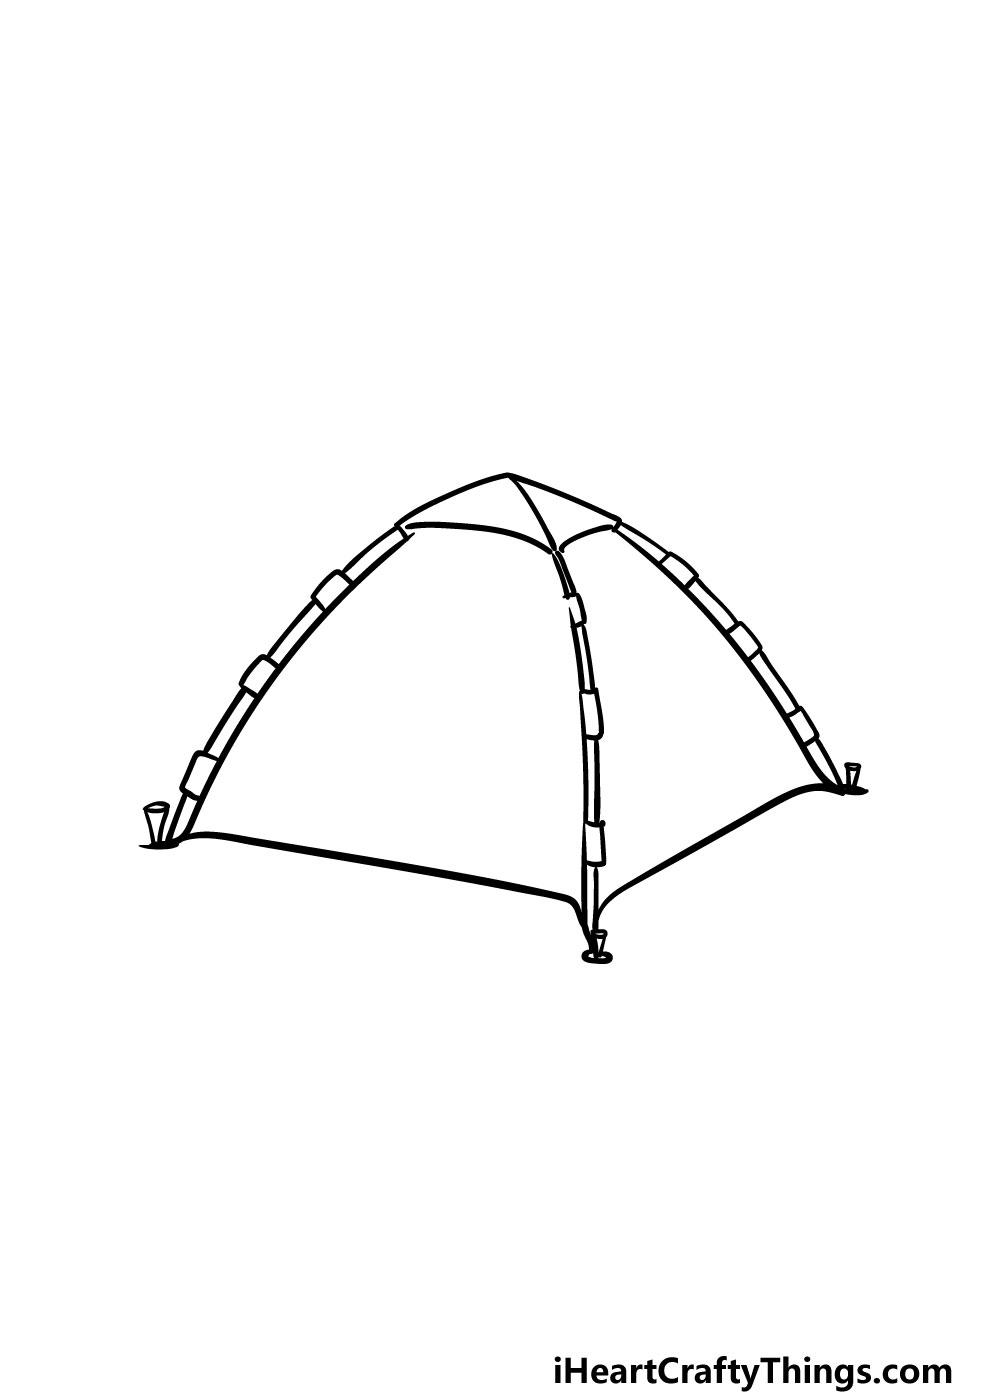
Step 1
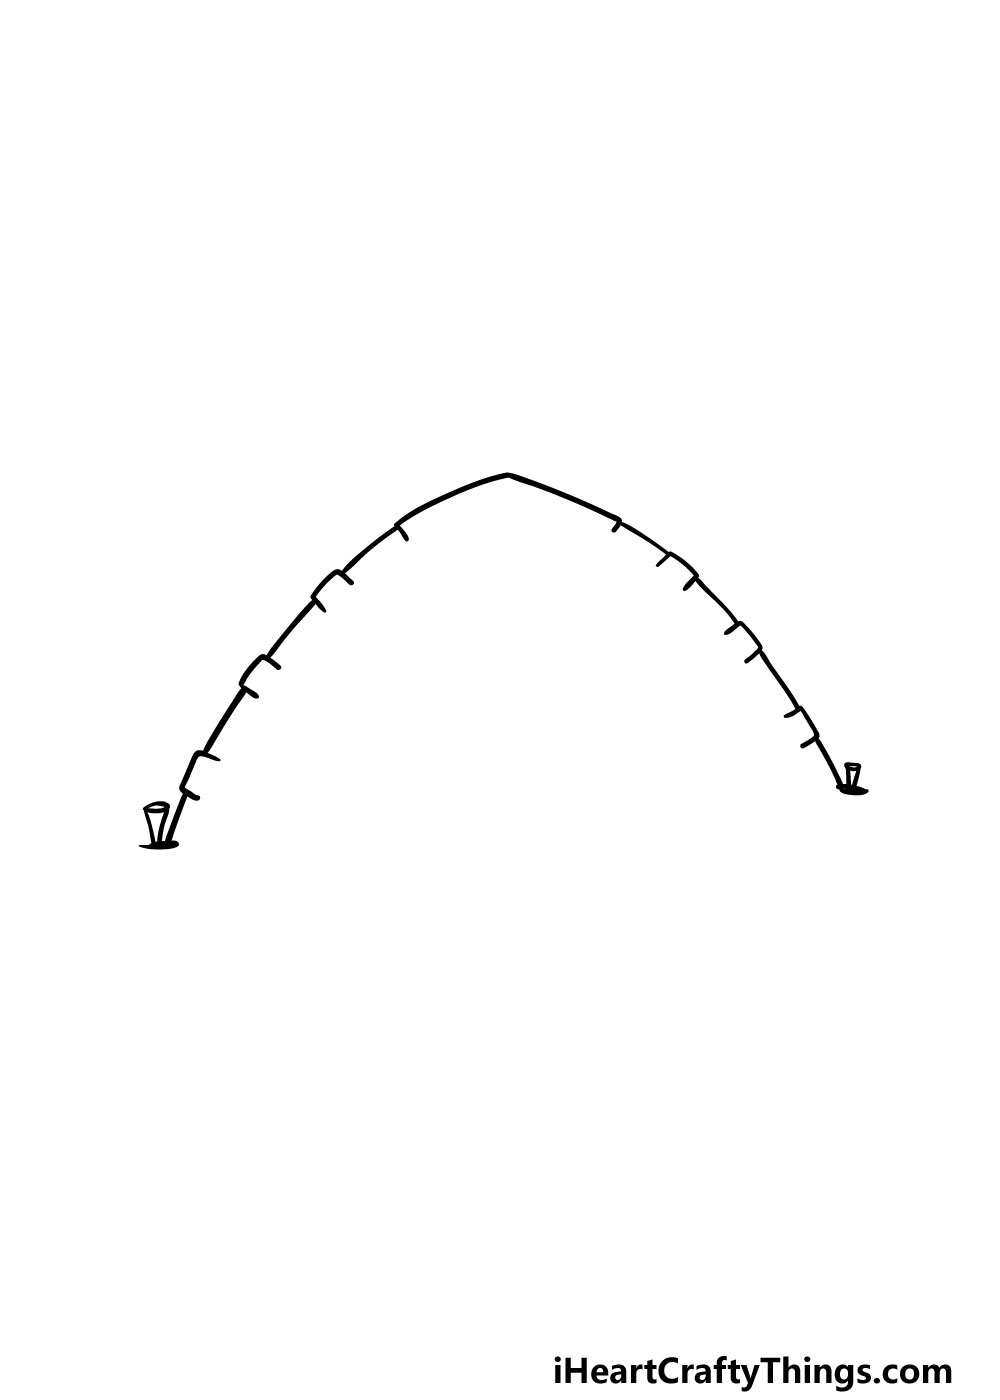
We will be drawing the top f the outline for your drawing in this first step of our guide on how to draw a tent.
The outline will be sharply curved, and instead of a smooth line it will have a few square shapes throughout it, as shown in the reference image.
These will show where the tent is connected to the support poles.
Finally, there will be a thin peg at the corner of each side of the tent. That’s all you need to do for now, and you’re ready to move on!
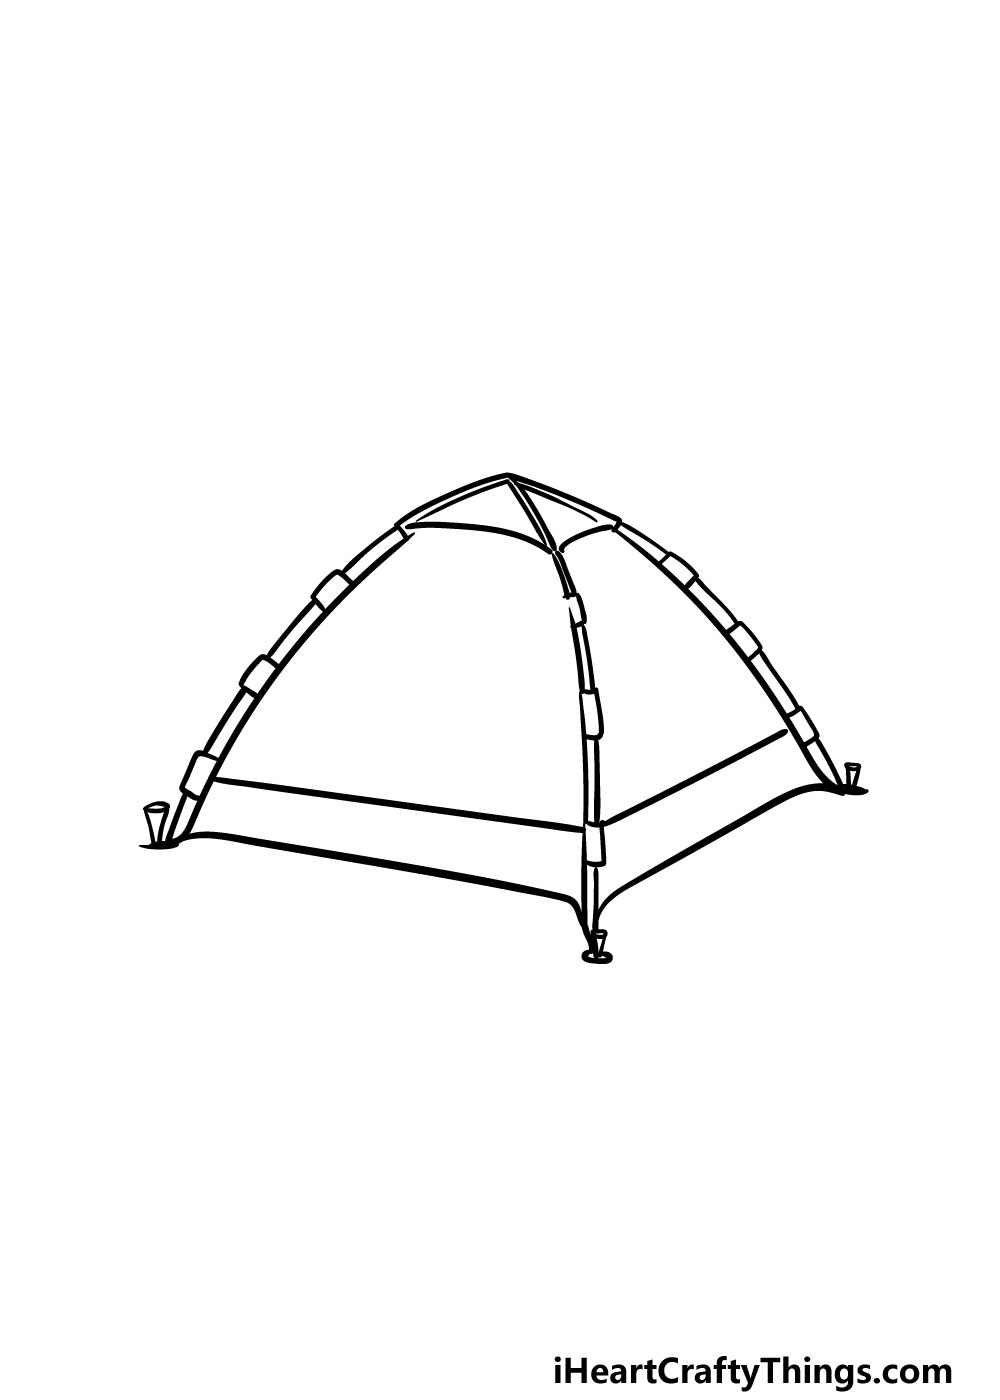
Step 2 – Draw another pole for the tent
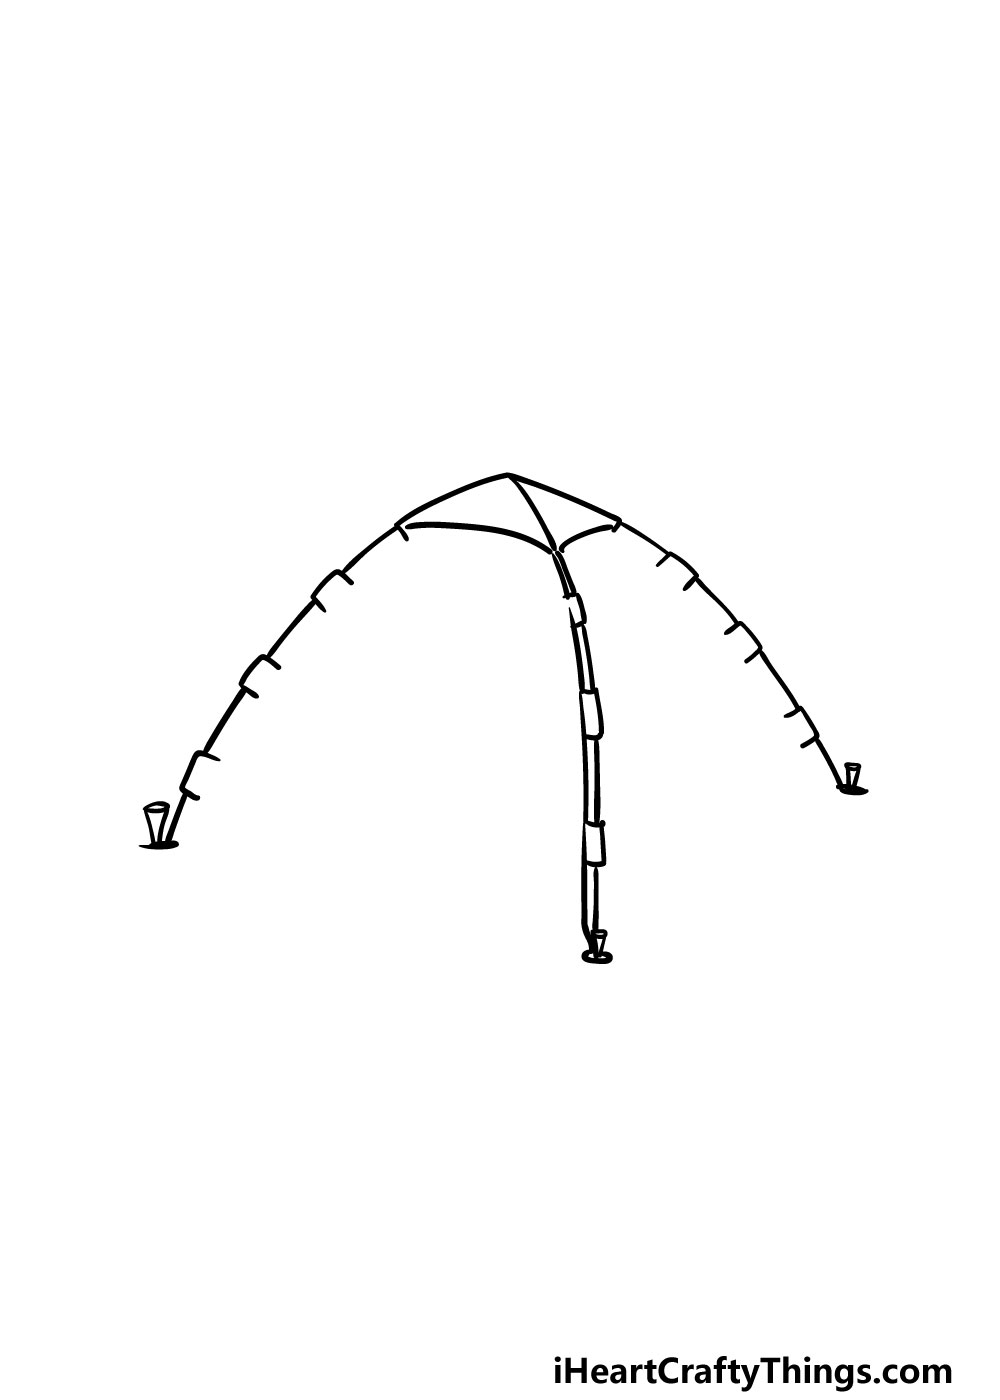
In this step of your tent drawing, we will be drawing another pole for it. This one will be going between the other two, down the center of the tent.
This pole will be drawn with a similar line to the ones that you used on the other ones, and will go nearer to the center.
There will also be a somewhat pyramid-like shape drawn with some straight lines at the tip of the tent.
Step 3 – Draw some more of the tent outline
For this third part of our guide on how to draw a tent, we will be adding more to the outline of the tent.
For the sides, use some smooth lines close to the more jagged ones that you drew for the poles earlier.
Finally, use some more smooth lines for the base of the tent before you move on to step 4.
Step 4 – Add some more detail to the tent
The next few steps f your tent drawing will be all about adding the final details to your picture before you color it in.
The details in this fourth step will be simple ones, yet they will be quite effective as well.
First, draw some more straight lines near the base of the tent. Then, you can draw some more inside the tip of the tent that you drew in a previous step.
With these lines drawn, you’ll be ready to add the final details in the next step, so let’s move on!
Step 5 – Now, you can add some final details for your tent drawing
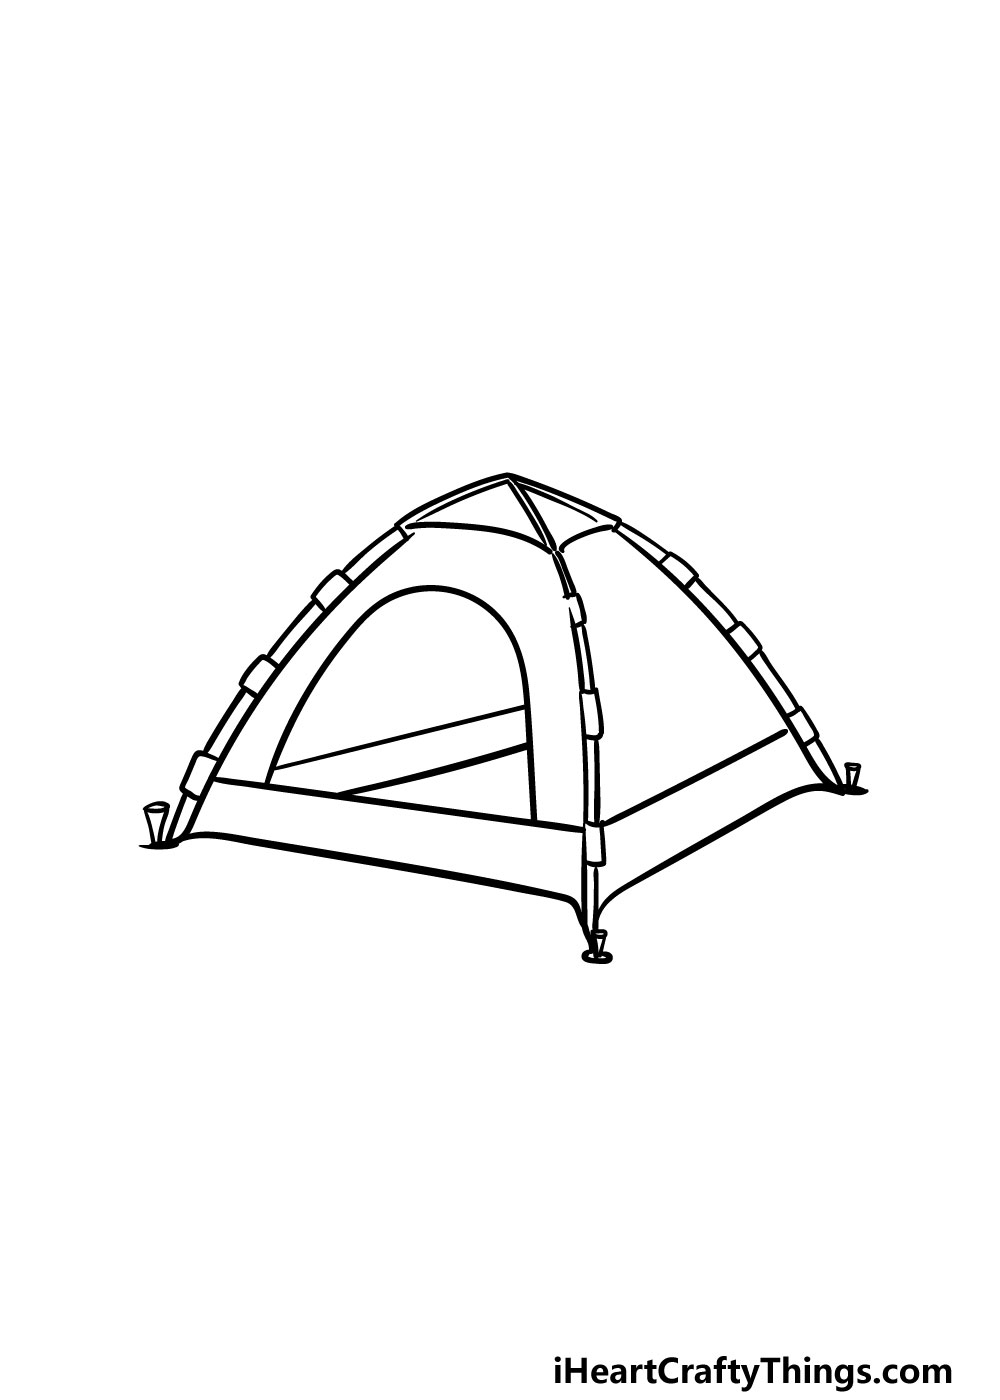
It wouldn’t be a very effective tent without a doorway, so we shall add one now in this step of our guide on how to draw a tent.
To draw the outline of the tent, you can use a rounded line from near the base of it. Then, you can use some straight lines inside of it to show the interior of the tent.
Once you have these details done, you’re ready for the final step! Before you move on, you could also have some fun adding your own elements as well.
Perhaps you could draw a background to show where this tent is pitched. Maybe there could be some woods in the background, with a cozy campfire at the entrance.
This is your chance to get creative with it and show where your ideal camping location would be! What kinds of final touches will you add to your awesome tent drawing?
Step 6 – Finish off your tent drawing with some color
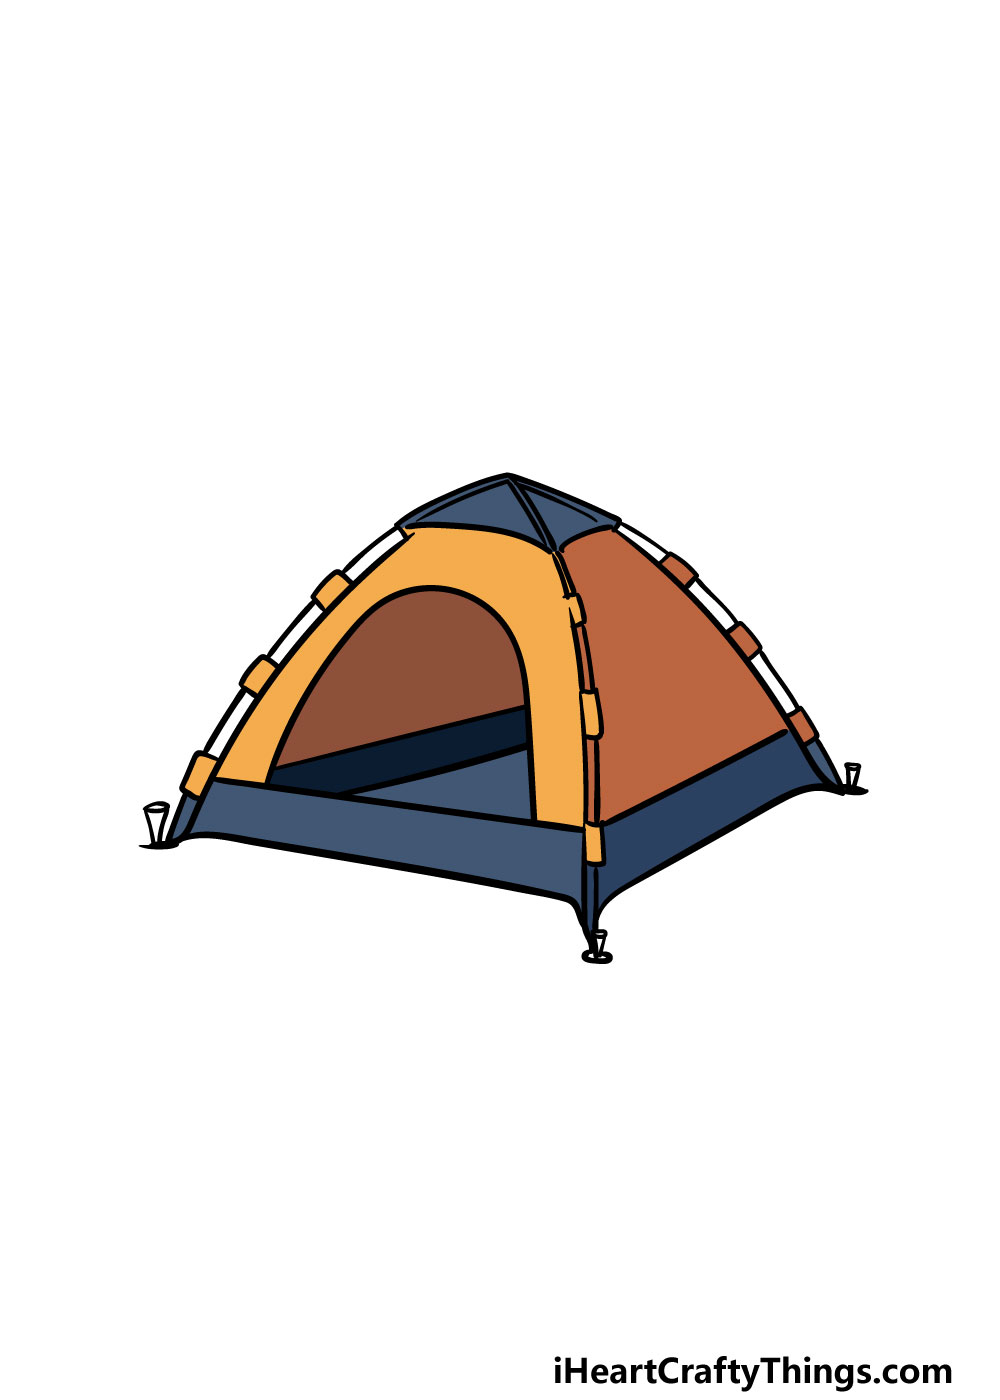
In this final step of your tent drawing, you will get to have some fun bringing some amazing colors to your picture.
For our example, we used some shades of orange and blue to fill it in, and while you could replicate this look you can also go for your own color schemes as well!
Tents come in a huge range of different colors and designs, so this is your chance to use your favorite patterns and colors to create your perfect tent.
If you drew any extra elements such as a background or other camping props, then you can have some fun coloring those too.
It’s also a lot of fun to play around with different art mediums, and you can achieve a wide variety of different looks and styles depending on what you use.
For instance, if you want a more muted look, then you can use more subdued mediums such as colored pencils or watercolors.
For a brighter appearance, you could try some markers or colored pens. You don’t have to stick to just one approach, and it can be great to mix contrasting colors and mediums for an image that pops!
3 More tips to make your tent drawing easy!
Make this tent sketch as relaxing as a camping trip with these 3 tips!
Showing perspective can be a difficult part of any drawing, and this drawing of a tent shows some with the open door.
It may seem like a small detail, but portraying the interior space can be trickier than expected.
If you are having a hard time with this aspect, you can make it easier on yourself by having the tent door closed.
This small change can make it so much easier, as you won’t need to depict the interior of the tent
It is one example of how a small change can make a big difference, so if there are other aspects that you struggle with then those can be changed as well!
The tent drawing we created in this guide is a classic design that you would see in many camping sites.
It is not a particularly complicated design, but you could also play around with making the design simpler.
This could be smaller detail changes such as the supports of the tent. Or, you could go for an entirely new tent design, perhaps a simpler triangular design.
You could look up different tent designs to find some that you may personally find easier. This would also allow you to make some variations with different tents!
Finally, your tent sketch could be made a bit easier by incorporating it into a larger image. This may seem counter-intuitive, but the bigger you make the scene the less the focus will purely be on the tent.
For example, you could draw a larger camp scene with trees and maybe a camp-fire. This would mean that the tent would be a smaller aspect of the image.
That would require less detail than it would if it were the sole focus of the image. You could also focus on additions that you feel comfortable drawing.
Going with this approach would also have the added benefit of creating a new and more realized camping setting!
Your Tent Drawing is Complete!
That brings you to the end of this guide on how to draw a tent! You did a great job on this picture, and you should be very proud of the end result!
Our aim with this guide was to make doing this drawing not only much easier but also more fun. Hopefully we achieved both of those goals for you as you worked with us on this picture.
As we mentioned in previous steps, there are lots of ways that you can keep the fun going with this image! Drawing a background or some extra elements for the setting can be a great way to personalize the image.
You can also get some great variety by experimenting with your colors and art mediums to get some great colors for your picture.
We also have a website full of incredible drawing guides for you to enjoy! We also upload new guides all the time, so you’ll want to visit often to make sure that you never miss out on the fun.
When you have completed your tent drawing, we would really love to see it! We hope that you will share it on our Facebook and Pinterest pages for us to admire!