What Kindergartner teacher wouldn’t love this, right? It was so simple to make.
1. Cut out two 6″ red circles and one 3″ black circle. I didn’t have any black paper so we just used a sharpie to make it black. The easiest way I found to make the 6″ circles was to fold a red piece of cardstock in half and then trace the half circle of a 6″ protractor. After cutting out the half circle and unfolding it, it was a perfect circle and perfect size. I’m sure you can just freehand it or print one off the computer.
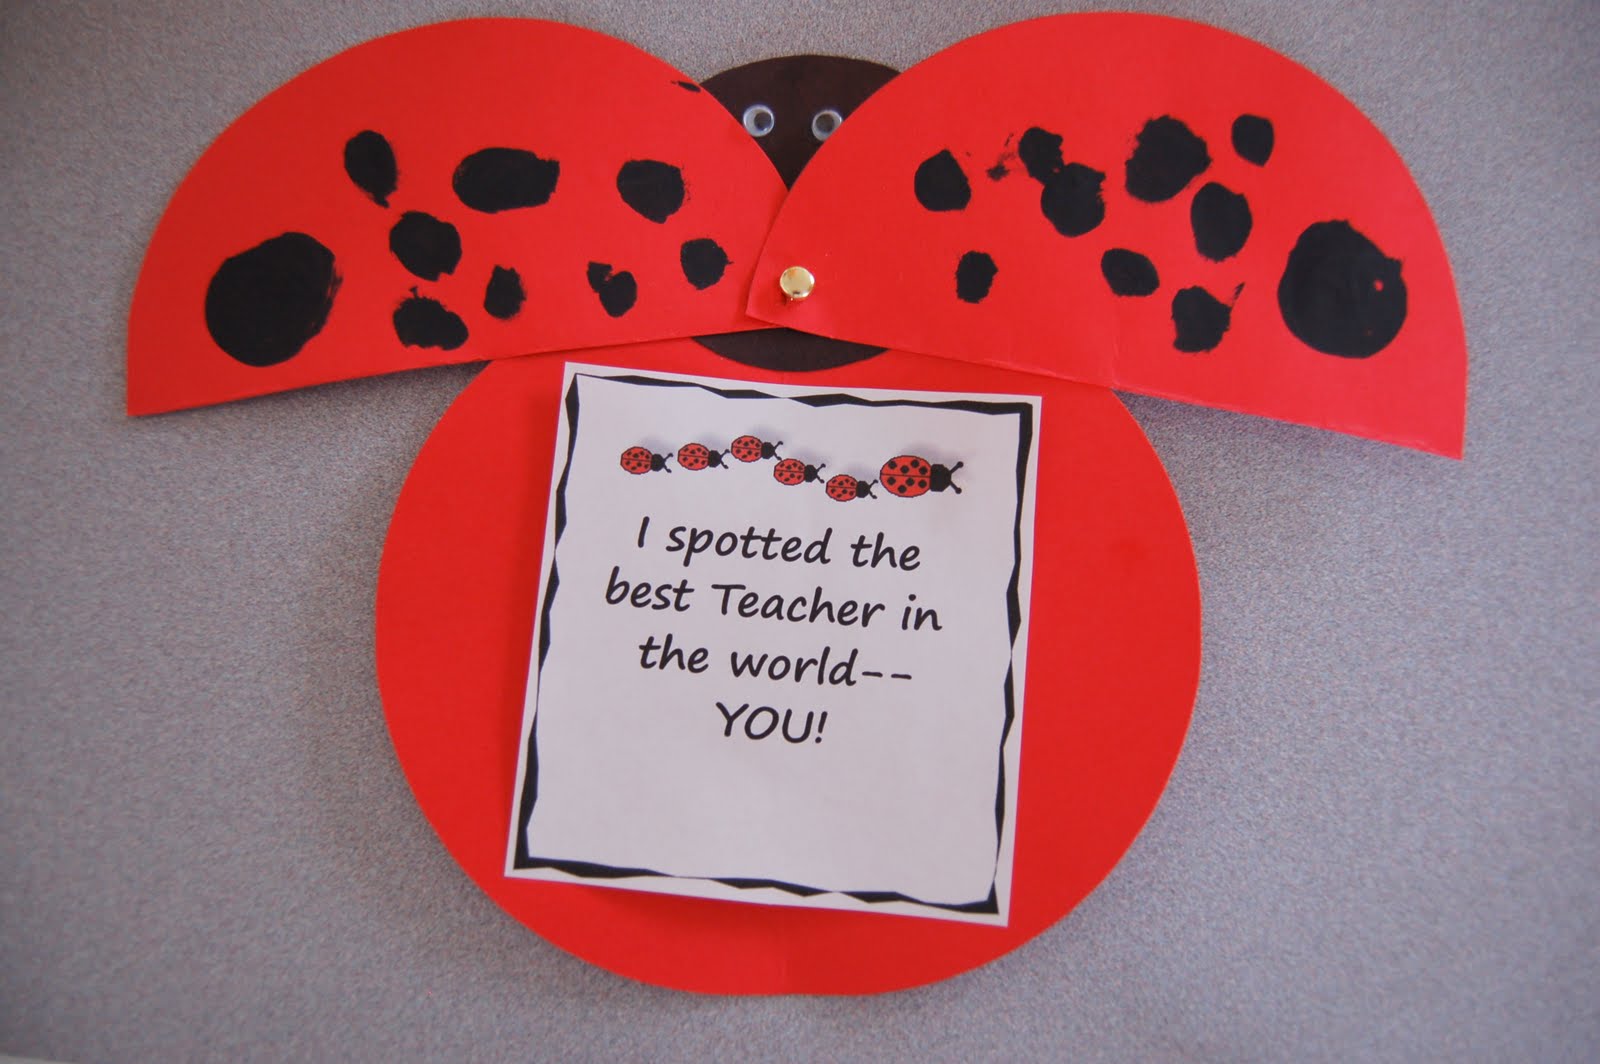
2. Take one of the 6″ red circle and have your child paint black spots on it. After the paint has dried, fold the circle in half and cut it in half to make the lady bug wings.
3. Glue the 3″ black circle onto the 6″ red circle to make the lady bug head.
4. Assemble the lady bug wings to the body with a brad so they open and close easily. You can also glue wiggly eyes to the lady bug head like we did.
5. I made and printed out the message in the middle from my computer, but you could also just write it on there with marker. Glue the message to the body of the lady bug under the wings.
6. Have your child sign the bottom of the message, and there you have it! A simple, inexpensive teacher appreciation craft.