Truth be told, I HATE spiders!! Even the thought of them makes the hairs on my arms raise in alarm…Yes, I am that terrified! But despite my fears, I simply couldn’t resist the book “The Very Busy Spider” by Eric Carle.
One of the highlights of this book is that the spider web throughout the book is made with raised paint so you can actually “feel” it. The boys had fun feeling the spider web on every single page as we read the story.
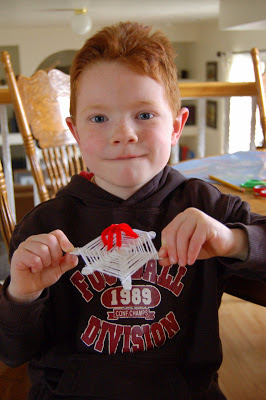
We thought it would be super fun to make our own beautiful spider web and spider, so this is what we came up with:
Materials you need:
– 3 craft popsicle sticks
– hot glue gun
– white paint
– paint brush (we used the foam kind but any will work)
– white yarn
– 1 pipe cleaner (color of your choice)
– scissors
Directions:
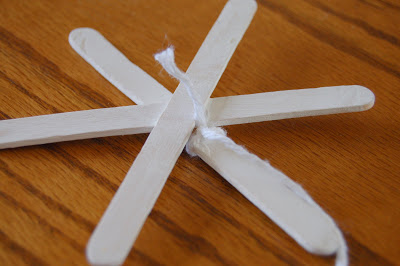
1. Use the hot glue gun to glue the craft sticks together in a criss cross pattern. This obviously needs to be done by an adult. I used the hot glue gun because it dries so quickly but you could use a different type of glue if you choose.
2. Paint the assembled craft sticks with white paint and let dry.
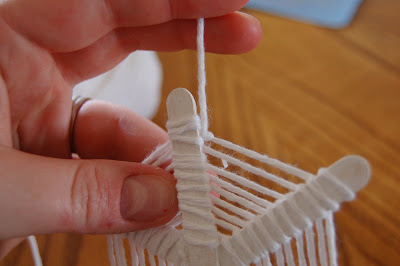
3. Now it’s time to start making the web. Wrap the white yarn around one of the craft sticks and tie a knot to get the web started. (see photo below)
6. Turn it over and your spider web is finished.
7. Take the pipe cleaner and cut it into 4 equal length pieces. (cut in half and then cut the halves in half)
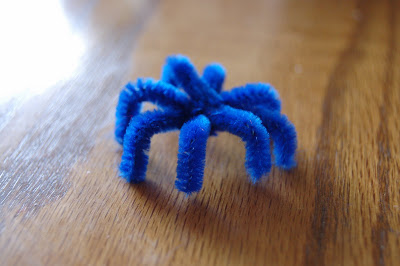
8. Twist the pipe cleaner pieces together in the middle (one piece at a time) to form the 8-legged spider. See pictures.
9. Bend the ends of the pipe cleaners to make spider legs.
10. Place the spider on the web. To secure it in place, twist 2 of the legs together on the back of the web.
11. At this point you are finished but you can tie more yarn to it to hang it somewhere, or I hot-glued a magnet on the back so it could hang on the fridge.
I ended up doing lots of the work on this project myself but the kids enjoyed it (especially the finished project) so it was worth it!
Happy Crafting!


