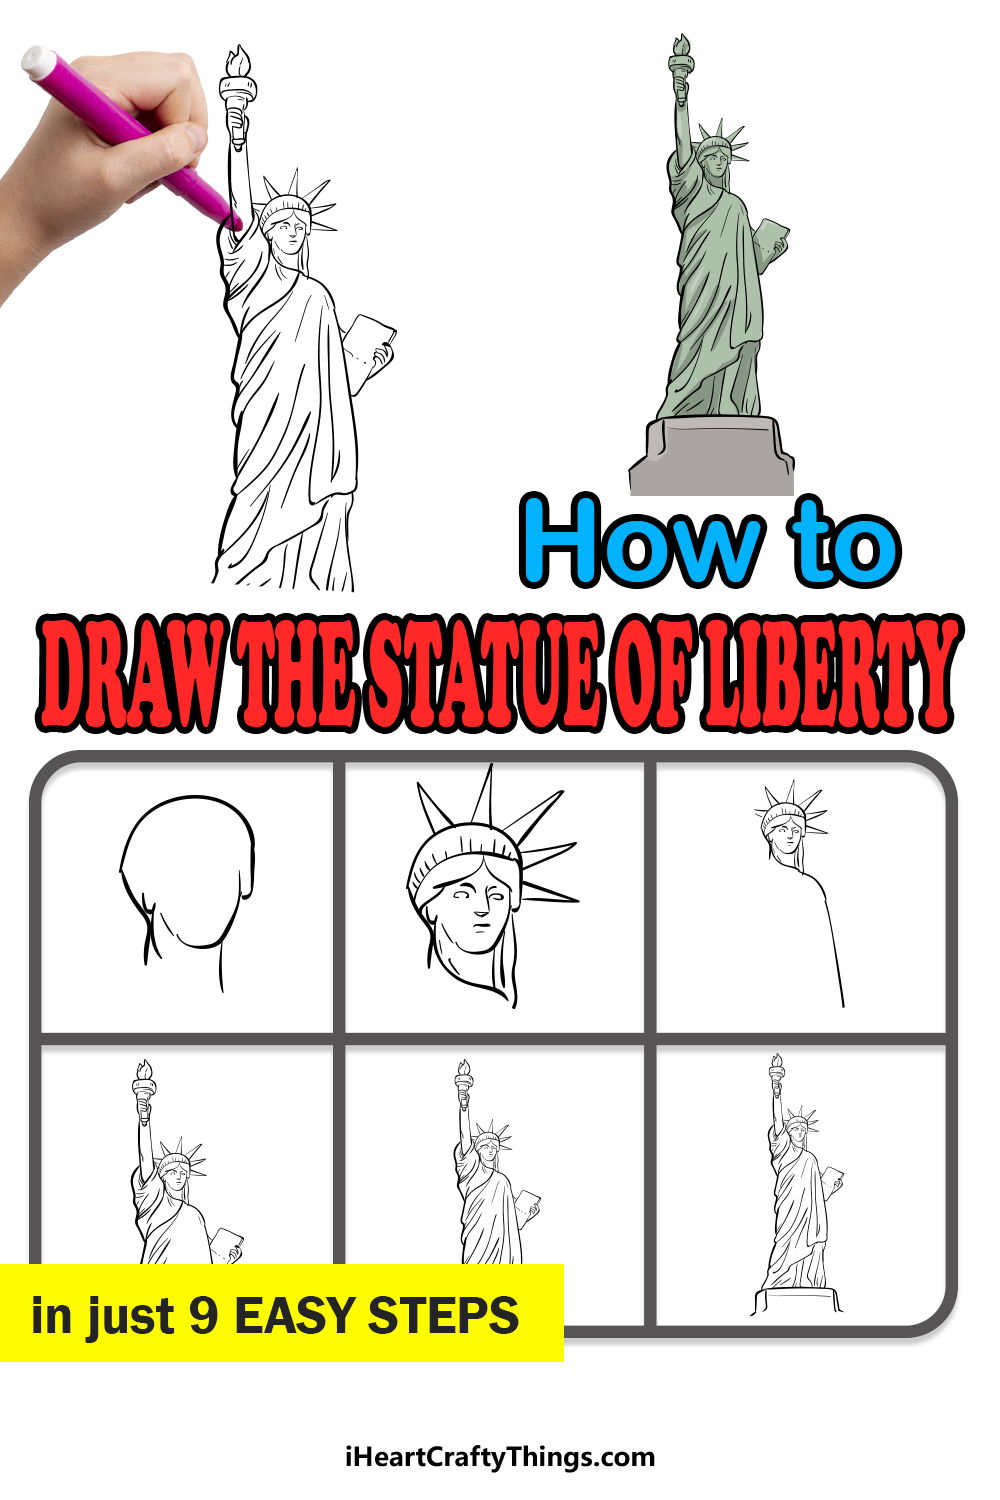
Kids of all ages can learn how to draw the Statue of Liberty by following this simple guide! You can recreate this iconic symbol of freedom in no time.
In 1886, the iconic statue was gifted to the United States by France as a gift to celebrate 100 years of American independence. Since then, it has stood proudly in New York Harbor, welcoming in new arrivals to the city.
It has also become closely associated with the ideals of freedom and democracy that are cornerstones of the US Constitution.
Many people like to try and draw this famous statue, but they may not know where to start! This guide will take you through all of the steps in order to make it easier than you think.
By the end, you will have an incredible representation of Lady Liberty.
Follow These Steps To Make Your Statue Of Liberty Drawing
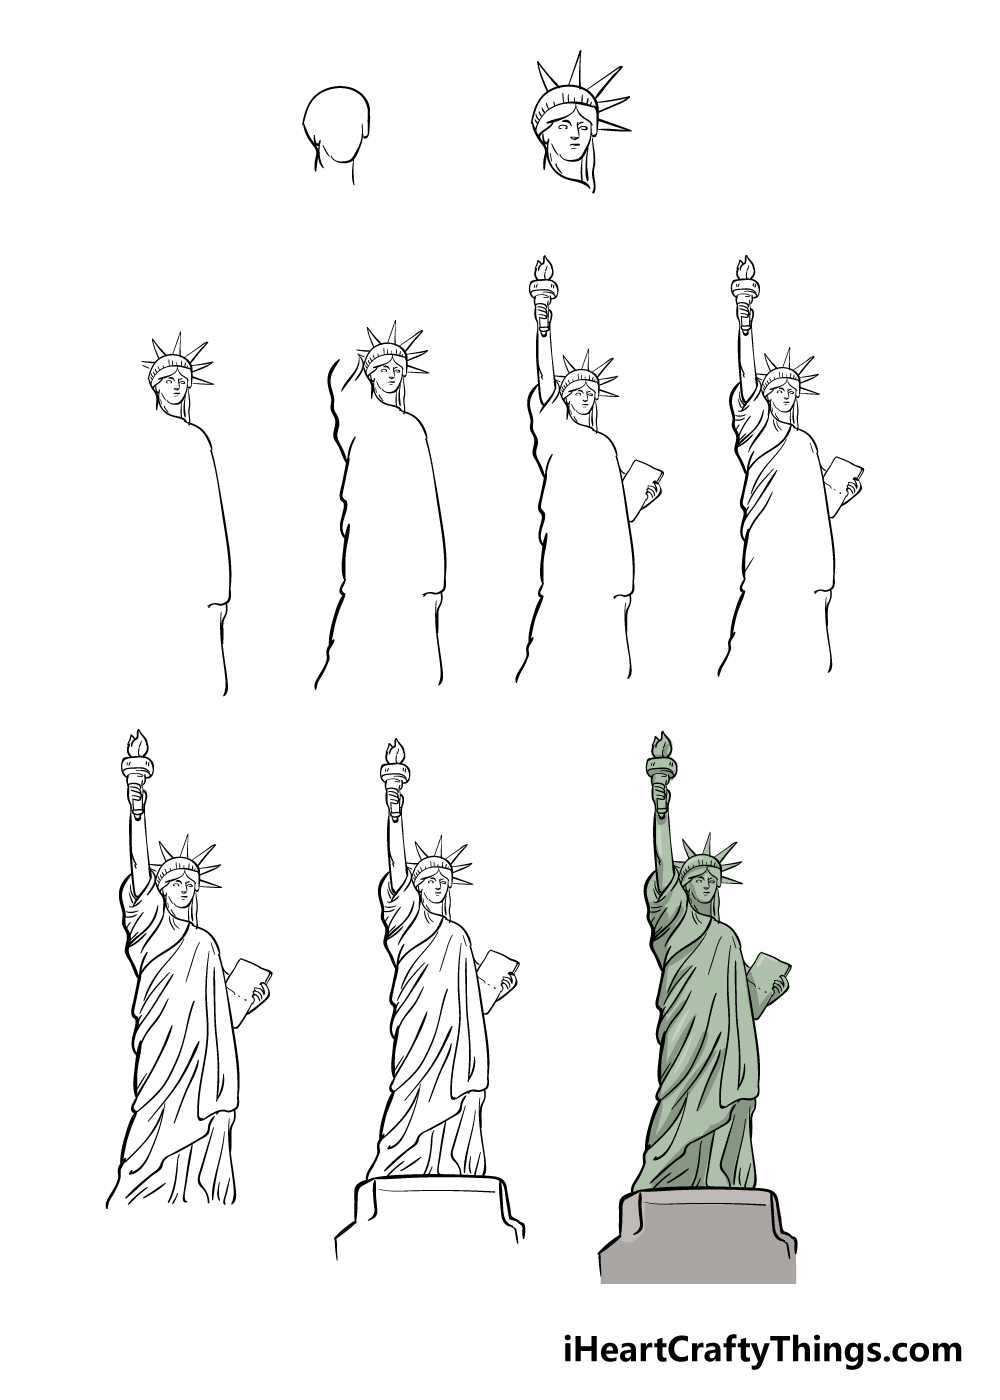
How to Draw The Statue of Liberty – Let’s Get Started!
Step 1

This guide on how to draw the Statue of Liberty has some tricky aspects, so be sure to take it slowly and follow the guide closely.
In this first step, we will be drawing the head and neck of the statue, as shown in the reference image.
You can use a curved line for the top of the head, and then draw a more angular line underneath this one for the jaw of the statue.
Finally, use two more curved lines coming down from this head for the neck of the statue.
Step 2 – Next, start the hair and face details

In this next part of your Statue of Liberty drawing, you will be adding some facial details along with some of her crown.
You may want to enlarge our reference image a bit in order to get a good look at all the facial details that you will be drawing in this step.
Her eyes, nose and mouth may look complicated but they are all drawn with some fairly simple lines.
Then, once you have her face drawn you can add some sharp shapes to the top of her head for her pointy crown.
You may wonder why we aren’t drawing them across her had, but it’s because her arm will cover some of them when we draw it later.
Step 3 – Now, start drawing her body

Now that you have the head drawn, we can focus on the body for this step of our guide on how to draw the Statue of Liberty.
To do this, simply extend some slightly curved lines down from her neck to form the left-hand side of her body.
This won’t be a totally straight line, and the reference picture will show you how it should look.
Step 4 – Next, draw the other side of the body
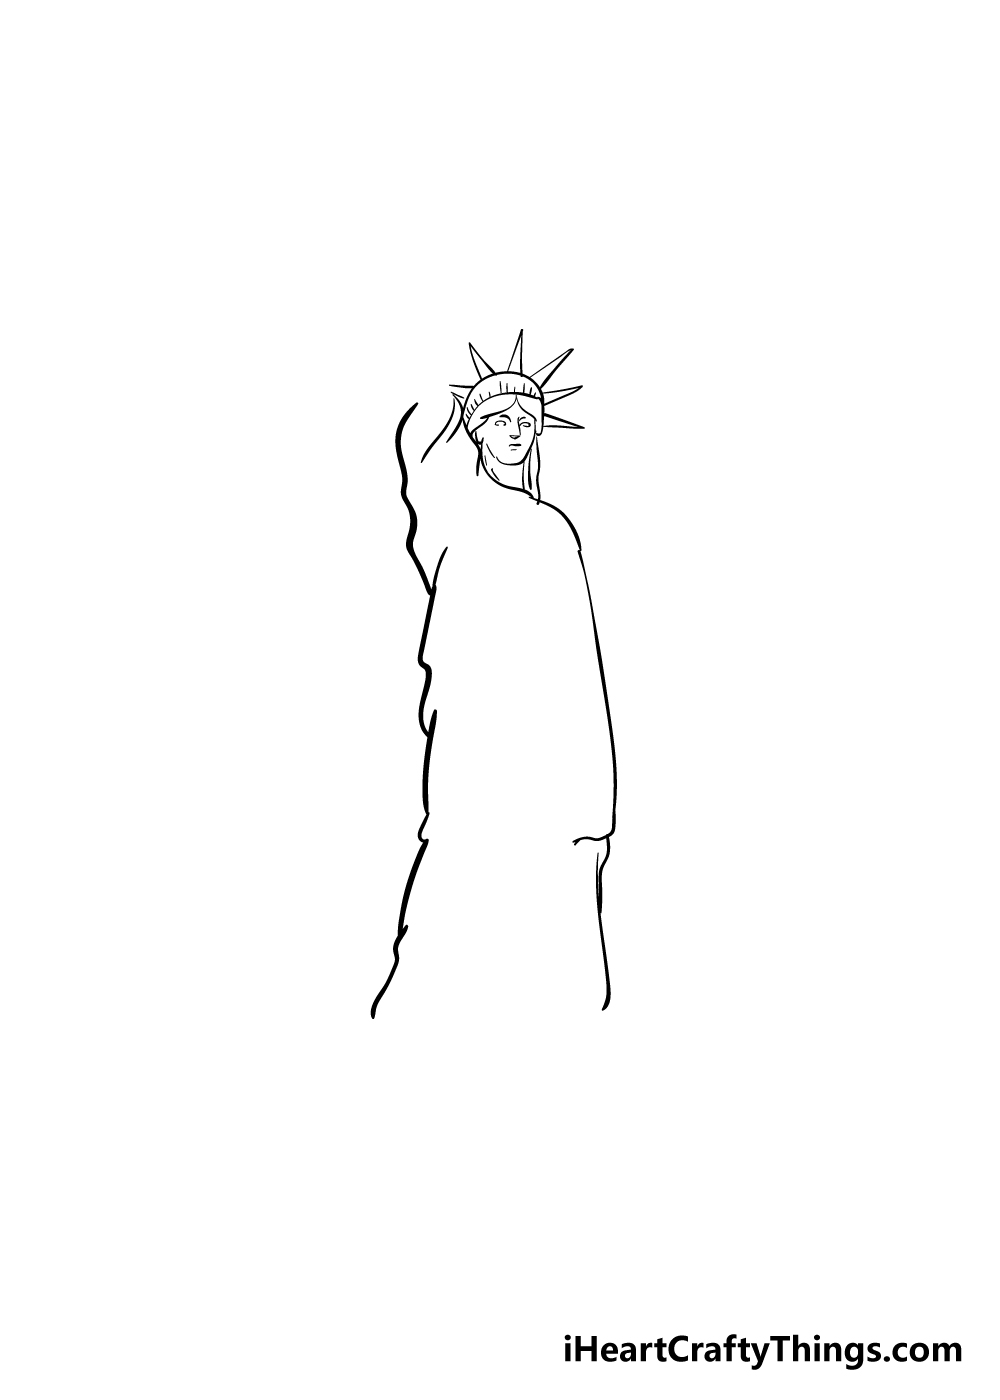
One of this statue’s most recognizable features is how Lady Liberty raises her hand to hold a beacon.
We will start to add this feature to your Statue of Liberty drawing now. Simply use some more curved lines extending up past her head and over some of the spikes that we mentioned earlier.
Then, you can use some similar lines coming down to form the left-hand side of her body.
Step 5 – Now, draw the arms of the statue

In this step of our guide on how to draw the Statue of Liberty, we will be drawing her arms. On the left, her arm will extend up from her sleeve straight up, and she will be clutching the famous torch.
The reference image will help you as you draw these elements. Finally, you can draw her other arm holding the tablet that has an inscription commemorating the Declaration of Independence.
Step 6 – Next, draw some details for her gown
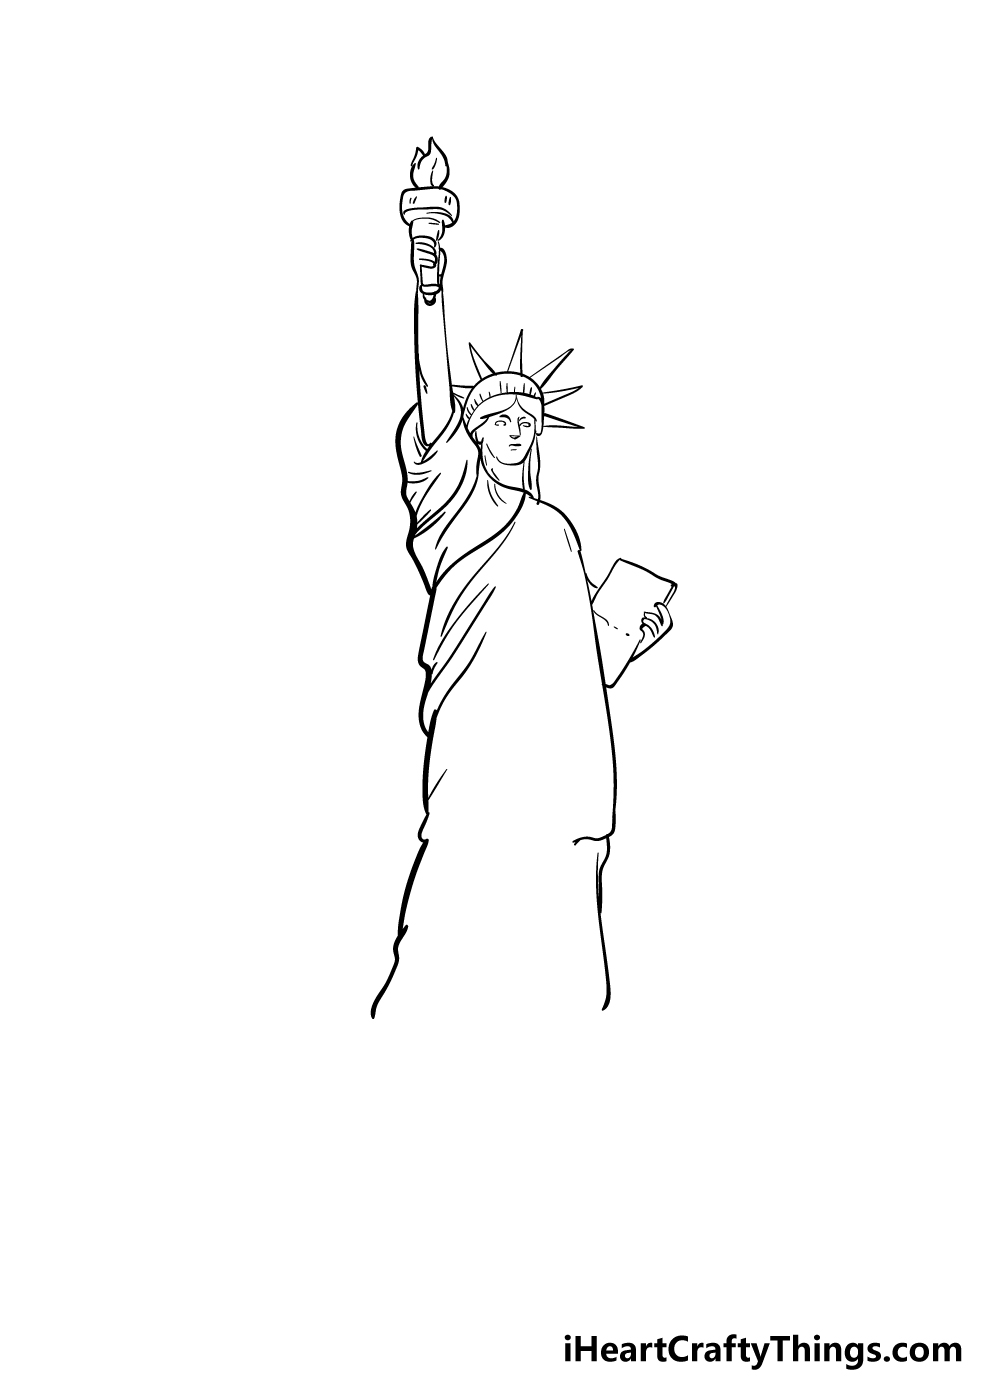
For the next few parts of your Statue of Liberty drawing, we will be focusing on the fold details of the gown that Lady Liberty is wearing.
To do this, you can add some straight and curved lines to her raised sleeves to create the appearance of the creased fabric.
Step 7 – Next, finish off her gown details
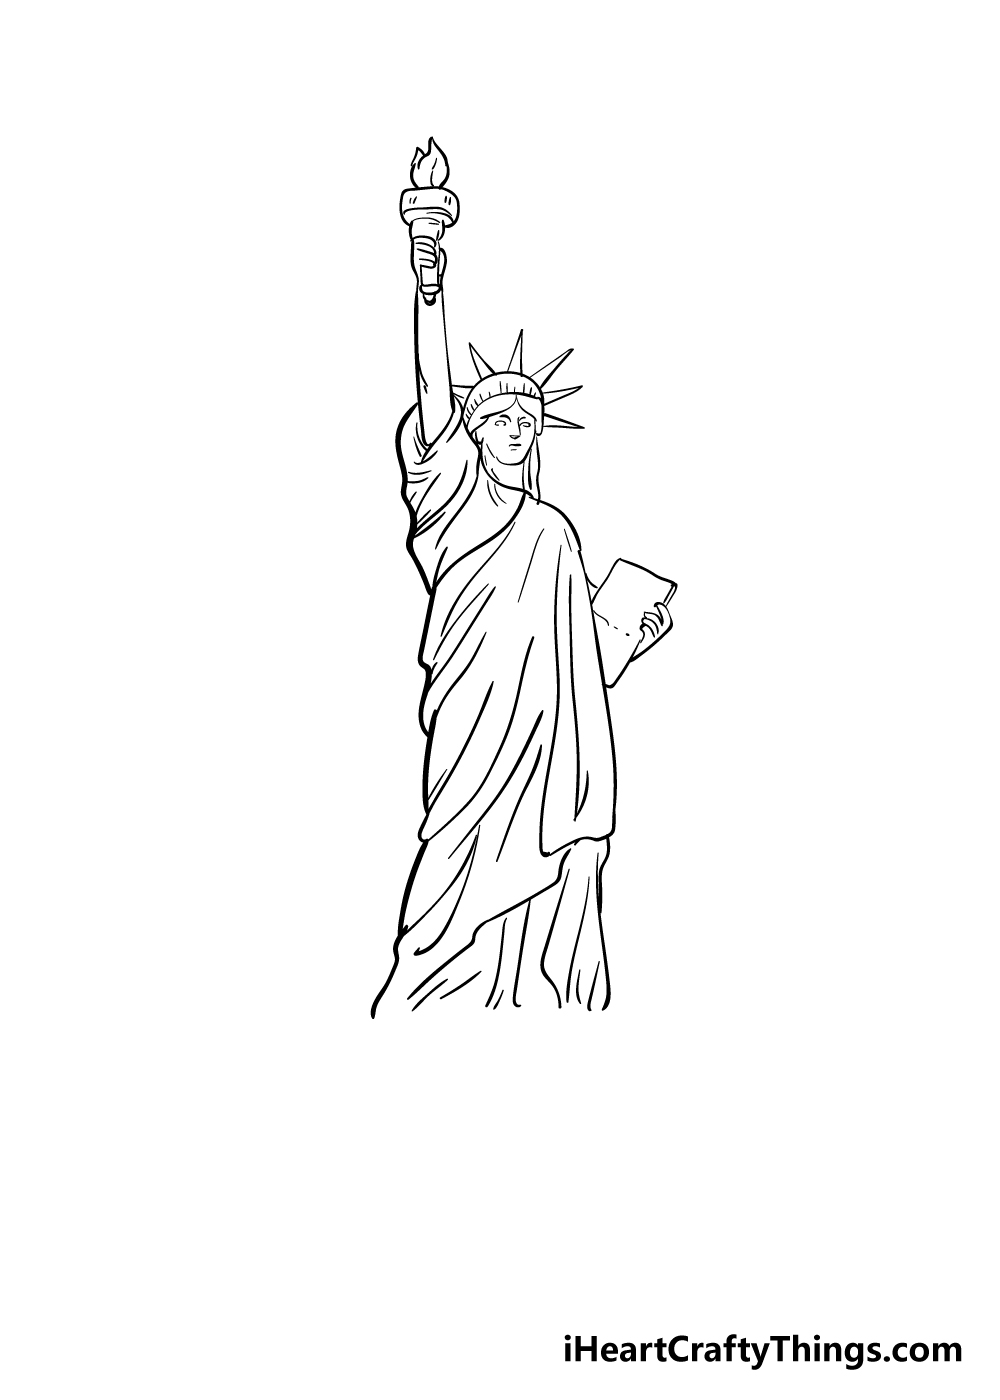
You can finish off the gown crease details that you began in the previous step for this part of our guide on how to draw the Statue of Liberty.
To do this, simply keep extending the same kinds of lines that you drew previously throughout the rest of her gown.
This will be a step where it will be very handy to follow the reference picture closely to see where you should add specific folds!
Step 8 – Next, draw the base of the statue
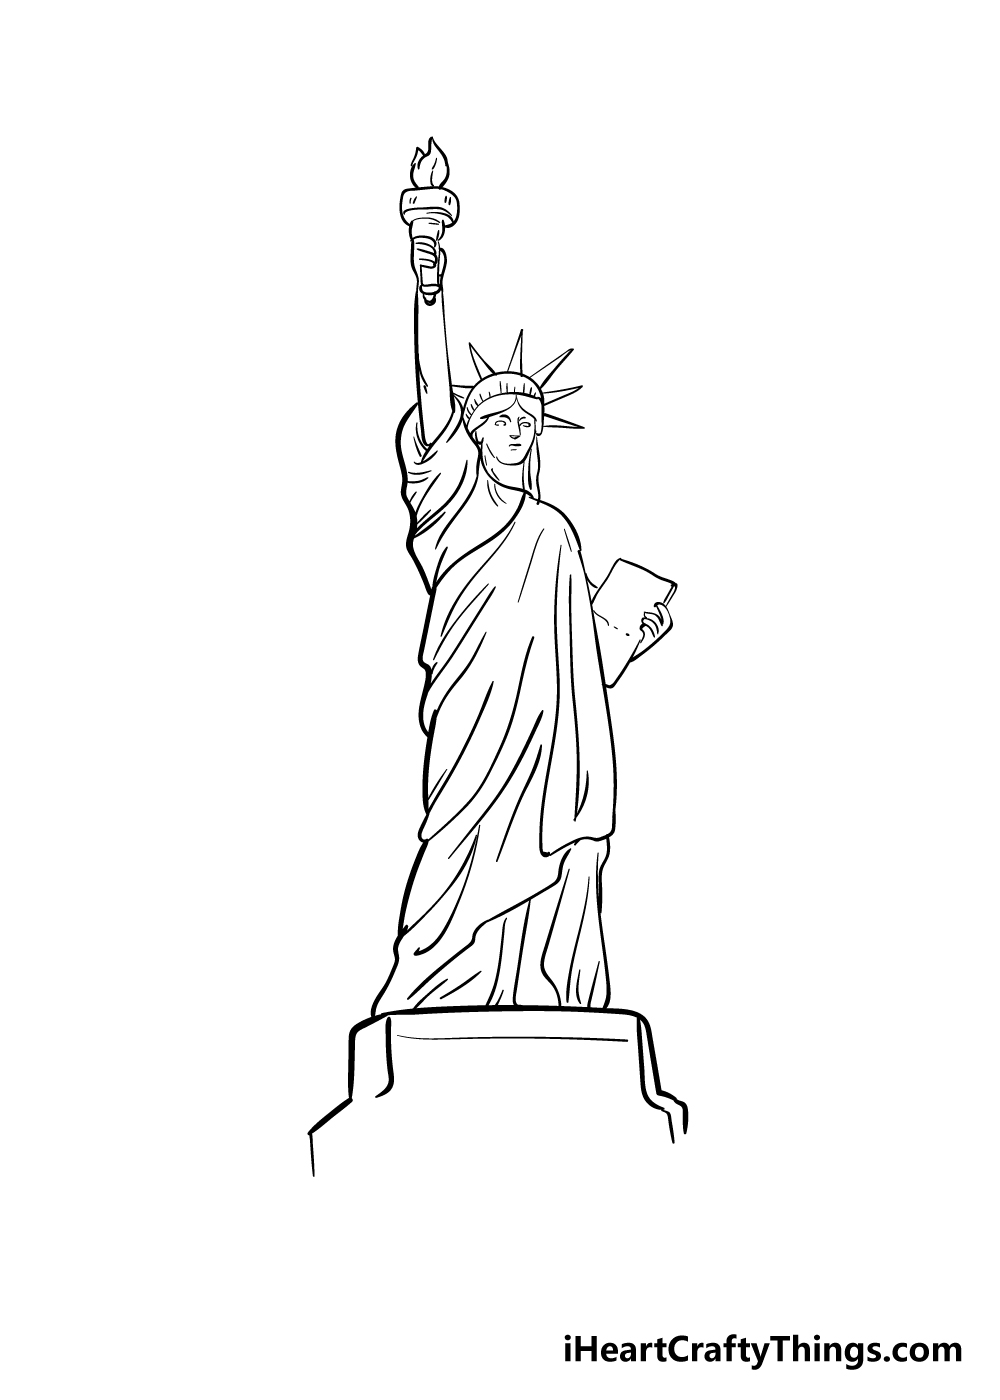
Lady Liberty stands upon a base, and you can draw that in this step of our guide.
This base will be drawn with some fairly straight lines that has two levels to it, one wider at the bottom and a more narrow one on top.
That finishes off the details for your Statue of Liberty drawing, but be sure to add any extra details of your own such as a background!
Step 9 – Now finish off your Statue of Liberty drawing with some color

For this final step of our guide on how to draw the Statue of Liberty, you can color Lady Liberty in!
The statue has a darker green coloring to most of it with a light grey background, and that is what we went with in our reference image.
Which of your favorite art mediums and tools will you use to color in your incredible drawing?
Prepare For This Drawing To Make It A Bit Easier
When you look at the later pictures in this guide on how to draw the Statue of Liberty, your stomach may sink a bit when you see how many details there are to draw.
It’s true that this can be a tricky drawing to do, as there are so many details, proportions and parts to get right. However, before we even begin there are a few ways to make your Statue of Liberty drawing a bit simpler.
We have plenty of pictures in the guide to take you through the process, but it can’t hurt to use some more pictures too. Start by looking up pictures of the Statue of Liberty online to see it from all angles.
You can also look up simpler cartoon versions of the statue, as these will help you get to grips with the details as well. That brings us to our next tip: changing the style of the statue.
If this detailed style is just not doing it for you, you could draw it in a style that suits your strengths a bit more. So, if you prefer drawing in a simpler cartoon style, then you could adapt the guide to suit that style.
If you would like to maintain the details in the guide, then pencils will be your best friends. Use some light pencils and press softly on the page to start the guide.
You can get the drawing looking as you want it, erasing any mistakes or mishaps along the way. Then, when you have got the drawing as you want it, you can simply draw over the lines with your pen and then erase the pencil.
These are a few ways that you can prepare, so good luck and have fun as we begin the first step!
Here’s how you can make your Statue of Liberty drawing even better…
Make your Statue of Liberty sketch even more incredible with these tips!
The Statue of Liberty is often associated with patriotism. You could emphasize this aspect in a few ways for your Statue of Liberty drawing!
One way would be to have some fireworks that are red, white and blue in the background. This would also give it an Independence Day vibe.
Or, you could draw a big American flag flowing behind it. What are some other patriotic touches you could add to the picture?
There are also ways you could add a more grounded background to your drawing of the Statue of Liberty. If you’ve ever visited the statue then you will have a good idea of what the background looks like in real life.
If not, you could look up some different photos of the statue and the surrounding area to draw your background.
This would be a stunning addition to your drawing, and it all depends on the kind of feelings you want this drawing to give off.
We showed the statue in a stylish yet detailed way for this Statue of Liberty sketch. You could stick to this style for your own drawing, but don’t be afraid to change it up if you want!
For example, you may want to make the statue look like a cartoon character. This would be fairly easy to do if you use the steps of the guide and change a few things.
Do you think you might like to change the style that the statue is drawn in?
Finally, don’t feel like you have to stick to the realistic colors of the statue! We stuck with the green and brown color scheme for our version of this Statue of Liberty drawing.
You could take a more stylistic approach if you prefer! Going back to our first suggestion, you could use some patriotic colors for the statue itself for another cool look.
What are some color schemes you could use for this drawing?
Your Statue of Liberty Drawing is Complete!
We hope that you enjoyed creating this iconic statue alongside s in this guide on how to draw the Statue of Liberty!
We created this guide to show you how easy it can be to draw even a more detailed picture like this when you know what to do.
We also created it to be fun for you to use, so we also hope it was enjoyable as well as helpful!
Now you can take this drawing even further by adding your own details such as a nice background. We can’t wait to see what you do to finish off this image!
When you’re ready for more drawing fun, you can visit us on our website as we have tons of guides for you to enjoy! We upload new ones all the time as well, so be sure to visit the website often!
We would love to see your finished Statue of Liberty drawing, so please feel free to share it on our Facebook and Pinterest pages for us to admire!