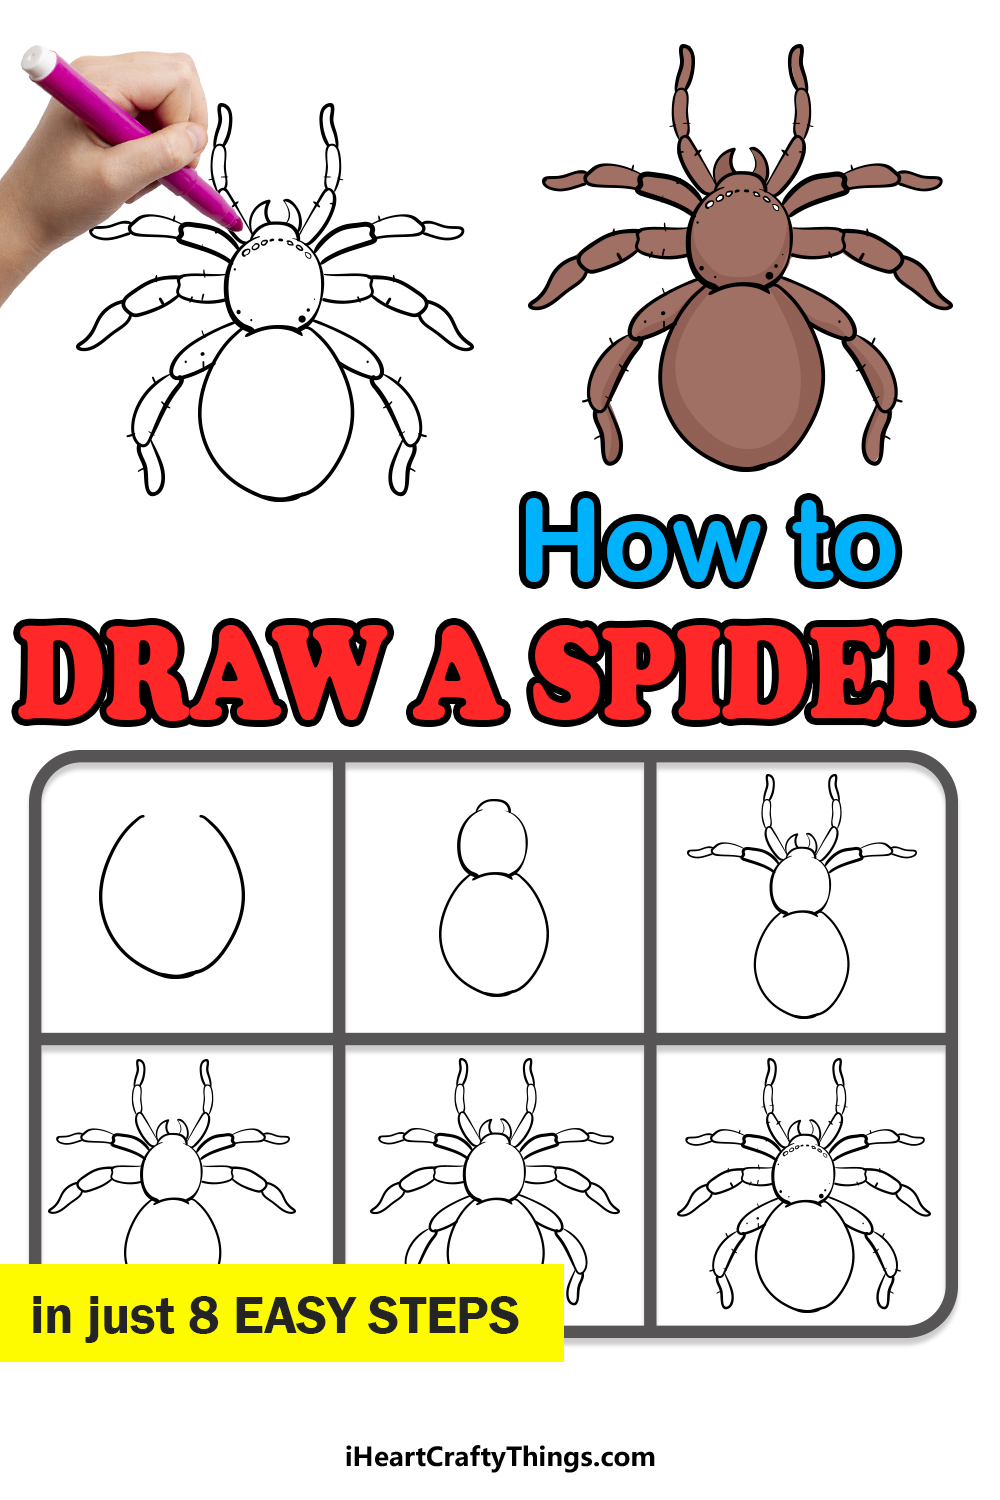
Anyone wanting to learn how to draw a spider can do just that by following this tutorial for kids. Find out just how fun and easy it is when you know the right tricks!
I’ll be honest, spiders really scare me! Despite that, I’m also fascinated by their unique appearance and see them as a challenge to draw easily.
However, I’ve broken down the design to make it so much simpler, and I want to share these techniques with you! You’re about to see how a simple curved line will transform into a creepy spider in just a few steps.
You’ll see how to draw all eight legs, eyes and other aspects of the spider. Even the sharp pincers of the spider are included to make it look even more menacing!
We’re going to find out how it’s done together, so get your favorite drawing tools and join me for this fun and simple process.
Follow Along And See How Easy It Is To Draw A Cartoon Spider
How to Draw A Spider – Let’s get Started!
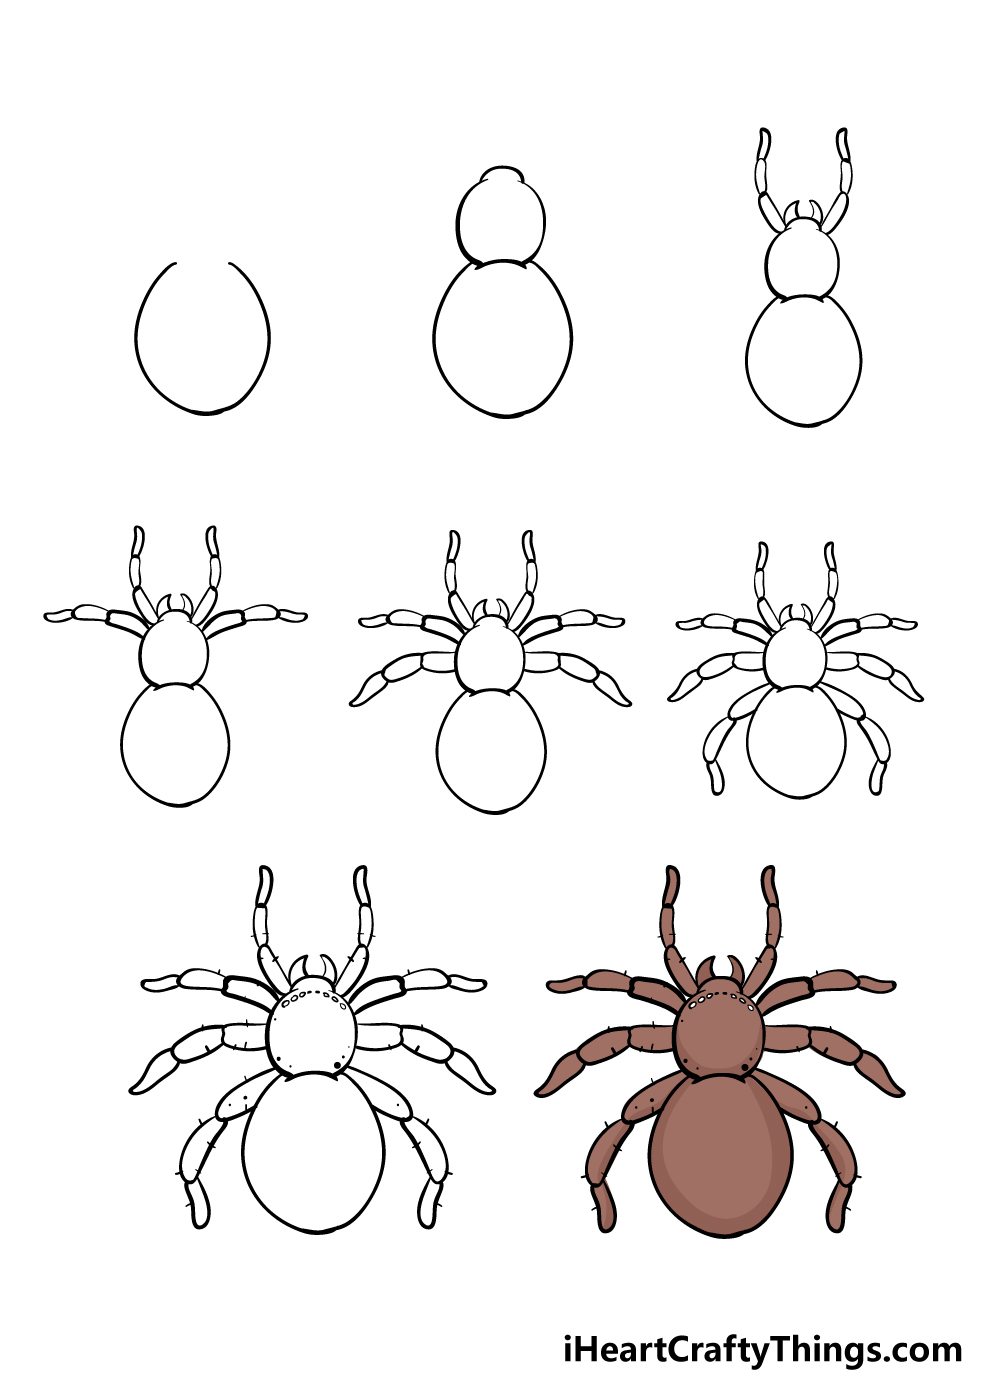
Step 1
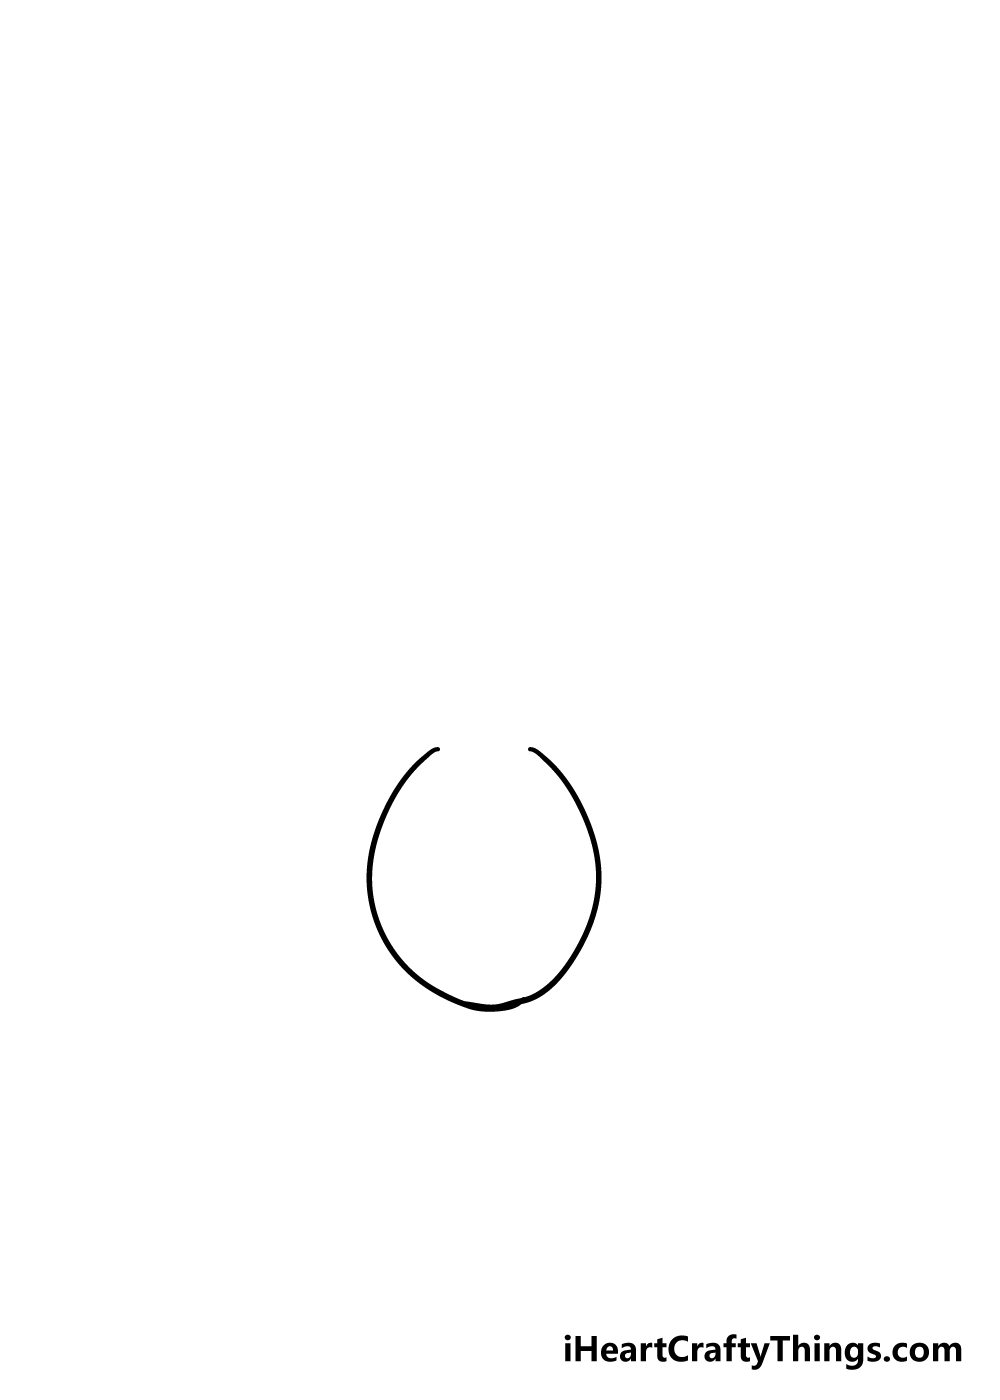
We will begin with the abdomen of your spider in step 1 of this guide on how to draw a spider. The abdomen is the back end of the spider, and we shall draw it by using a long oval shape.
The shape won’t have a top, as we will be adding in another part of the body over that section. Once it’s looking like it does in the reference picture, you’re good to go for step 2!
Step 2 – Now, draw in the body and head
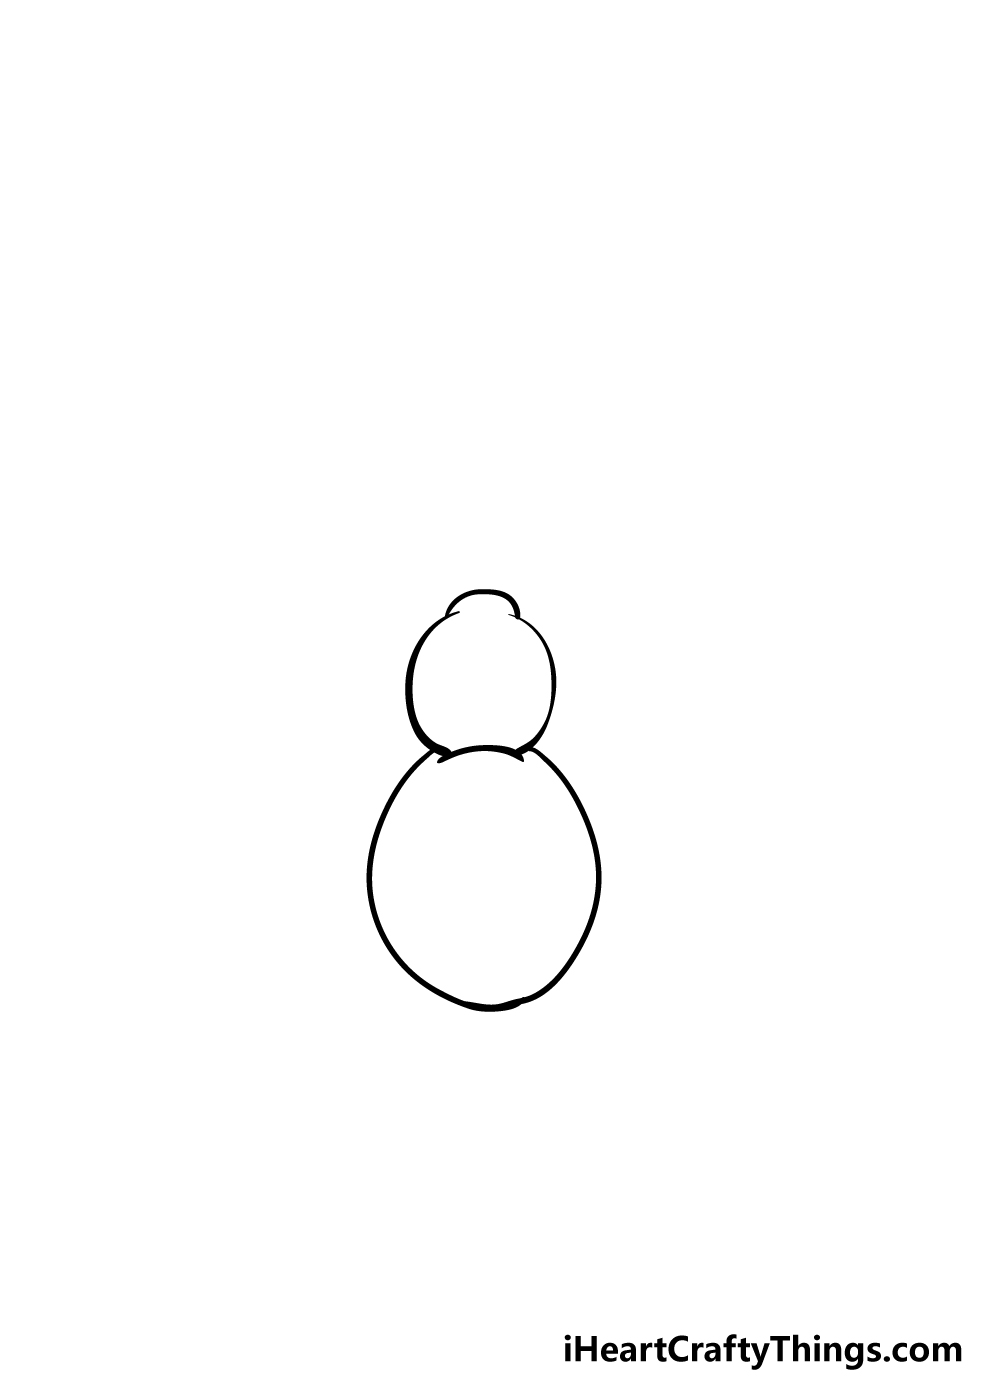
Using the space you left at the top of the abdomen earlier, we shall draw in a body and head for your spider drawing.
The body is very rounded and almost circular. At the top of the shape, however, there should be a small yet long lump which will be the head of your spider.
Step 3 – Next, draw in the first legs and pincers
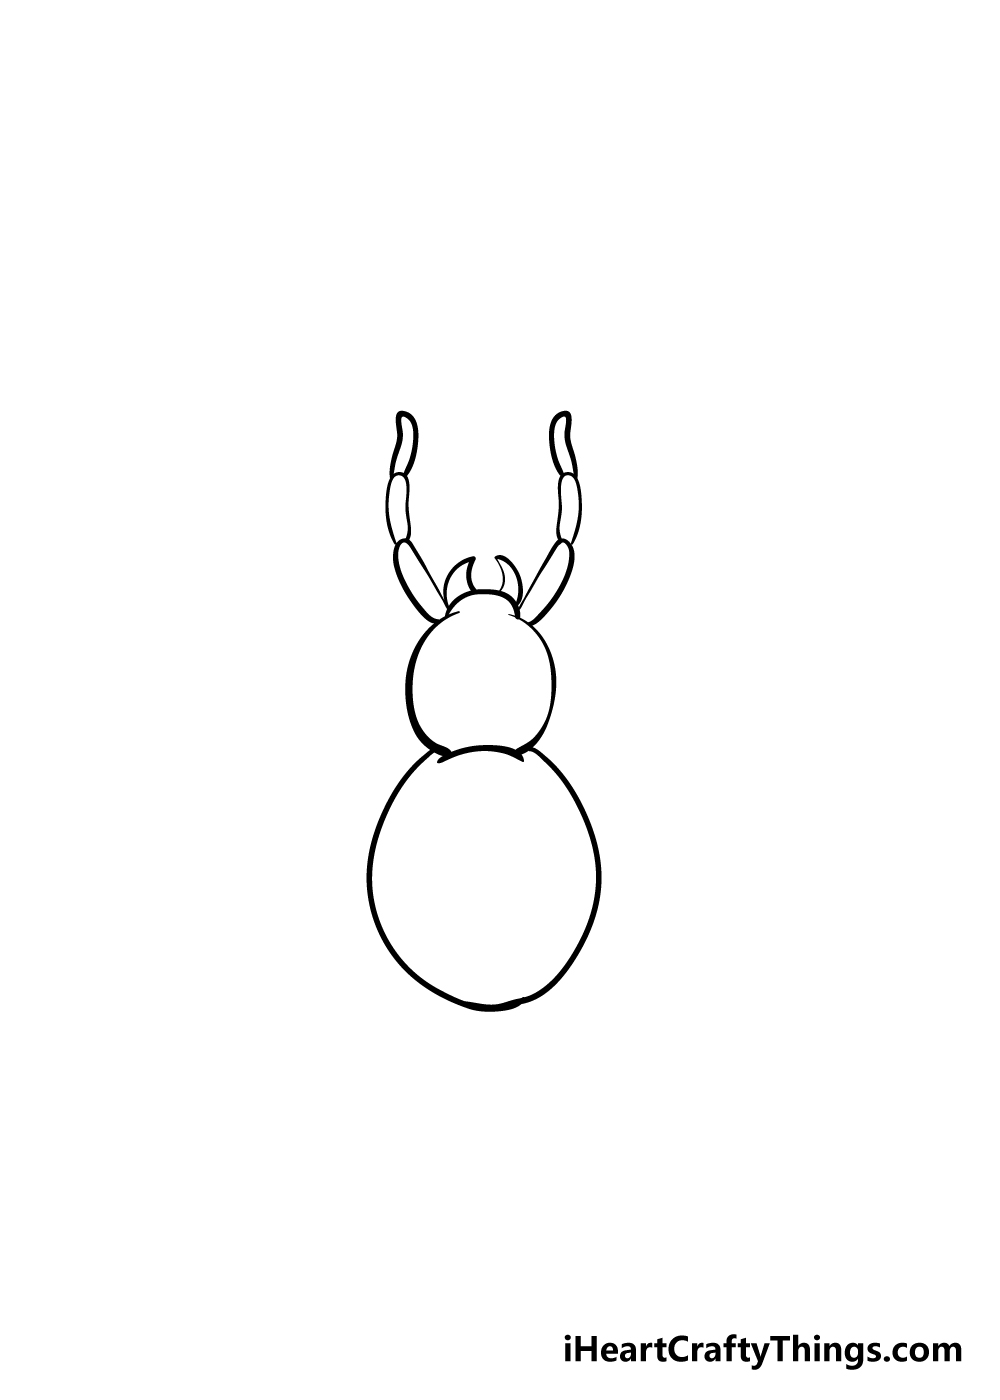
If we know one thing about spiders, it’s that they’re well known for their eight legs. For that reason, we shall start to draw some in for this step of our guide on how to draw a spider!
Before you draw these legs, be sure to add two scary pincers near the very top of the head section.
With these drawn, you can then draw two legs near the front. As you can see in the reference picture, these front legs sill extend out from just next to the pincers.
They’re made up of three sausage-shaped shapes connecting to one another.
Step 4 – Keep adding some legs to your spider
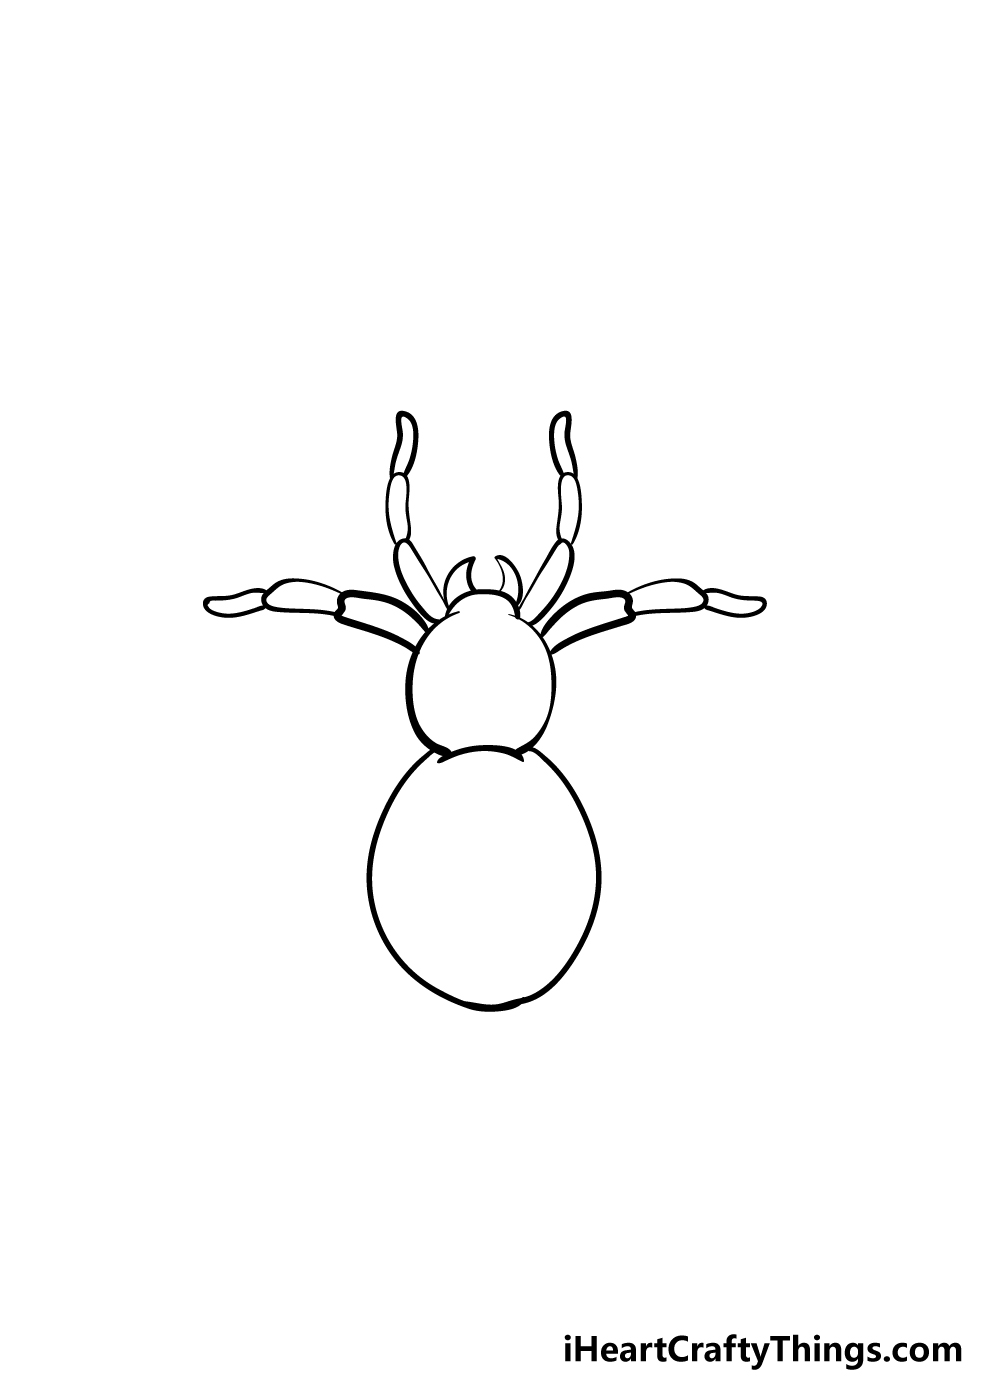
We shall keep adding legs to your spider drawing in these next few steps. For now, add in two slightly curved legs just underneath the two front ones you drew in the previous steps.
These ones will be a little longer than the front legs, so be sure to closely look to the reference pictures to get the various lengths looking accurate.
Step 5 – Next, draw the next row of legs
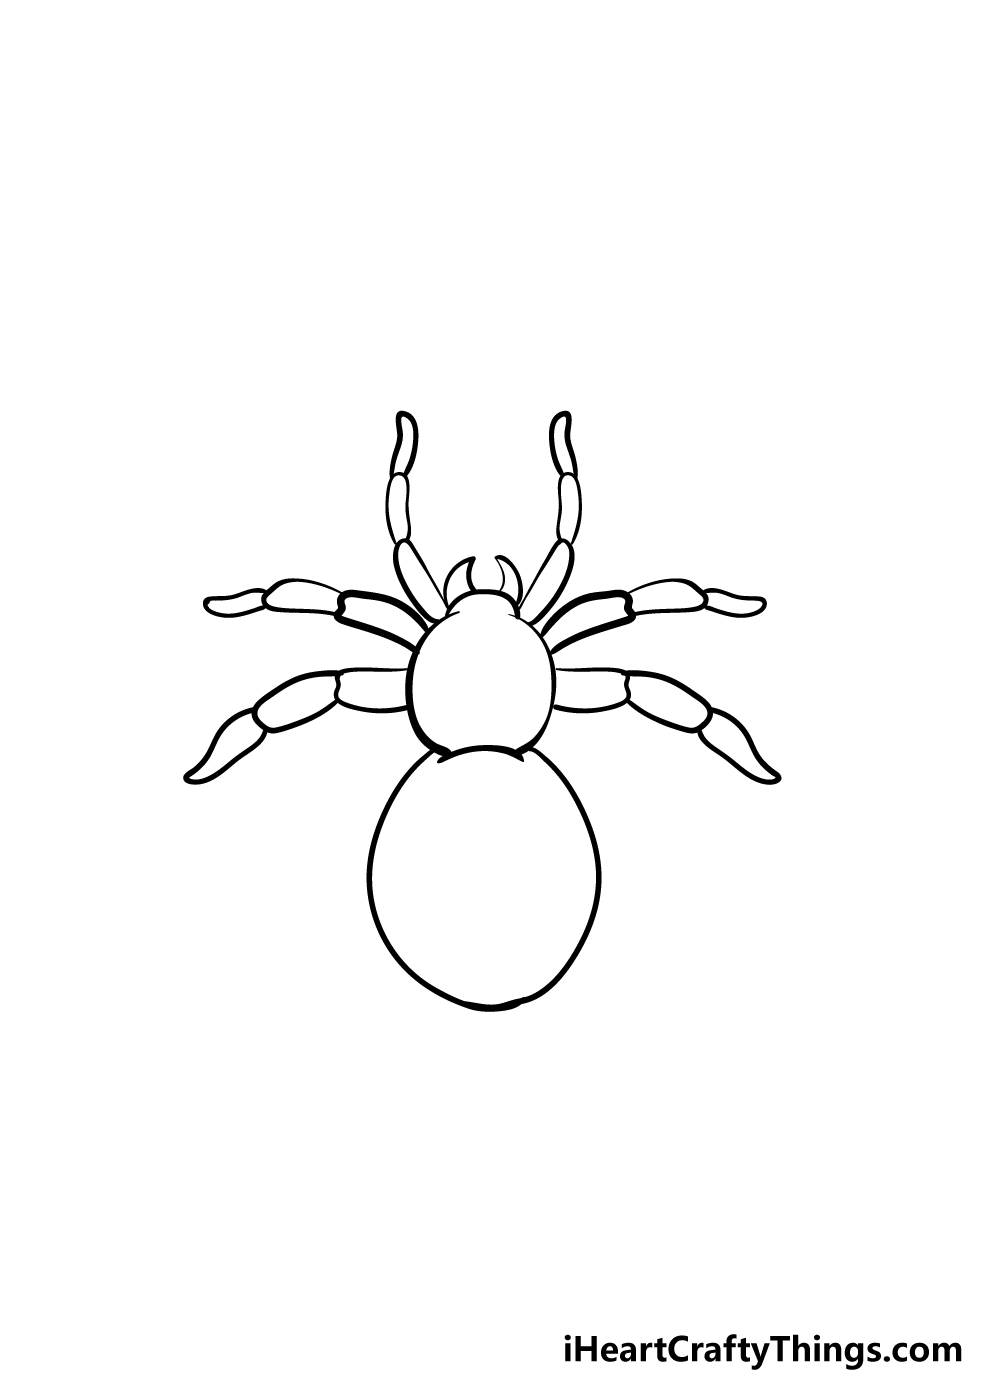
We weren’t kidding around when we said that spiders have lots of legs to draw! For step 5 of this guide on how to draw a spider, we shall add another row of them.
These ones will be even longer than the previous row. Each of these legs will still have three sections no matter how long they get, though.
Step 6 – Draw in the last two legs
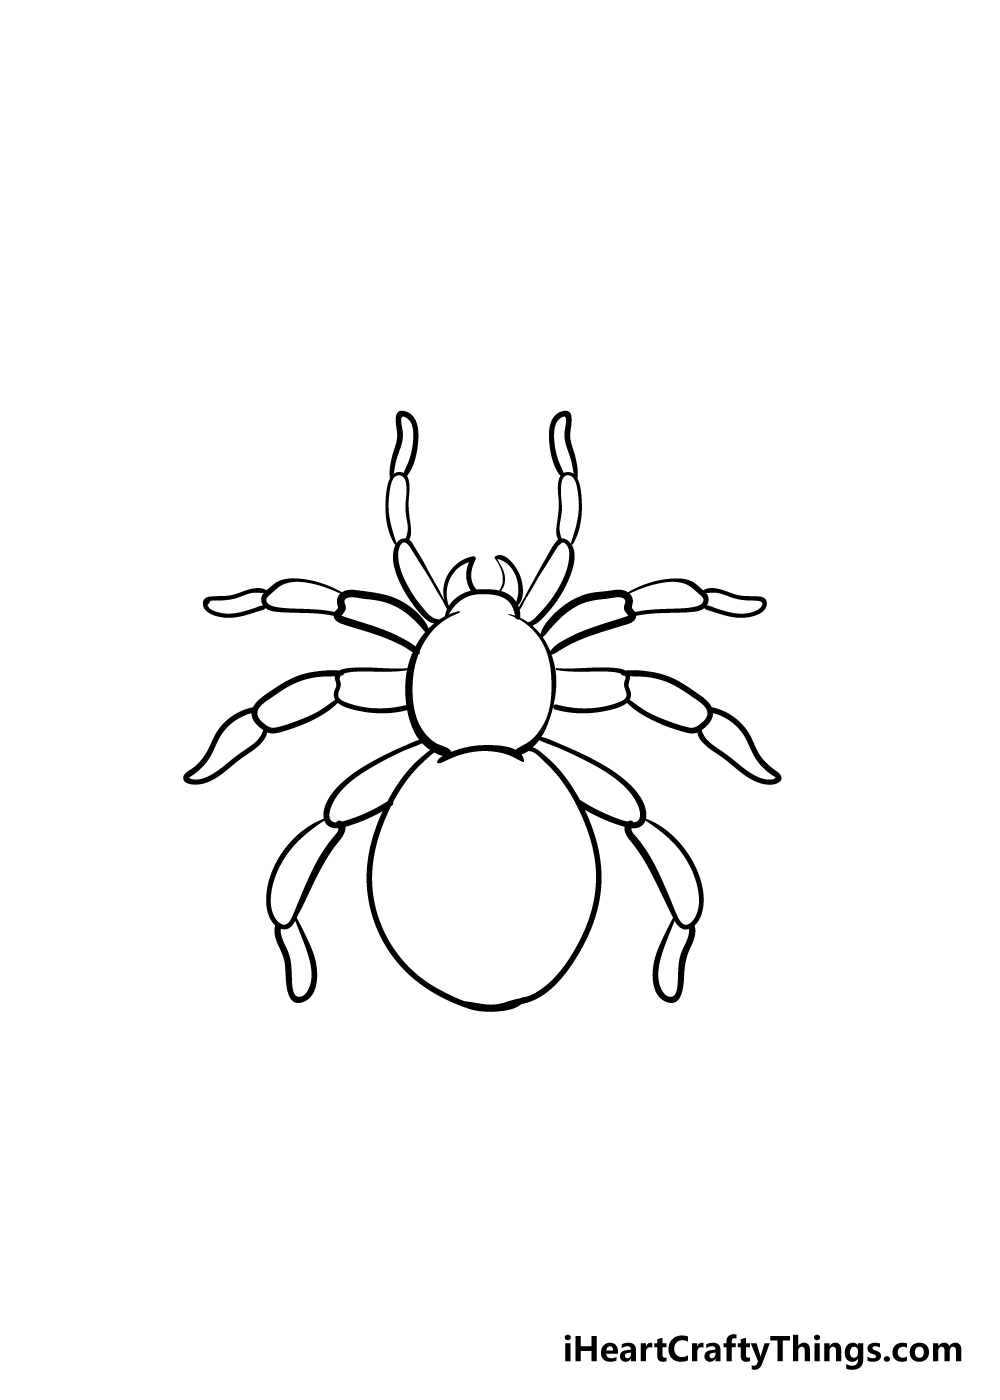
We’ll be finishing off the legs of your spider drawing in this step. These will still have 3 sections with the ones at the end being a bit shorter than the other segments.
These legs will also be angled a bit differently and extend back towards the tip of the abdomen. With all 8 legs present and accounted for, we can move on to the final details!
Step 7 – Draw in some final details
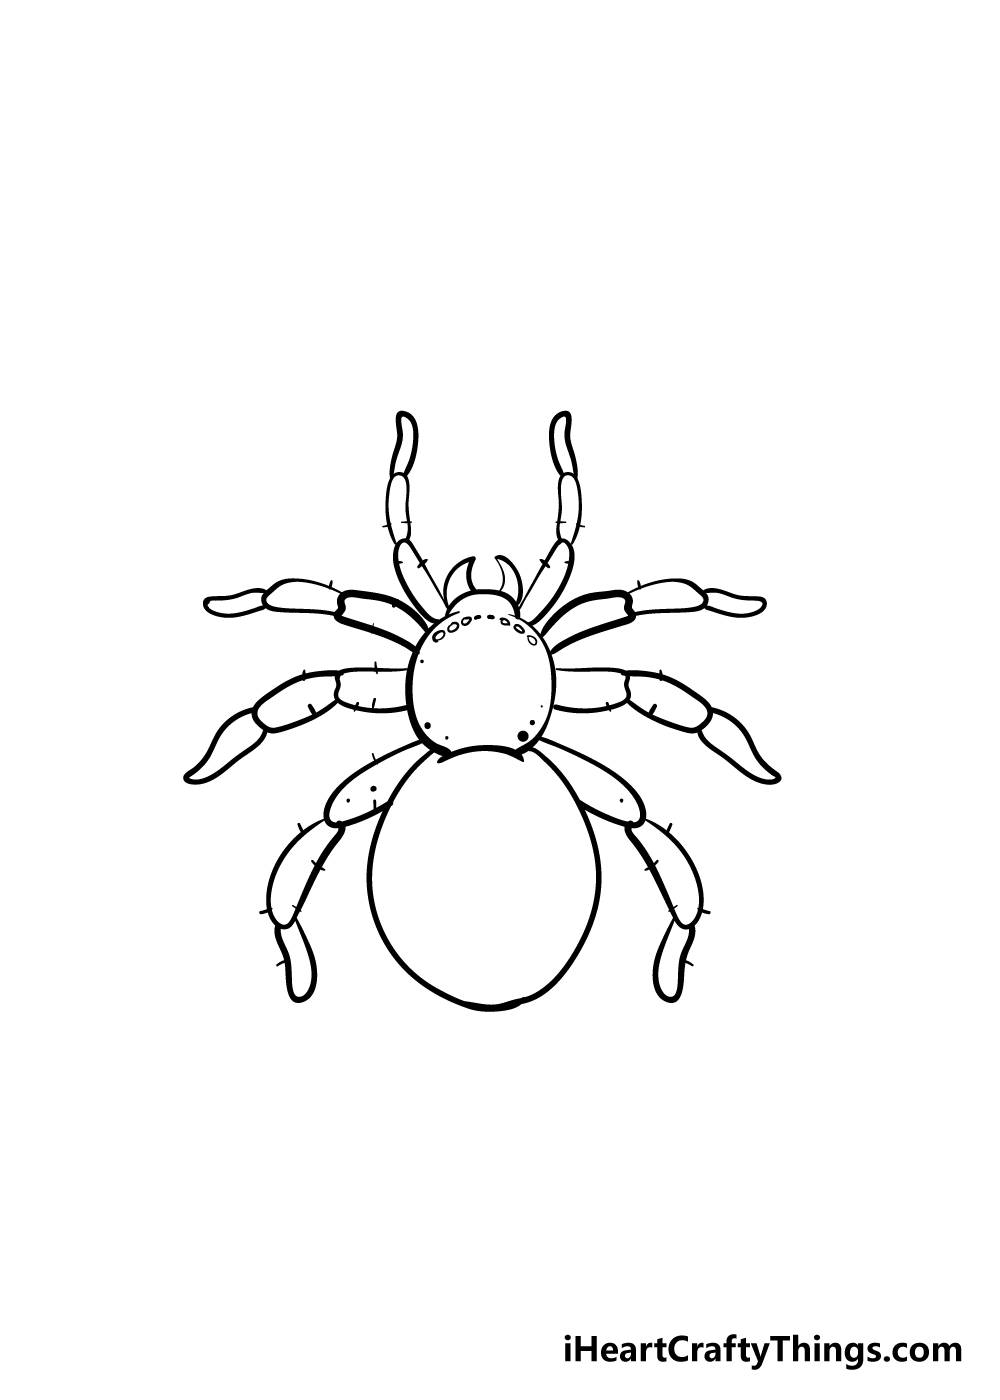
Your spider drawing is already looking creepy and cool, but we can make it look even better with some final details!
Spiders are also well known for having eight eyes, so be sure to draw some in for your spider near the end of its head.
Then, it’s just a matter of drawing some final touches! In our image, we used many smaller lines to create a hairy look for the spider.
Some spiders, such as the fearsome tarantula, do have quite hairy bodies, so if you wanted to make your spider extra creepy then you could add lots more lines for a very hairy look!
What do you think you will draw in for the final details?
Bonus: Try Out These Tips To Make Your Drawing Easier
Spiders are scary to many people, but we don’t want this drawing to be scary to take on! In this guide, we tried to make it as easy as possible, but it’s still possible for it to be difficult.
If you’ve had a hard time with this spider drawing, then we wanted to provide a few ways to make it easier. First of all, you might want to consider changing the breed of spider.
Some spiders have very simple bodies and details, and one of these species may be easier for you to use. If so, you could look up some pictures of spiders online, and then find some species that are easier for you to draw.
You may even simply prefer some of the looks of these species, so it would work out! If you would like to stick to the design in our guide but are struggling with it, you can make it easier as well.
Sticking to the idea of looking up pictures online, you could try to find some photos of spiders with similar builds to the one in our image, and then use it to supplement the guide.
Getting a better look at the small details and proportions of a real spider may help you to overcome some of the difficulties you’re having with the drawing.
If there are specific parts of the design that are giving you a hard time, then you could also focus on those parts and then practice with a pencil to get the hang of it.
Then, you can use this practice to build up the final drawing. We know you can do it if you take your time, keep trying and practice, so we hope these tips will help!
Step 8 – Now finish it off your spider with some color
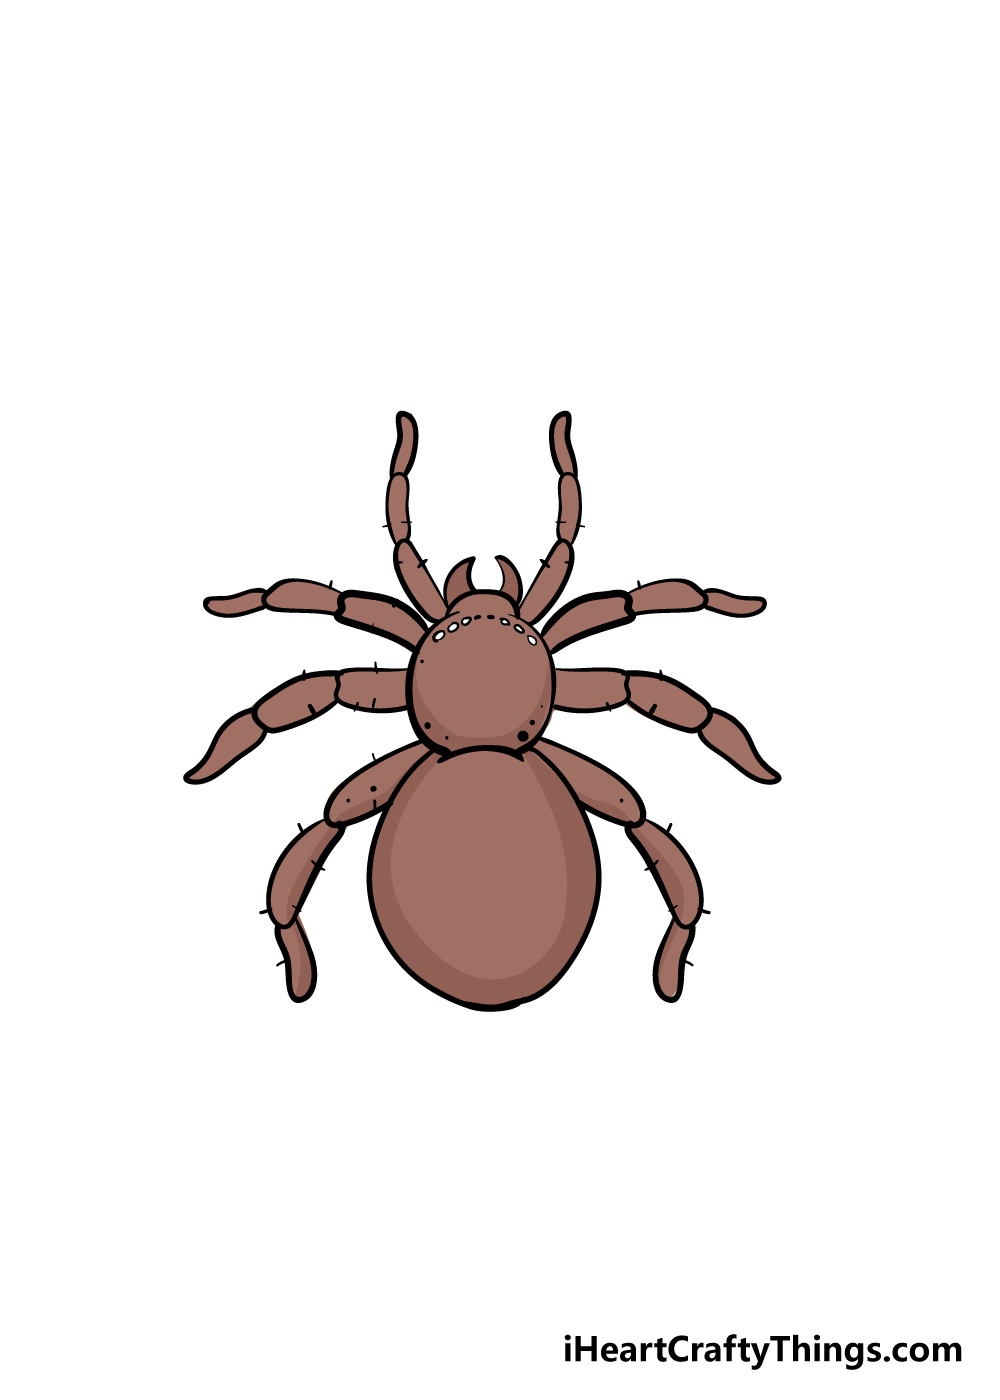
This is the final stage of this guide on how to draw a spider, and it’s a fun one! Now that you have drawn an awesome spider, you can have a great time coloring it in.
We have shown you just one way that you could color in your scary arachnid, but this is a step where you can get creative!
Spiders come in all kinds of shapes, colors and patterns, so there are no wrong ways to color in this creepy spider.
Once you’ve decided on your colors, you could use different art mediums like paints, watercolors or colored pens to give your spider drawing a fantastic look! What art tools will you choose for your drawing to finish it off?
Do this to take your spider drawing to the next level
Make your spider sketch all that it can be with these fun tips we have for you!
One of the first things you can do to make this spider drawing even better is by drawing a web for it to sit on.
Spiders make all sorts of wonderfully elaborate webs, and you could make some great designs.
If you want to do this, then you could look up some real webs or use some cartoon ones from online to help you. Or you could wing it and create your very own spider web design!
What kind of spiderweb design would you like to create?
If you added a spiderweb to your drawing of a spider, then this tip will be a follow-up to that first one!
You could add some smaller details on the web and around the spider to make it look even more dynamic.
These could be simple details such as flies and other bugs caught in the web, to name a few. What are some other details that you could add to the web?
Next, we think you could add a great background to this image to really finish it off! This would work whether you added a web or not.
The settings could be anything from a normal house to a yard or maybe even a spooky haunted house. Adding a background can really help to set your artwork apart even more!
What are some cool background settings you could create for this image?
Anyone scared of spiders may want to ignore this final tip that we have for your spider sketch!
Once you have mastered the design of this spider, you could add some different spider species surrounding it.
If you need some inspiration (and won’t be too creeped out,) then you can look up photos of different spider species to use as inspiration.
There are so many weird and wonderful spiders you could choose, so what do you think you will use to finish off this awesome drawing of yours?
Your Spider Drawing is Complete!
Archachnophobics beware, because you have finished this guide on how to draw a spider!
Spiders look like they would be quite difficult to draw when you first see them due to their complicated and intricate body structure, but we hope that this guide proved otherwise.
We wanted this guide to be lots of fun for you to use while also showing you how drawing can be so much easier when you have different steps to break it down into.
Now that you can draw an amazing spider, what will you add to it to really personalize your spider drawing?
You could draw in a cool background for your spider to show the terrain it’s in, or if you’re feeling extra creative you could draw in a sider web for it to sit on!
Touches like these along with the color choices and mediums that you use can really bring your drawing to life, so we can’t wait to see what you do!
This isn’t the end of drawing fun for you, though, as we have many more drawing guides coming out all the time for you to enjoy! Be sure to check out our site often to never miss your next drawing tutorial.
We would also love to see how you finish off your spider drawing, so please feel free to share it on our Facebook and Pinterest pages for us to enjoy!
Here Is A Cartoon Spider Drawing To Inspire You!
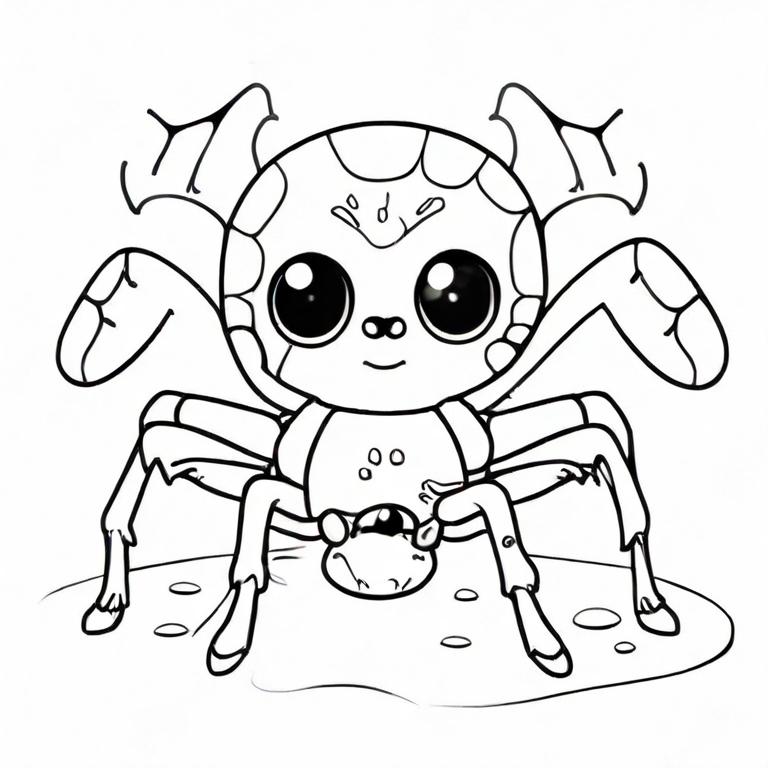
Let’s face it, spiders can be rather creepy! This cartoon spider drawing for kids created by our artist Amanda shows one that is cute instead of being creepy.
This spider really looks friendly, and it’s one that you probably wouldn’t be scared of if you were to find it in your house! When making your own cartoon spider sketch, you can use this picture to inspire your design.
Of course, you could also add some other elements as well. For example, an obvious choice would be to draw a spider-web design in the background.
You could even add some cartoon flies to the web for some extra fun if you were to do so. If you would have a hard time drawing that, then you will find spider web designs online to help you.
What other backgrounds could you do?