Mandalas have become very popular in recent years for a variety of different reasons. A mandala is a collection of geometric and usually symmetrical shapes that come together to form a complex shape.
They are used for relaxation and meditation in a variety of ways. Some people like to use already drawn mandalas to color them in for relaxation and expression.
Other people like to learn how to draw a simple mandala so that they can express themselves with drawing and coloring.
This can seem like an intimidating task, however, as mandalas are complex in appearance.
You may think that making it simple would be impossible, but this guide is here to show you that it can be really easy!
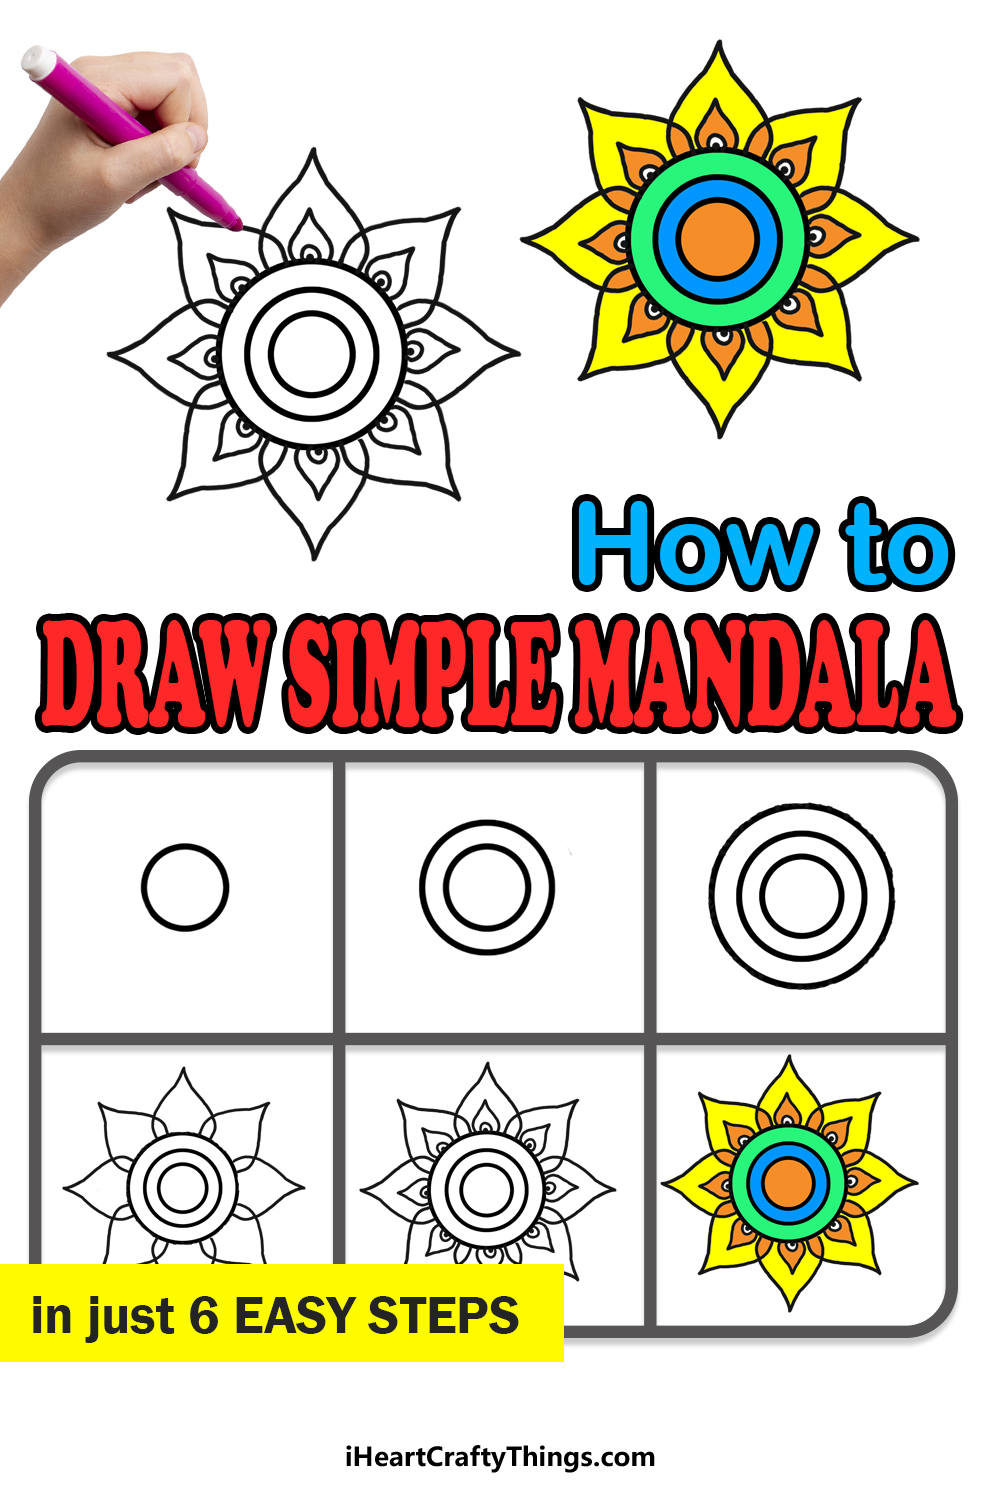
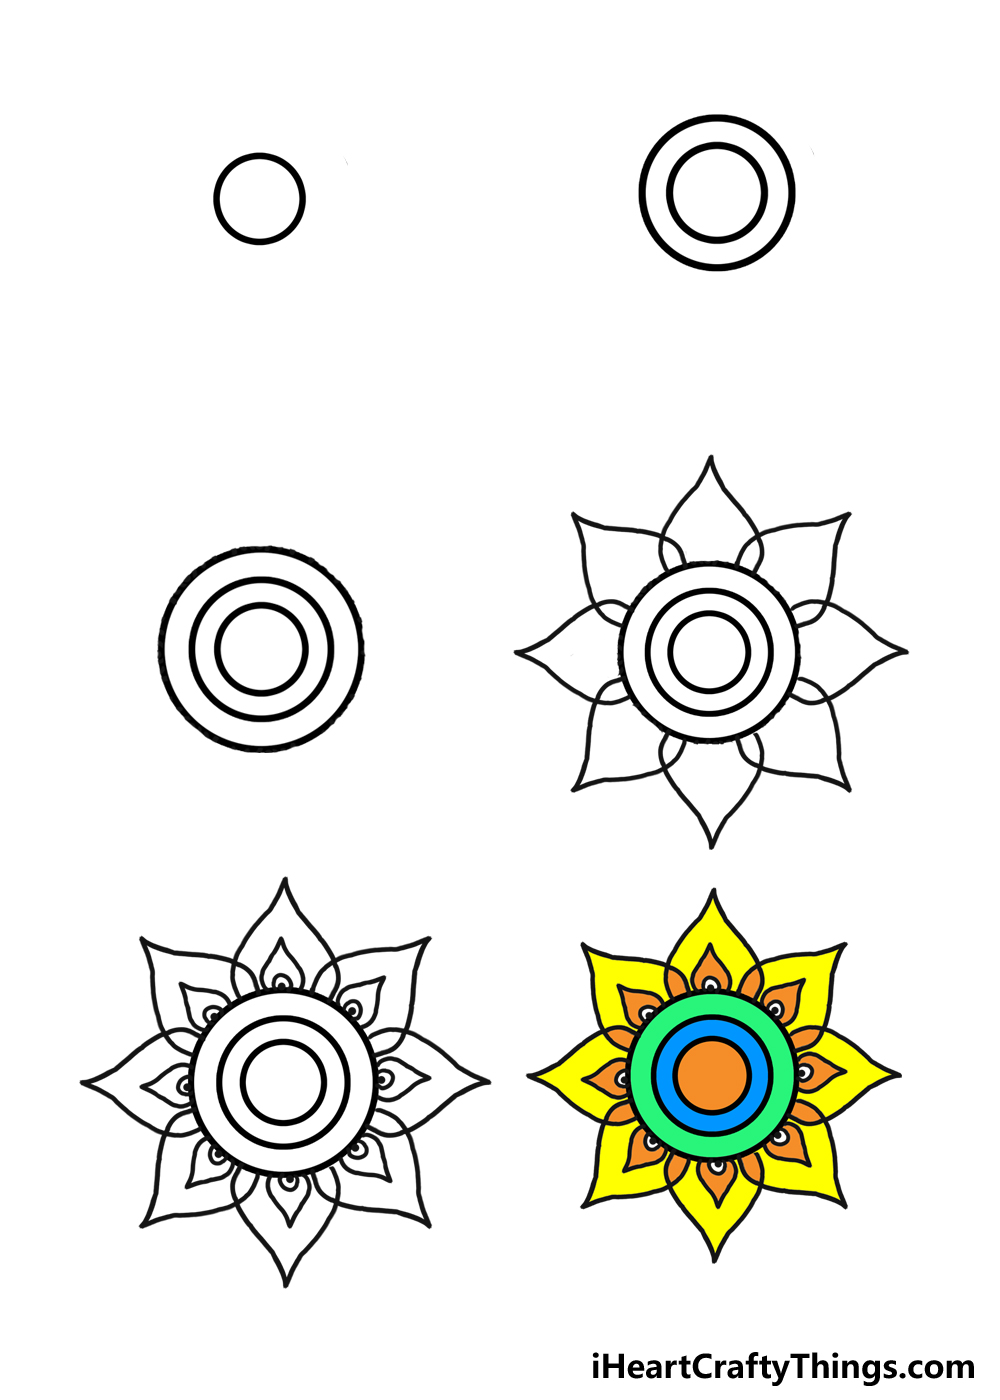
Throughout these six steps, we will get you started with a simple mandala design.
Once you have the hang of this mandala, you will be able to design your own and make them as complex as you like.
We will even go over some ways that you can make your drawing more colorful.
There’s a lot to go over, so get out your drawing tools and get ready for some relaxing drawing fun as we create a simple mandala drawing.
How to Draw A Simple Mandala – Let’s Get Started!
Step 1
If you were to look at the later images of this guide, you may be thinking that even though it is a simple mandala it is way too difficult to draw by hand.
We’re here to show you that it can be easy when you break it down and take it slowly! You can also make it easier by using the right tools for the job.
One of your best friends when creating this design would be a drawing compass.
This simple drawing tool uses a sharp point on the page and a grip for your pencil that allows you to draw circles easily.
If you have one of these already, then you’re good to go, otherwise they can be bought at most craft stores. If you don’t have access to one, then there are other options.
You can use household objects that are perfectly round such as caps for bottles or lids for jars. These can then be traced around to create some perfect circles.
A drawing compass would be ideal, but there are certainly ways to get creative with it if you don’t have one. With all that out of the way, we will start things simply.
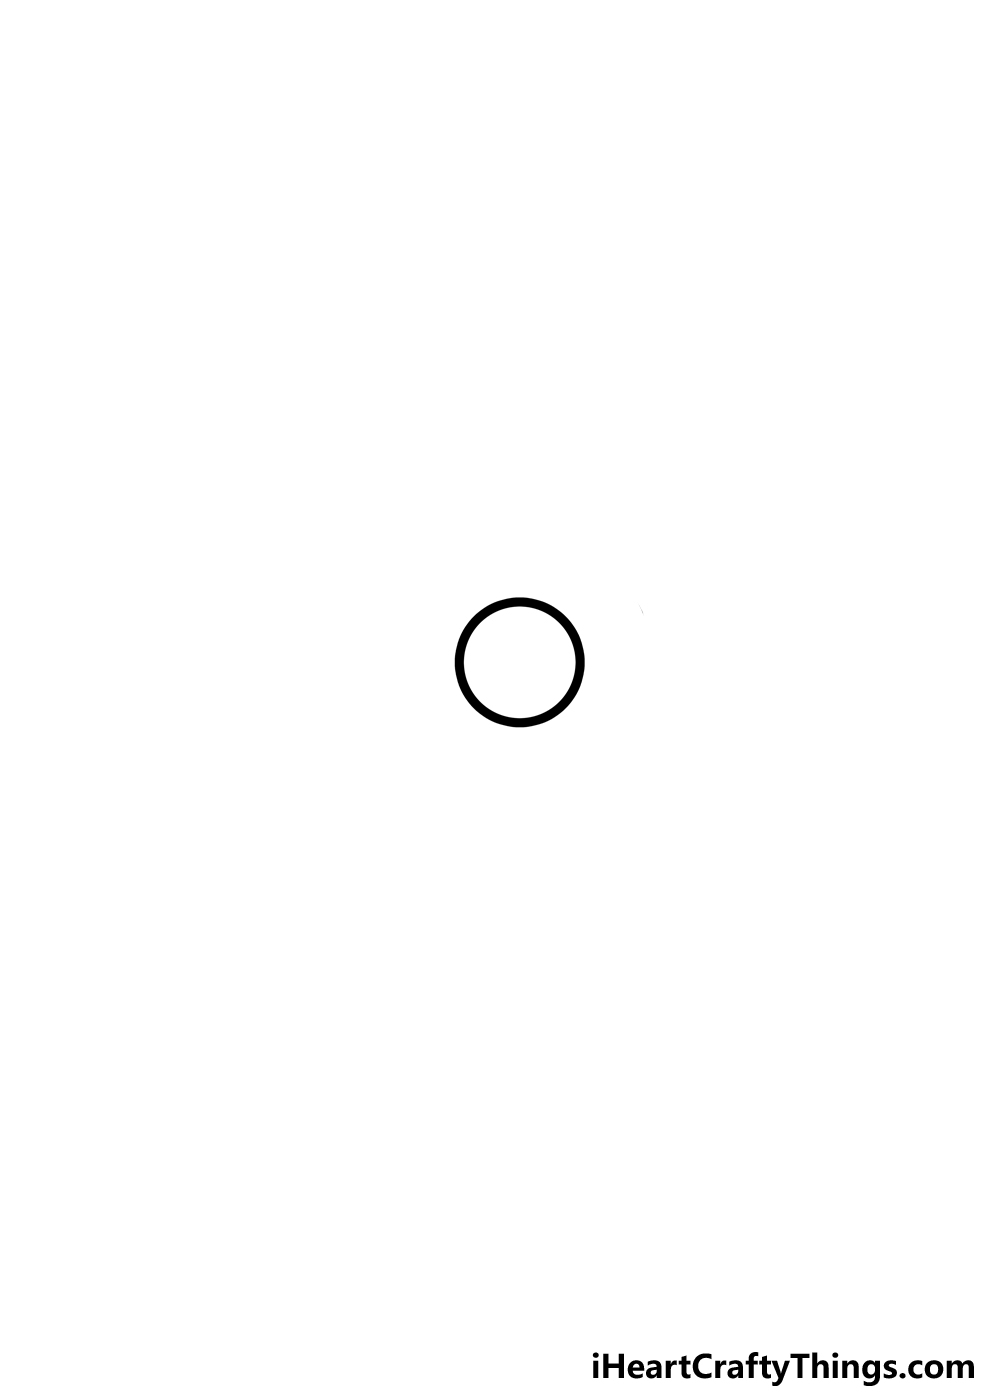
All you need to do for this first step is draw a single circle, and this will be the center of your simple mandala.
You can make it bigger than ours if you want to, but if you want to follow our design then try to make it medium sized.
Then, we can continue to step 2 and continue this design!
Step 2: Draw the next circle of the design
This second step of this guide on how to draw a simple mandala will be as easy as can be. This is because you will essentially be recreating what you did in the first step.
If you were able to do it once, you can do it again! This will be true no matter which method you’re using to draw the circle.
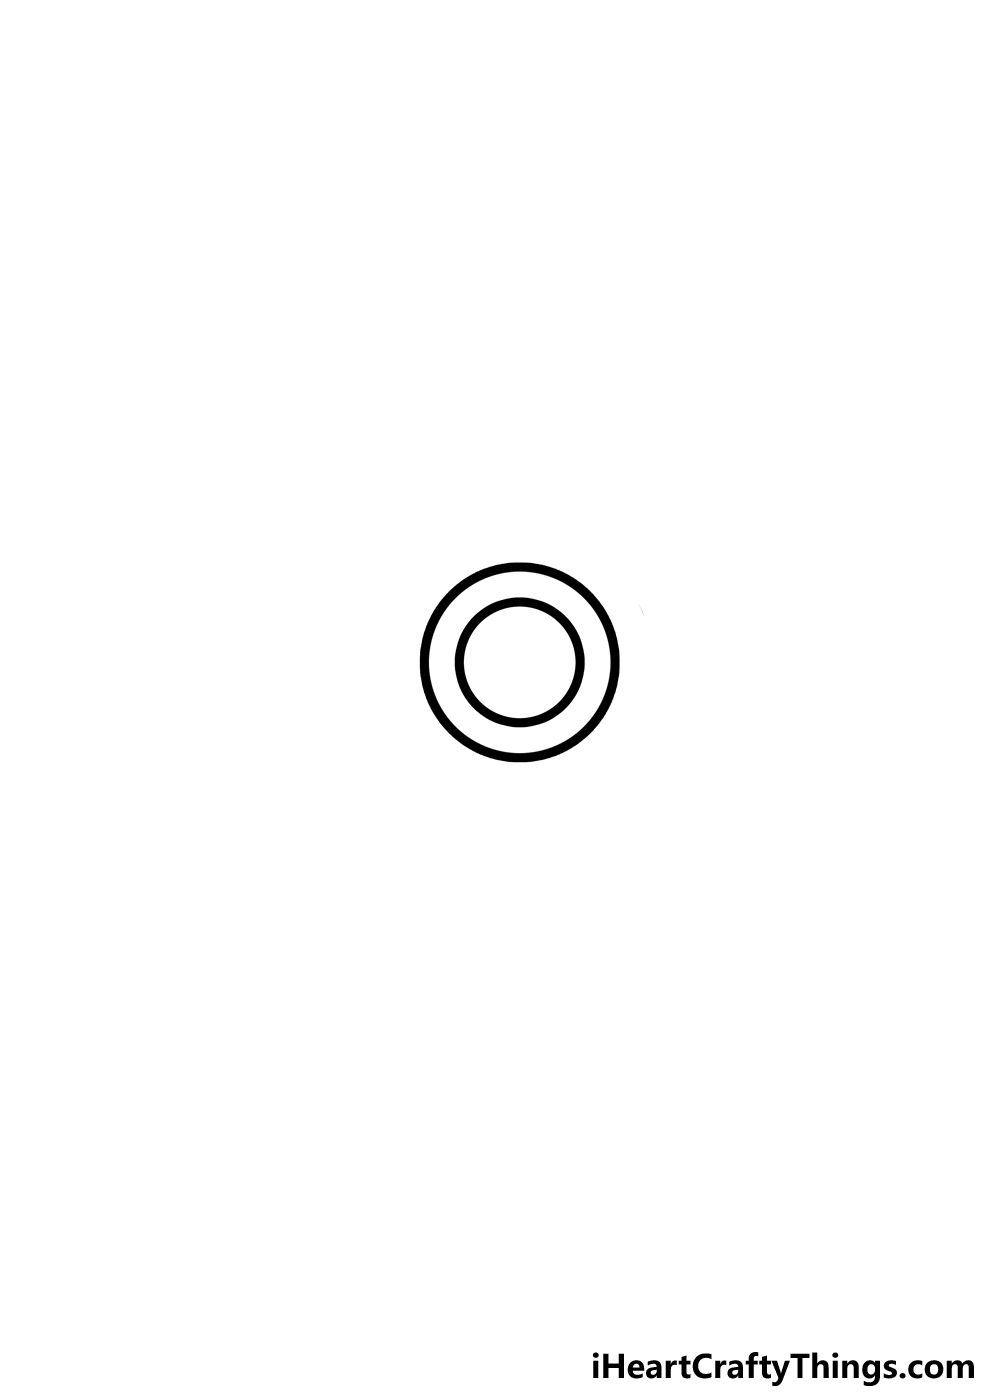
We started with one at the center, and this next one will go around the first one. It will look a bit like the frame of a dart board, as you see in the reference image.
Drawing this second circle is simple, but it does also have its challenges. For instance, you should try to make the space between the two circles as even as possible.
If you position it just a bit off so that one side is closer to the edge than the other, it will really make the design look weird.
If you’re worried about positioning it properly, then you can always draw the circle with a pencil first. You could still do this with your chosen circle drawing method.
If you do this, try to press lightly with your pencil so that you can easily erase the failed or unneeded attempts. When you’re happy with how it looks, you will know how to position your pen for the final circle.
When you have this second circle, you will be ready for the next step of the guide, so let’s head on when you’re ready!
Step 3: Add another circle surrounding the first two
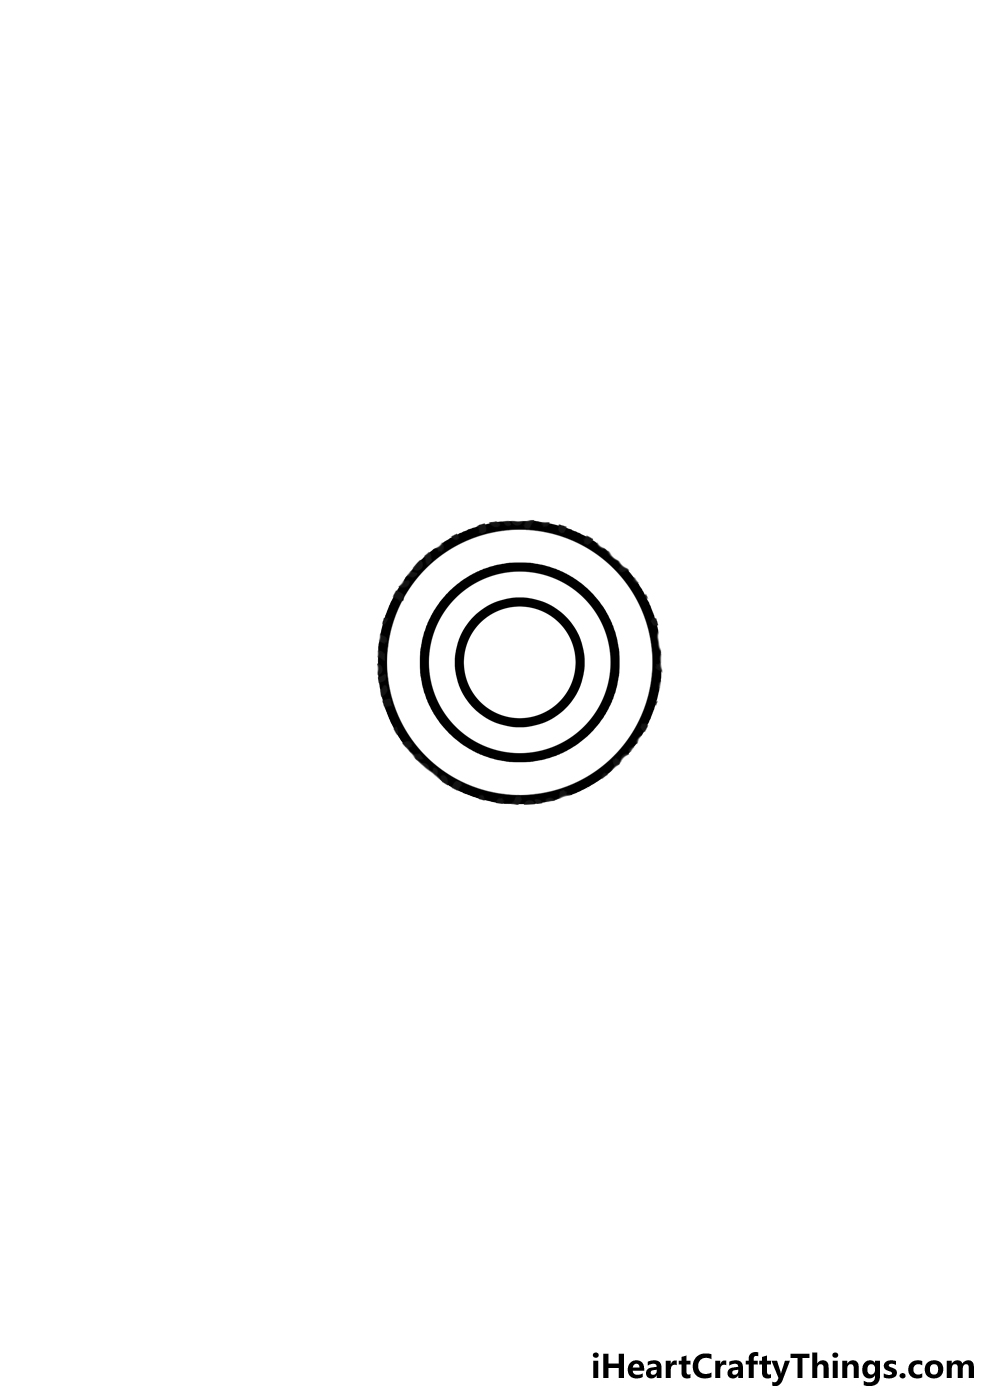
If this simple mandala drawing was starting to look like a dartboard before, it will look even more like one by the end of this step.
That’s because we will be adding another circle to the design, bringing the total to three.
This circle will be the biggest one so far in this guide, but you will essentially be doing the same thing you’ve done before in the previous two steps.
That’s why we would recommend using the same caution for this circle that we did for the last one.
That means using your drawing method to create a circle that is equally spaced between the second circle.
Once again, you could always draw a pencil version of this next circle to prepare. When you have drawn this circle, we will be ready to add different kinds of details that aren’t circles in the next few steps.
Before you head on, you could add some more circles to the design. For example, you could draw some smaller ones in the center of these ones.
Or, you could add some more around this latest one. It’s up to you, and you can customize this design in any way you wish!
For now, we will assume that you stuck to the design as it appears here and we will move on to step 4 of this guide.
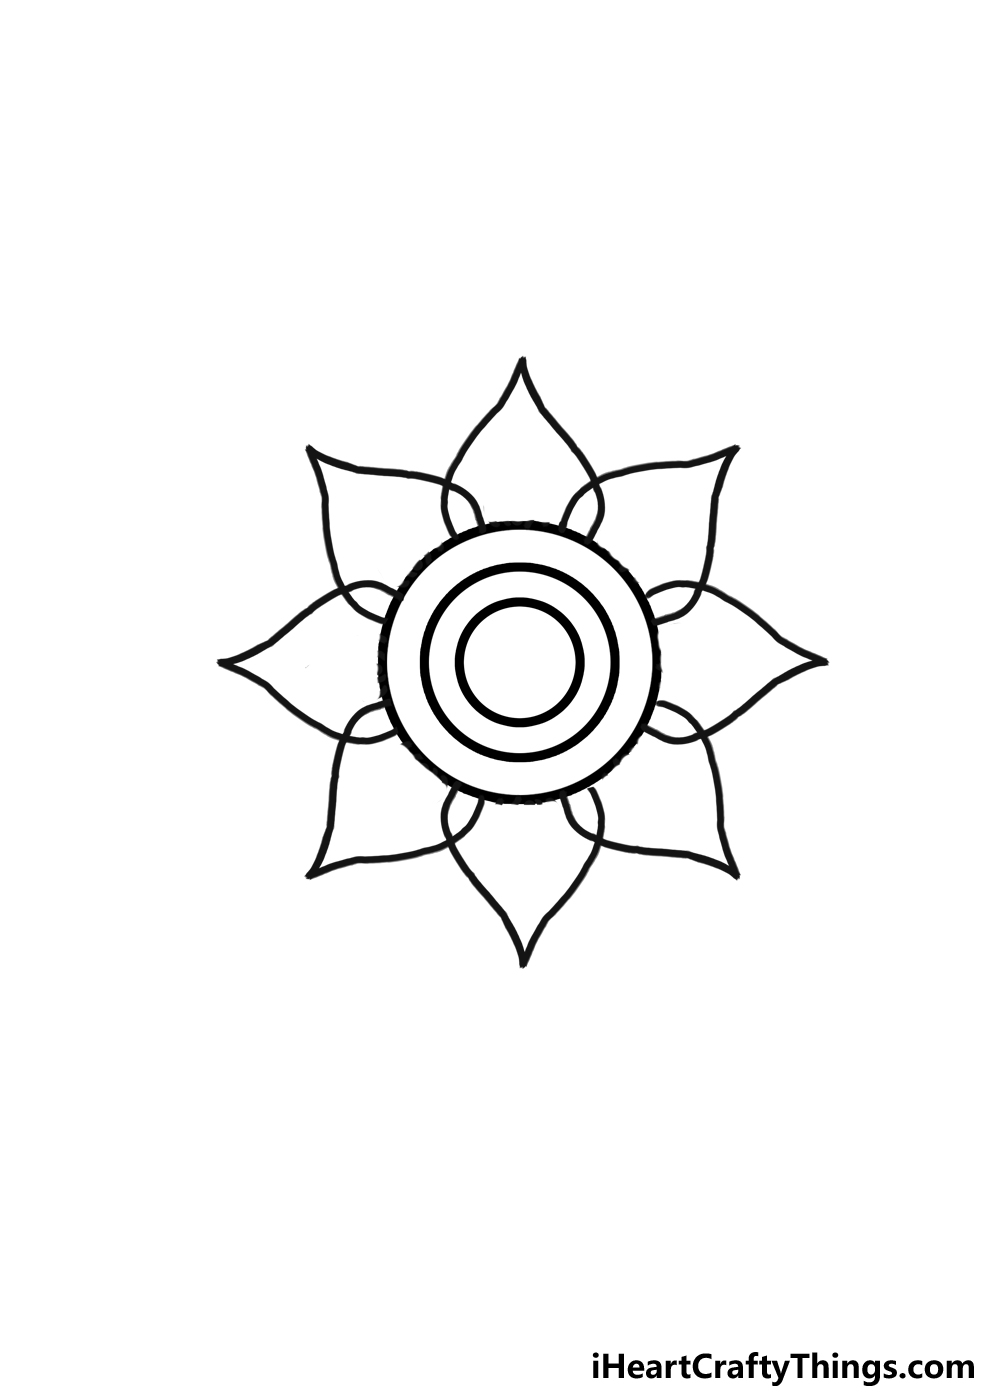
Step 4: Now draw some petal shapes around the circles
The first three steps of this design were fairly straight-forward, but this next one will be a bit more complex.
That shouldn’t be scary though, for as long as you take it slowly then it shouldn’t be too difficult.
As you will see in the reference image, we will be adding a series of rounded ‘petal’ shapes around the outer circle. The tricky part of drawing these petals is that they should all be the same size.
At the very least, they should be more or less the same size, and we’re trying to make them look as identical as possible.
This would be another step where drawing with a pencil first would be highly recommended.
Let’s practice by drawing the very top shape of the simple mandala. The sides are rounded and curved, and they culminate in a pointy tip.
If it helps, you can measure the length of the base of this petal so that the others will be the same size. Then, we will draw a series of these petals all along the circle.
As you will see in our example, each one will overlap on the sides, only slightly. If you space it properly, there should be eight of these petals surrounding the circles.
Of course, you could always change it so that there is a different amount if you prefer! This is definitely a step to take nice and slowly and plan it out as best you can.
Once you finish this step, you will be ready to add some final touches in the next step, so let’s head to that when you’re ready to proceed!
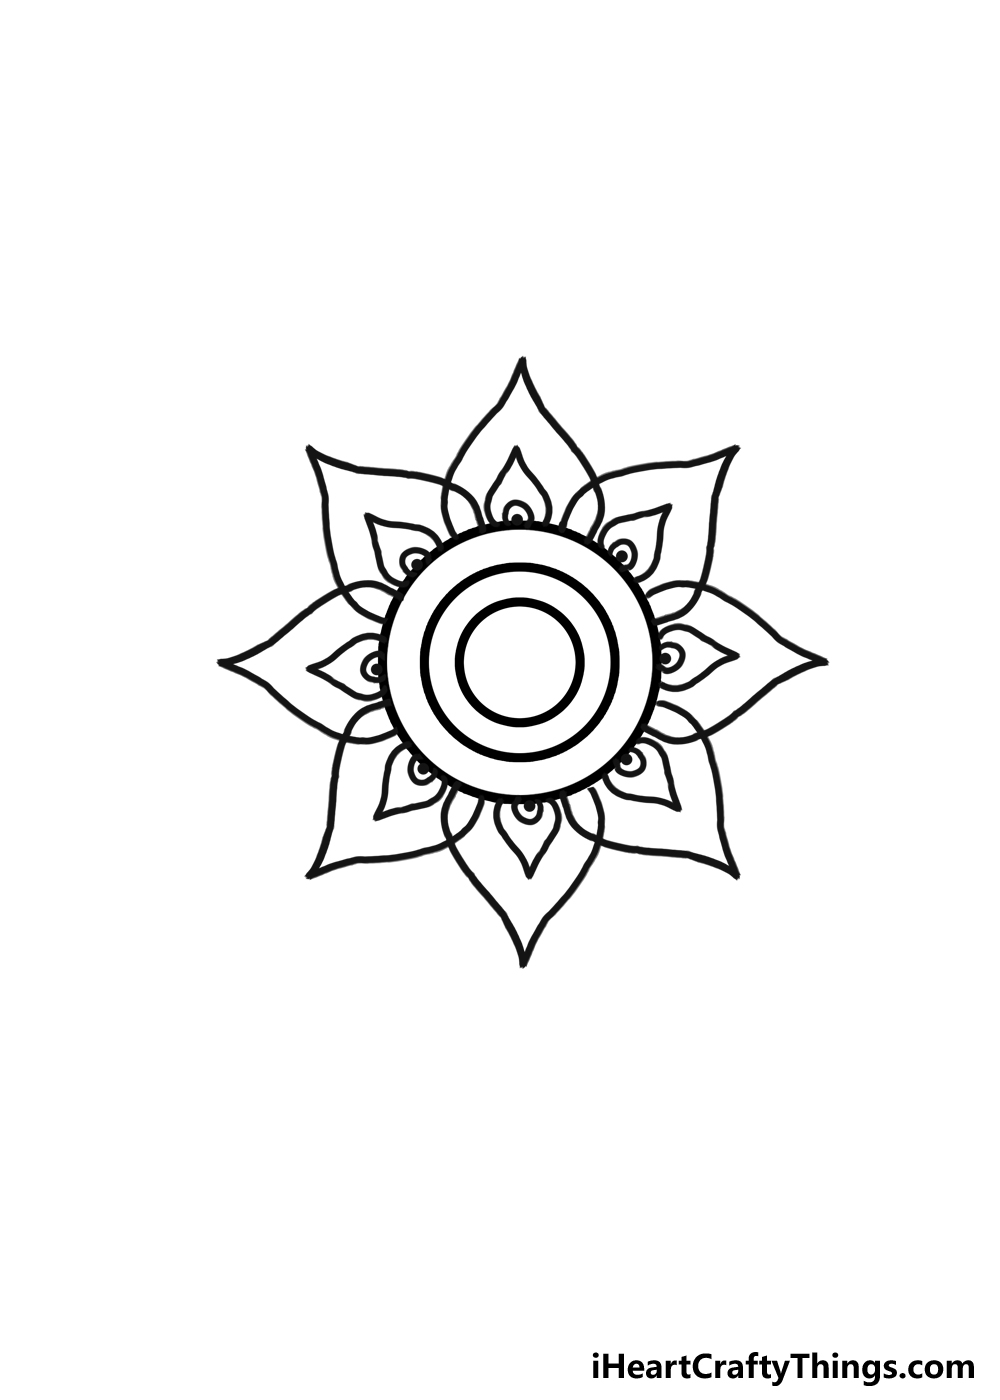
Step 5: Draw the final details and any extra touches for this simple mandala
That previous step of this simple mandala drawing was a bit more complex, but now that it’s done you can relax with some easier details.
It might not seem that way, as we will essentially be drawing more of these small petals.
This time, each one will be even smaller and placed inside one of the larger ones. This means you won’t have to worry about spacing them out or making them consistent sizes.
Each one of these little petals will then have a small circle at the base, and then a dot inside these circles. With these drawn, you will be done with the design and ready for some color!
You don’t have to move on just yet, however, as now you can add some of your own details and ideas.
You have seen how simple shapes can come together to form a more complex design, so you are ready to get creative with it.
You could add some more circles, petal shapes or maybe some sharper shapes poking off. If you don’t want to change the design of the simple mandala, you could still make it more complex in other ways.
One would be to draw a background, and this could involve some shapes or colors, as we will see in the next step. There are so many ways to put your own spin on this drawing!
These were just a few, but this is all about expressing yourself, so let your creativity take over and see what happens.
Step 6: Now, finish off with some color for this simple mandala
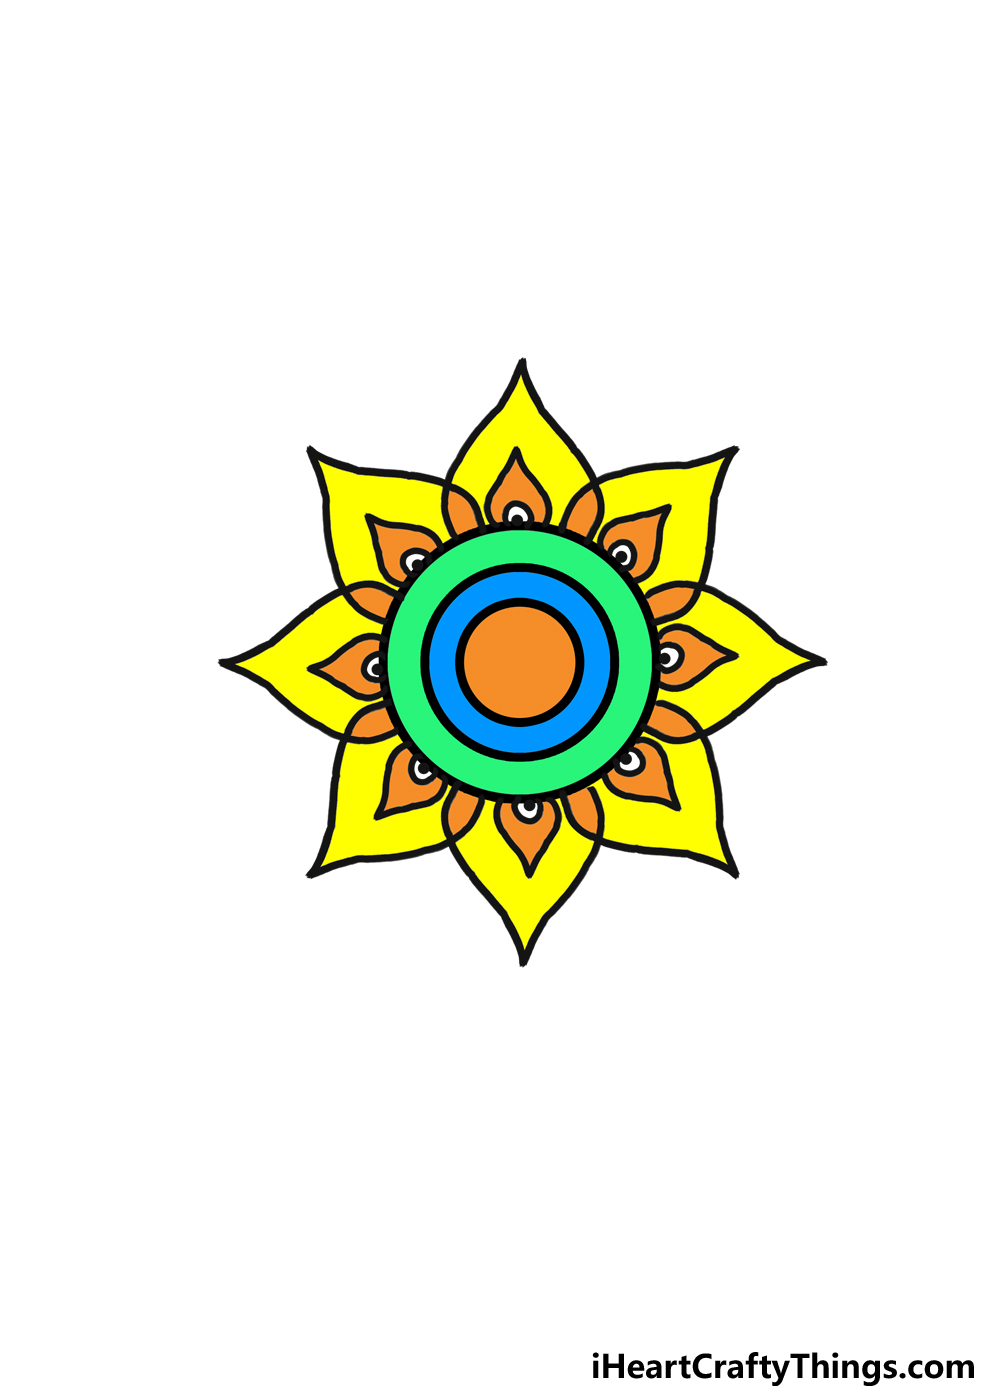
There were some challenges to overcome when drawing this simple mandala, and there was some concentration involved. Now, at the final step you get to relax with some coloring fun!
The colors we show in our reference image are more of a suggestion than anything. In this step, we encourage you to use your creativity and come up with some of your own color choices.
When coloring mandalas, it’s usually recommended to not think too much about it and see where your subconscious leads you.
That’s something you can do for this simple mandala you have created!
In our example, we used warm oranges and yellows for the petals, while sticking to cooler green and blue for the circles. Then, we brought it back to the warm color scheme with some orange for the center.
That is what we chose, but now you can show us whether you like these colors or want to go for something else instead. When coloring, you can also think about the art mediums you use.
There are some fiddly details to color in here, so we would recommend art tools that allow for precision. These could include colored pens, markers or colored pencils.
Those kinds of mediums allow you to color in smaller spaces, and they can make the colors nice and bright as well.
Of course, this is just a suggestion, and you could use any art tools you like.
How will you color in your version of this simple mandala?
Your Simple Mandala Drawing is Complete!
While this guide on how to draw a simple mandala had some tricky aspects, we hope that it was still a fun and relaxing experience for you to take on!
Now that you’ve finished the guide, you can take it so much further and design your own unique mandalas. You have everything you need, and you can use all sorts of shapes and lines.
When designing new ones, just try to remember to make everything as symmetrical and interconnected as possible.
You can also just keep building off of this one and make some variations.
It’s up to you, and we’re sure you will create all kinds of amazing mandala designs that you can then color!
When you have finished this drawing of a simple mandala, you can then go ahead and share it on our Facebook and Pinterest pages.
We always love to see how your artwork turned out, and it will be great to see how you made this simple mandala your own!