There are many incredible creatures living in our oceans, and they come in many different shapes and sizes.
The shrimp may be one of the smaller creatures in the ocean, but it is one of the most unusual looking.
Shrimp are also popular amongst fish food enthusiasts, and because of their unique appearance they are also popular to portray in artwork.
If you would like to create some of this artwork yourself, then learning how to draw a shrimp is essential.
By the end of this guide, you will be able to draw one of these curious creatures!
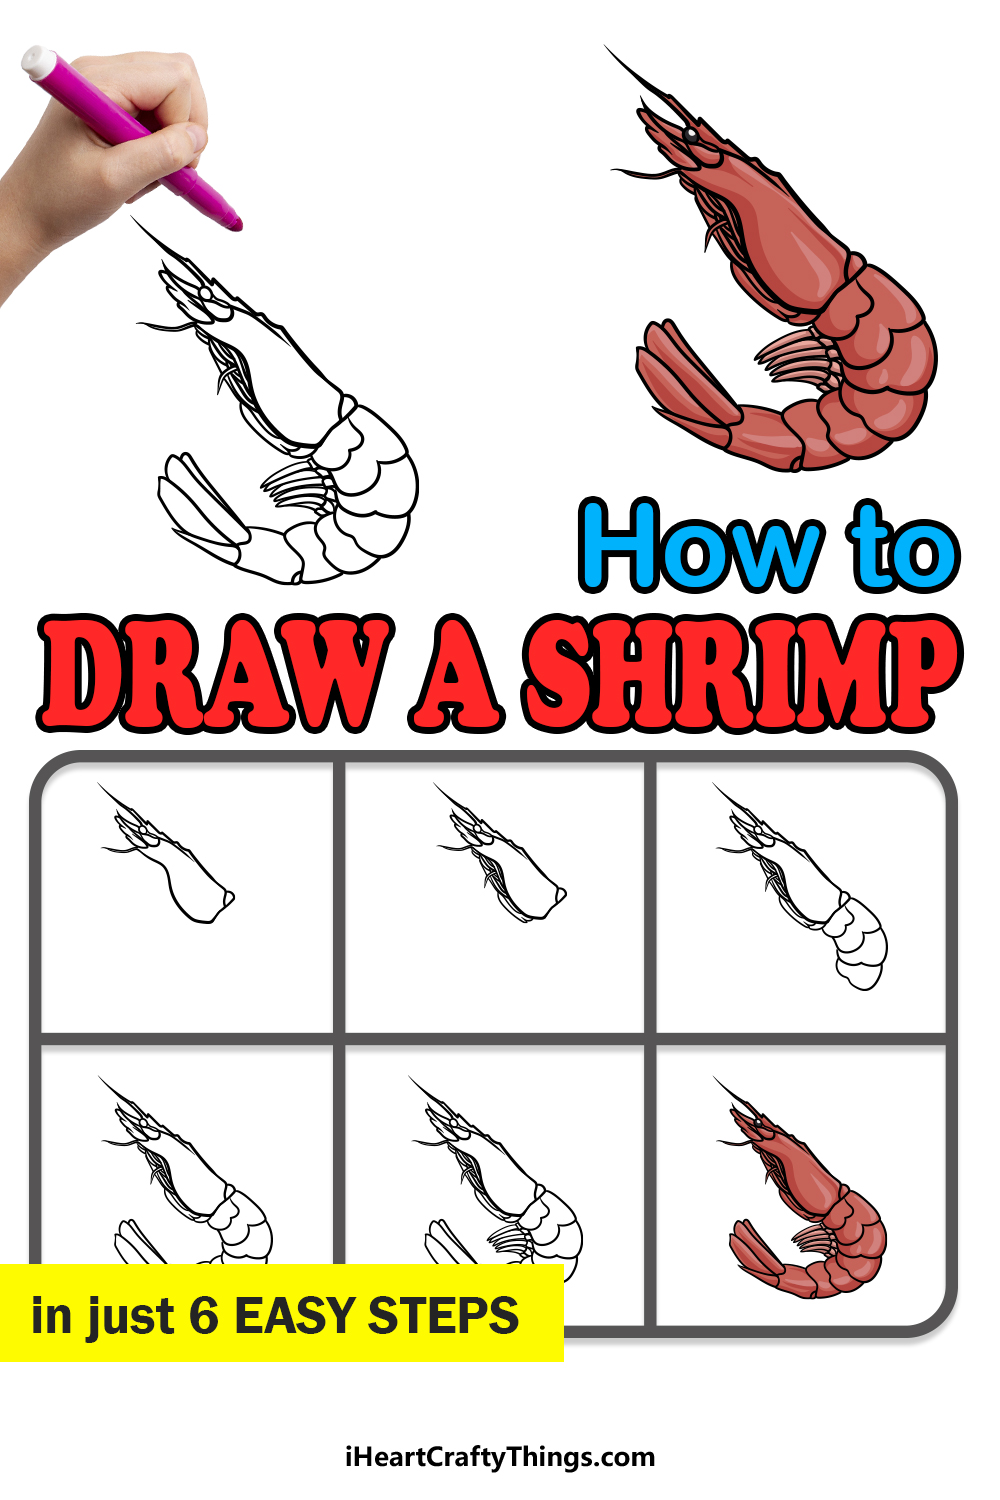
We hope that you enjoy this step-by-step guide on how to draw a shrimp in just 6 steps!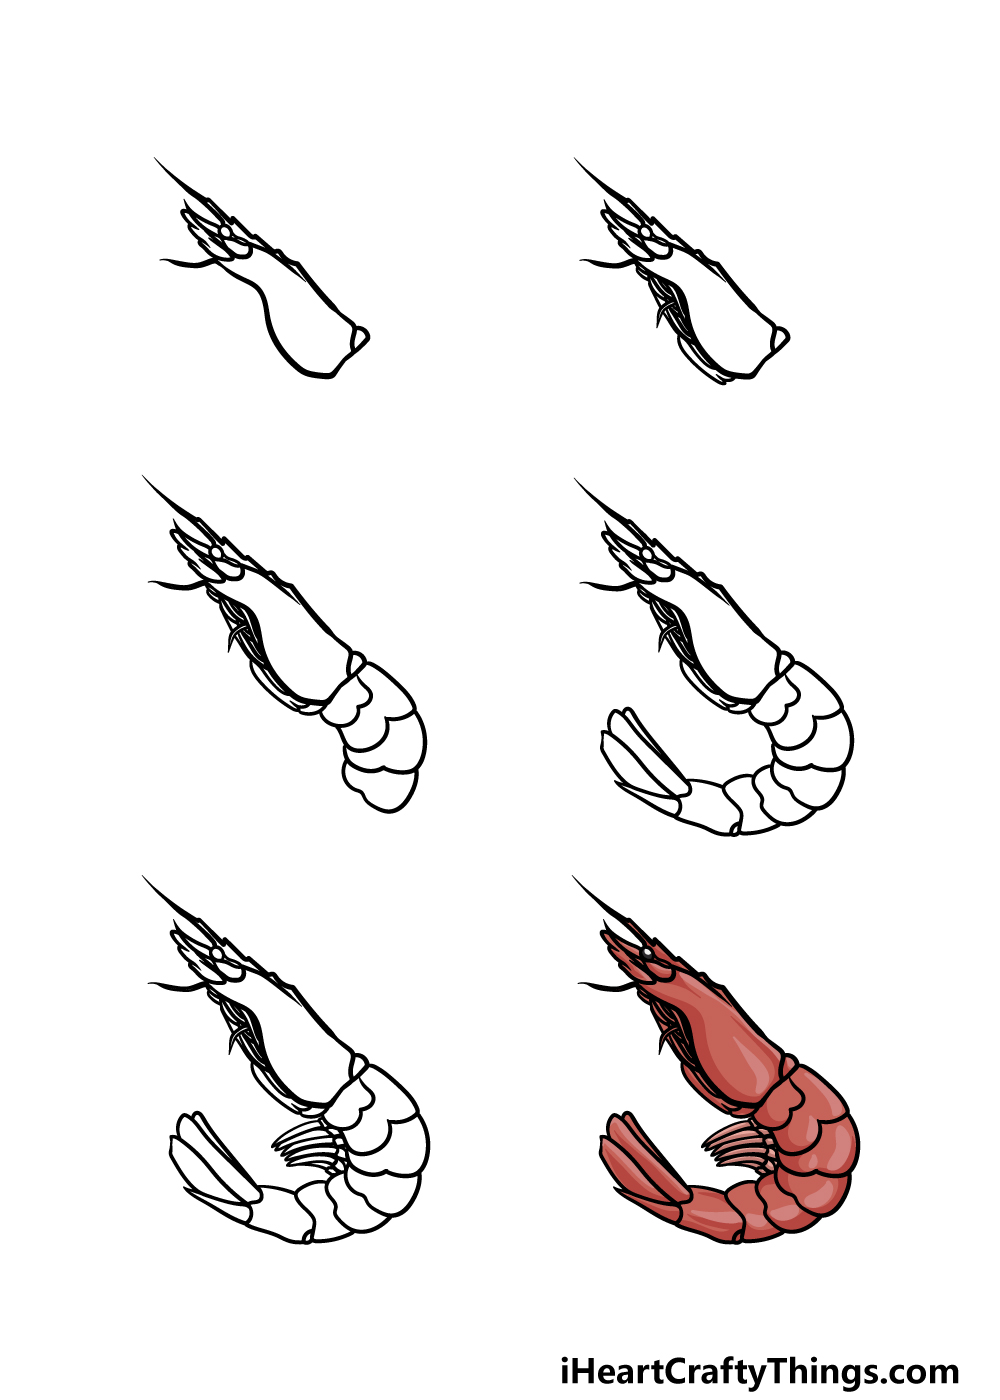
How to Draw A Shrimp – Let’s get Started!
Step 1
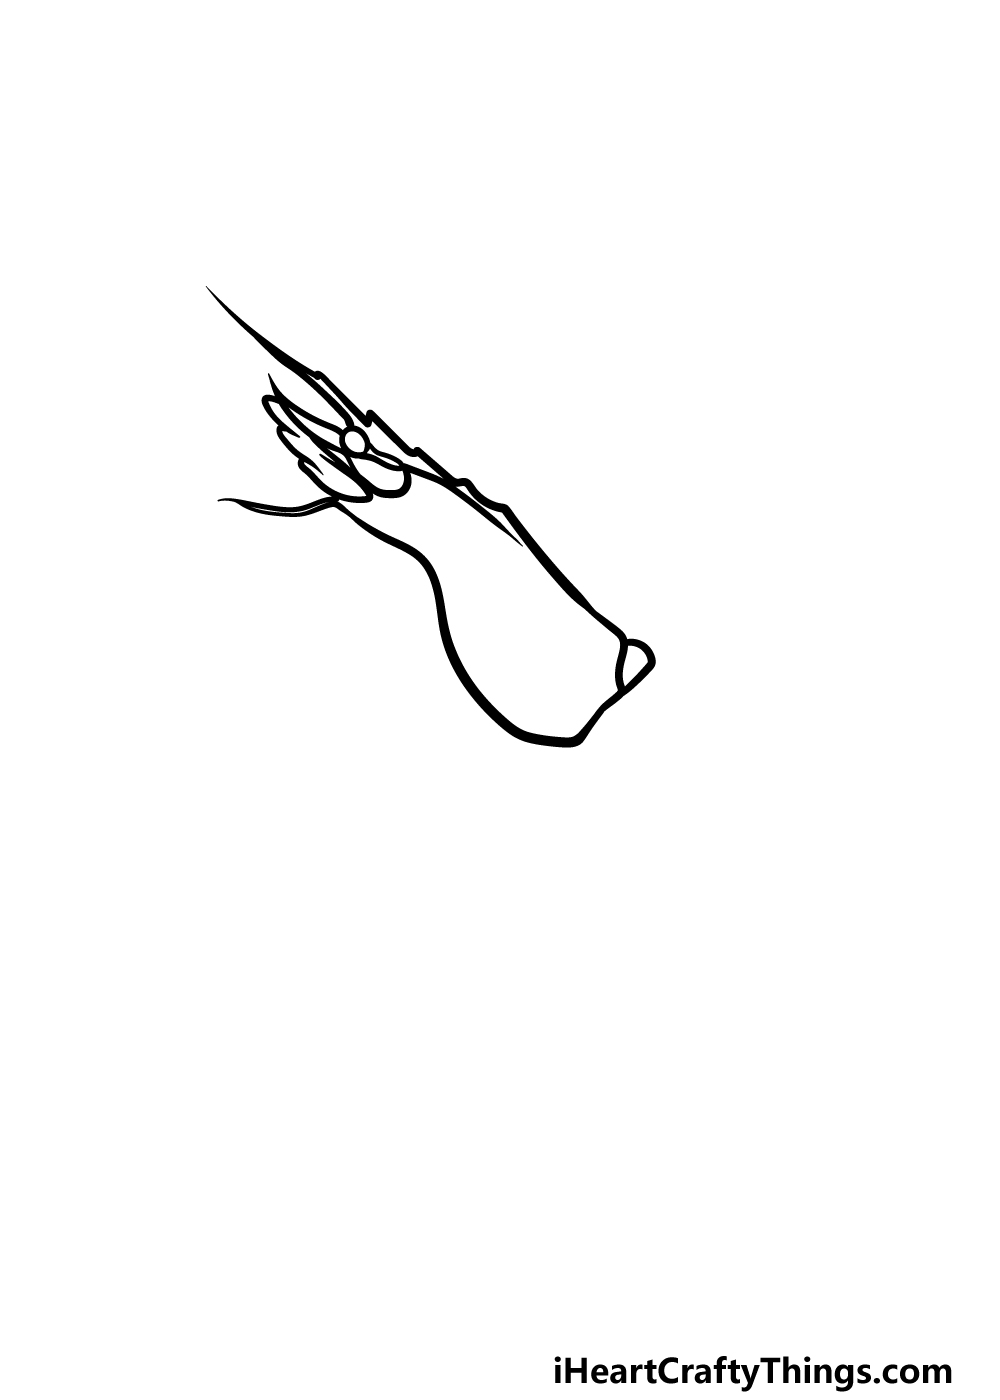
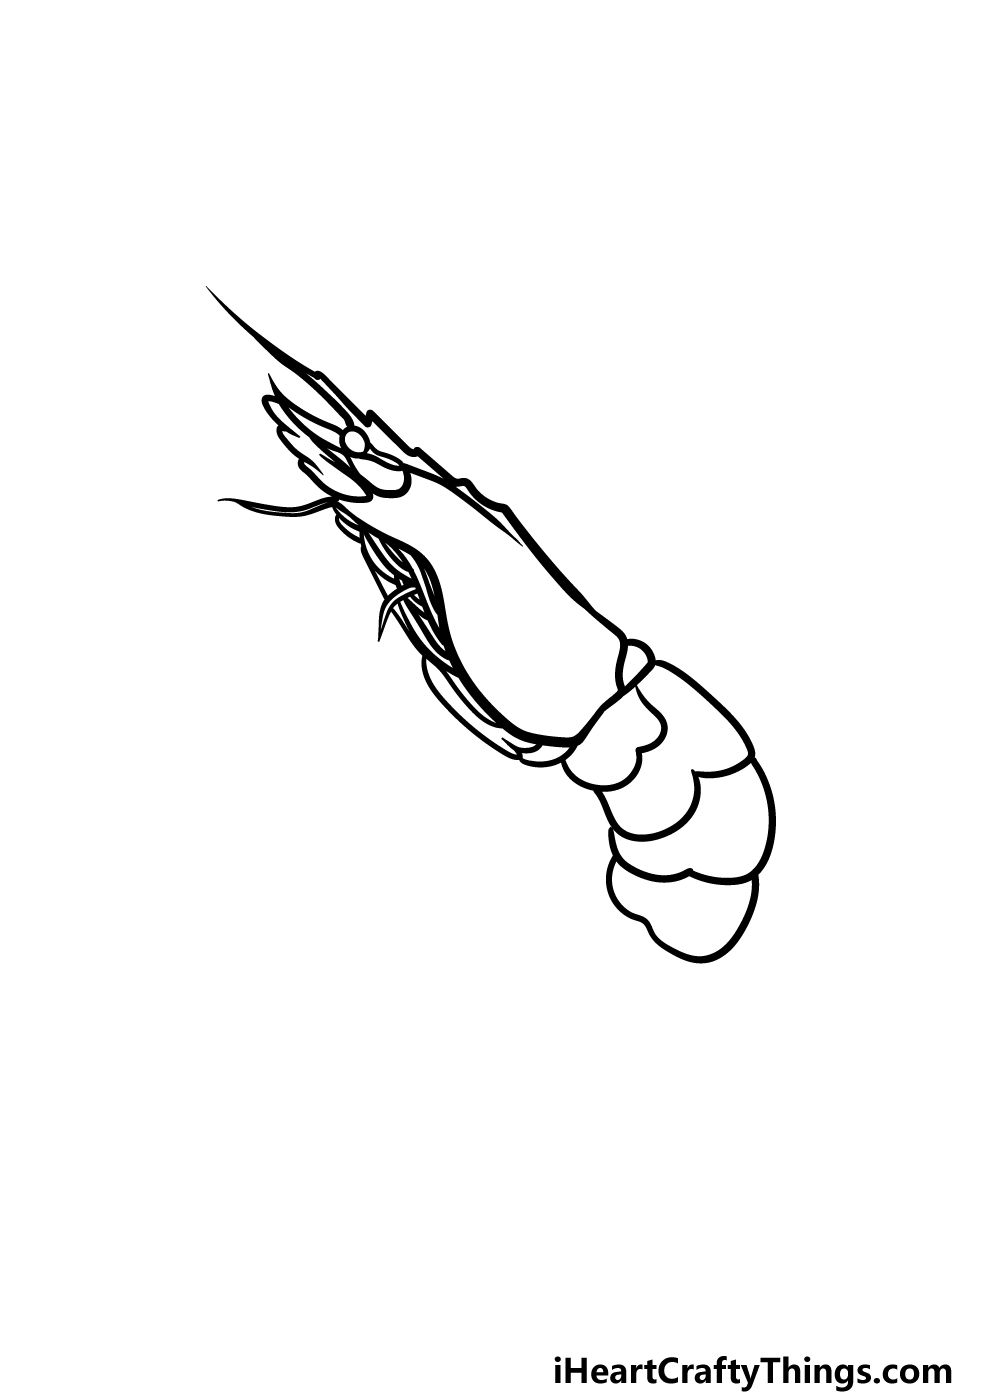
For this first step of our guide on how to draw a shrimp, we will be drawing the head and body of the shrimp. To do this, we will be drawing some curved lines with a pointy end for the head.
The head will also have some smaller long shapes on it and a small circular shape for the eye. You can also use some curved lines for the feelers of the shrimp.
Once you have this part of the shrimp looking as it does in our reference image you’re ready for step 2!
Step 2 – Next, draw the legs of the shrimp
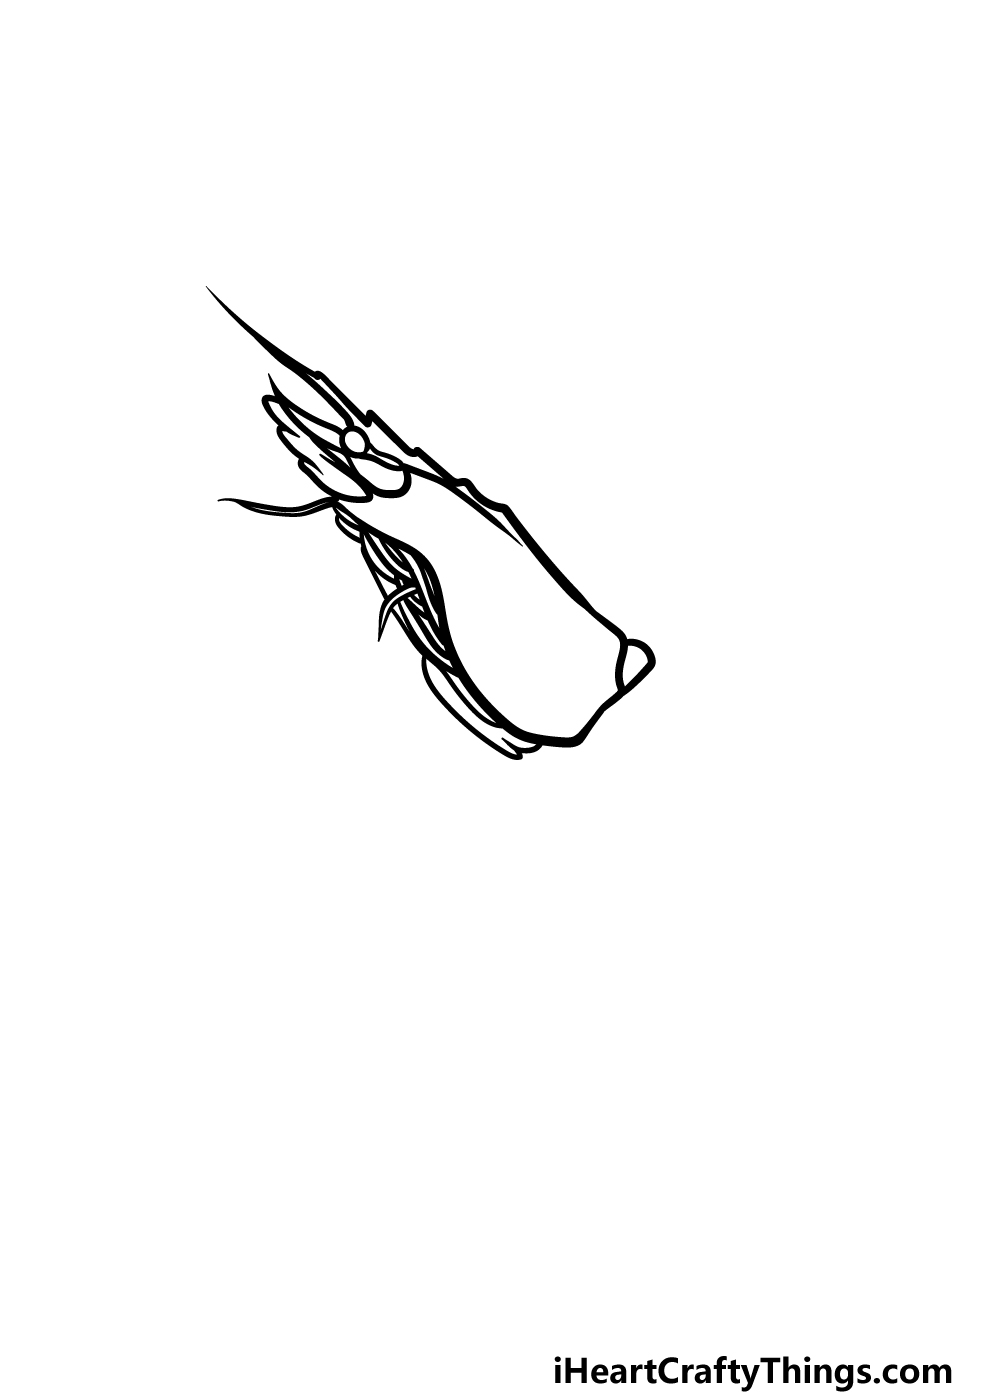
Shrimp have lots of little legs at the base of their bodies that they use to scuttle along the ocean floor. We will be drawing this aspect for this step of your shrimp drawing.
These legs will be drawn using some small, thin curved shapes at the bottom of the body that you drew in the previous step.
That’s all there is to it for this step, and we are ready to proceed!
Step 3 – Now, draw the curved segments of the body
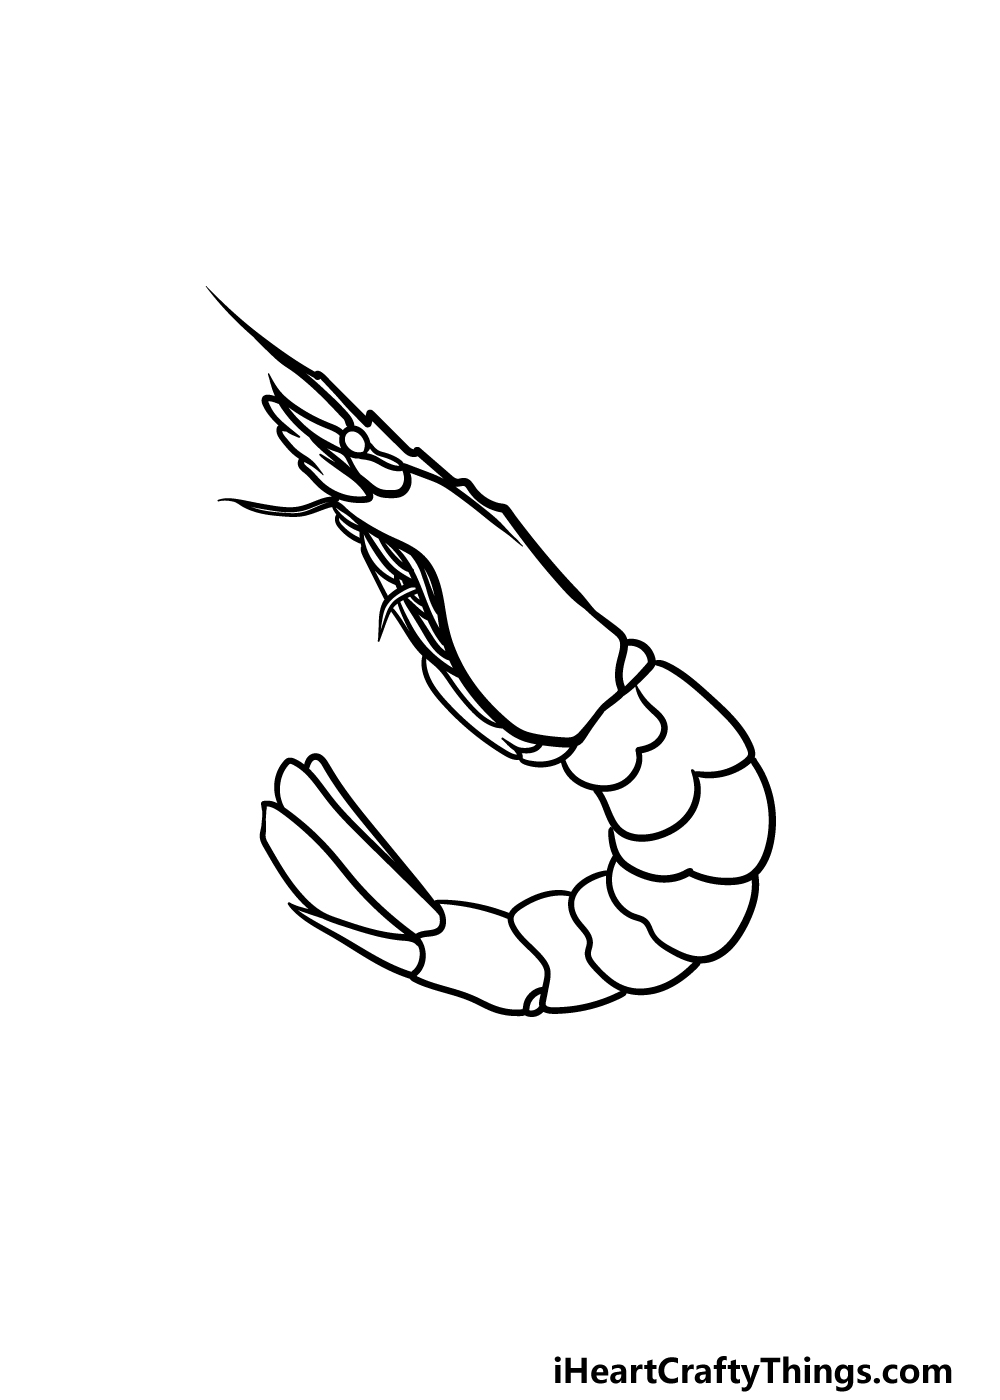
The back half of a shrimp’s body is made up of several curved separate parts, and these are what we will be drawing for this step of our guide on how to draw a shrimp.
To draw these segments, you will be using some more curved lines for the various segments that connect to one another.
As you draw these segments, be sure to angle them so that the body starts to curve in on itself.
We will only be drawing four of these body segments for now, but we will be adding some more in the next steps!
Step 4 – Next, draw the rest of the shrimp’s tail
We will be drawing the rest of the shrimp in this next part. This will be focused on the tail for the most part, and you can start drawing it by adding three more of those body segments curling in.
Then, once you have added those segments, you can finish off this step by adding some long and thin shapes to the end of the tail.
Once you have finished this tail and the rest of the body, we will just have a few final details to add before we start coloring it in for the final step.
Step 5 – Now, finish off your shrimp drawing
This step of our guide on how to draw a shrimp will be all about adding the final touches and parts before you move on to the final step.
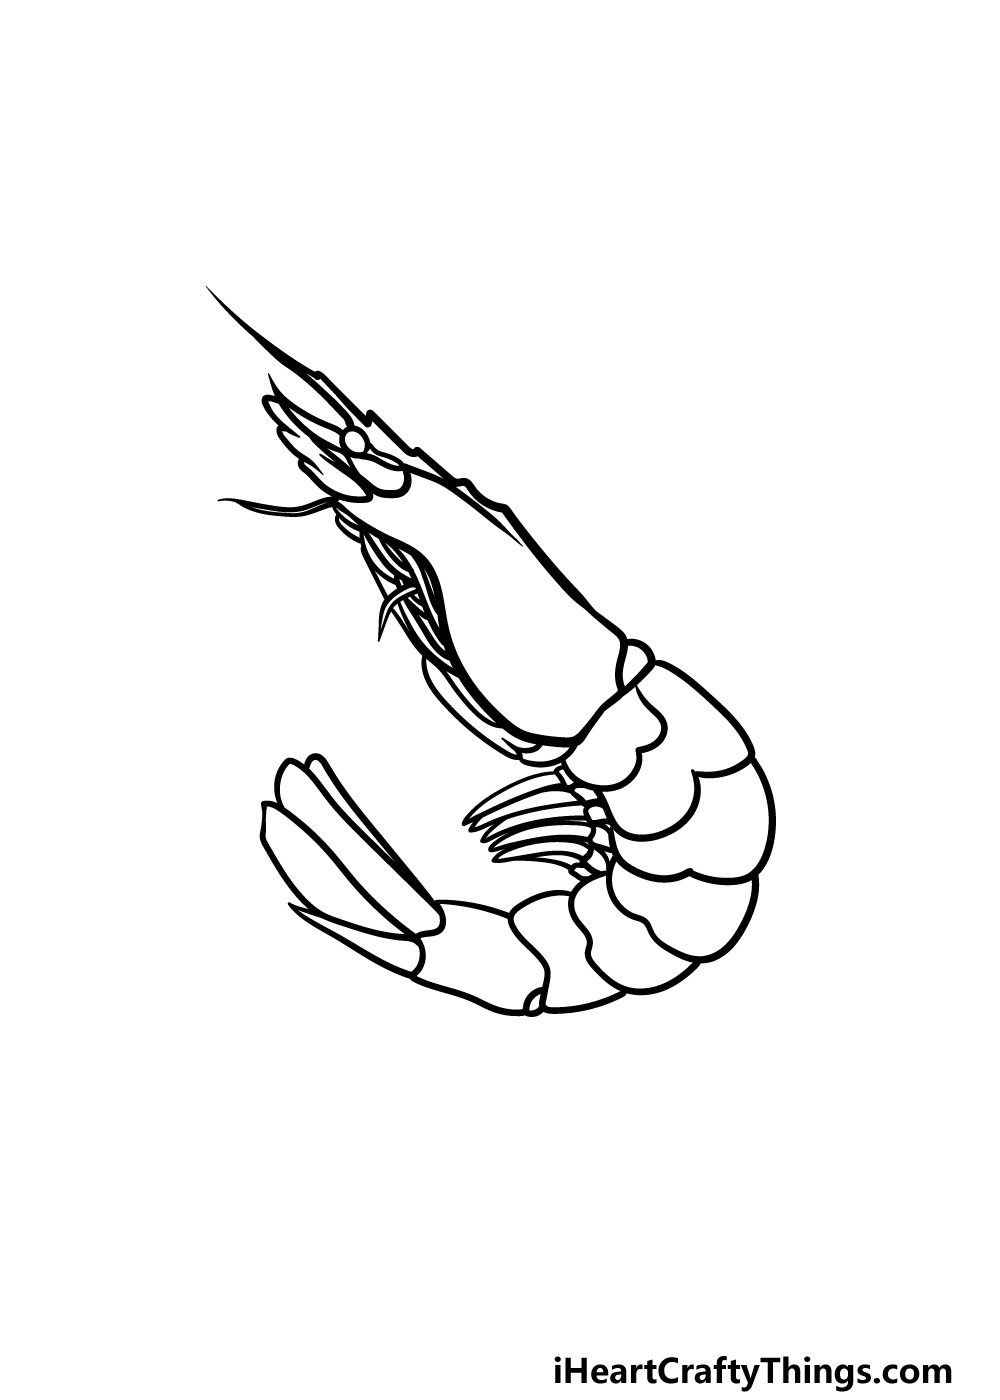
First, we will add some more legs to the shrimp, and these ones will go nearer to the back of it.
You can use some small square shapes for the base of the legs, and then use some curved liens with sharp tips at the end for the rest of the legs.
These legs will be a lot longer than the previous legs that you drew! Once you have drawn these legs, you have finished all of the details in this guide!
Before you move on, you can also add some details of your own to put your own spin on it.
You could draw some more shrimp to go with this one, or you could draw some more sea life such as some lobsters or fish!
You could also draw a background to show where this shrimp is, and there are many options for the types of backgrounds you could go for.
How will you finish off this picture before the final part?
Step 6 – Finish off your shrimp drawing with some color
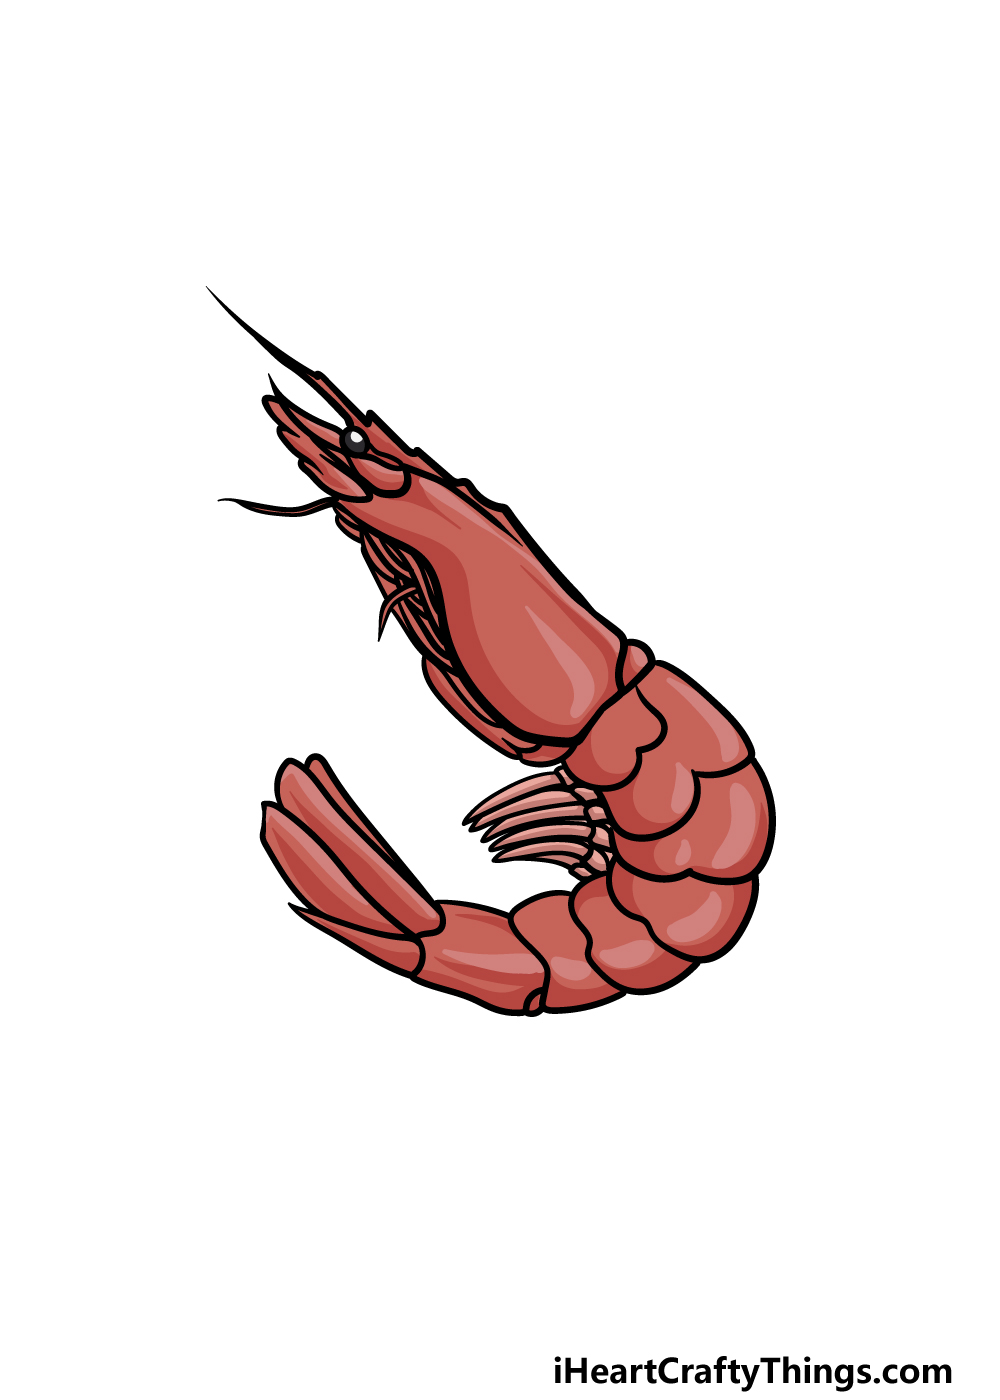
Now that you have finished this shrimp drawing, you can finish it off with some amazing colors. In our reference image, we went for some shades of red for the shrimp to give it nice realistic colors.
You could go for a similar color scheme for your own drawing, but you could also incorporate any colors that you love for it.
You could even create a more stylistic look by using your favorite bright colors to bring it to life. Once you know what colors you would like, you can also choose which art mediums and tools to use to bring the colors to life.
You could use some acrylic paints or colored markers for some brighter colors or some watercolors and colored pencils for more muted tones to the colors.
No matter what you choose will look great, so let your creativity flow and express yourself with color!
Do this to take your shrimp drawing to the next level
Make this shrimp sketch look even better with some fun tips to try out!
You did a great job creating this drawing of a shrimp, but you could add to it by adding even more shrimp alongside it. This would be a great way to fill the page!
You know the basics of how to draw a shrimp, so now you could add as many as you like. They could all be posed similarly, but you may also want to change the pose and direction they are in.
How many shrimps do you think you would like to put into this drawing?
Adding more shrimps is one way that you could populate this drawing, but there are other creatures you could also add. Similar creatures would include lobsters, crabs or crayfish.
You don’t have to stick to crustaceans, however, as there are other ocean creatures that you may want to add instead. Fish and squids would be a few other options you could consider.
What other animals could you add to this artwork?
Next, you have some options for the background settings you use for this shrimp drawing. One would be to show it in its natural habitat in an ocean setting.
You could make an incredible underwater scene with fish and all sorts of ocean creatures swimming around. Maybe you could even add a detail like a sunken ship!
Looking up pictures from under the ocean would help you to design this background for your own artwork.
Shrimps are also a delicious delicacy around the world, so you could also use a meal setting for your shrimp sketch. This could be as simple as showing a pile of shrimp on a plate with some sauces.
You could take it even further by adding sides, beverages and other things you would enjoy with a seafood meal. Then, it could also be fun to add some characters sitting around this meal ready to enjoy it.
You could even design these characters using your own friends and family as inspiration!
Your Shrimp Drawing is Complete!
All six steps of this guide on how to draw a shrimp are complete, and you have a really cool shrimp drawing to show for it!
We hope that the steps of this guide helped to make drawing a realistic shrimp easy and fun for you to do.
Whenever you take on a new drawing, breaking it down into smaller steps is the best way to take it on, and that’s what this guide aimed to do!
Now you can take this drawing even further by adding some more details and elements of your own.
We mentioned a few ideas that you could try such as drawing some more sea creatures or a background. We can’t wait to see what you choose to put your own spin on this picture!
When you’re ready to find your new drawing guide, you can visit our website where we have plenty of awesome guides for you to enjoy. We have many more coming soon, so be sure to check in often!
Then, once you have put the final touches on your shrimp drawing we would love to see it! Please remember to share it on our Facebook and Pinterest pages for us to see!