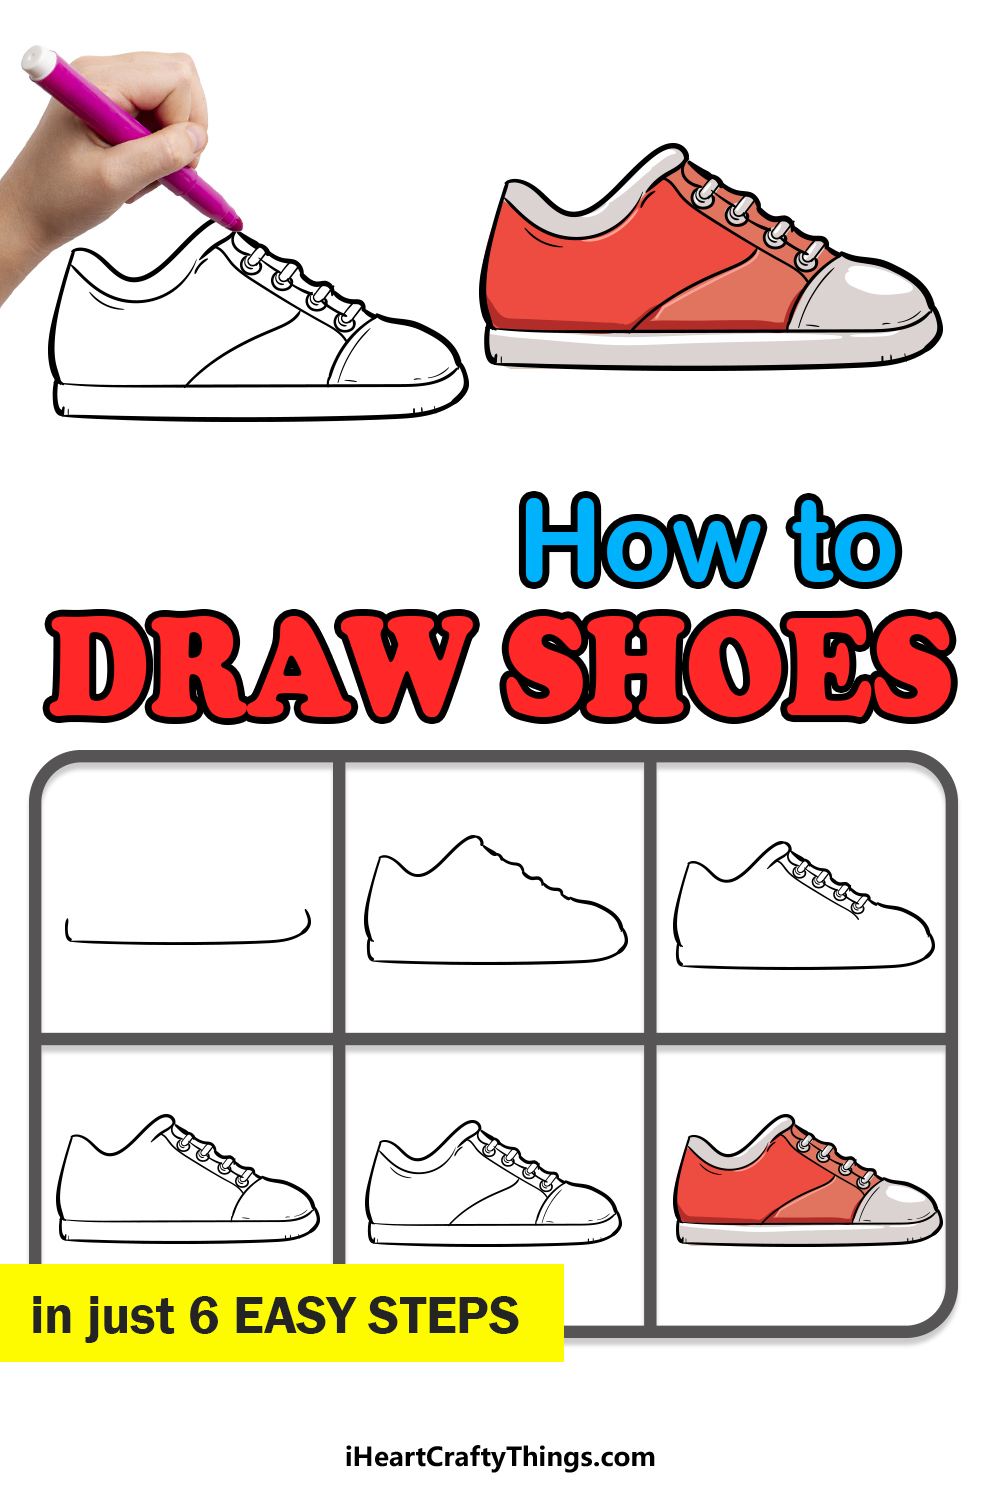
If you want to know how to draw a shoe, this guide for kids will be perfect for you. This surprisingly tricky drawing can be much easier when you have the right steps to follow.
We all wear shoes, and so many would assume that it would be really easy to draw one. However, when you actually sit down to do it you will find that it’s quite a challenge!
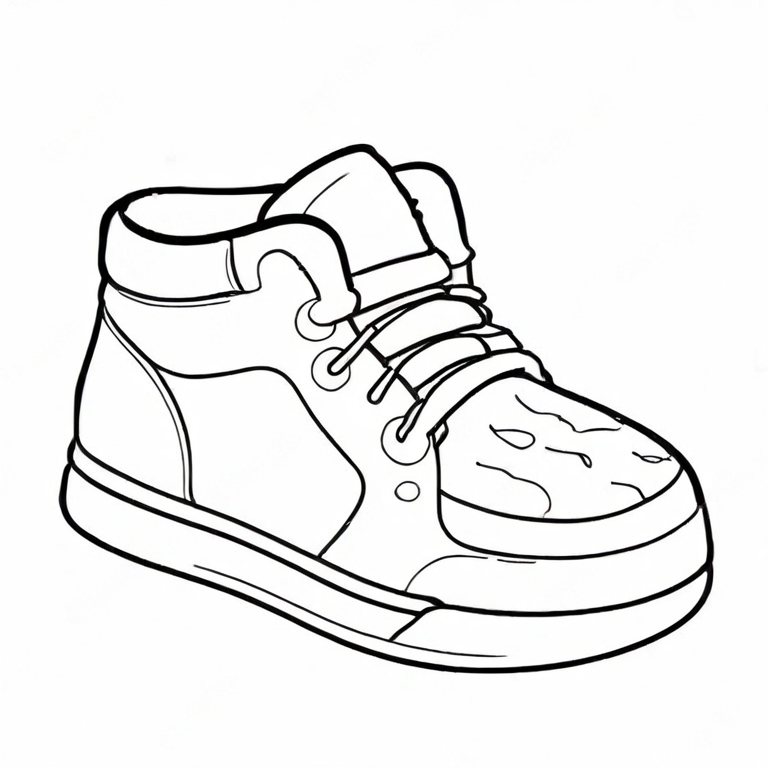
In this guide, I will take you through the steps to create a side profile simple shoe design. You will see how to draw the laces, rim and sole of the shoe.
I’ve left the design quite basic so that you can easily master the design. Once you have done so, you could add all sorts of small details and color choices to make it more unique.
You’ll amaze everyone you know with your skills, and it all begins with the first step of the guide.
Watch And Follow These Steps To Create A Shoe Drawing
How to Draw A Shoe – Let’s get Started!
Step 1
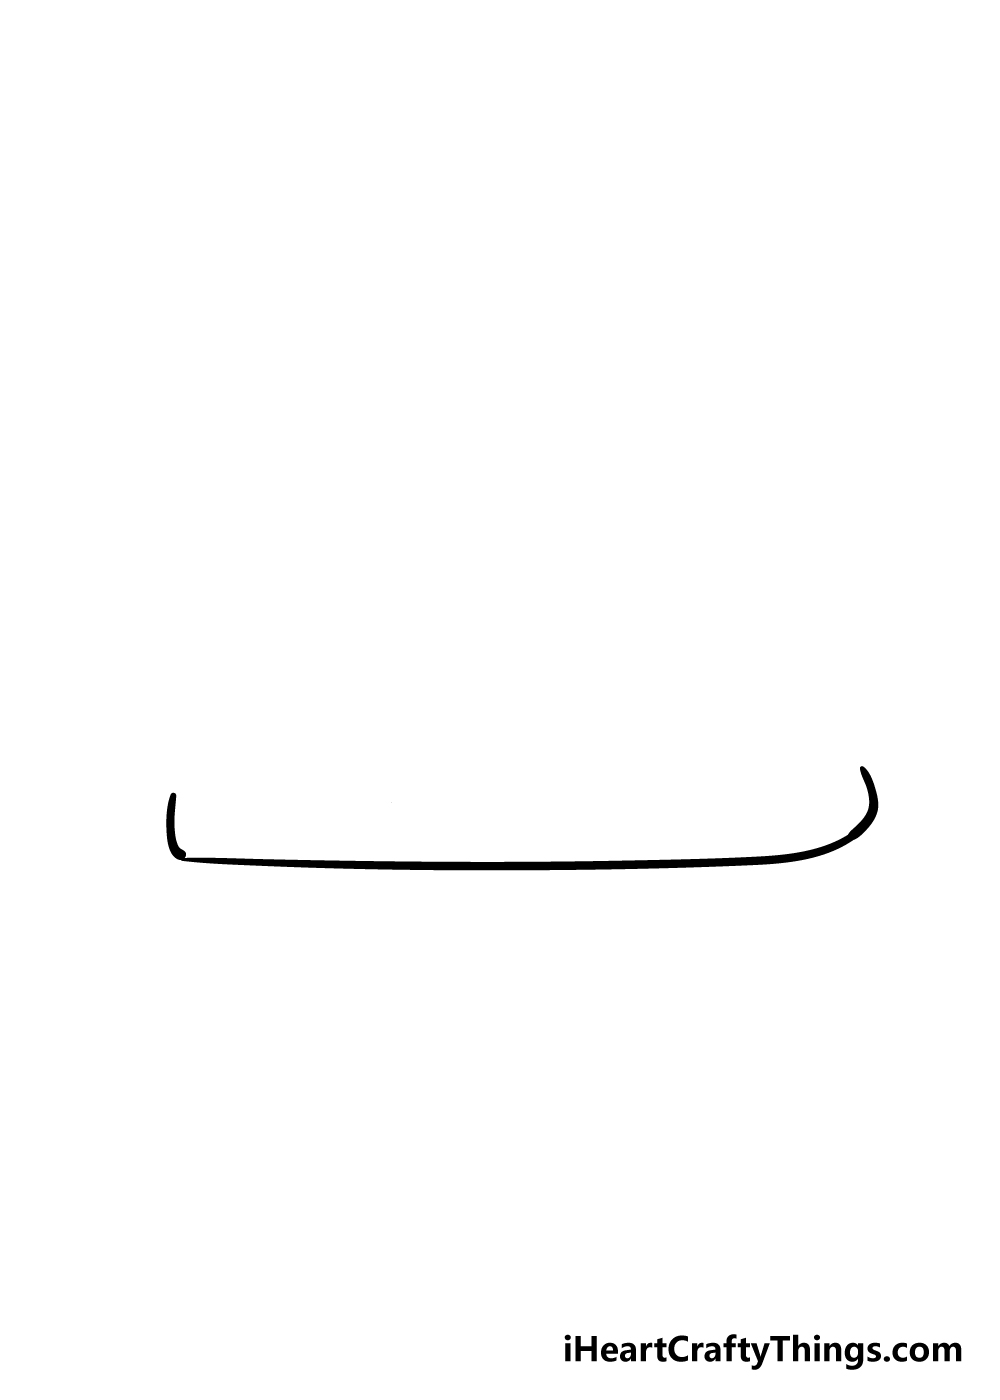
While it might be hard to sit down and draw a shoe from memory if you try to, there are a few elements that we can all agree on for the structure that are the standard for all shoes.
We will be drawing a sneaker in this guide, and that means that it will have an almost completely flat base.
You can use a ruler to draw a horizontal line. Near the end of the line, you should start to curve it up, at first gradually and then more sharply.
You can then finish off the base with a very slightly curved line at the back, as you can see in the image.
Step 2 – Draw in the outline of your shoe
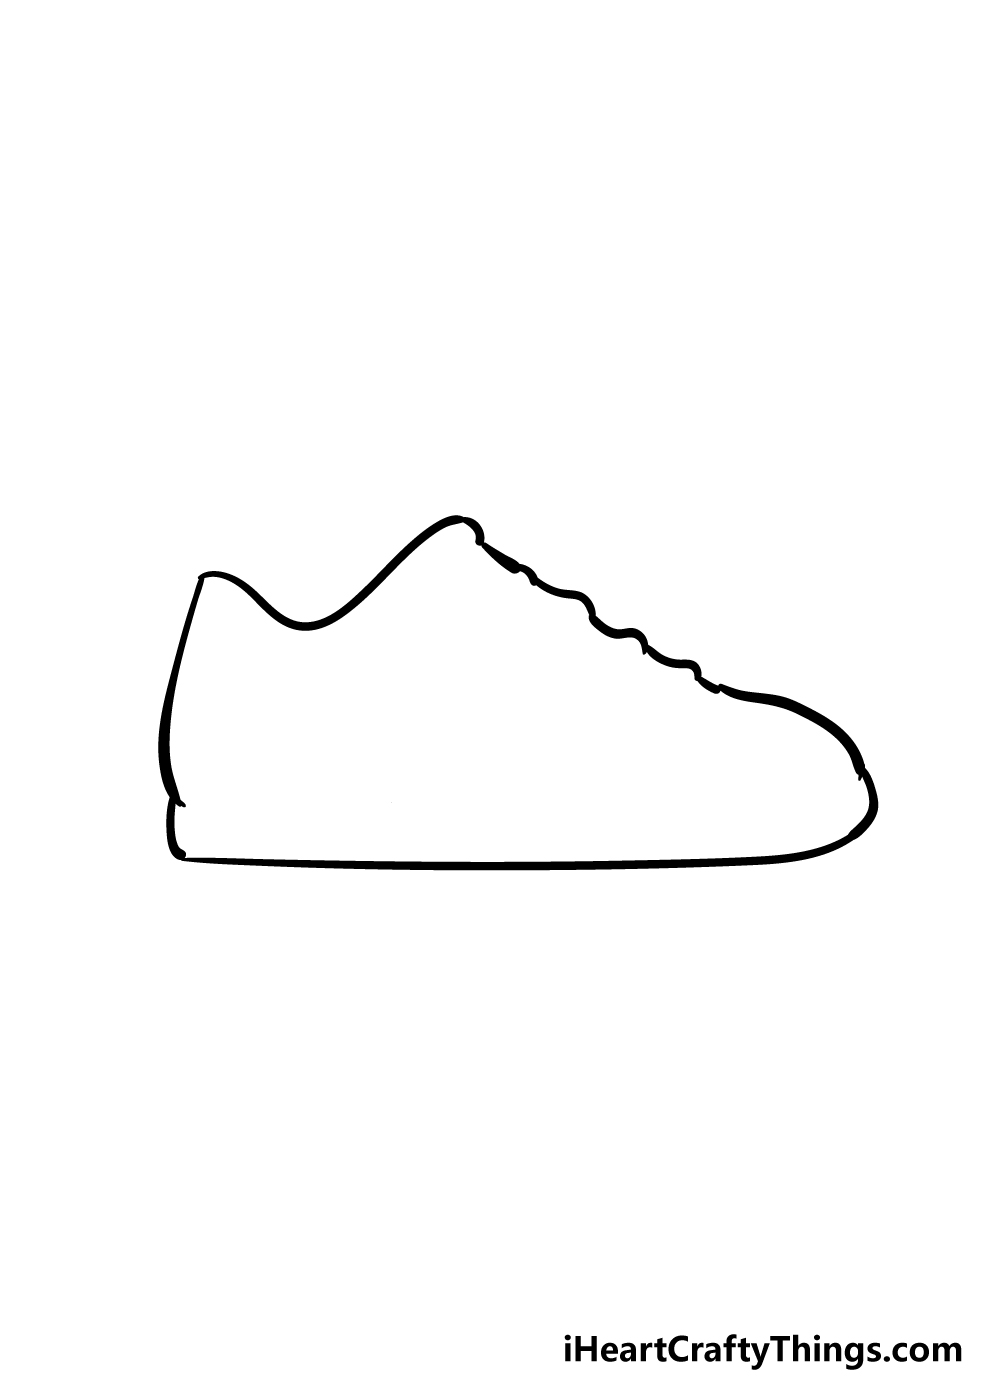
For this second step of your shoe drawing, we will be adding in an outline for your shoe.
This part could be a little tricky at first, so I would recommend drawing with a pencil first and then going over it in pen later.
We will take this step slowly as there are a lot of different elements to it. Starting from the back of the base of the shoe, draw in a vertical, curved line.
You can then draw in a horizontal line that dips sharply in the middle to form the opening of the shoe.
From there, you can draw in a curved line coming up from the front of the shoe’s base. Once you have that in, I would use a pencil to draw a line between the end of that line and the end of the opening of the shoe.
Using that pencil line as a guide, you can draw in the sloping front of the shoe, making a few indents for the laces.
For this step, you should really take your time and refer to the reference picture closely. I know you can do it!
Step 3 – Now, we shall add in some laces
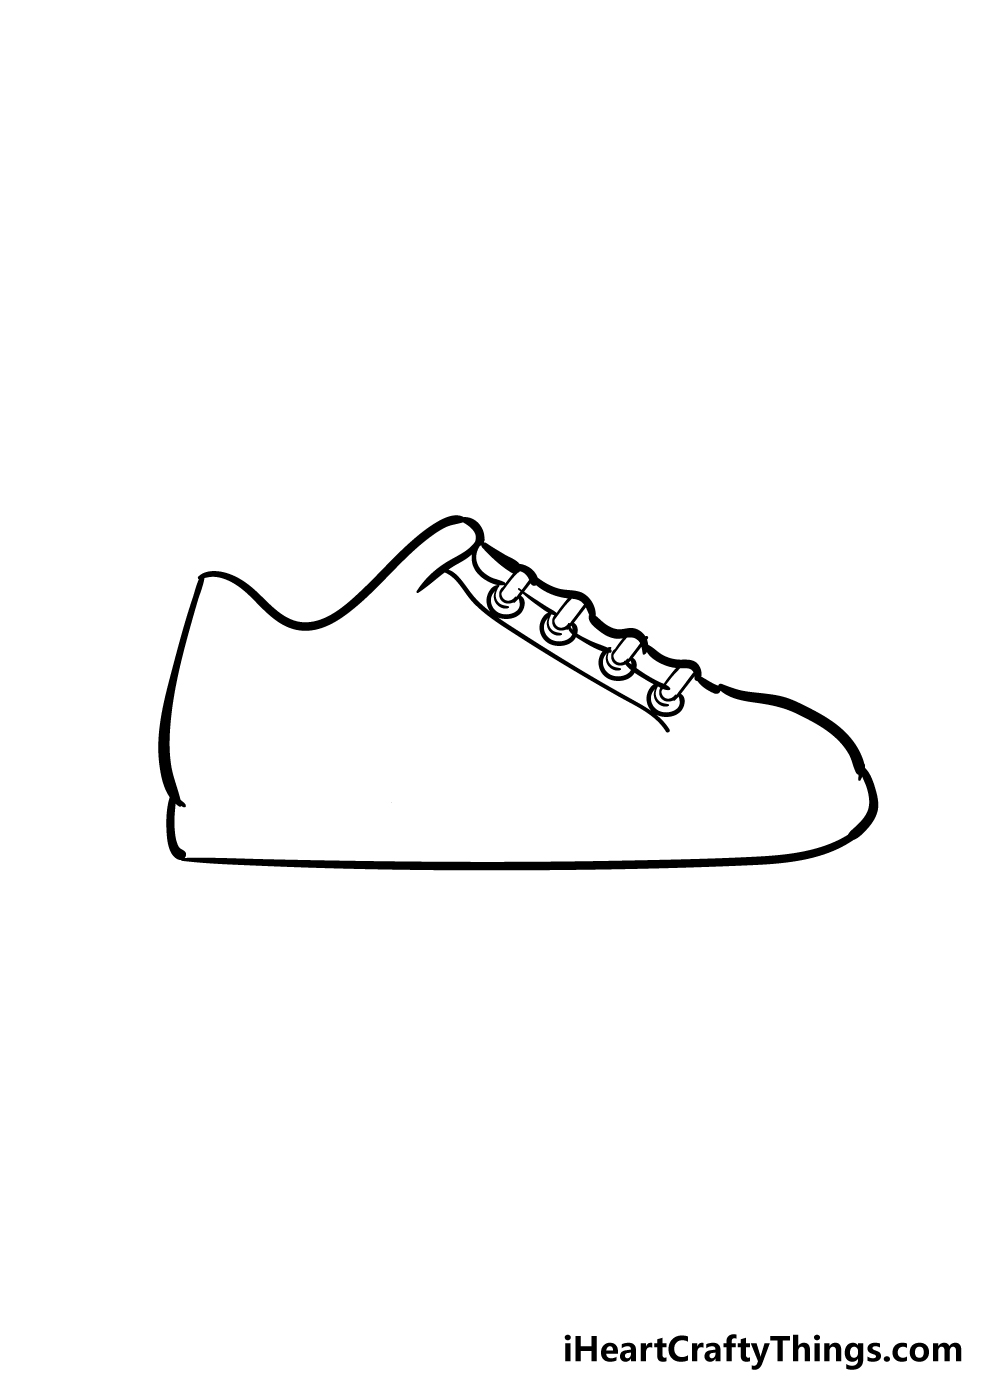
Using the bumpy indents you made in the slope of the shoe previously, you can now draw in the laces.
These may look complicated, but if you look closely at the picture, you will see that they’re made up of some pretty simple shapes.
You can draw in the laces themselves using some curved lines, and then use some circular shapes for the metal rims.
Once those are in, you can finish off the lace section of your shoe drawing with some straighter lines around them.
Step 4 – Add in some details for your shoe
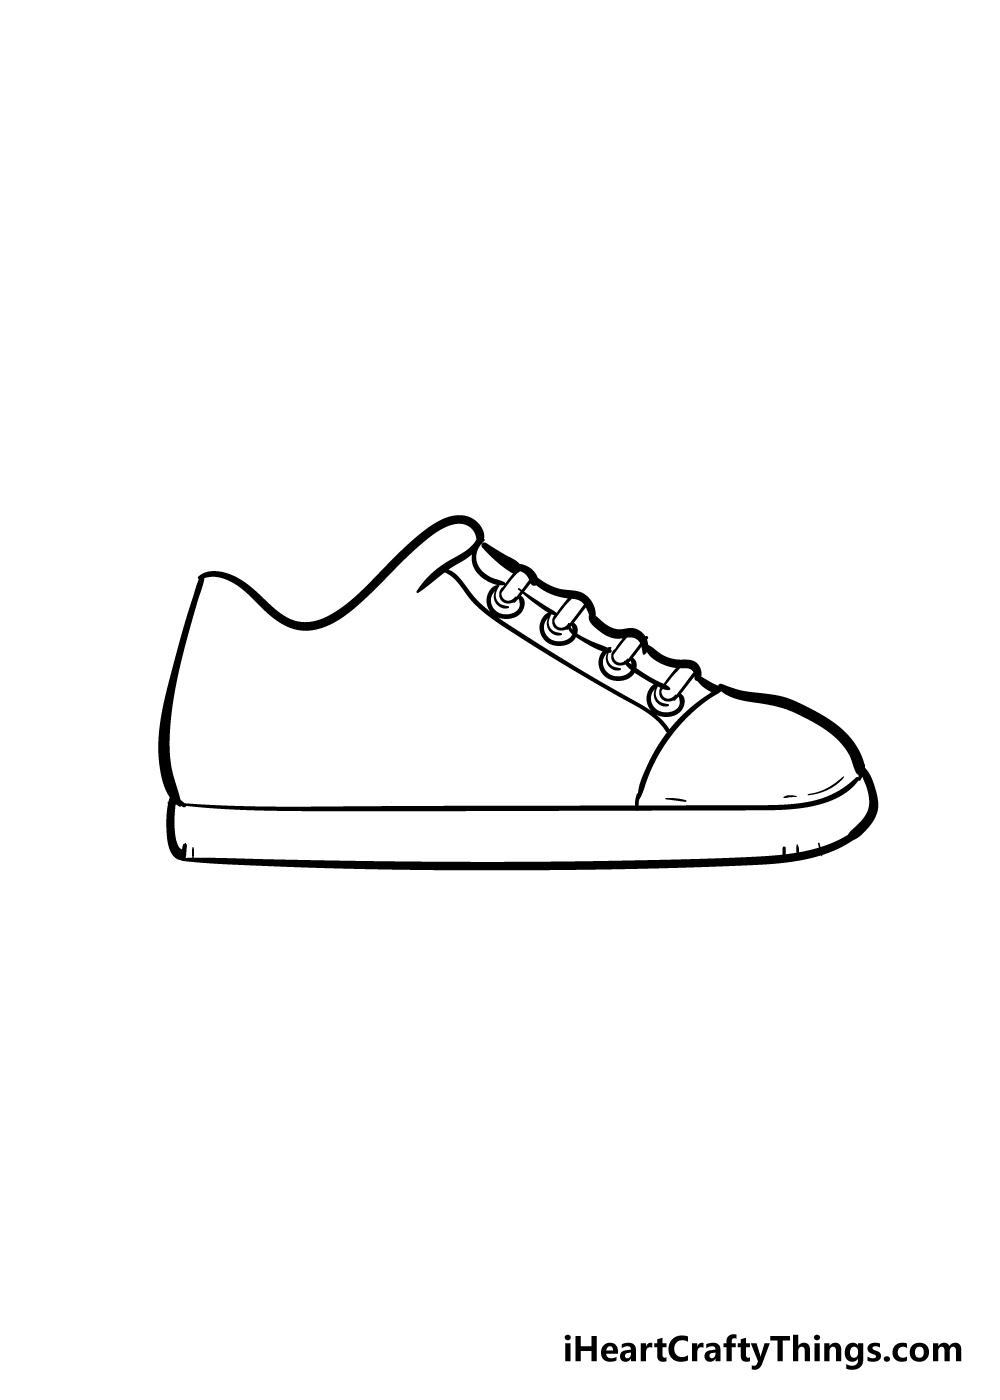
The previous few steps in this guide on how to draw a shoe were a bit tricky, but the last few steps are all about adding in some details!
To start with, simply draw in a horizontal line along the length of the bottom of the shoe to make the base.
Then, simply add in a curved line near the front like you can see in the reference picture.
Step 5 – Now, you can add in the final details
Your shoe drawing is very nearly done! The hard parts are over, so now you can have some fun adding in some fun details.
Using some curved lines, you can add in the details that we show in our image, but don’t be afraid to add in some details of your own!
You could even draw in some accessories like buttons, stickers and other fun patterns to set your shoes apart!
If you own sneakers like this in real life, you could also try to make this one look like your own shoe!
Bonus: Try These Ideas If You Had A Hard Time With This Drawing
How hard can it be to draw a shoe? That may be something you thought when you began this guide on how to draw a shoe.
They are such common objects that we use almost every day that you would be forgiven for assuming that it would be easy to draw them. However, as you have seen, it can be tricky.
Even with this guide, you may find yourself getting frustrated at the drawing, and maybe it just won’t come out the way you wanted. One of the best ways to make it easier would be to use some real shoes to help.
If you happen to own some shoes that look similar to this one, then that would be perfect. Place it on the table you’re drawing on and position it similar to the one in the image.
Then, you can use this real shoe to help supplement the pictures in this guide. The shoe you use doesn’t need to be an exact match for the one in the image, but the closer the better!
You could also look up some images of sneakers online to help you draw. Doing either of these methods will not only allow you to draw the shoe easier, but they could help you to customize the shoe drawing.
Using these real life examples will help you to get a better understanding of the form and finer details of the design in the guide. Then, you can use them to add further branding details, logos and accessories.
Using a pencil to draw before committing to a pen can also help as you don’t have to worry about mistakes. Then, when you’re happy with it we can head to the final step and add some colors!
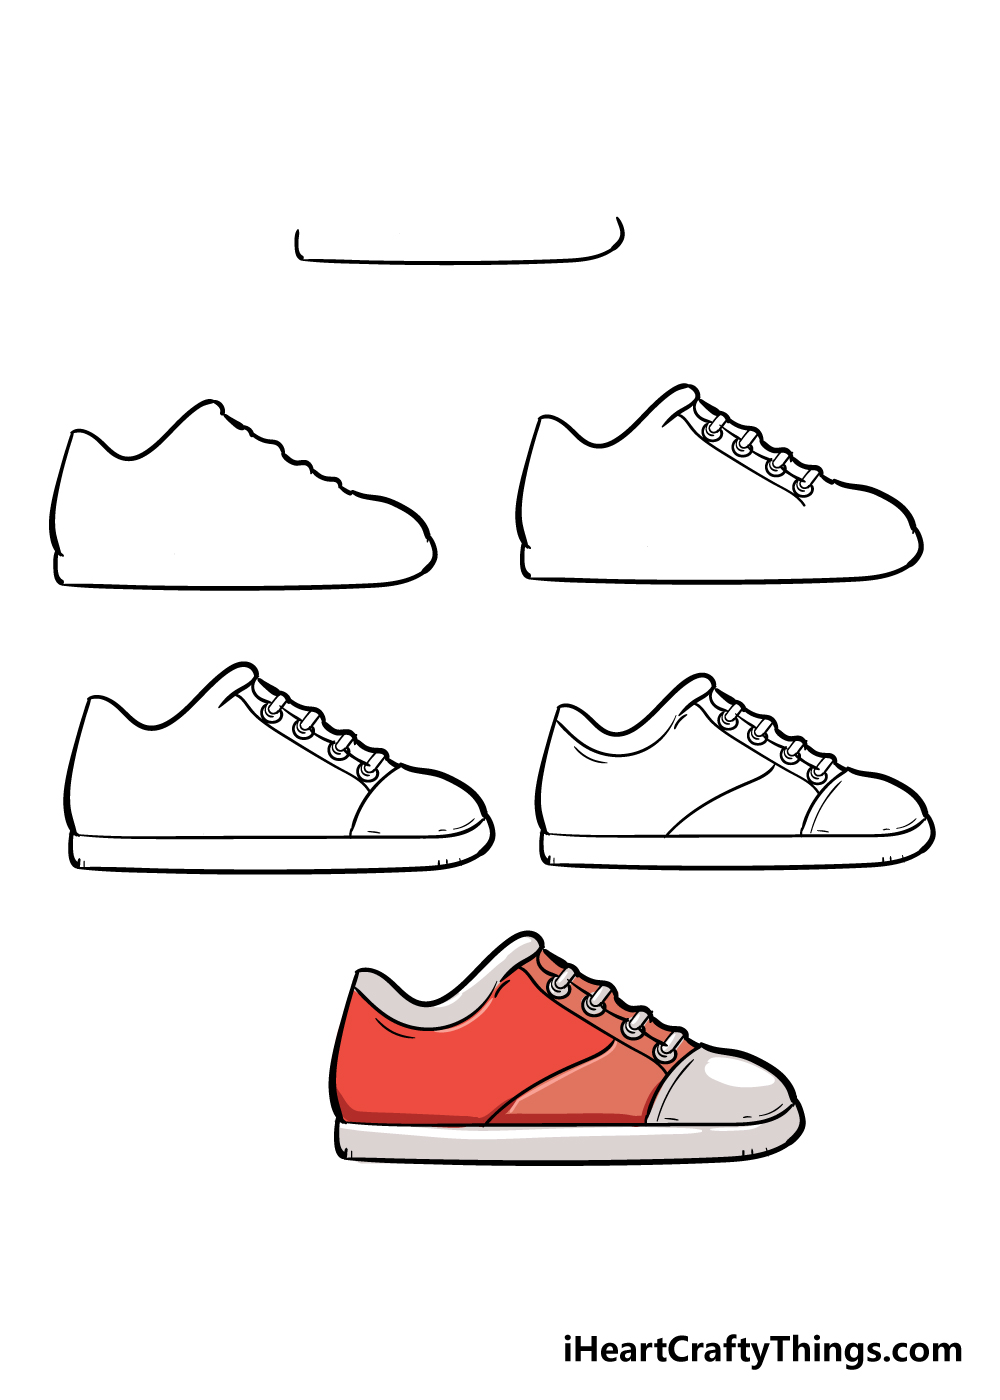
Step 6 – Finish off your drawing with some color
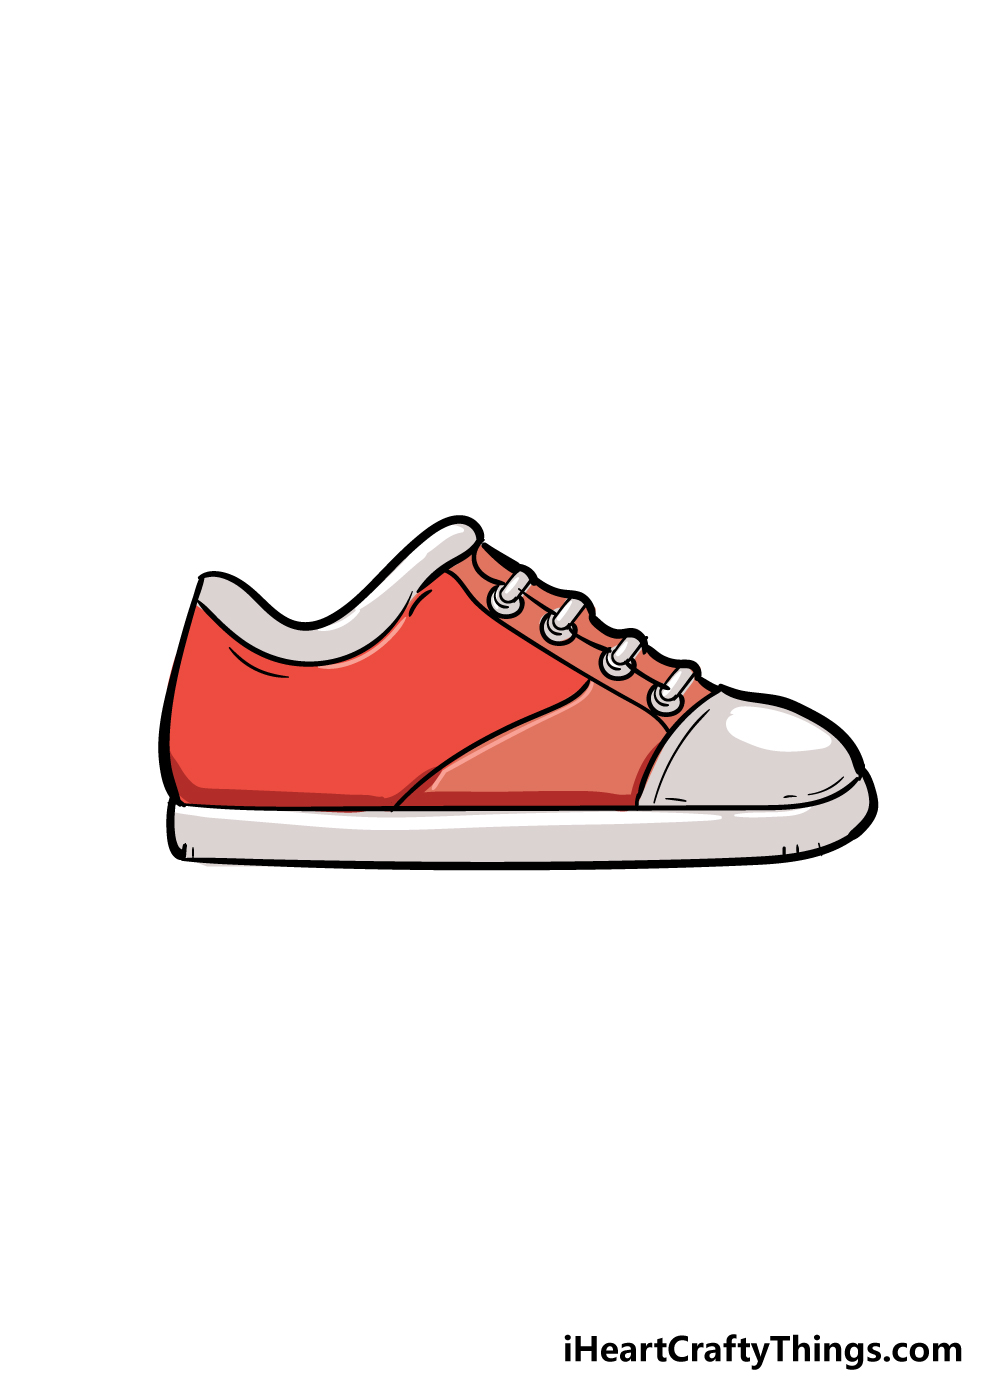
With those final details, you have completed your mission of learning how to draw a shoe!
While you should be proud of this accomplishment, your shoe drawing just needs one more step to be complete, and it’s a fun one!
For this step, you should let your creativity flow and color in your shoe with all of your favorite colors.
The picture we have shows just one way you could color it in, but the possibilities are endless!
You could replicate your favorite shoe brand, make it look like your own shoe in real life or let your inner fashion designer out as you create your own design!
This image would also be fun to use some beautiful different art mediums on.
You could use paints and colored pens or pencils, but you could also incorporate some fun crafts such as beads or stickers onto it as well.
I’m sure that whatever you choose, it’s going to look amazing!
5 Tips To Make Your Shoe Drawing Even Better!
You have an incredible shoe drawing, but now we will show you how to make it even better!
As you well know, there are many more than just one make and style of shoe in the world, and the one we drew here is one of many.
By changing a few details such as the shape of the shoe, the sole and the laces, you can create a whole new type of shoe! Do you have a favorite shoe brand you could turn this shoe drawing into?
Some people like to make their shoes more personalized by adding small accessories to them. You could do the same thing for this shoe you have created!
These could include little badges, stickers or other patterns that someone may use to give themselves some fancy footwear. Can you think of some accessories you could put on this shoe?
Having one shoe is all well and good, but it would be useless unless it had a twin! For that reason, another way to make this shoe sketch even better is by drawing a matching shoe next to it.
It would be easy to draw, as you would merely need to follow the steps of the guide to add another one next to this one.
We always like to recommend adding a background to any of these drawings, as that really helps to take the drawing to a whole new level.
For this one, you could draw the shoe next to some other objects. For example, maybe they could be with objects you would use on a run such as a water bottle. You could even draw the shoe to look as if it is being worn!
Playing with colors is always so much fun, and you can try out all sorts of amazing colors for this drawing of a shoe.
When coloring smaller details such as the laces and soles, you can use mediums such as colored pens, markers or small paintbrushes to give yourself a lot more precision.
We would love to see the color combinations and mediums you use!
Your Shoe Drawing is Complete!
You set out to learn how to draw a shoe, and now you’ve done it!
This guide was made to make this process much easier for you, as breaking down a drawing into many steps can help make it much easier to grasp.
We really hope that you had a lot of fun drawing alongside us with this step-by-step guide!
Drawing it is just half the fun, though, as now you can have a great time personalizing your amazing shoe drawing!
Will you draw in a background, add a leg in above the shoe or do you have some other creative ideas in mind?
There are no wrong answers here, so we can’t wait to see how creative you can be with your shoe drawings!
This guide is one of many that we will be bringing out in the future, so be sure to check in to our site often to make sure you will be among the first to try out the new guides!
We hope that you will share your colorful, creative shoe drawings to our Facebook and Pinterest pages! We’re very curious to see how you finish off these drawings, and we can’t wait to enjoy them.
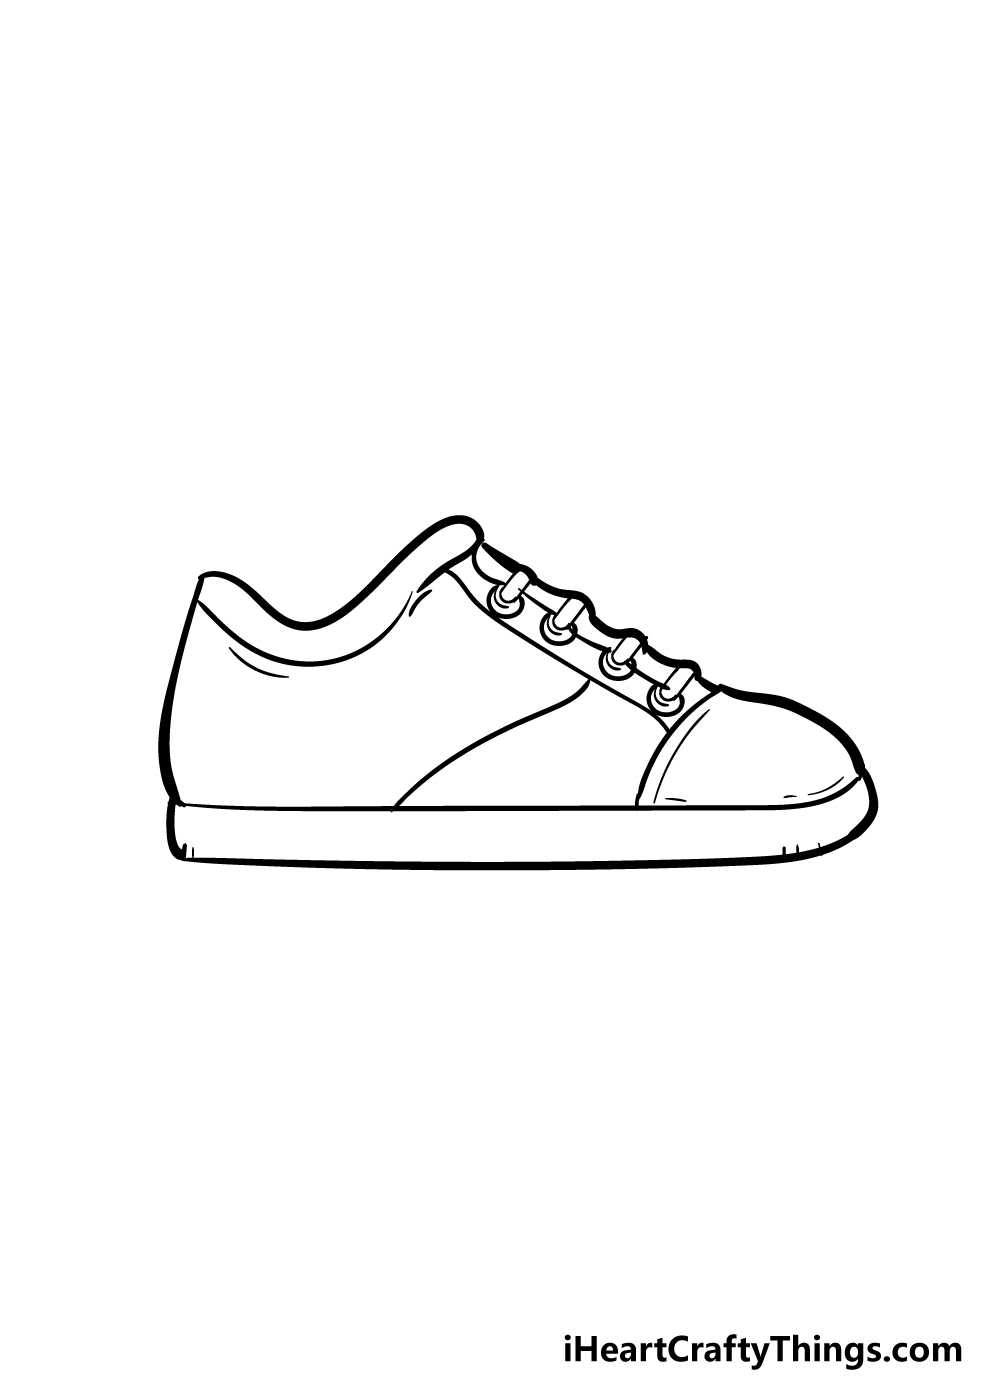
Here Is An Easy Shoe Drawing To Inspire You!
We all put on shoes most days of our lives, and this familiarity would make you think that drawing one would be a breeze. It can be harder than you think, though!
So, having a bit of extra help never hurts. That’s why we asked our artist Amanda to create this easy shoe drawing for kids to help you out as you draw.
She brought the focus to the show to give you a good look at all of the details and how they interact with one another. You can also see the laces and how they should be positioned.
When you have mastered this drawing, you could challenge yourself to draw the partner to this shoe next to it. This could be done by reversing the image and then drawing it that way in the scene.