The scythe is a pretty basic tool that is used most often in farming to help cut down grass and various crops.
It also happens to be a tool that looks pretty cool, so it shows up in many movies, books, video games and other media.
It is probably most well known as the signature accessory of the mythical Grim Reaper. Learning how to draw a scythe is a great way to design your own cool version of this versatile tool!
If this sounds like something you want to do, then you’re in the right place! You’ll definitely want to read all the way to the end of this guide to see how it’s done.
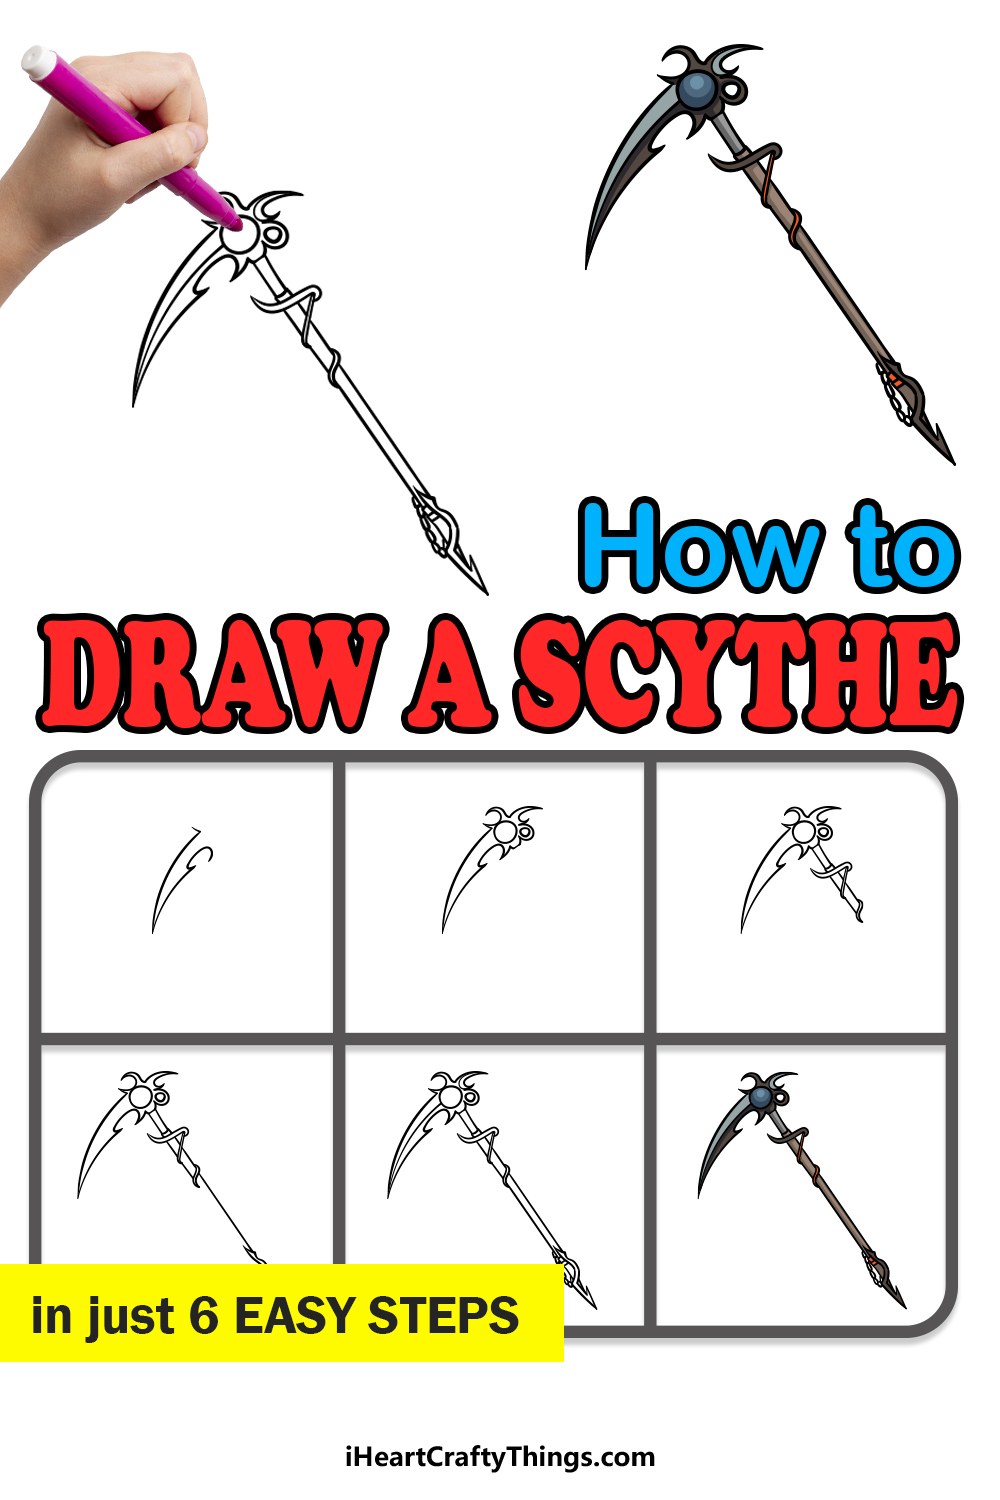
Our step-by-step guide on how to draw a scythe in just 6 easy steps will show you how to recreate this awesome scythe design that we have prepared for you.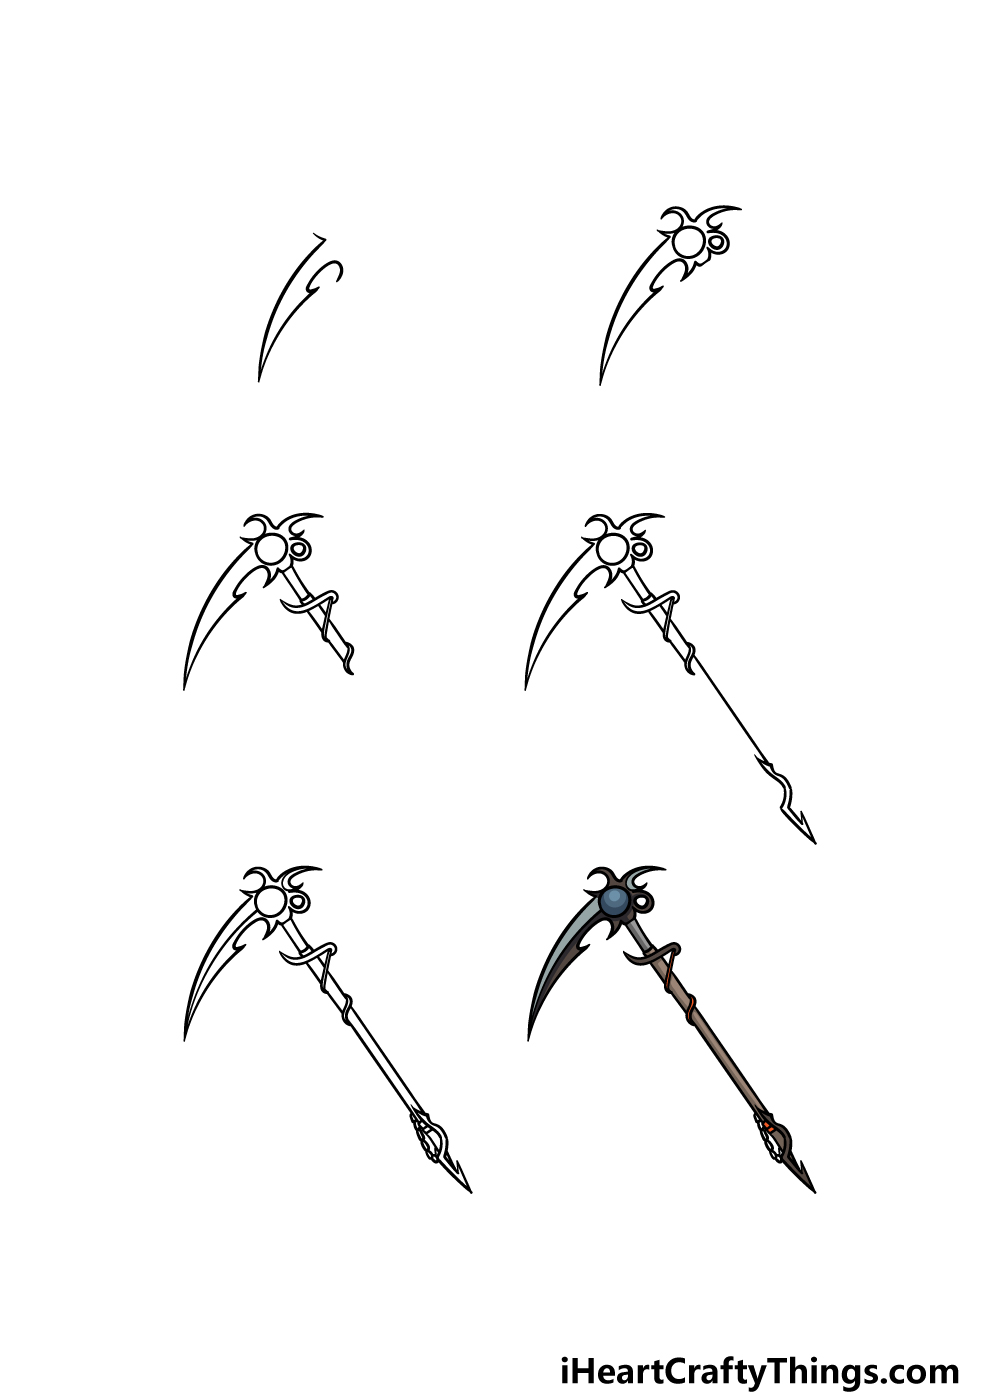
How to Draw A Scythe – Let’s Get Started!
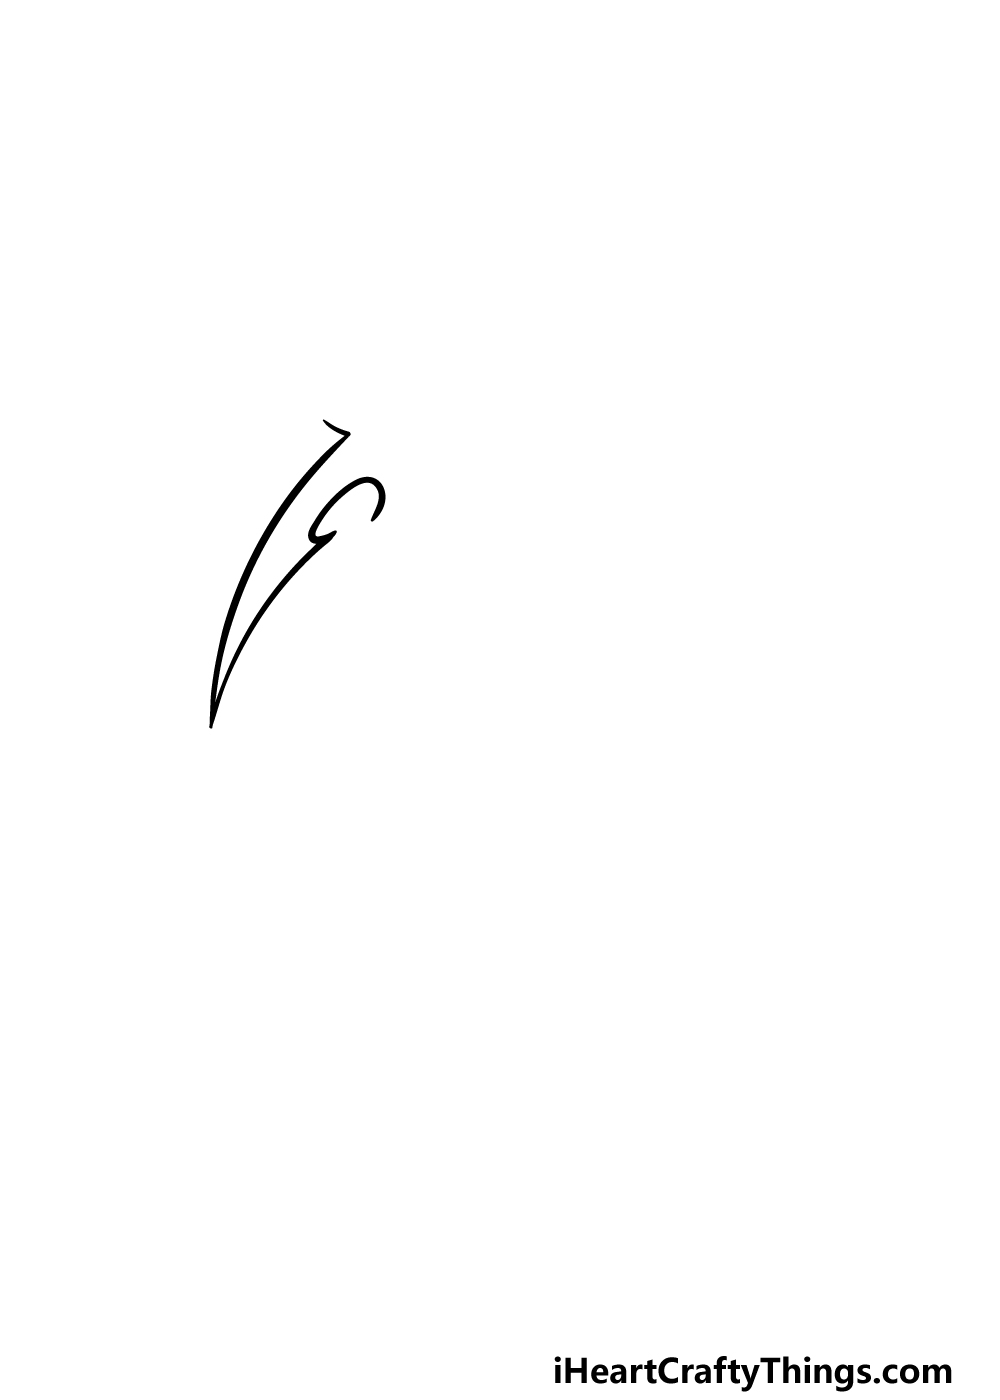
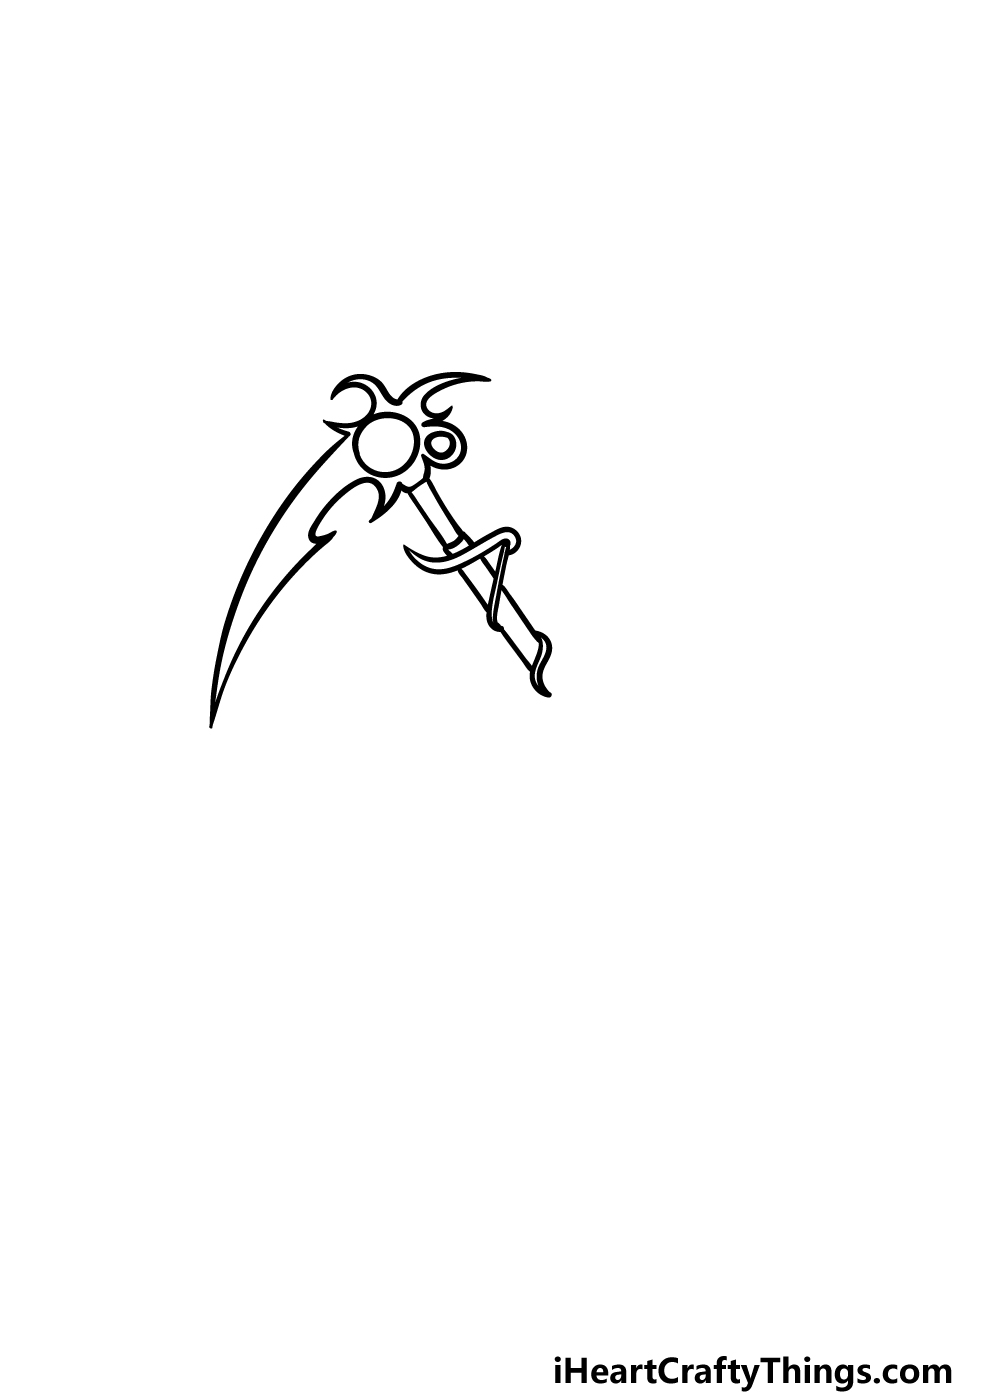
Step 1
In this guide on how to draw a scythe, we will be drawing a rather ornate, cool-looking version of this tool.
The scythe that we will be drawing looks like it would be right at home in an epic fantasy or horror story!
To get things started, we will begin with the blade of the scythe. Use a single curved line for the top of the scythe as it looks in our reference image.
Then, give it a sharp tip and extend another shorter curves line for the first half of the bottom edge.
There will then be a rounded, sharp hole in the bottom edge, and once that is drawn you will then be ready to move on to the next step.
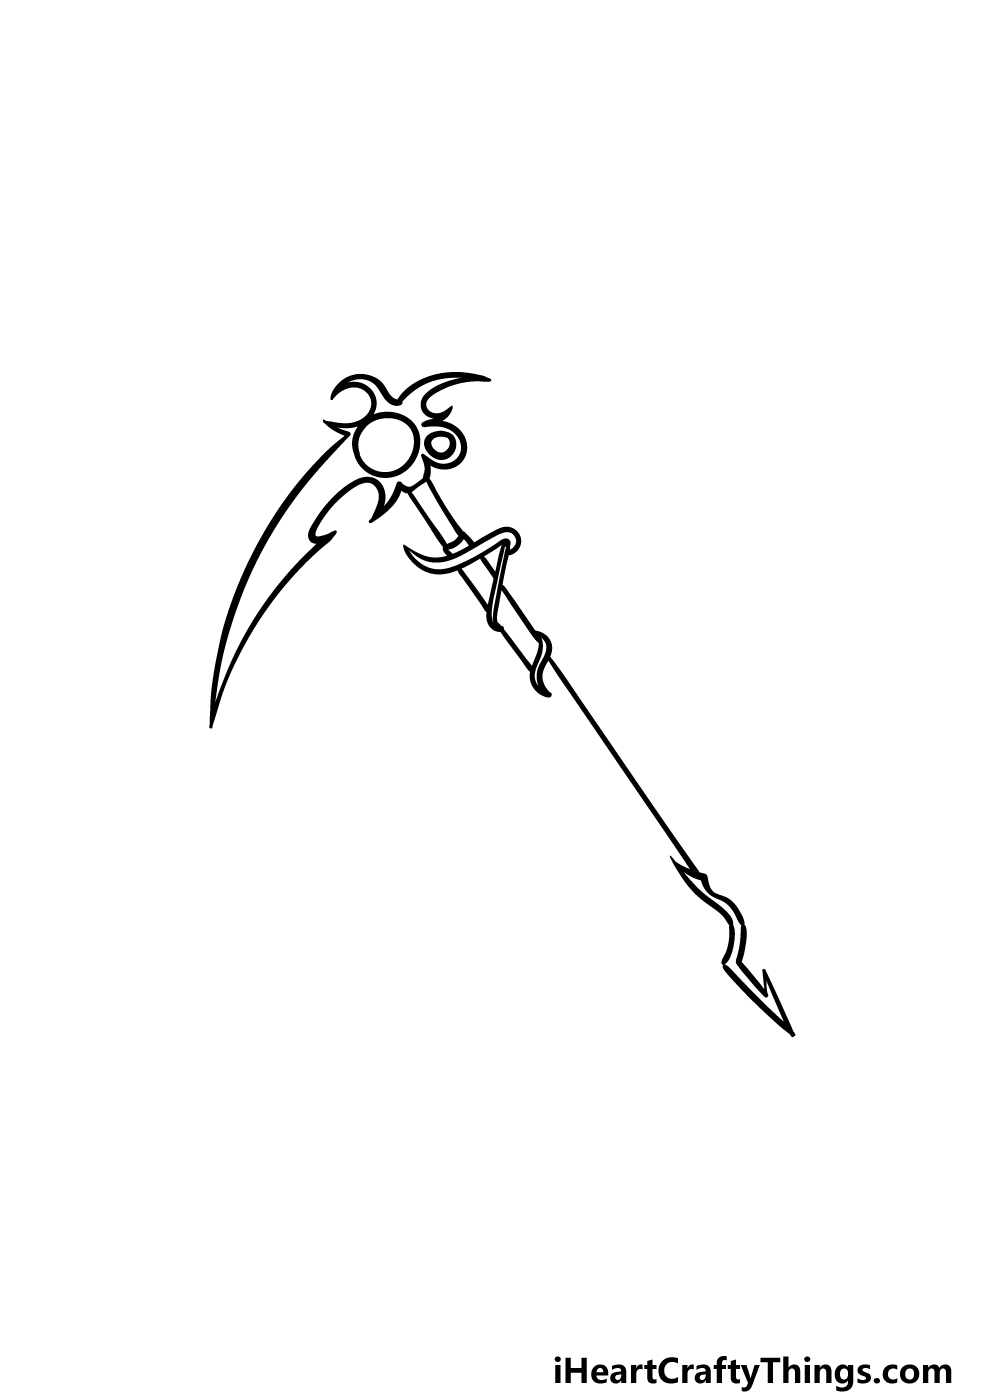
Step 2 – Next, draw the rest of the scythe blade
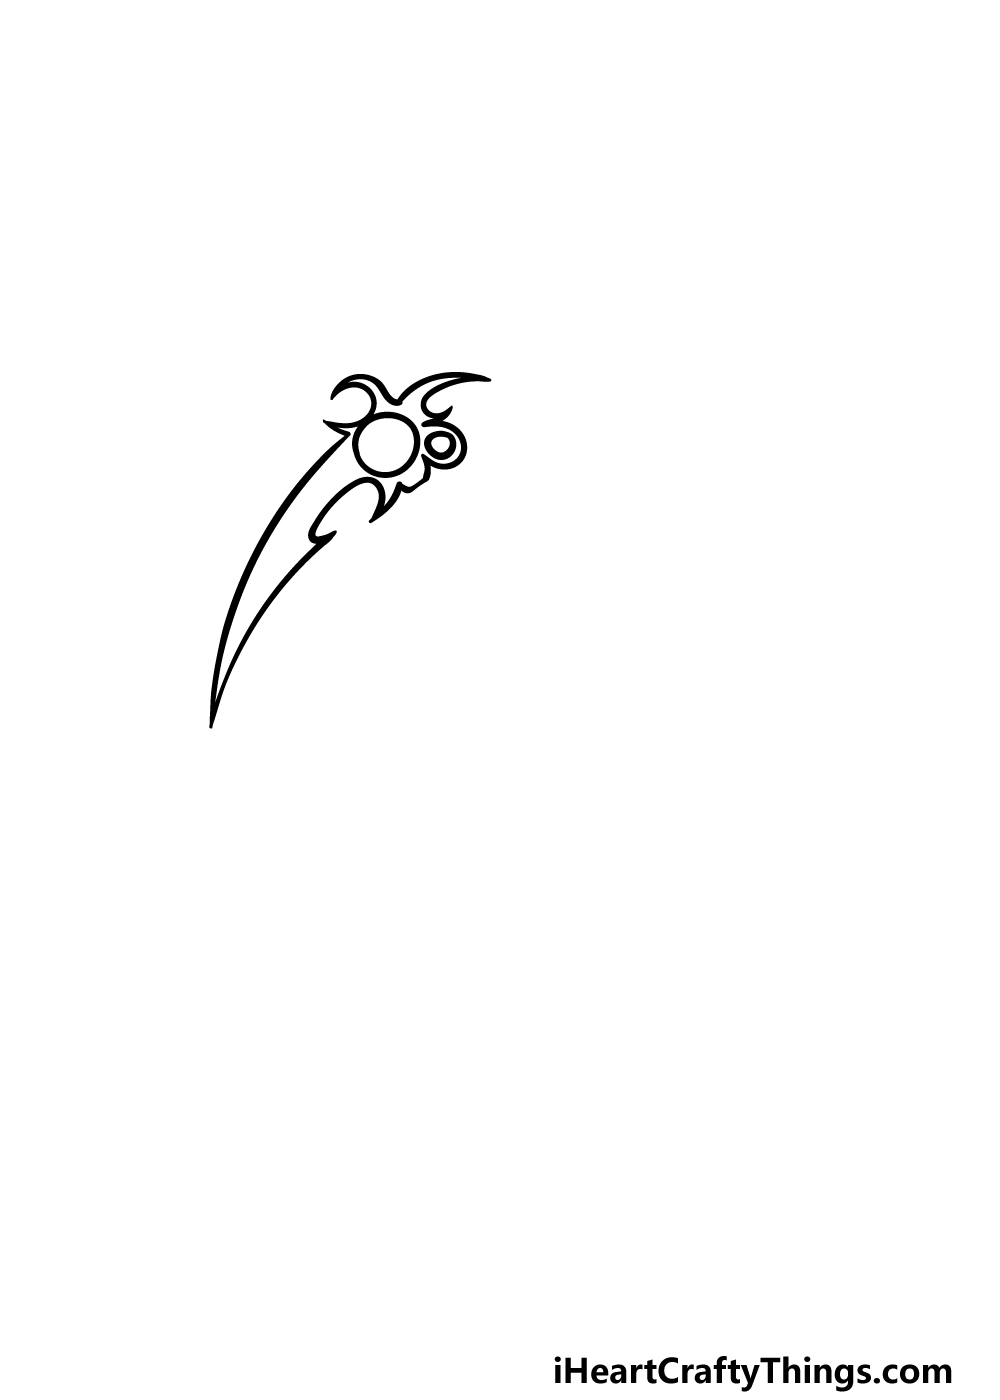
Now we can finish off the blade of tour scythe drawing in this next step. Just like the rest of the scythe, this part of the blade will be ornate and detailed.
You can begin by drawing a circle near the back of the blade. Then, draw another smaller circle near it.
Once these circles are drawn, you can then draw some more curved lines for the curved outline of the scythe blade as they appear in our example.
Then it will be on to step 3 of the guide, so let’s proceed when you’re ready!
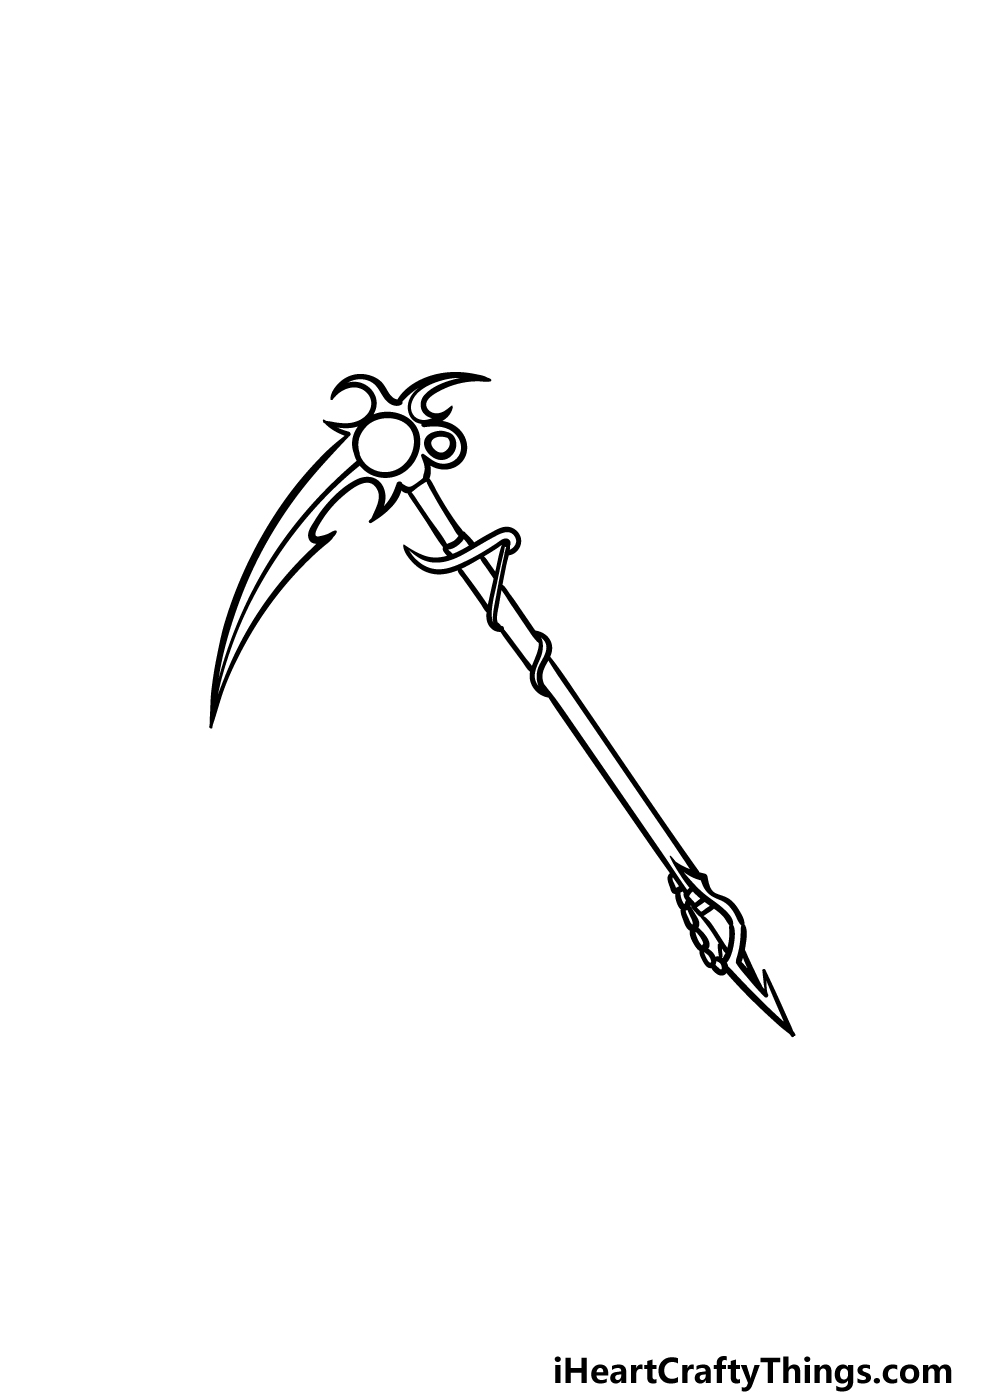
Step 3 – Now, draw the start of the handle for the scythe
We shall leave behind the blade for now as we start to draw the handle in this step of this guide on how to draw a scythe.
Even though this is just the handle, that doesn’t mean that we won’t be making it as detailed and ornate as the blade was!
It would be recommended to use a light pencil and a ruler to draw the straight lines of the handle.
Then you can use a pen to draw the angular detailing snaking around the handle and sticking outward.
Be sure to also go over the straight lines of the stick itself before you move on to step 4!
Step 4 – Next, draw some more of the handle
Continuing on with this scythe drawing, we can now add some more to the handle.
If you used our suggestion of drawing a pencil line earlier, you can now use your pen and ruler to draw the rest of the edge for the handle.
Once that is drawn, we will then be adding some detailing at the very end of the handle.
This detailing will be thin and angular in an almost lightning-bolt shape. Once that is drawn, we shall then be ready to finish off the final details and elements in the next step of the guide.
Step 5 – Add the final details to your scythe drawing
Now you are ready to finish off the final touches and details in this fifth step of our guide on how to draw a scythe!
The main thing that we will be doing in this step will be to draw the rest of the handle. Use your pen to draw the rest of the stick of the handle, and then finish off the detailing at the end of the handle.
Once that is drawn, you can then add some more curved line detailing onto the blade of the scythe. Then you are ready to color your creation in when we get to the last step!
Before you do, you could also draw a background or some accessories to go with this awesome scythe. We can’t wait to see how you finish it off!
Step 6 – Finish off your scythe drawing with color
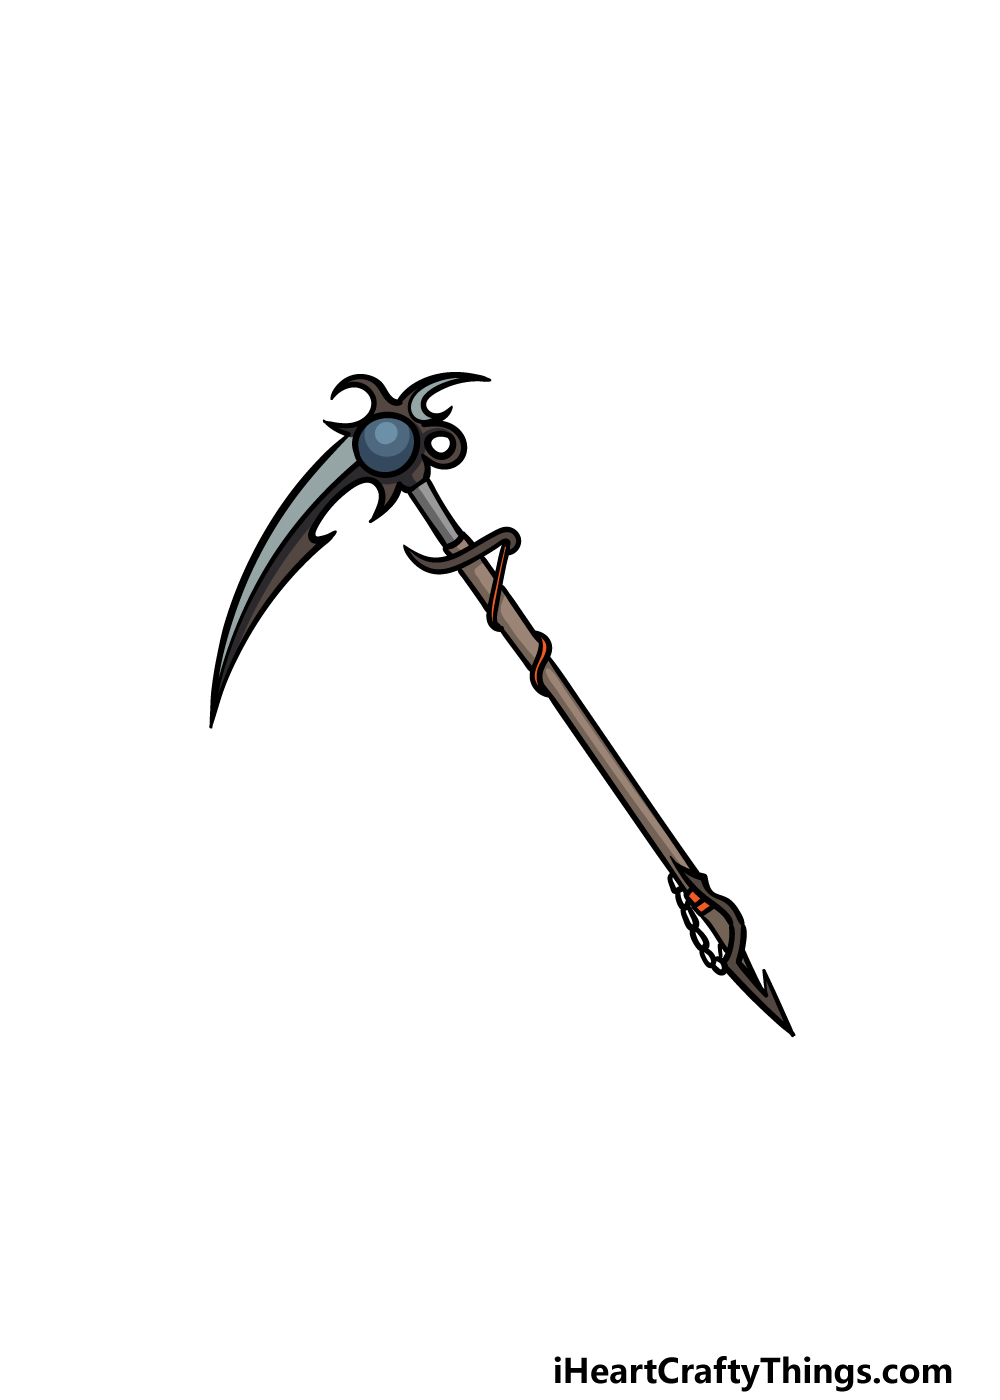
You have arrived at the final step of this scythe drawing, and now you’re ready to color it in to truly finish it off. In our reference image, we kept the colors that we used a bit more dark and muted.
You could take a similar approach with your own one, but this is your drawing and you should also feel free to use any color choices of your own that you may like!
Then, you can also have some fun deciding on the art mediums and tools that you will use to achieve your color choices. Be sure to have fun with it and see what happens!
3 More tips to make your scythe drawing easy!
Cut down on the frustration as we show you how to make this scythe drawing easier to draw!
This drawing of a scythe that we created in this guide looks really cool with all of the small details it has in its ornate design. This may look cool, but it can also make it harder to draw.
If you’re having a hard time with the design, you may wish to look into simplifying it a bit. You might even simply prefer to have a more realistic and pared-back design.
If you do simplify some of the details, you could pick and choose which ones to change depending on your own preference. What are some details you might want to remove or change?
There are also various art tools and mediums you can use to make it much easier on yourself. This is true whether you keep to our design for this scythe drawing or simplify it as we suggested earlier.
First, you’ll want to have a ruler on hand to help with the handle. Then, you could possibly use a drawing compass to help with the curved parts.
Also, it would be a good idea to start off the drawing with a pencil instead of using your pen straight away. Use the pencil to map out the drawing, and then you can go over with a more permanent medium when you’re happy with how it looks.
You could also make this scythe sketch easier by adding a character to the image. The reason this will potentially make it easier is that it will mean there is more to look at.
With that being the case, there will be less opportunity for close scrutiny on the scythe itself. That way, if you can’t get it looking as you want it, it will be less noticeable.
The character doesn’t have to be drawn in a super realistic or detailed style, and you could go with whatever style you find easiest.
This can not only make it easier but will also make the drawing even more interesting to behold!
Your Scythe Drawing is Complete!
You have completed all 6 steps of this guide on how to draw a scythe, and you have an awesome picture at the end of it.
We wanted to give you a really cool scythe design to draw in this guide, but we also wanted to make sure that it would be a fun and easy experience for you to work on it.
Now that you have completed this drawing, you can also add your own ideas, details and elements.
Perhaps you could even design your own awesome character that could be wielding this amazing scythe! What ideas can you think of to finish this image off?
When you’re ready to take on a new drawing challenge, you can then check out our website where we have more guides waiting for you.
We upload new ones frequently, so keep checking in to never miss out!
We would love to see how this scythe drawing turned out, so please go ahead and share it on our Facebook and Pinterest pages so we can see!