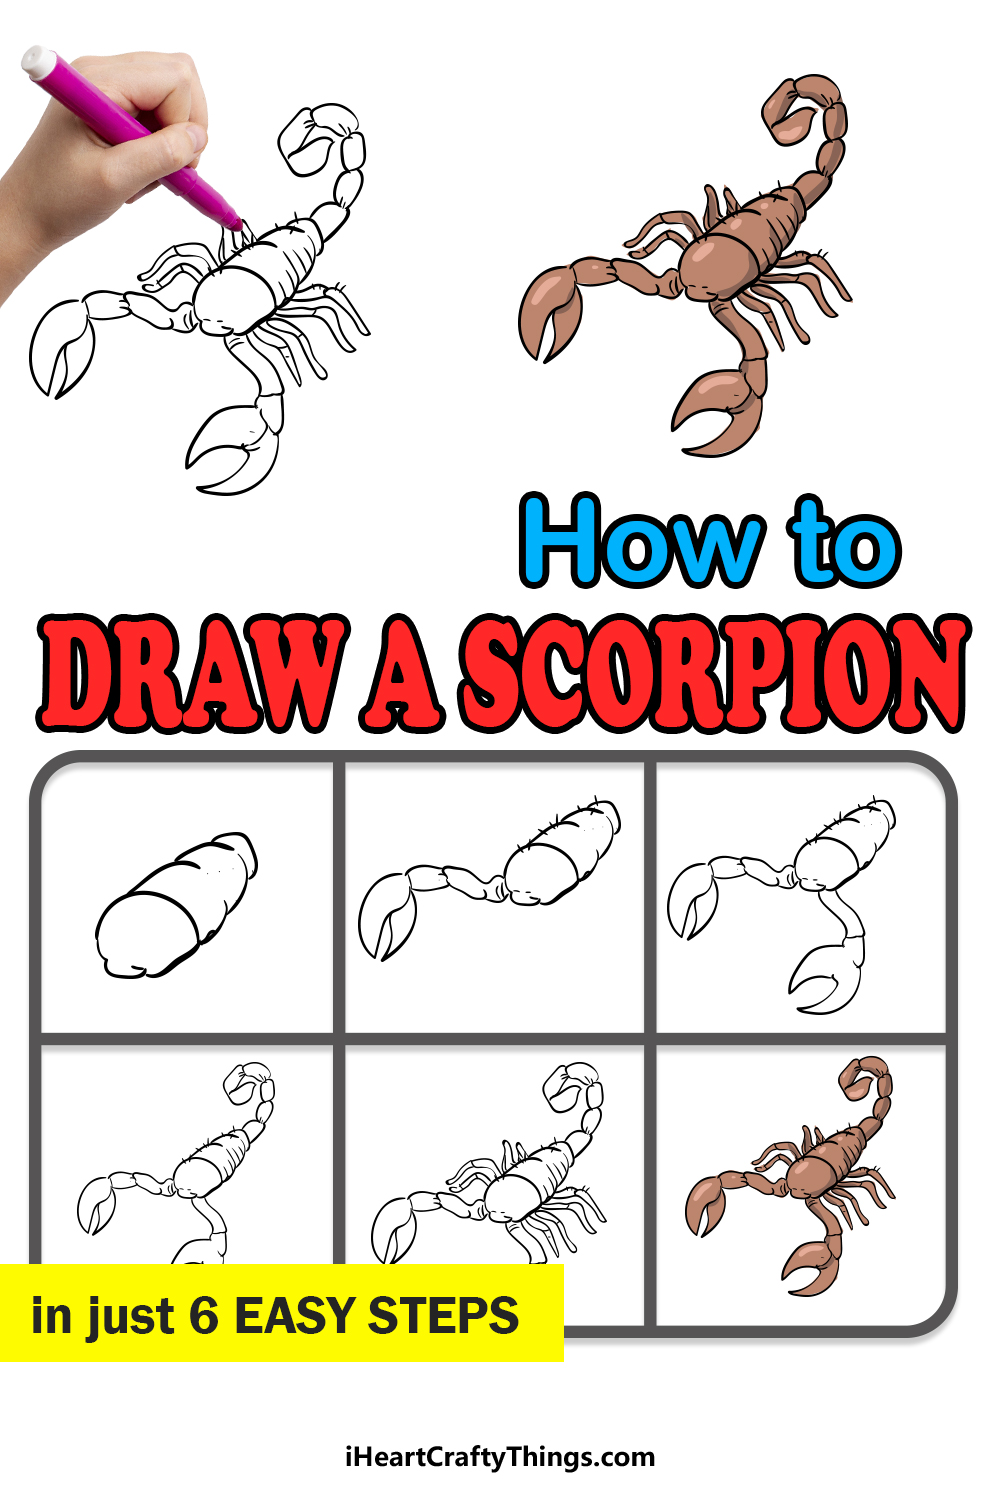
Anyone can learn how to draw a scorpion by following this fun and easy guide! Let’s discover how to recreate this intimidating arachnid.
I am quite scared of spiders, but scorpions may scare me even more! These little guys just look really mean and intimidating with their stingers ready to sting.
Their stingers can administer some pretty powerful poison that can cause a great deal of pain in humans. This means you should definitely not mess with them.
That being said, I also think they look really cool. There is something about how dangerous they look that is weirdly appealing. Drawing them is quite tricky, as they have a lot of details and segments.
That’s why I have conquered my fears to look closely at this creature in order to break it down into simpler steps you can follow. So let’s begin and see how we can make one of these impressive little guys!
Watch And See How To Make A Scorpion Drawing
How to Draw A Scorpion – Let’s Get Started!
Step 1
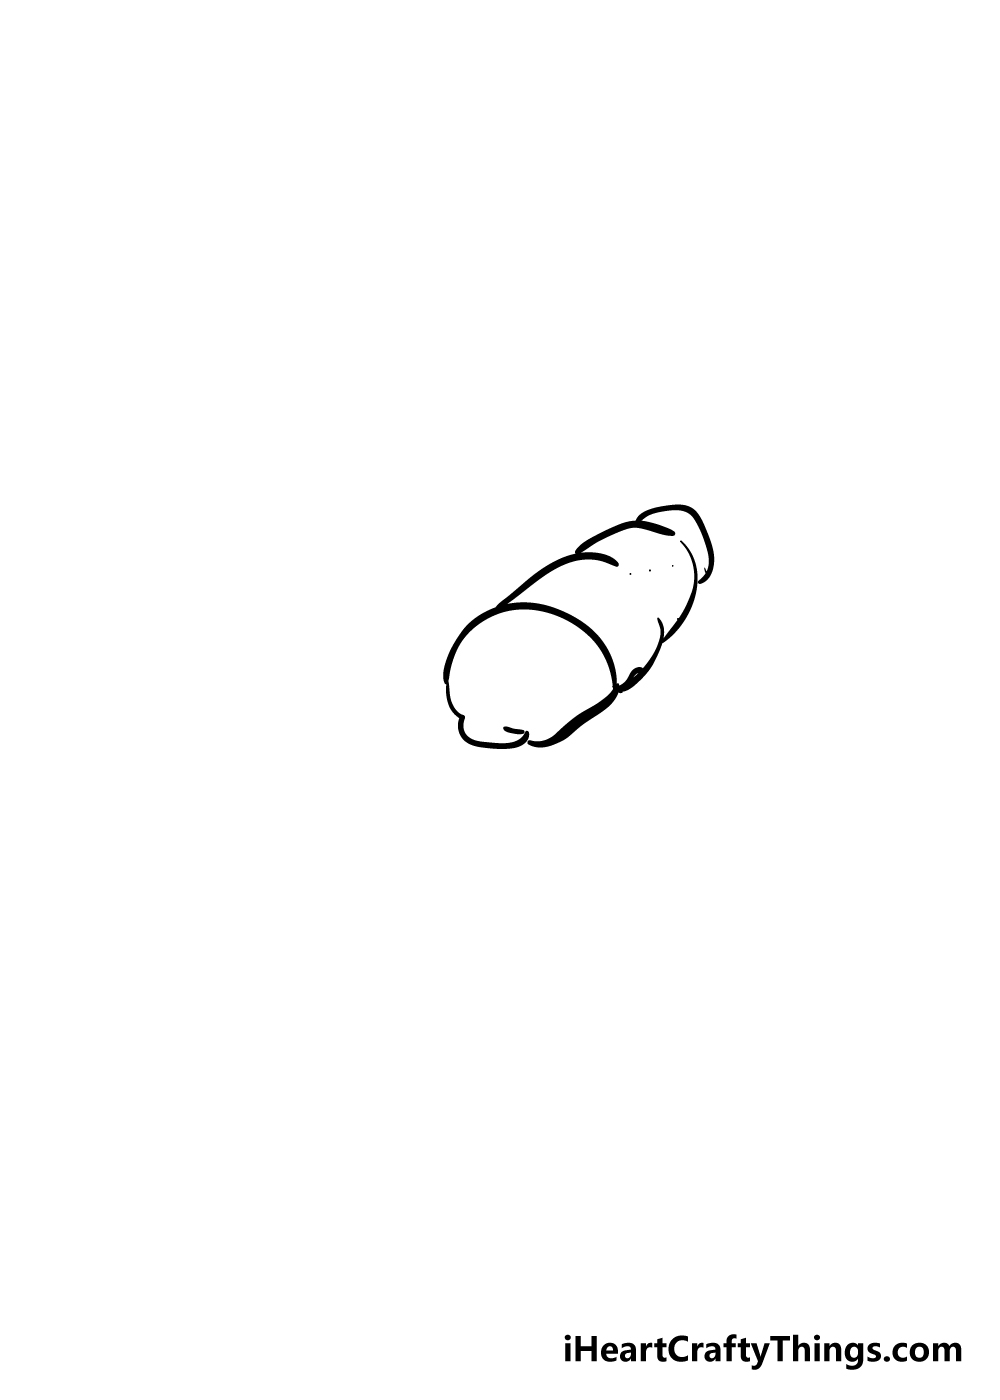
To get this guide on how to draw a scorpion going, we shall start with the head and body of the scorpion
The head has a very rounded top as seen in the reference image. There will be a slightly more angular outcropping at the bottom of the head, however.
Then, once you have the head drawn you can start on the body. The body will have three sections to it, and each section will get slightly smaller as the body goes further along.
Once you have these elements drawn, you’re ready for step 2!
Step 2 – Draw the first pincer for your scorpion drawing
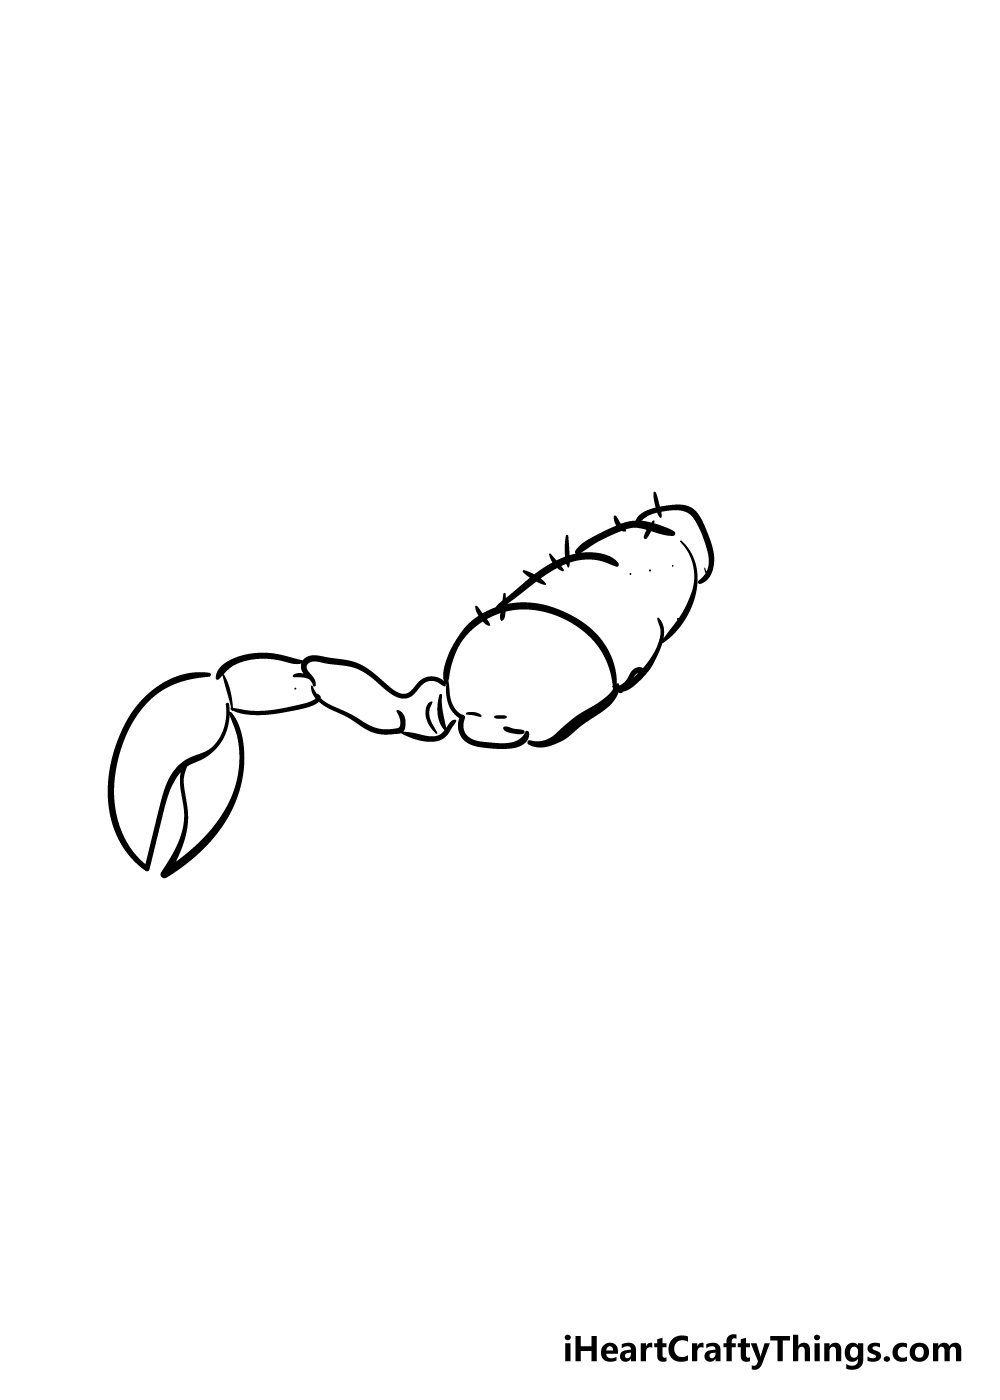
Scorpions are known for two elements in particular: the pincers and the tail. We shall begin with the first of these in this part of your scorpion drawing.
Much like the body, the arm of the scorpion also has segments to it. Using some curved lines, you can extend the first segment of the arm.
It will twist outward, where this first segment will end and the next one will begin. The second segment will be much smaller, as seen in the reference picture.
Then, it’s time to add the famous pincer! Use some curved lines with a sharp point to it for the larger part of the pincer on top. Then, you can add the smaller half beneath it.
You can finish off this step by adding some lines on the body for some hairy details.
Step 3 – Now, we shall add another pincer arm
You’ve added one pincer arm so far in this guide on how to draw a scorpion, so now it’s time to add the other!
This arm is at a slightly different angle, so it will have fewer segments to it. You can use some curved lines coming out from under the head for the arm portion, and then draw a similar pincer to the one you drew in the previous step.
That takes care of the pincers for now, so let’s move on to that other recognizable feature we mentioned for the next step!
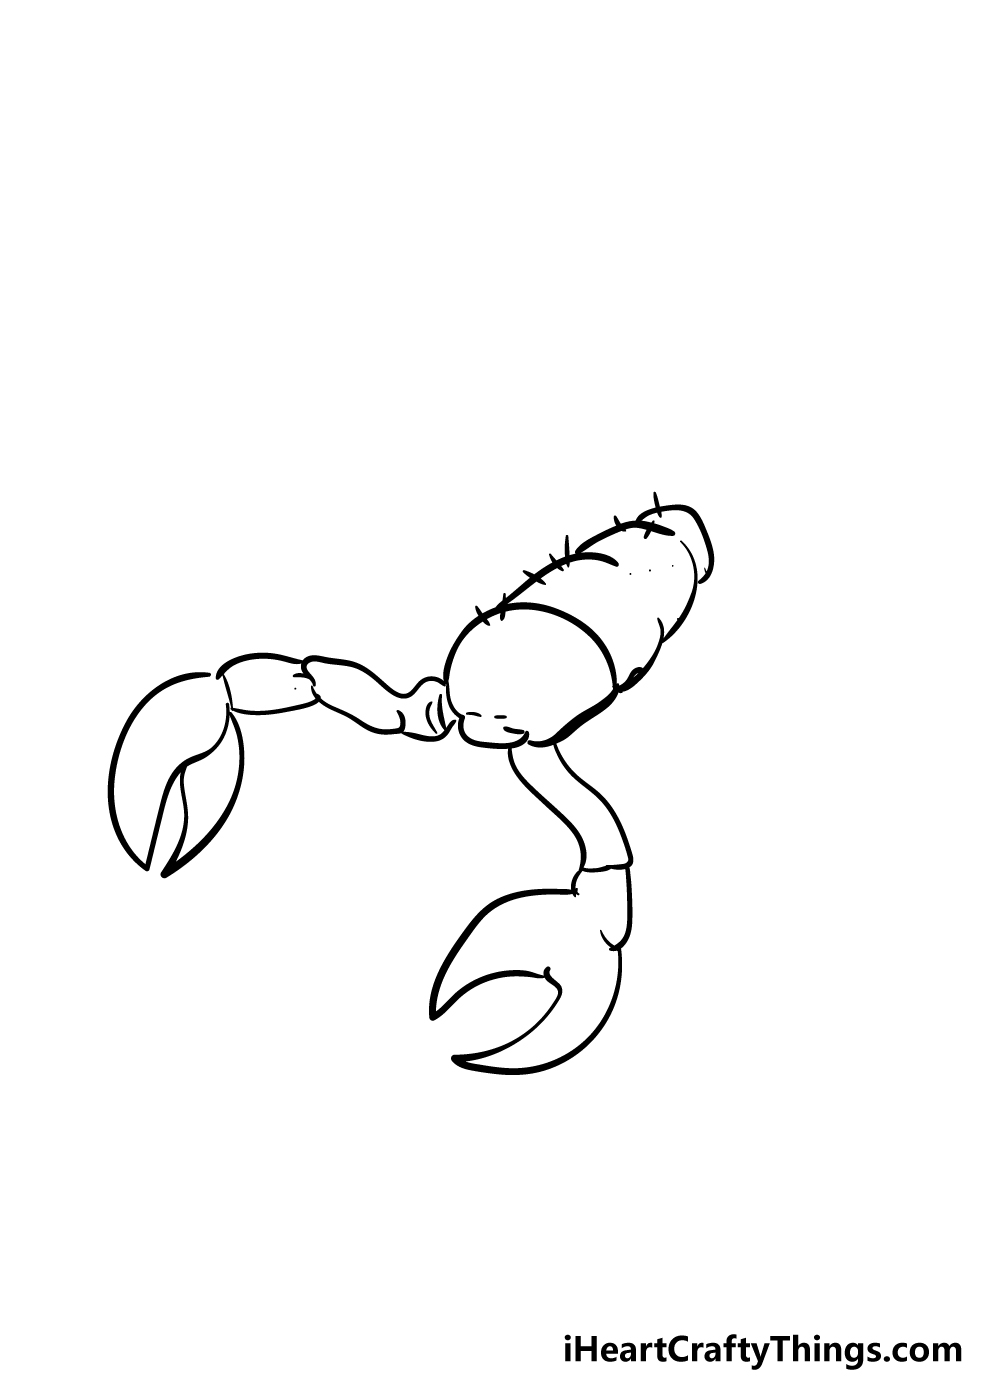
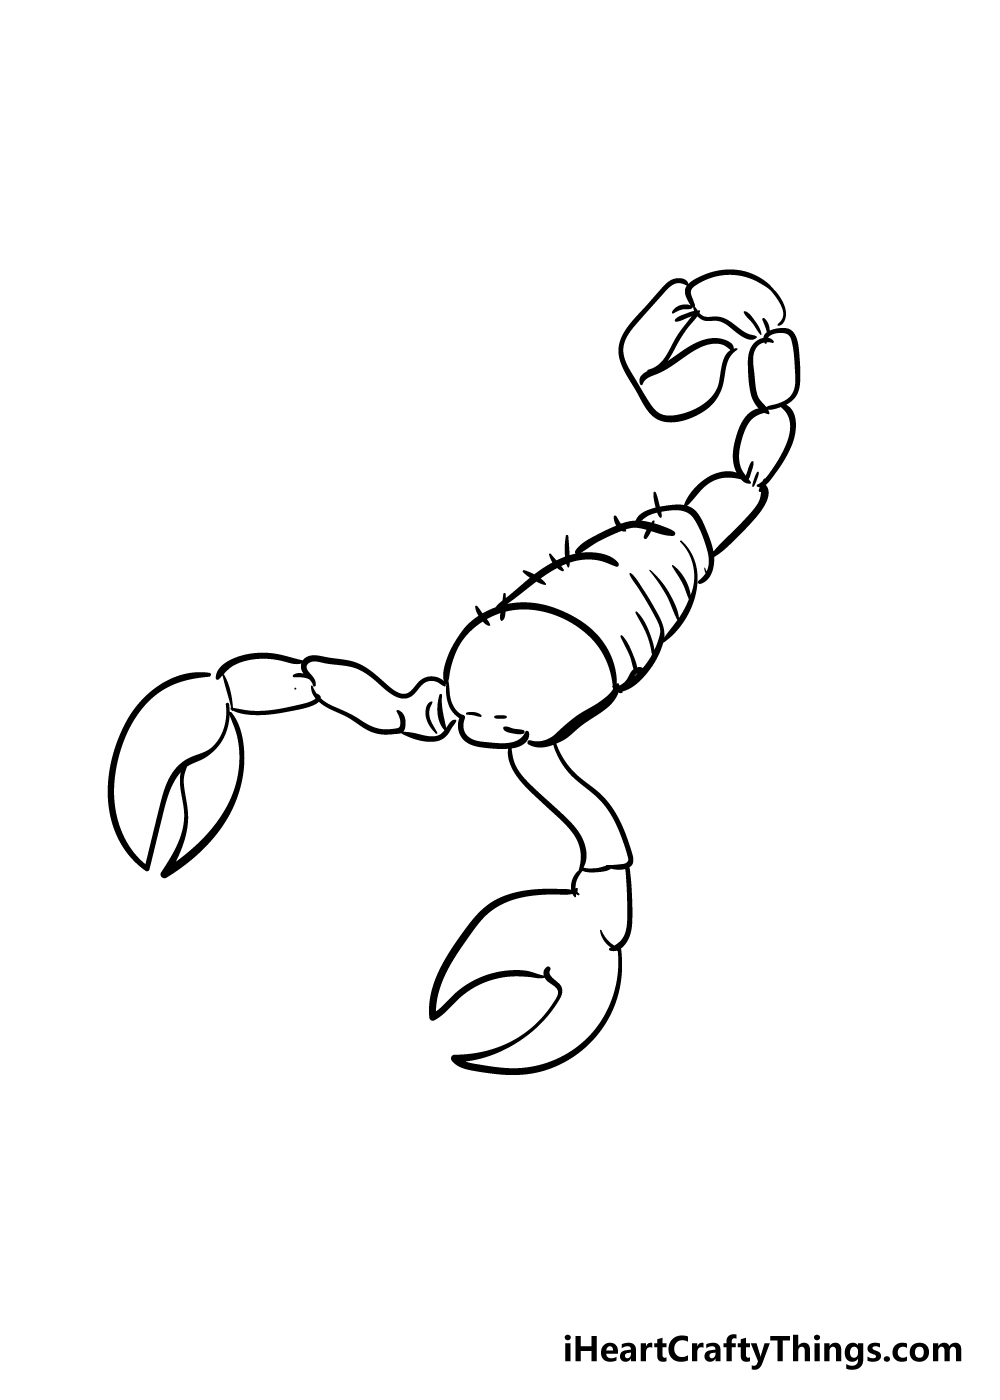
Step 4 – Add the scorpion’s tail
Normally, it would be recommended to not get anywhere near a scorpion’s tail, but for this part of your scorpion drawing you will be getting up close and personal with it!
These tails are what the scorpion will use to strike with its venom, and no scorpion drawing would be complete without it.
Much like many of the other parts of this drawing, the tail will have several segments to it.
There will be four rounded segments to this tail, and they should be drawn in such a way as to have it curling over the back in an arch.
Then, there will be another segmented shape at the end, but it will end in a sharp point for the business end of the tail. The reference image will guide you as to how this should look!
Step 5 – Now, you can add the legs and final details
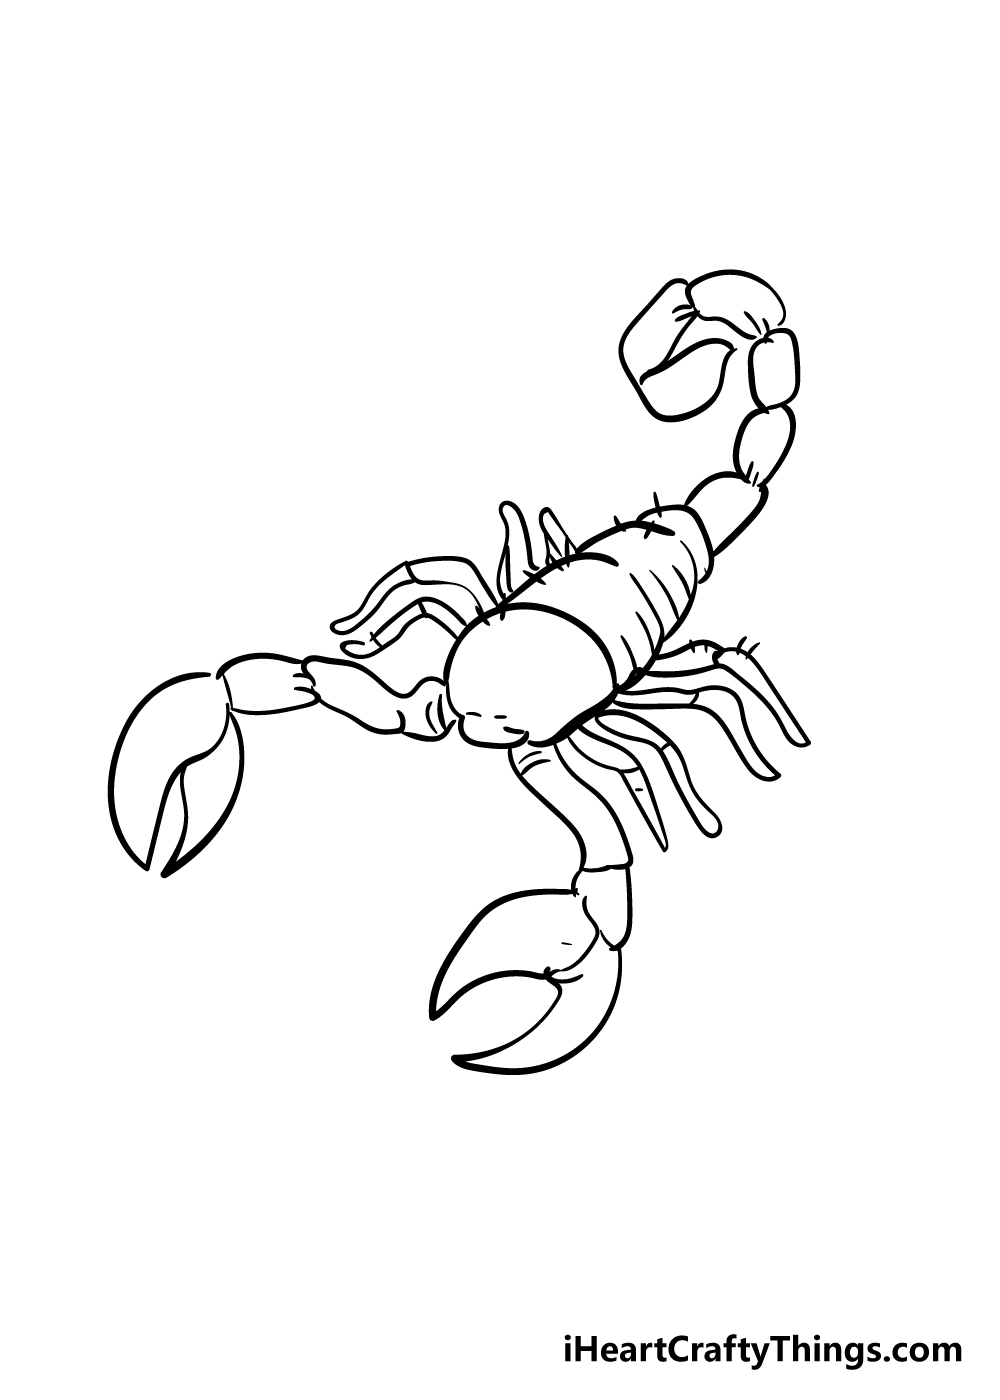
As we mentioned before, scorpions are part of the arachnid family, so like spiders they have eight legs.
We will finish off this guide on how to draw a scorpion by adding these eight legs and some final details.
As you can see in our picture, each leg will be made of two segments. The first segment should angle upward, and the second downward.
Once you have all the legs drawn, you can add more lines throughout the scorpion for some more hairy detailing. Before you move on to the final step, be sure to add any of your own details to finish it off!
One idea would be to draw in a background to show the kind of terrain this fearsome scorpion lives in.
Bonus: Make This Scorpion Drawing Even More Intimidating
Scorpions are scary creatures, there’s no doubt about it. You know not to mess with them because of their big claws and intimidating features.
We tried to capture that in this guide on how to draw a scorpion, and we dare say it was a success. However, you could make this scorpion look even more intimidating with a few changes.
One way you could make this scorpion drawing even scarier would be to add some more creatures to the drawing. It could be some more scorpions, for example.
Simply follow through the guide again, and then you can change a few small details like the pose of the scorpion. Even one additional scorpion would be scary enough, but a whole bunch of them would make the skin crawl!
There are also some other scary creatures you could add, like spiders for example. Can you imagine a big tarantula next to this scorpion?
We can imagine it even though we don’t like to. Despite that, it would certainly be a way to make the picture even scarier!
Another way you could do that would be to change some details. If a scorpion is raising its tail in a striking pose, you want to be far away from it.
Drawing that would make this scorpion look like it means business. You could also use some bright reds and oranges in order to give this picture a brighter look.
It may make it look like a warning sign that dangerous scorpions are out and about. You could even add some text that warns people of a scorpion threat.
Can you think of any other ways you could make this scorpion more intimidating? Be sure to add your own ideas before we move to the final step.
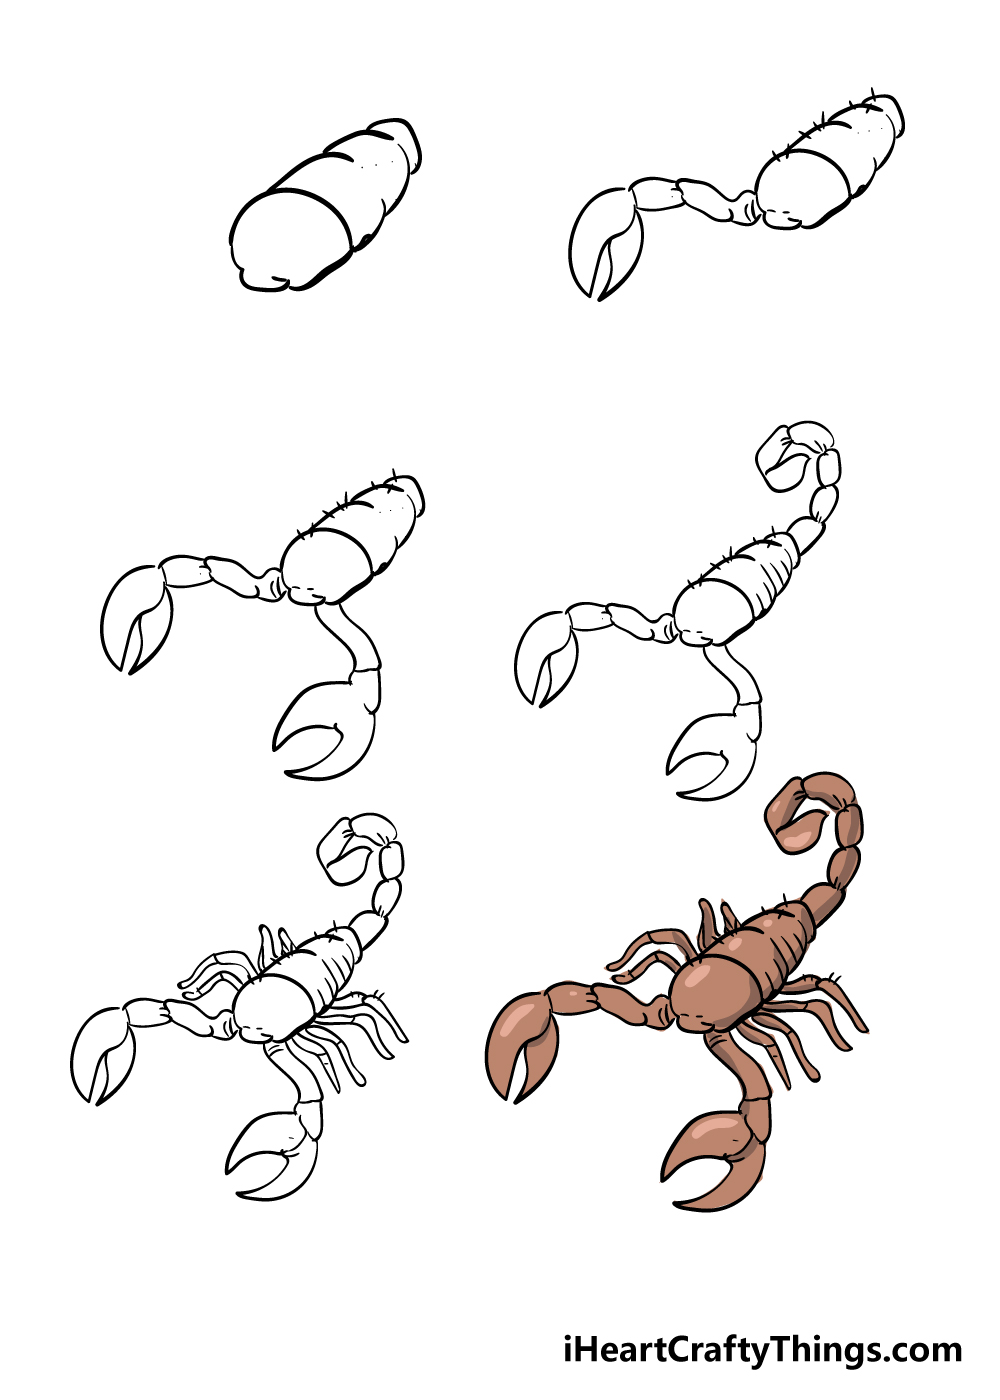
Step 6 – Finish off your scorpion drawing with some color
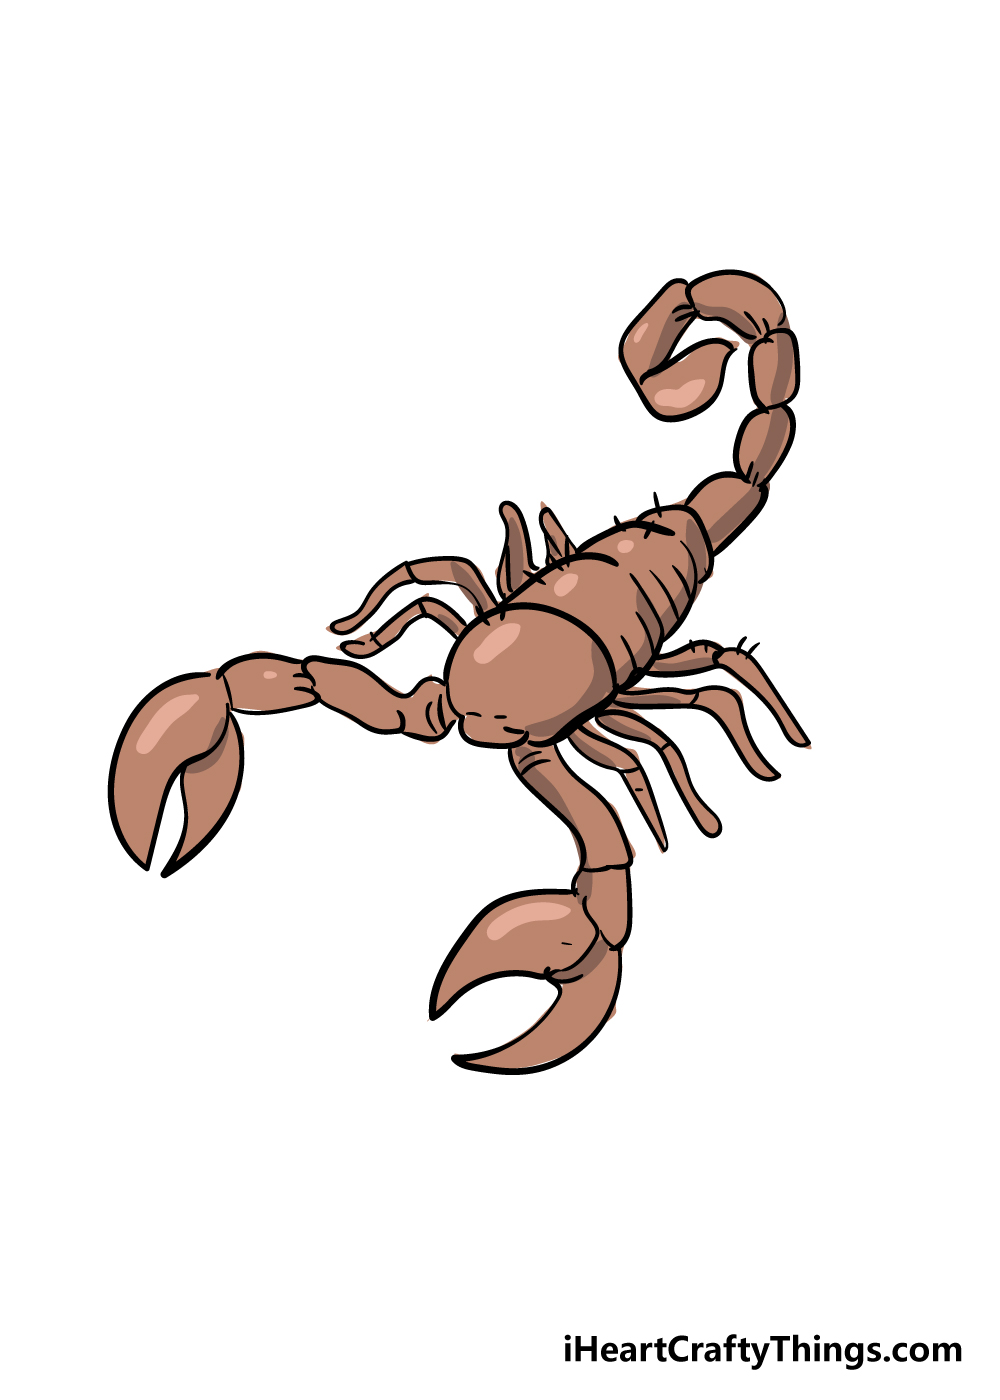
In this final step of your scorpion drawing, you can bring it to life with some amazing colors! We used a more muted brown color set for our example image, but this is just one of many color schemes you can go with for your drawing.
Scorpions come in many different color schemes, so you can really get creative with your favorite colors!
You also have many options available for the different art mediums you can use. If you prefer a more muted look, you could use watercolors or colored pencils for a softer look.
For a more striking and vibrant look, you could use acrylic paints or colored pens. Any approach will look great, so how will you finish off your scorpion drawing?
3 More tips to make your scorpion drawing easy!
Make this scorpion sketch easier with these 3 fun and easy tips!
A scorpion is a pretty unique looking creature no matter which species you are looking at. This can make this drawing of a scorpion a lot more difficult, but you could remove or change some details to make it easier.
This particular scorpion we drew is not particularly detailed, but it could be simplified even further.
For example, you could turn it into an even more cartoon inspired design.
This could be done by combining some of the separate sections and instead drawing some lines across where the sections would be connected. This could also result in a more unique image!
This scorpion drawing shows just one type of scorpion, but there are many other scorpion species. You could look at some of these other species and maybe depict one of them instead.
First, you could look up some scorpions online to find some photos. Try to find one that has a simpler body structure if you’re having a hard time with this scorpion.
Then, use some photos of this new scorpion species along with our guide to make drawing it so much easier. This is a tip that could also be used if you merely wish to make some variations on the drawing.
Do you have a favorite type of scorpion that you could use?
Finally, you could make this scorpion sketch easier by incorporating the scorpion into a larger design.
Making the image more involved may seem like a way to make the drawing even more difficult, but it doesn’t have to be so!
For example, you could draw the scorpion in a terrarium environment. This would include a glass container with some sand and rocks inside of it.
This way, the scorpion would be a much smaller aspect of the image. That would mean that would not need to be as detailed as if it were the sole focus of the picture.
These additions to the design would depend on what you find easiest to draw!
Your Scorpion Drawing is Complete!
We hope that you had a lot of fun working through this step-by-step guide on how to draw a scorpion!
Scorpions may be tough creatures, but hopefully by using this guide drawing one wasn’t tough at all!
A drawing is always made easier when you break it down into steps and take it slow, so we know that by following this guide you will end up with an amazing drawing!
Now you can take over and personalize your incredible drawing by adding some of your own elements and background details. We can’t wait to see what you come up with!
If you’re ready for more drawing fun, be sure to visit us on our website! We have tons of amazing drawing guides like this one that cover a wide range of subjects and styles.
We upload new guides often, too, so be sure to check in often to never miss out!
Once you have finished your awesome scorpion drawing, we hope you will share it on our Facebook and Pinterest pages for us to enjoy!