


The purpose of a scarecrow isn’t much of a mystery, in fact it’s right there in the name! These straw men are created to keep crows from ravaging crops, but that doesn’t stop them from being creepy to humans as well!
Their spookiness has made them popular additions to scary movies and as Halloween decorations.
Despite the fact that they appear around quite a lot, it can still be tricky to learn how to draw a scarecrow.
It can be tricky if you don’t have the right guide, at least, but luckily you happen to be on the right guide!
This step-by-step guide on how to draw a scarecrow will make sure that drawing this doesn’t have to be a scary experience.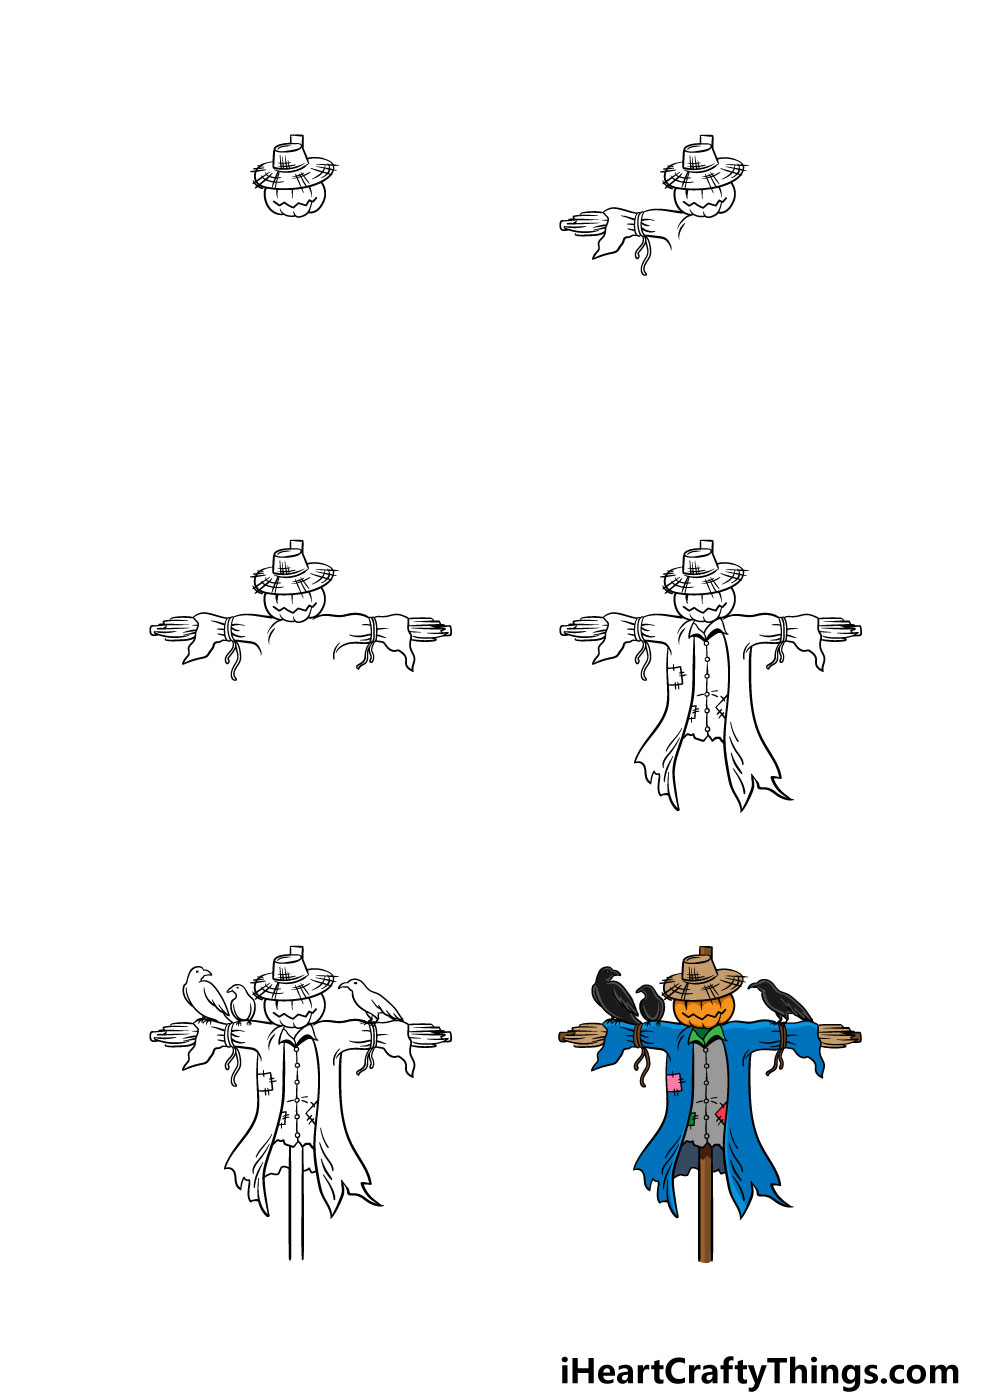
How to Draw A Scarecrow – Let’s get Started!
Step 1
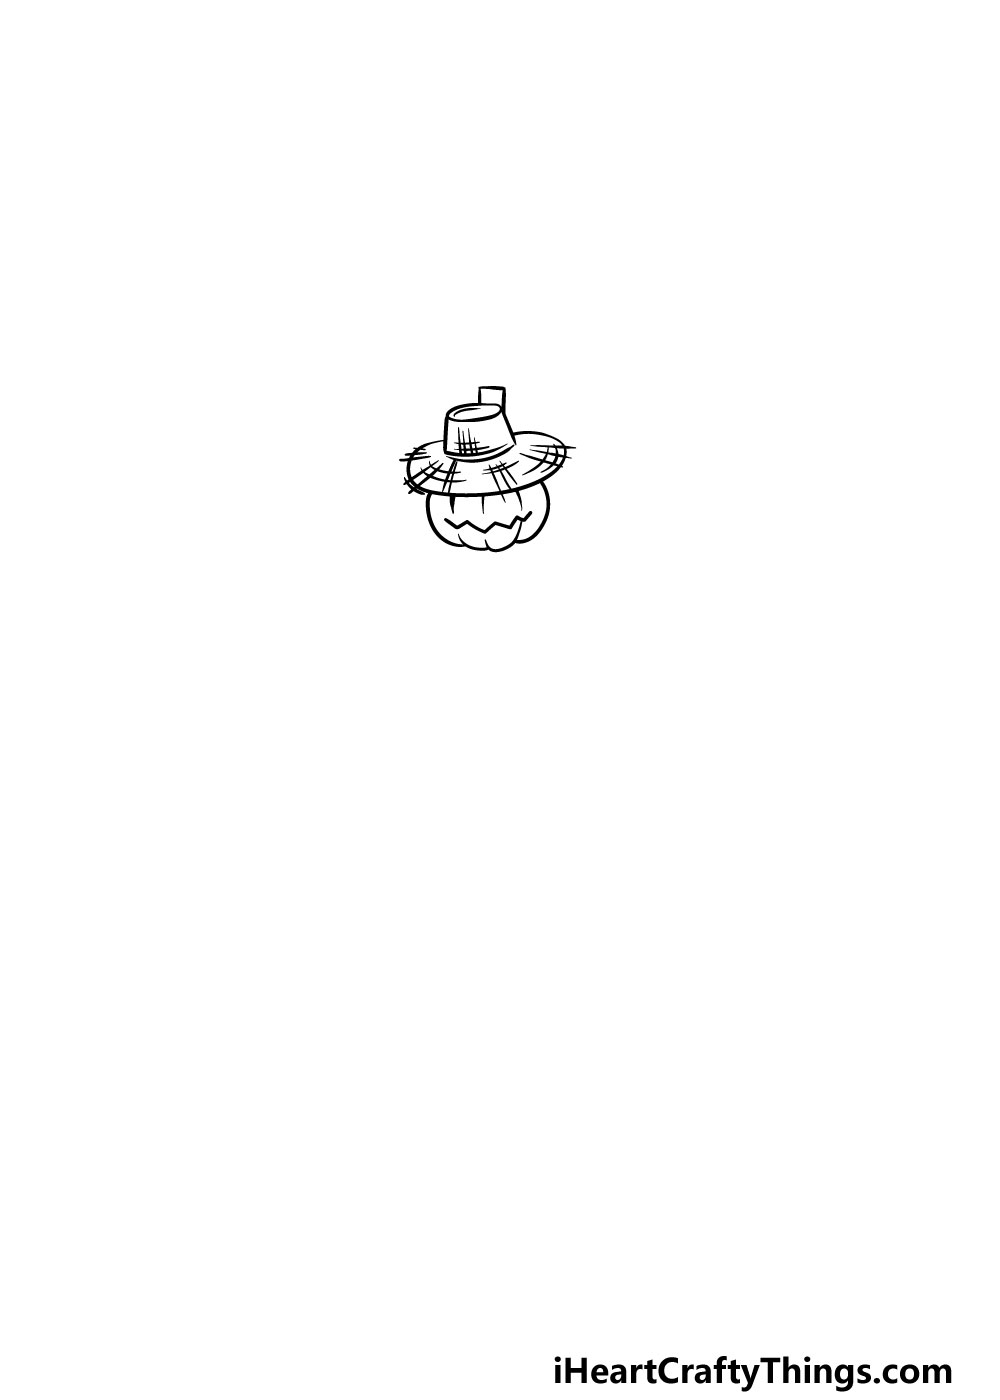
We will be starting this guide on how to draw a scarecrow off by drawing the head of the scarecrow.
The head will be made from a pumpkin to really fit that Halloween feeling that scarecrows are so often associated with!
Before you draw this pumpkin head, you can first begin with the hat on his head. This will be drawn with an oval top, two lines coming down from that and then a round rim.
Once you have drawn this hat, you can also add some lines to it for a cross-hatching effect that will make it look like it’s made of straw.
Finally, you can draw the pumpkin head by drawing some curved lines coming down from the hat. Some simple lines for the eyes and a jagged one for the mouth will finish it off nicely!
Step 2 – Draw the first arm of the scarecrow
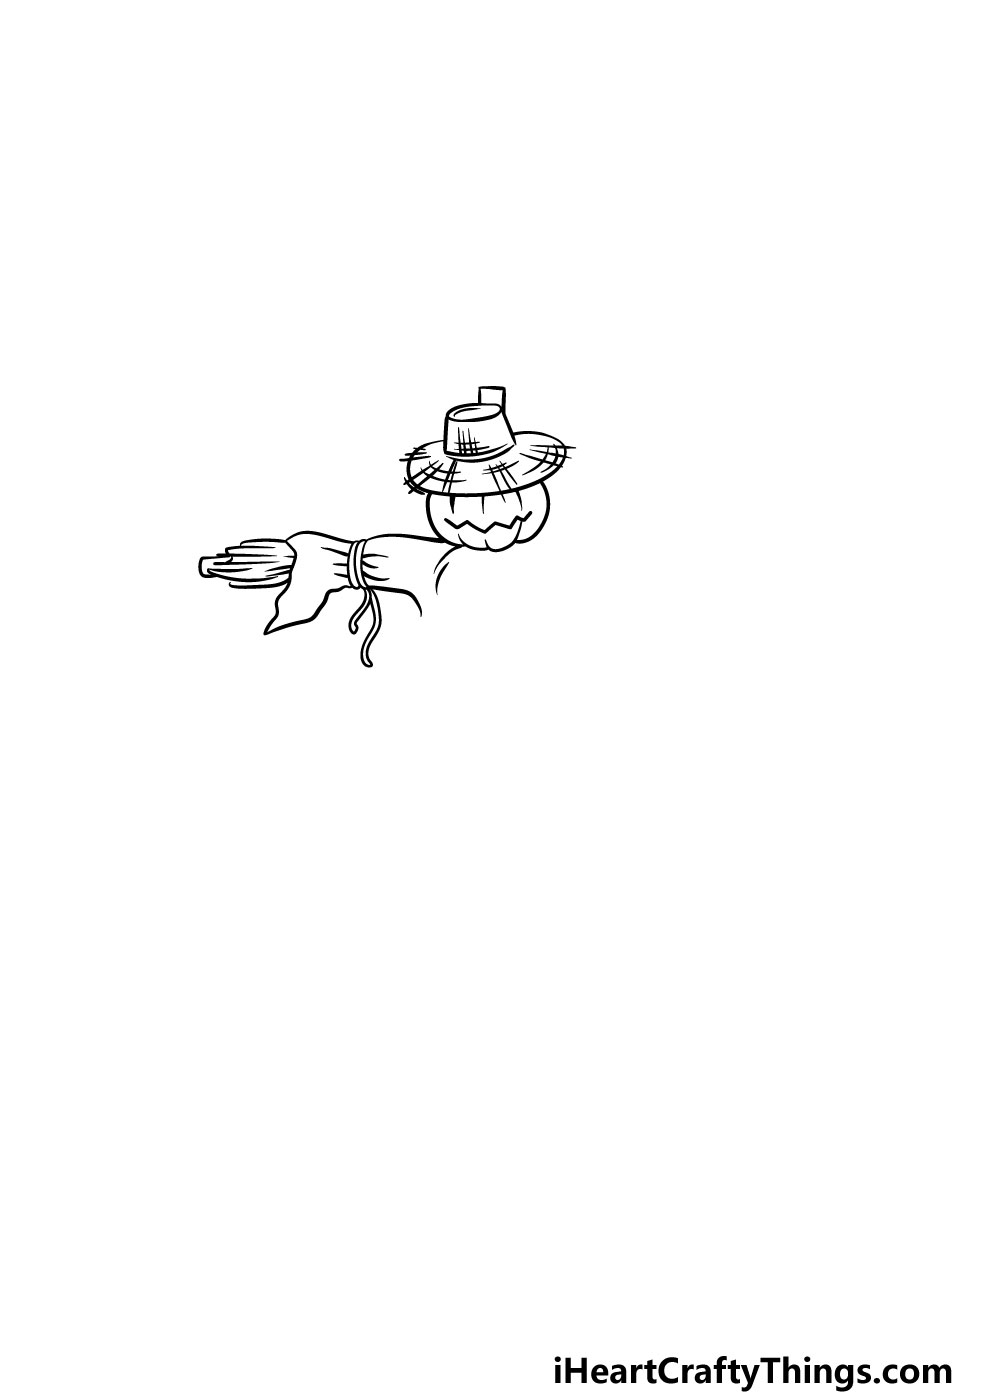
Now that you have the head of your scarecrow drawing completed, you can start on the first arm of the scarecrow.
The scarecrow will be wearing a jacket, so the arm will be covered in that material. You can also use some curvy lines to draw the rope tied around the sleeve of the jacket.
Finally, some straw and wood will be poking out from the shirt sleeve as shown in the reference picture. That’s all there is to it for this step and you’re ready to proceed!
Step 3 – Now, you can draw the other arm

You successfully drew the first arm in the previous step of our guide on how to draw a scarecrow, and in this step you can draw the other.
This should be no challenge for you, as all you need to do is draw a mirror image of the arm that you drew in the previous step. You could always change up the details a bit if you wish, however!
Step 4 – Next, draw the shirt and coat of the scarecrow
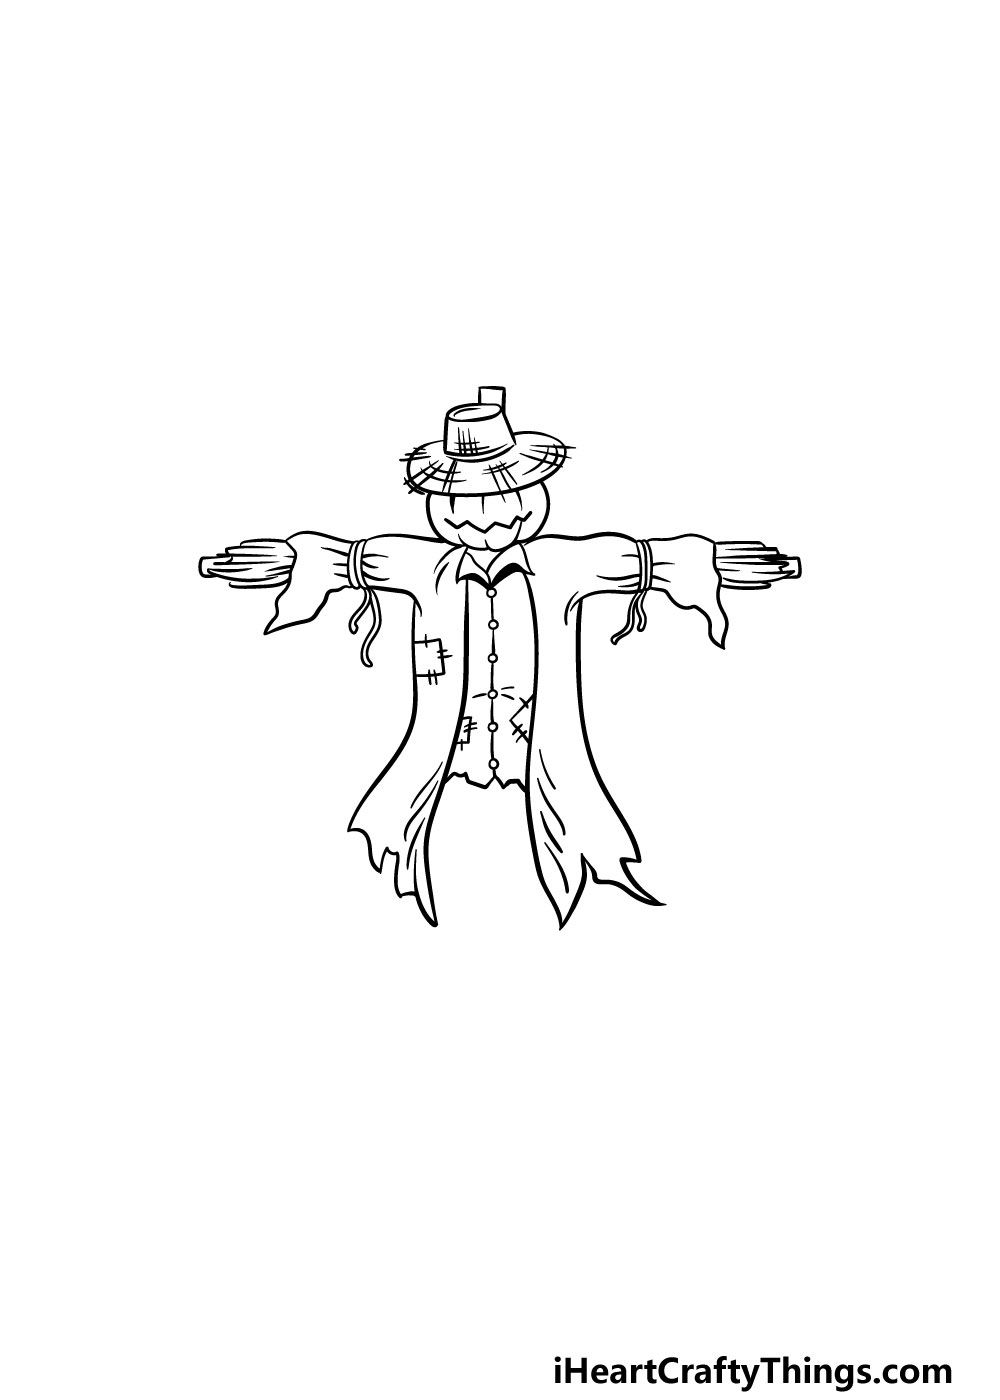
We will be extending the clothing of the scarecrow down from the head in this step. First, start off by drawing the collar at the base of the neck.
Then, use some curved lines for the sides of his coat drooping down. Finally, draw a line going down the center of his shirt, and then draw some small circles going down it for the buttons.
You can also add some small squares with lines at the edges for patches in his shirt.
Step 5 – Now, you can add the final details and elements
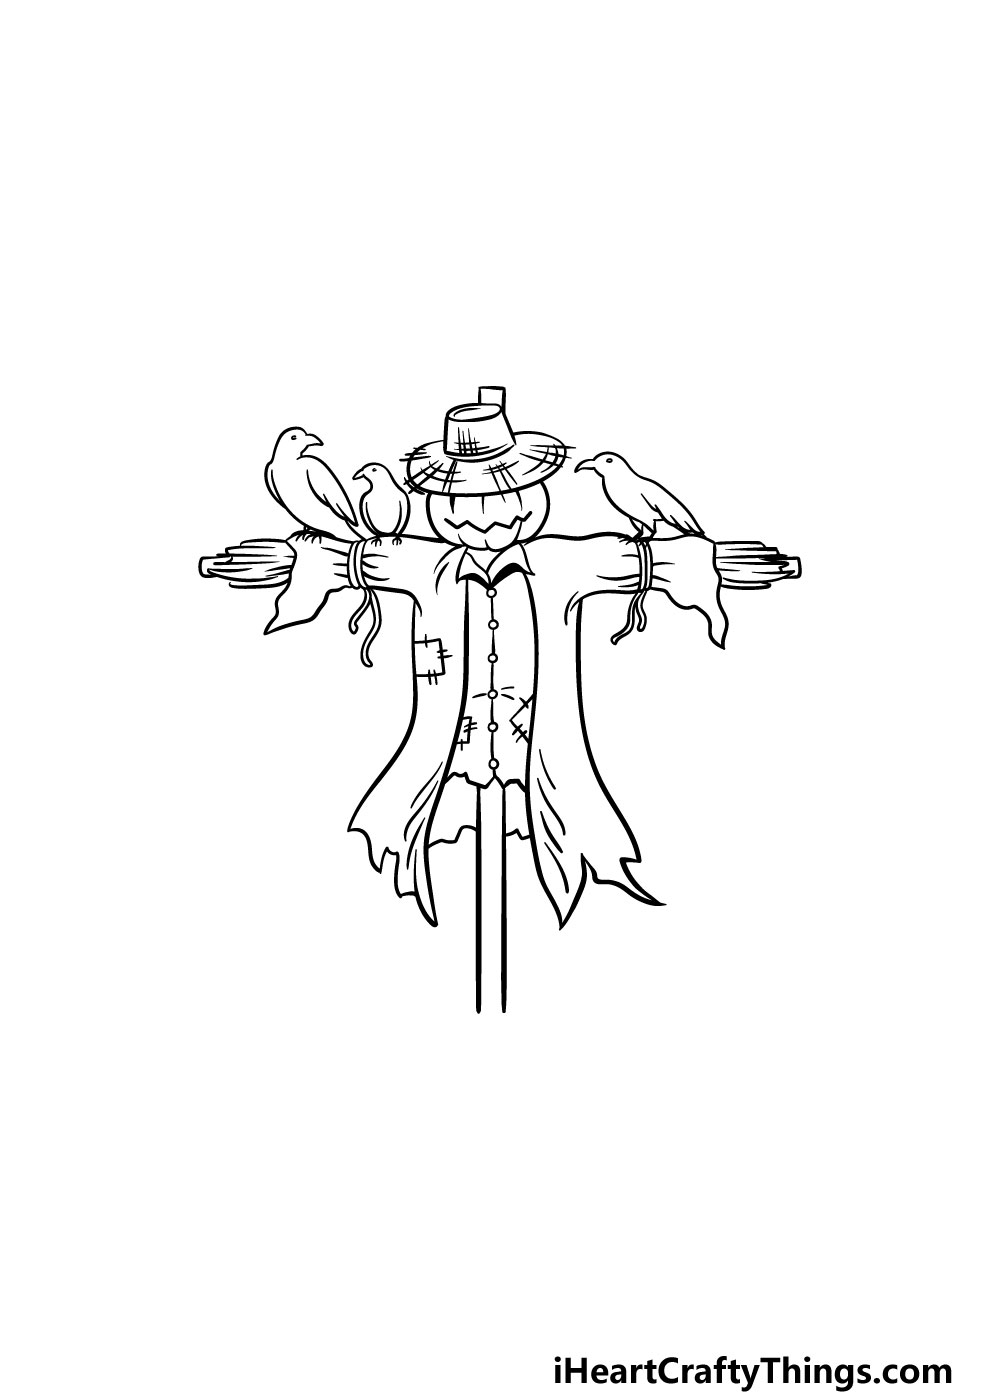
This part of our guide on how to draw a scarecrow will be all about adding some final details and elements before the final step.
First, use some straight lines coming don from the scarecrow for the pole that he is hanging on.
Then, you can add some crows onto his arms to show that this is maybe not the most effective scarecrow ever!
That will finish off the details of this guide, but before you move on you should feel free to add any details of your own that you may like!
One great addition would be to create a background for your picture. You could draw something like a cornfield or maybe a spooky haunted house for the background to create an even more Halloween-inspired image.
Hat background elements or extra details can you think of to put your own spin on this scarecrow drawing?
Step 6 – Finish off your scarecrow drawing with some color
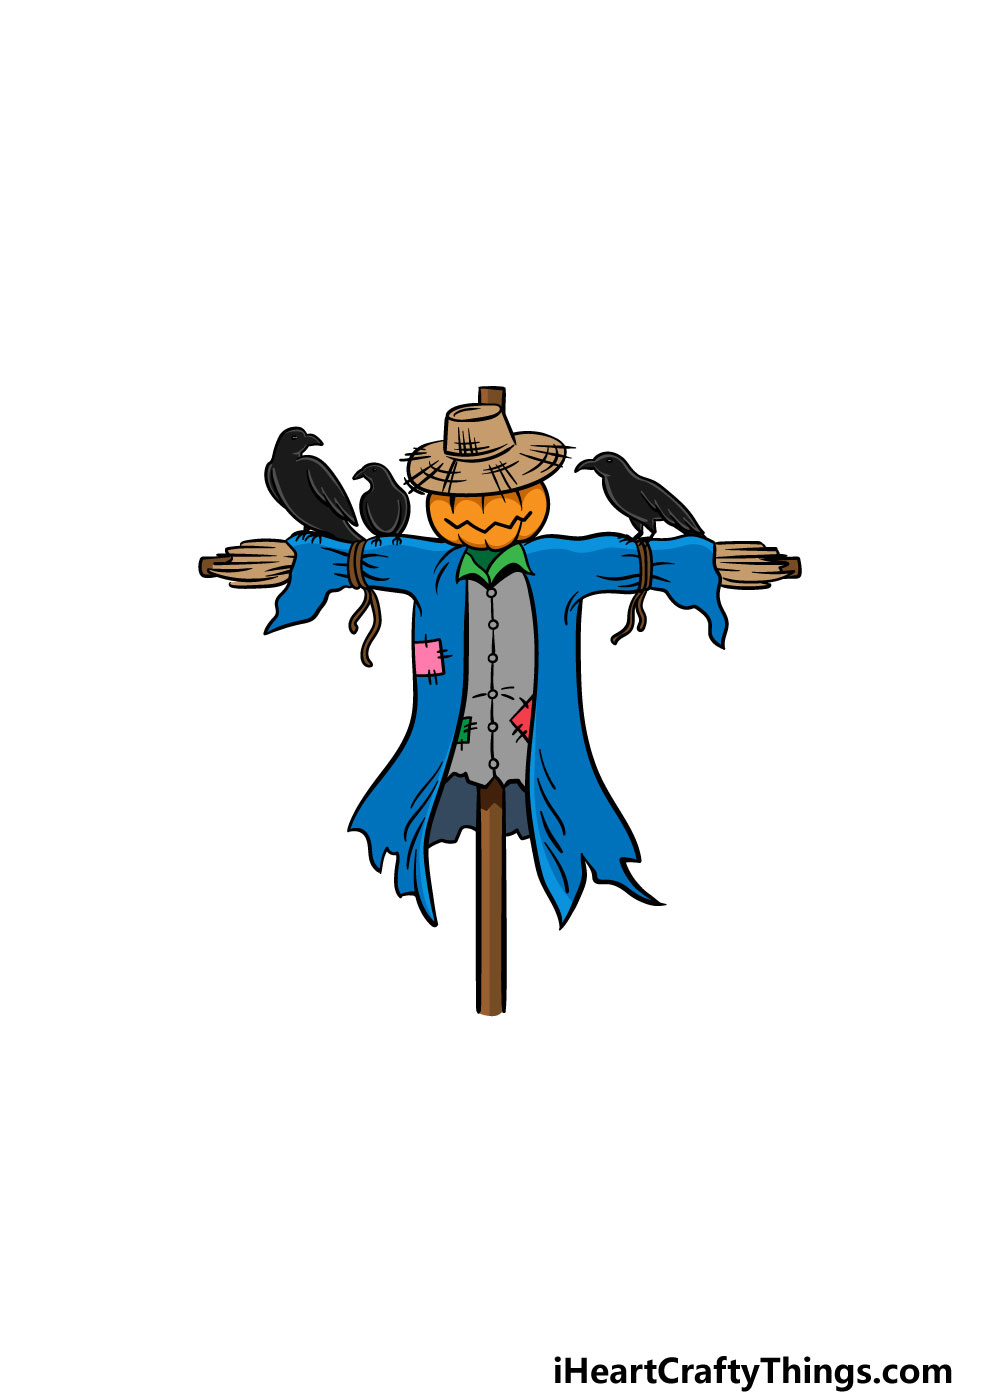
Now that you have finished the scarecrow drawing, you can now bring it to life in this final step of our guide on how to draw a scarecrow!
In our reference image, we used some orange for the pumpkin, and then finished with some blues and browns for the rest of the scarecrow.
We also added splashes of colors such as green and red for smaller details in the image.
This is a step where you can really let your creativity take over and use any colors that you love!
There are lots of ways that you could incorporate your favorite colors into this image, and you can use different art mediums to bring these colors to life.
Mediums such as watercolors or colored pencils can be great for images with a spookier vibe such as this one.
On the other hand, using mediums such as acrylic paints, colored pens or markers would bring some vibrant colors to the image that would also look amazing!
What colors, art tools and mediums will you use to finish off this image?
Do this to take your scarecrow drawing to the next level
Making your scarecrow sketch even better doesn’t have to be scary with these tips!
This drawing of a scarecrow that we created in this image doesn’t look that scary. Some scarecrows can be rather creepy, and it could be fun to make this scarecrow a bit spookier!
You could do this by giving him a more sinister facial expression, and you could also make his clothes look darker and more ragged.
Maybe the scarecrow could also have legs that it uses to creep about.
What are some other ways you can think of that you could use to make this scarecrow a bit scarier?
Once you have decided how you would like your scarecrow to look, you could also add a background to make this image even more interesting to look at.
An obvious choice would be to portray something like a cornfield, perhaps with a barn in the distance. That would be one idea, but there are lots of other settings you could go for!
If you’ve ever seen a real scarecrow, you could use the setting of that real one to help you as you draw.
It could also be fun to add one or two more friends for your scarecrow drawing. If you were to try this, then you could follow the steps in the guide again while changing some details on each scarecrow.
They could be next to one another, or some could be drawn smaller in order to show perspective. What do you think these scarecrows could look like?
Finally, you could also look into adding other kinds of characters to finish off your scarecrow sketch. These could be cartoon humans, for example, one could be a farmer in a straw hat.
You could also maybe go for some animals you would expect to see on a farm, and they could be befriending the scarecrow.
These could be drawn in a cartoon style, or you could make them look more realistic if you prefer.
What kinds of characters do you think you would like to add?
Your Scarecrow Drawing is Complete!
That brings you to the end of this guide on how to draw a scarecrow!
This image may have seemed like a scarily difficult prospect to take on, but we hope that by following this guide you found it to be not only easy but lots of fun too!
Now that you have completed this image, you can take it even further by adding your details and elements.
We mentioned a few ideas like adding a background or your own details, so it’s up to you to decide on what kind of spooky setting you would like your scarecrow to be in!
We have many more drawing guides like this one for you to enjoy on our website! We hope to see you there often, as we upload new guides frequently for you to enjoy.
Once your scarecrow drawing is done, we would love to see your creative artwork! You can let us take a look by sharing your picture on our Facebook and Pinterest pages.