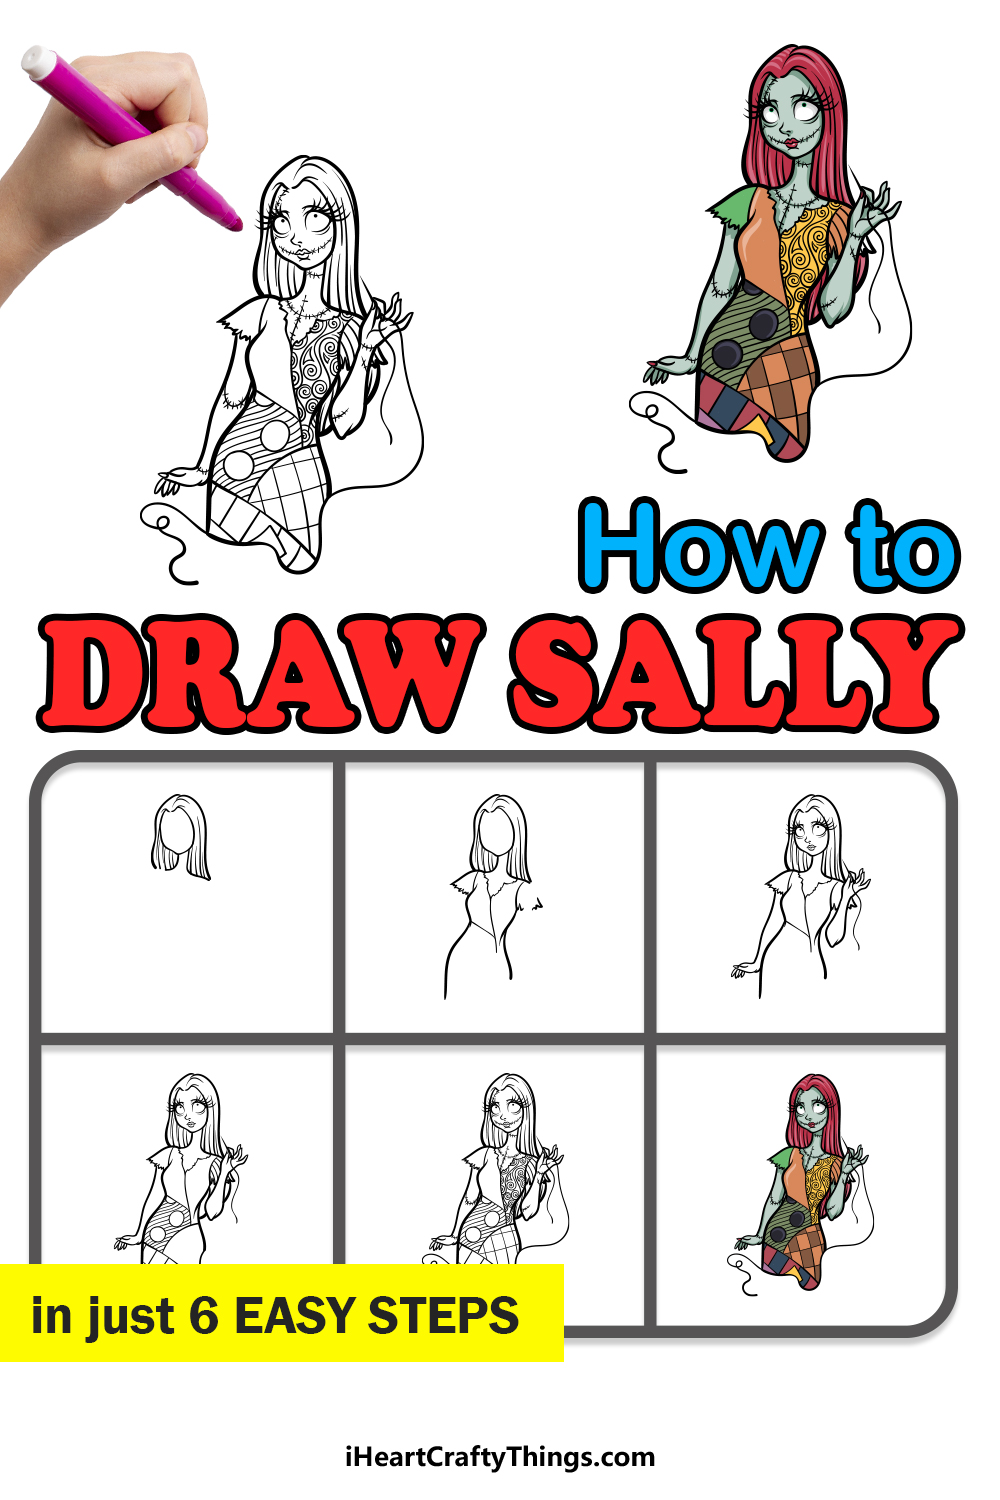
The Nightmare Before Christmas is an animated film that remains popular today despite being almost 30 years old.
It’s a dark and yet charming tale featuring some unique and quirky characters, and it serves as the perfect display of writer Tim Burton’s imagination.
One of the main characters of the film is Sally, and she has won many fans not only because of her fun traits but also her unique design. Fans of this character may want to know how to draw Sally but not know where to start.
If you are one of those fans, you’ll be glad to know you’re in the right place!
Our step-by-step guide on how to draw Sally is here to show you how fun and easy it can be to draw this beloved character.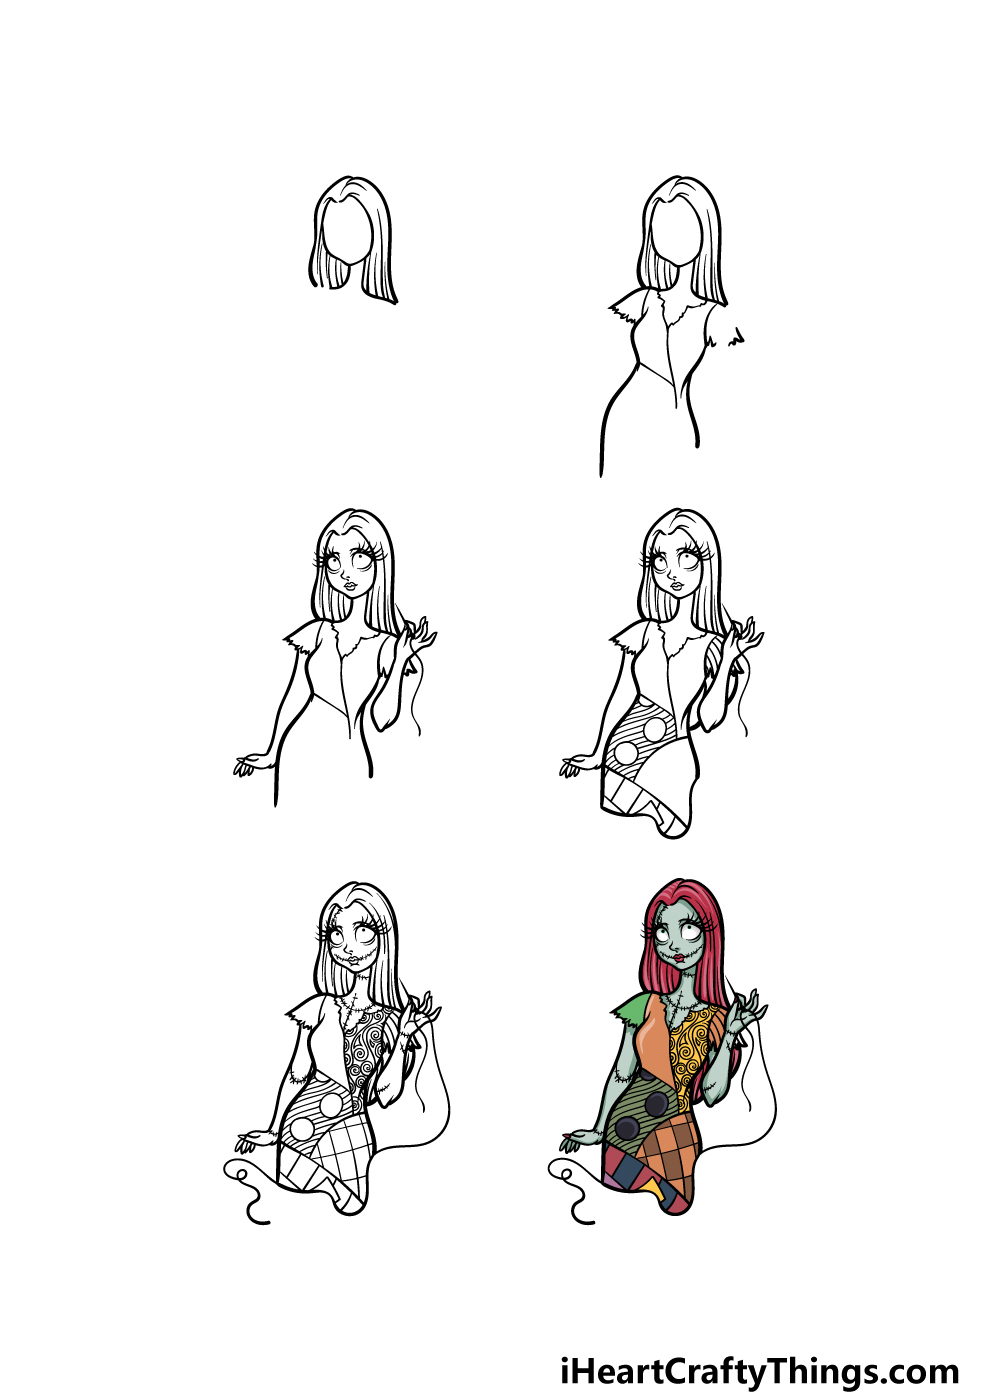
How to Draw Sally – Let’s Get Started!
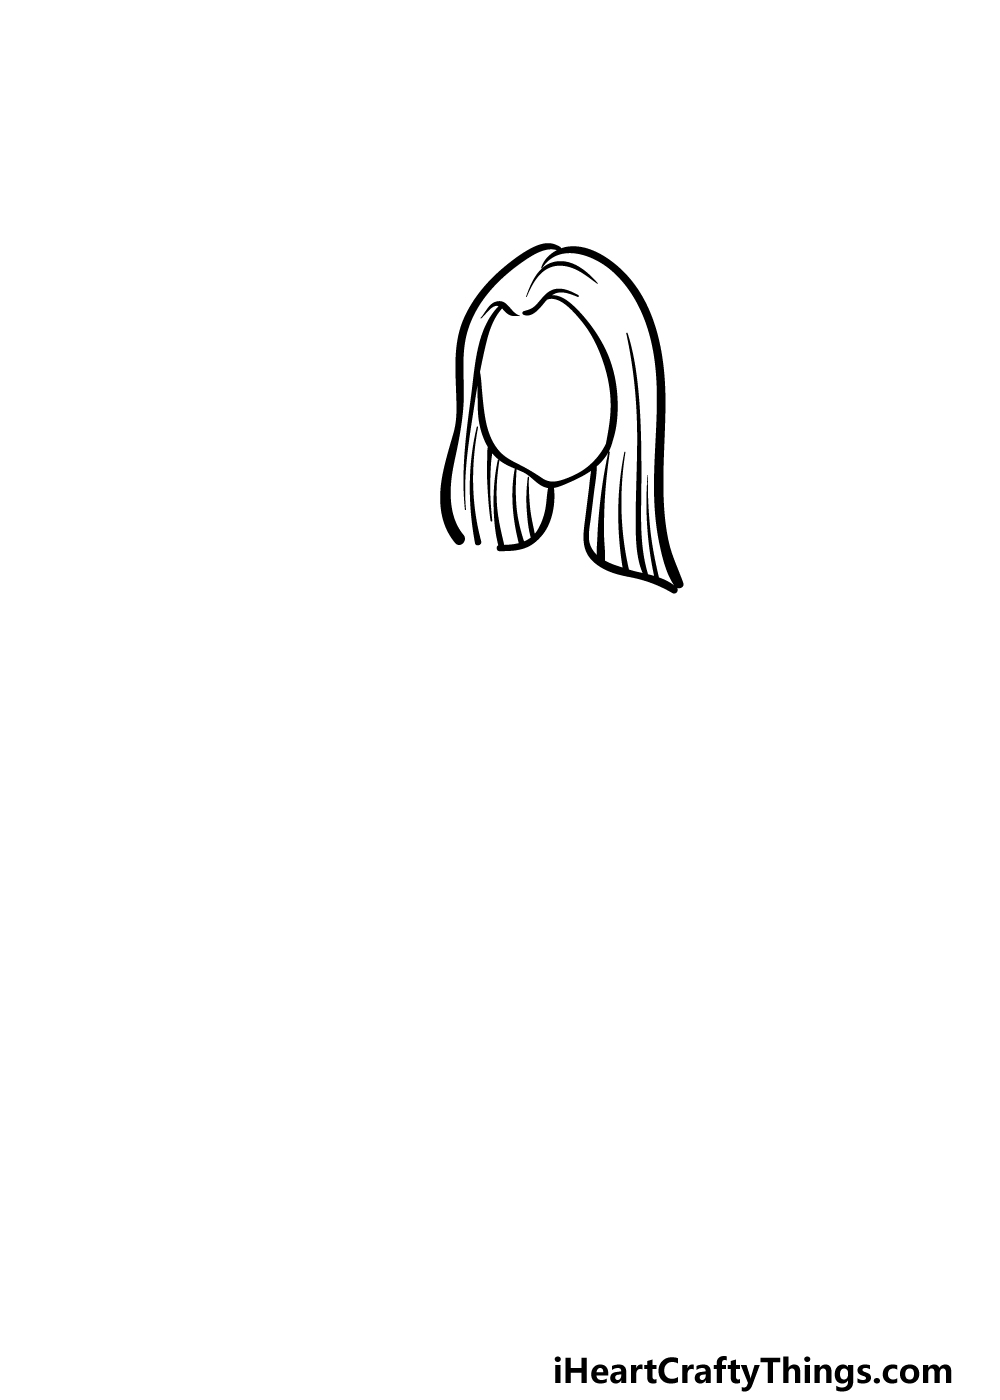
Step 1
This character has a really cool design that seems to have been inspired by the stitched-up design of Frankenstein’s monster.
These details can make it difficult to learn how to draw Sally, but we will take it slowly to show you that it can be easier than you think!
To get started with this guide, we will be drawing her face and hair outline. First, use a curved line for the outline of her face with a slightly pointy chin at the base.
Then, use some more curved lines close to one another coming down from her face for her thin neck.
Finally, use some wavy lines for the outline of her straight hair dropping down around her face. Add some line details to the hair, and then you’ll be ready for step 2!
Step 2 – Now, start drawing the outline for her body
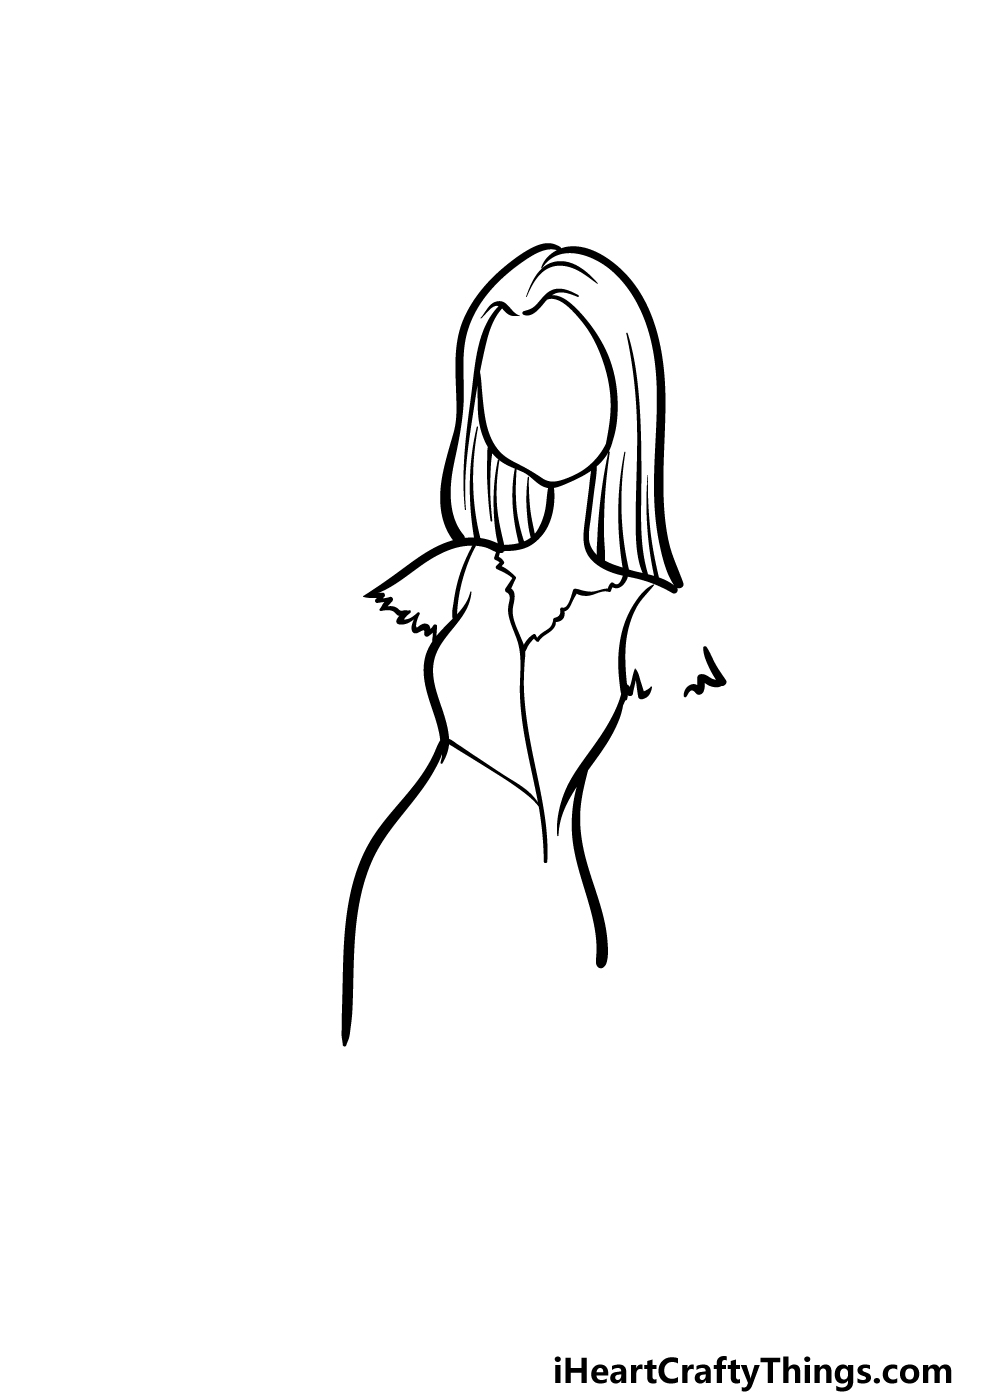
For this next step of your Sally drawing, we will be starting the outline of the dress that she is wearing.
Her body seems to be stitched together, as we’ll be drawing soon, and her dress isn’t in much better shape.
There will be some smooth curved lines for most of her dress, but there will also be some jagged lines by the sleeves to make it look as if it is made of ripped fabric.
The line for the neck hole will also be drawn in a similarly jagged style. You can leave some gaps in the sleeve on the right, but we will fill these gaps in as we move to the next steps.
Step 3 – Draw her arms and facial details
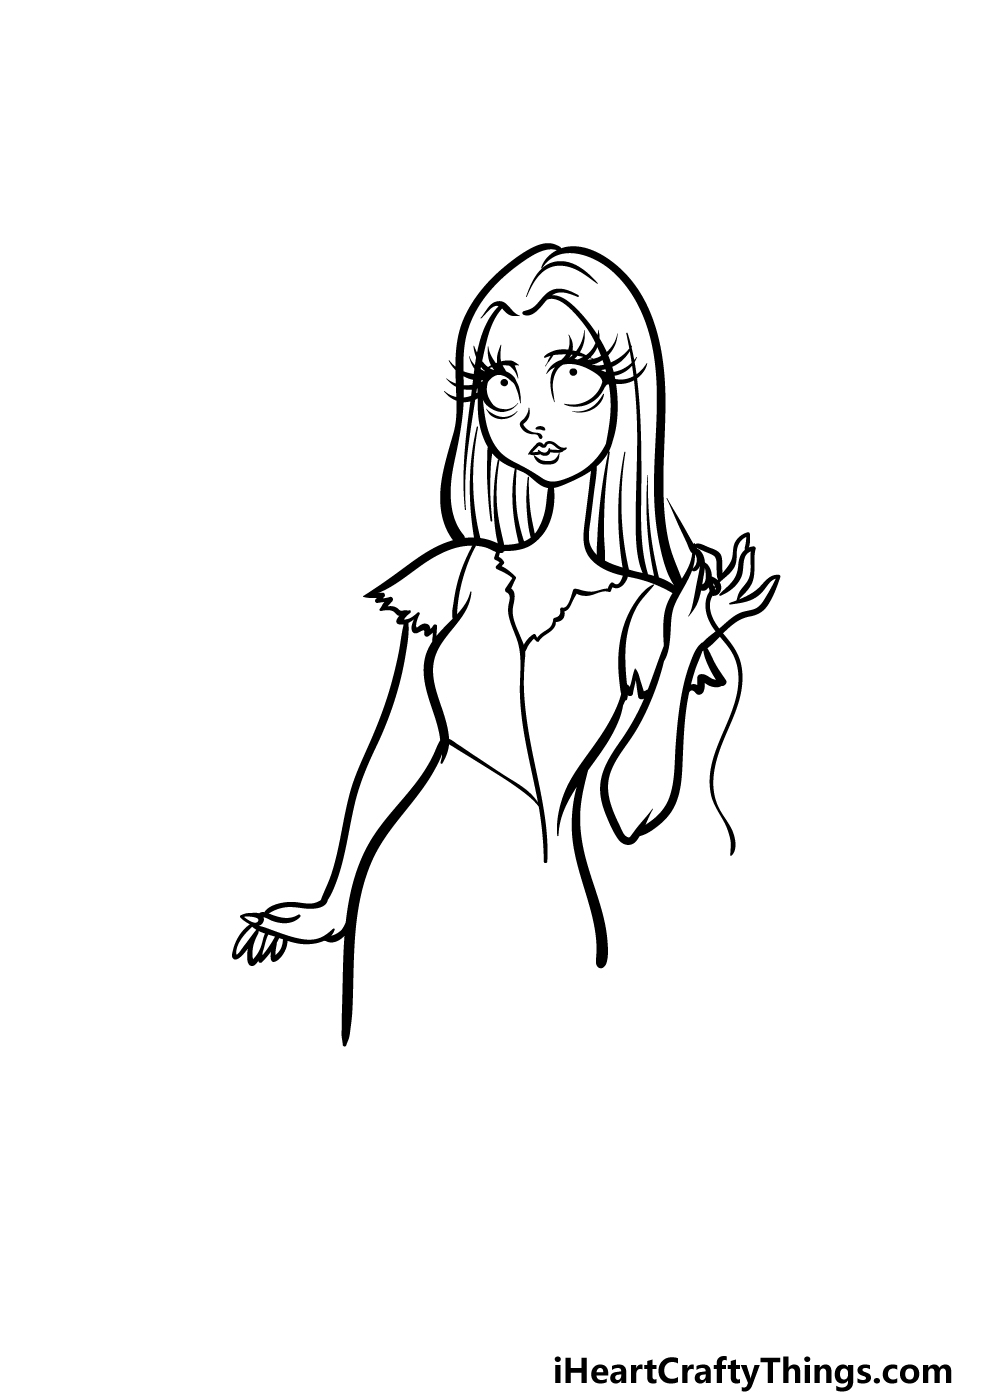
In this third step of our guide on how to draw Sally, we will be drawing not only her arms but also some facial features.
First, let’s start with her face. She has large, rounded eyes that are characteristic of the Tim Burton style.
These will have some large eyelashes coming off of them along with some lines beneath them.
Finish off her face by drawing a small nose and a pouty mouth. Her face looks pretty normal now, but we will add some stitch details in the following steps.
To finish off this third step, we will draw her arms. The arm on the right will be raised up and will fill in the spaces you left in the sleeve. This hand will also be holding a threaded needle.
The other arm will be down at her side, and then we can proceed.
Step 4 – Next, start drawing some sections of her dress
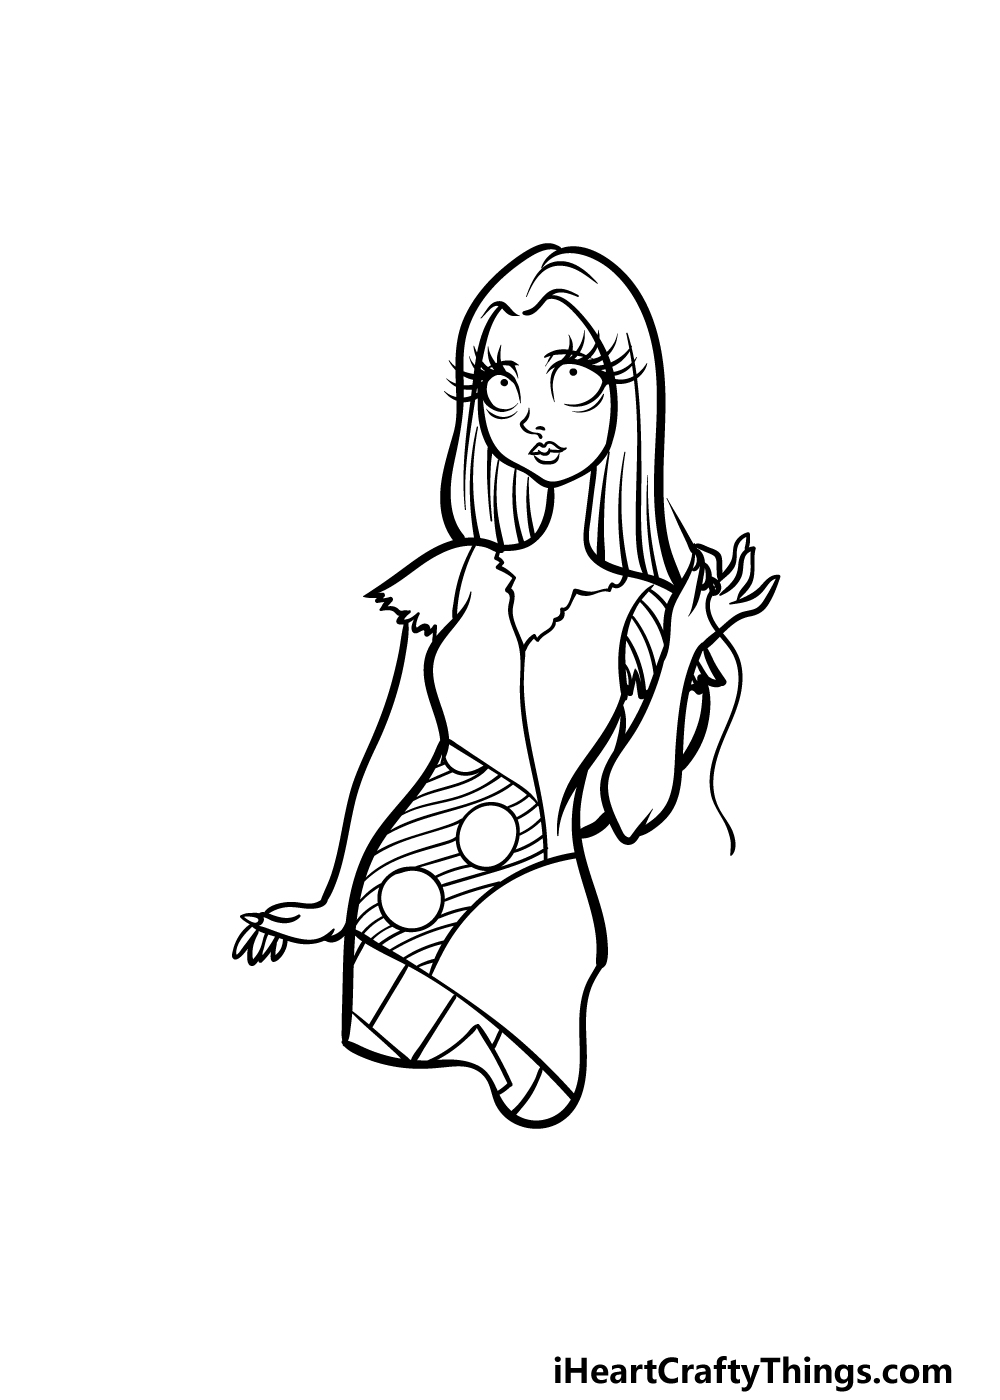
The dress that Sally wears is made up of many different pieces of fabric roughly sewn together. We will add the first of these sections for this part of your Sally drawing.
The first will go by her waist, and it will have some circle shapes on it with some line details as well. Then, the base of her dress will have a square pattern on it.
Finally, you can finish off this step by drawing some stripes on her right sleeve. Then you’ll be ready for the final details in the next step!
Step 5 – Add the final details to your Sally drawing
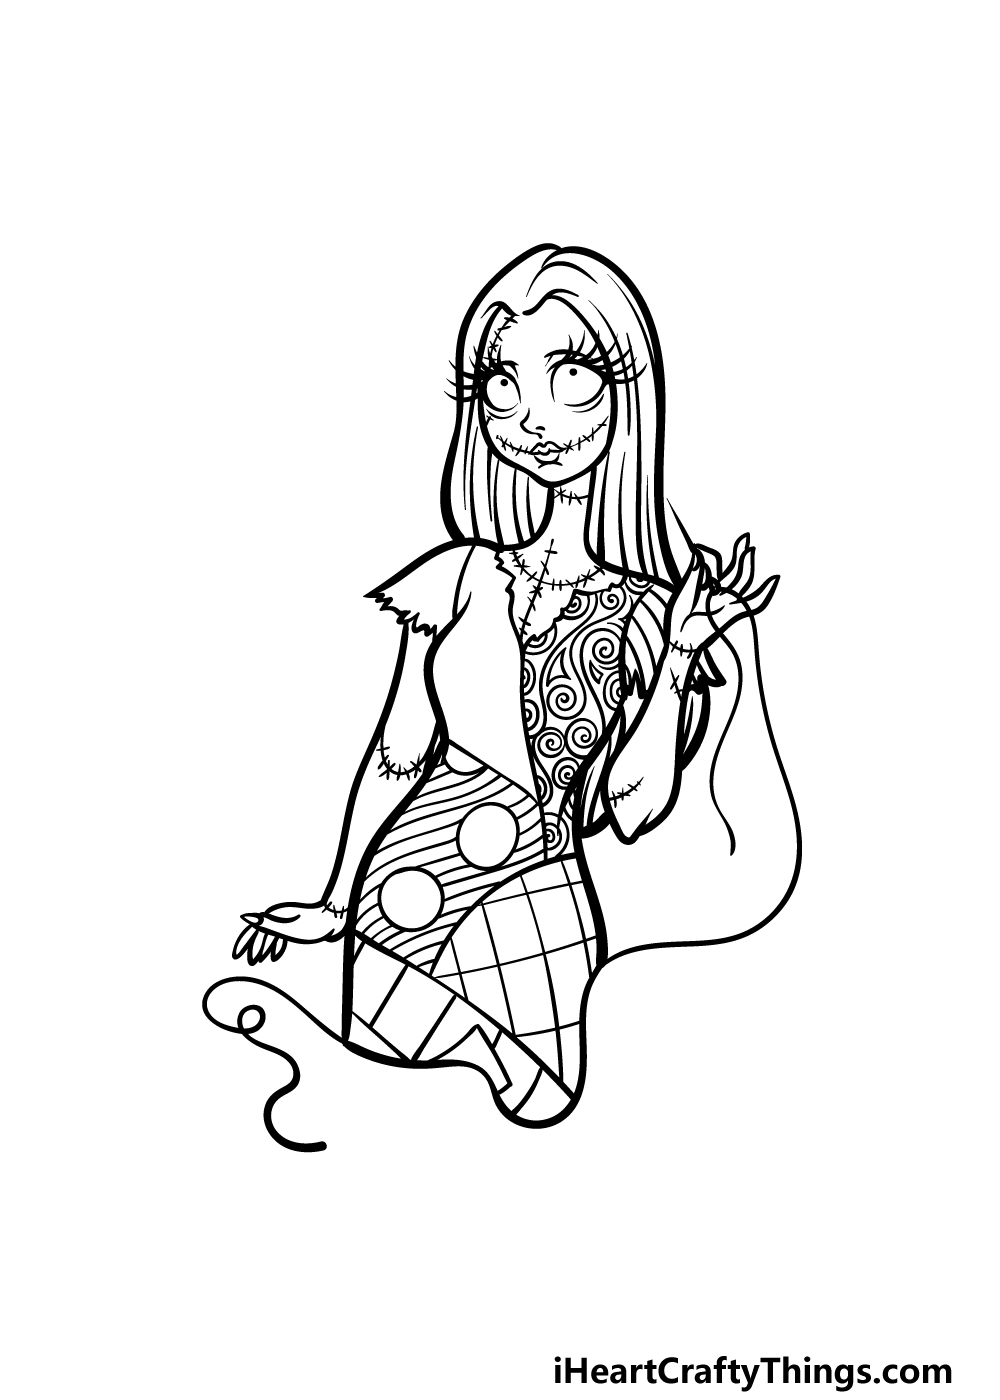
Now, you’re ready to finish off the final details and touches in this step of our guide on how to draw Sally! First, we will be drawing those stitches we’ve mentioned a few times.
This will give her that Frankenstein ragdoll look she is known for. Draw some curved lines along her body and face with smaller lines going along them, as shown in the reference image.
Then, you can finish off by drawing the final sections of her dress.
Before you move on, you could also draw a background or even add more characters from the film! How will you finish off your image?
Step 6 – Finish off your Sally drawing with color
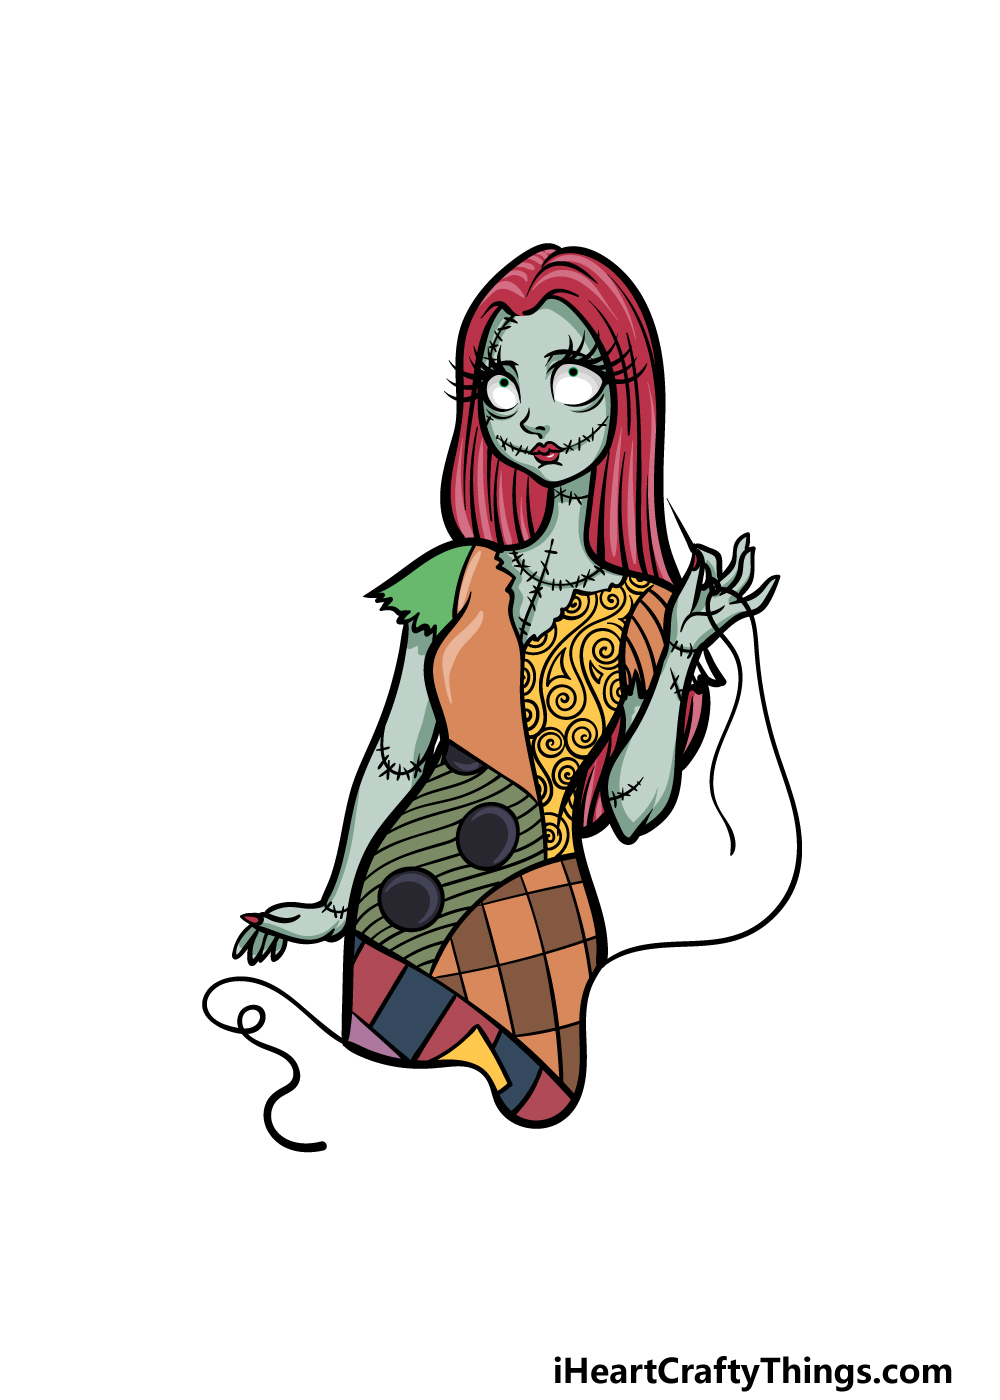
This is the final step of your Sally drawing, and in it we shall complete the image with some colors.
We went for her classic colors from the film in our reference image, so you can copy it if you want her looking screen accurate.
To do this, we used reds for her hair and then a light green for her skin.
The different sections of her dress are colored with clashing bright colors to further show that they are made of many different fabrics stitched together.
Will you go for these classic colors, or will you choose some new ones of your own?
Here’s how you can make your Sally drawing even better…
Represent this iconic character with these tips we have for your Sally sketch!
This drawing of Sally shows just a portion of this famous character. If you want a more complete portrayal, then you could add some more of her body.
To do this, you could either use the film or some pictures online to build on this design in our guide.
By doing this, you could also change her pose or her expression a bit.
What kinds of poses would you like to create for this drawing?
Another way that you could make this drawing look even better would be by keeping Sally as she appears in the image, but then you could add some kind of border.
This could be a circular shape or design around her, but there are so many creative approaches you can take.
These could be based on elements from the film, or you could go for a completely unique design.
Can you think of any patterns or textures that would make the viewer think of the film that you could use for this border?
Sally is such an iconic character, but there are many more characters from the film that are just as famous. It could be fun to add one or more of these characters to this Sally drawing!
The most obvious choice would be to add her love interest, Jack. There are many other villains and allies that you could add as well, however.
Which of your favorite characters could you add to this image?
Finally, if you decided to not add a border then you could instead draw a background to finish off your Sally sketch. You would have a few ways that you could do this if you wanted to.
For one, you could choose a location from the film and then adapt it to a background. There would be so many places to choose from!
Or, you could create a unique location or use some shapes, words and colors to fill the background.
Your Sally Drawing is Complete!
You have completed all of the steps in this guide on how to draw Sally! We hope that working on this guide made it much easier for you to recreate this beloved character.
Following the steps we laid out is the best way to ensure that you can master this drawing in no time.
Then, we wanted to leave some room for you to get creative. We mentioned how you could draw a background, add characters or change up the colors and mediums you use.
These are just a few ideas, so how else will you personalize this image?
You can also check out our website for more drawing guides, many of which feature more awesome characters from films, shows, animes and more! We upload new ones often, so keep checking in regularly.
We would be thrilled to see how this Sally drawing came out, so when it;s done please be sure to share it on our Facebook and Pinterest pages for us to admire.