Going to a funfair or carnival can be one of the most fun outings you can experience! Usually, these events will have some fun rides to go on.
Of all these rides, a roller coaster is one of the most thrilling ones that you can go on, and they manage to be both fun and scary at the same time.
While it can be fun to ride one, you can also have a great time learning how to draw a roller coaster.
Their complex structure can make it tricky to draw though, but this guide will show you how to do it.
We hope that you have a thrillingly fun time working on this step-by-step guide on how to draw a roller coaster!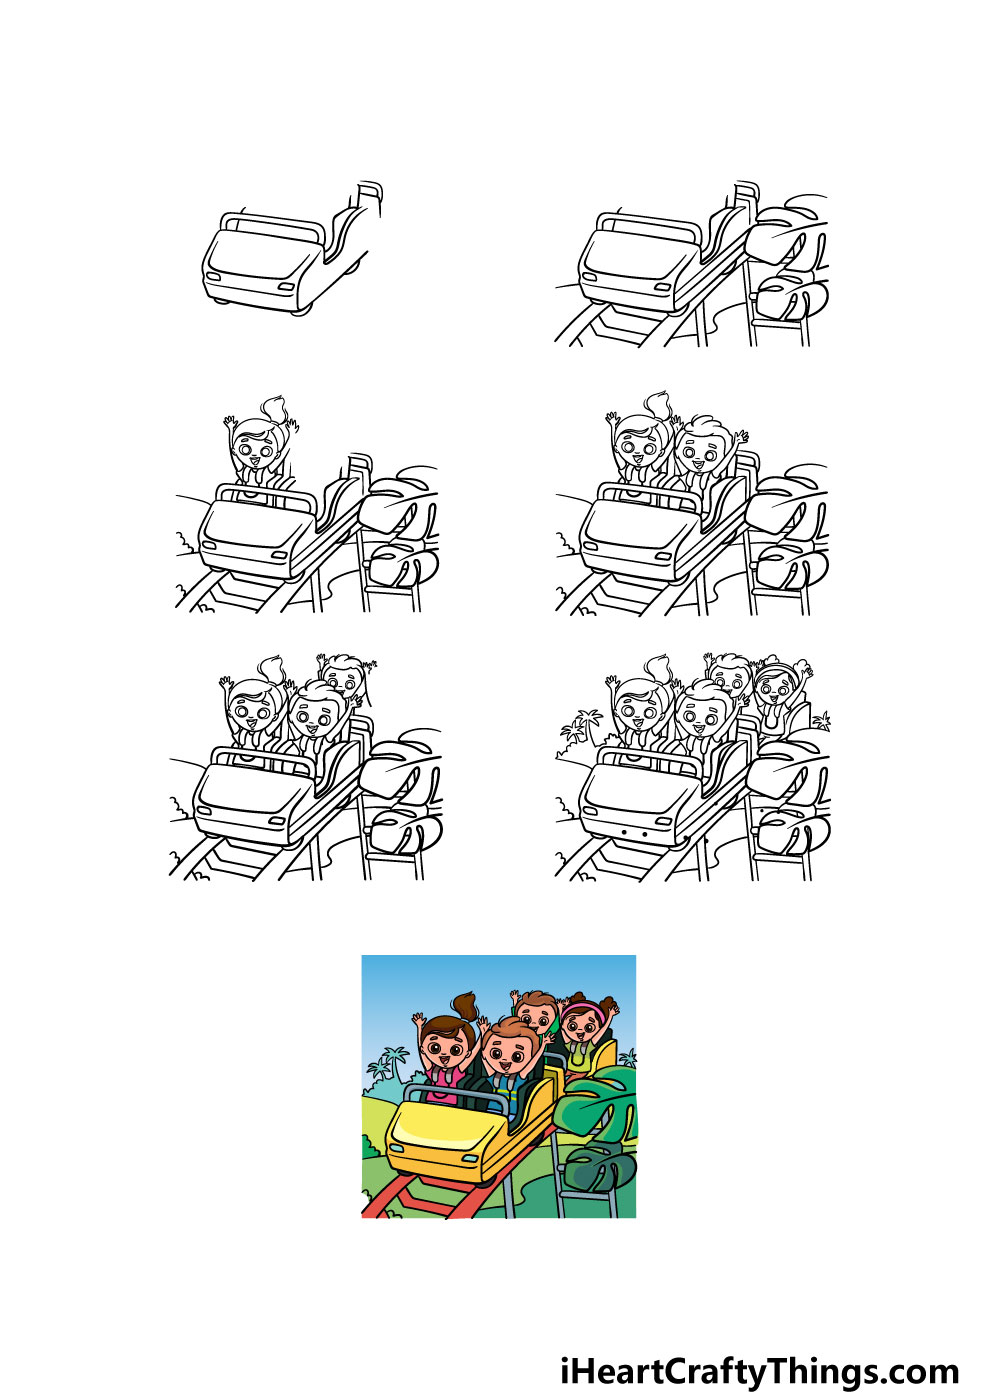
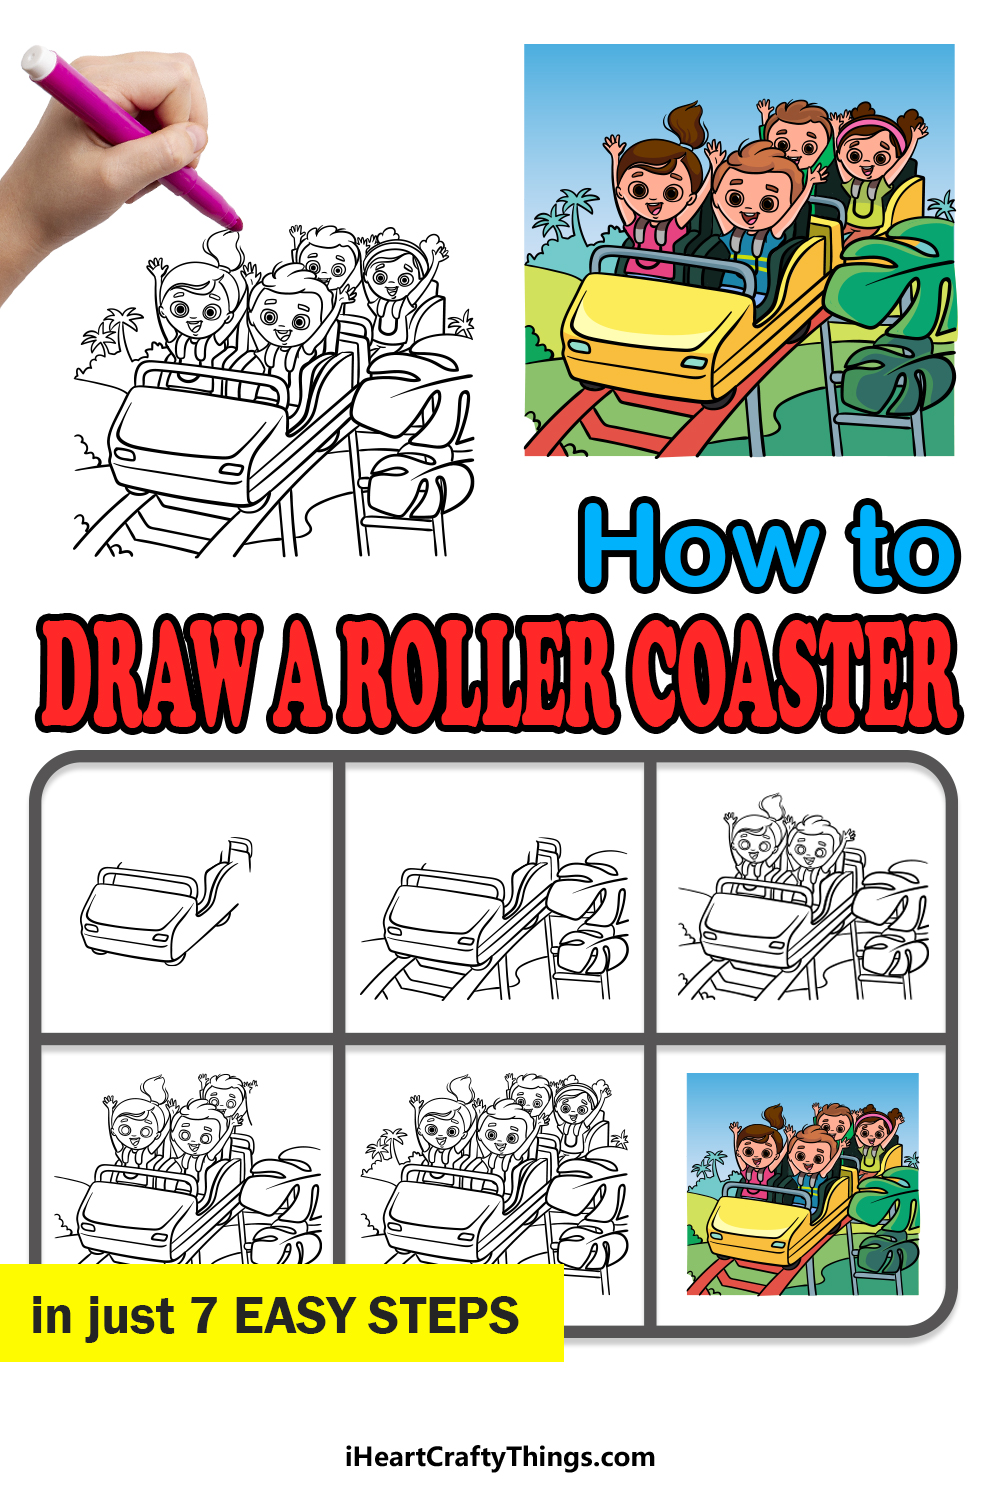
How to Draw A Roller Coaster – Let’s Get Started!
Step 1
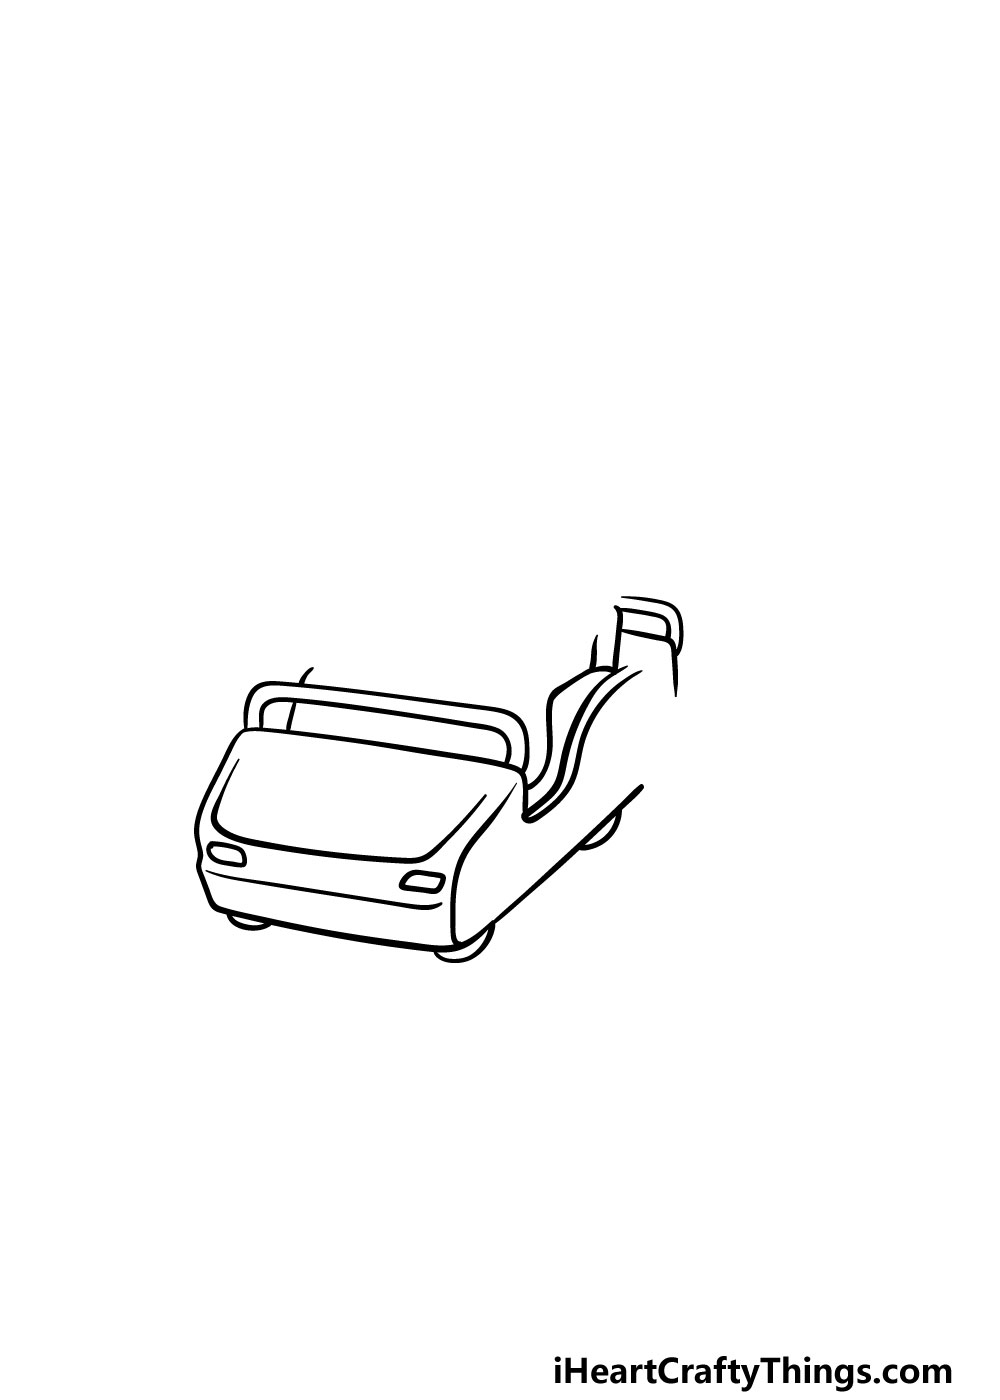
In this guide on how to draw a roller coaster, we will be drawing a roller coaster car with four people sitting in it. For this first step, we will be drawing the car to start with.
There are a few different components to this car, so taking it slowly and following the guide closely will be the best way to easily draw this car.
You can use a combination of straight and curved lines to draw the body of the car, and there will also be a safety bar at the front.
There will be a gap at the top of the car where we will be drawing the people in the next few steps.
Step 2 – Start drawing the surroundings for the roller coaster
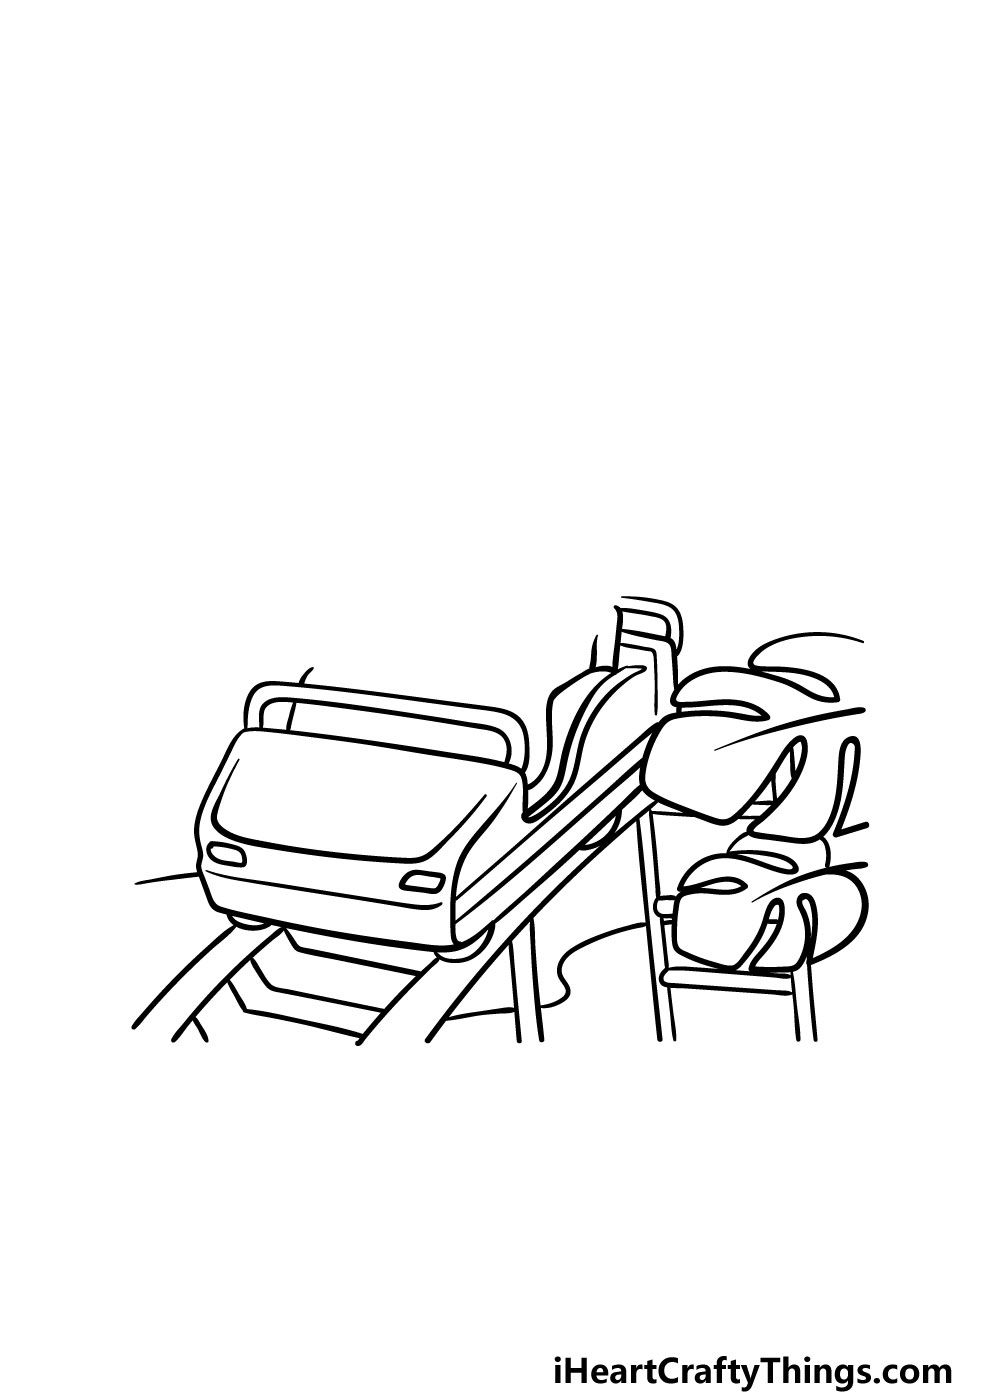
This second part of your roller coaster drawing will also involve a lot of details for you to draw, so it’s another one where you will want to go slow and follow the guide.
First, you can use some curved lines for the track of the roller coaster.
These tracks will also have lines going down vertically for the poles holding the tracks in the air.
Then, we will be drawing some background details such as some large leaves next to the roller coaster. You could also add some details of your own before moving on as well!
Step 3 – Draw the first person riding the roller coaster
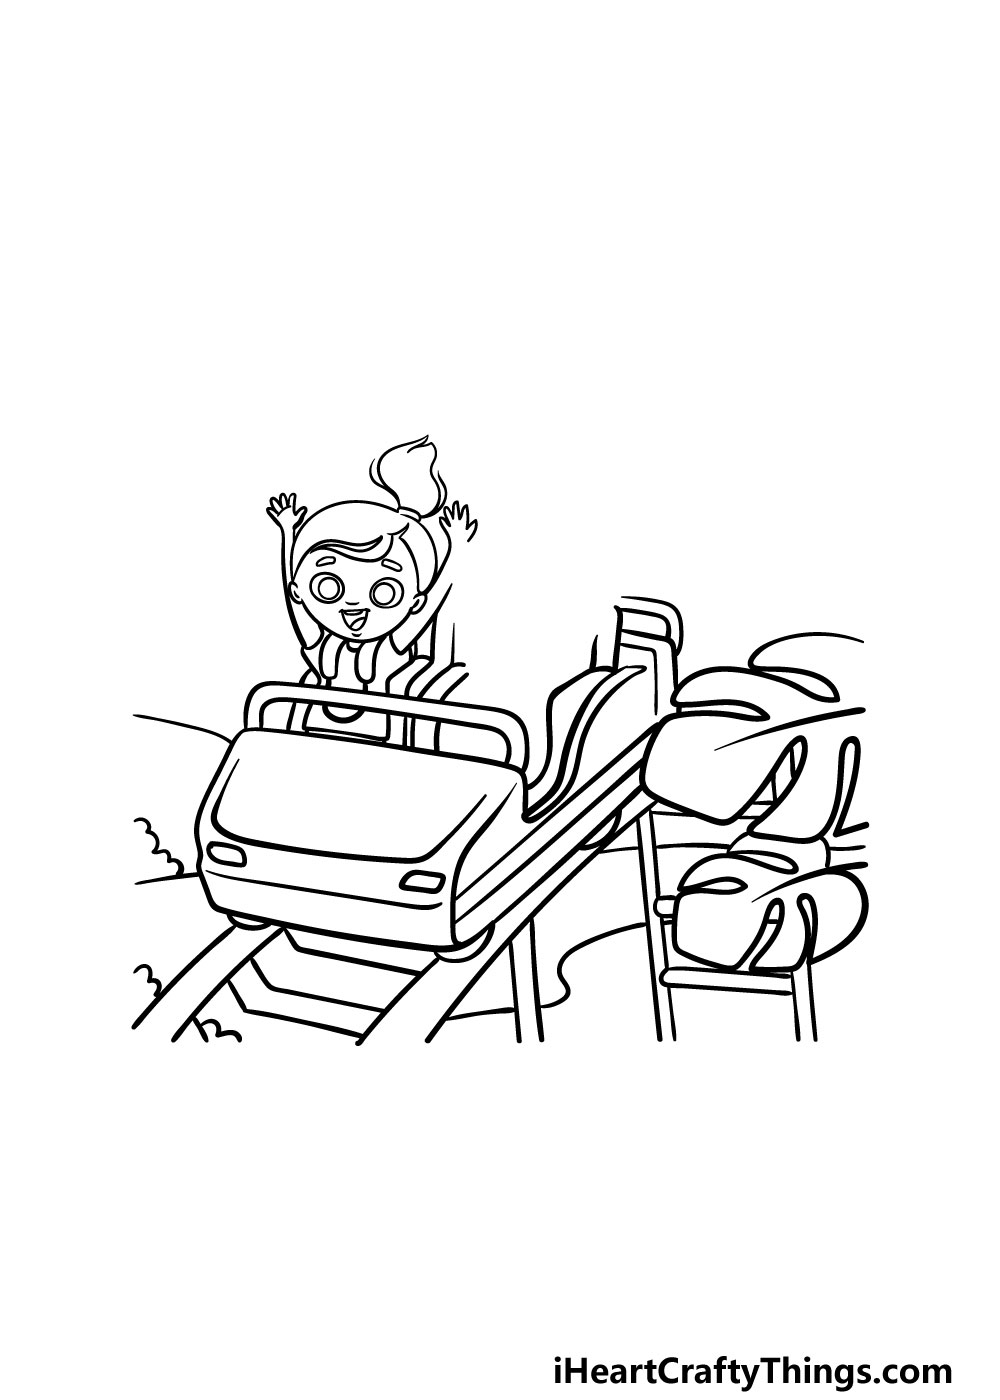
Now that you have the car of the roller coaster drawn, in this next step of our guide on how to draw a roller coaster we will be drawing the first person riding it.
The first person will be a little girl, and as with all of the people riding the car she will be drawn in a fun cartoony style.
You could also change up the style of the people on the roller coaster as well if you prefer.
Step 4 – Now draw another person
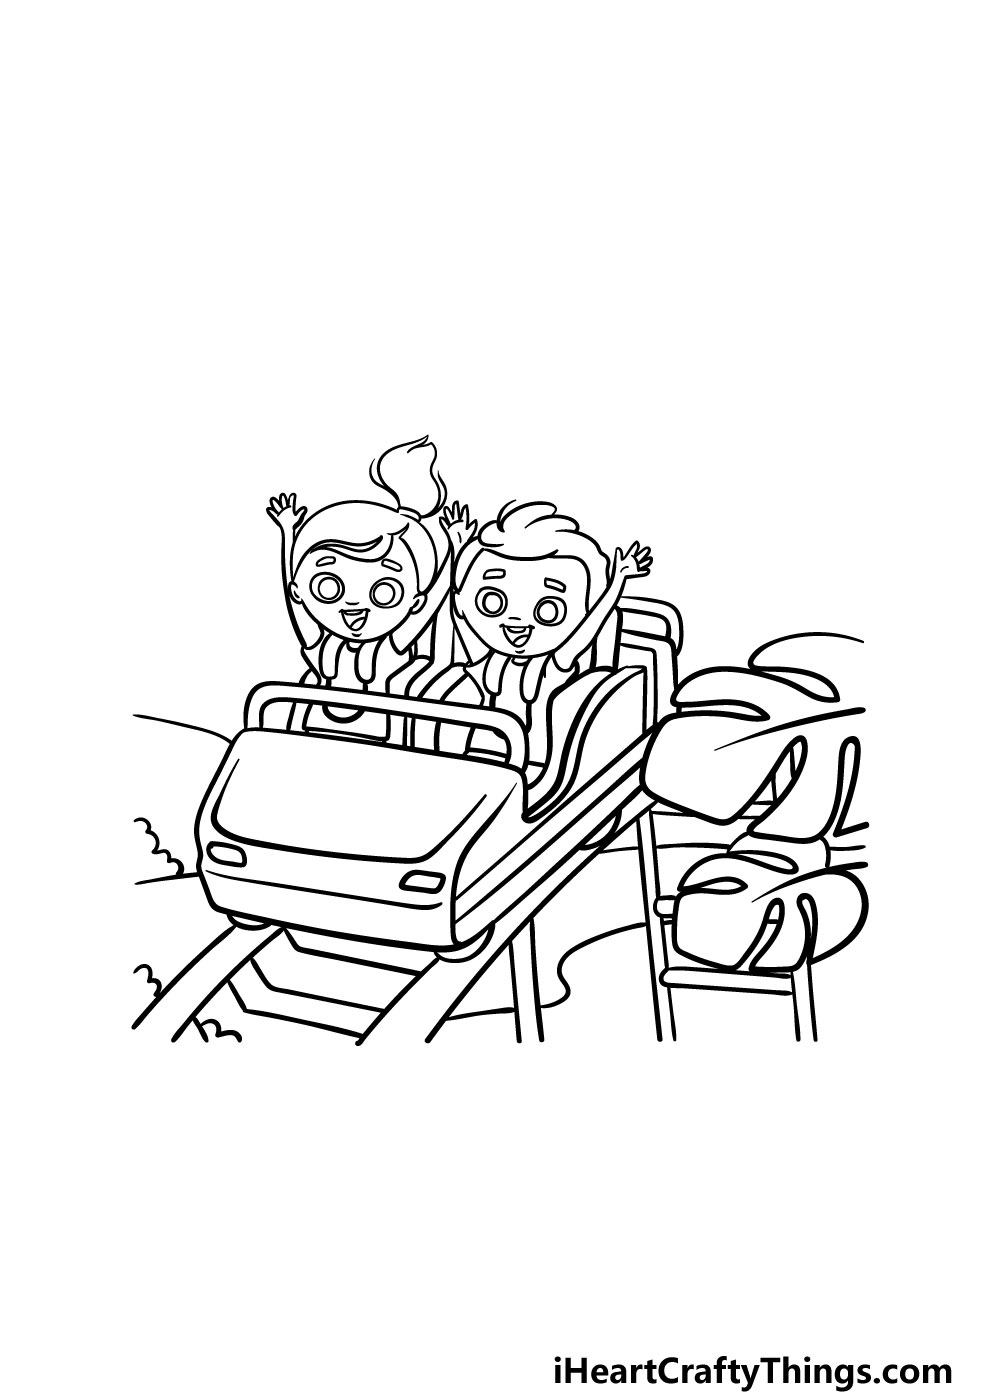
In this fourth step of your roller coaster drawing, you will be adding another person to the picture.
The next one will be a little boy. You should also be sure to draw the restraints holding them into the car.
Step 5 – Next, draw another kid in the roller coaster
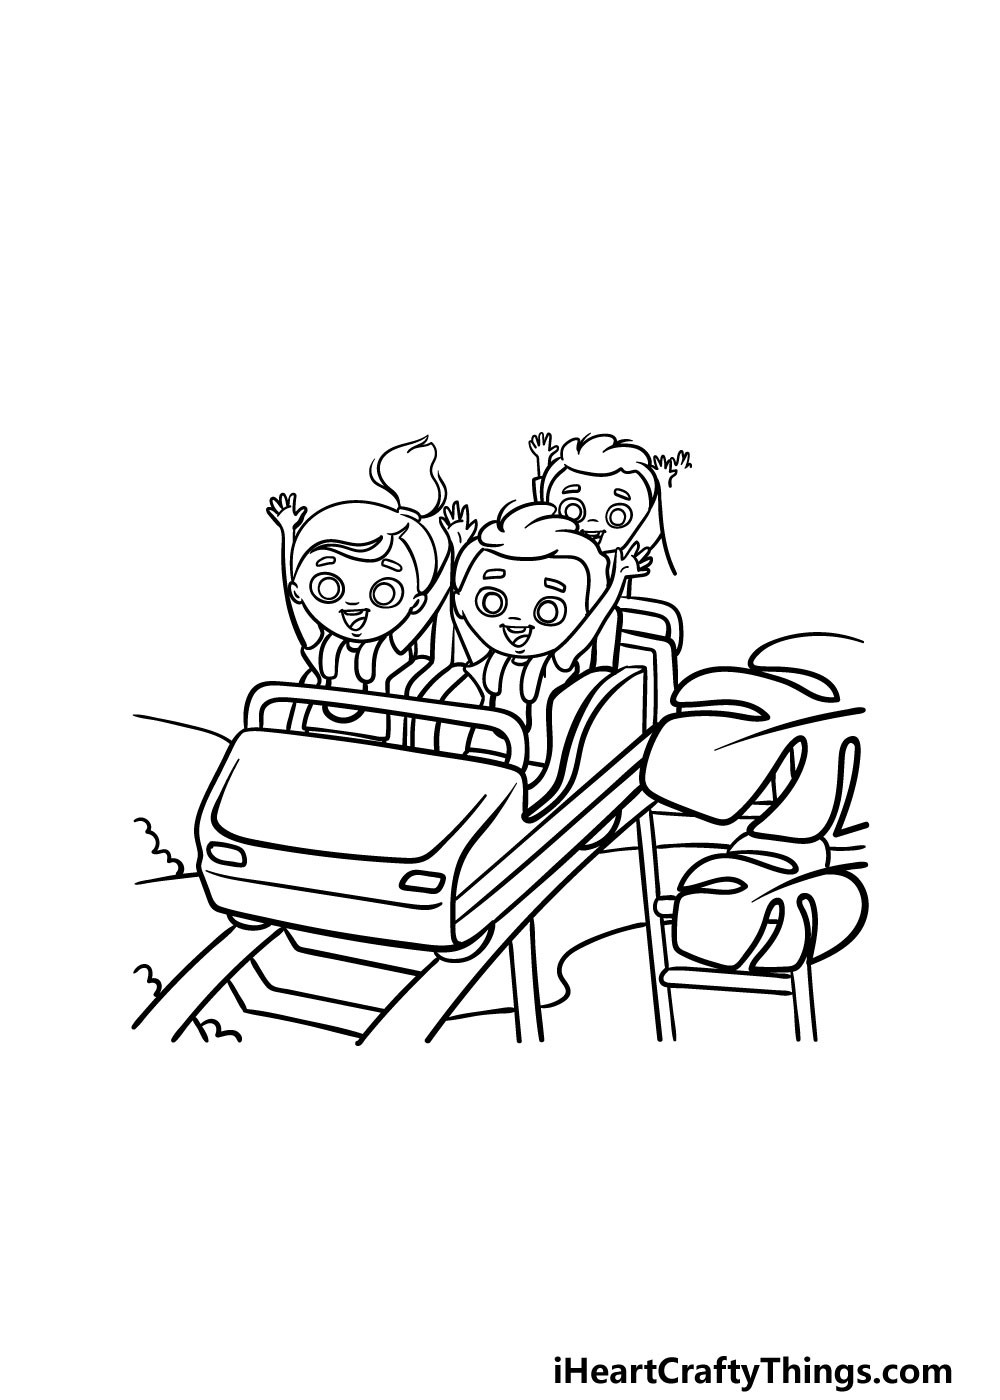
We will continue to draw more children in the car for this step of our guide on how to draw a roller coaster.
This little boy will be in the next row, and he will be sitting in another section of the car that we will draw in the next step.
There will be another kid sitting next to him, and you will also draw the start of her hands in this step.
Step 6 – Now, add the last child and final details
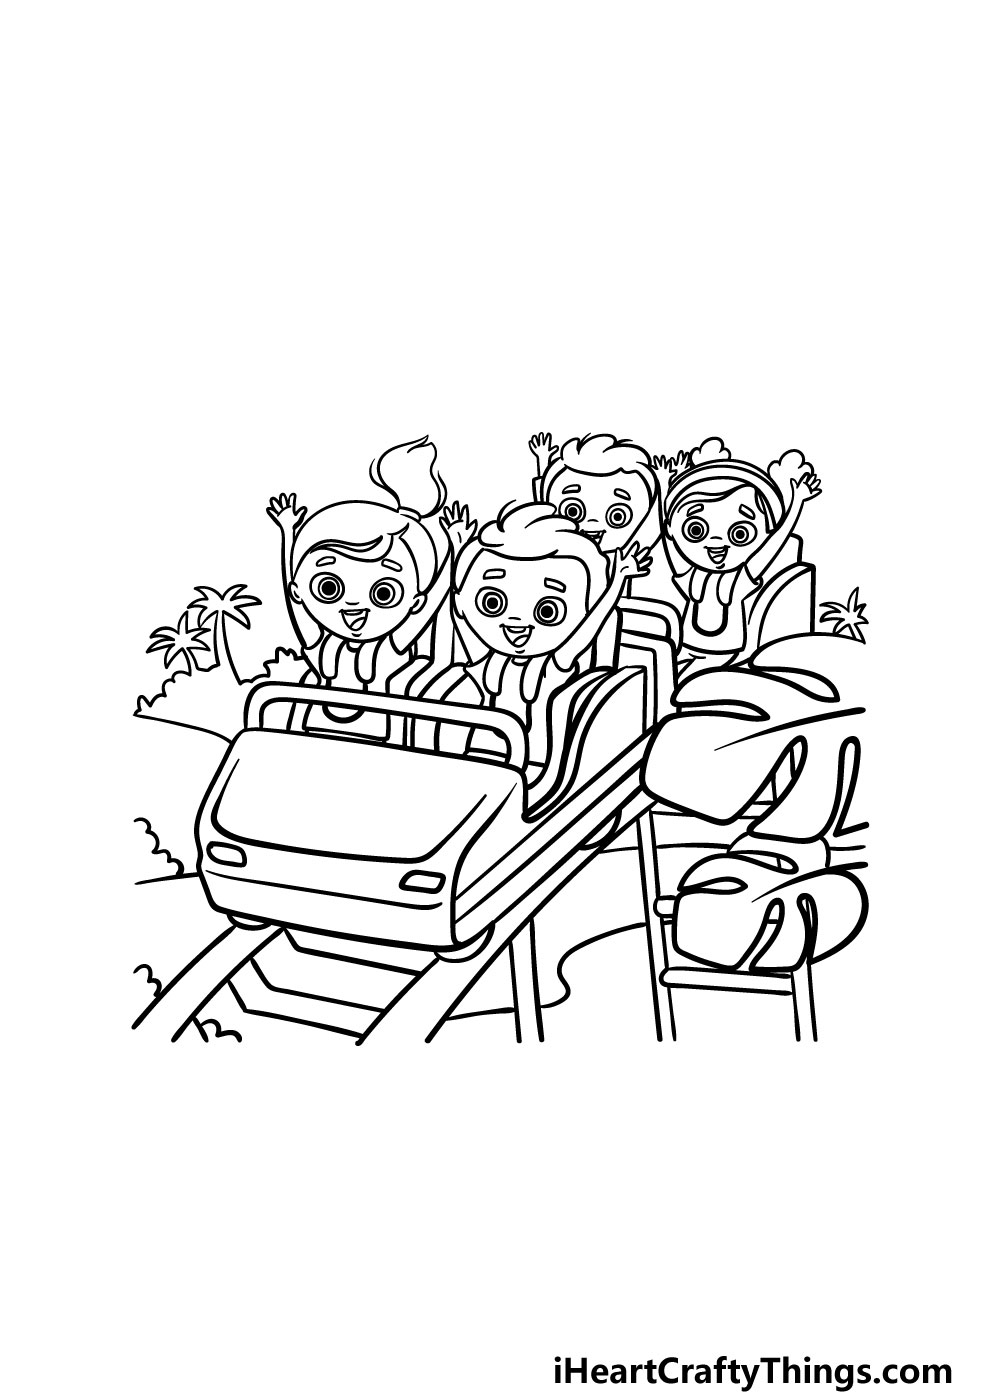
It’s almost time to add some awesome colors to your roller coaster drawing, but first we have a few more details and elements to add.
As mentioned in the previous step, we will be drawing one more child on the roller coaster.
You will also be using some curved lines to create the second car of the roller coaster that she will be seated in. once you have drawn that second car, you can finish off with the final child.
Once you have drawn that final kid, there are just a few details to add before you move on.
You can add some background details such as trees or mountains, but this is a step where you can also add some details of your own!
You could change up the background, make the people riding the roller coaster look different or add some decoration to the sides of the roller coaster.
These are just a few ideas that you could go for, so what else can you think of to finish off this image?
Step 7 – Finish off your roller coaster drawing with some color
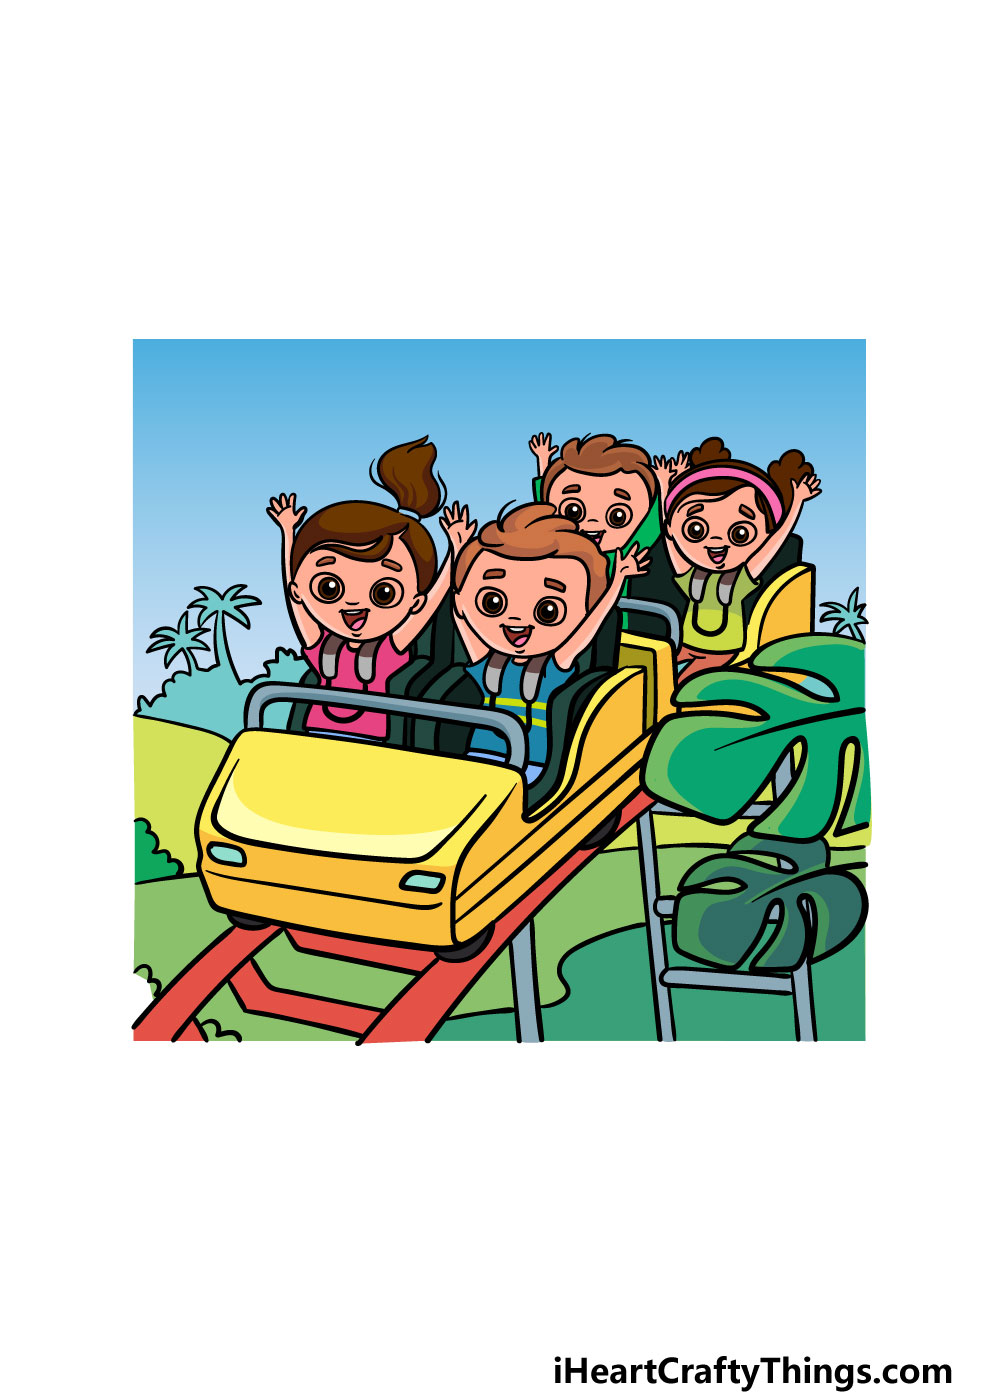
This final step of our guide on how to draw a roller coaster will be all about adding some amazing colors to it to finish it off.
We used some nice bright colors for our reference image, but remember that this is only a suggestion.
If you like the colors we chose then you can use it to replicate the colors for your own drawing, but you can also change it up and incorporate any other colors or art mediums that you love!
Be sure to have lots of fun being creative and see what happens!
Here’s how you can make your roller coaster drawing even better…
Prepare for an artistic thrill ride as we make your roller coaster sketch even better!
This drawing of a roller coaster shows a coaster that has a simple design with yellow coloring. You could customize the roller coaster to look more like one you would design!
This could be as simple as changing the color to your favorite color. Or, you could add some pattern or picture details on the surface of the roller coaster.
It’s up to you, and this is your chance to show off what your own personal roller coaster would look like.
This roller coaster has 4 cartoon people having a great time on it. You could change this aspect of the drawing to make it more personalized as well!
One fun way of doing this would be to change the faces of the characters to match you and your friends. That way, it would look like you are enjoying this roller coaster you have designed.
Which friends or family members would you like to join you on this roller coaster ride?
A roller coaster will often have a windy track that goes in all kinds of loops and crazy directions. You could extend the track on this roller coaster drawing to create the ultimate ride!
To do this, you would want to either use a big piece of paper or make sure the roller coaster design is small on the page. Then, you could build the track around it and include all the crazy features you want!
To build on our last tip, you could also add a background to show off what the rest of the theme park may look like. This is a chance for you to try your hand at designing other rides and theme park features!
There could be other roller coasters in the background or maybe a ferris wheel. You could base this background on a real life theme park or design a completely new one.
What kinds of rides would you like to have in the background?
Your Roller Coaster Drawing is Complete!
That concludes this guide on how to draw a roller coaster! We hope that working on this guide made the drawing process much easier for you to do, but we also aimed to make it a lot of fun as well.
As long as you follow this guide and take it slow we know you will end up with an amazing image!
Finishing this guide doesn’t have to be the end of the fun, though! One way you can keep it going is by adding some details of your own.
These could include additions to the background, but could also include changing the design of the roller coaster or the children riding it.
This is your chance to have fun and get creative with it, so we look forward to seeing what you do!
Another way to keep the drawing fun going is to try out one of the many amazing guides that we have on our website! We upload new ones frequently as well, so be sure to check in often.
We would be thrilled to see your amazing roller coaster drawing when it’s done, so please be sure to share it on our Facebook and Pinterest pages for us to enjoy!