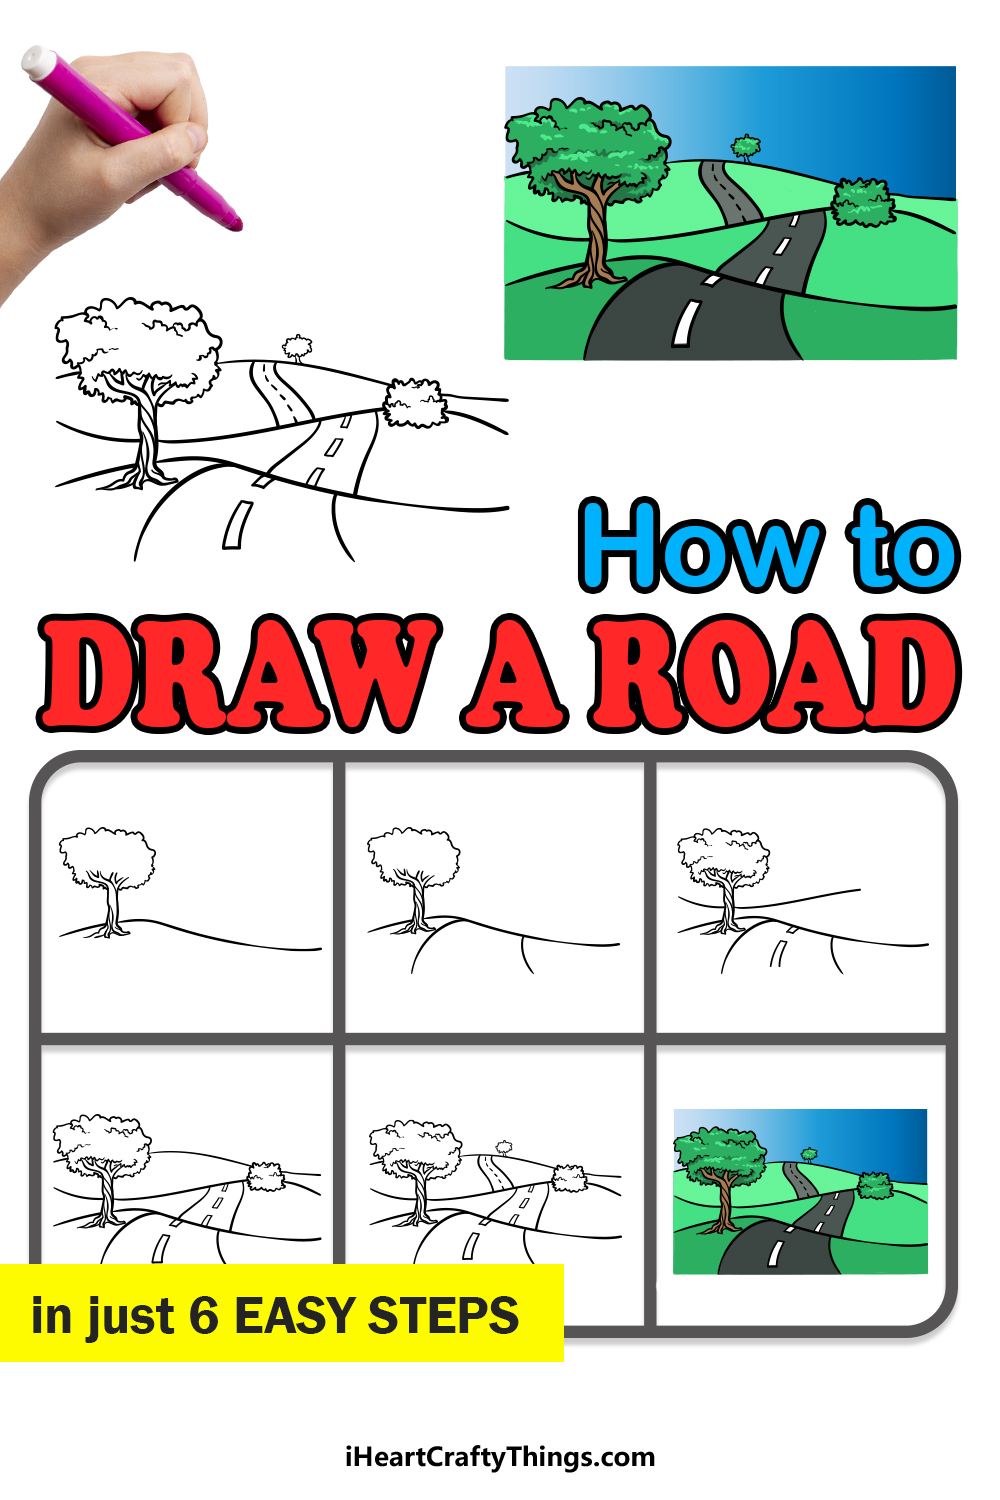
Roads are a structure to get us from A to B on a basic level, but they have also come to represent freedom and discovery.
There are few things as liberating as soaring down an open road to see where it takes you.
Unlimited possibilities are at the end of each road that we take, and learning how to draw a road can be a great way to imagine what those possibilities could be.
If you would like to take a road trip from the comfort of your chair, then you will love this guide!
Our step-by-step guide on how to draw a road in 6 steps will take you on a creative journey!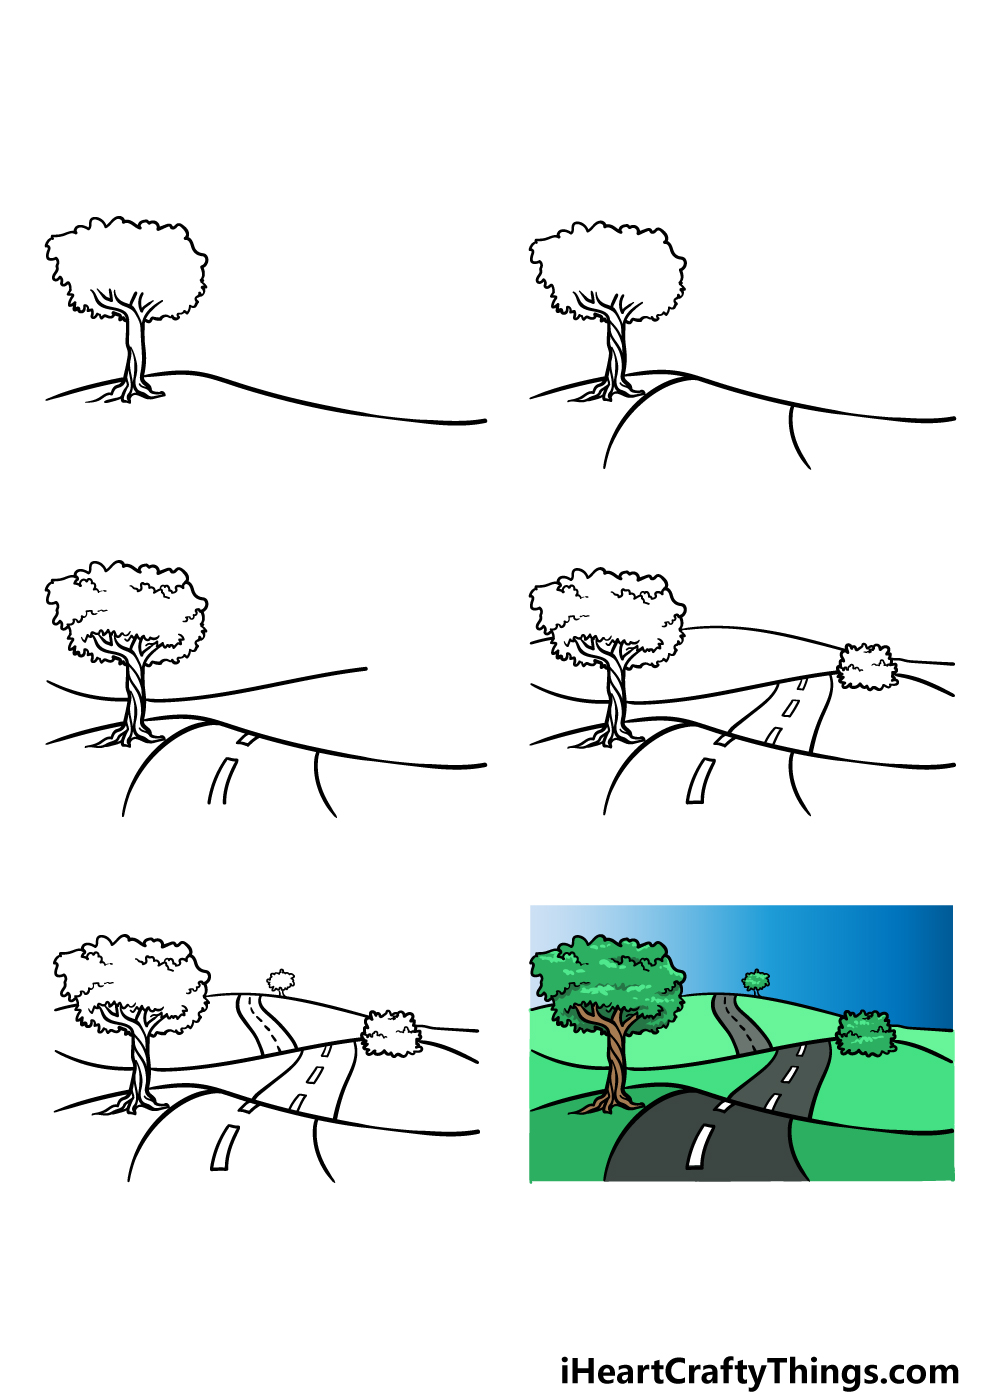
How to Draw A Road – Let’s Get Started!
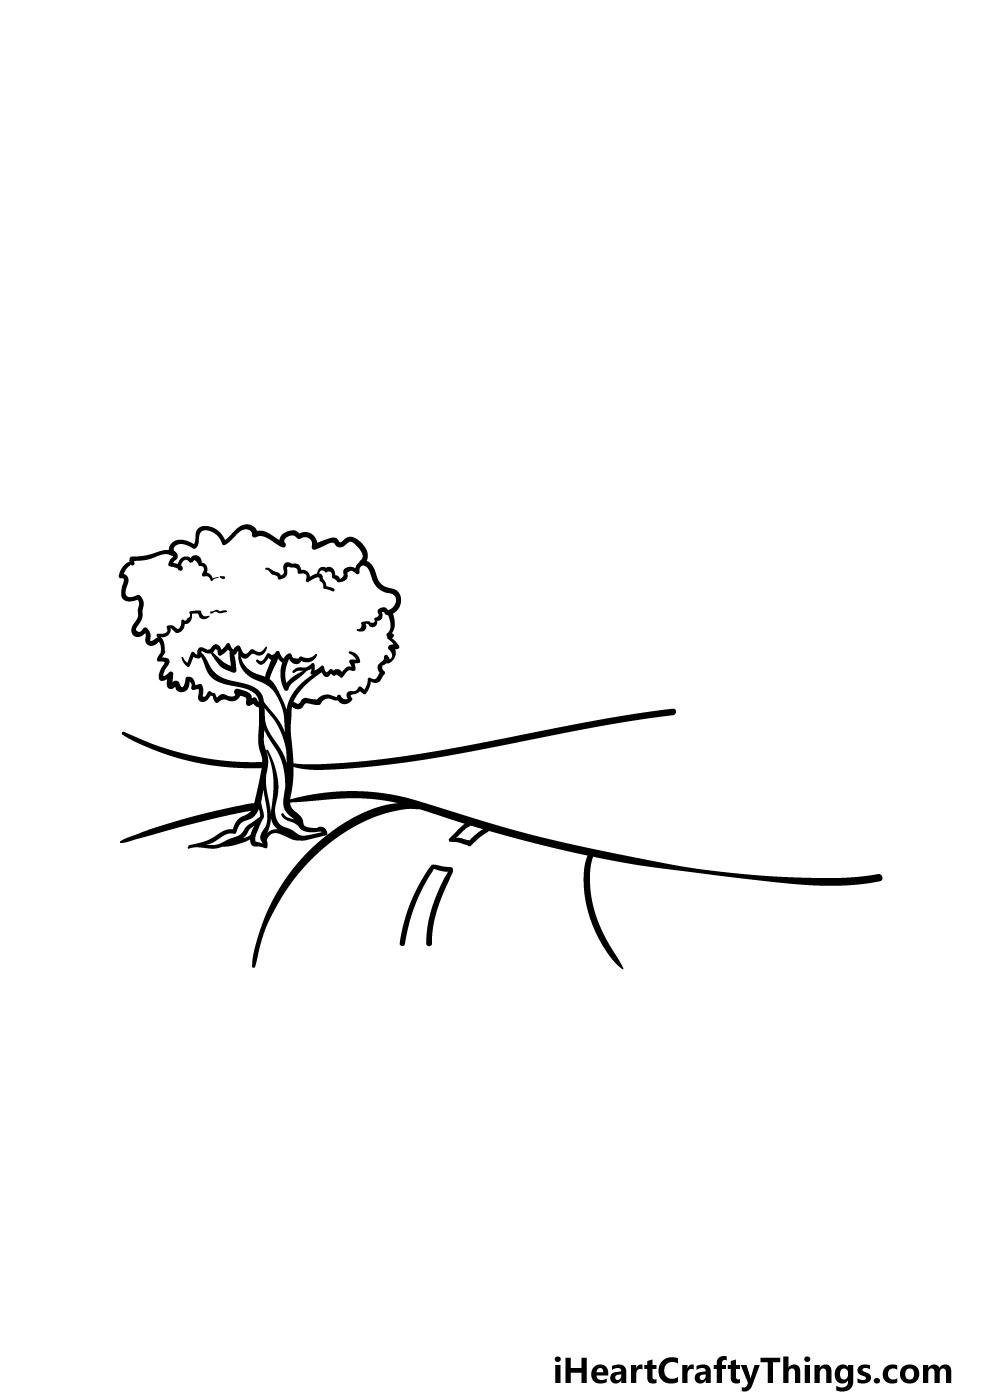
Step 1
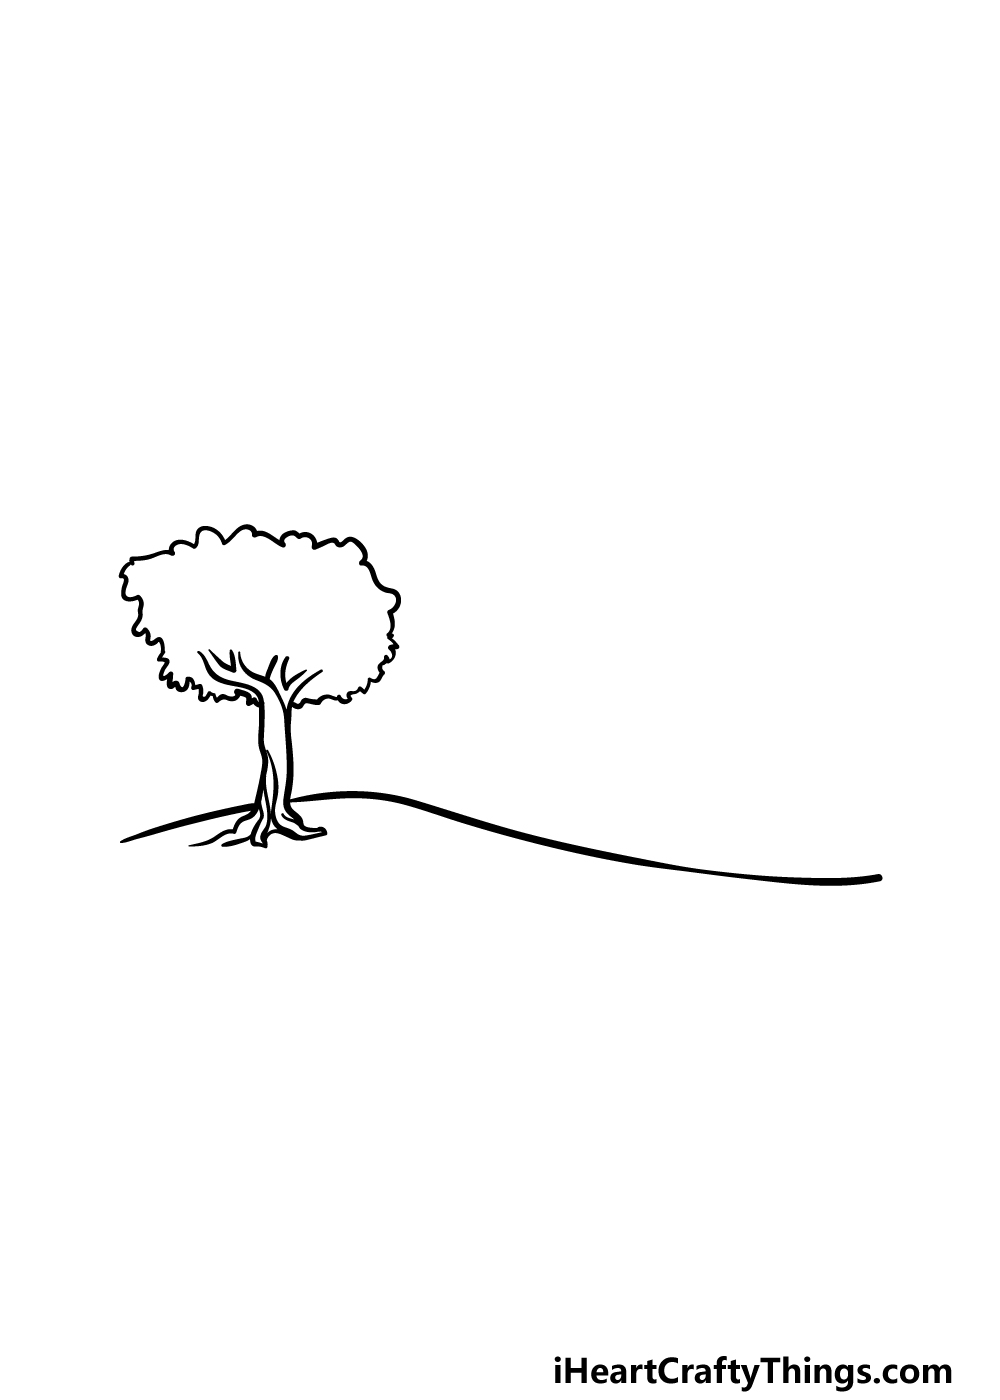
In this guide on how to draw a road, we will be depicting a lazy drive down a country road for you to draw. To get this started, we will begin with a nice tree for the roadside.
To do this, use some thick, rounded lines for the trunk and branches of the tree extending up from the ground.
Then, we will surround the upper portion of the tree with some bumpy and jagged lines for the leafy top of the tree.
Once you have drawn this tree, we will then start drawing the landscape background for the image.
To do this, you can use a curved, thick line for a hill in the background. Then you will be ready to continue in step 2!
Step 2 – Next, start drawing the road
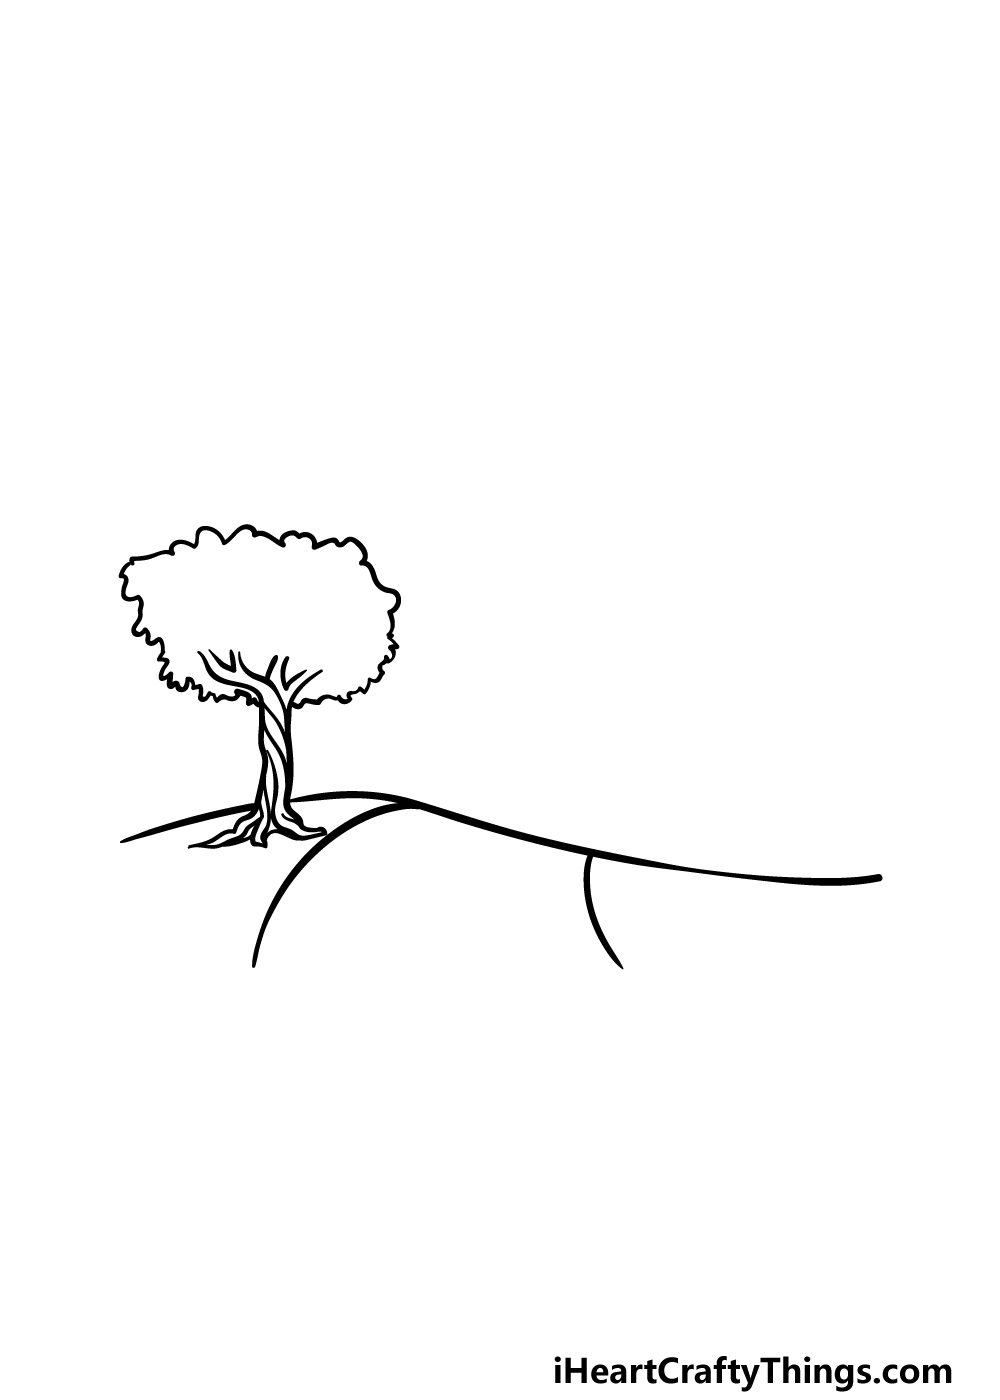
For the second part of your road drawing, we will start drawing the road itself. This should be quite an easy step for you to do, but it will be effective in its simplicity!
All you need to do for now is add two rounded lines onto the section of the landscape that you drew in the prior step.
These lines will be quite far from one another for now, as this is the section of the road that is closest to us as the viewer.
You can finish off by drawing some more details for the trunk of the tree to have you ready to move on.
Step 3 – Draw some road details and more of the landscape
We will be building up the landscape and adding some finer details in this step of our guide on how to draw a road. First, we will draw the lines on the road.
You can add these by drawing some long and thin rectangle shapes on the section of road that you drew in the last step.
Then, draw another long and curved line over the previous bit of scenery for the next hill in this landscape.
You can finish off this step with some smaller details for the leaves of the tree, and once you have it looking as it does in our reference image you will be ready for step 4.
Step 4 – Now, draw more of the road and landscape
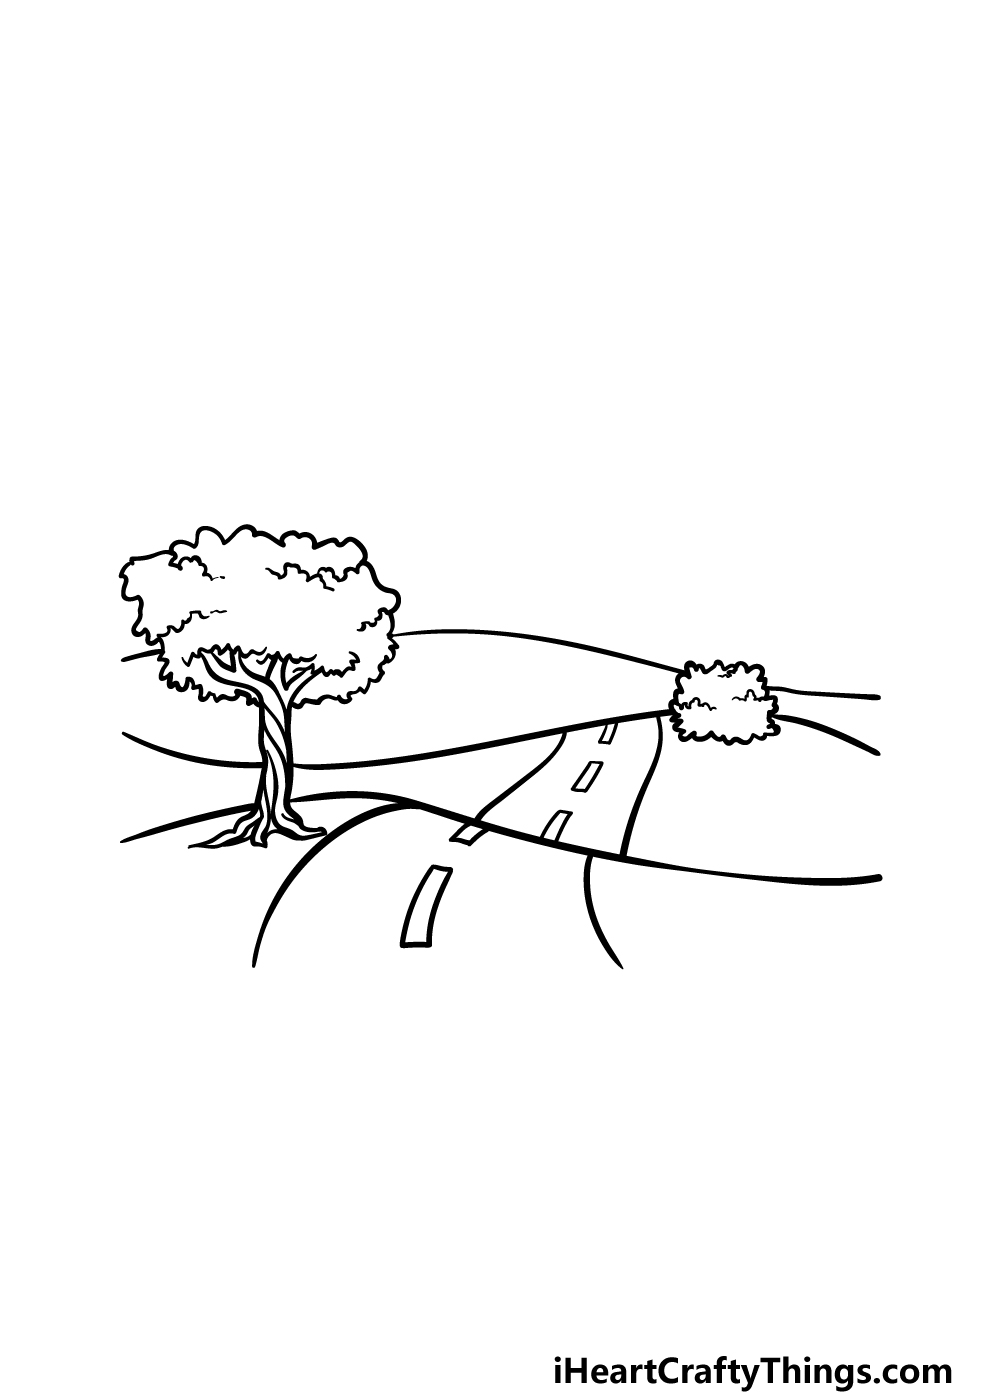
This step of your road drawing will see you adding even more to the landscape. First, draw some curvy lines onto the second hill for more of the road.
Seeing as this section of road is further away, the lines will be closer together. You can then add more rectangular shapes onto the road, and then draw a small bush on this hill.
Finally for this step, finish off by drawing the final hill above the other two.
Then there will just be a few final details to add in the next part!
Step 5 – Finish off your road drawing
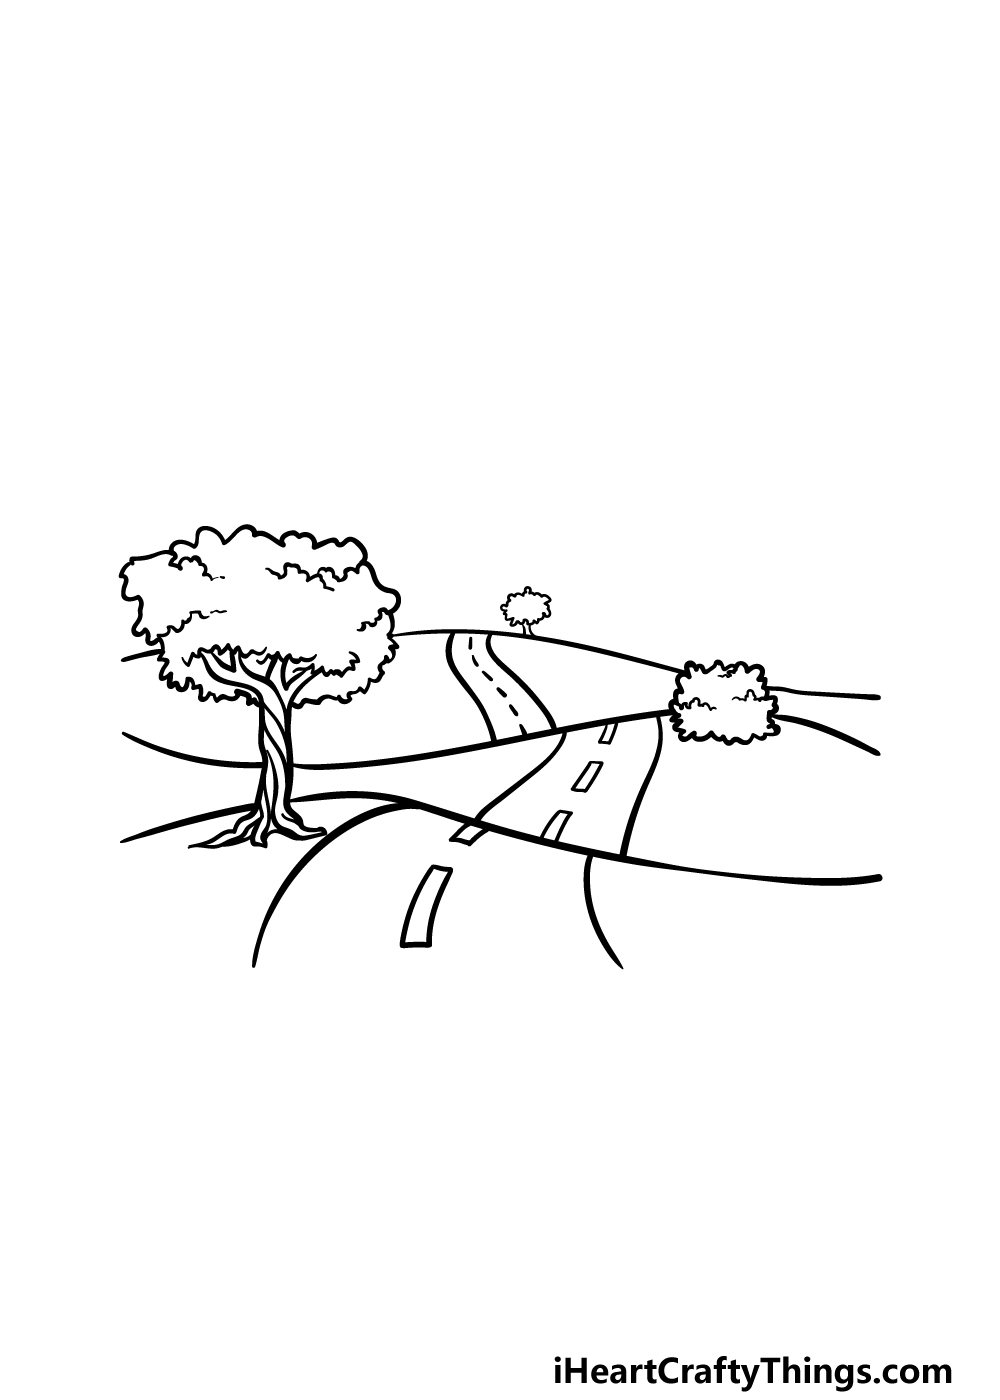
You will be able to add the final section of the road in this step of our guide on how to draw a road. Simply add some more curvy lines even closer together on the final hill.
The lines on the center of this portion of road will just be drawn with some lines instead of rectangles because they are so far away.
You can finish off with a small tree in the horizon, and then be sure to add any additional structures or details of your own! How will you finish off this drawing before we color it in?
Step 6 – Finish off your road drawing with some color
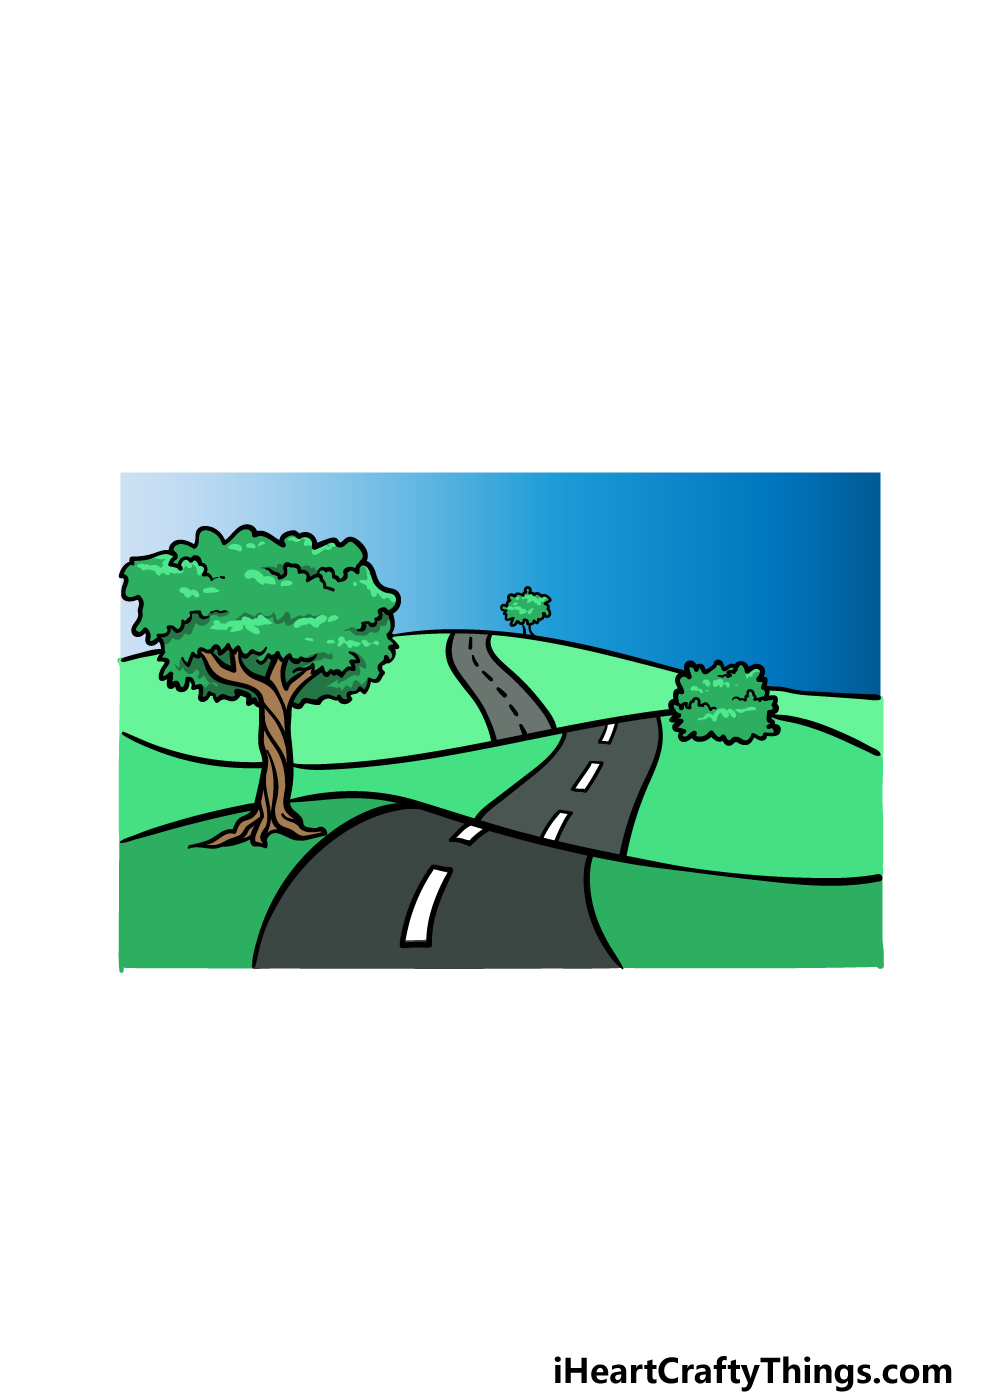
In this final step of your road drawing, we will be finishing it up with some amazing colors. In our reference image, we showed you just one way that you could go about coloring your picture.
We used a gradient of different shades of blue to create a rectangle sky above it.
Then, we used some various shades of light and dark greens for each section of the hill, along with the bushes and leaves for the tree. Finally, we finished off with some lovely browns for the trunk of the tree.
These are the colors that we chose, but there are actually loads of options available for how you could color this in.
You could change up what kind of day it is by using grey for the sky or darker tones for the background elements.
Then you could achieve the mood you would like for it by changing up the art mediums that you use. We will be interested to see what colors and mediums you decide on for this image!
Here’s how you can make your road drawing even better…
Travel towards some drawing fun with these fun tips for your road sketch!
The stretch we created for this road drawing is empty and full of possibilities. You can make this drawing even more interesting by adding some more things to the scene!
We have one tree on the side, but you could add a few more to make the scene look even more vibrant.
Or, there could be some traffic cones, manhole covers and all manner of different features you could see on a road.
What else could you add to this stretch of road?
A road would be pretty pointless without things driving on it, so that’s something else you can add to this drawing of a road! There are so many different vehicles you could add to the scene.
The obvious choice would be to add some cars, but even with that there are many variations to choose from. You could also add trucks, motorcycles or any manner of vehicle you would see when cruising down the highway.
Do you think you will add a long line of vehicles or keep it a bit sparer?
We left the horizon of this road sketch quite blank, but you could fill it if you liked. For instance, you could show a huge city looming in the background.
Or, maybe there could be some massive clouds building in the distance. There are many different approaches you could choose from, and these details could drastically change the look of the picture.
It would also be great to experiment with different colors and art tools as you finish off this scene. We went with colors that are quite vibrant and striking for our example, and it does look great!
There are plenty of different colors you could go for, however. You may want colors that are lighter and more subtle, for instance.
In this case, watercolors and colored pencils would be the perfect fit. That’s just one example, but it all depends on what kinds of colors you want for your artwork.
Your Road Drawing is Complete!
You have completed all of the steps in this guide on how to draw a road, and you have an incredible landscape drawing to show for it!
We aimed to make sure that this guide would be as fun and peaceful to work through as it would be to drive along a peaceful open road. Hopefully we achieved this goal of making the guide both fun and easy for you!
Now that you have finished all of the steps laid out for you, this is your chance to take this drawing even further.
You could do this by adding some more elements for the scene, changing up some of the details or creating a different mood for it. You can also have fun experimenting with your colors and art mediums for an incredible image!
When you’re ready to embark on your next drawing journey, be sure to check out our website. We have some amazing guides there for you to enjoy, so keep checking in to never miss out on the fun!
Once your road drawing is finished, we would love to see the results of this drawing journey! Please share it on our Facebook and Pinterest pages when you’re ready for us to see it.