Foxes are one of the most popular animals in the world, and they are associated with cunning and intelligence.
They also come in many different species variations, but when one thinks of a fox they will almost definitely be thinking of a red fox, as it is arguably the most recognizable.
Despite its fame, it can still prove rather difficult to learn how to draw a red fox, but that’s what we’re here to go over now.
If you want to know how it can be done, then you’re in the right place! You’ll definitely want to work all the way through to the end of this tutorial.
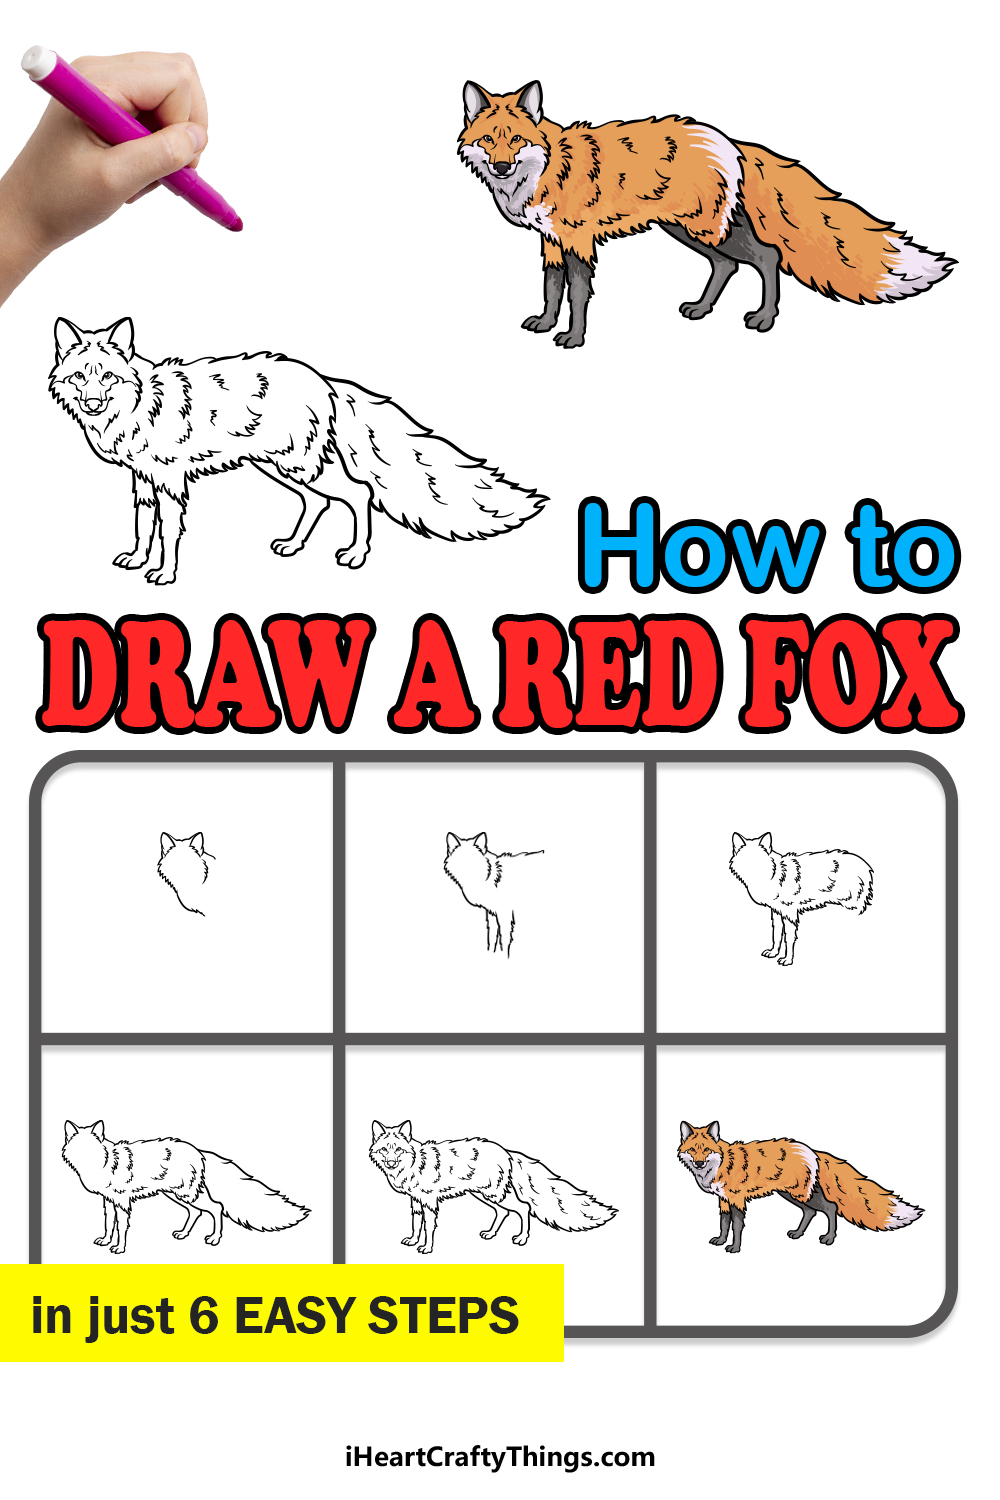
We hope you enjoy this step-by-step guide on how to draw a red fox in just 6 easy steps!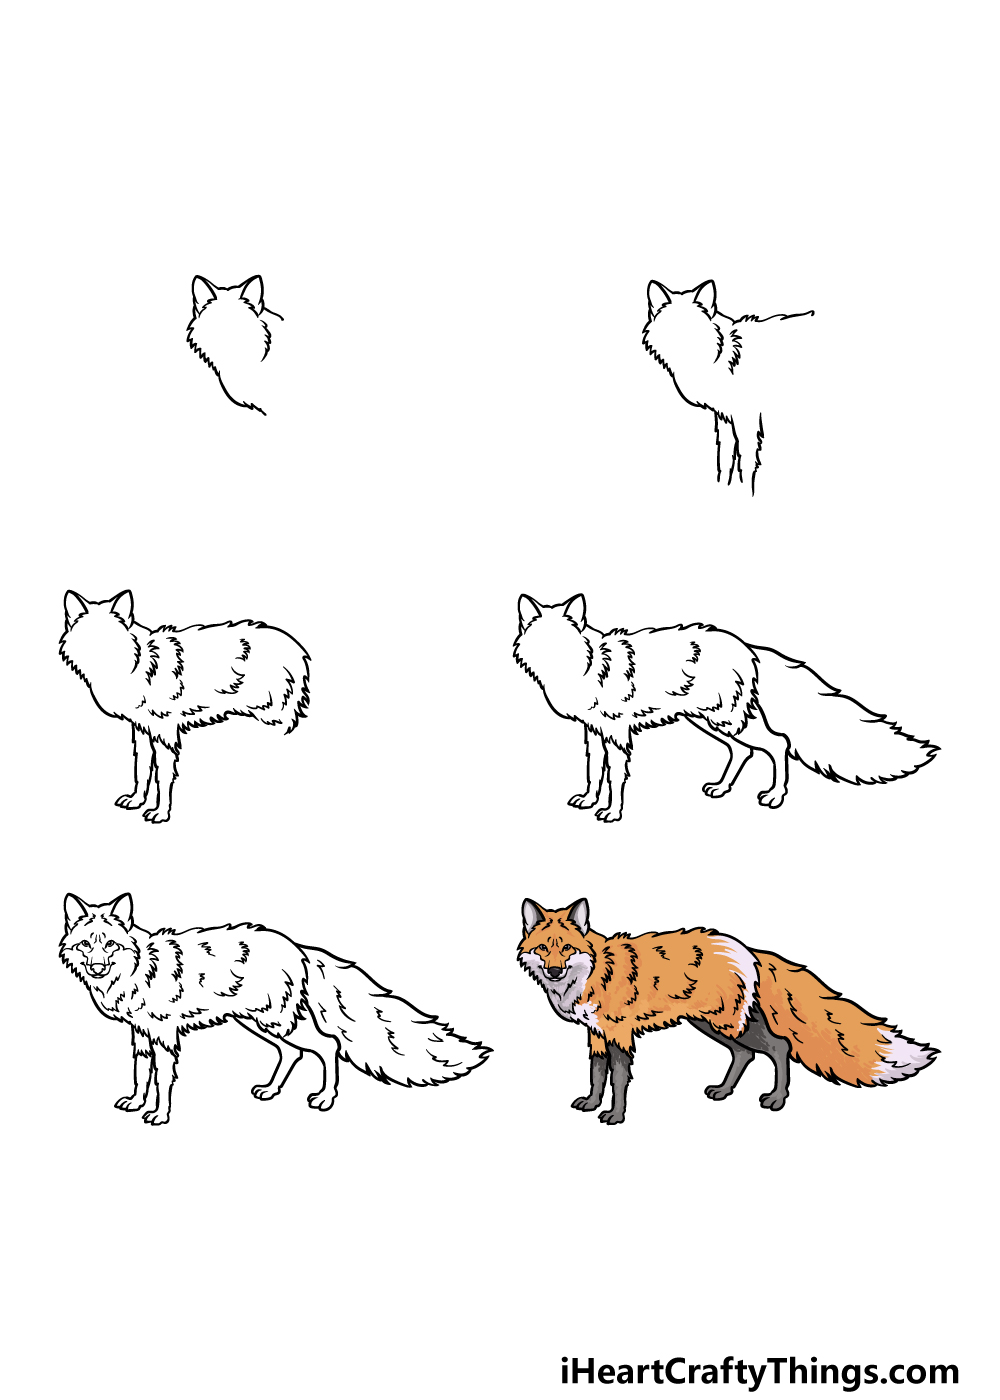
How to Draw A Red Fox – Let’s Get Started!
Step 1
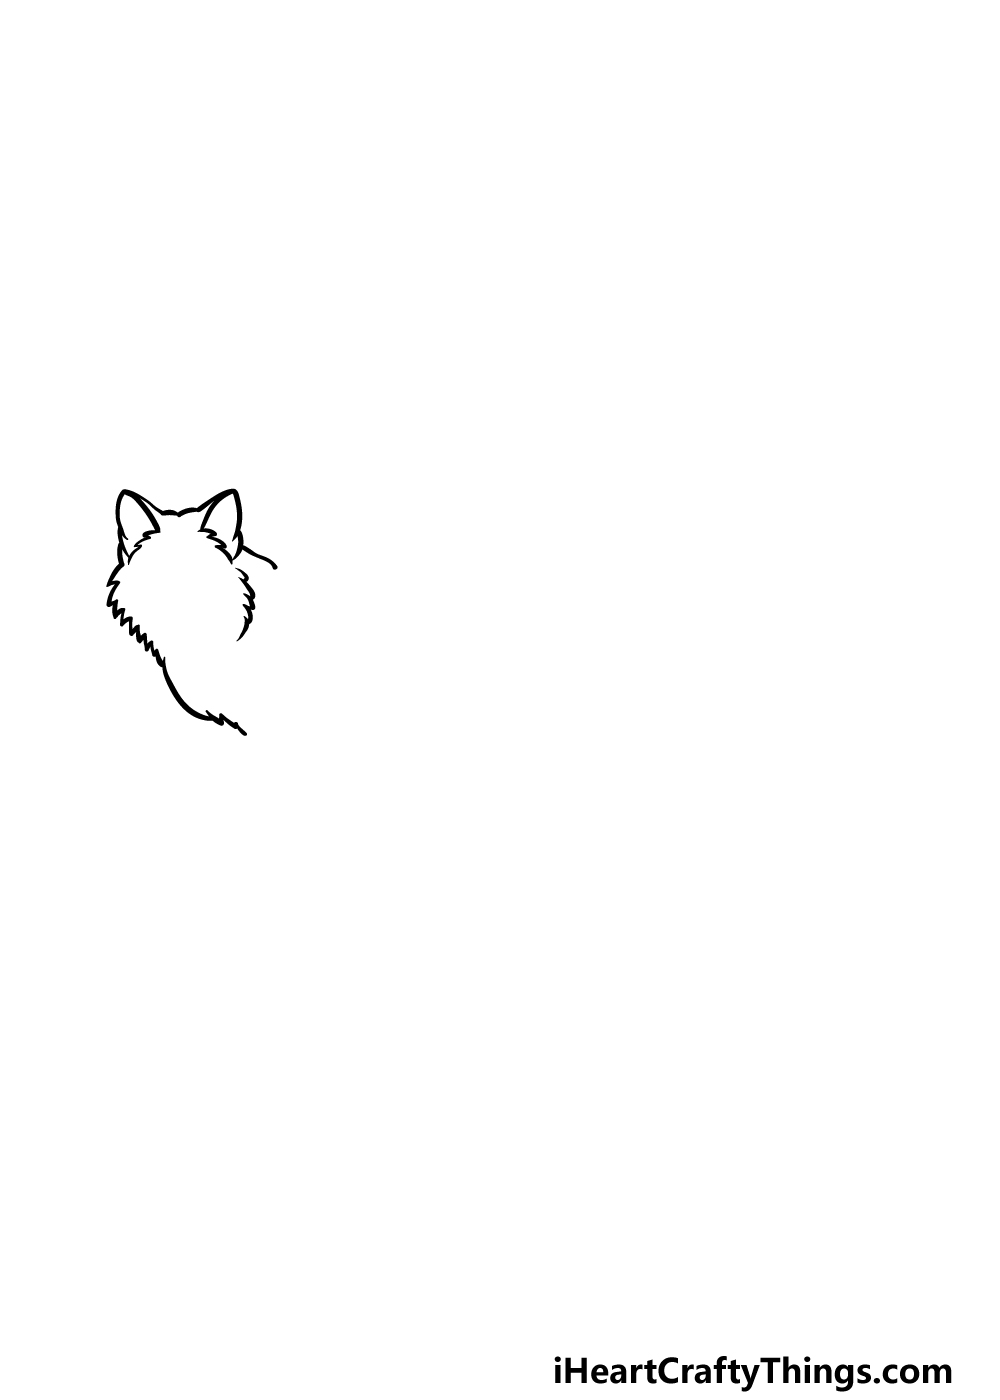
To get this guide on how to draw a red fox started, we will begin with the outline for the head of the fox. First, use some small rounded lines for the ears and inner ear sections.
Then, we will be using some more jagged, pointy lines for the sides of the face. These pointy lines will help to make the head of the red fox look nice and furry.
Then you will be ready to move on to the second step of the guide!
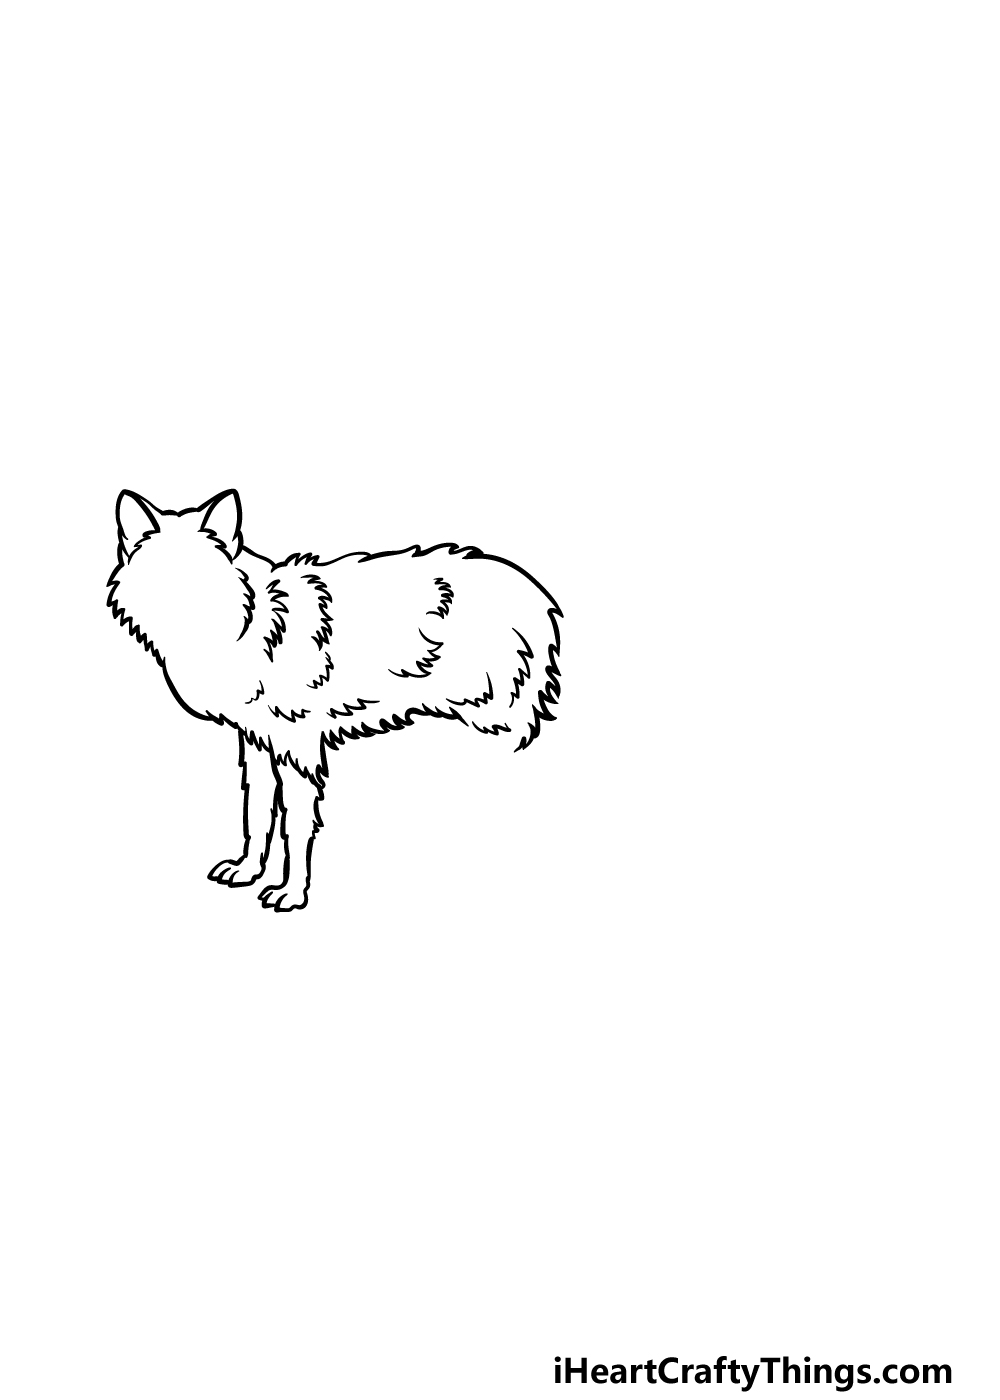
Step 2 – Now, start drawing the body of the red fox

This second step of your red fox drawing will see you starting on the body and legs of the red fox. For the back of the fox, we will be using a similarly pointy line to again make it look nice and pointy.
You can add another of these lines to the interior of the body as well to add more fur details there as well.
Then, you can start drawing the first legs. These legs will again have that same furry line quality to them, and they will get a bit thinner as they go down.
Don’t worry about the feet for now, as we will be drawing those very soon.
Step 3 – Draw the feet and start of the body for the red fox
We mentioned how we would be drawing the feet in the last step of this guide on how to draw a red fox, and that’s just what we will be doing in this step!
The feet should be very easy to draw, as all you need to do is use some small curved lines for the little paws at the base of the legs.
Once you have drawn these feet, we will then turn our focus to the body of the fox.
For the body, we will be drawing more pointy fur details to the interior, and then you can use more of those fur lines for the outline of the body.
When you have replicated these parts of the body that appear in our reference image, we can then finish off the outline in the next step.
Step 4 – Next, draw the rest of the body outline
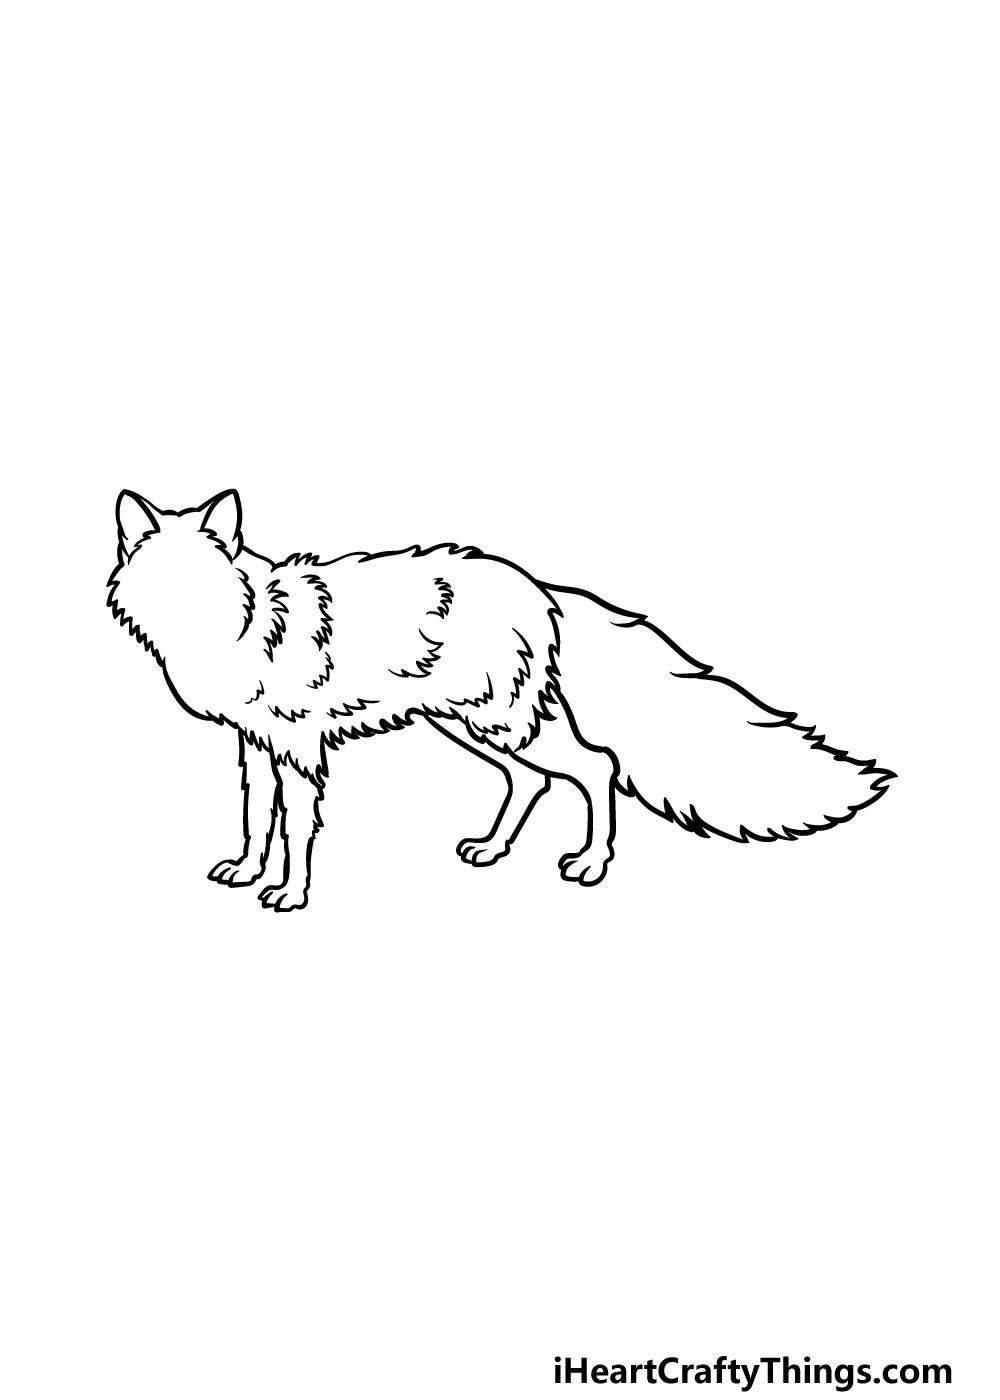
Before you move on to the final details of your red fox drawing, we shall first add the rest of the outline.
For the legs, you will see in our image that they will have a smoother outline and will be at a different angle to the front legs.
It also wouldn’t be much of a fox without the big bushy tail, and you can draw that with more of those pointy fur lines. Then it’s time for those final details!
Step 5 – Add the final details to your red fox drawing
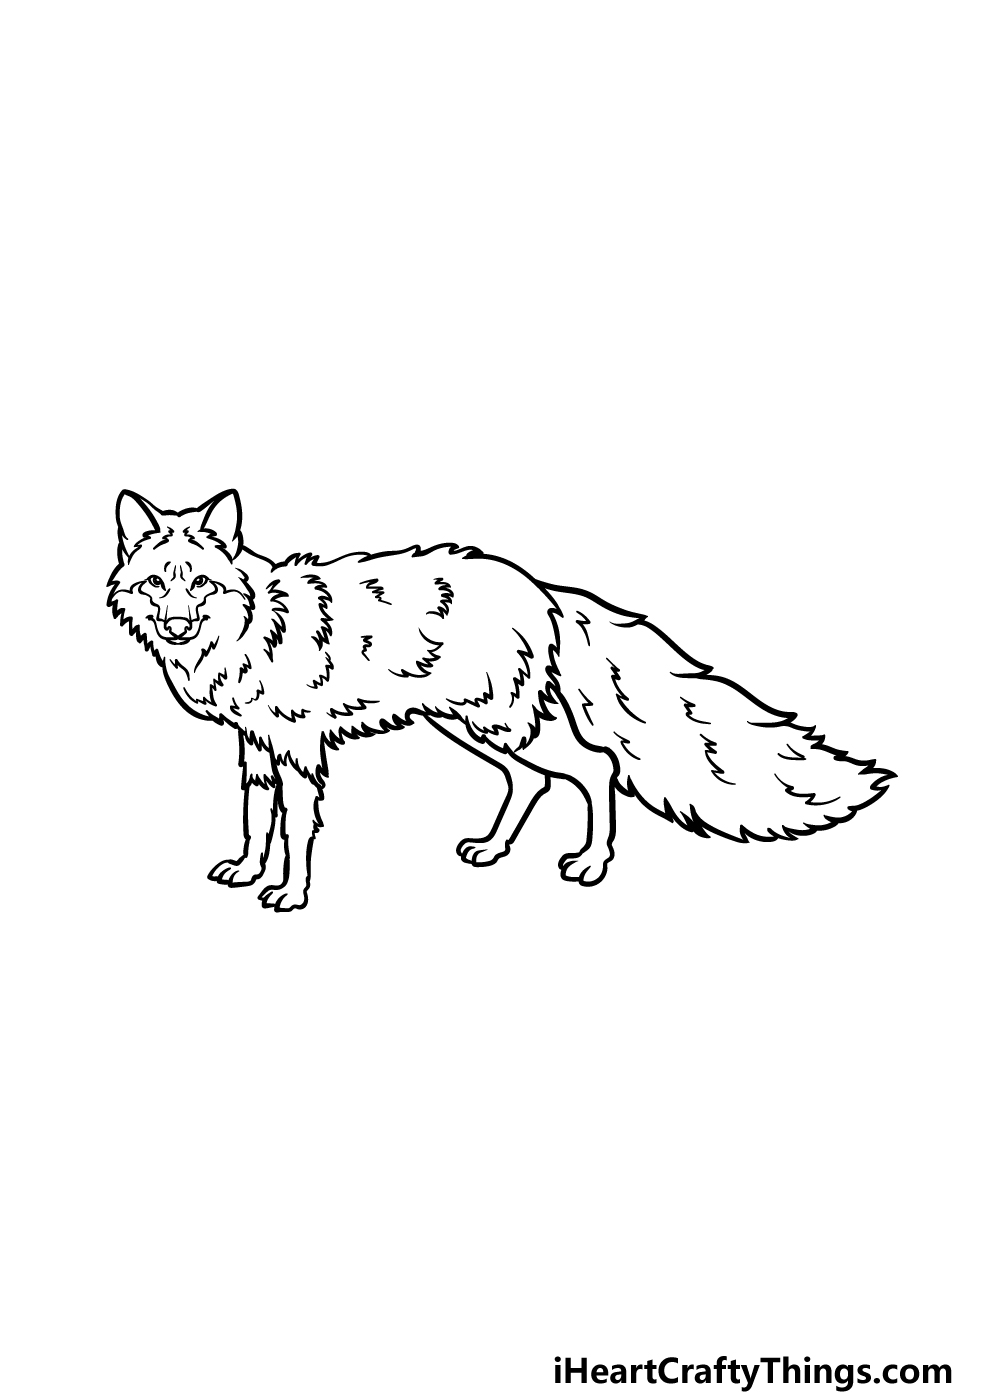
This fifth step of our guide on how to draw a red fox will be all about finishing off those final details and touches.
The main aspect to focus on will be drawing the facial details of the red fox. This means that we will be drawing the small eyes, nose, muzzle and smaller fur details to the face.
Once that is drawn, we will also add some small jagged lines throughout the body to make it look even furrier.
When you have finished adding all of these final details, we will then be ready to proceed to the final step!
Before you do that, be sure to also add any additional details or extra features you may want. What kind of background would you like to create for this cute fox?
Step 6 – Finish off your red fox drawing with color

Now you’re ready to finish off this red fox drawing with some color!
As the name of the fox may suggest, if you want a realistic look for the animal then you will want to get out your reds and oranges.
This is what we did for our reference image, where we used some lovely oranges and red highlights for the majority of the body of the red fox.
There are also some white spots in some areas as well as a darker grey for the bottom halves of the legs.
You could use our example image to guide you if you would like a similar look for your own drawing, but feel free to also use your own color choices!
What colors and art mediums came to mind when deciding how to color this image?
5 Tips To Make Your Red Fox Drawing Even Better!
Find out how to make your red fox sketch even better with these 5 fun tips!
This drawing of a red fox that you created is already looking fantastic, but it could look even better if you were to add some fox friends for it to interact with.
Now that you know how to draw a red fox, this would be easy to do! All you would need to do is redo the steps from the guide and change a few of the details to add more foxes.
Adding another fox to the image is one option, but you could also add other animals to the scene. There are many examples you could go with.
These could include birds, other small carnivores or maybe something larger like a deer. What are some animals you could add?
Another way you could make this red fox drawing even more unique would be by changing the position that the fox is in. we have it in a simple standing pose here, but you could go for something more involved.
For instance, the fox could be running as it hunts another animal. You could look up some pictures of foxes online to help you if you want to create new poses.
Adding a background is always great for making a picture more interesting to look at. That is certainly true for this red fox sketch!
You can find foxes in many kinds of environments, so you would have many options to choose from. You could even depict the fox in different weather conditions such as snow.
Or, you could make it a Fall scene with red and yellow leaves surrounding it.
Lastly, once your red fox looks exactly as you want it, you could finish it off by putting your artwork in a frame. These can be bought at many craft stores, and an adult can help you pick the right size.
This would be a fantastic way to display your finished red fox drawing for everyone to see and admire!
Your Red Fox Drawing is Complete!
You have finished all of the steps in this very cunning guide on how to draw a red fox, and the picture you have ended up with is really fantastic!
In this guide, we aimed to show you that it can be not only easy to draw one of these adorable foxes but that it can also be lots of fun. Hopefully we achieved this aim throughout the tutorial!
When you have finished with this drawing, you can keep the fun going by adding some more details and elements of your own to finish it off.
We went over a few ideas you could try, but feel free to let your creativity flow and show us what you can do!
Then, you’ll want to see what else we have in store for you on our website. We have many awesome drawing guides to enjoy, and more are on the way soon!
Please also be sure to share your completed red fox drawing on our Facebook and Pinterest pages so that we can see how it turned out.