There are many different dog breeds, but it would be hard to find a breed that’s smaller, cuter or fluffier than the adorable Pomeranian.
These little dogs have become very popular around the world because of their incredible cuteness and quirky personalities.
They’re also known for being absurdly hair and fluffy, and while this makes them very cute it can also make it quite tricky to learn how to draw a Pomeranian.
While it may be a bit difficult to do, with the right tutorial it can be made much easier! Luckily, this is the tutorial you’ve been looking for if you would like to know how it’s done!
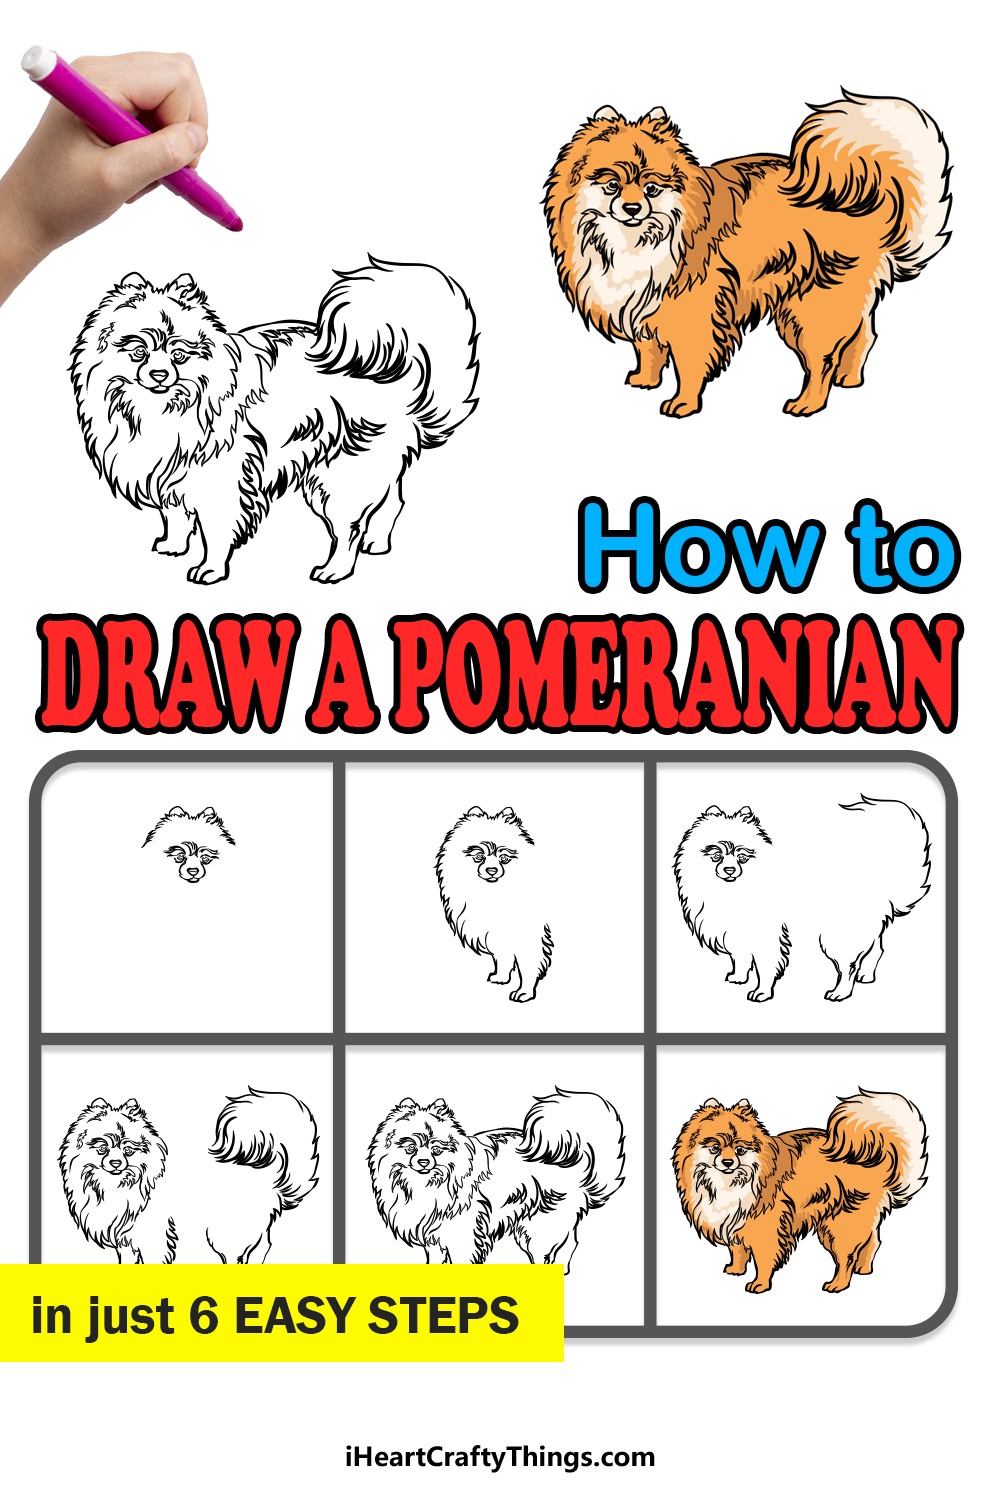
We hope that you enjoy this extra cute step-by-step guide on how to draw a Pomeranian in just 6 easy steps!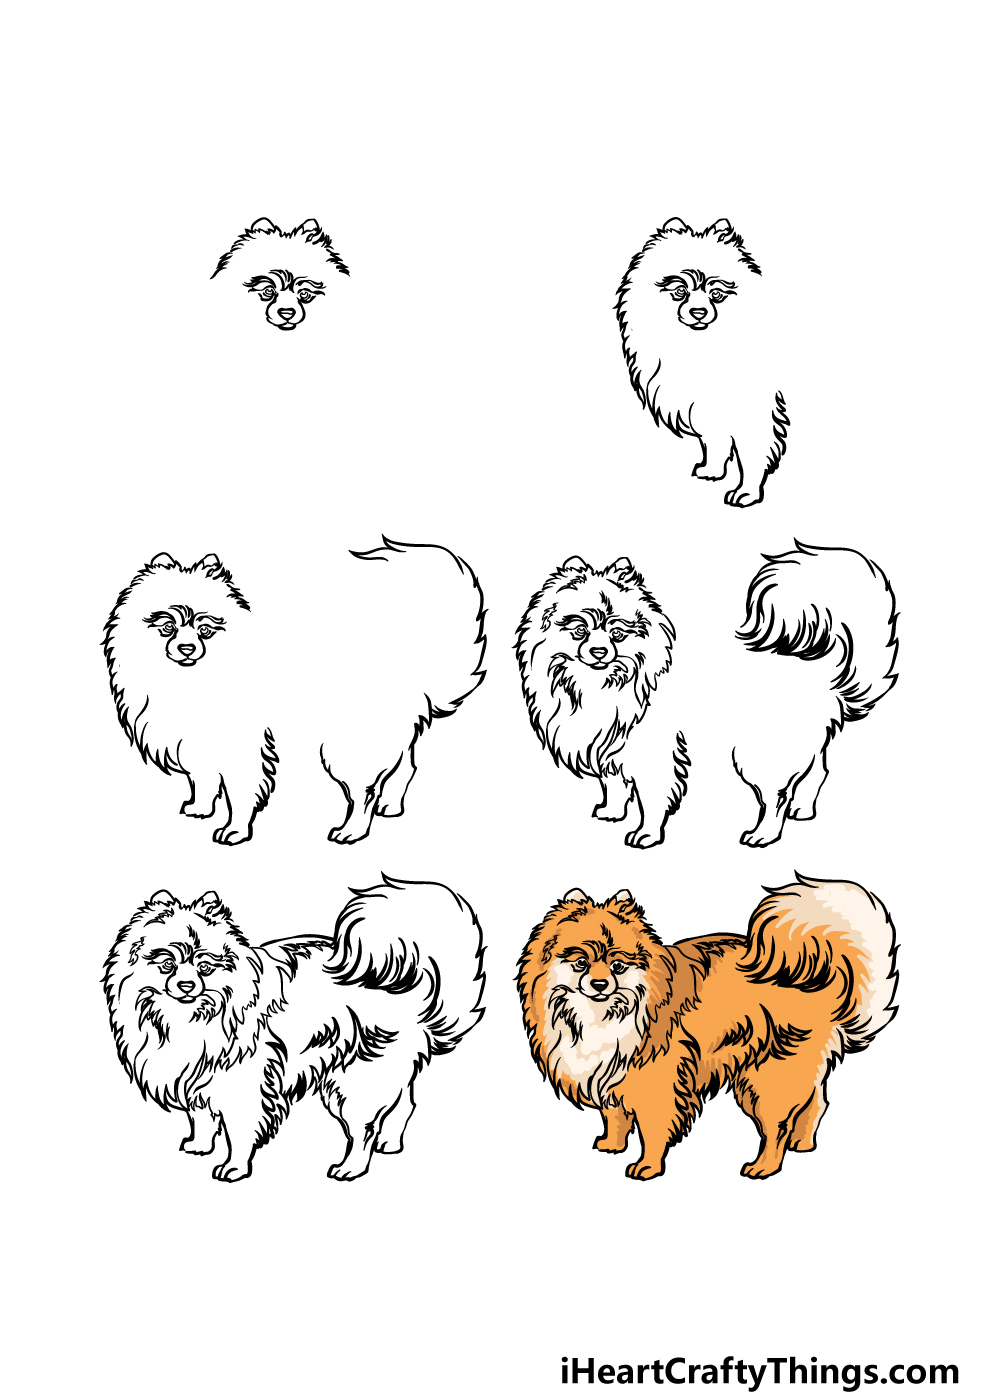
How to Draw A Pomeranian – Let’s Get Started!
Step 1
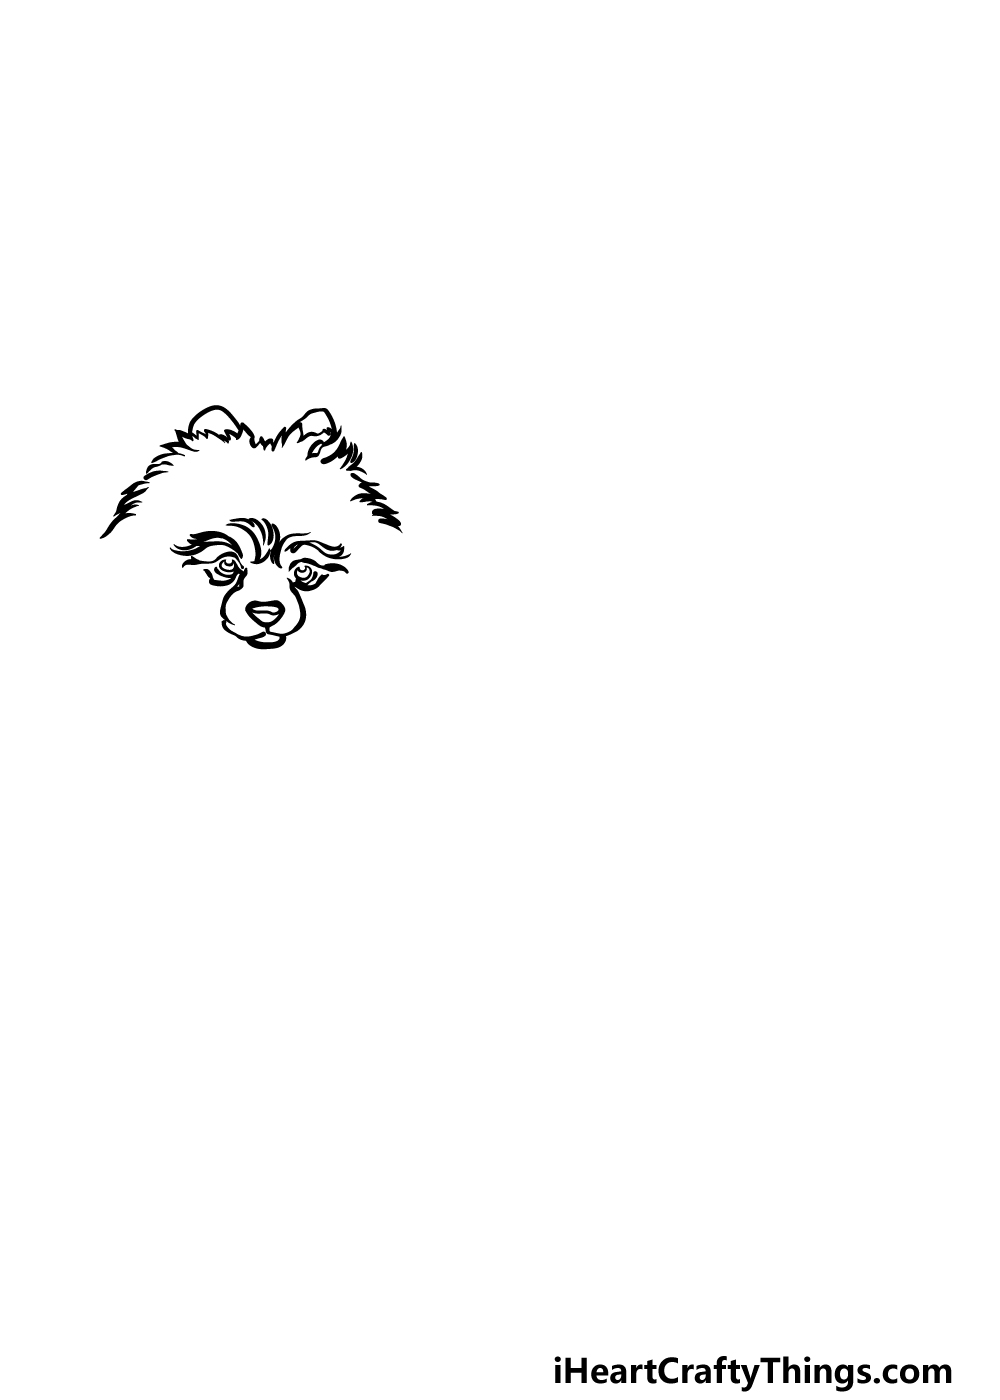
We shall start with the face and the head outline in this first step of our guide on how to draw a Pomeranian.
First, draw some small, curved lines for the little muzzle on the face of the dog. Then, draw a small, triangular nose onto the muzzle.
The eyes will be quite small and round, and they will be surrounded by some curved lines to make it look like there is a lot of hair around them.
Then, use lots of small, pointy lines for the outline of the top of the head of the Pomeranian. These pointy lines will again be used to make the dog look nice and fluffy.
Pomeranians have small, rounded ears, so you can draw them on top of the head before we move on.
Step 2 – Now, start drawing the chest and legs of the Pomeranian
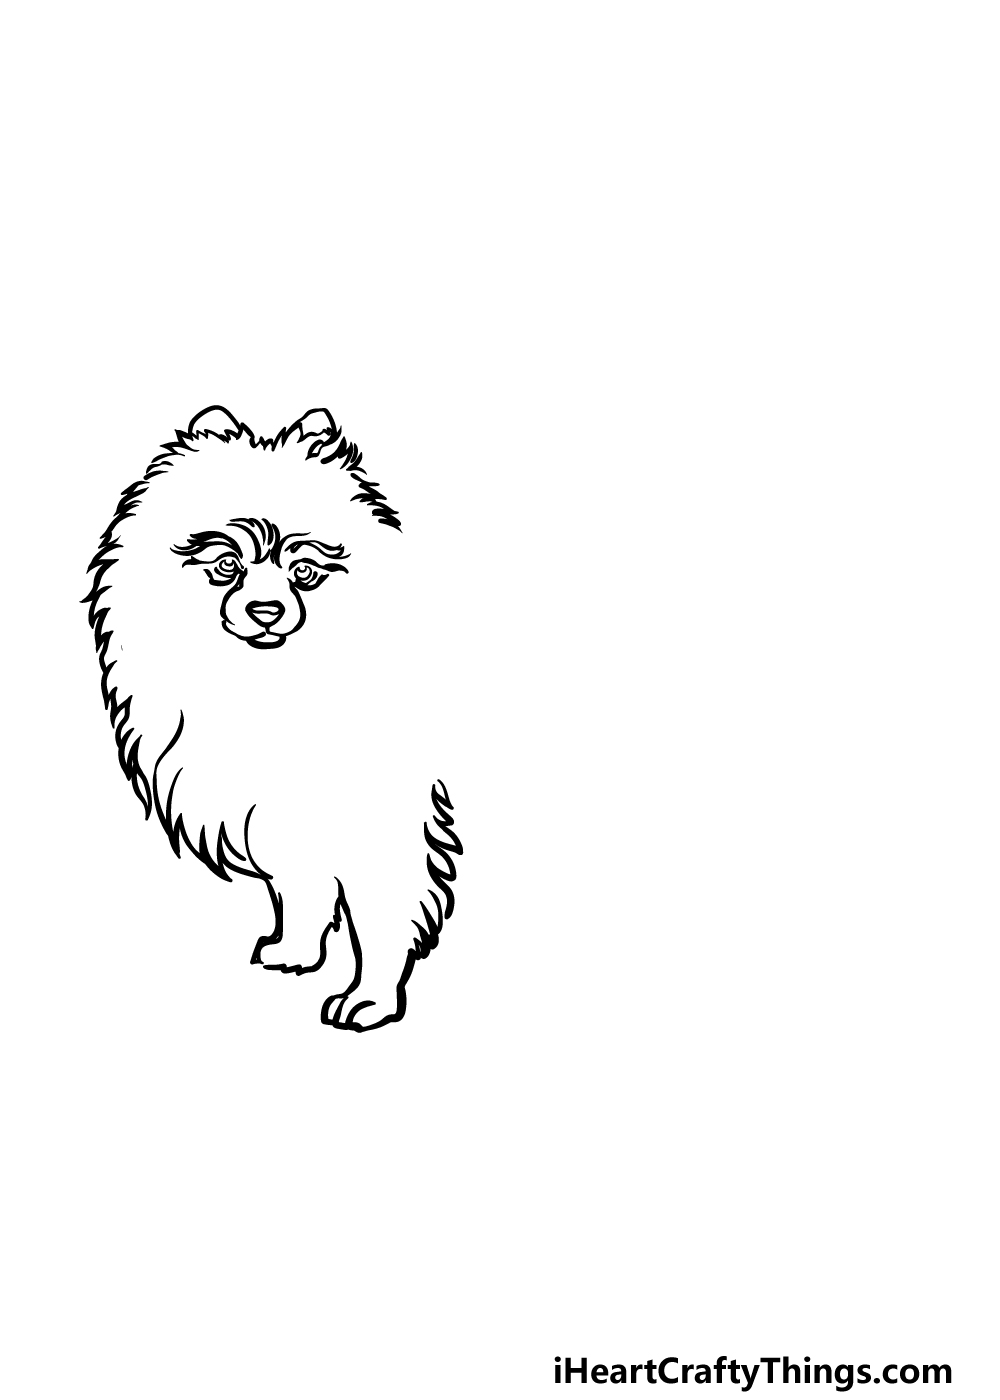
Now that you have the head and face of your Pomeranian drawing done, we can now start adding some more parts of the body. First, we will be drawing the chest.
This chest will extend from where the outline for the left-hand side ended. The chest will also be drawn with lots of pointy lines, as we want the chest to look just as hairy and fluffy as the head did.
As we move lower on the chest, we will also be using larger pointy lines to make the hair look longer and thicker.
Pomeranians also have pretty small, stubby legs, and we will be drawing the front legs in this step.
The outline for the fronts of the legs will be quite smooth, but the backs of the legs will be drawn with some more jagged, pointy lines to make them look furry too.
Step 3 – Draw the tail and the back legs
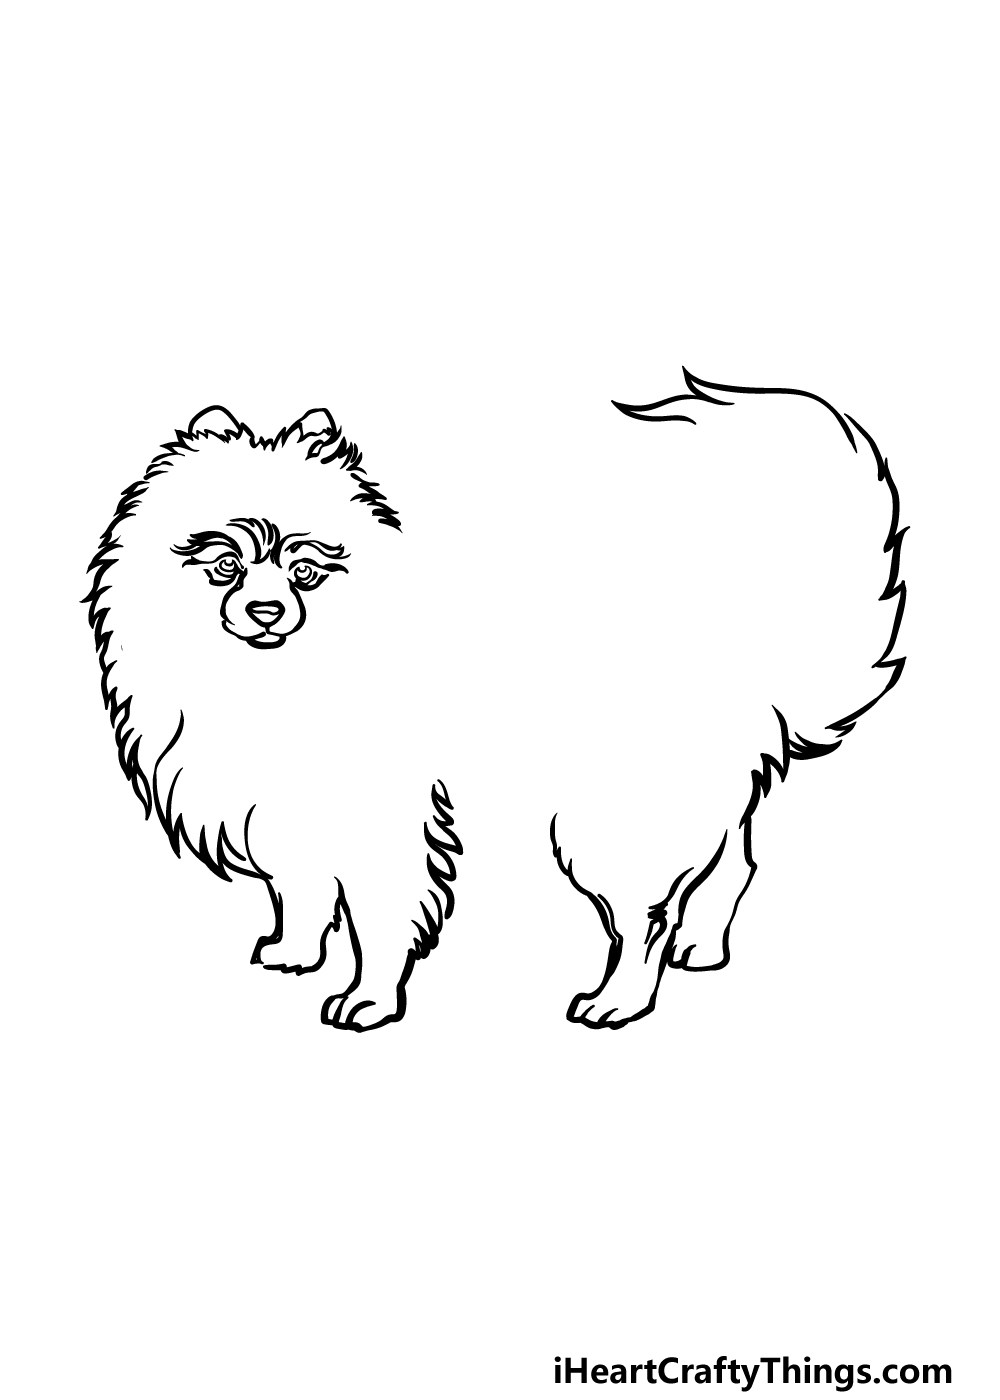
Continuing with this guide on how to draw a Pomeranian, we will be adding the start of the tail and the back legs.
We won’t be drawing the central portion of the Pomeranian for now, so be sure to refer to the reference image to make sure that your version also has a short body length.
First, draw the back legs close to one another. They will look rather similar to the front legs, but they will be a bit wider at the tops of the legs.
Then, we will be drawing the back outline of the tail. This will be curling up and over the back of the dog. It will also be drawn with some pointy, curved lines to make it look nice and fluffy.
Step 4 – Next, draw some details for the Pomeranian
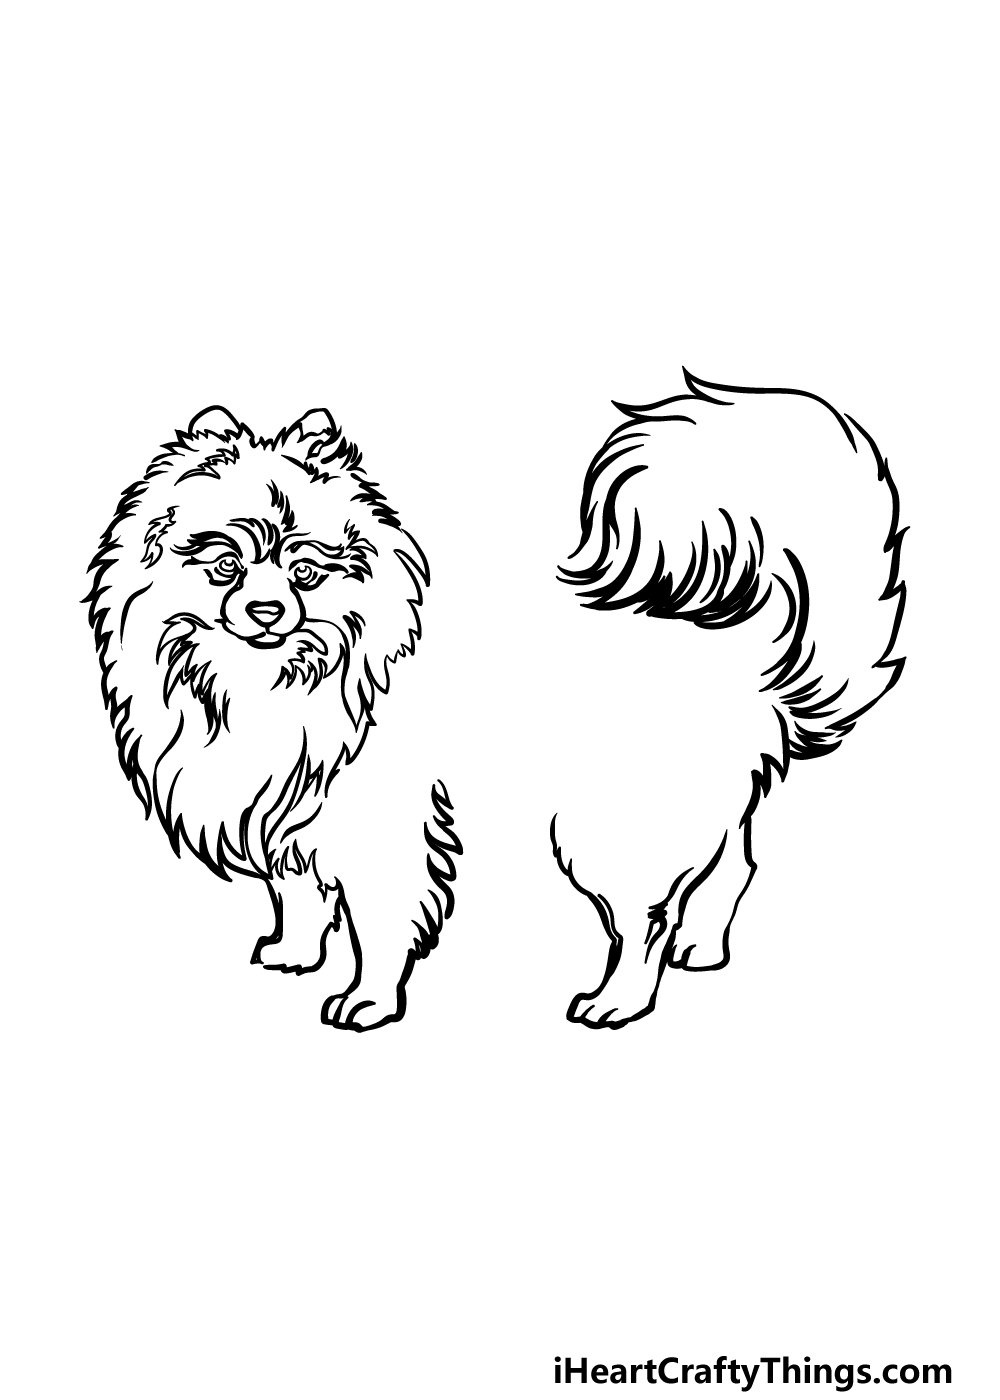
Before we add the middle section of your Pomeranian drawing, we will first add some details to the sections you have drawn already.
First, draw some shapes inside of the head outline that are made up of some pointy sectioned extending outwards.
These can be a bit tricky to draw, so try your best to replicate them as they appear in our reference image.
Once these details have been added, we will then add the front section of the tail.
To show that the tail ends in some thick, wavy hair, we will draw this part by using lots of wavy lines close to one another.
Then, we will be ready for the final touches in the next step!
Step 5 – Add the final details to your Pomeranian drawing
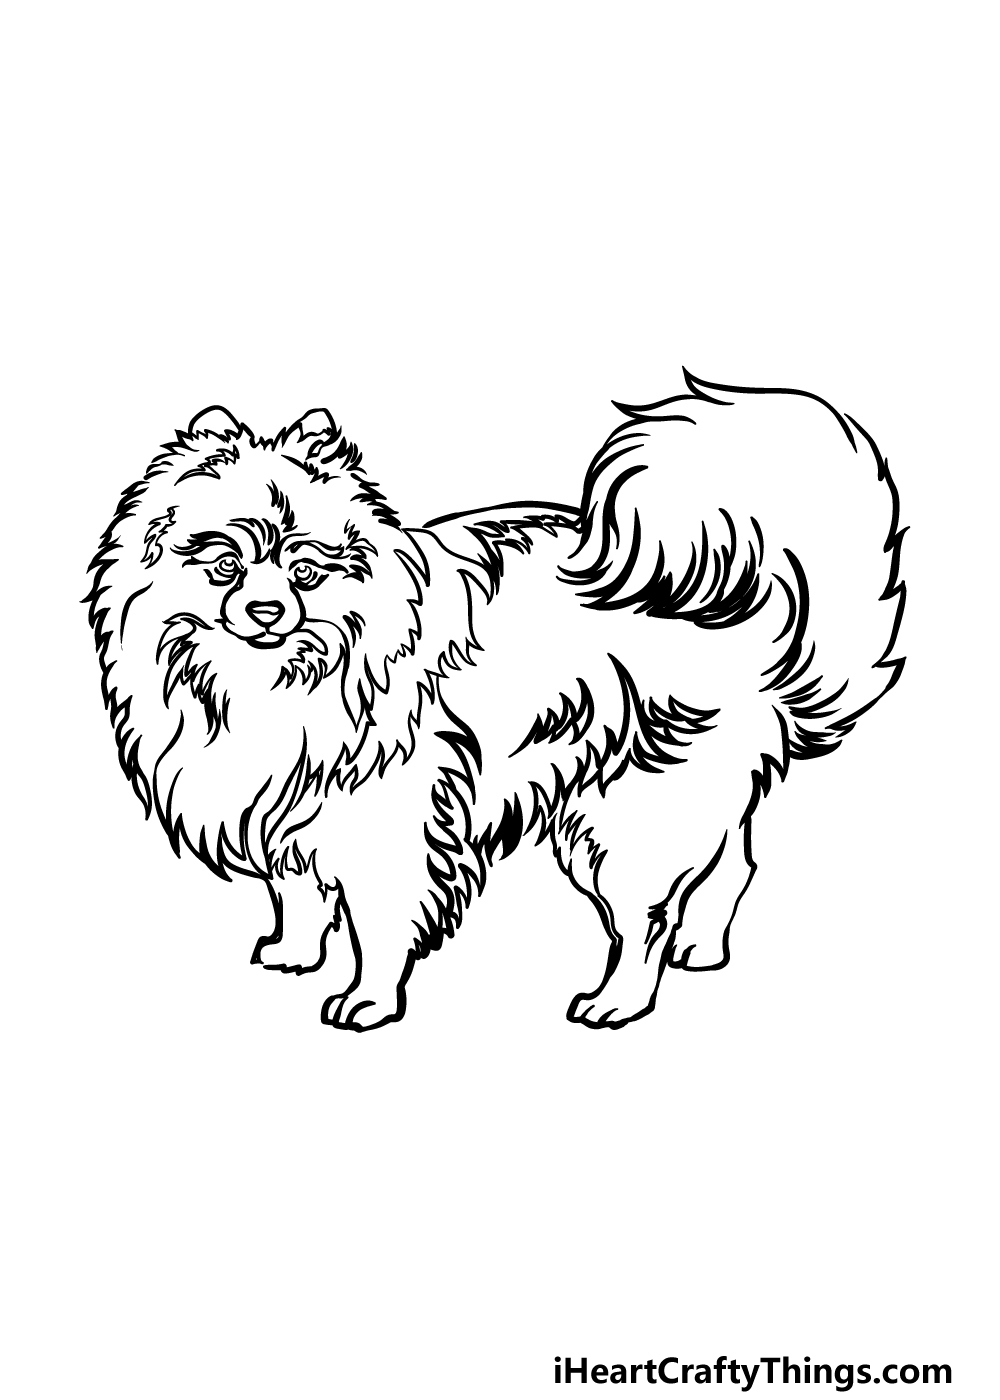
You’re now ready to add the final elements before we move on to the final step of this guide on how to draw a Pomeranian.
This means that we will be drawing the middle section of the dog. For this middle section, we will be adding some more shapes made up of sharp, curly sections like the ones that you used for the face.
Finish off the outline with some larger pointy lines, and then you’re ready for the final step! Before you move on, be sure to also add any extra details that you would like.
What kind of background do you think would suit this cute little dog?
Step 6 – Finish off your Pomeranian drawing with color
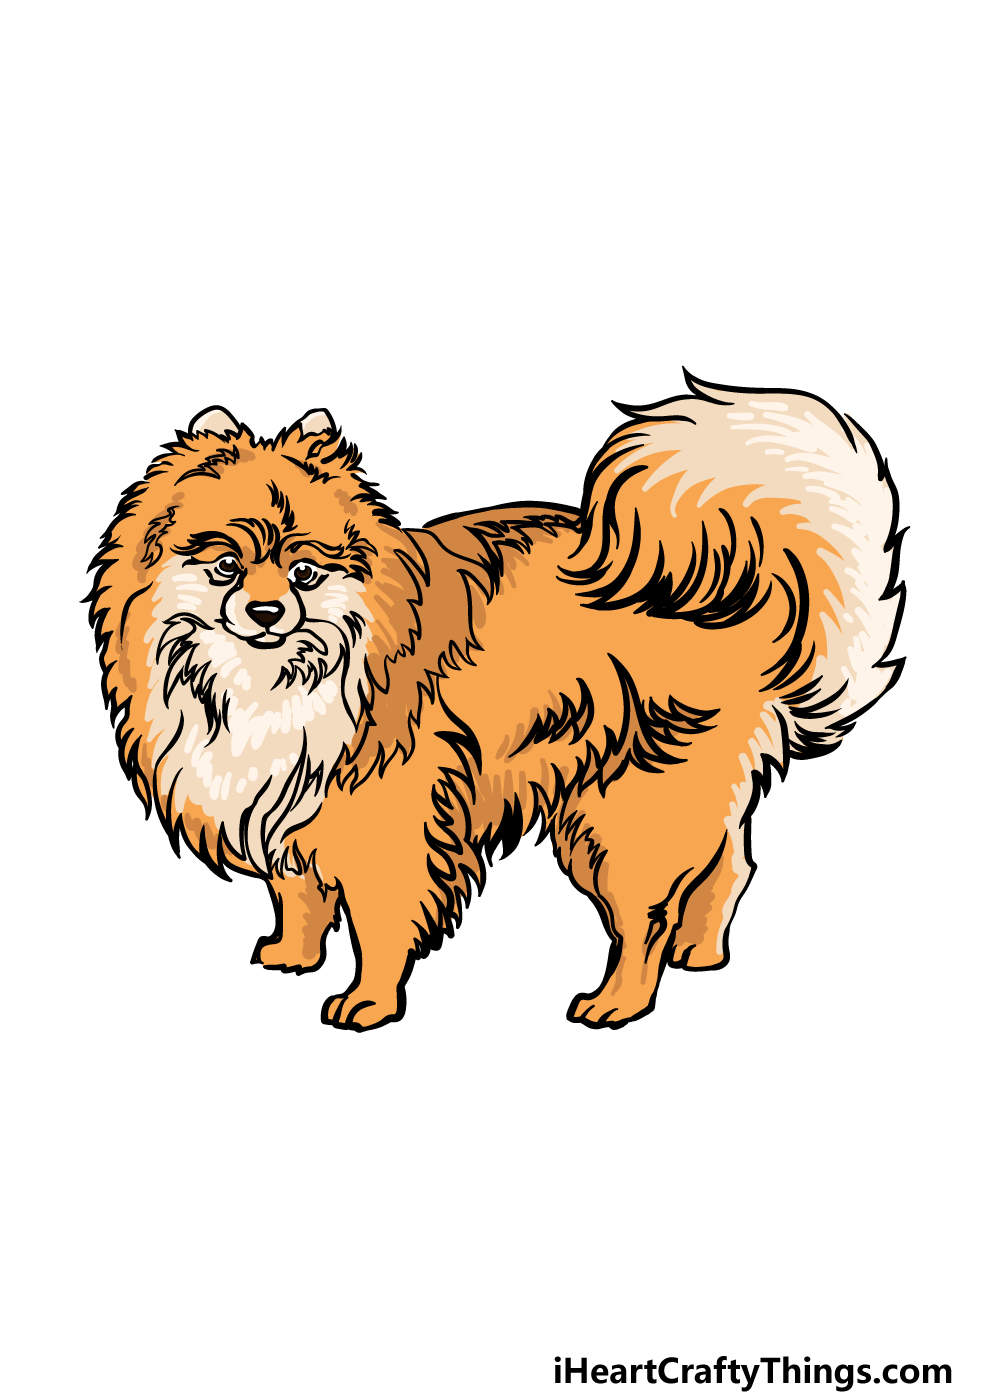
This dog breed typically has a tan and beige color scheme, and this is what we went for in our example image of this Pomeranian drawing.
You could use similar colors for your own drawing, but you should also feel free to use some unique colors for your own Pomeranian variation if you wish!
Do you think you will go for the classic Pomeranian color scheme or will you change it up?
Even when you have your colors chosen, remember that you can also have fun experimenting with your favorite art tools and mediums.
3 More tips to make your Pomeranian drawing easy!
Make your adorable Pomeranian sketch even easier with the help of these 3 tips.
One of the defining features of this dog breed would have to be how fluffy it is. This has been represented well in this drawing of a Pomeranian.
While this looks really good, it can also make the drawing a lot harder to do. If you wanted to simplify this drawing to make it easier, the hair details would be a good place to start.
By removing some of the line details and altering the outlines a bit, you could make it simpler without taking away too much from the design.
If there are other elements you struggle with then these can also be simplified!
Another way you could get past some of the trickier elements of this Pomeranian drawing would be by adding some accessories.
We mentioned in the previous step that you could remove some hair details, but you could also cover them.
For example, many people like to put special dog sweaters on their dogs to keep them warm and stylish. You could add one for this Pomeranian to wear!
Not only would this make the dog look even cuter but it would also mean that you wouldn’t have to draw the tricky hair details.
What are some other accessories you could use to cover up tricky parts of the drawing?
One of the best ways to make any drawing easier is by using photos of the real thing to help you. That is something we would highly recommend for this Pomeranian sketch!
If you happen to have a Pomeranian as a pet, then you have a model ready to go. If you don’t, then you will find many photos of Pomeranians online.
They will be in many different poses and settings, but you should be able to find some that are posed at least fairly similar to our example.
Once you have your reference images, you can then use them along with the images in our guide to make the picture easier to complete.
Your Pomeranian Drawing is Complete!
All 6 steps of this guide on how to draw a Pomeranian have been completed, and you have an incredible drawing to show for it!
We hope that you had a wonderful time recreating this adorable dog during the guide, and we also hope that it was made much easier than expected.
Now you can show off your own creativity by adding your own details, elements and ideas to this image! We can’t wait to see how you go about finishing off this cute picture.
There are also many more amazing drawing guides to enjoy on our website! We bring new guides out often, so keep checking in to never miss out.
We would also be thrilled to see how your adorable Pomeranian drawing came out! The best way to show us is by sharing your creation on our Facebook and Pinterest pages for us to check it out.