


Learn how to draw a Christmas Tree with this simple guide. The steps of the guide will make your Christmas drawing easier than ever before.
Creating art is a great way to celebrate the festive season with friends and family, and this guide will make sure that everyone can create some Christmas art.
In this guide, I have broken down the process into some simple lines and shapes while still adding some details like baubles, a star on top and texture for the pine needles.
Those are the details we chose, but you can customize the drawing with decorations you would put on your own Christmas tree once you have the hang of it.
The guide has been designed to be accessible for all sorts of skill levels and ages, so all are welcome for some Christmas fun! It could be a good idea to spread this guide to your friends and family to go through it together.
Let’s prepare for some festive creativity as we embark on this guide together.
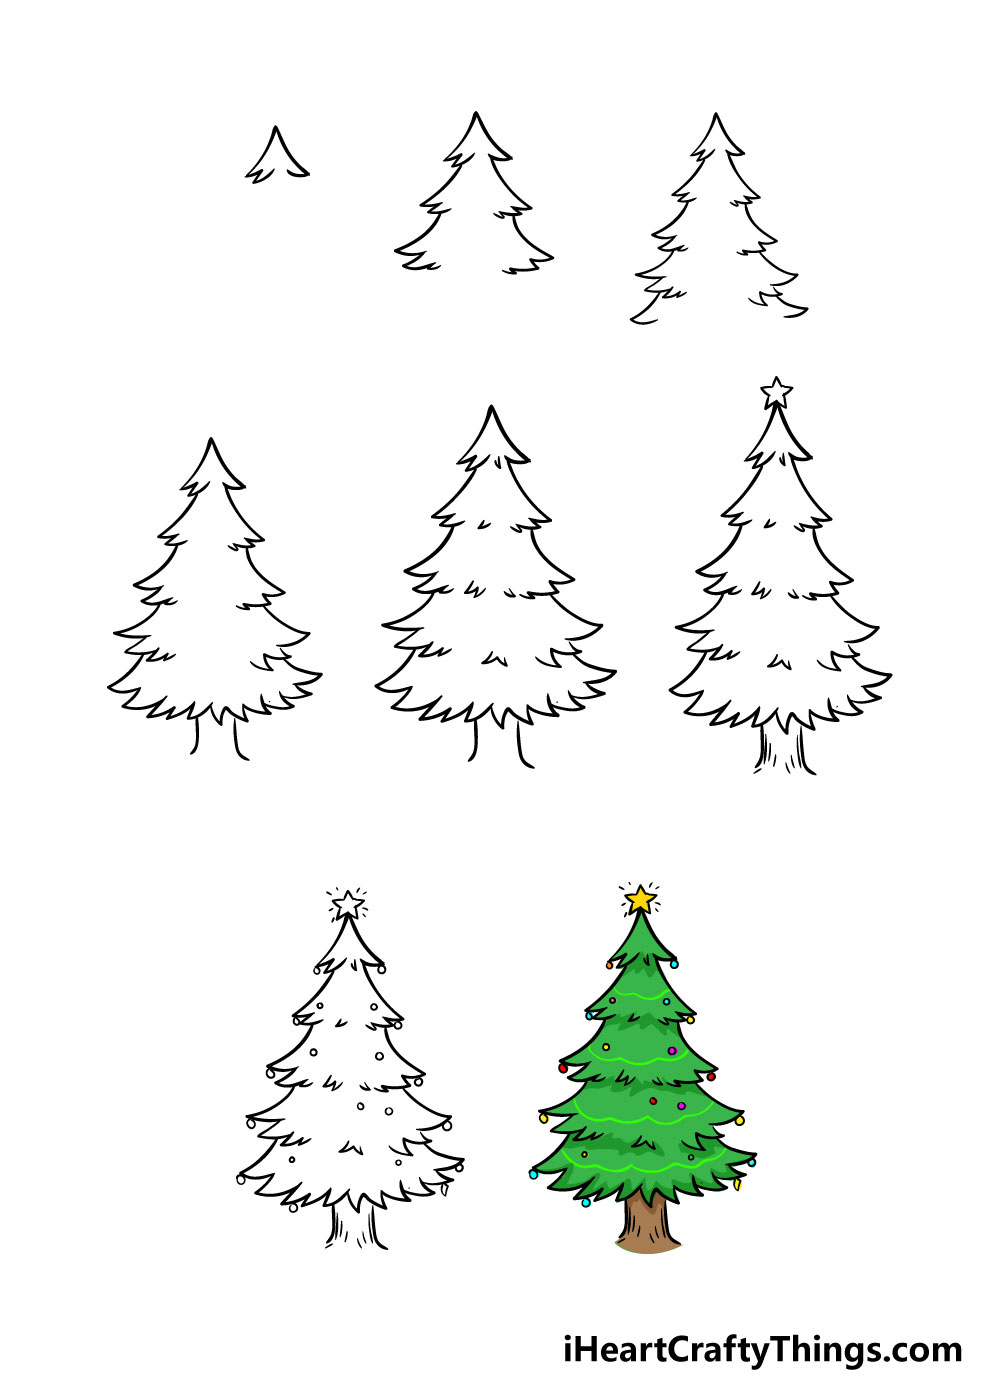
Follow Along With These Steps On Drawing A Christmas Tree
How to Draw a Christmas Tree – Let’s get Started!
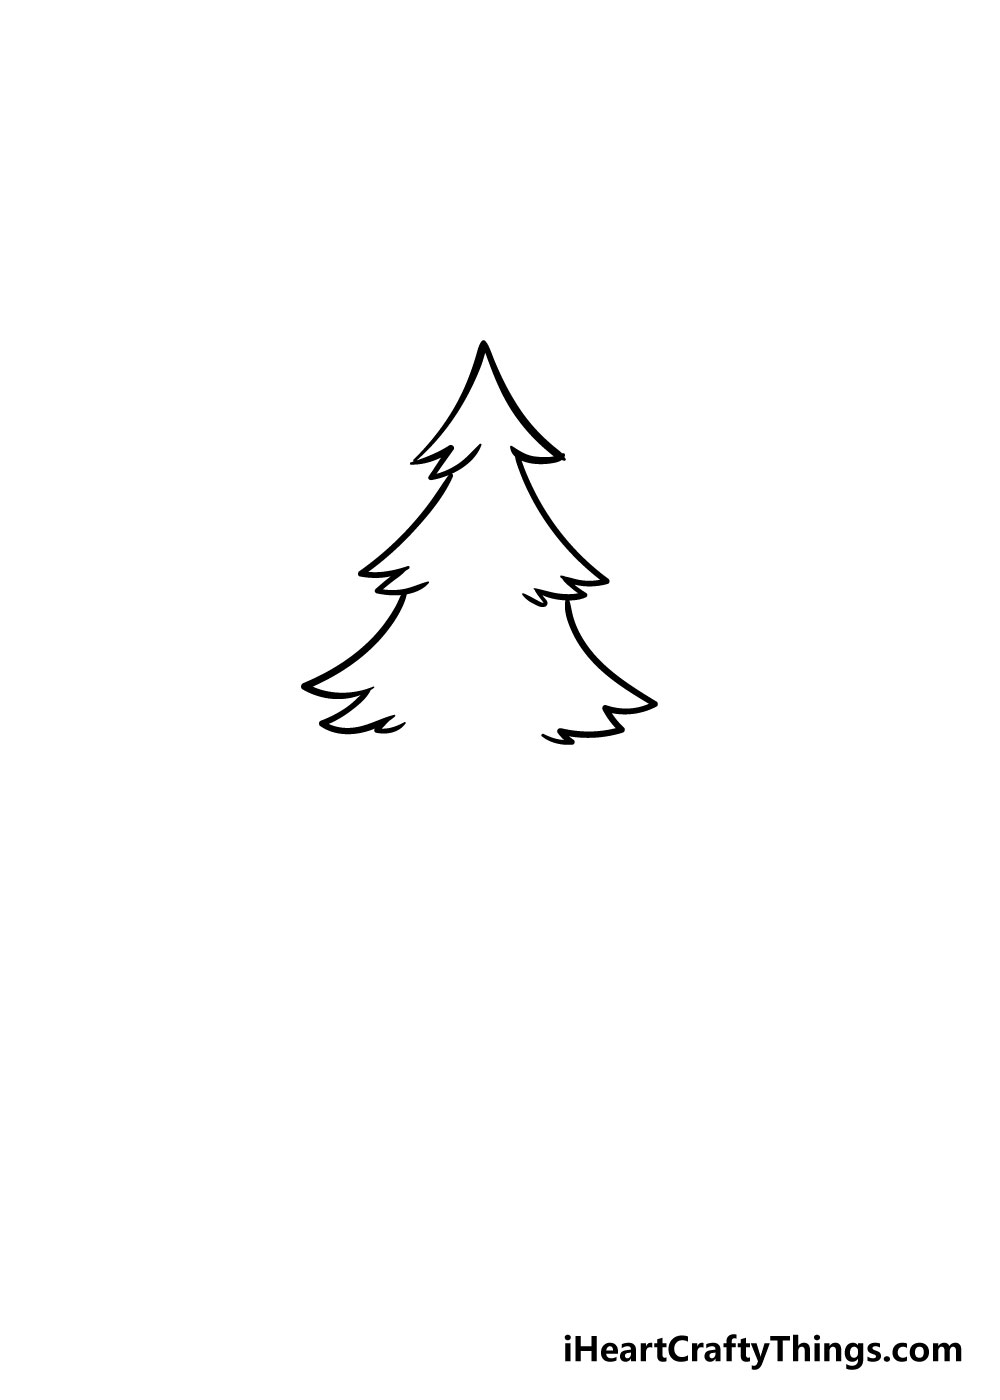
Step 1

To start off your Christmas Tree drawing, we will begin with the tip of the tree. We won’t be adding in any decorations or details quite yet at this point.
To start with, you can draw what will look a bit like a curved triangle with a bottom that curves inward.
The reference image is there to guide you, so if you follow the look of the picture the tip of your tree will be finished in no time!
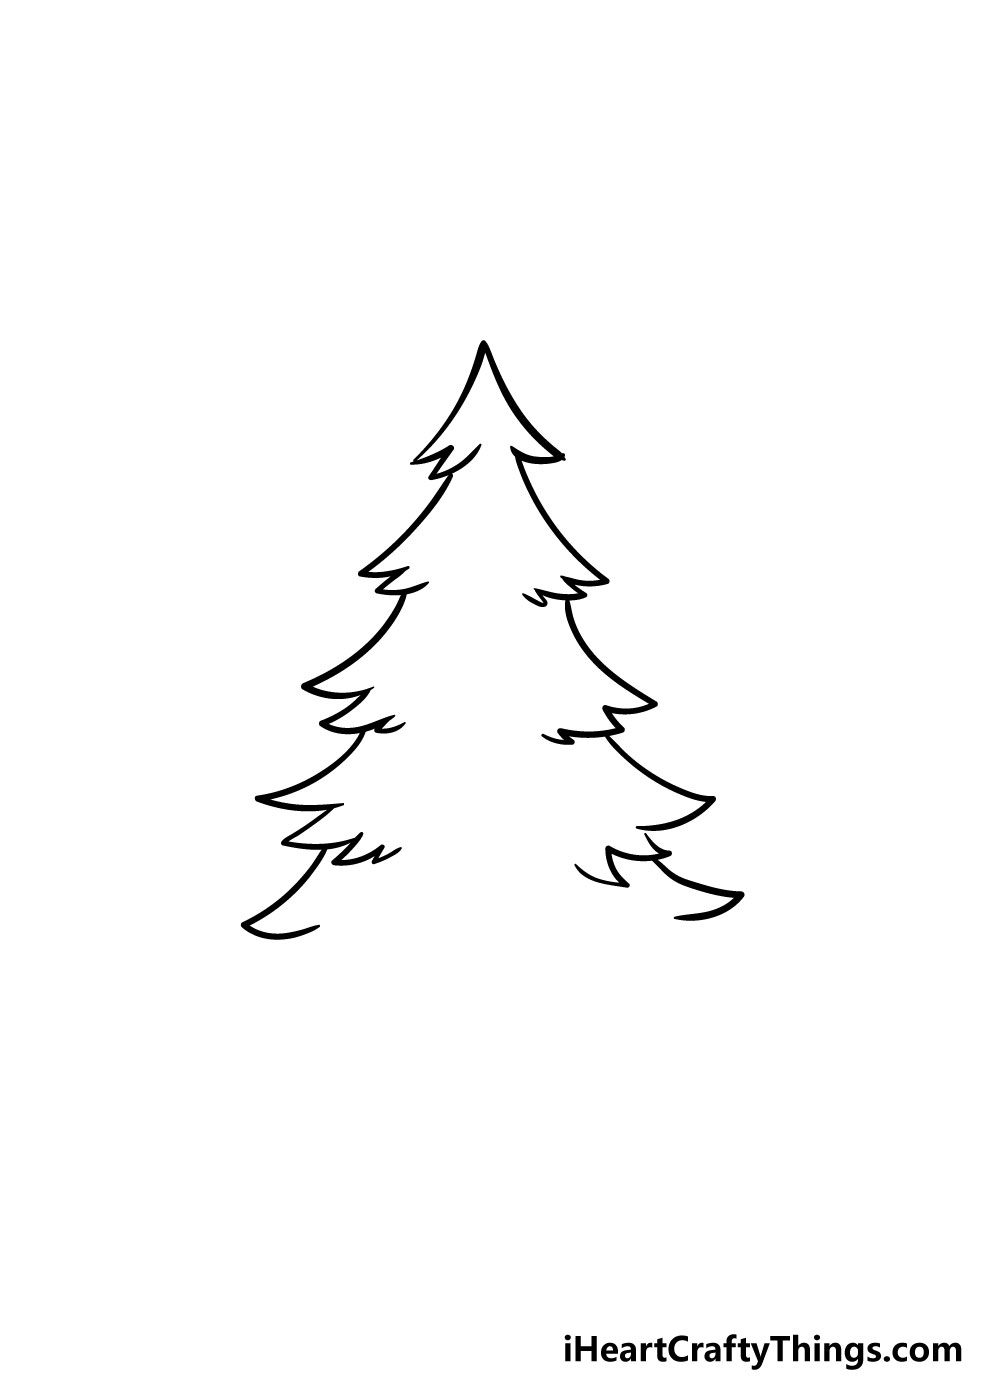
Step 2 – Draw in the next section of the tree
For this next step, we will draw in the middle section of your Christmas Tree drawing. You will essentially be drawing something similar to the first step, but much longer this time.
You will be drawing in two sections of the tree under the tip, and the reference image will give you an idea of the length you’ll want these sections to be.
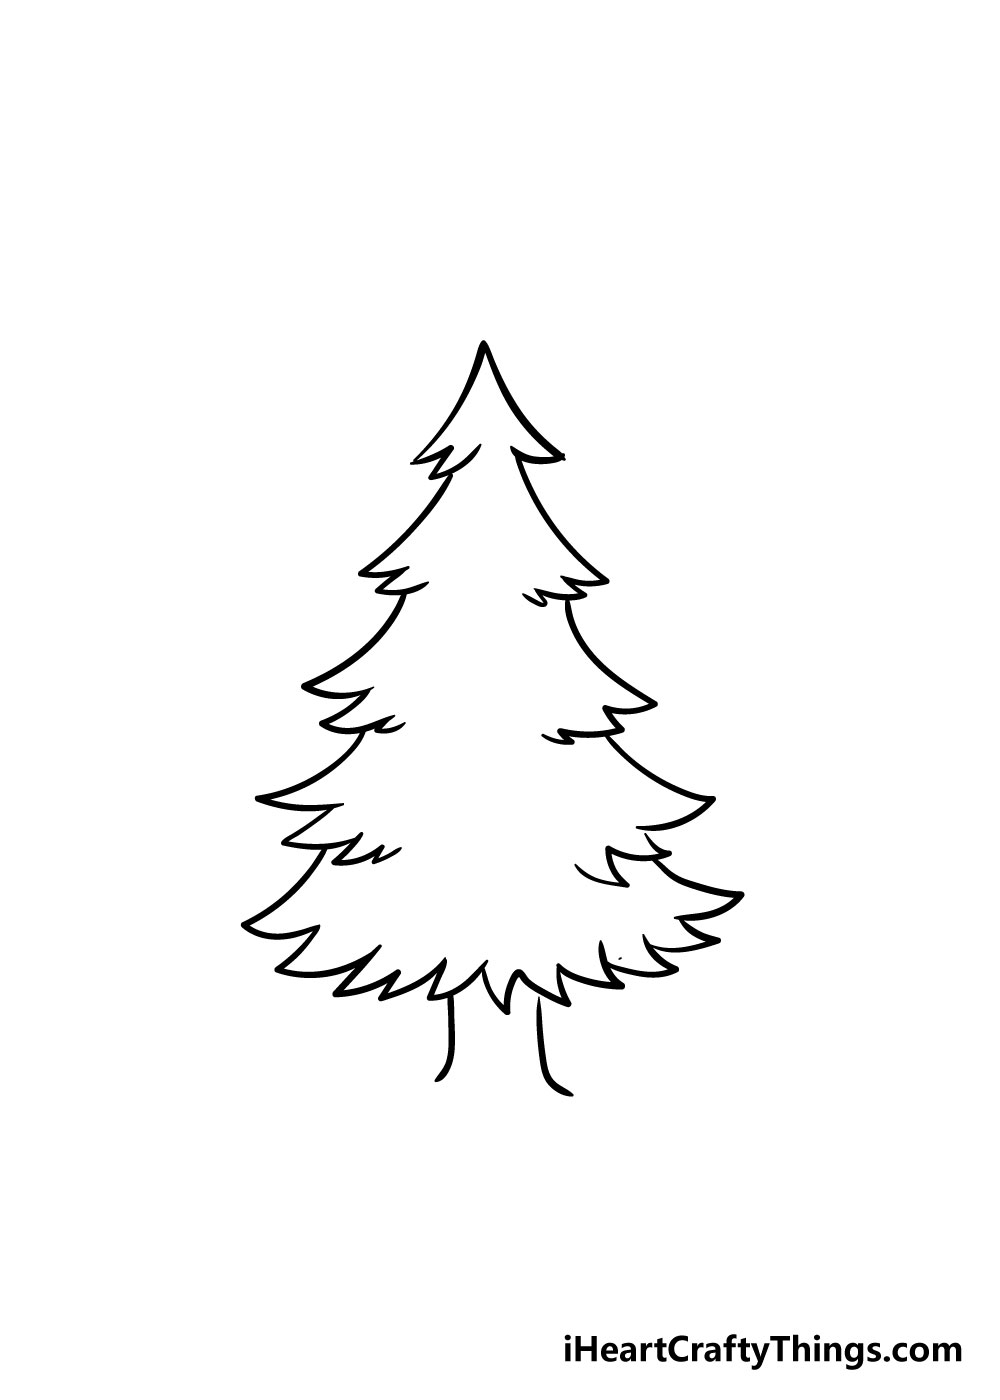
Step 3 – Next, draw in more of the tree
The next step in this guide on how to draw a Christmas Tree will have you drawing in two more sections of the tree.
The first section will be quite long, as the tree will be extending outwards. The final section will be much shorter but still extending outwards.
Once again, the reference image will be a great guide to how these final sections should look.
Step 4 – Now draw in the bottom of the tree and trunk
For step 4 of our guide on how to draw a Christmas Tree, we will be adding in the bottom of the Christmas Tree.
To do this, you can draw in a curved, jagged line connecting two bottoms of both sides of the tree. It should curve downwards a bit as you can see in the picture.
Once you’re happy with how that looks, you can then add in two lines with curves at the end for the trunk of your Christmas Tree. it’s really beginning to take shape now!
Step 5 – Next you will be adding in some small details

The main part of your Christmas Tree drawing is finished now, so for the next few steps we will be adding in some details to finish it off!
The details in this step will be small and subtle, as we will be adding in some small jagged lines inside the tree to make it seem like the tree has some depth.
Step 6 – Next you will be adding more details
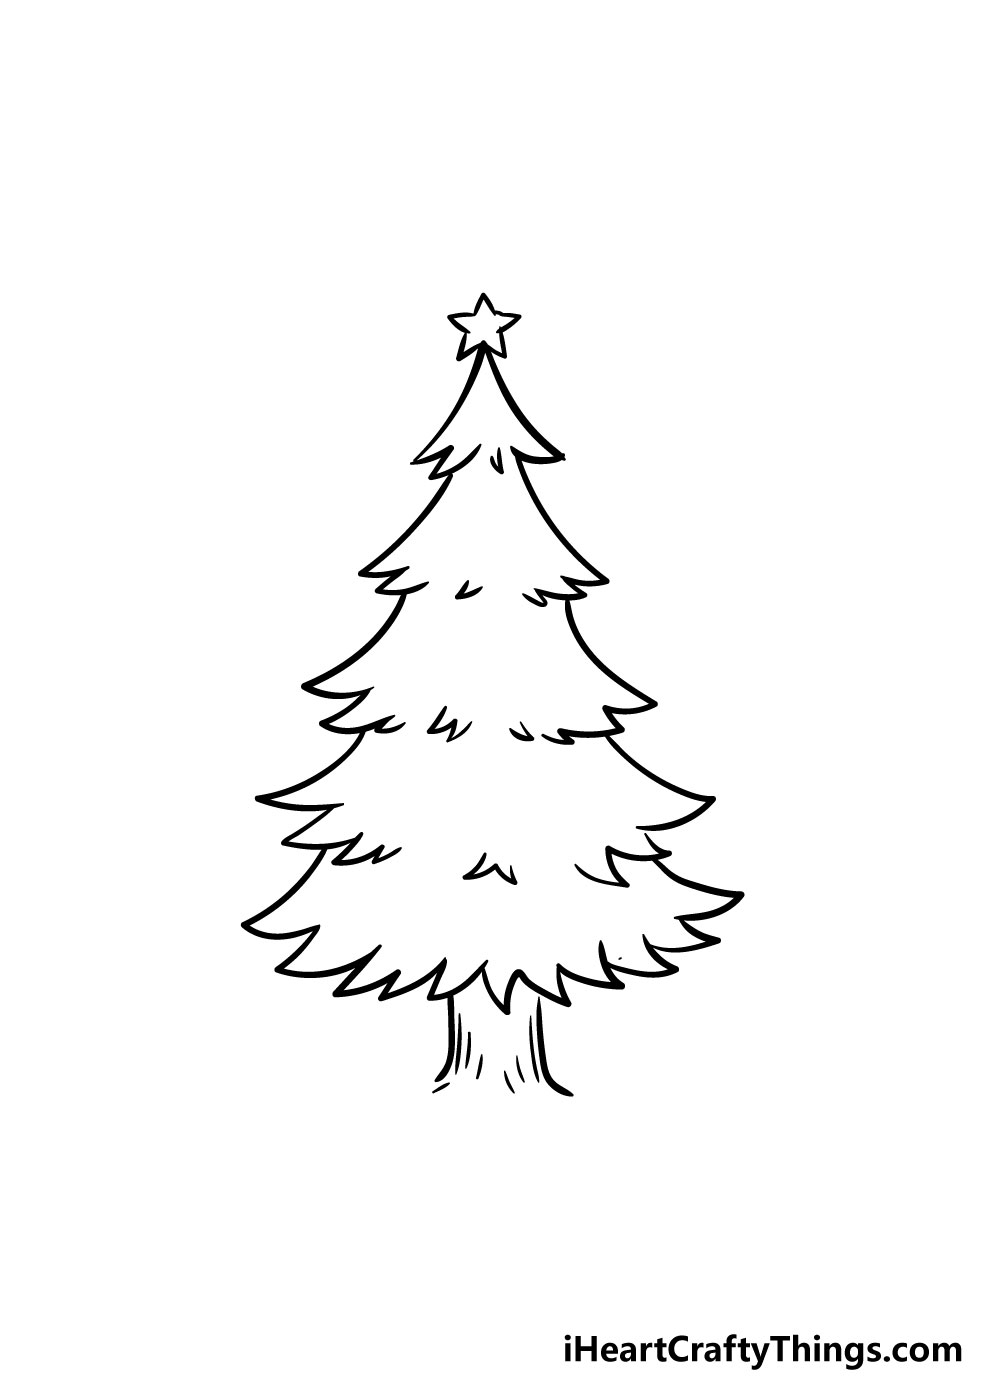
Every Christmas Tree needs a beautiful ornament on top to finish it off, so we will be adding a star in this next step.
For this element, you could draw in a star like the one we see in the reference image, but if you have a favorite tree topping ornament you could draw that in instead!
Once you have your tree topper drawn in, we will be adding some lines to the trunk of the Christmas Tree to give it a more wood-like appearance.
Step 7 – Now draw in the decorations

Step number 7 should be a lot of fun because we’ll be drawing in some fun decorations onto your Christmas Tree drawing!
We’ve shown one way you could make the decorations look in this picture, but this is a step where you can really get creative.
You could draw in your favorite ornaments and even add in details like tinsel. Maybe you could decorate it to look like the last Christmas tree you had in your house.
Once you’re happy with the decorations, you can add in any final details you think your Christmas tree drawing could use to make it look really pretty!
Step 8 – Now finish it off with some color
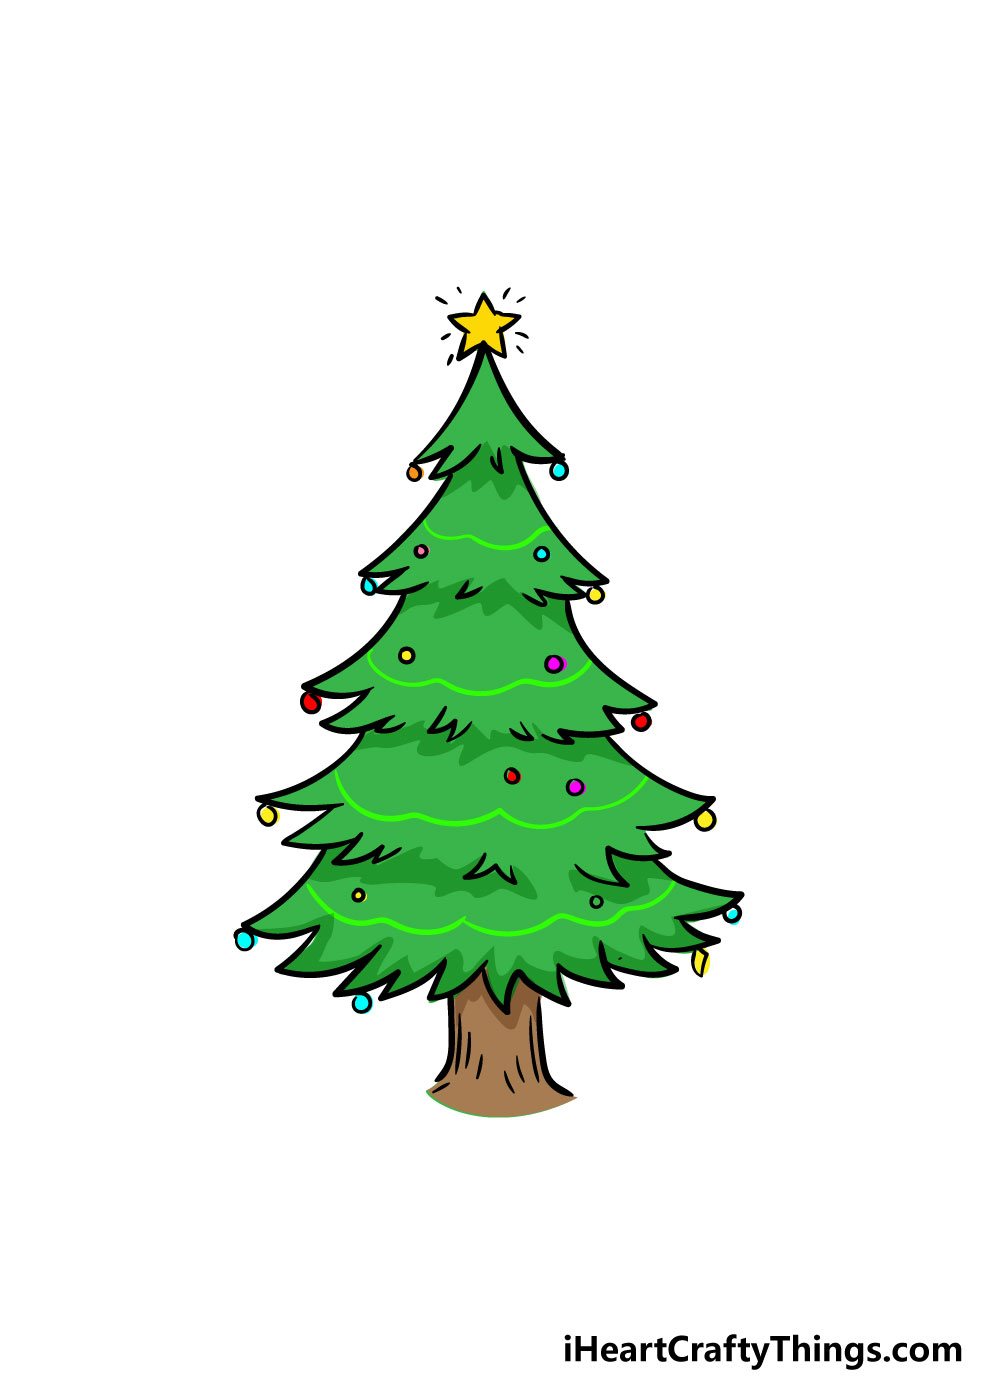
Your wonderful Christmas tree drawing is almost complete, and all it needs is some beautiful colors to finish it off!
Christmas is one of the most colorful holidays we have, so you should really let your creativity and imagination run wild as you color in your Christmas tree drawing.
You could also try out some fun art mediums to really bring your drawing to life. Using mediums such as acrylic paints can bring some wonderfully bright, whereas you can get a pretty, softer look using watercolors.
Using other mediums like colored pens and pencils can also be great for adding some smaller colorful touches to your drawing.
This picture is sure to look even more incredible once it’s colored in, so we can’t wait to see how you finish off your Christmas tree drawing!
Bonus: Turn This Christmas Tree Drawing Into A Lovely Christmas Gift
You’ve done a great job working on this Christmas tree drawing, and now you may wonder what to do with it. There are many things you can do with an artwork once it’s done.
You could stick it in a scrapbook, hang it on the wall or, as the title suggests, give it to someone as a gift! There are a few ways to present your artwork as a gift, and the simplest would be to give it as is.
However, if Christmas is coming up then there is some more you could do to make this drawing a lovely gift. One idea would be to turn it into a Christmas decoration, and there are a few ways to do this.
You could make some cool decorations that can stand on their own by folding some cardboard into cones. Then, you could stick your cut out Christmas tree drawing to the cone, leaving you with a cool decoration!
Or you could draw a few of these Christmas trees and then stick them to some string to make something you could hang from the ceiling.
Another idea would be to make this drawing into a fun Christmas card, and you could make a few different variations with different crafts and colors.
It would also be lovely to place your drawing into a nice frame to give someone, and these are just a few ways that you could present your drawing.
If you had a wooden box, you could also stick or decoupage this drawing to the lid and then give that as a box for some keepsakes! How else could you turn this drawing into a gift for someone?
Do this to take your Christmas tree drawing to the next level
Enjoy some festive tips as we show you how to make your Christmas tree look even lovelier!
When it comes to Christmas trees, you can never have too many decorations. We spoke about adding some tinsel and baubles in the guide, but these are just a few that you could draw!
Lots of people like to have personalized, handmade ornaments, and you could design some to add to this Christmas tree sketch.
What are some fun and unusual ornaments you would like to have on a Christmas tree?
Christmas trees are usually covered in all sorts of amazing colors, and you can show some of them for this Christmas tree drawing.
For this picture, we would recommend the brightest and most vibrant art tools and mediums you have.
Colored markers, pens and acrylic paints are a few examples of bright and vibrant mediums. You could also go for some watercolors for a more muted look if you prefer.
It’s completely up to you, and either approach will look great in its own way!
Using art tools and mediums is one thing, but you can also incorporate crafts and other materials to take it to the next level.
You could use glitter, glitter glue or stickers as a few ways to spice up the colors. You could even glue some small pieces of real tinsel onto the tree.
That would really make this an eye-catching picture to behold, and we’re sure you can think of many other fun crafts that you can use.
Lastly, you can make your drawing of a Christmas tree even better by adding some background elements. There are lots of details that you could add for a background.
Some examples would be a pile of presents or a frosty window behind the tree. You could also try and make it look like your own house to show what Christmas morning usually looks like to you!
What other details could you add to a fun and festive background setting for this beautiful image you have created?
Your Christmas tree Drawing is Complete!
When you set out to learn how to draw a Christmas tree, it probably seemed like it would be difficult to learn.
We hope that our step-by-step guide on how to draw a Christmas tree made it fun and easy for you to learn!
Like with any drawing challenge, it can be made so much easier when broken down into several smaller steps, so that’s what we aimed to do for this guide.
Once you’ve finished drawing your Christmas tree picture, we hope you’ll have just as much fun coloring it in!
We also hope that you’ll add in some of your favorite Christmas tree decorations by drawing them in.
Once you have drawn and colored your Christmas tree, we would love it if you would share your festive artworks yo our Facebook and Pinterest pages for us to admire!
We always love to see your amazing artworks and can’t wait to see some beautiful, colorful Christmas trees.