


Get ready for this step-by-step guide on how to draw a palm tree for kids! By the end, anyone can learn how to draw this famous and distinctive tree.
Palm trees make one immediately think of vacation spots and relaxation. But despite the fact that it has these associations, it’s not always easy to draw them.
That’s because their trunks are bent in a distinctive way, and the palm leaves they sport have a lot of details as well. The best way to learn how to do it is to look at each individual element and build up the design from there!
That’s what I aimed to do with this guide. By following along, you will see that it’s all a matter of knowing what to do. No matter your age or skill level, you’ll be drawing your own palm trees before you know it.
You could even add your own ideas, details and backgrounds to make it even more unique once it’s done!
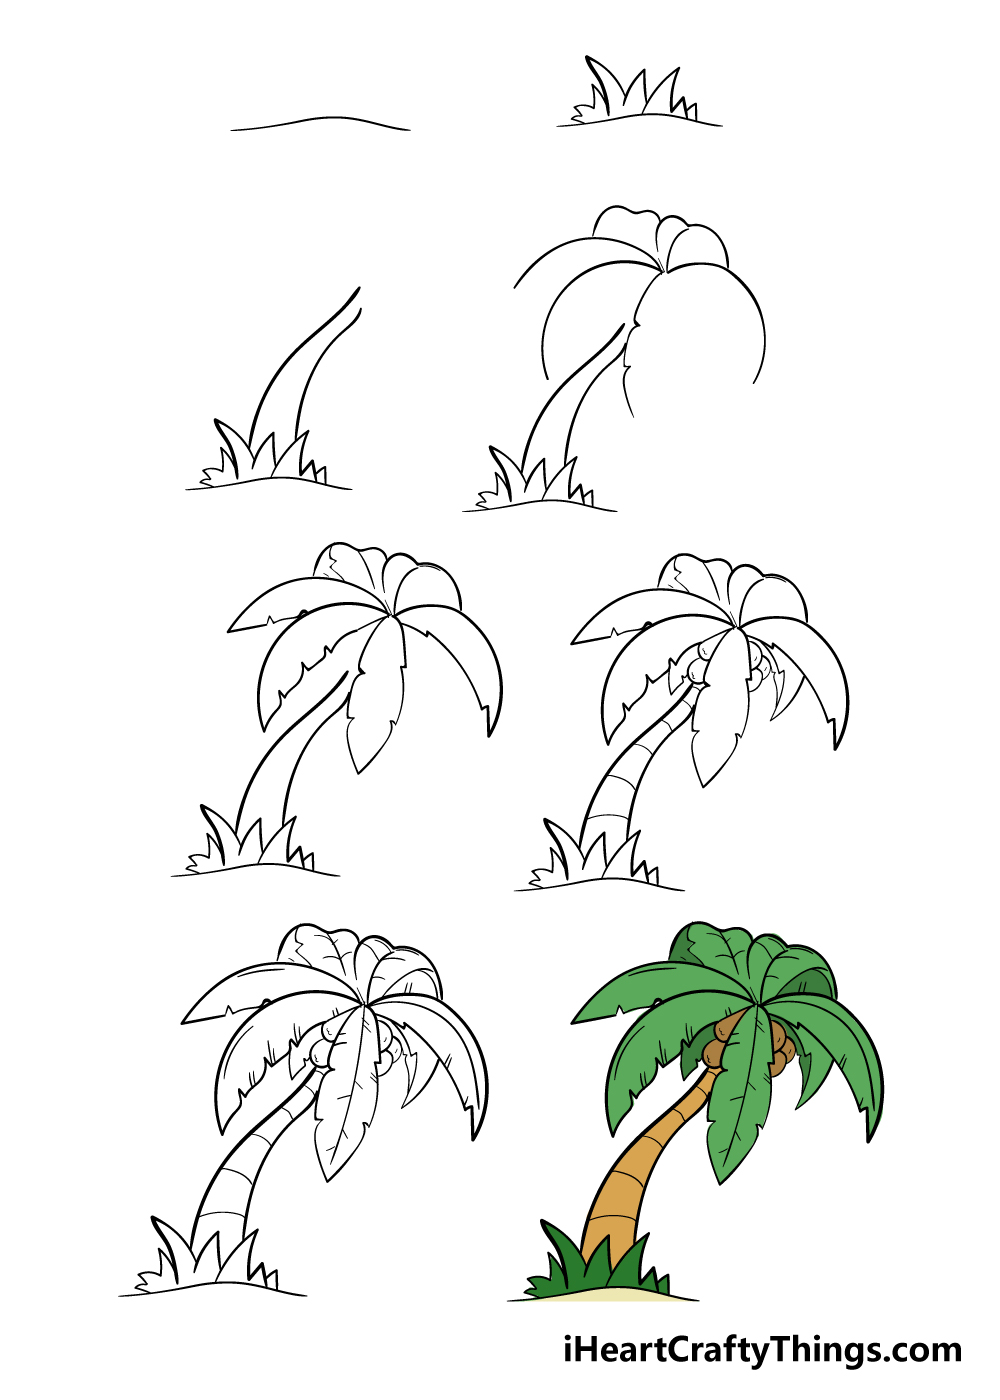
Follow The Steps And See How To Make A Palm Tree Drawing
How to Draw A Palm Tree – Let’s get Started!
Step 1

We will start simple for this first step of our guide on how to draw a palm tree. To begin, simply draw in a thin, curved line. This will form the bit of sand that your palm tree will be poking out of later.
You can try to get the line to look like the one in our example, but you could change up how the line looks a bit if you want to!
Step 2 – Now, draw in some grass
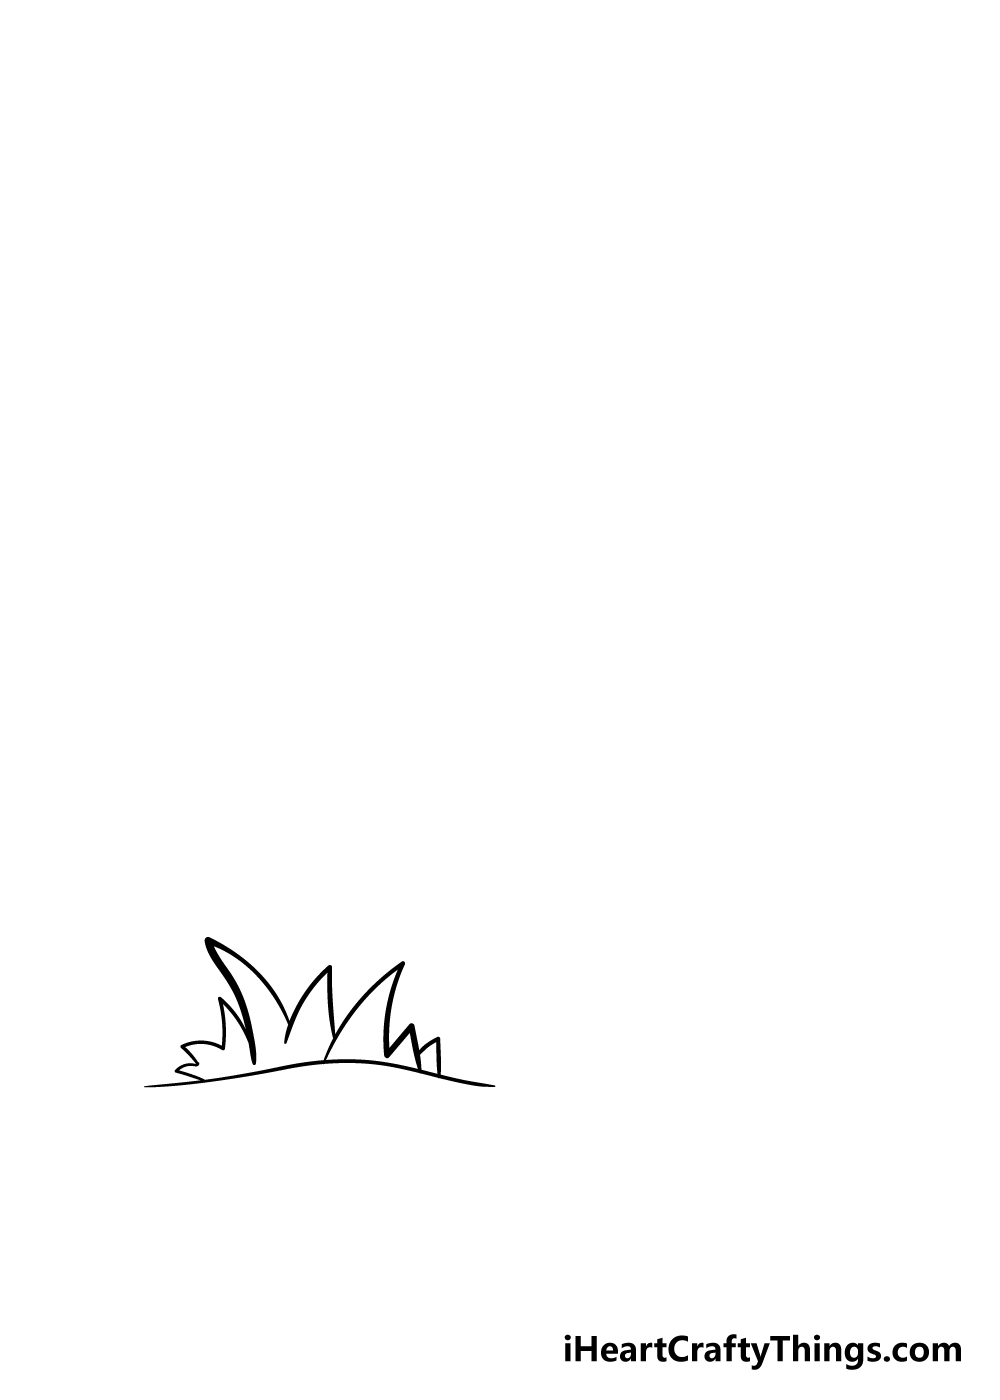
Using the line you drew in the first step, you can now add some grass to your palm tree drawing. This will be made up of a series of jagged lines that vary in length.
You can curl them over a bit to give them some movement, as you can see in the image.
Step 3 – Next, draw in the trunk of the tree
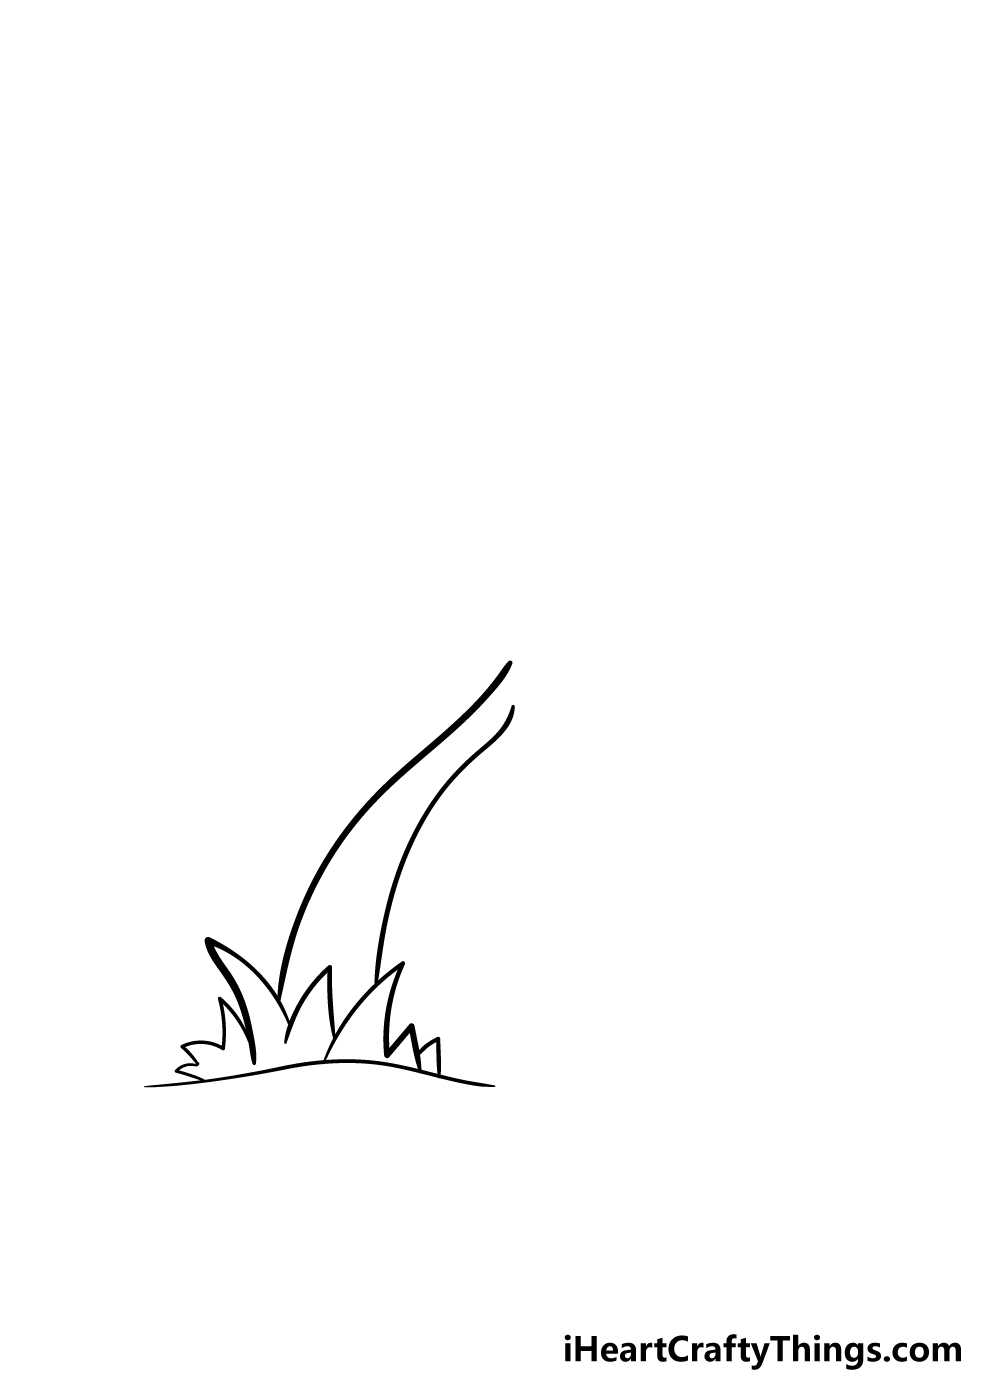
A palm tree wouldn’t be a palm tree if it didn’t have the distinctive long trunk they are well known for.
Because of this, we should probably add a trunk to your palm tree drawing! Draw in two long and curvy lines up from the jagged grass lines to form the trunk as it appears in our reference picture.
Once you’re happy with the look of the trunk, we can move on to the next step.
Step 4 – Start to draw in the leaves of the tree
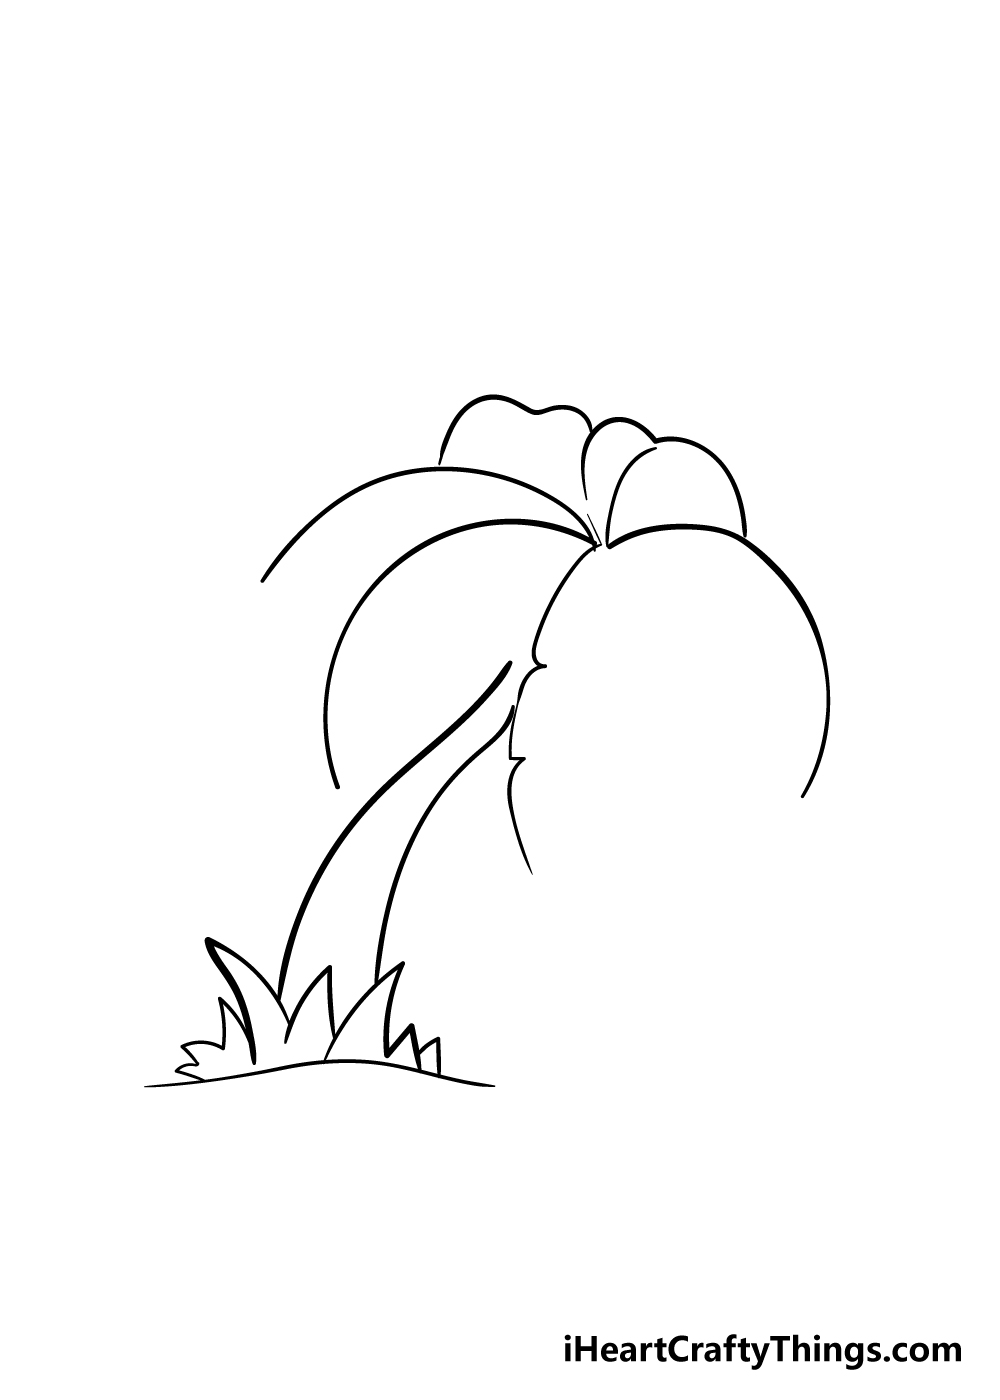
For this next step of our guide on how to draw a palm tree, we will begin to draw in the big leaves on top.
In this step, I would recommend following the guide image very closely, as it will help when you draw in more of the leaves later on.
This part of the leaves will be drawn in sing some very curved lines above the ones you used to draw in the trunk of the tree in the previous step.
To make this step easier for you, try to determine a center point that all of the lines should start at. The reference picture will give you an idea of where you could place that center line.
The leaf line that extends the lowest will have a slightly more jagged line than the other ones.
This step can be a bit tricky, but if you follow the image closely I know you can do it!
Step 5 – Now, draw in more of the leaves
Using the lines you drew for the leaves in the previous step, you can now draw in more of the leaves of your palm tree drawing.
Starting at the end of each line, draw another line towards the center. The picture will show you which lines should be smooth and which should be jagged.
Once the leaves look good to you, we can move on to step 6!
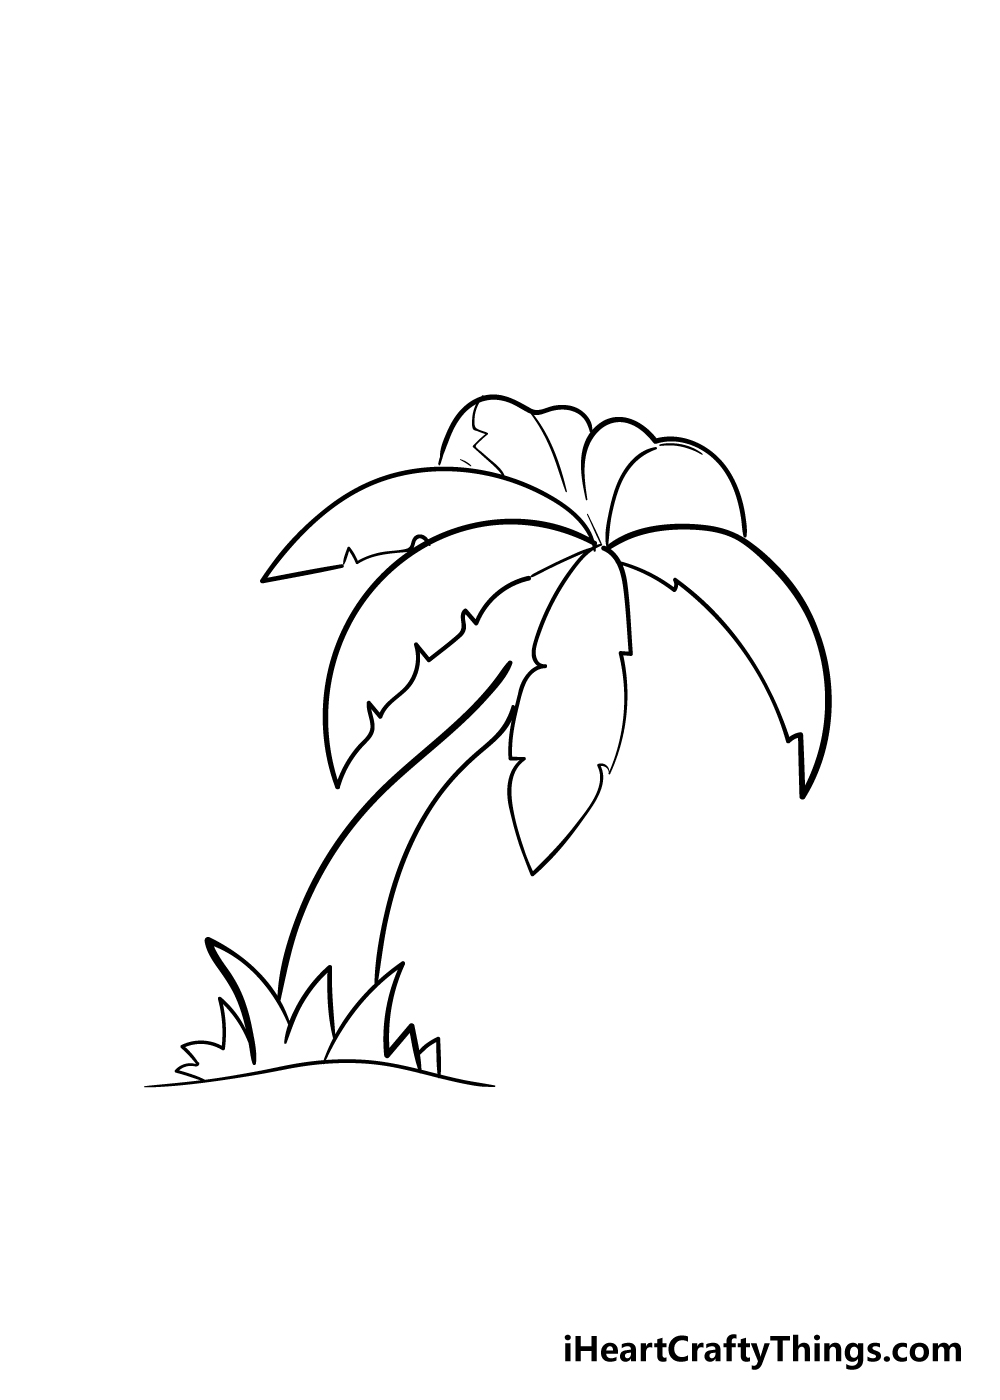
Step 6 – Now, you can draw in some coconuts and details
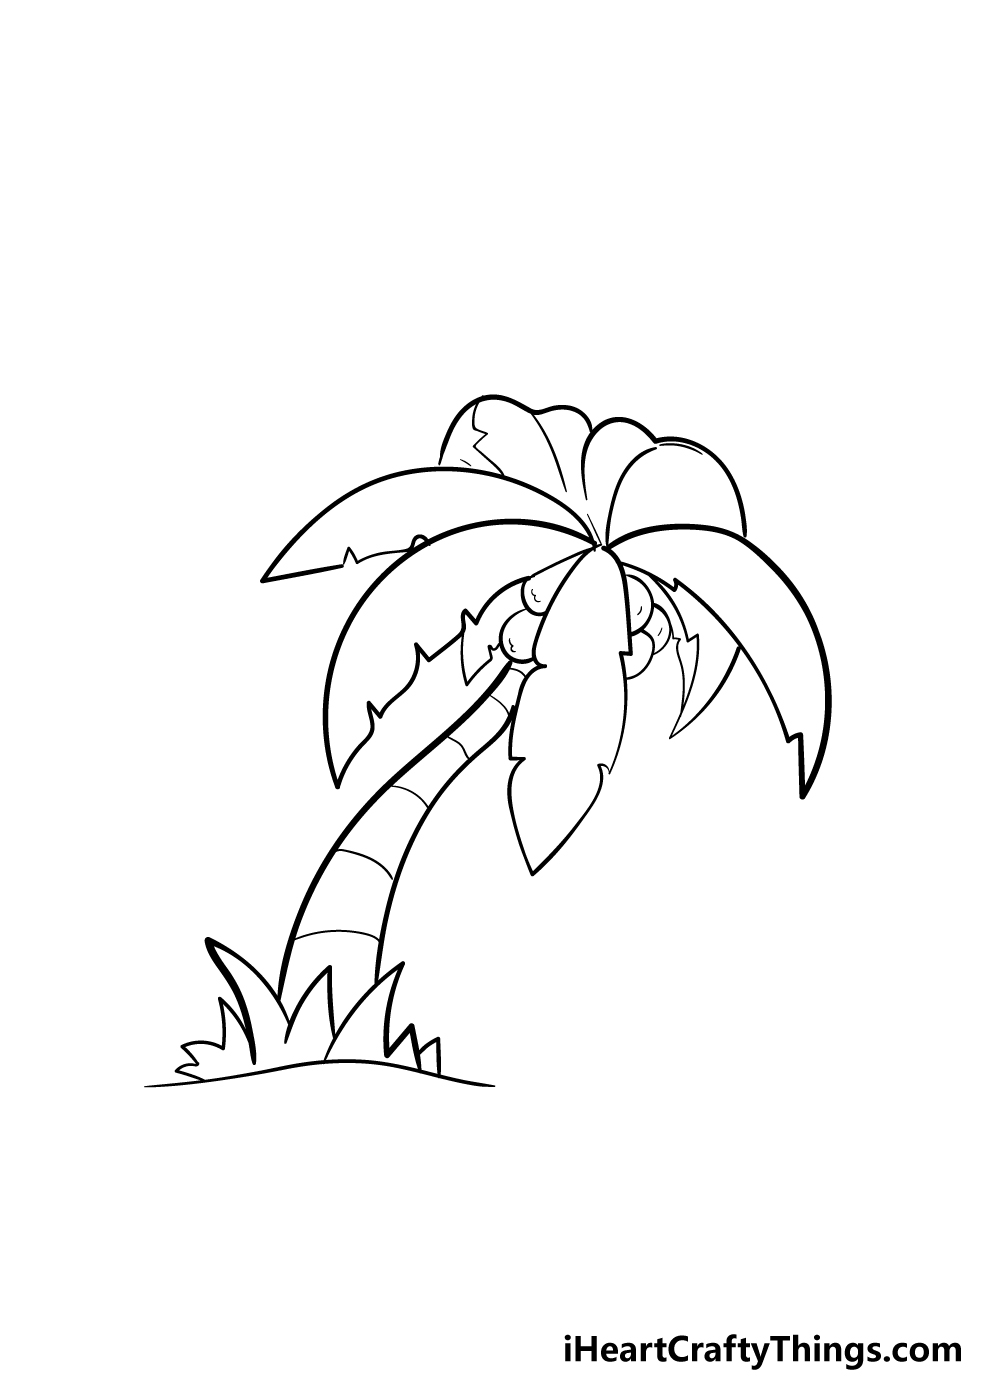
For this step of our guide on how to draw a palm tree, simply draw in some circular shapes between the leaves near the center of the top of the trunk.
They will fill in the spaces between the trunk and the leaves that were left in the previous step.
Then, draw in some horizontal lines long the width of the palm tree trunk to give it some texture.
Step 7 – Draw in some final details
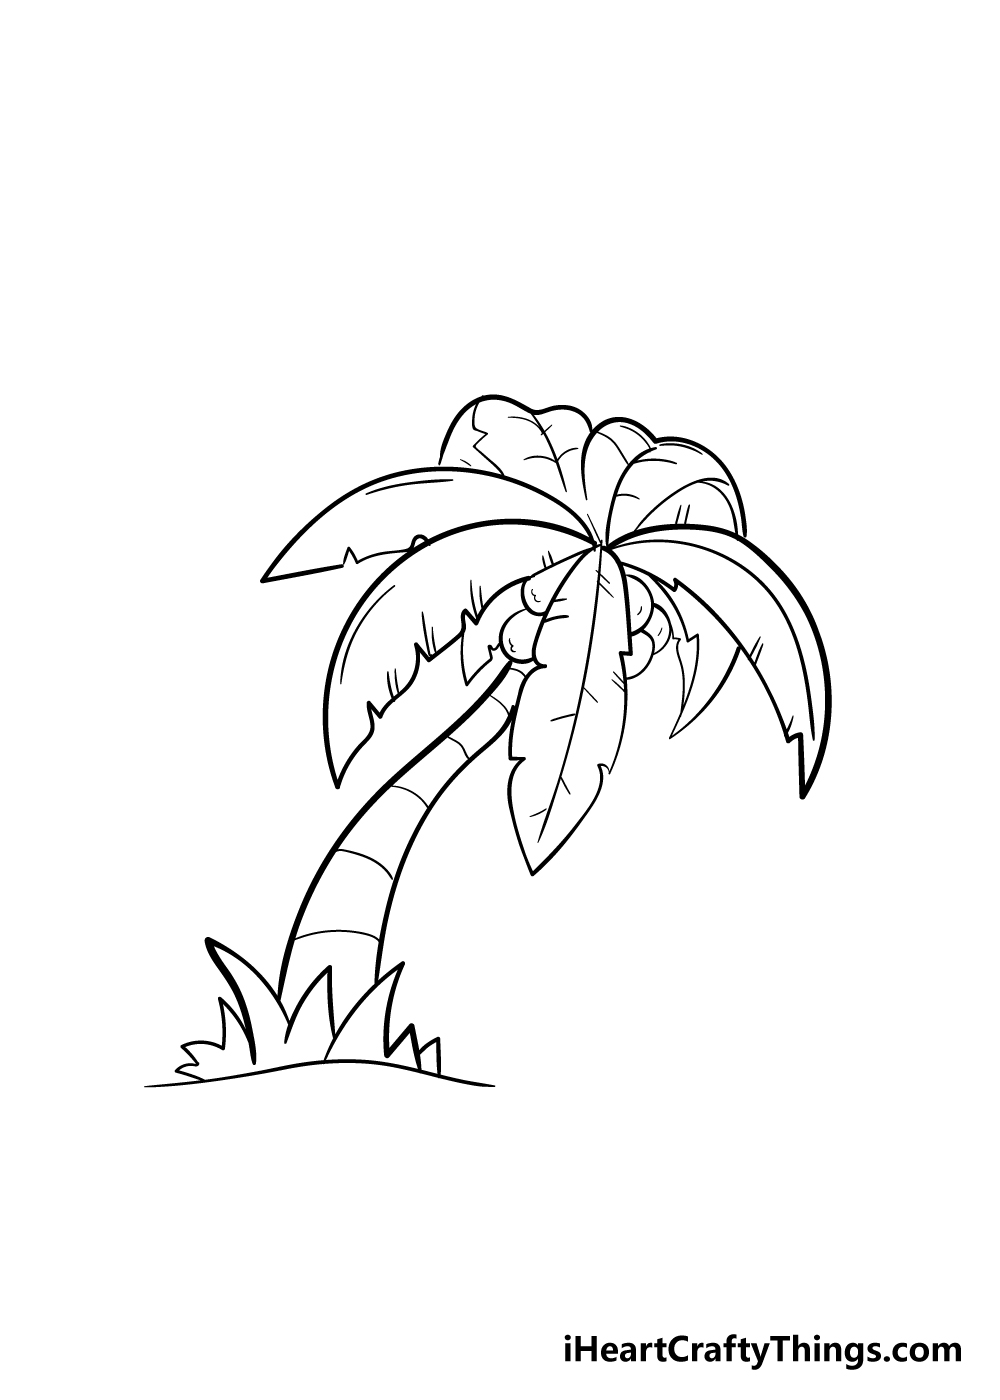
Your palm tree drawing is looking really good! Before you move on to the coloring, simply add some lines to the leaves to make them look a bit more textured and vibrant.
You can also add in any fun details you think would look good!
Bonus: Create A Border For This Palm Tree Drawing
Very soon, we will be covering some ways that you can add some color and backgrounds to this drawing of a palm tree. Before we do that, we wanted to go over some ways that you could add a border to the drawing.
To begin this, you will simply need a ruler to draw a rectangular border for the picture. Try to make sure that the border is equally sized on all edges of the page.
You should also ideally leave enough space for yourself to add some pictures, text or patterns to the border. With that in mind, there are a few ways that you can fill in the border.
Some may like to do a simple approach that can give the picture a more classic look. This could be done by coloring the border with a solid color like black.
If you have a large border for the image, then you may want to use something like a black marker to make coloring it go faster. You could also paint it or use any other mediums you like.
Of course, you could also draw some pictures or patterns. Maybe you could make a border of things like pineapples, umbrellas and other things you would associate with palm trees and Summer.
If you don’t feel like drawing these kinds of details, you could use stickers or other craft supplies in the border instead. These ideas are all fairly simple, but sometimes the simplest ideas are the best!
Adding a border can really take your drawing to the next level and would make it perfect to use as a poster or a gift for someone. What are some ideas you have for a border to finish off this drawing in style before the final step?
Step 8 – Finally, give your palm tree some color
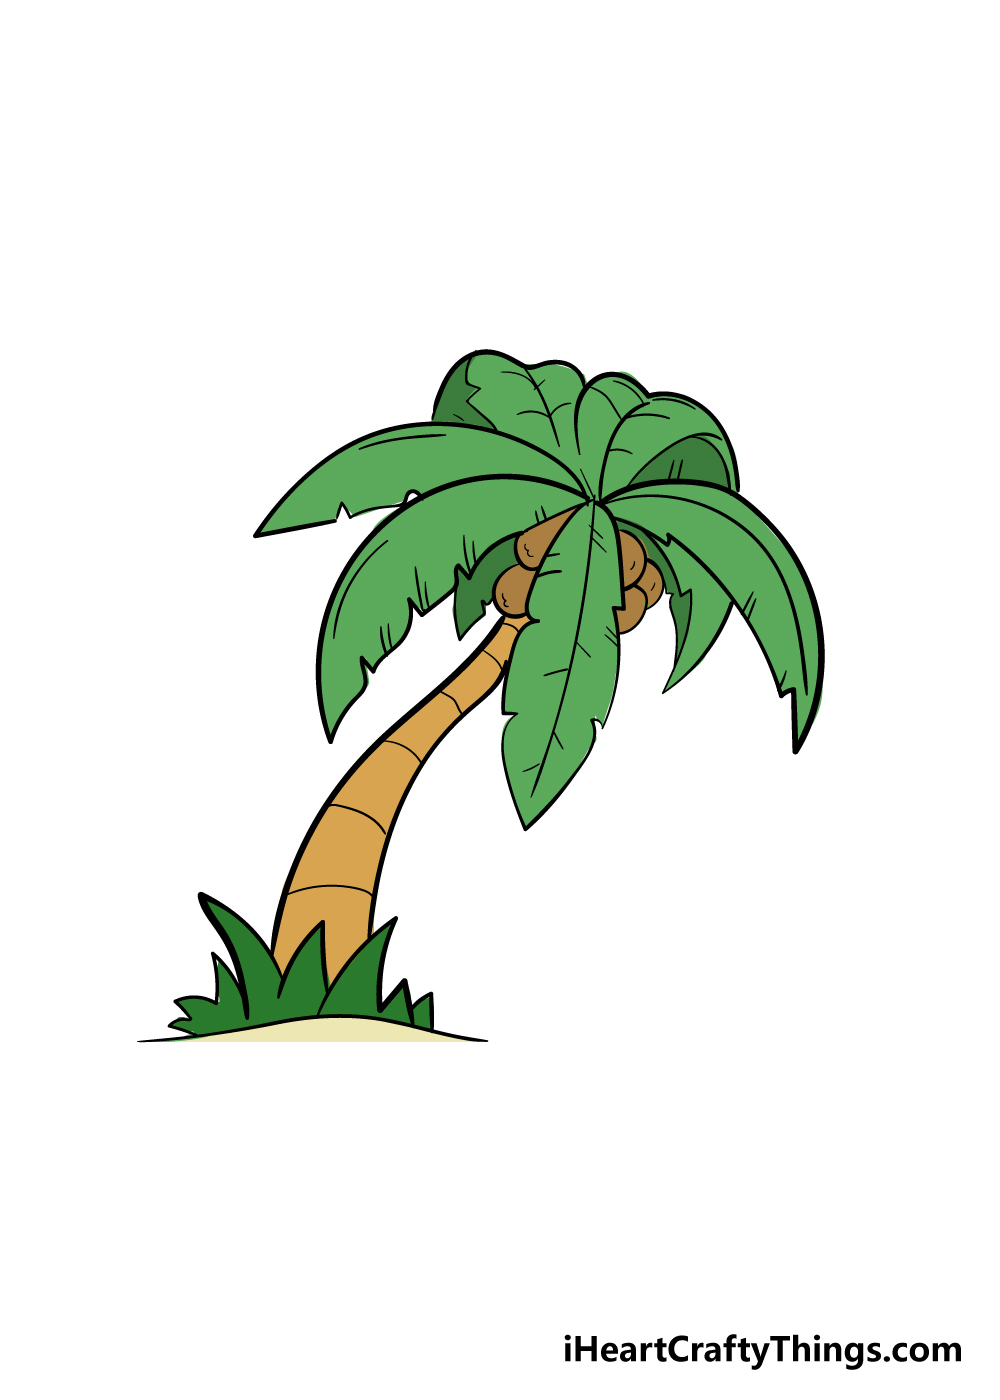
I hope you’re ready for even more fun because now that your palm tree drawing is finished, you can have some great fun coloring it in!
This is a step where you can let your creativity shine and pick your favorite colors to finish it off. We have shown you one way to color it in, but you should go with your creative instincts.
Maybe you could even draw in a beautiful ocean background with a sunset!
If I were coloring this in, I would use some watercolor paints to give it a beautiful, soft look. That’s just one option of many though, so what colors and mediums will you choose for your drawing?
4 More Ways To Make Your Palm Tree Drawing Unique
Have a fun and relaxing time as we make this palm tree sketch even greater!
When we think of palm trees, we probably think of a tropical beach setting. That would be the perfect background for this drawing of a palm tree!
This could be as simple as adding a horizon line behind the palm tree and then making it blue. You could also make it more detailed with some waves or maybe some islands incorporated as well.
What other details and elements could you make to create a wonderful ocean setting for this image?
The beach is just one of many places you could see a palm tree, however. That’s why you could also create any number of other background settings for this image.
It could be in a desert oasis, a backyard poolside or maybe at a lavish hotel. These are just a few possibilities for where you could set this palm tree.
Can you think of any other places where you may expect to see a palm tree?
You could also populate this palm tree drawing with some more trees. If you were to do this, then it would be great to add a few more palm trees to make it even more of a tropical paradise!
Of course, you do not need to stick to just palm trees when it comes to populating the image. You could add any other trees or plants you like to create exactly the scene you want.
What trees can you think of to add to this scene?
Finally, we think it would be great to add some human characters to this palm tree sketch. The characters you add would depend on the background setting you have in mind for this artwork.
For example, if you set it at a beach, then having people in swimming gear would be perfect. You could even base the characters on yourself and people you know for an extra fun touch!
What sorts of poses would you use for these human characters?
Your Palm Tree Drawing is Complete!
We hope that this guide we put together on how to draw a palm tree helped you to have a relaxing, fun time learning how to draw this beautiful tree!
We tried to separate this guide into steps that would be easy to follow and also allow for some creative inputs from you!
Now that you have a completed palm tree drawing, the fun can continue with a beautiful background and maybe some wildlife like tropical birds or crabs scurrying around!
You can also get some amazing color variations with mediums such as acrylic paints, watercolors, colored pens and pencils.
This is a chance to get out your favorite art tools and let the creativity flow!
There are lots more step-by-step drawing guides like this one coming your way soon, so make sure to check out our page often to make sure you catch them as they come out!
We always love to see how you all use and interpret these guides, so we would love to see your palm tree drawing when it’s done!
You can share it on our Facebook and Pinterest pages for us to see, and we can’t wait to be blown away by your stunning artworks!
Here Is An Easy Palm Tree Drawing To Inspire You!

A palm tree brings to mind tropical vacations and relaxing days by the sea, so drawing one shouldn’t be a difficult, frustrating task.
Our artist Freddy has created this easy palm tree drawing for kids to help you with this artwork!
He added a lot of details to the trunk and the leaves of the tree that may make it look difficult to do, but it’s actually easier than it looks.
If you take it slowly and focus on each individual deltail, then you can do it easily.
This is your drawing, so you could also simplify it if you wish. Making the lines simpler and removing some of the details would be a good way to make it easier.
But if you’re willing to put in the time and the effort, then you will be able to achieve this design!
