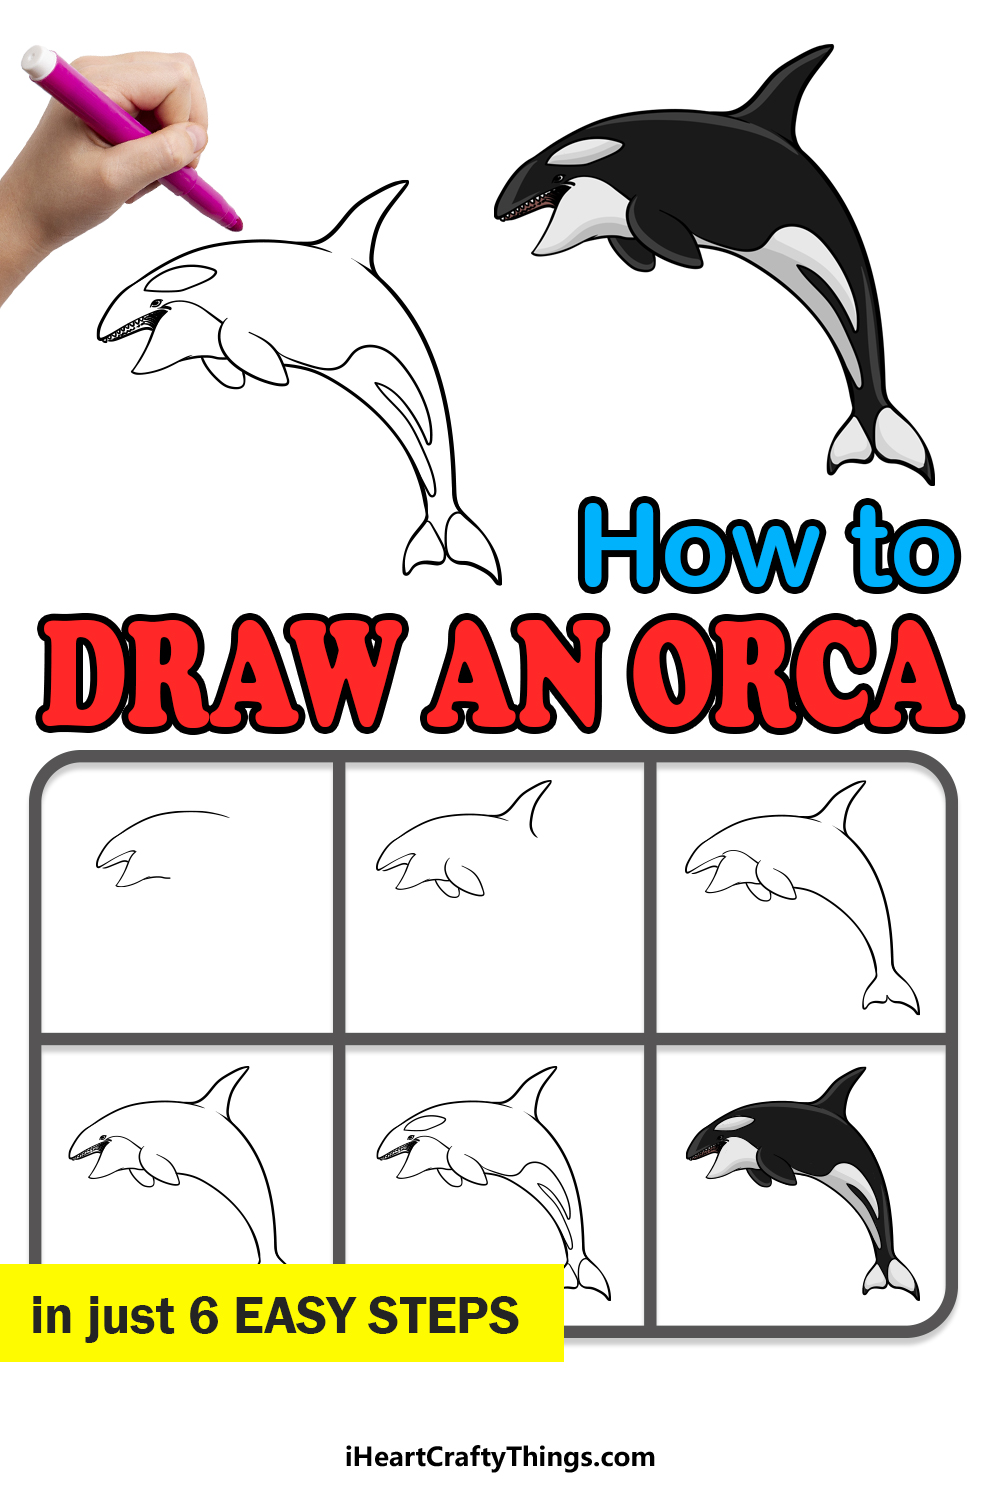
If you want to find out the easiest way to learn how to draw an orca, this guide for kids is meant for you! You will soon be able to recreate this incredible creature.
Orcas are as deadly as they are beautiful. There is a reason they are also called killer whales! They are known as apex predators, meaning that they don’t have any natural predators that come after them.
They also stand out because of their distinctive black and white color scheme, and this makes them popular to depict in artworks. It’s not always easy to get the drawing looking right, though!
That’s why I made the steps of this guide easy for anyone to follow. If you work with the steps, take your time and try your best then you will have an incredible orca in no time!
Make Your Orca Drawing In A Few Easy Steps!
How to Draw An Orca – Let’s Get Started!
Step 1

To start this guide on how to draw an orca, we will be starting with the head and mouth. First, use a long curved line for the top of the head and the start of the back for the orca.
Then, we will bring some straighter lines inward for the mouth. You can draw the other side of the mouth interior next.
The mouth may look a bit bare with no teeth for now, but we will amend that later!
Then, finish off this step by drawing the bottom of the head with another curved line.
Step 2 – Next, start drawing the fins and flippers
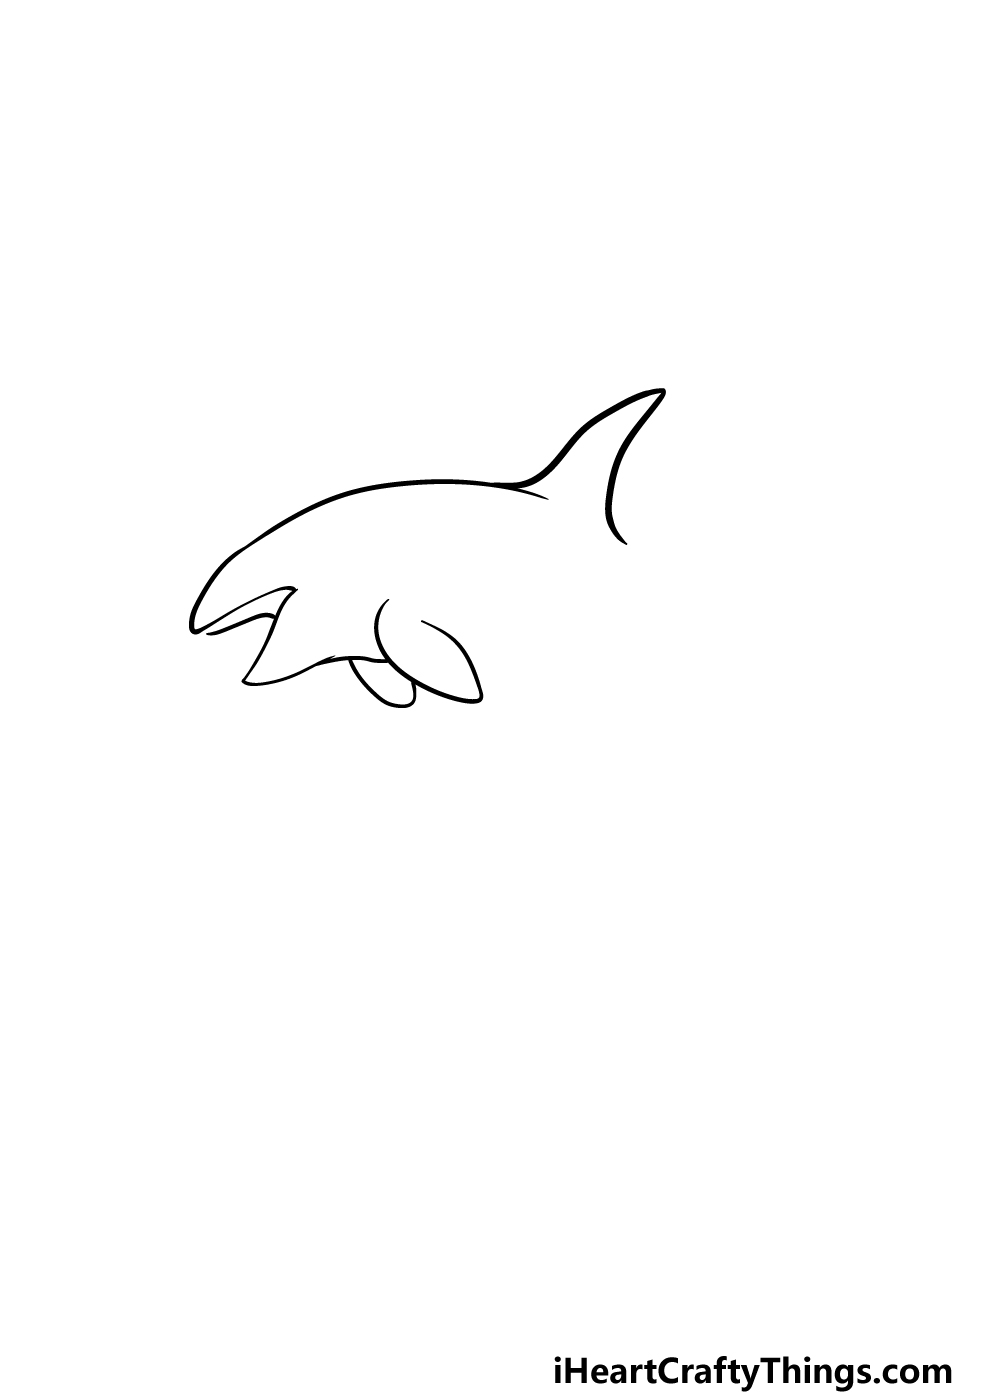
For this next step of your orca drawing, we will be drawing the fins and flippers for the orca.
First, draw a curved line that has a dull point at the bottom of it for the first fin near where the bottom of the head ended. Then, use another curved line for the other fin next to it.
Next, we will be drawing the dorsal fin for the orca. This will be drawn on the back with another curved line that has a rounded point to it.
The point of this fin will be a bit sharper than the ones for the flippers, but it will still be a bit rounded. Once you have drawn all of these aspects, we can then move on to the next part!
Step 3 – Draw the rest of the body outline
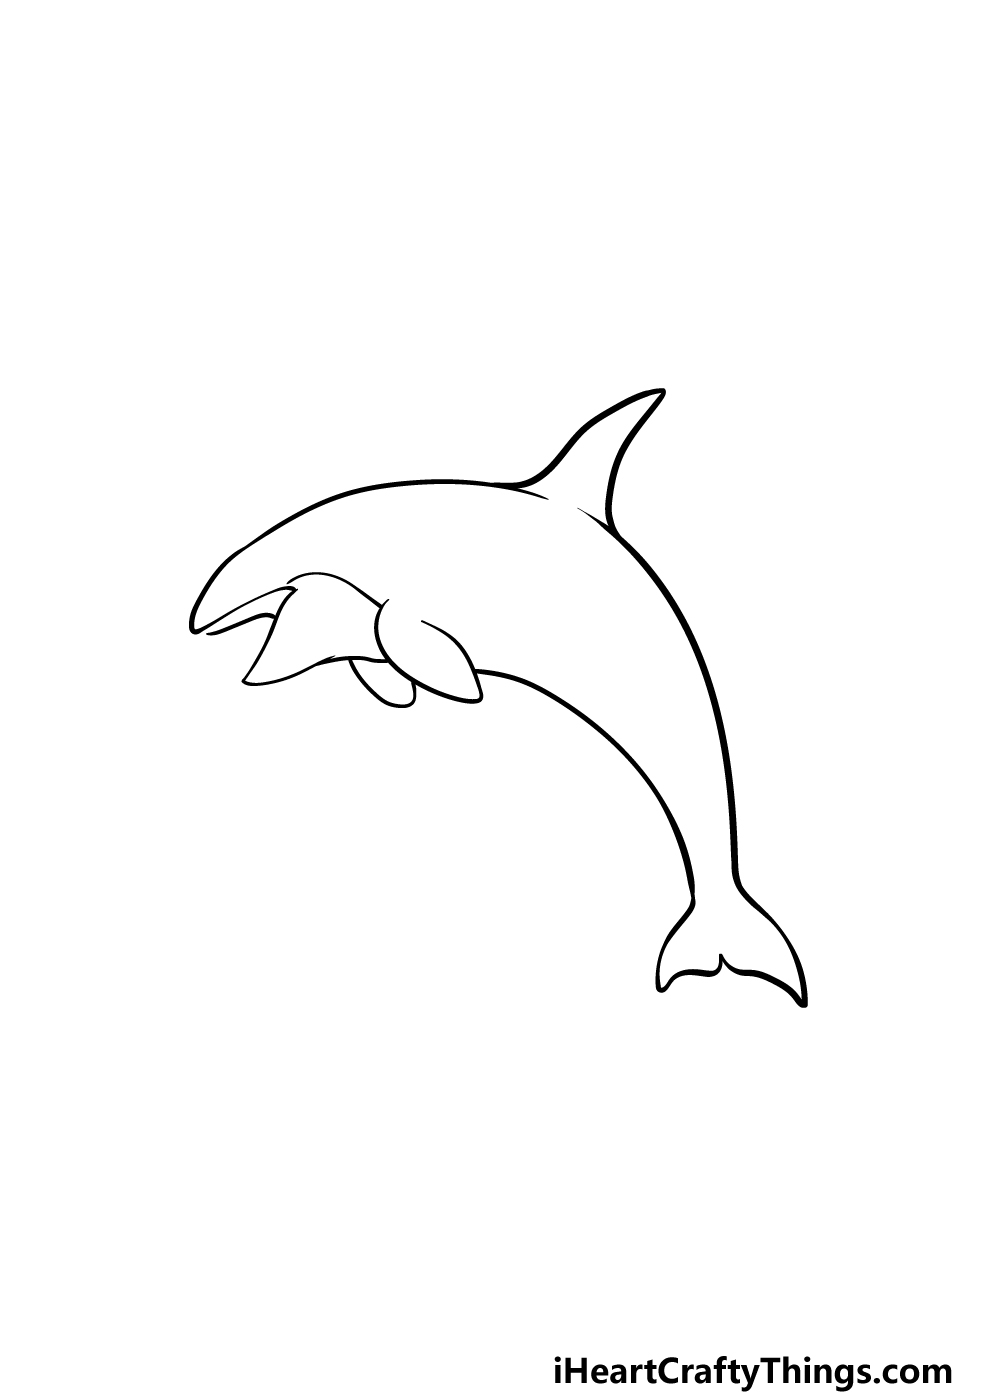
Our third step in this guide on how to draw an orca will be all about finishing off the outline for this creature. First, we will be drawing two long, curved lines.
The first will extend from the base of the dorsal fin, and the other will come back from the flippers.
As these lines go, they will move closer together, as shown in the reference image. Near the end of these lines, you can then add the flipper at the end. It will have two points poking out with a dip at the center of it.
Be sure to follow the reference image closely as you draw to make sure you don’t get lost!
Step 4 – Now, draw some facial details

We mentioned earlier that the orca is an apex predator, and it wouldn’t be effective at that without some sharp teeth! As promised, we will add some in this step of your orca drawing.
For this step, you will find it much easier if you use a pen with a very thin tip or use a really sharp pencil. That is because the teeth details are going to be really small and fiddly.
When you’re ready, draw some tiny triangular shapes along the upper edge of the mouth. Once you have drawn these, add some shading near the back of the mouth.
Finally, we will be drawing the eye for the orca. This eye will be rather small and close to the corner of the mouth. Then you will be ready for some final touches in the next step!
Step 5 – Finish off your orca drawing
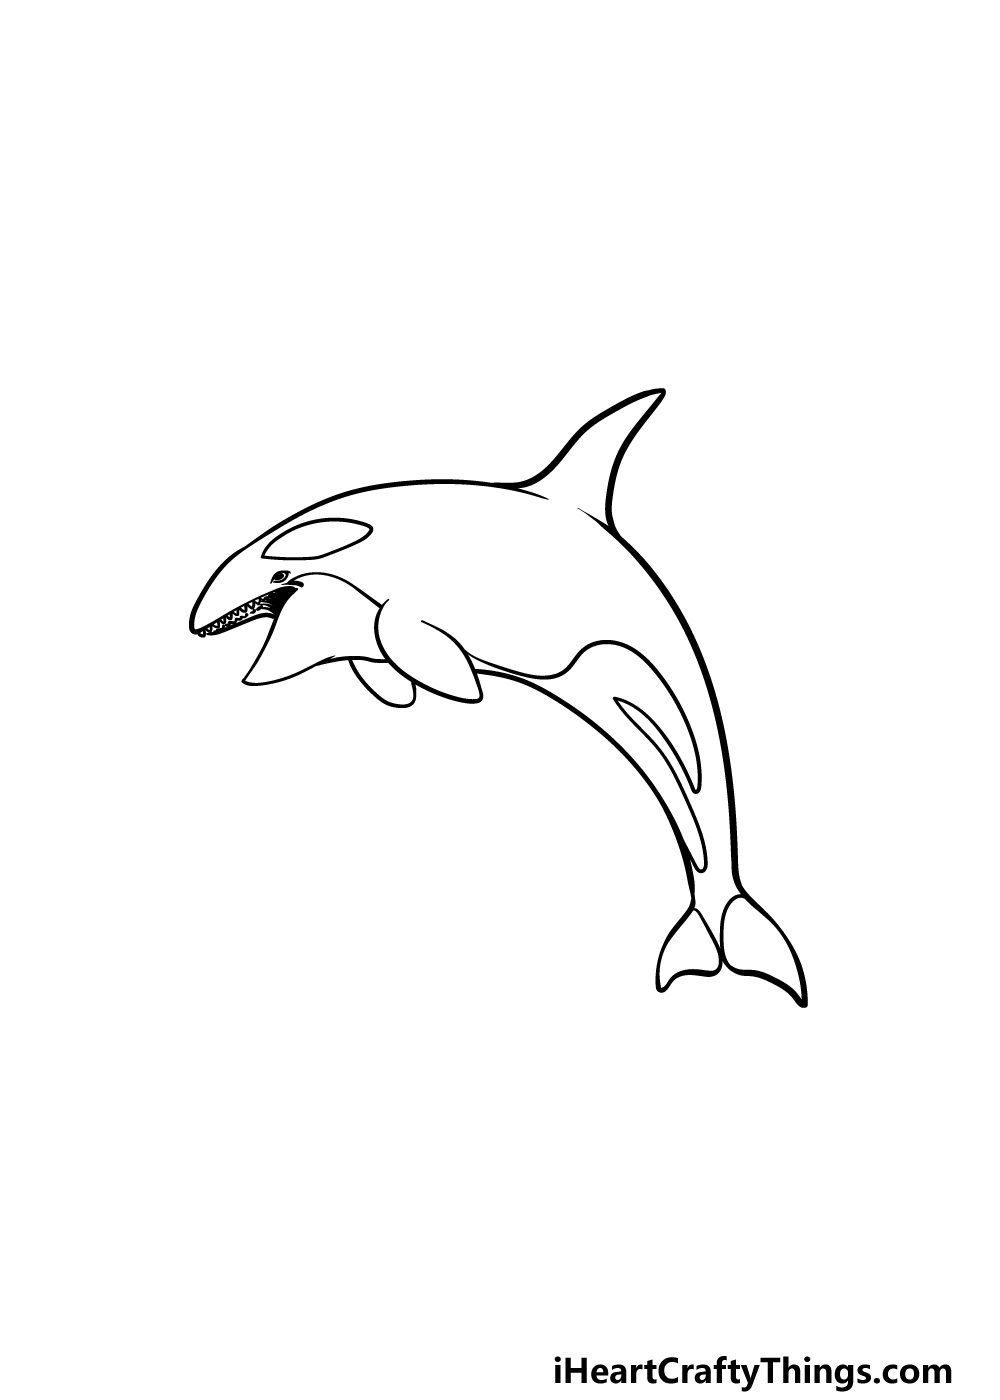
For this step of our guide on how to draw an orca, we will finish off with some pattern details.
You can draw a rounded, football-like shape near the head and then draw some larger shapes near the base of the body.
Once you have added these details, you are ready for the final step! Before you proceed, you could also add some details of your own.
An idea for this would be to draw a background that has more fish or marine life swimming around this orca.
This is just one idea you could go for, so what else can you think of to finish off this image?
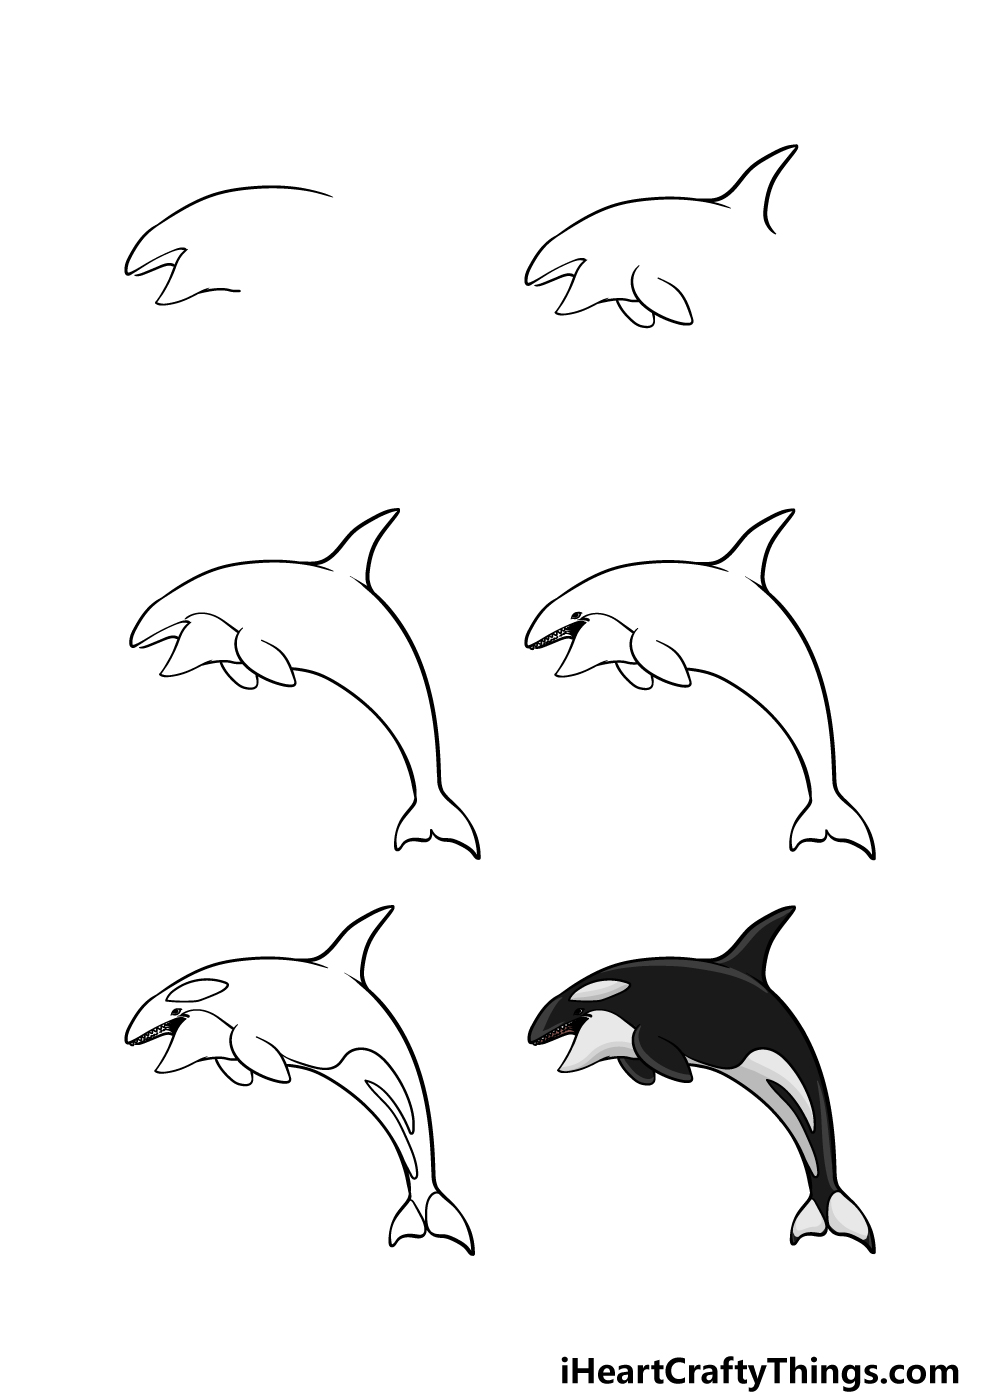
Step 6 – Finish off your orca drawing with some color
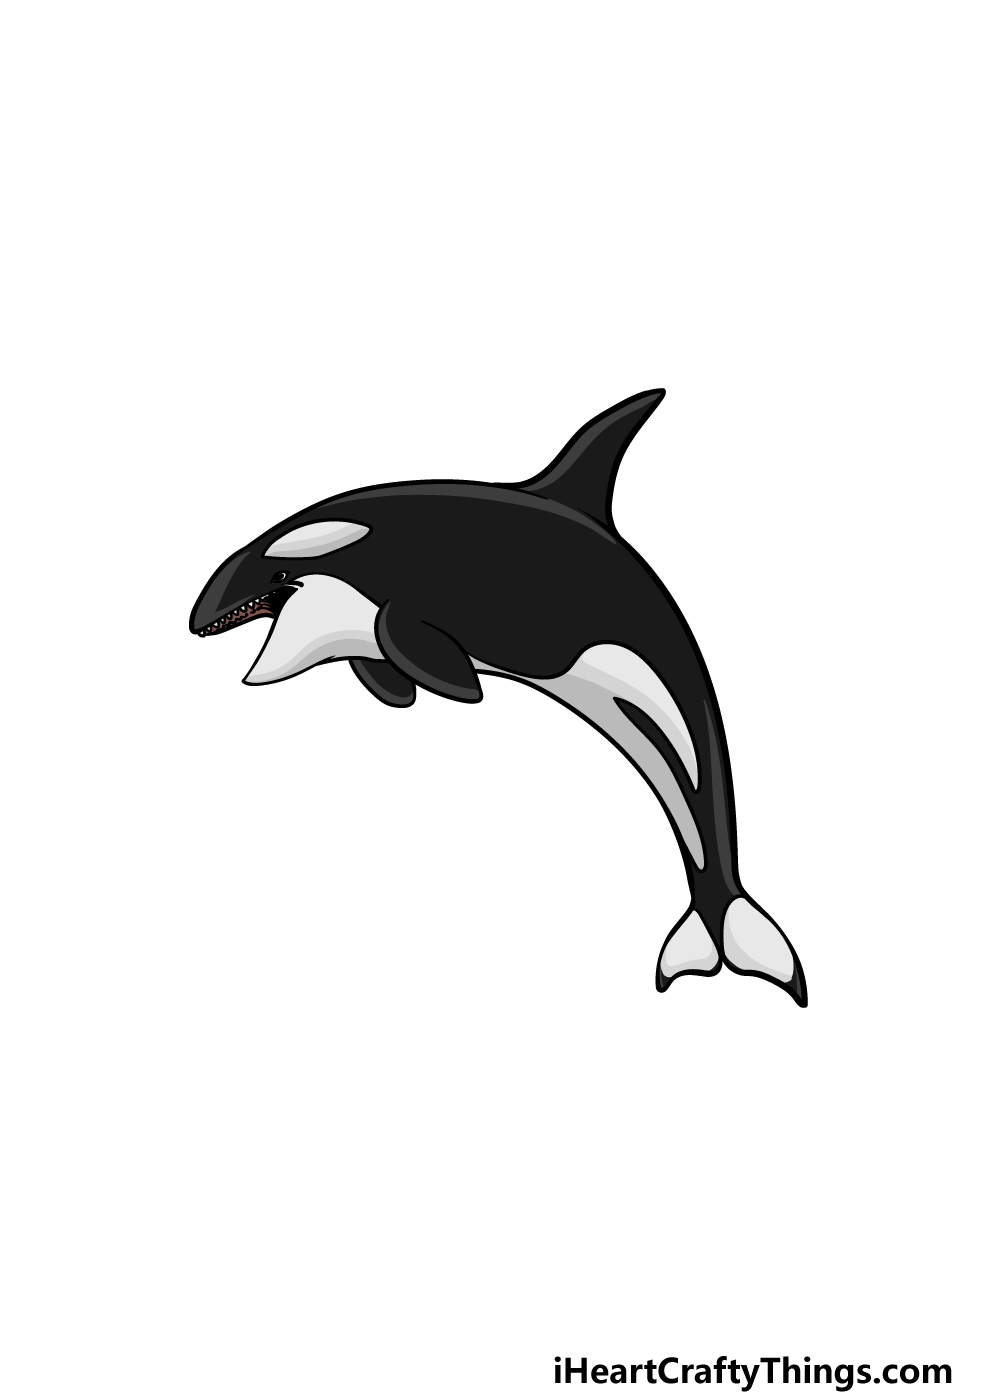
Orcas are not exactly known as the most colorful of creatures, as they have a striking yet simple black and white color scheme to them.
This is what we went with in our reference image in order to give it a more realistic look, but there are also loads of ways to switch it up.
You could use your favorite bright colors for a more stylistic image, or experiment with the colors for the background.
Another way to keep the colors looking more dynamic is by utilizing different art mediums. Perhaps you could give the orca or the background a softer look with some watercolors or colored pencils.
Or maybe you would prefer a brighter look with some acrylic paints and colored markers. The choice is up to you, and we can’t wait to see how you finish off this drawing!
Here’s how you can make your orca drawing even better…
Make your majestic orca sketch even better with these fun and easy tips!
This drawing of an orca looks like it is leaping from the water of the ocean. That would be a great way to add to this artwork!
By drawing some water and splash effects, you could make it look like it’s leaping up. To do this, you may also want to remove the tail to make it look like that part is still underwater.
Or, you could make it look like it is completely out of the water.
Orcas are social animals, so if you had fun drawing this one then you could add some more to the image. They could be posed similarly to the one in this guide, or they could be in different poses.
A pod of orcas can contain a few of these majestic creatures, so you could add as many as you like! If you need some help portraying other poses, maybe try to look up some images online to help you.
Adding other orcas to your orca drawing is one idea, but you could also add some other ocean creatures. Some more obvious choices would be some dolphins or maybe a great big whale.
You could also go for some sharks or maybe something even more unusual like an octopus. The ocean is filled with many creatures to choose from!
If you add some more ocean creatures, what are some that you think would best suit this amazing image?
Once you have added all of your extra creatures and water details, you could then finish it off with a background. The background for your orca sketch could be as simple as showing the horizon of the ocean with some clouds.
Or, you could start to add elements such as ships, big waves or maybe some desert islands. You could even make it look like the view of this orca is from under the surface of the ocean.
What are some backgrounds you think would look great for this picture?
Your Orca Drawing is Complete!
With the colors and final details added, that will conclude this guide on how to draw an orca!
We hope that this guide made it so that you could replicate this incredible creature with no frustrations, and also that it was a lot of fun!
Now you can keep it going, and some ways to do this would be to draw a background, add more sea creatures or experiment with some awesome colors and art tools.
It’s up to you now, so have fun being creative!
When you’re ready for more, you can visit our website for more incredible drawing guides. Be sure to keep checking in to never miss any new guides we have coming out!
We would love to see how you did justice to this amazing animal in your orca drawing, so please share your finished artwork on our Facebook and Pinterest pages!