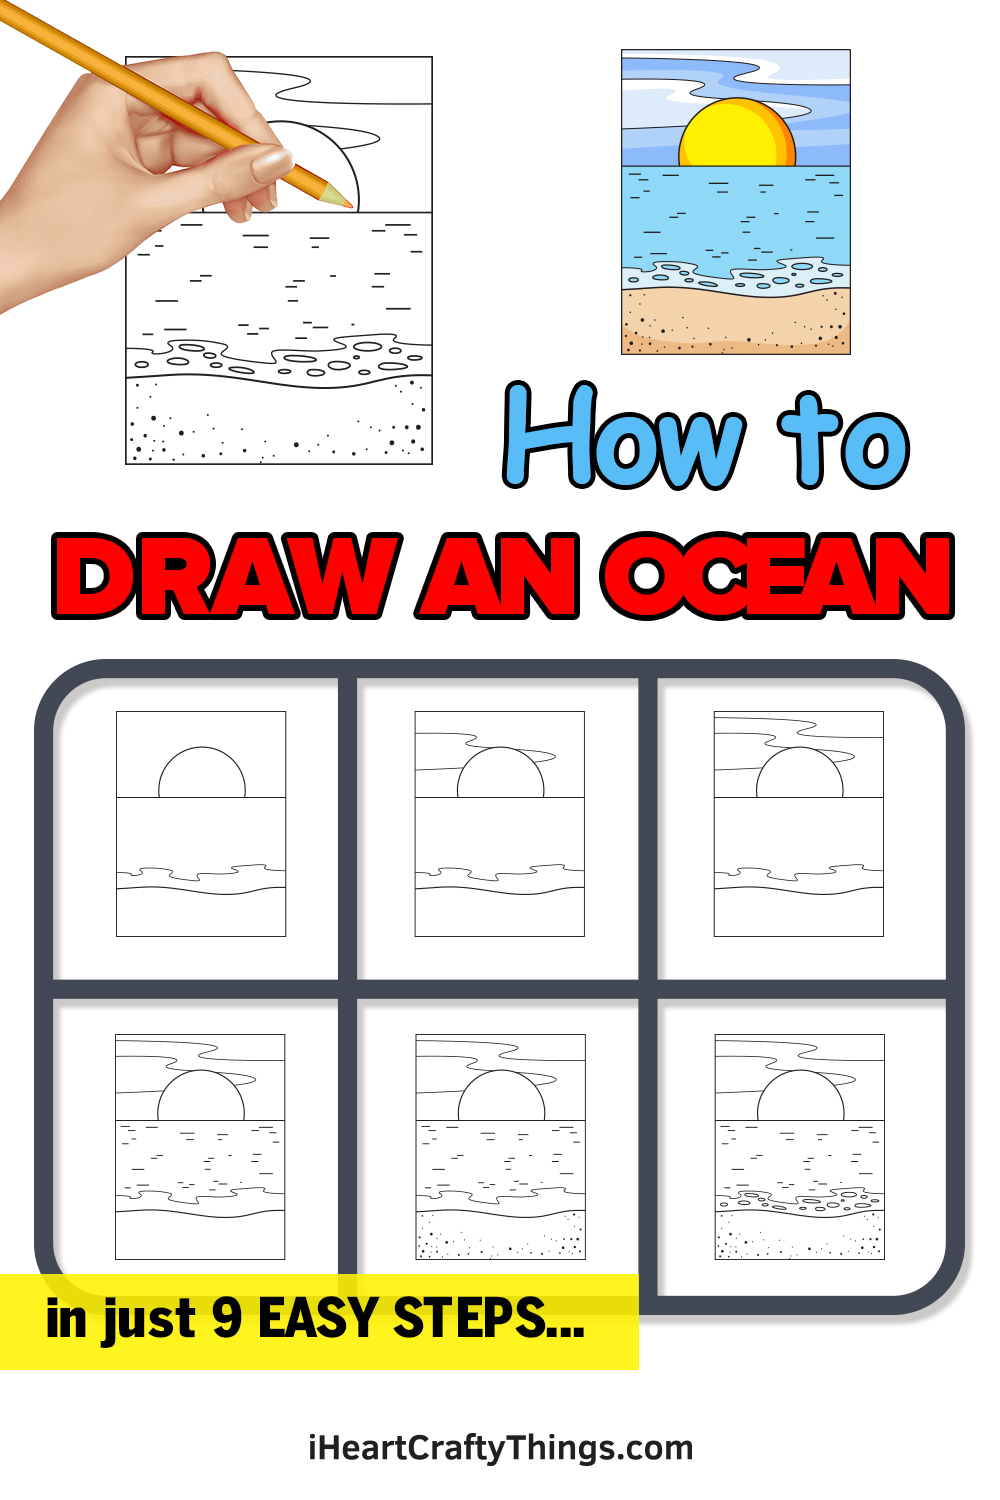
Create some relaxing vibes as you learn how to draw an ocean thanks to this guide for kids! I’m going to show you how you can draw a tranquil ocean of your very own.
Pretty much everyone feels the same feeling of relaxation from the beach. There’s something about the beautiful vistas and crashing waves that feels good for the soul.
Not everyone can go and visit an ocean whenever they want to, though. Creating an ocean drawing can be the next best thing, and you’re about to learn how!
You’ll see how to draw the beach itself, some gentle waves and even the sun setting above this peaceful scene. Once you have drawn it, you could even add a few of your own details in order to make your own personal perfect beach day.
Watch And See How To Create An Ocean Drawing
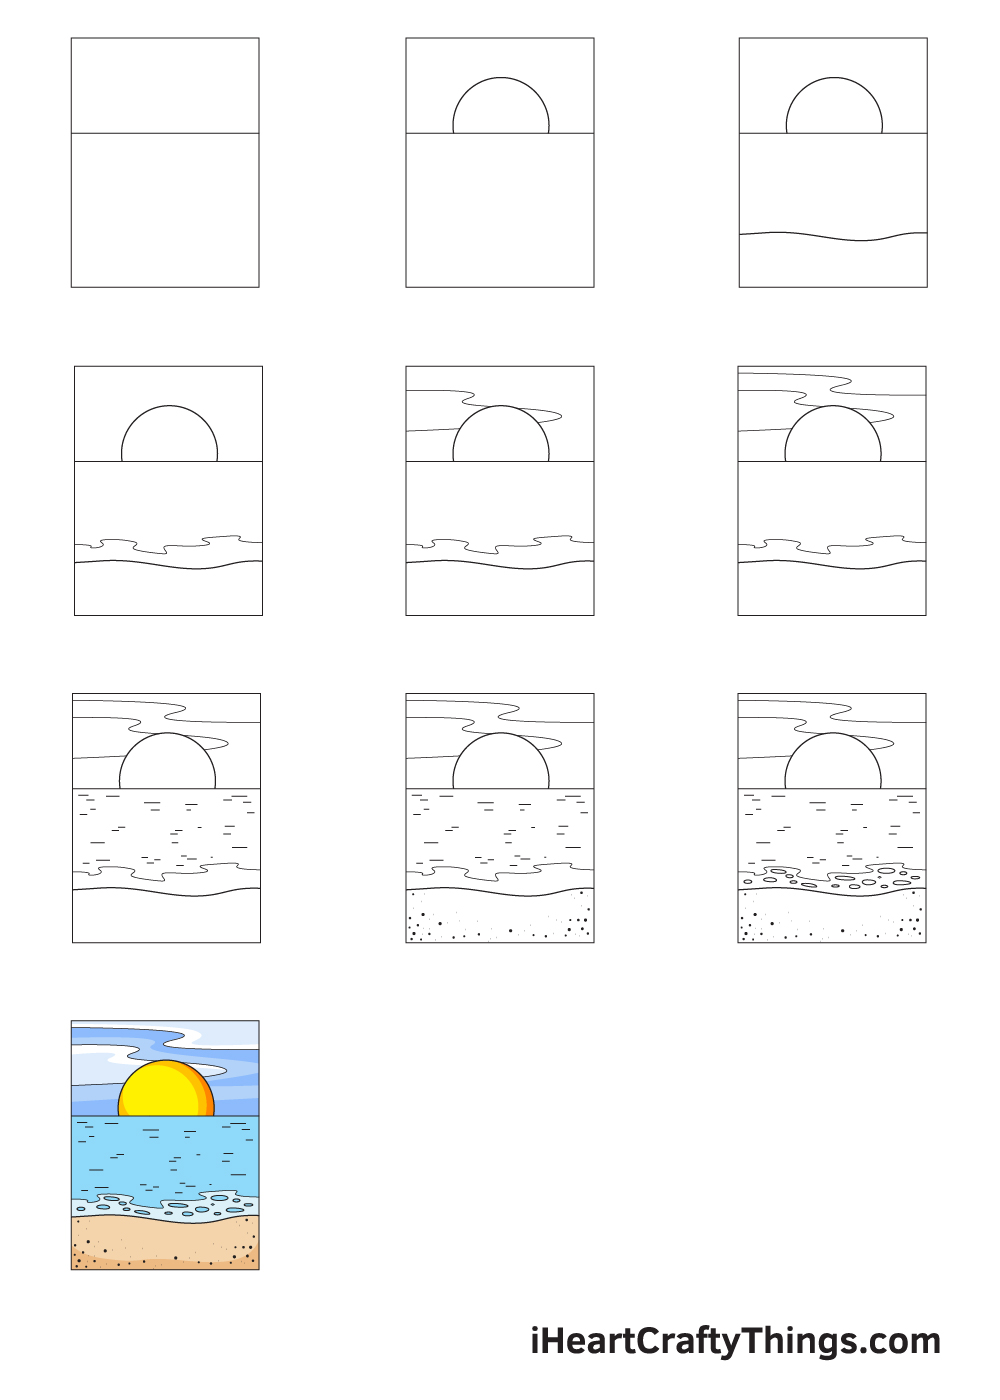
How to Draw an Ocean – Let’s get started!
Step 1

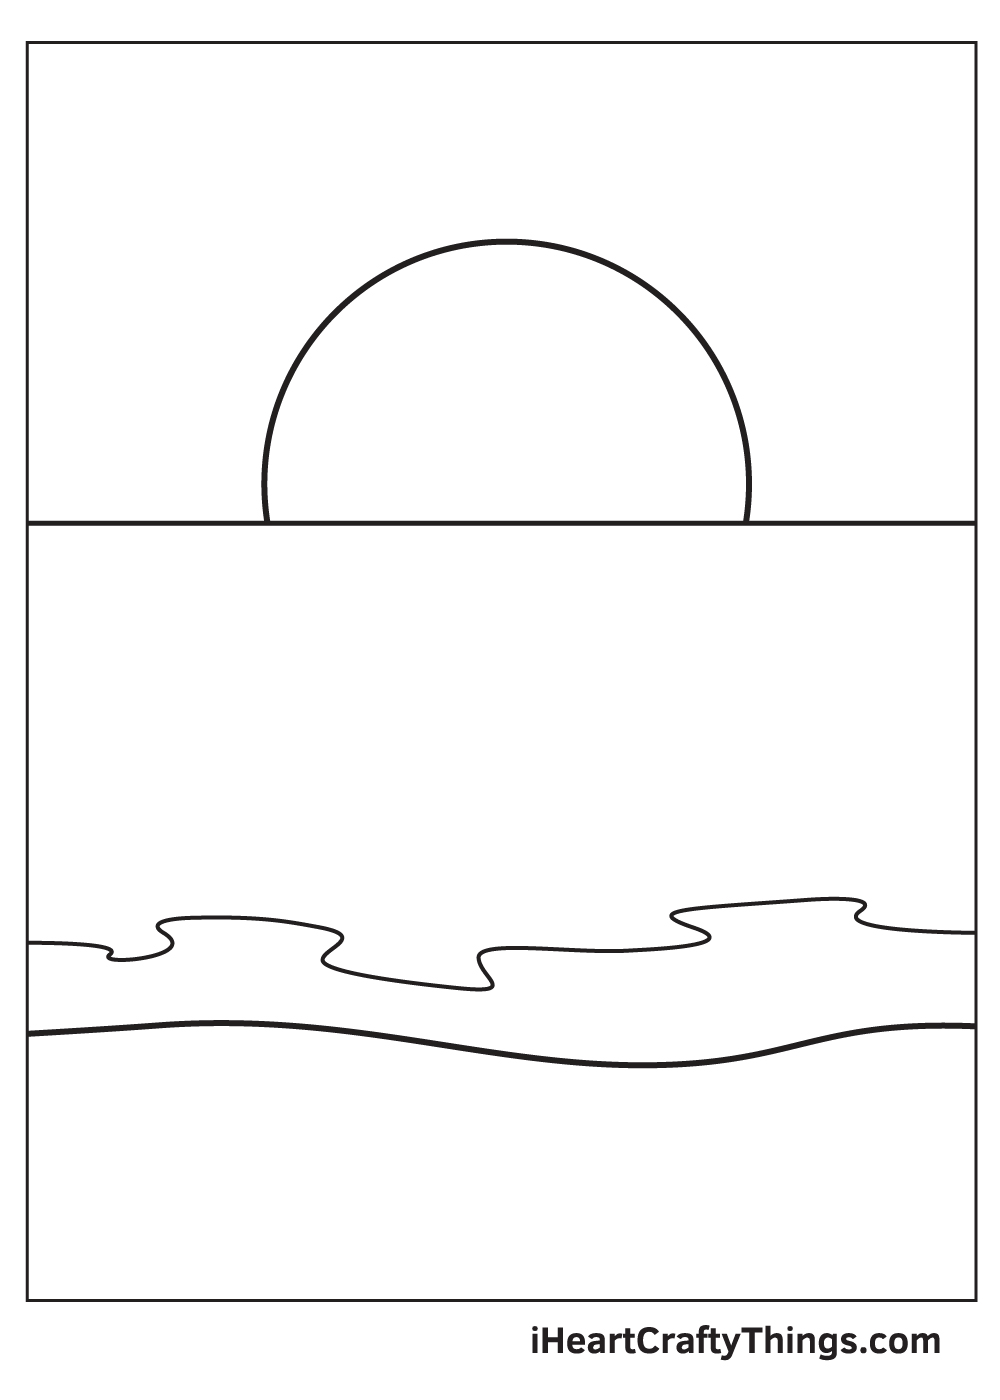
Begin by creating the horizon, which refers to the line where the surface of the ocean and the skies meet. Simply draw a straight vertical line across your paper.
Keep in mind that the line should be positioned right above the middle of your paper. It should divide your paper into two, with the bottom space relatively bigger than the top.
If you need help drawing a perfect straight line, feel free to use a ruler. This will enable you to draw a straight line flawlessly and effortlessly.
Step 2 – Draw the Sun on the Horizon of the Ocean
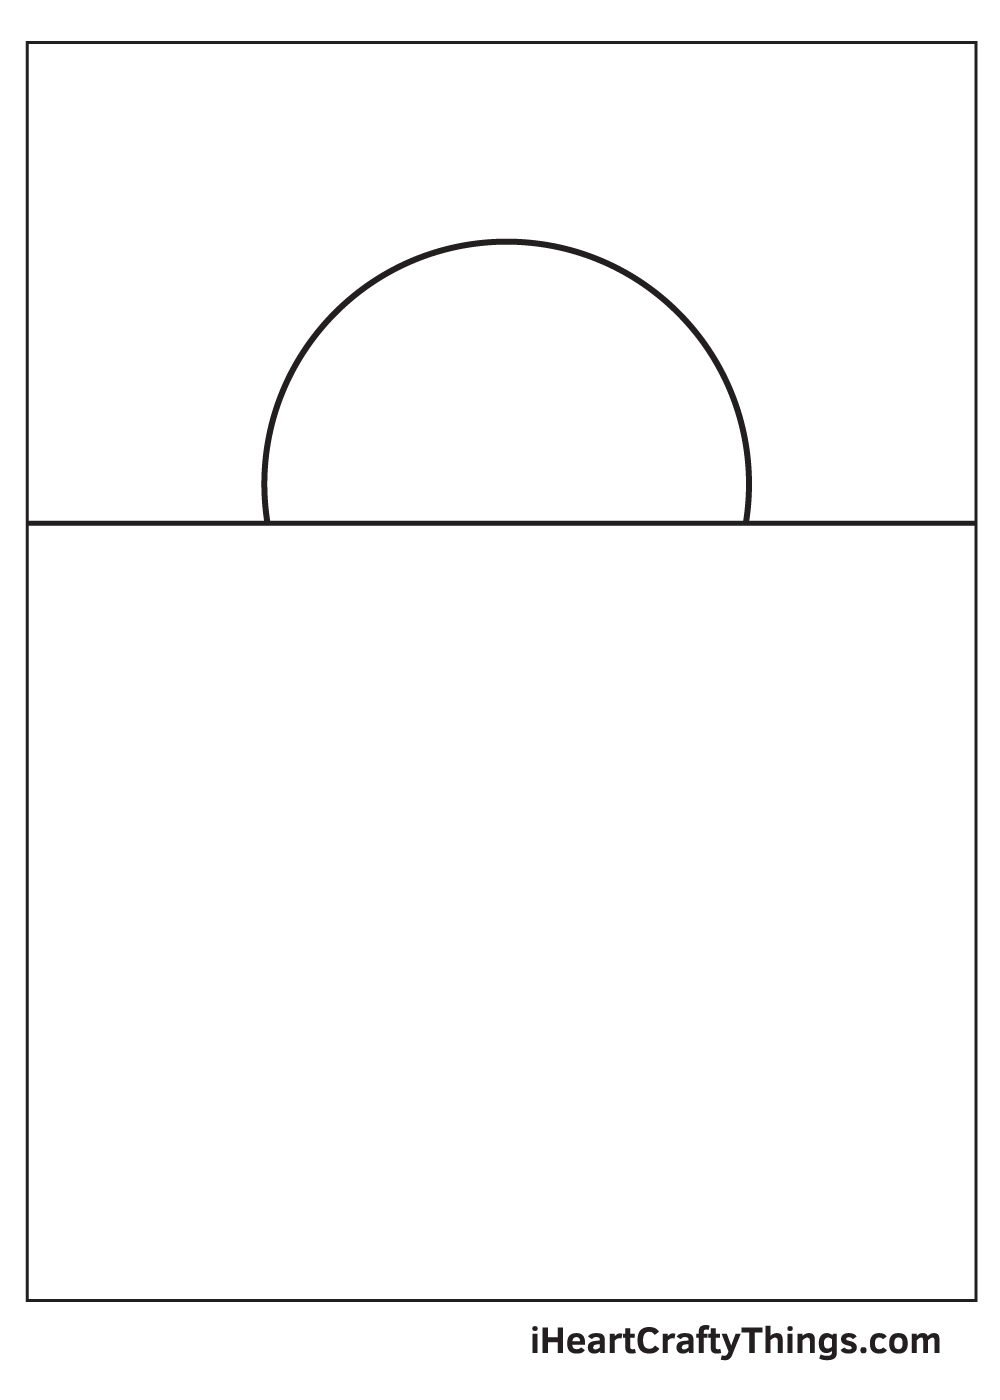
Draw a semicircle above the horizon, which is the vertical line we drew previously. This outlines the sun that is either rising or setting, depending on which you prefer.
Make sure that the sun is drawn in the middle of the horizon to make your drawing look aesthetically pleasing.
Step 3 – Create a Division Between the Sea and the Sand
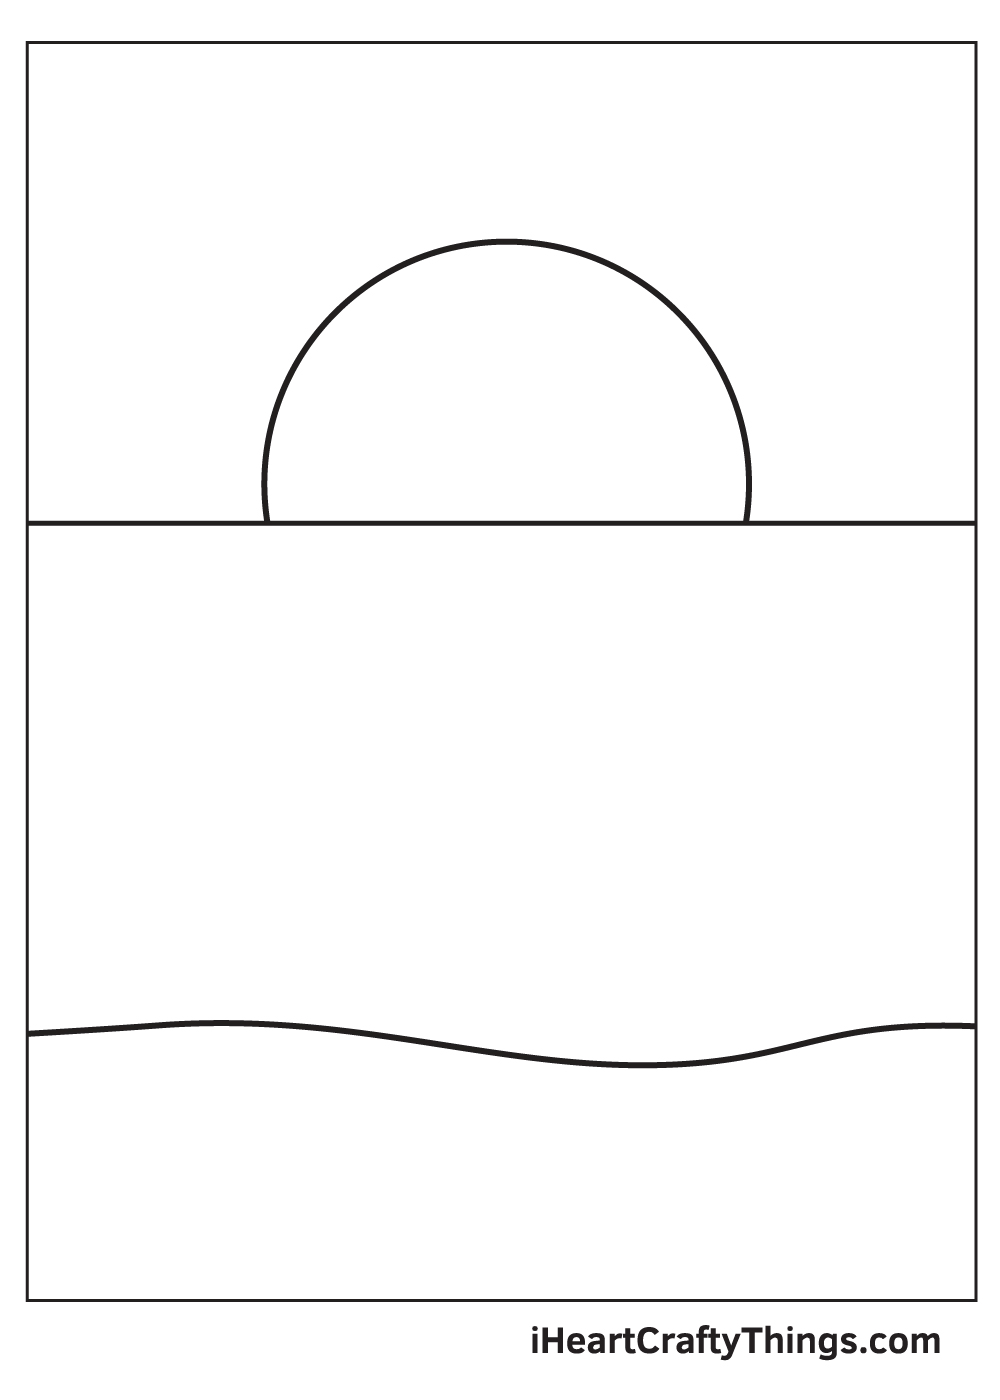
Create a space for the sand by drawing a wavy line at the bottom part of your paper. This separates the sand from the ocean.
After completing this step, the seashore should now be evident.
Step 4 – Afterwards, Add Patterns on the Ocean
Create an illusion of depth by adding patterns on the surface of the ocean. Simply draw continuous curvy or wavy lines on the edge of the ocean close to the shore.
Don’t worry if the line isn’t perfectly wavy. As a matter of fact, the more uneven this line is, the more natural the ocean waves look.
Step 5 – Next, Add Patterns All Over the Sky
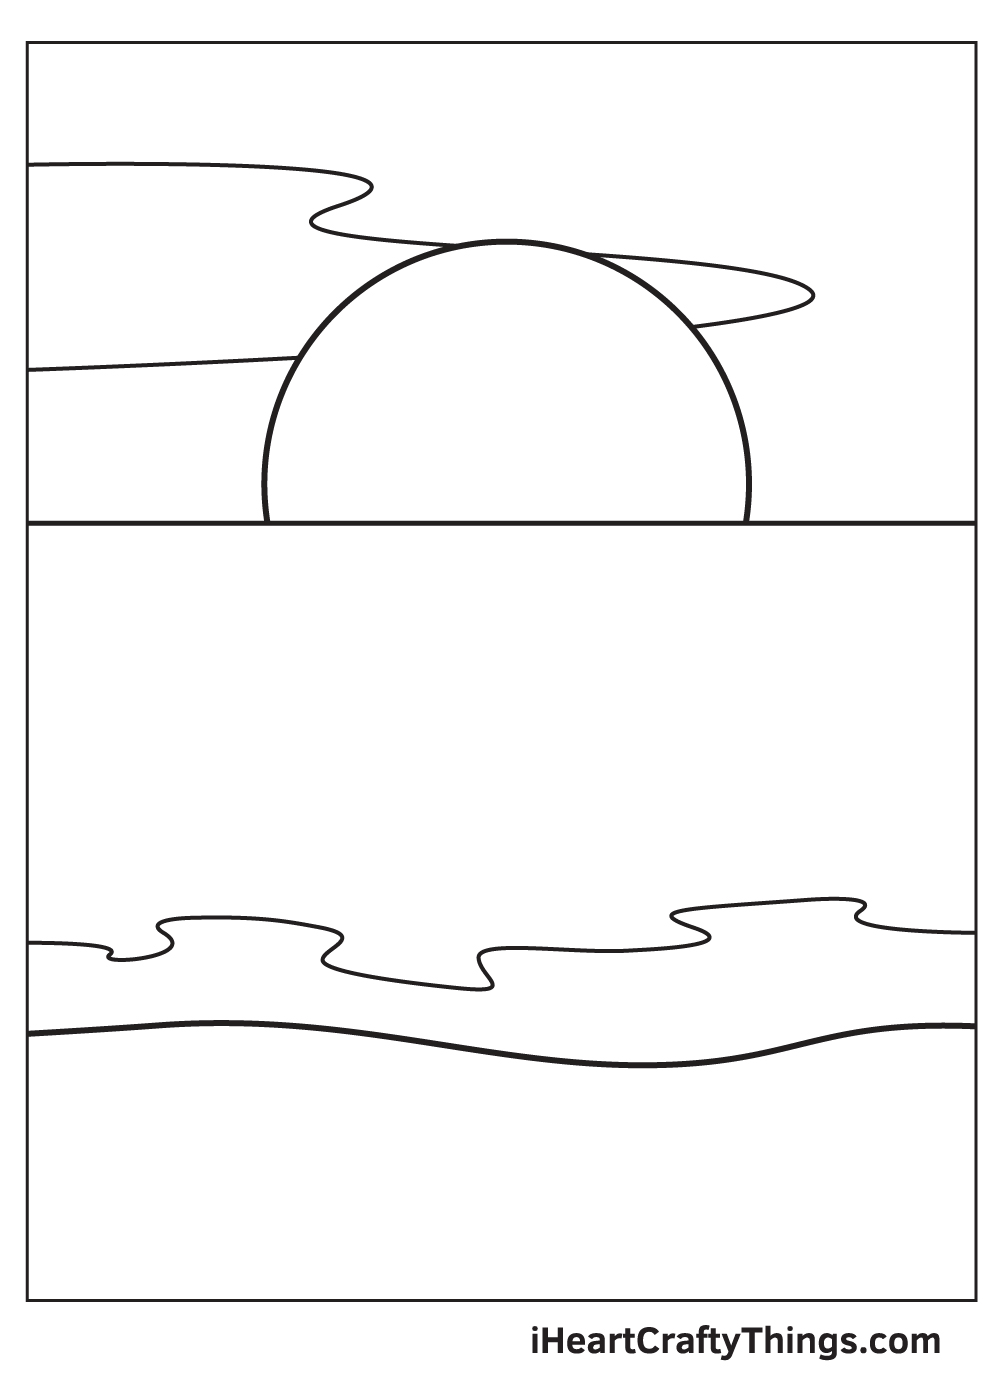
Draw a straight horizontal line emerging from the left side edge of the sky heading towards the right side.
Afterwards, form a small curve then get back on track in the rightward direction.
After getting past the sun, go on a roundabout and extend the line returning to the left side.
If you follow the steps correctly, this should form an irregular shape with curves across the sky.
Step 6 – Make the Sky Brighter to Set the Mood
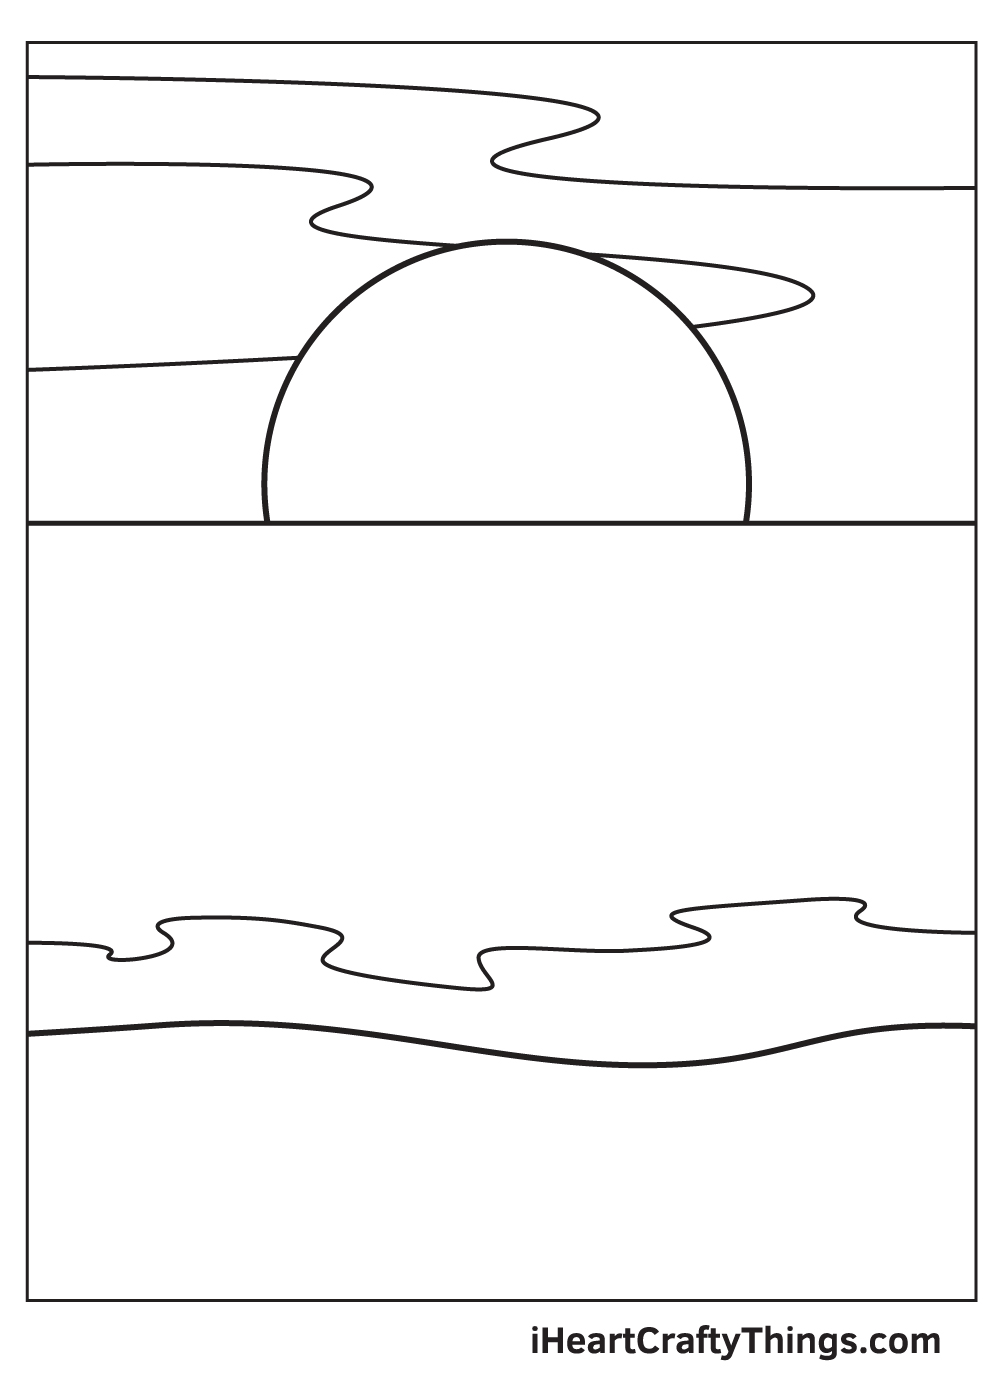
Draw another line across the sky following the outline of the line we drew in the previous step.
This line should be right above the previous one, emerging from the left side edge and extending all the way to the opposite side.
Step 7 – Then, Add More Details on the Ocean’s Surface

Adding details and patterns on the ocean is essential to add texture, making it appear dimensional and realistic.
Draw multiple short horizontal lines in different spots on the surface of the ocean. Make sure that the lines vary in length; some are quarter of an inch long while some are even shorter.
Don’t press down too hard with your pencil when drawing these lines. Draw light strokes with a gentle hand to avoid creating harsh and thick lines.
Step 8 – Now, Draw the Sand Along With its Texture

To add texture and make the sand look realistic, simply draw multiple small dots in various sizes scattered all over the surface of the sand.
Don’t forget to shade the tiny dots and make them appear pitch-black.
Step 9 – Now, Add Multiple Bubbles on the Ocean
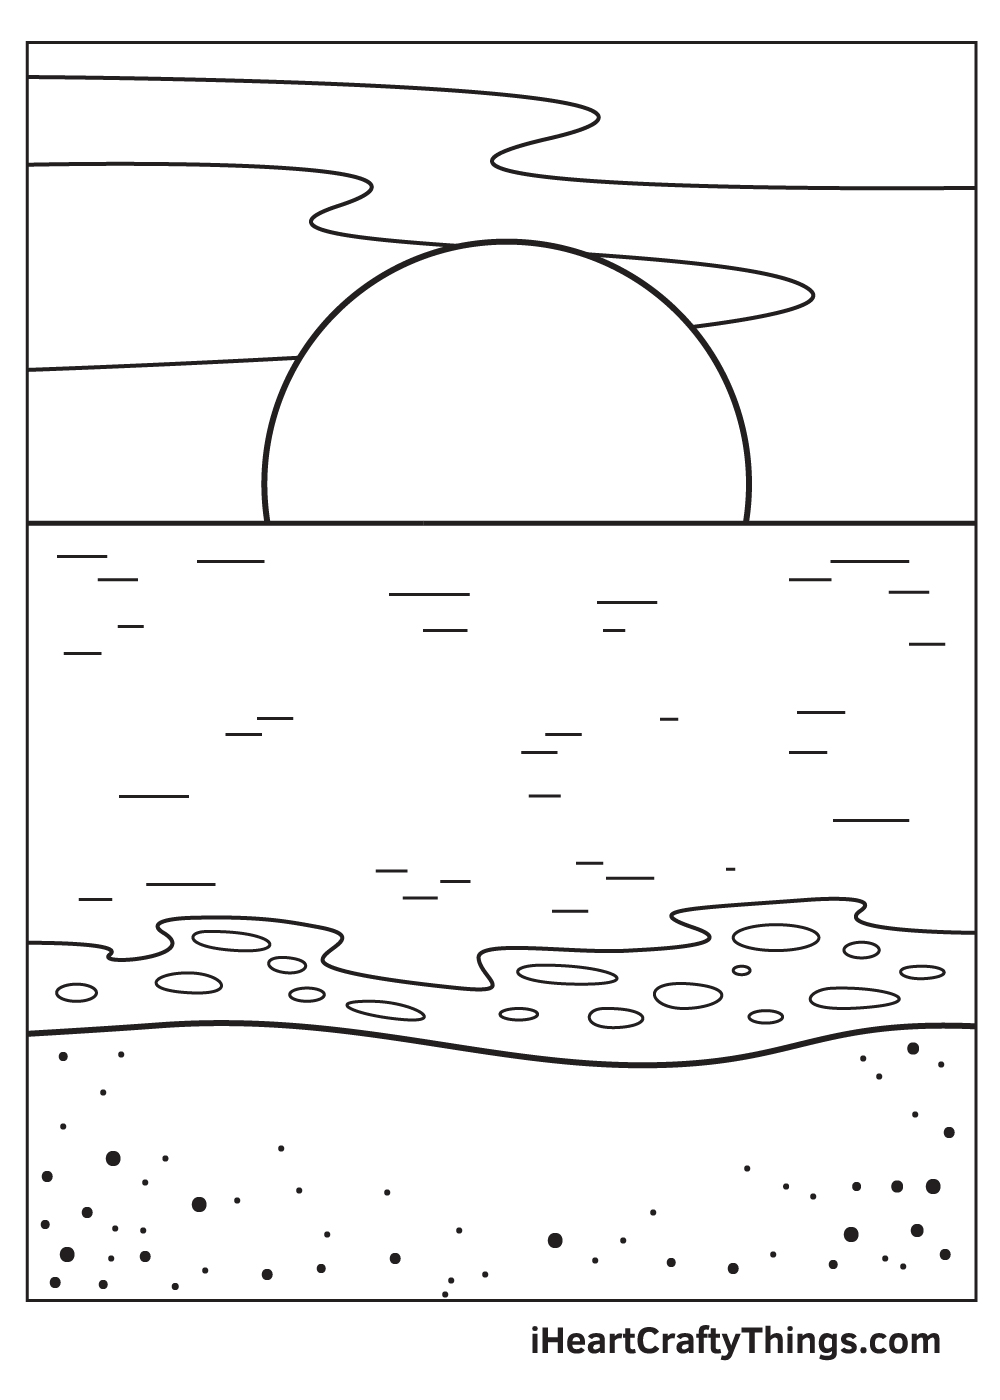
Draw lots of irregular circle shapes on the edge of the ocean near the coast. This creates the appearance of the bubbles, producing an illusion of realistic ocean waves.
The bubbles, as seen in the illustration, differ in shapes and sizes.
As you can see, the ocean has finally come together! Now, all it’s missing is a splash of colors to make your artwork look vibrant.
Now that we have finished drawing an ocean, we will now be moving on to the final—and the most enjoyable—step.
Go ahead and prepare your favorite coloring materials because we will now be coloring your ocean drawing!
In the illustration, you will see that we used the color blue on the ocean and the color white on the edge of the ocean. Then, we used light brown to color the sand.
To create a bright, sunny day, we used vibrant yellow for the sun and a combination of a deeper shade of blue, light blue, and white for the sky.
You can opt to use our illustration as a guide when coloring your drawing or handpick a unique set of colors.
It’s all up to you! Whichever you decide to do, we’re sure your drawing will turn out beautifully! We can’t wait to see which colors you will use.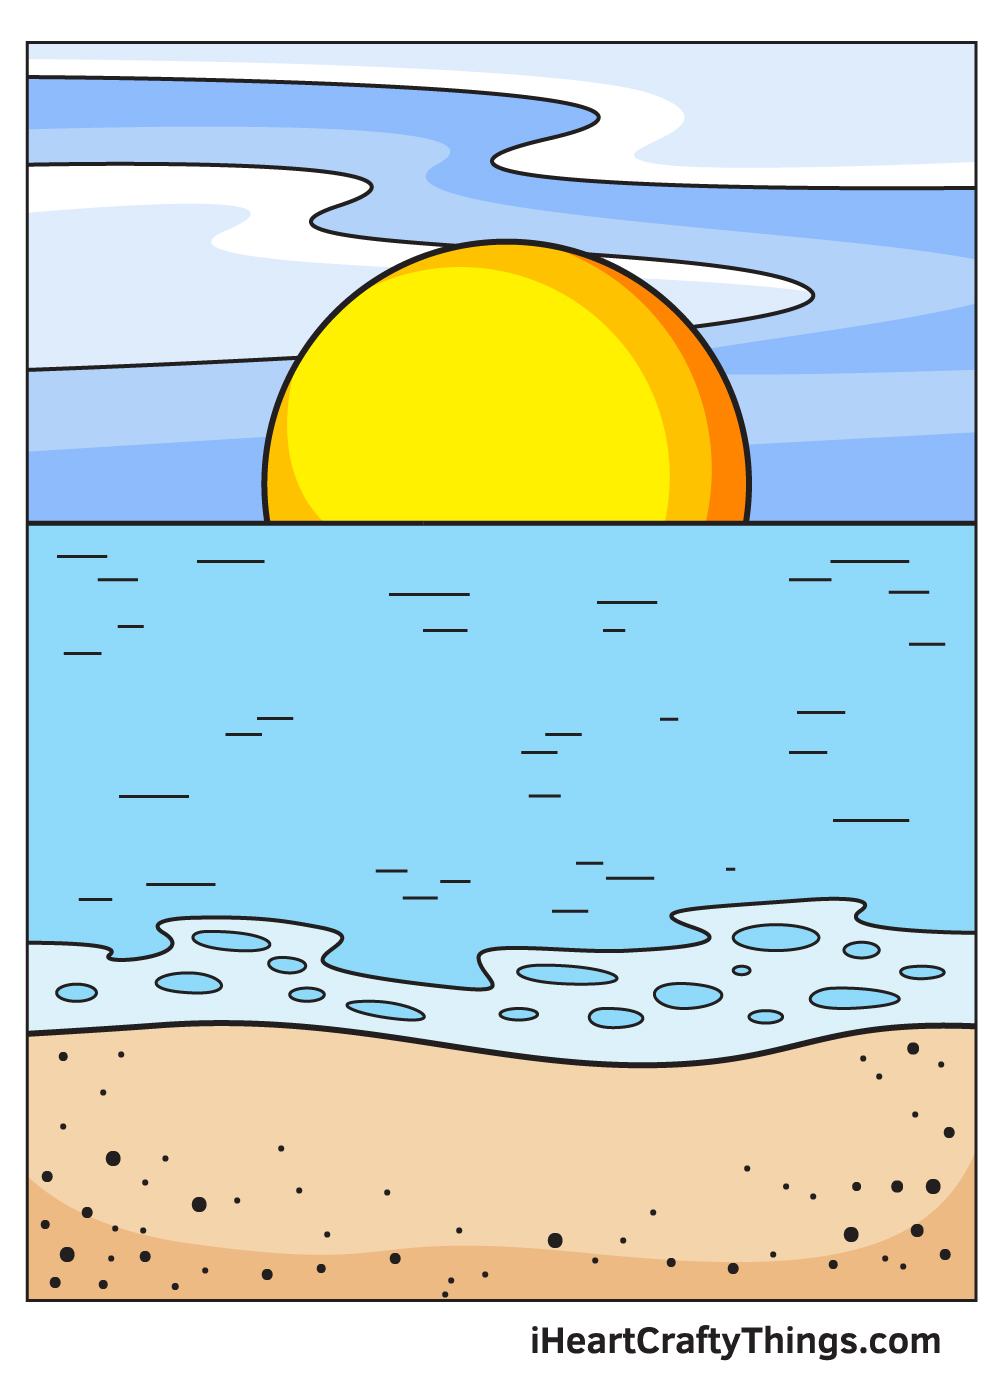
5 Tips To Make Your Ocean Drawing Even Better!
Make your stunning ocean drawing even better with these handy tips!
You created a calm and lovely ocean scene in this guide, but as we all know the ocean is filled with life.
You could portray some of this life in order to make this ocean drawing even more stunning! Maybe there could be a dolphin leaping from the water or some turtles on the shore.
These are a few creatures you could add, but what others can you think of?
Adding creatures is a great way to improve this drawing, but you can also add some other details. For example, we think that some palm trees would be a beautiful addition to the image!
Some clouds and beach umbrellas would be a few more examples of what you could add. What do you think would finish off this ocean sketch?
You can also change up the design of this ocean scene in a few ways that would be simple yet effective.
For example, you could make the sun higher or lower in the sky depending on the time of day you would like to portray. We will also cover how you can use colors to change the time of day depicted in a later tip we have for you.
Before we discuss some color options, we would also recommend using various art tools for the actual drawing.
By using a mixture of pencils and pens, you can help to make some outlines be more emphasized or use a pencil so they can be defined with colors. Be sure to use any tools at your disposal!
Now, we will talk about the colors you can use for this ocean drawing. We mentioned changing the time of day using colors earlier, and this is a simple and fun method.
By using some bright yellows, oranges and reds, you can turn this into a beautiful sunset scene. Or, you could stick to the bright blues we used for a peaceful midday setting. Be sure to also use all of your favorite coloring mediums!
Your Ocean Drawing is Complete!
It’s a lot of fun learning how to draw an ocean, isn’t it? We think this artwork would look amazing to be hung up on the wall once it is colored and framed.
In which part of your house do you think this ocean drawing would look great?
Remember, all of our drawing tutorials are 100% free for you to use as learning materials to help you practice your drawing skills.
Don’t forget to keep re-visiting our website so you can keep enjoying newly uploaded drawing tutorials.
Once you’ve finished your masterpiece, don’t hesitate to show off your work of art and share it on our Facebook page and on Pinterest.
We’re excited to see your incredible ocean drawing!