A key can unlock a lot of mysteries! If you find a key on the street there are infinite possibilities to what it could unlock.
Because of this, a key has also become a symbol of secrets and access around the world. Even though we all use keys all the time, it can be surprisingly difficult to learn how to draw a key.
Luckily, this guide you’re about to do will make it so much easier for you!
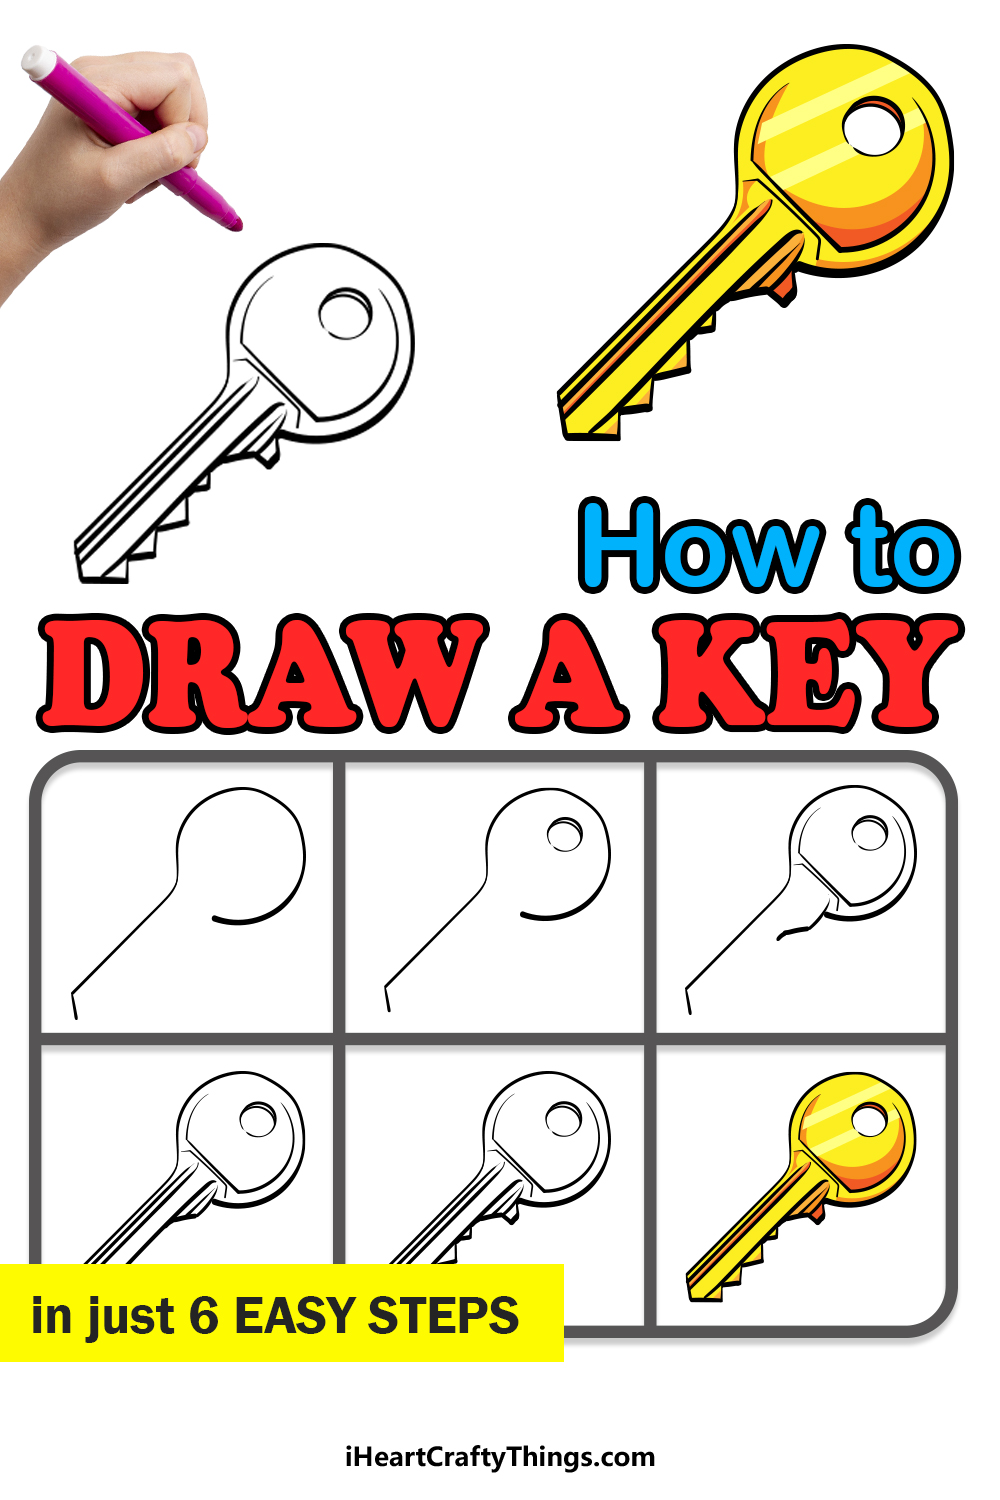
Our step-by-step guide on how to draw a key in 6 easy steps will show you the key to creating this drawing!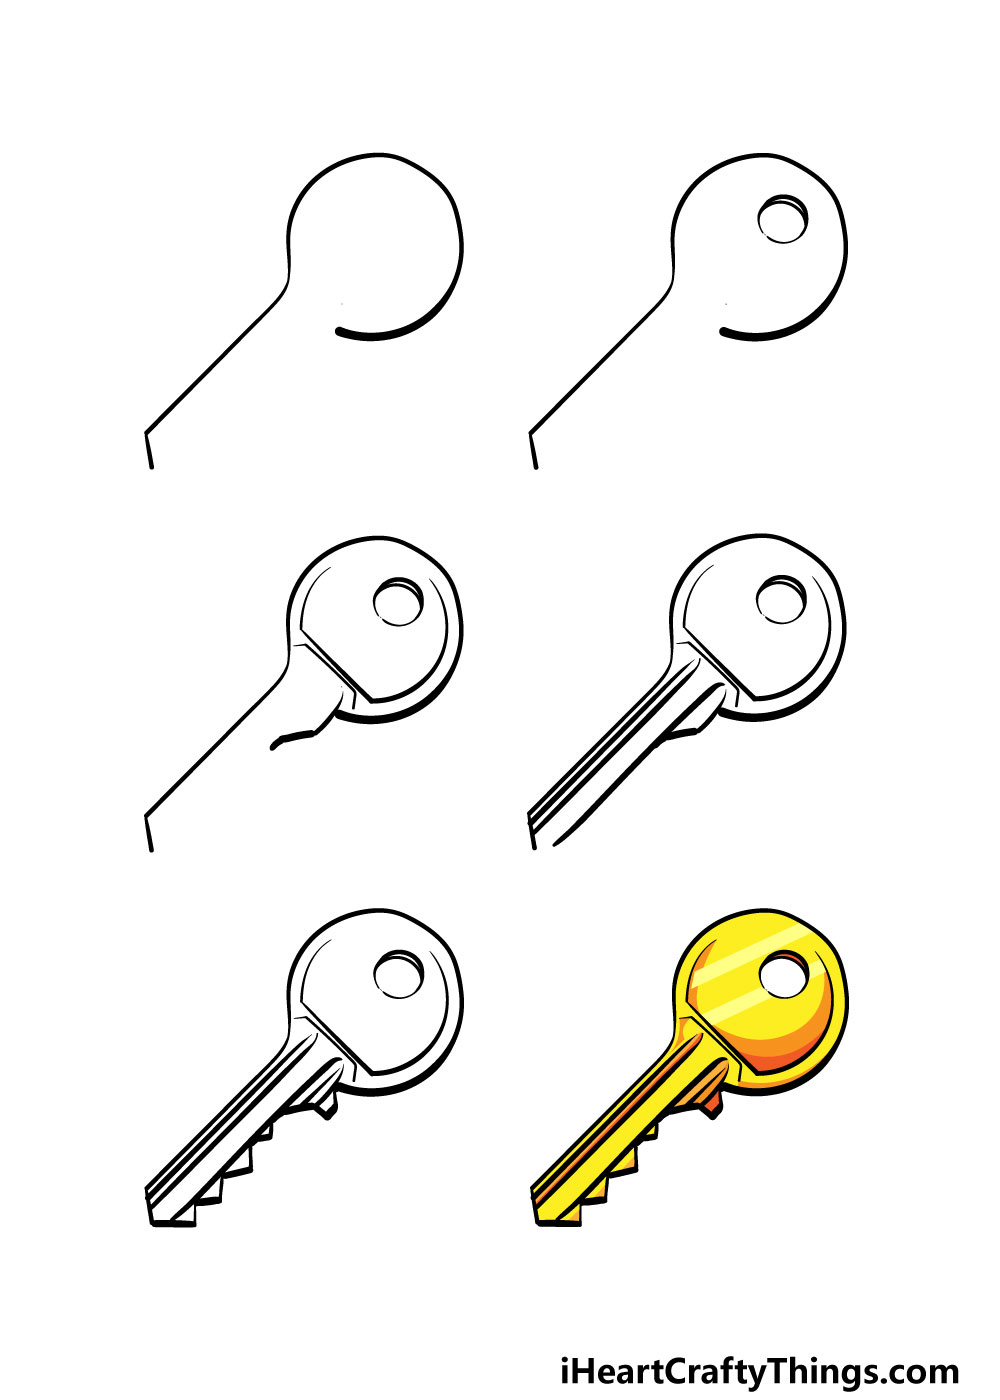
How to Draw A Key – Let’s get Started!
Step 1
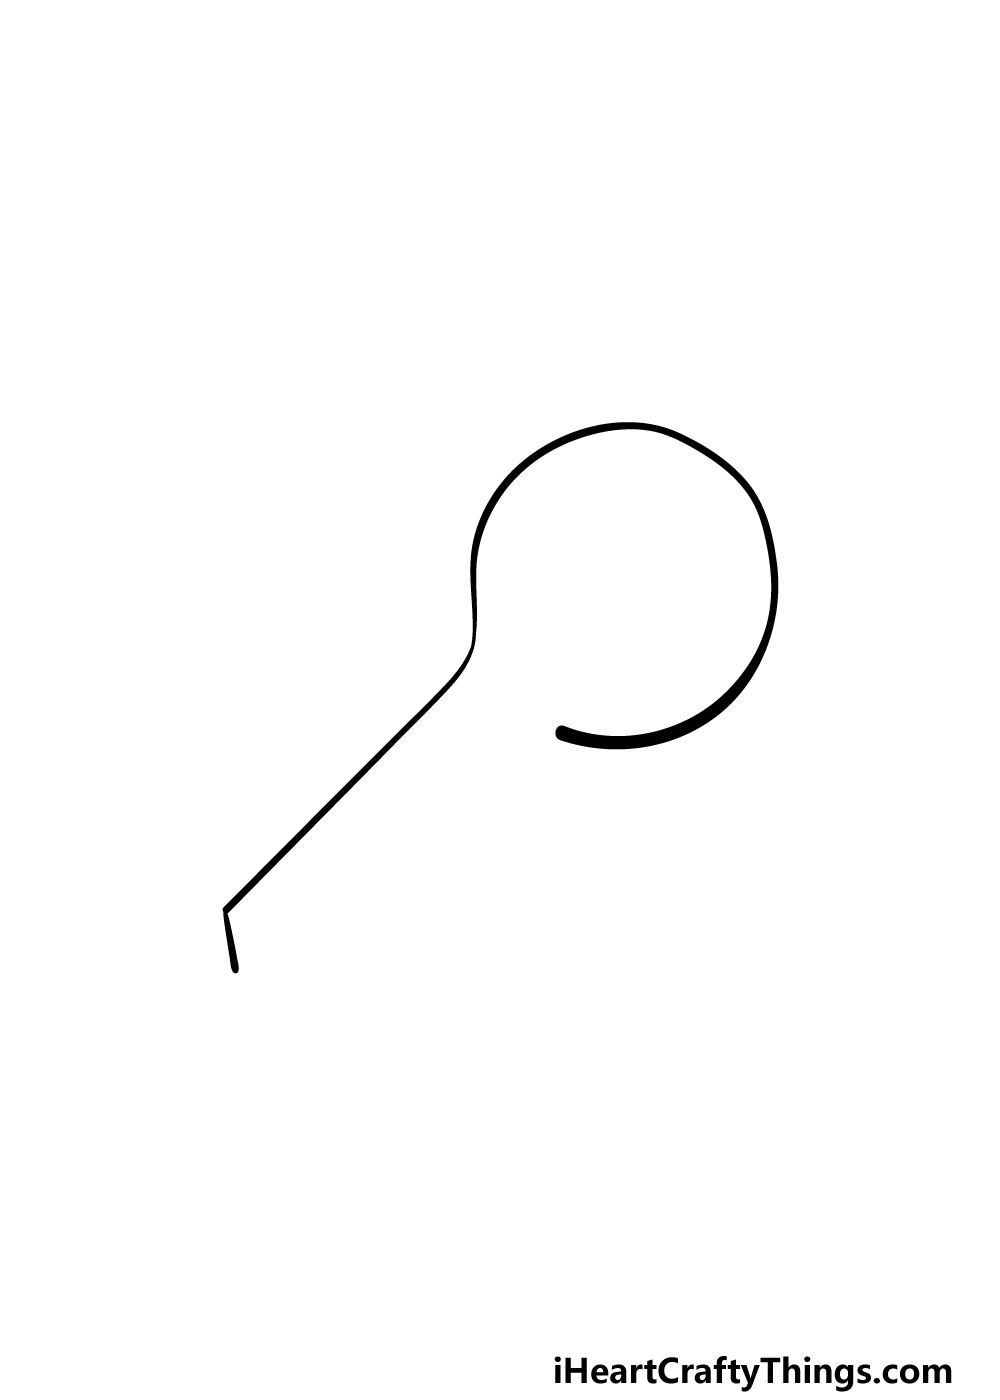
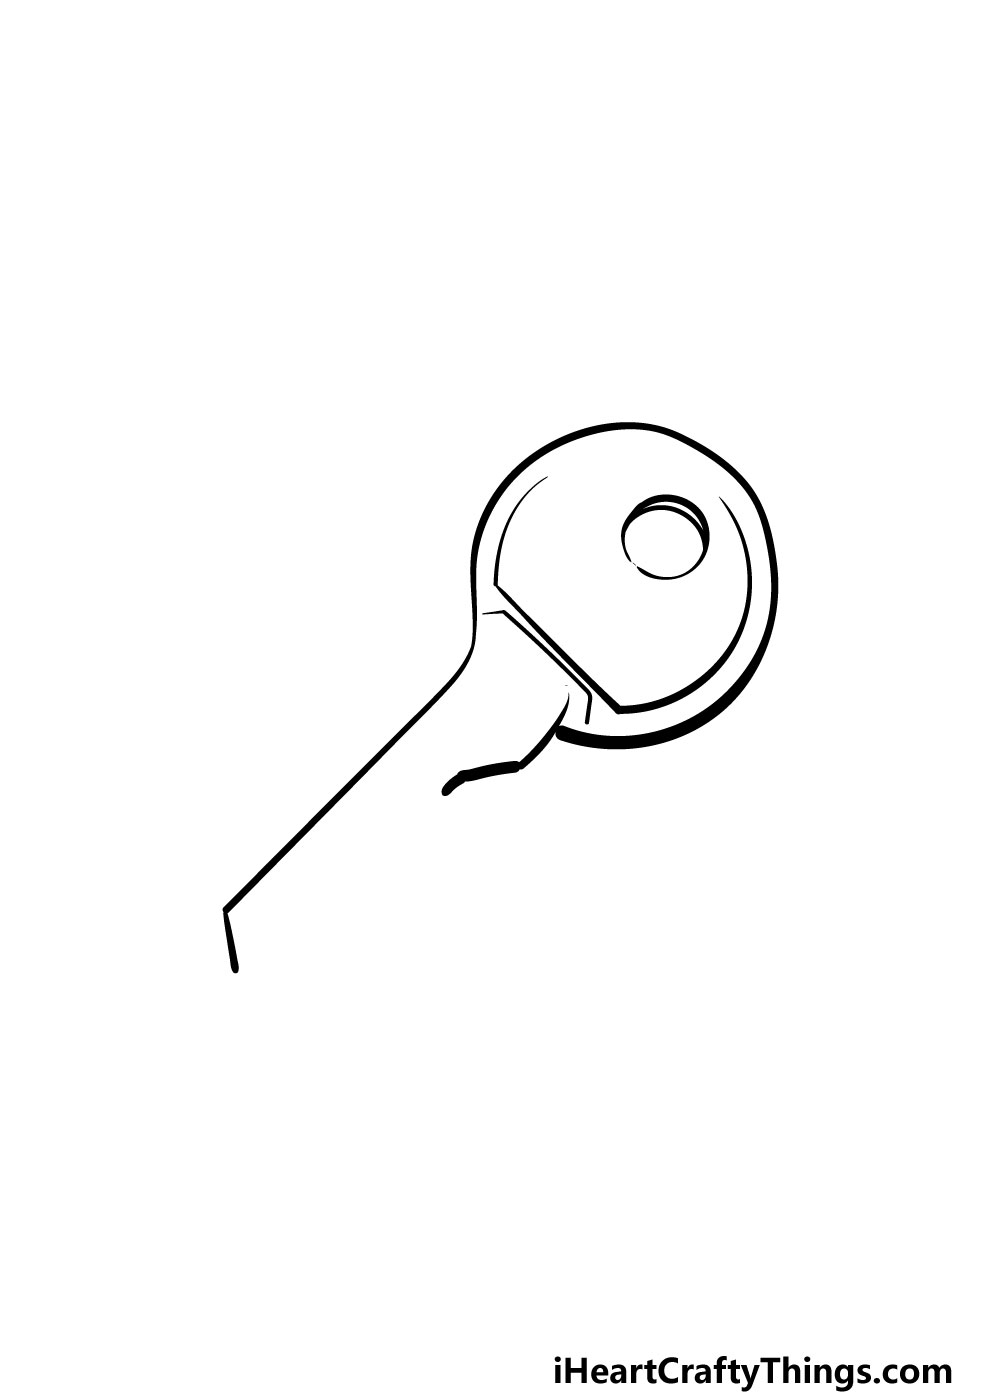
In this first step of our guide on how to draw a key, we will start with the rounded end of the key. To do this, simply draw a rounded shape that looks like a circle with a gap at the lower left.
Then, you can draw a straight line coming diagonally from that rounded shape, and there will be a straight line at the end of it.
Once you have your drawing looking like our reference image then you’re ready for step 2!
Step 2 – Draw a hole onto the key
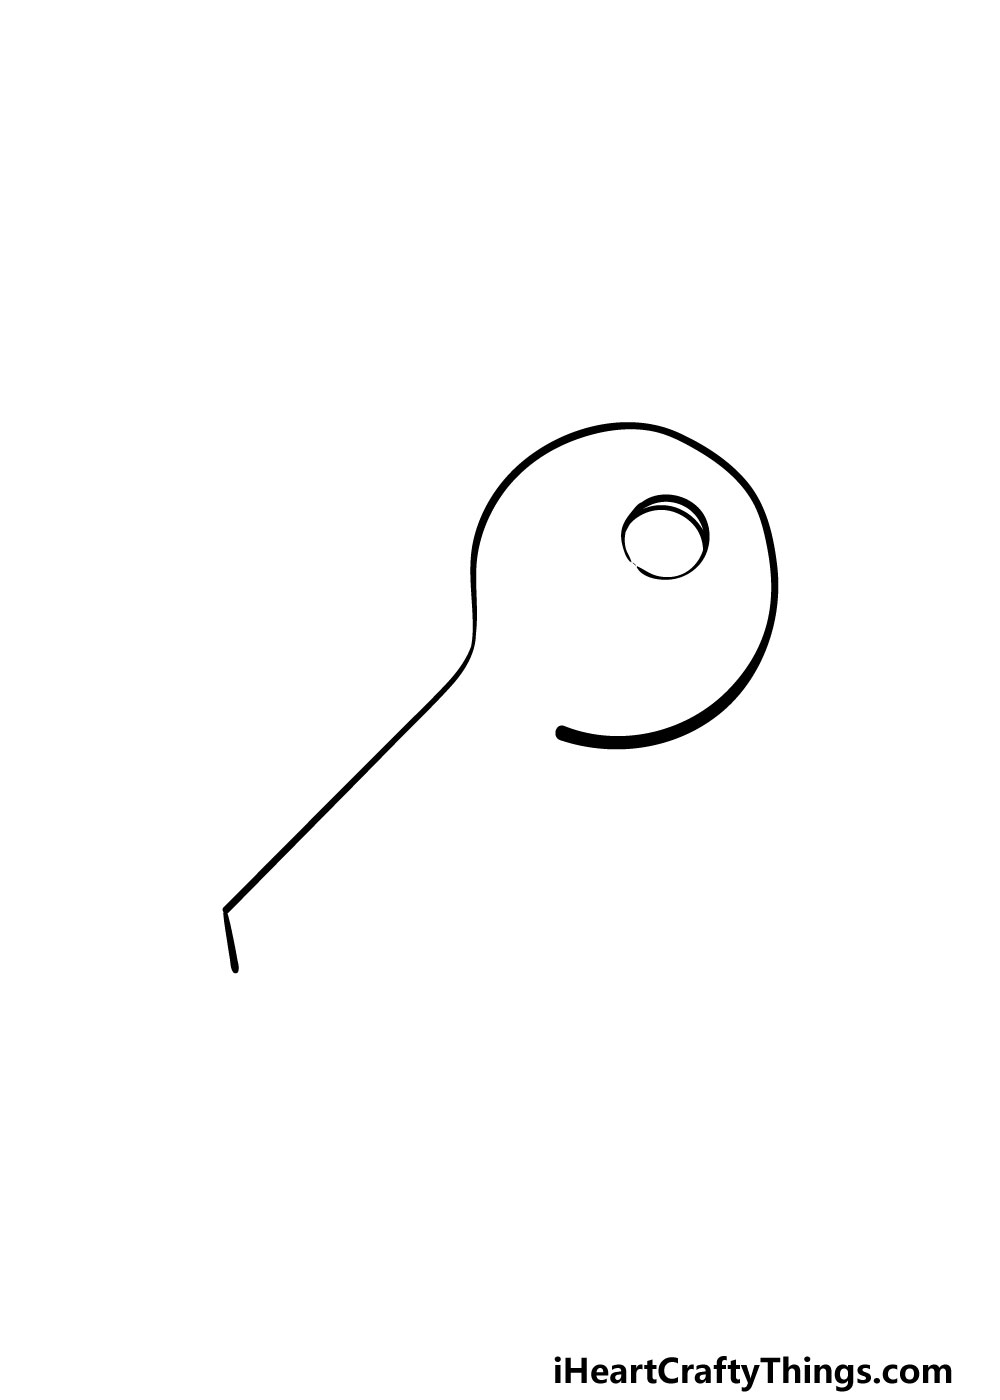
This second step of your key drawing will see you drawing a small hole onto the key. This would be the hole that you would thread a keyring through.
To draw this, simply add a small circle onto the rounded part of the key, and then draw a line on the inner edge of the circle. You’ll see what we mean by that when you look at our reference image.
Step 3 – Now, you can draw some inner details on the key
We will be adding some details to the inside of the key in this part of our guide on how to draw a key.
To do this, we will be using some straight and curved lines to add some details as shown in the reference image.
These will add a lot of great detail to the key and help it to look more authentic. Be sure to follow the image closely as you draw!
Step 4 – Next, draw some straight lines inside of the key
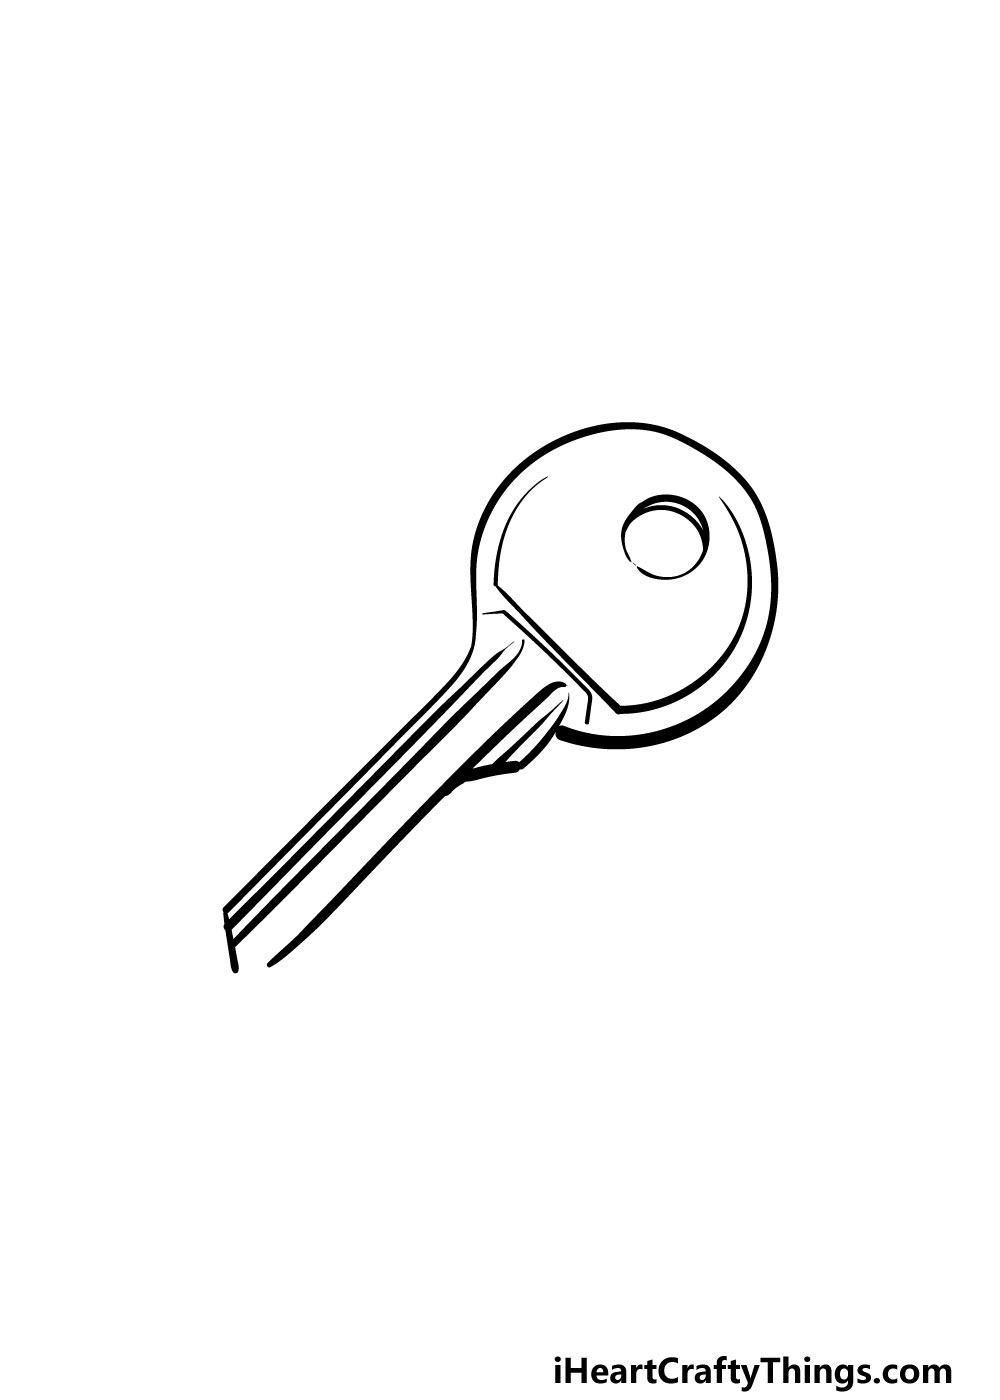
Now, we will be adding more details to the straight edge of your key drawing. All you need to do is use a ruler to add some thick, straight lines into the center of the key.
These will form the grooves of the key that are used to help the lock recognize the key. That’s all you need to do in this step, and you’re ready for some final touches in the next step.
Step 5 – Now, you can add some final details to your key drawing
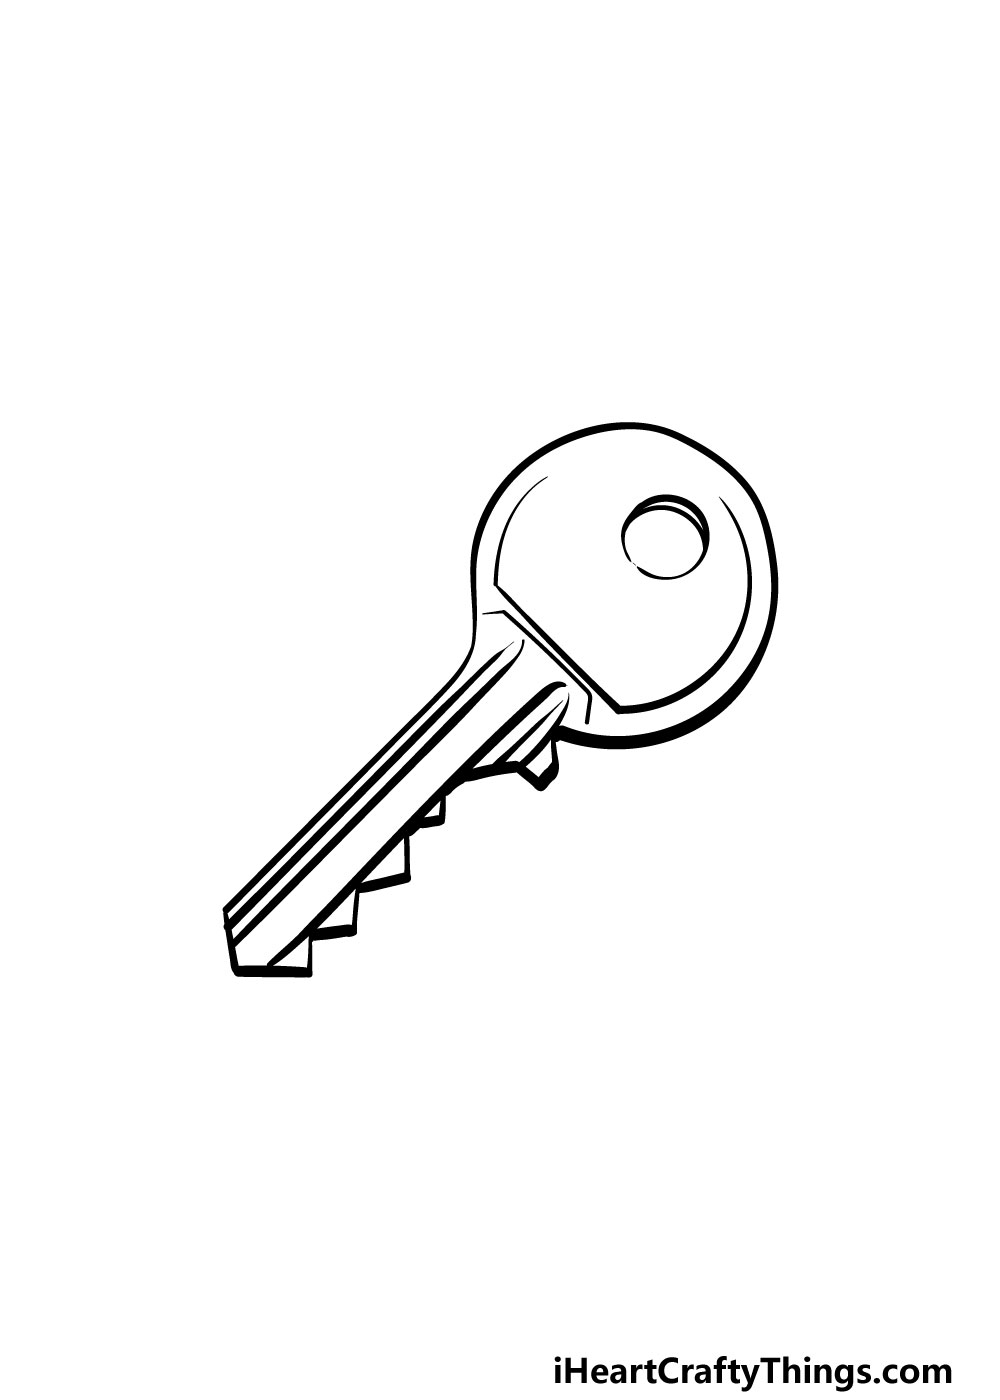
This fifth step of our guide on how to draw a key will be all about adding some final details to your picture.
First, you can use some strait, short lines to make some sharp shapes onto the edge of the key.
This will finish off the details of the key, but before you move on, you should feel free to add any extra details and elements that you want!
You could draw a background to really finish off your drawing, and there are many creative ways that you could go about this.
Maybe you could show what this key will be unlocking and have it so that the key is about to go into the keyhole! What cool things can you think of for the key to unlock?
You could also add some smaller details such as little scratches or rust to make this key look very well used.
Another idea is drawing a keyring onto the key, as this is a great way to add some of your own personality to the drawing. We can’t wait to see what you come up with to finish off this image!
Step 6 – Finish off your key drawing with some color
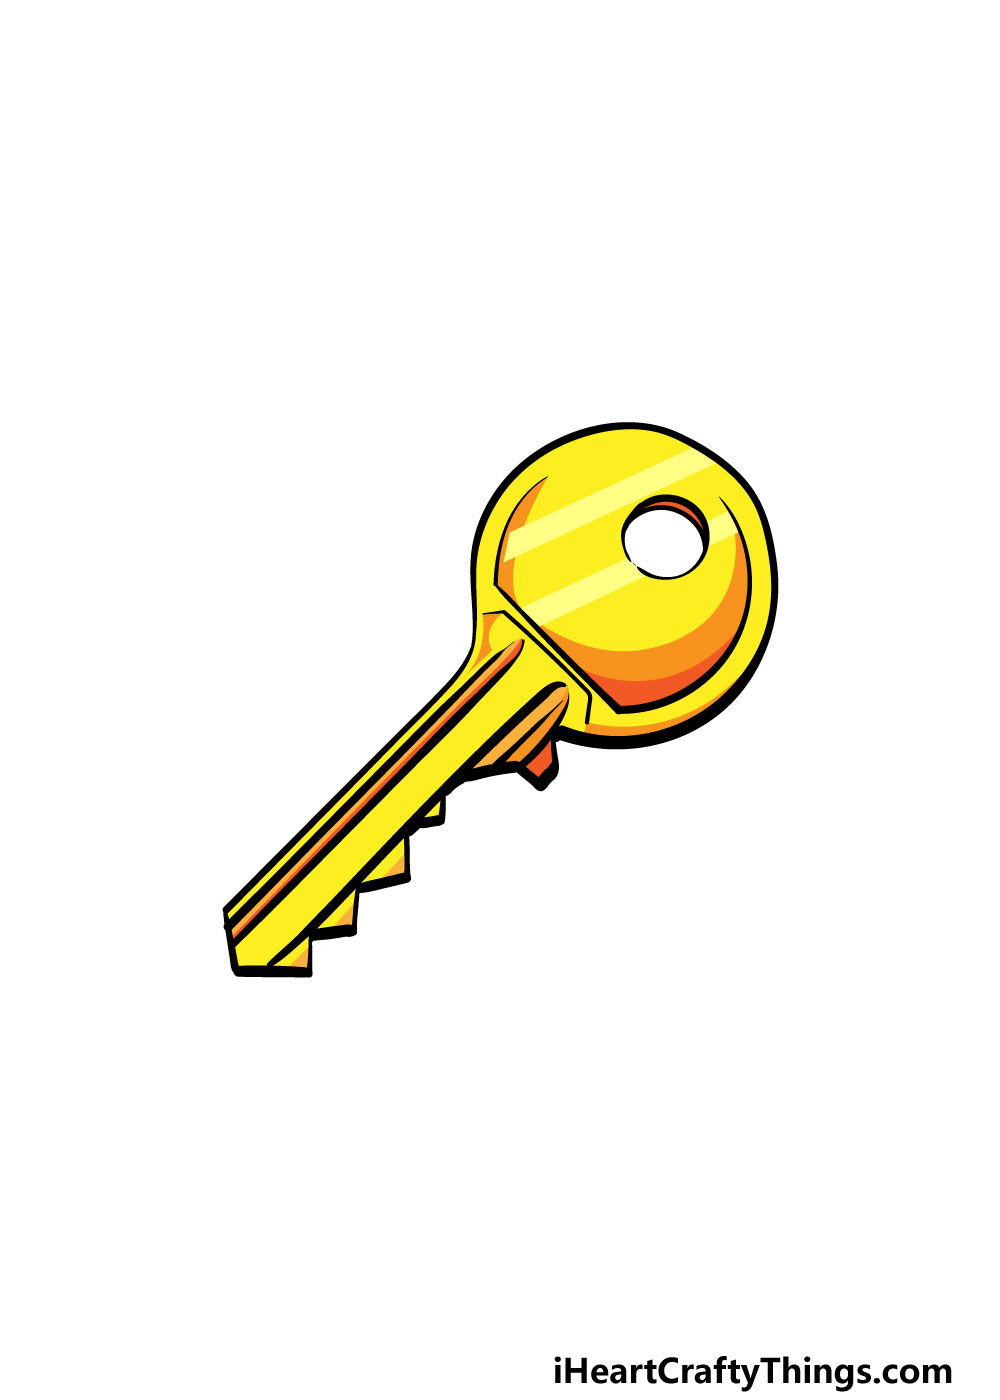
That will bring you to the final step of your key drawing! This step is a fun one, as you can finish off the drawing with some amazing colors.
For our example image, we used a combination of yellows and oranges to create a shiny bronze key.
This is just one of many ways that you could go about it, however! You could work any of your favorite colors into this image, as keys can have all manner of different colors and designs.
If you drew a background or extra details like a keyring then these can be elements that you can add color to.
Once you know what colors you will be using, you can also have some fun choosing which art tools and mediums you will use to finish it off!
For some bright colors like the ones in our image, you could use some acrylic paints or some colored pens and markers for colors that pop off the page.
You could also go for an equally great muted look by using some watercolor paints or some colored pencils.
It’s all up to you, and you should follow wherever your creativity leads you!
Do this to take your key drawing to the next level
Unlock some helpful tips that will help you make this key drawing even better!
Keys will often be attached to something like a tag or a keyring. You could add an element such as this for this key sketch!
This could be as simple as a tag that shows what this key is for or as complex as a big keyring.
Drawing a keyring would be a fun way to add a more personalized element to this key. You could come up with something really fun and quirky if you were to do this!
Another way you could show what this key is for is by drawing a background. You could show the key inside whatever it unlocks. Or, you could show it about to unlock whatever it is that it’s for.
This could be a door, padlock or maybe even a music box. These are just a few ideas, but there are loads of creative ideas you could use to have this key for! What do you think this key would unlock?
Keys will also sometimes be on a ring with lots of other keys. That also presents a fun way that you could take this drawing of a key to the next level. You could draw it on a ring and have it next to a few other keys.
This would also be a great way to take what you learned in this guide as you design some more key variations. If you’re feeling ambitious, then you could make a huge bunch of keys!
Lastly, you can change this key drawing by literally changing it! There are so many designs for keys, and they can often be quite intricate.
When you have the hang of this design, you could look up different key designs. You might even have some keys in your house that you could use as inspiration!
This suggestion would also go really well with the previous one, as you could design lots of keys and put them on a single ring.
Your Key Drawing is Complete!
We hope that you had a great time working on this guide on how to draw a key with us!
Drawing something like a key can be surprisingly difficult when you get down to it, but by breaking it down into smaller, more manageable steps it can be made much easier.
It may make it easier, but it can also make it much more fun!
Now that you have mastered this drawing, be sure to take it even further with your own touches!
We suggested a few ideas such as drawing a background, showing what the key is unlocking or drawing a keyring to go with it.
These are just a few ideas you could use, however, so feel free to get creative with it and see what happens!
When you’re ready for your next drawing challenge, be sure to visit our website! We have tons of amazing guides for you to enjoy there, and we also upload new ones all the time.
We would also love it if you would share your completed key drawing on our Facebook and Pinterest pages. We can’t wait to see your amazing artwork!