Any aircraft you see represents an immense feat of human ingenuity.
Propelling people into the air with such ease is truly one of the greatest technological innovations in the past century, and some aircraft take this even further.
Jets would be a great example of this, as they represent the peak of aviation technology.
Many aircraft enthusiasts love the speed and elegance of this aircraft, and they often like to learn how to draw a jet.
If you love them as well and would like to know how you can create some great artworks featuring them, then look no further than this tutorial!
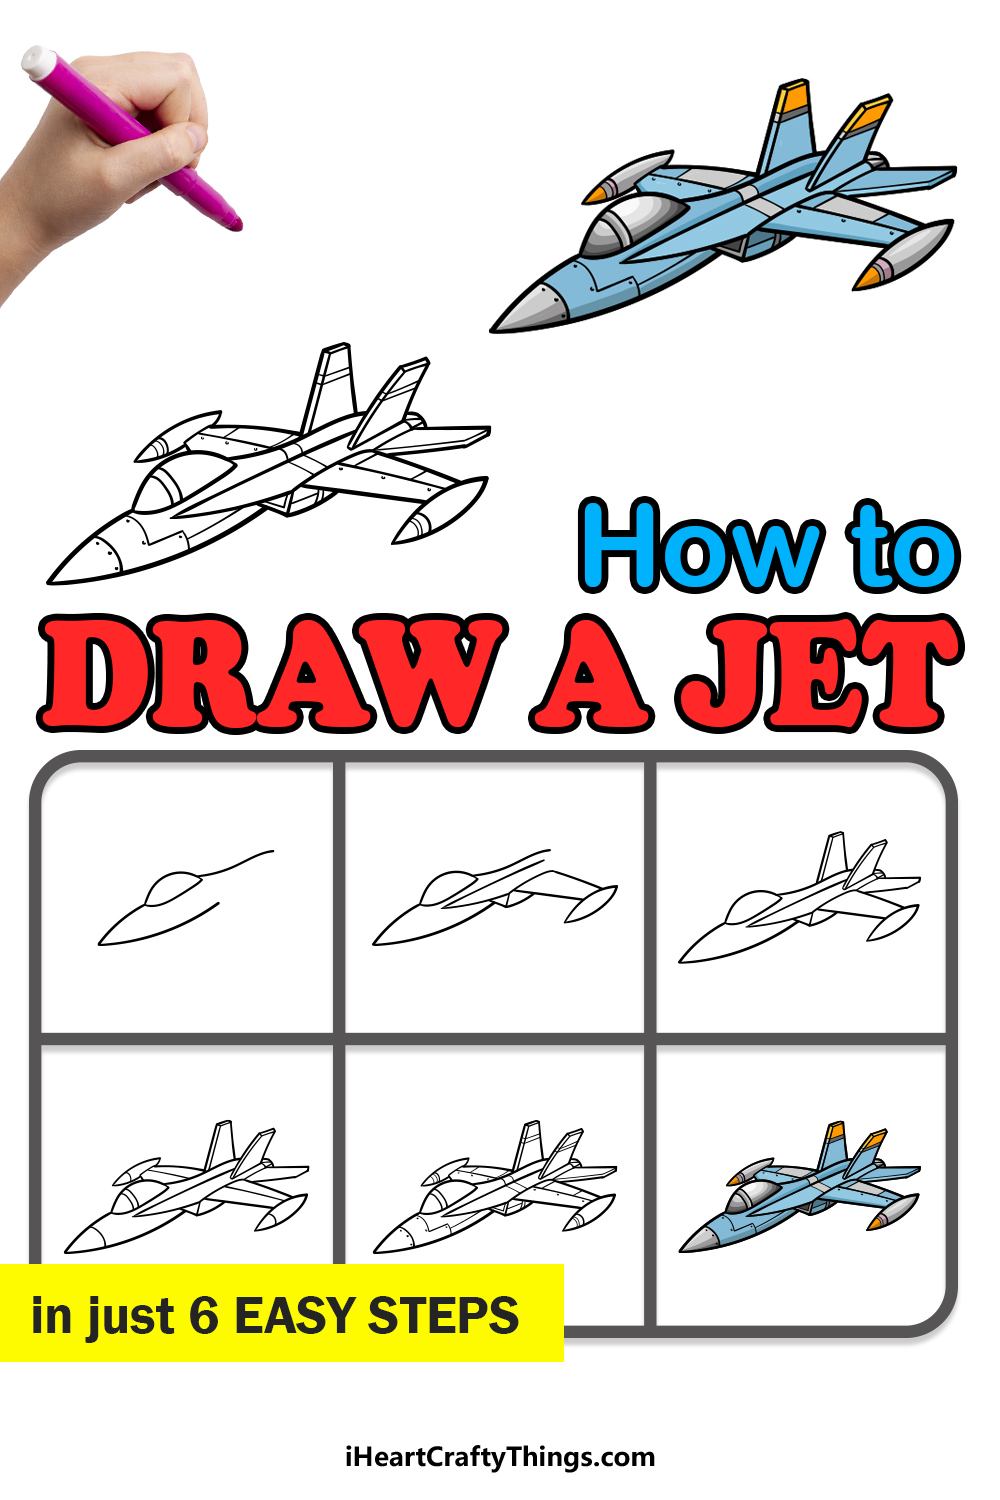
Our step-by-step guide on how to draw a jet in just 6 easy steps will show you how you can recreate this incredible machine.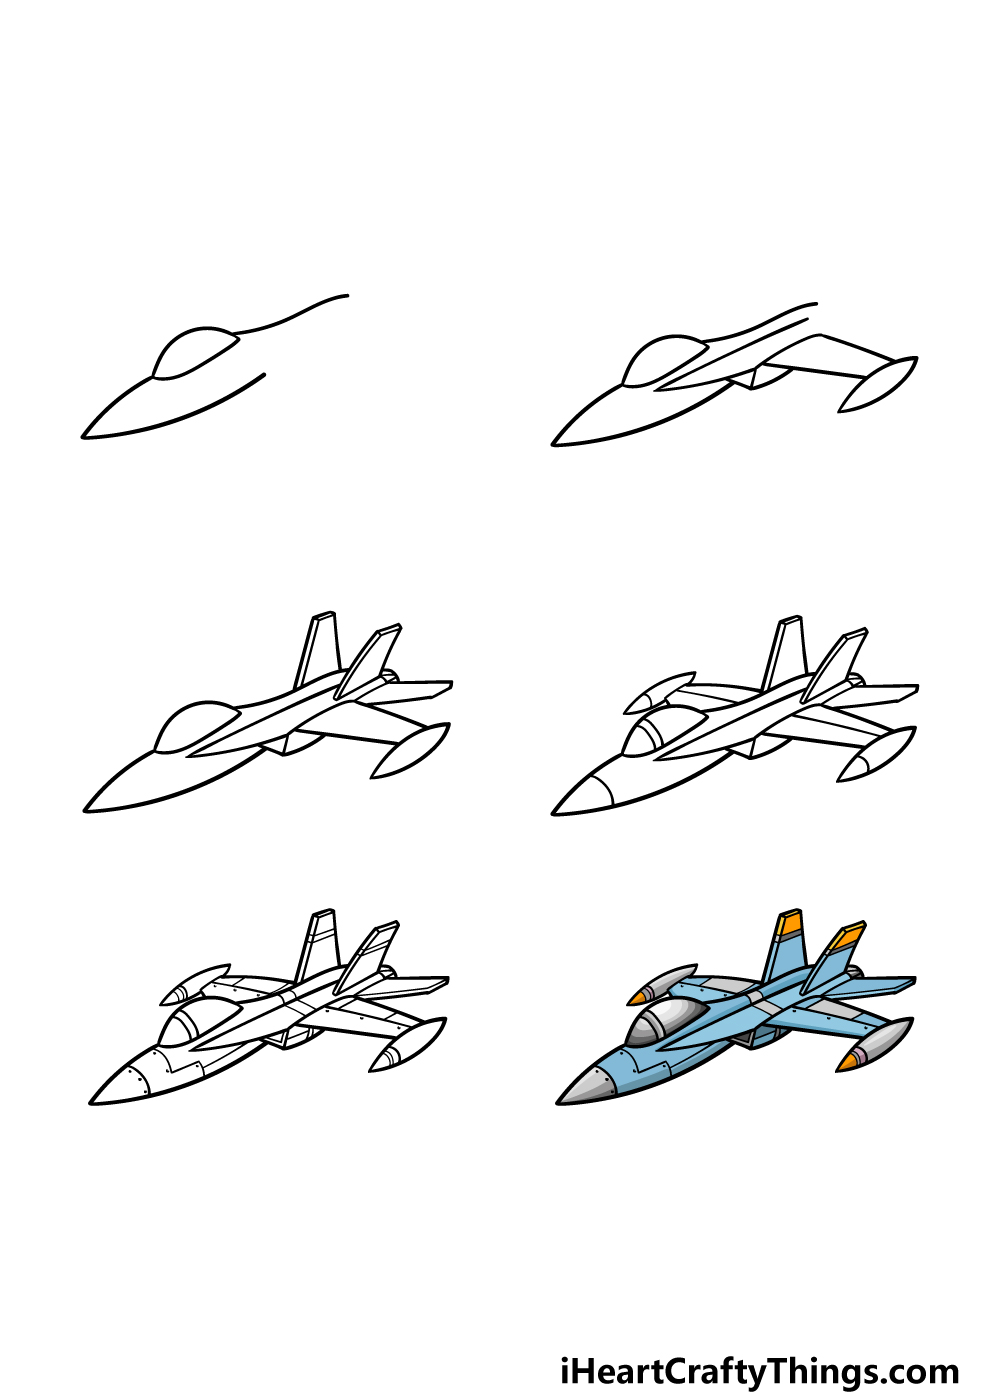
How to Draw A Jet – Let’s Get Started!
Step 1
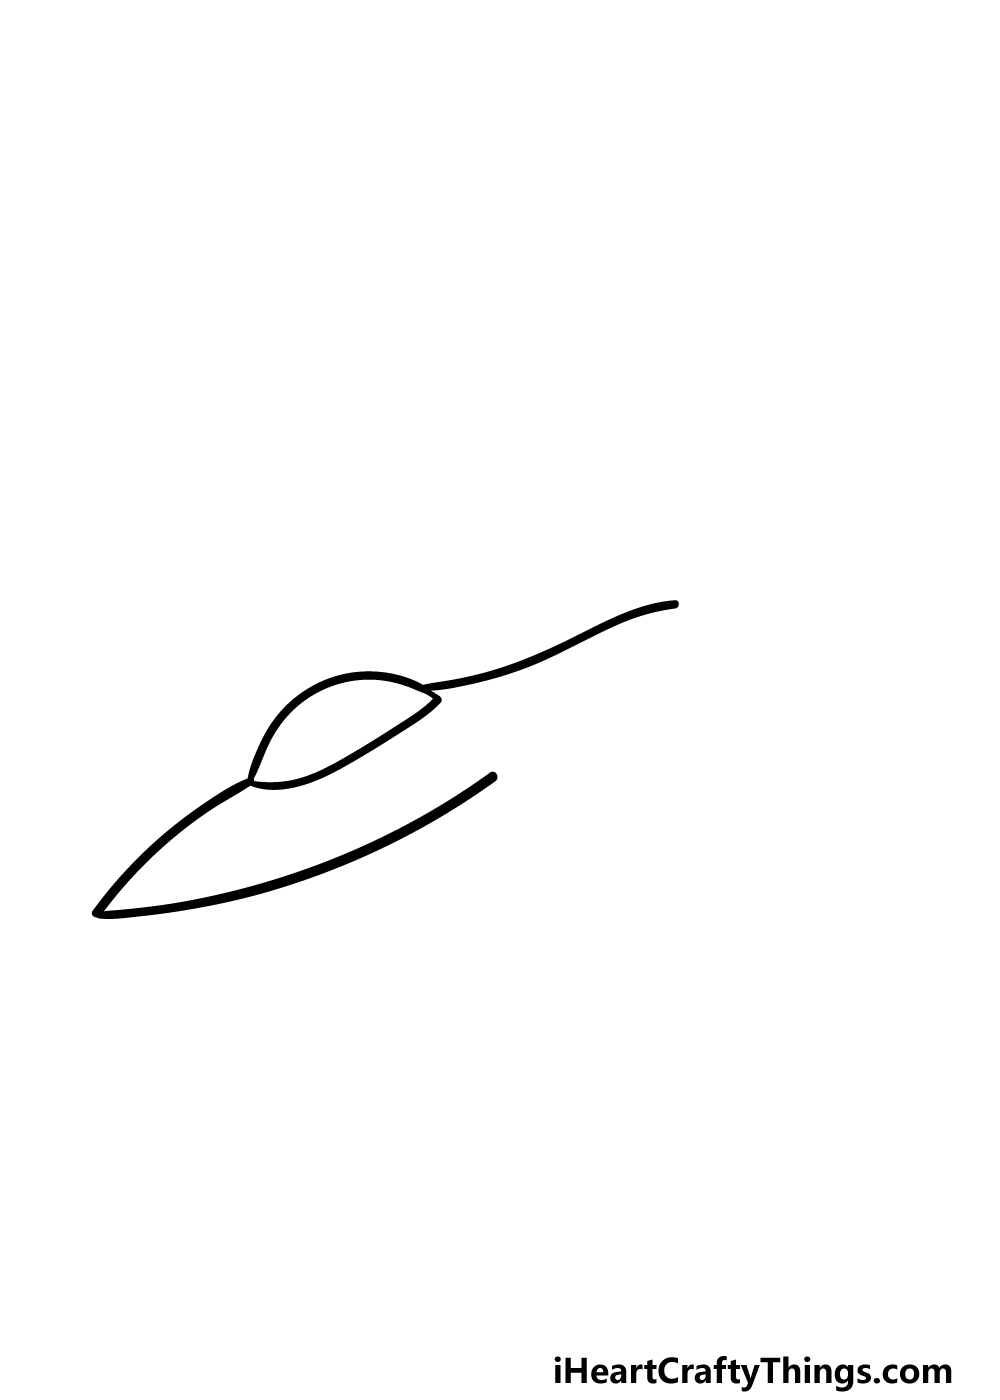
As we start this guide on how to draw a jet, we shall begin with the cockpit of the aircraft as well as the start of the body.
For the cockpit, we will be drawing a flat, rounded shape with some sharp points at either shape.
The top of the glass will bulge out a bit, but it will still be fairly flat as that will make the jet more streamlined.
Then, we shall be drawing the tip of the jet. To draw this, use a curved line with a very pointy tip right at the front.
You can then finish off this step by drawing a wavy line coming from the back of the cockpit for the back of the jet. That’s all we will be doing in this step, and then we can move to step 2!
Step 2 – Now, draw the wing of the jet
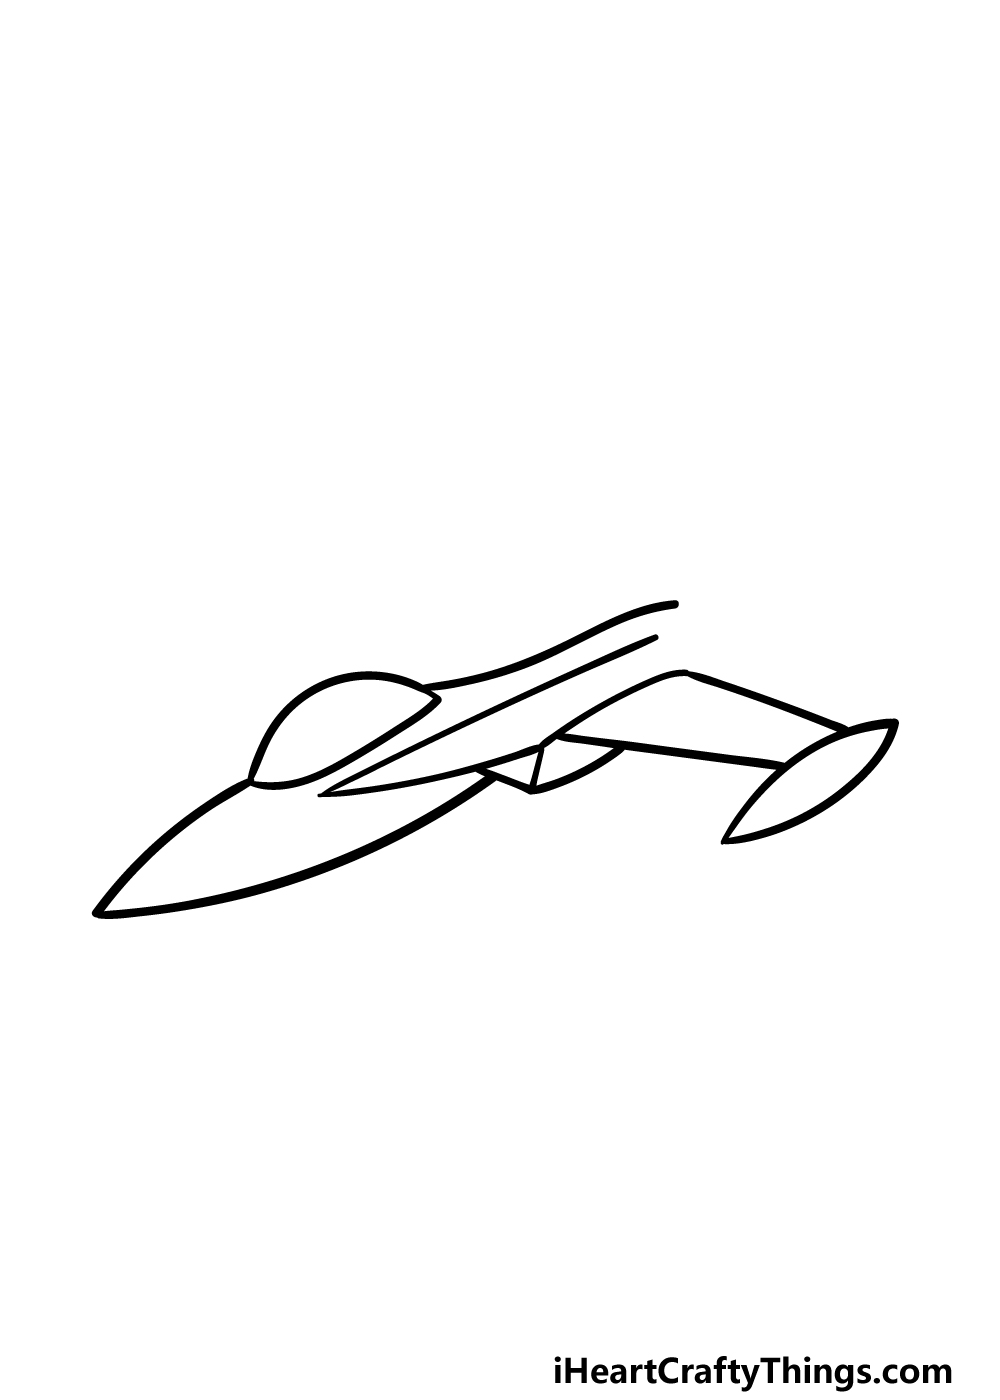
A jet wouldn’t get very far without some wings, so we will add the first of these in this step of your jet drawing.
The wings of the jet are made up of a few different sections, and you can draw the first section attached to the body by using some longer curved lines with a sharp point at the front.
Then, draw the engine below it using some more angular lines.
You can then draw another section using some straight lines that get closer together the further they go on, and then finish off with a pointy oval shape at the end of it.
Step 3 – Draw the tail of the jet in this step
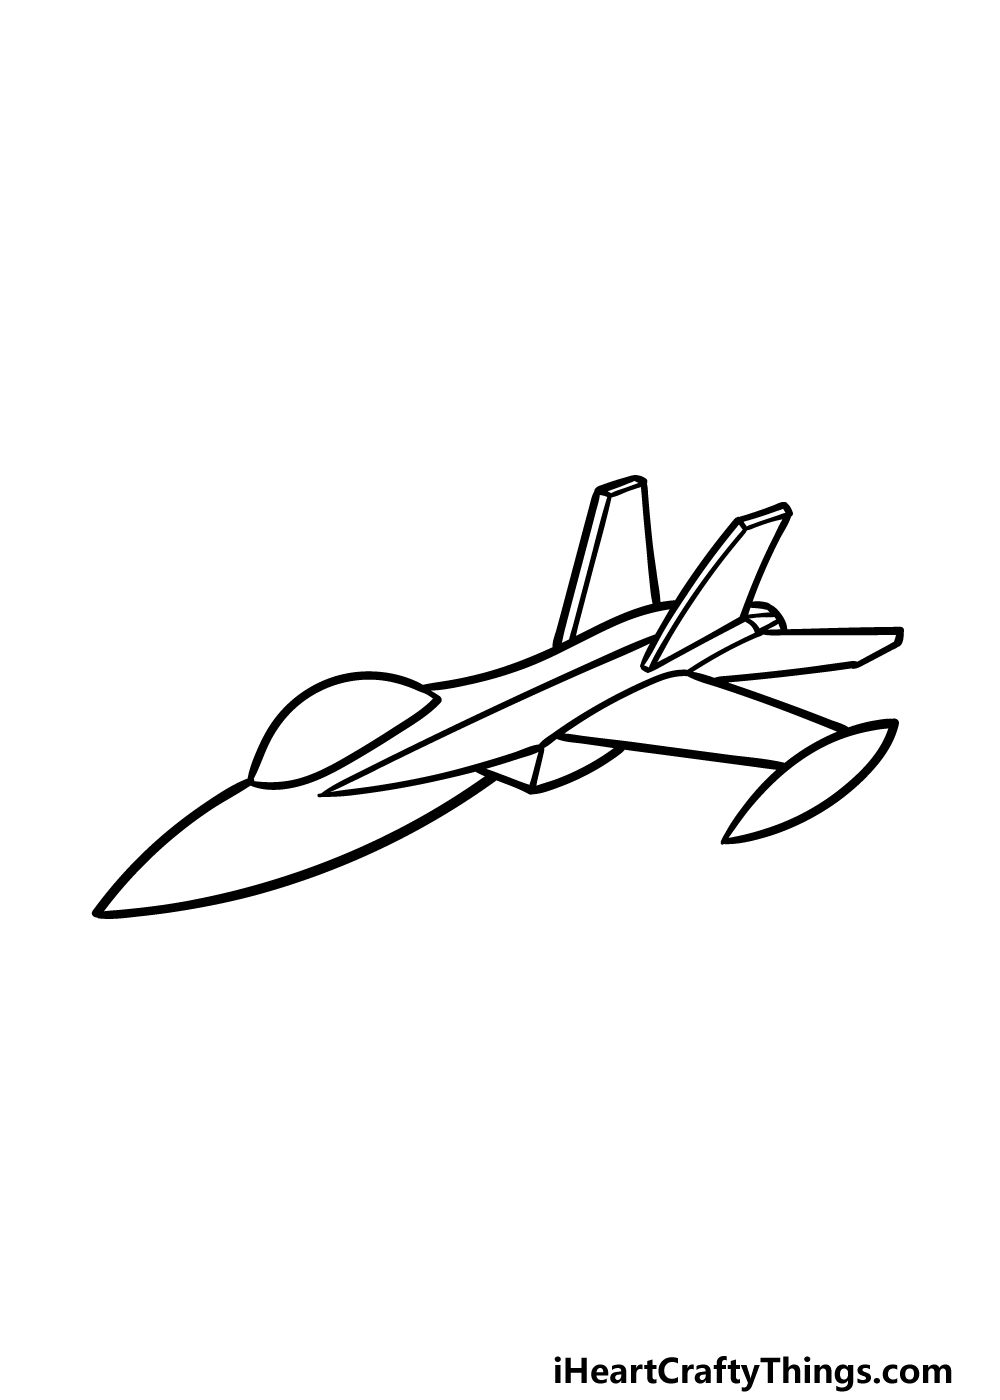
For this third step of our guide on how to draw a jet, we will be working on the tail of the aircraft. First, we will be drawing the vertical stabilizers of the tail.
These will be some tall, thin sections that you can draw with some straight lines. Using a ruler would be very helpful for these stabilizers!
Once they are drawn, we will then add a horizontal side stabilizer. This will look very similar in shape to the top ones, however it will poke out the side.
Draw one more small section at the very back of the jet, and then you can proceed to step 4 of the guide.
Step 4 – Next, draw another wing and start adding some details
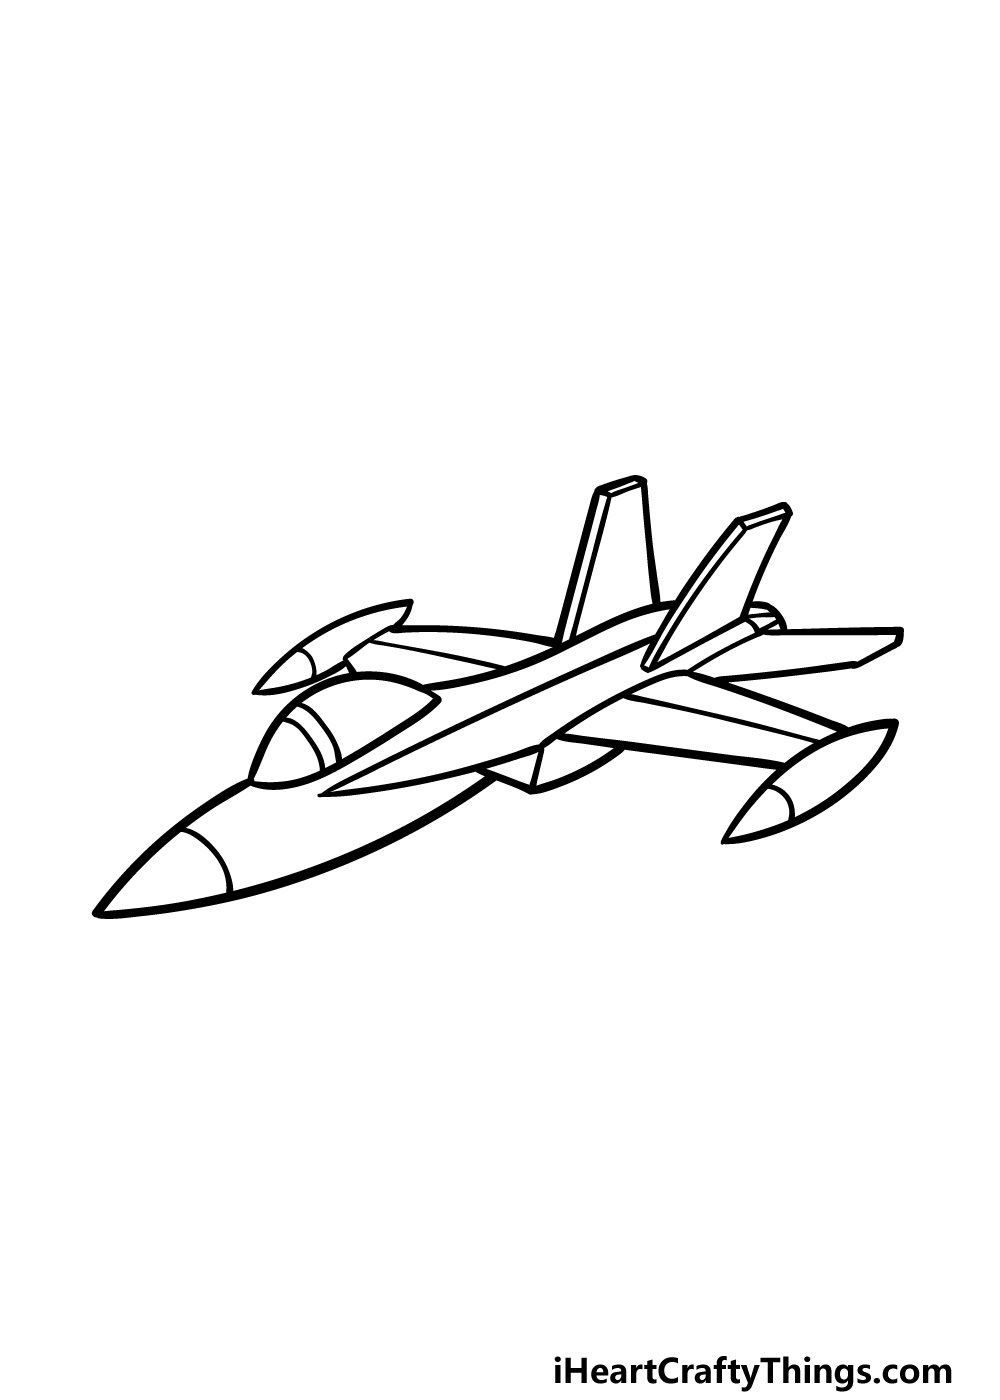
Continuing with this jet drawing, we shall be adding another wing to the aircraft. This one will be similarly constructed to the other one, however it will look smaller to show perspective.
Then, once the other wing is done we shall be adding some smaller details. First, draw a curved line near the tips of the pointy oval sections at the ends of the wings.
Then, add some more curved lines near the front of the glass cockpit and then finish off with one more near the tip of the jet. Then you will be ready for the final details and touches in the next step.
Step 5 – Add the final details to your jet drawing
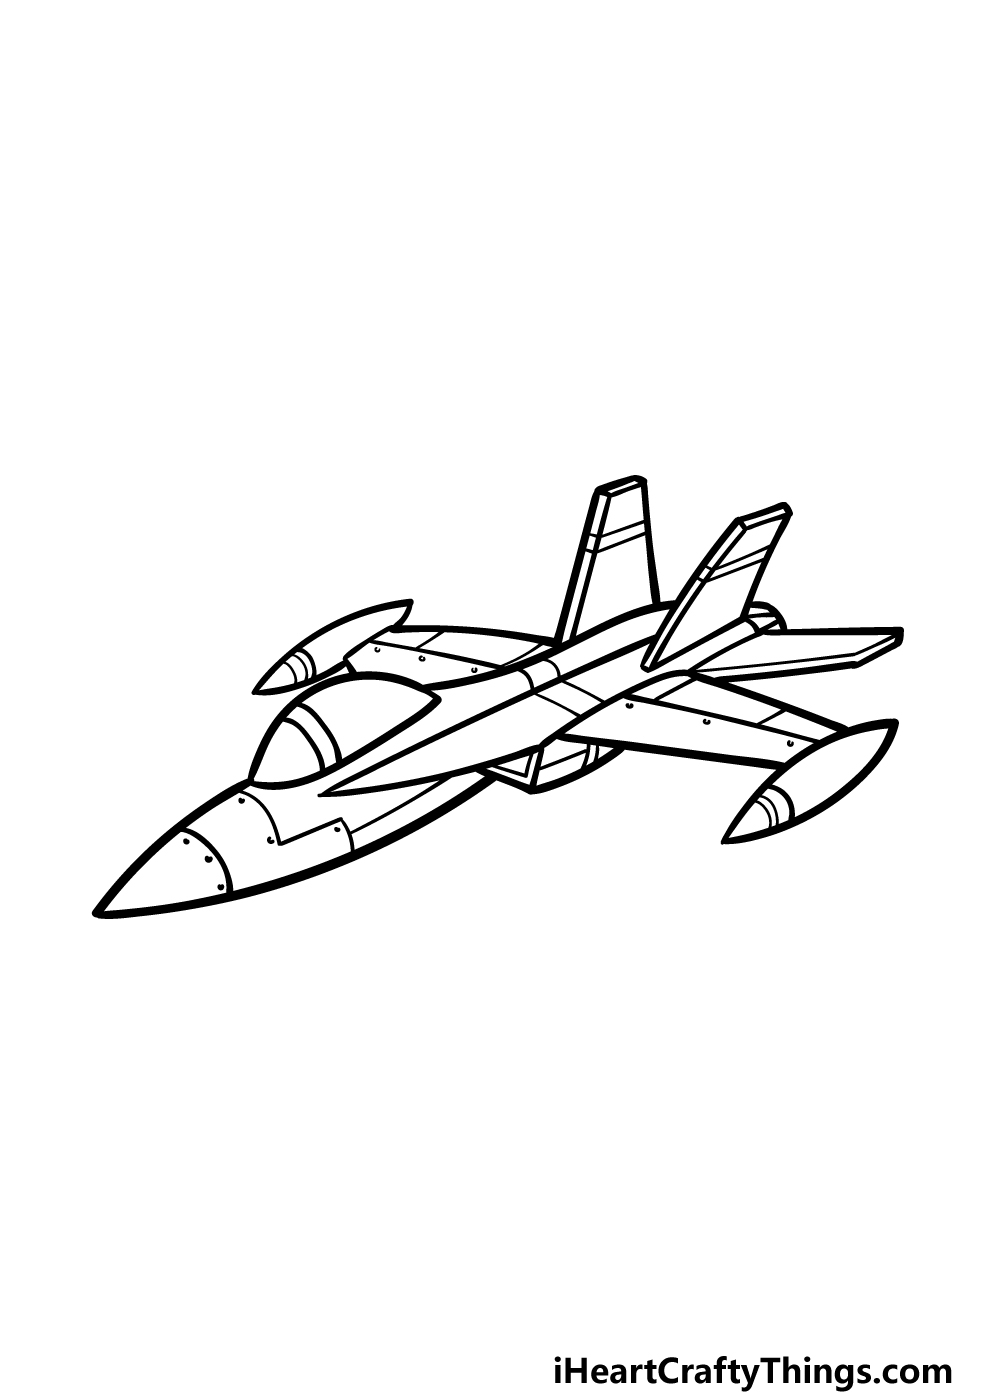
It’s almost time for the final step, but first we have a few last details to add in this step of our guide on how to draw a jet.
In this step, we will be illustrating that jets are usually made of several large metal sheets connected to one another.
To do this, we will be drawing some line details all throughout the aircraft. Then, we will be drawing some dots near these lines to show the rivets holding the jet together.
Once you have replicated all of these details, you can finish off with your own details and ideas!
One idea would be to draw a background, and if you do that then what setting will you create for this awesome drawing?
Step 6 – Finish off your jet drawing with color
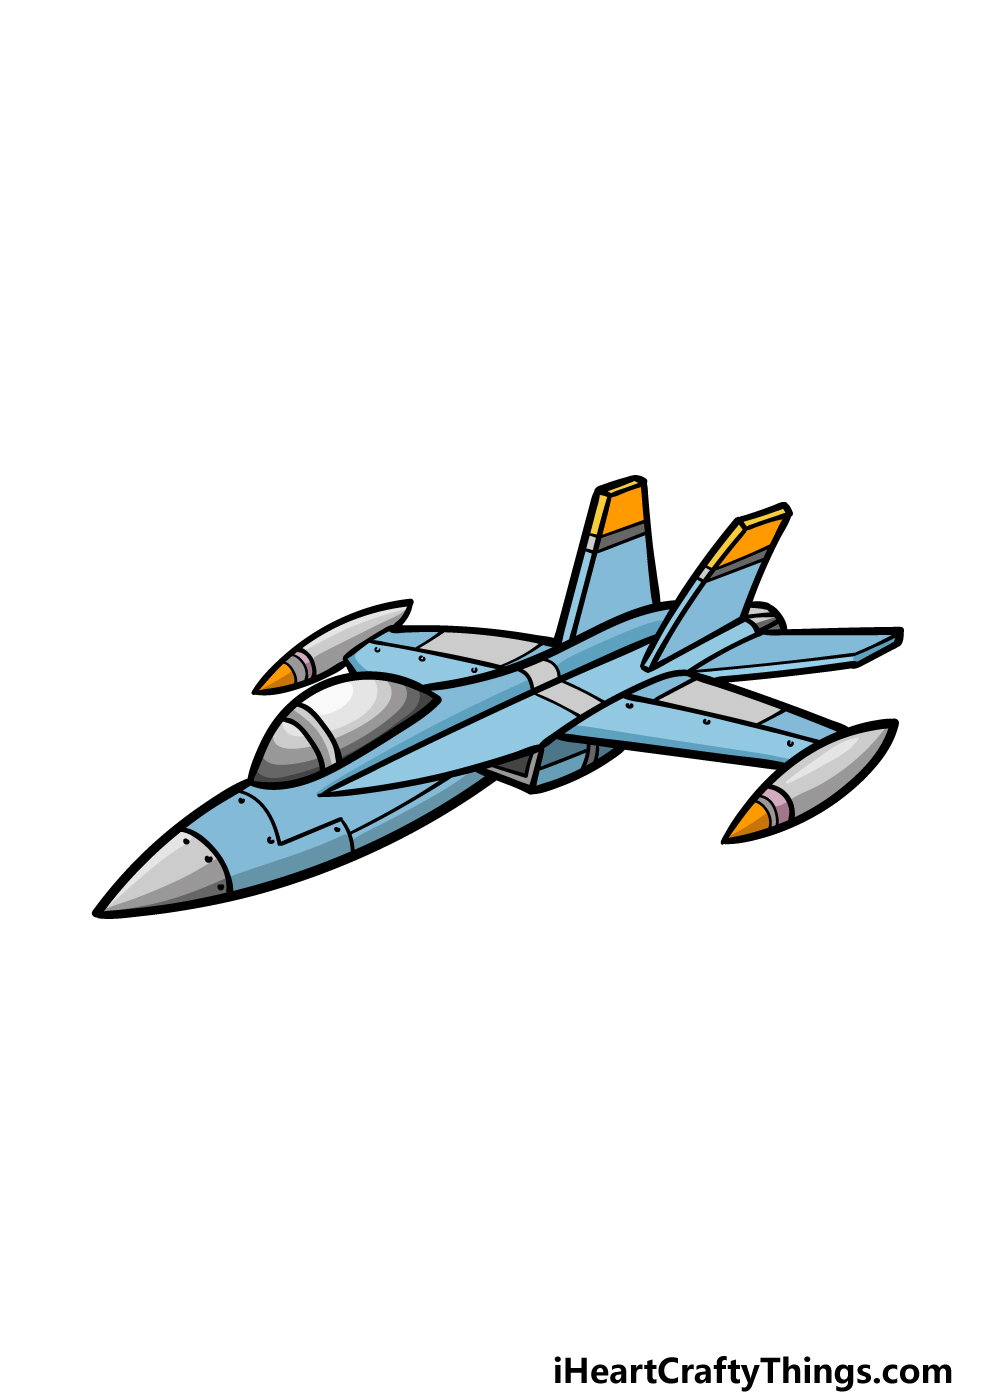
This is the final step of your jet drawing, and in it you can finish off with some colors.
We kept the colors a bit more muted in our reference image, using mostly light blues and greys with some small elements of dark yellows.
You could use similar colors if you like this look for the jet, but there are many more colors that you could go for as well!
Jets can come in a wide variety of different color schemes, so you have lots of freedom with how you could color it in.
Sometimes they will even be camouflage, so you could look up and replicate that kind of pattern for one idea.
What colors and art mediums will you use to finish it off?
Do this to take your jet drawing to the next level
Take flight for some drawing fun as we make your jet sketch even greater!
Often, jets will fly in a formation, so we think that would be fun to portray in this drawing of a jet.
Luckily, all you would need to do is follow through the guide to add as many more jets as you like.
They could even look largely identical, but you may want to change their angles a bit to make each one more distinct. How many more jets would you like to add in order to finish off this formation?
Adding identical jets is one way that you could enhance this drawing, but you could also add different kinds of aircraft. These could include different kinds of jets.
If you like airplanes, helicopters and other aircraft then these could be added as well. To do this, you may wish to look up some pictures of your chosen aircraft before adding them.
Can you think of some other awesome examples of aircraft that you could add to your drawing?
Another interesting idea you could try out would be to zoom in on this jet drawing to show more details.
This is something that you could do throughout multiple versions of the drawing, for example.
You could start out by taking a closer look at the cockpit. That way, you could show a better look at the pilot of this jet.
For a fun detail, you could even make the pilot look like yourself or maybe someone you know!
A jet can fly through many different environments and conditions, and you could show this by adding a background for your jet drawing. There are so many amazing landscapes you could use!
If you look up any kind of natural landscape pictures online, any you find would make for a perfect background for this drawing.
Then, you could add extra details such as cloud and weather effects. What sort of landscapes would you like to use for this drawing?
Your Jet Drawing is Complete!
That brings us to the end of this guide on how to draw a jet.
Drawings such as this can be a bit tricky thanks to all of the small details and elements, but in this guide we tried to break it down so the details would be much easier for you to tackle.
Now that you’ve completed it, be sure to also keep it going with your own ideas and elements. This is your chance to show off how creative you can be, so have fun with it and see what happens!
You can then check out our website where dozens of drawing guides are waiting for you to enjoy! We have many, many more coming soon, so stay posted to never miss out.
Before you start your next drawing, you can share your finished jet drawing on our Facebook and Pinterest pages for us to see!