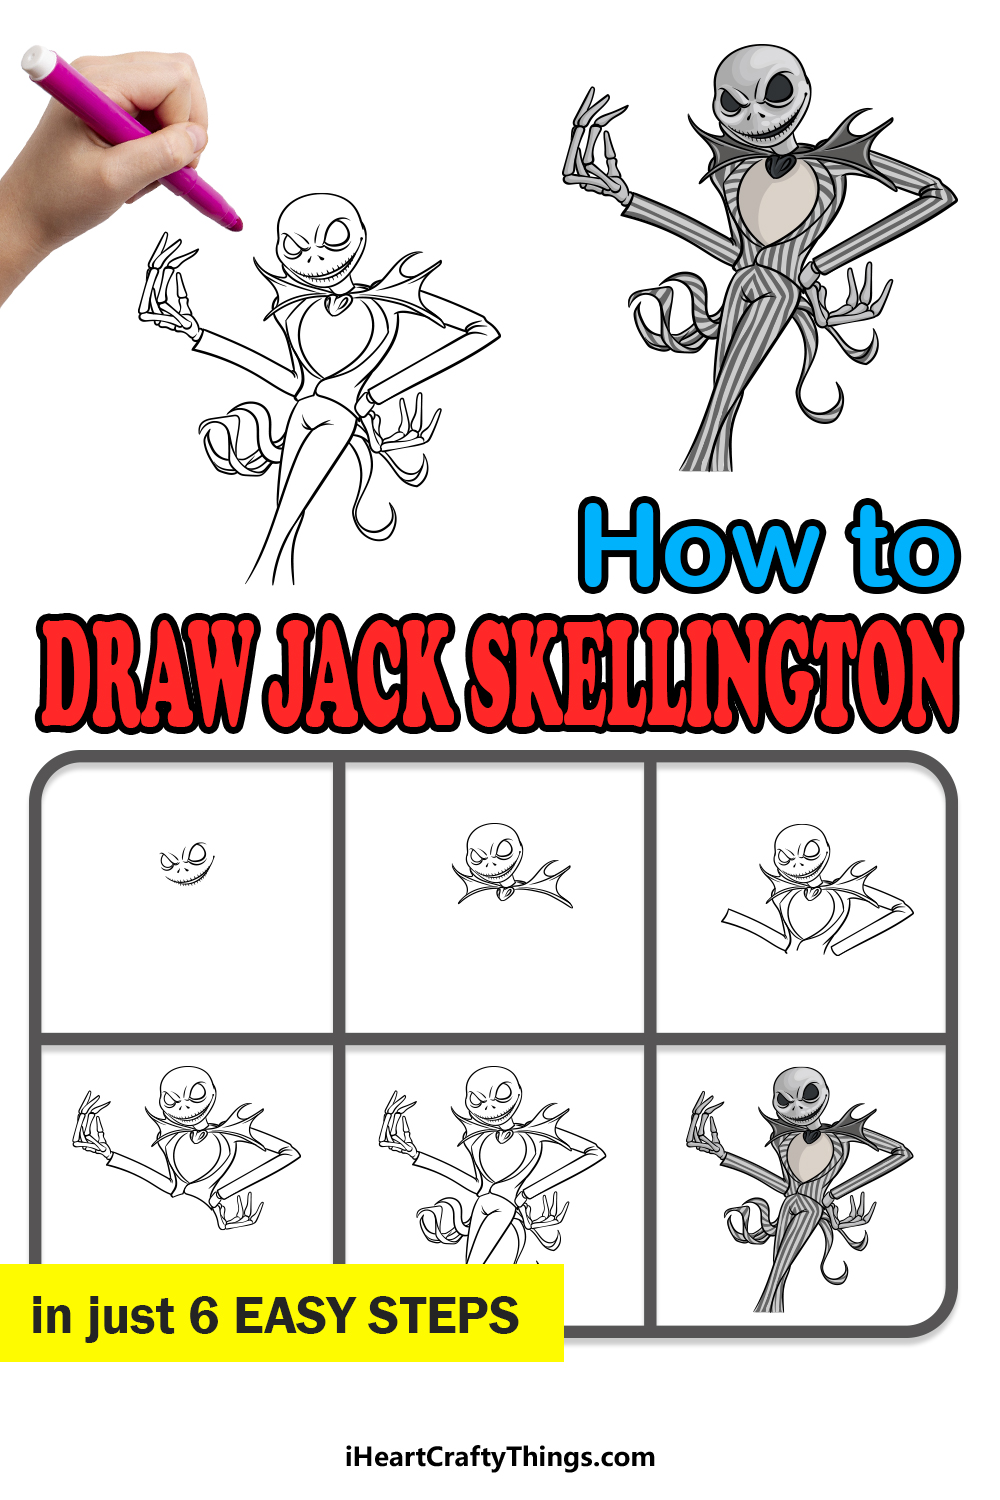
Anyone wanting to learn how to draw Jack Skellington has found the perfect guide! This tutorial for kids is easy for anyone to follow.
The Nightmare Before Christmas is a classic 1992 animated film that puts a macabre twist on traditional Christmas films. Many people think it was directed by Tim Burton, but he came up with the story, leaving the directing to Henry Selick.
The film tells the story of Jack Skellington as he seeks to learn more about Christmas, and it makes for a charming yet mildly disturbing tale!
Many people love the design of Jack Skellington, as there is just something appealing about it. Fans of the film often love to try and draw Jack, only to find that it’s easier said than done.
This guide will show you the easiest way to draw him without sacrificing any of the details and design elements you know him for.
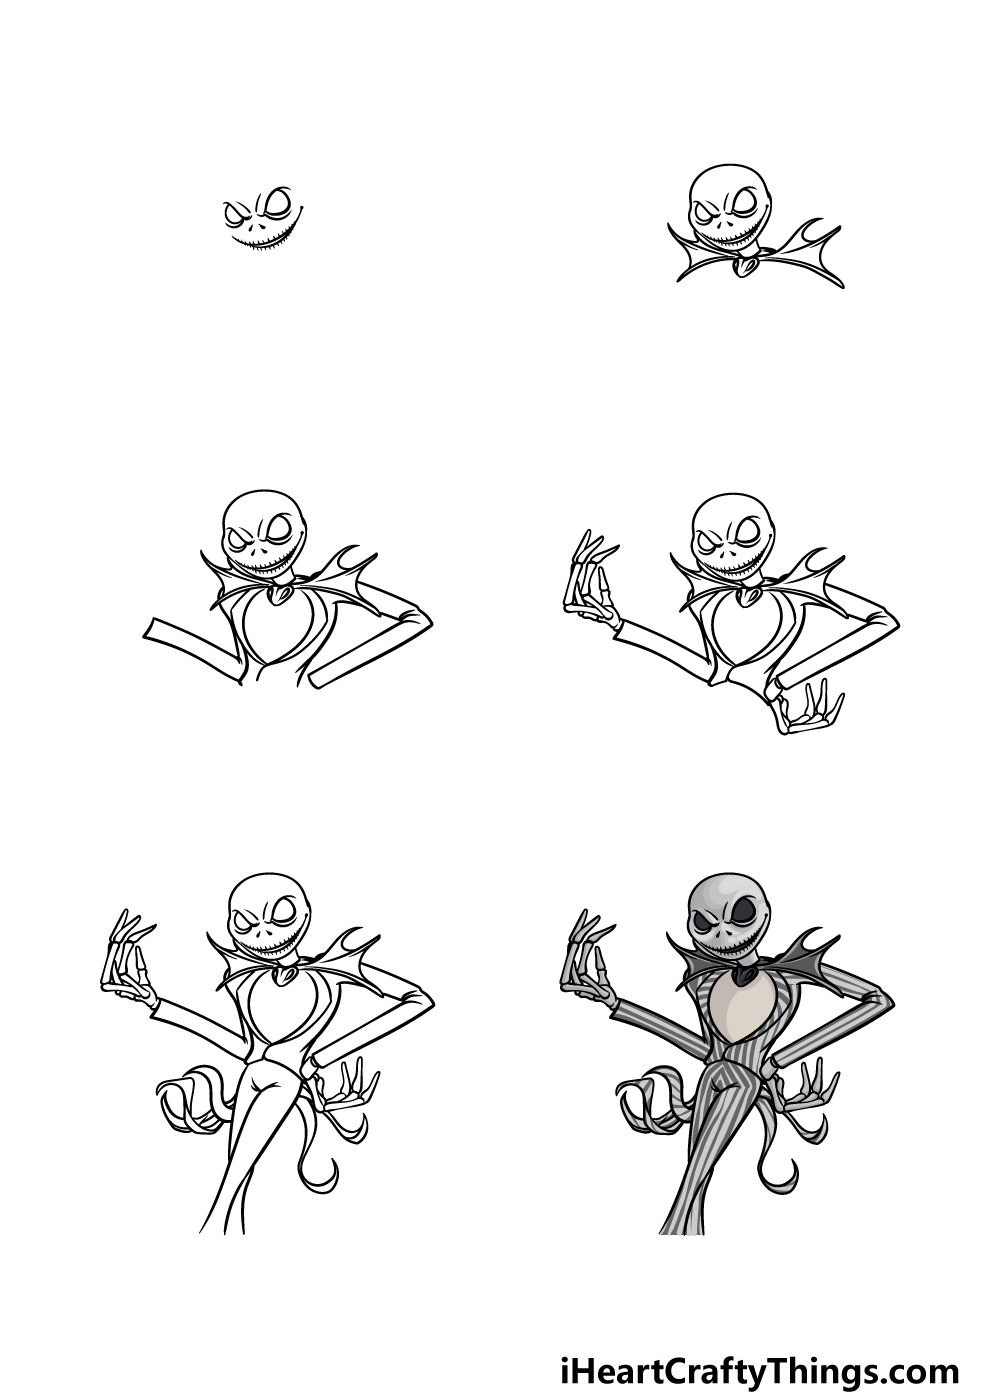
Watch And See How To Make Your Jack Skellington Drawing
How to Draw Jack Skellington – Let’s Get Started!
Step 1
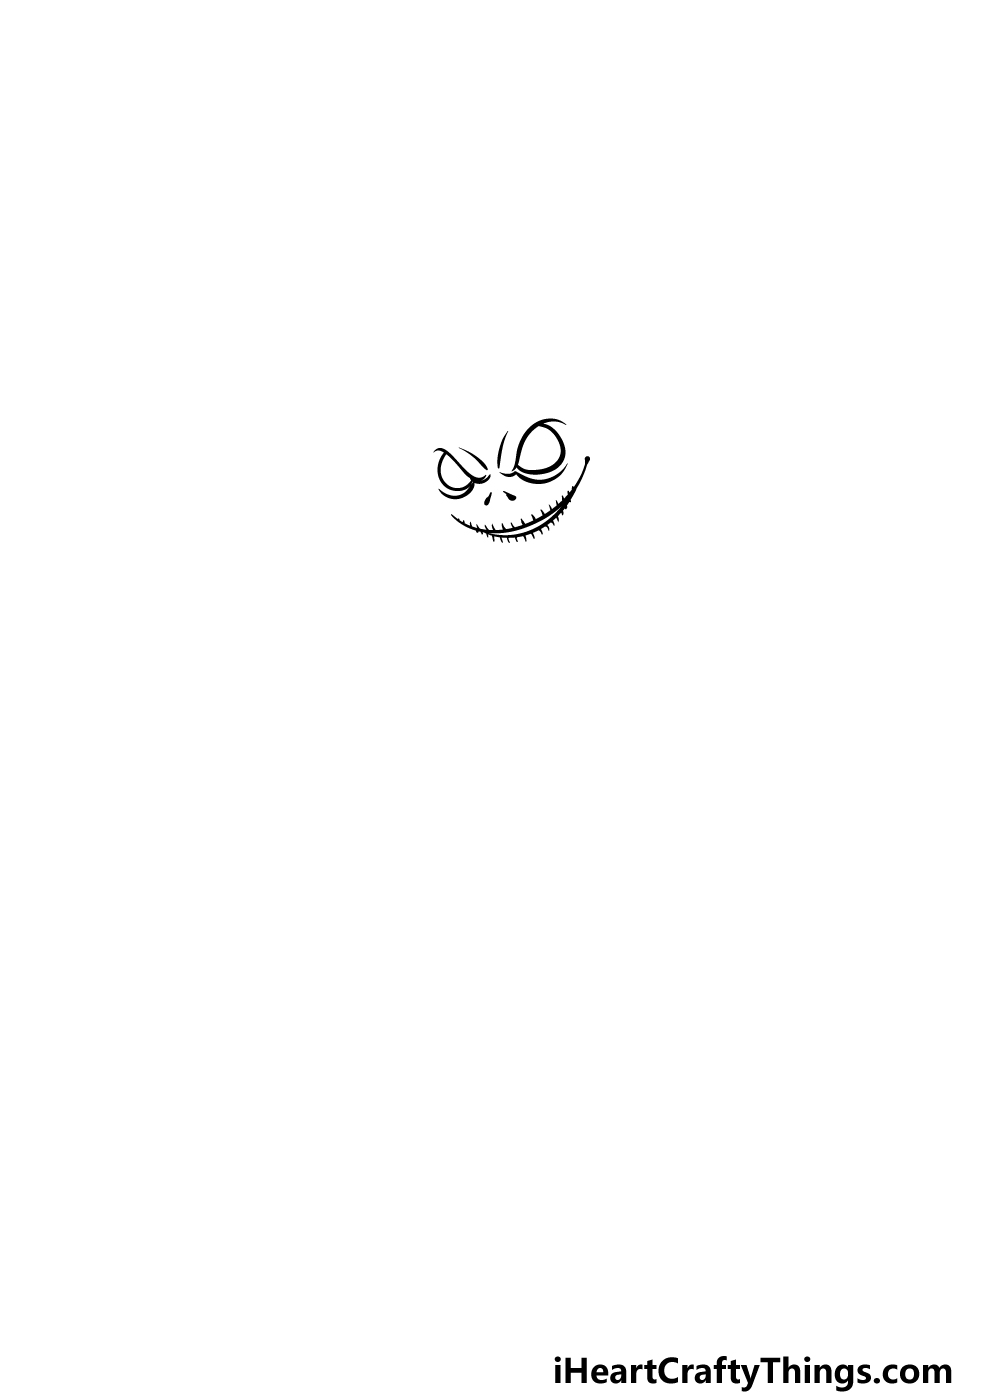
One of the most defining features of Jack Skellington is in his name, he is a living skeleton!
With this in mind, we will be starting with his skull head in this first step of our guide on how to draw Jack Skellington.
To begin this, we will first draw the face of the skull. First, use some curved lines for the top of his eyes that will give them some attitude.
Then, draw some more lines between them to further emphasize his facial expression, and then draw two dots beneath them for his nose.
Finally, we will draw his grinning mouth. You can do this by drawing two curved lines connecting to one another. Then draw rows of small lines poking off the top and bottom of the mouth to make it look like teeth.
Step 2 – Next, draw his head outline as well as the top of his outfit
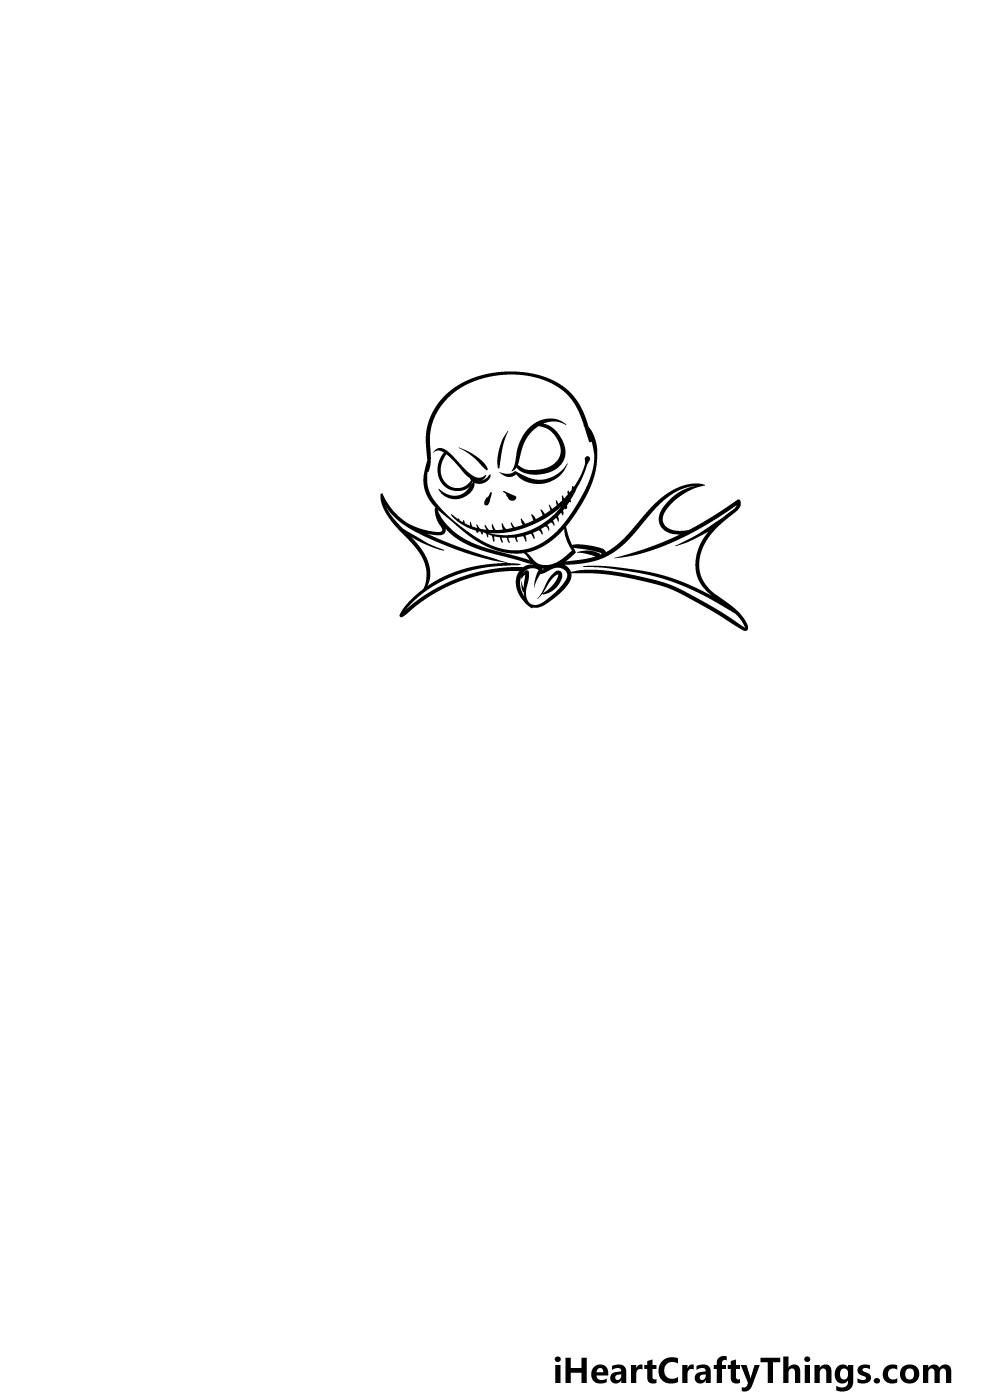
Now that you’ve drawn his face, you can draw his head outline in this part of your Jack Skellington drawing.
His head is separated into two halves, with one curved line for the top and a wider one for the bottom of his head.
Then draw two short lines coming down from his head, as these will form his neck. Then we will create the collar of his outfit, and the center of it will be a small round shape that will serve as a sort of broach connecting the two wings.
Speaking of the wings, we will use some curved lines to form the shapes of his collar that look a bit like bat wings. Then you’re ready for step 3!
Step 3 – Start drawing his arms and chest
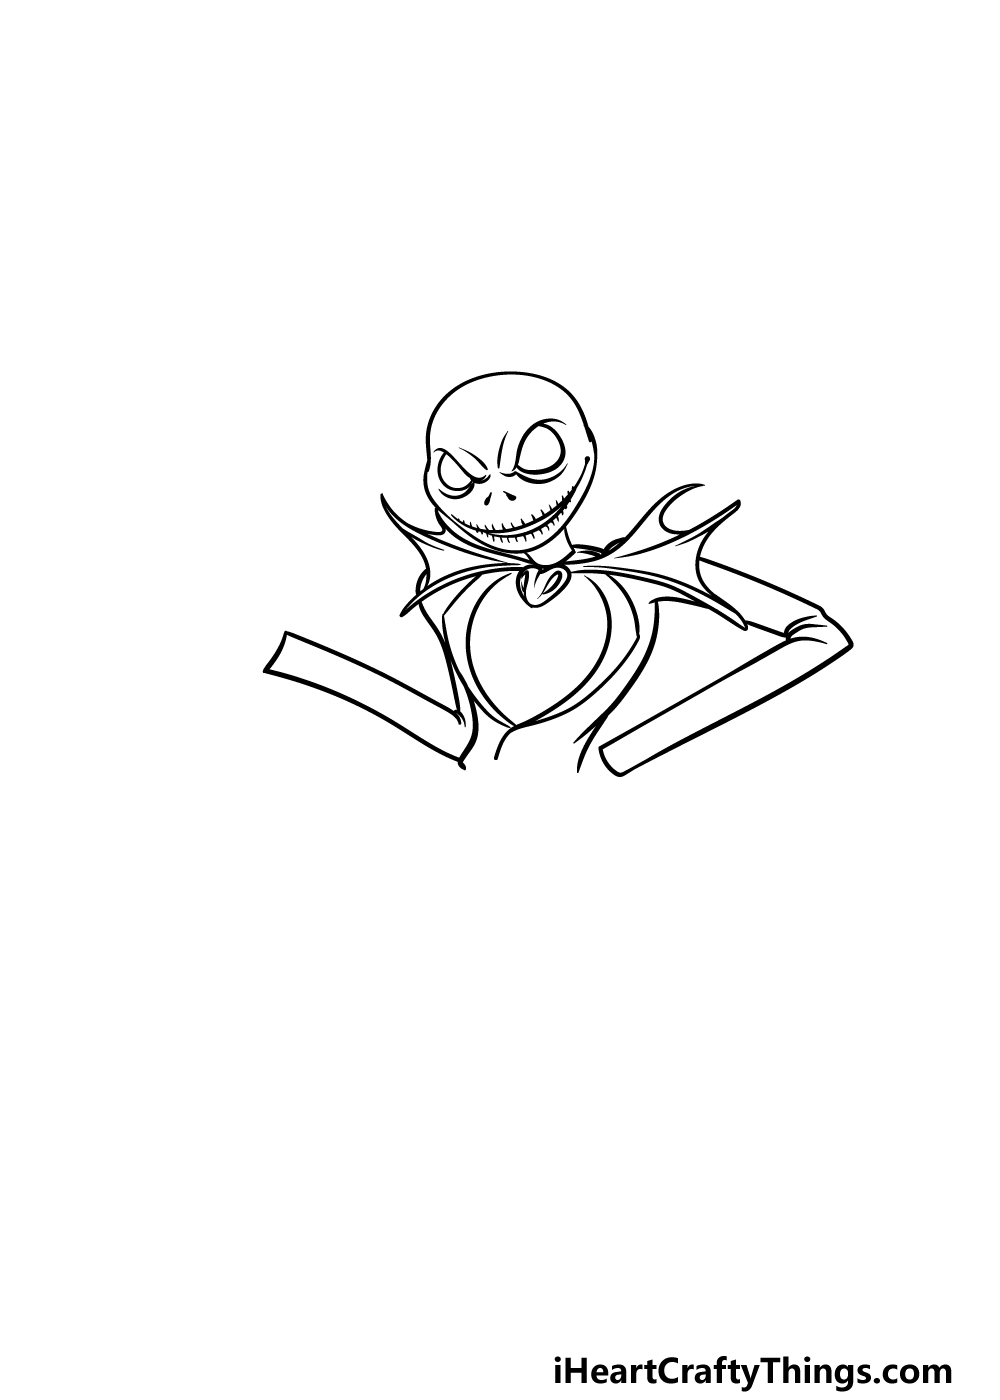
His head is complete for now, so for this third step of our guide on how to draw Jack Skellington we will start to draw his arms and his chest.
Starting with the arms, we will be using some curved and straight lines for his arms. The arm on the left will be raised, but the one on the right will be bent at his side.
Then you can draw his jacket and his chest using some more rounded lines. Once it looks as it does in our reference image, you’re ready to proceed!
Step 4 – Now, draw the hands for Jack Skellington
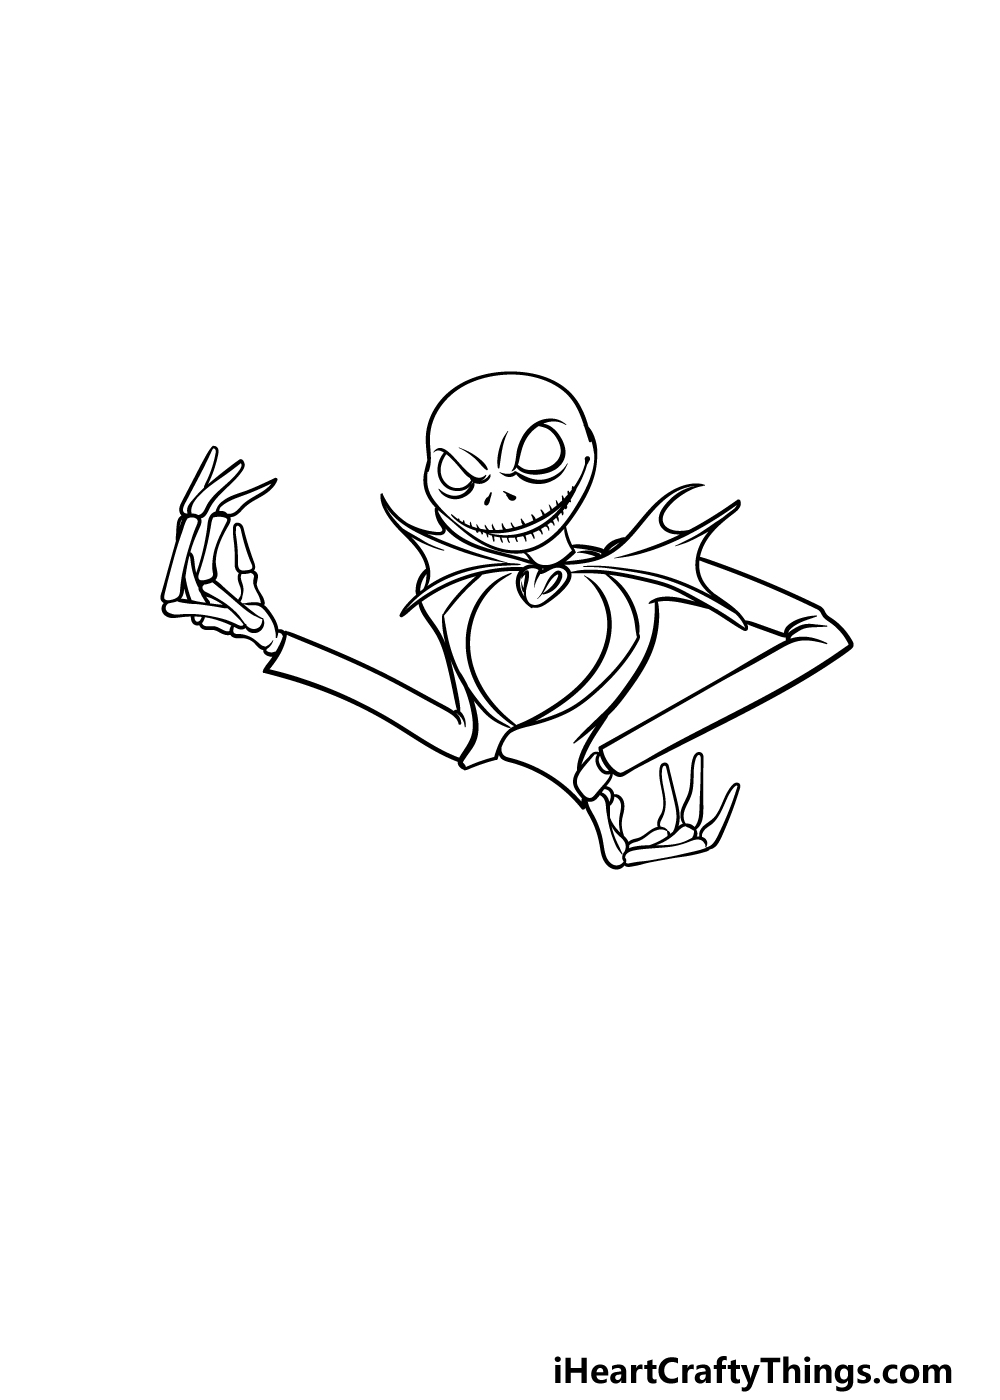
For this part of our Jack Skellington drawing, we will be drawing his skeletal hands. Because his hands are skeletal, we will be using several segments for his hands.
The arm on the left will have a hand that is raised up, and the one on the right will be curled to show that the hand is against his waist.
With both of his hands drawn, we just have a few final details to add in the next step of the guide!
Step 5 – Finish off your Jack Skellington drawing by drawing his legs
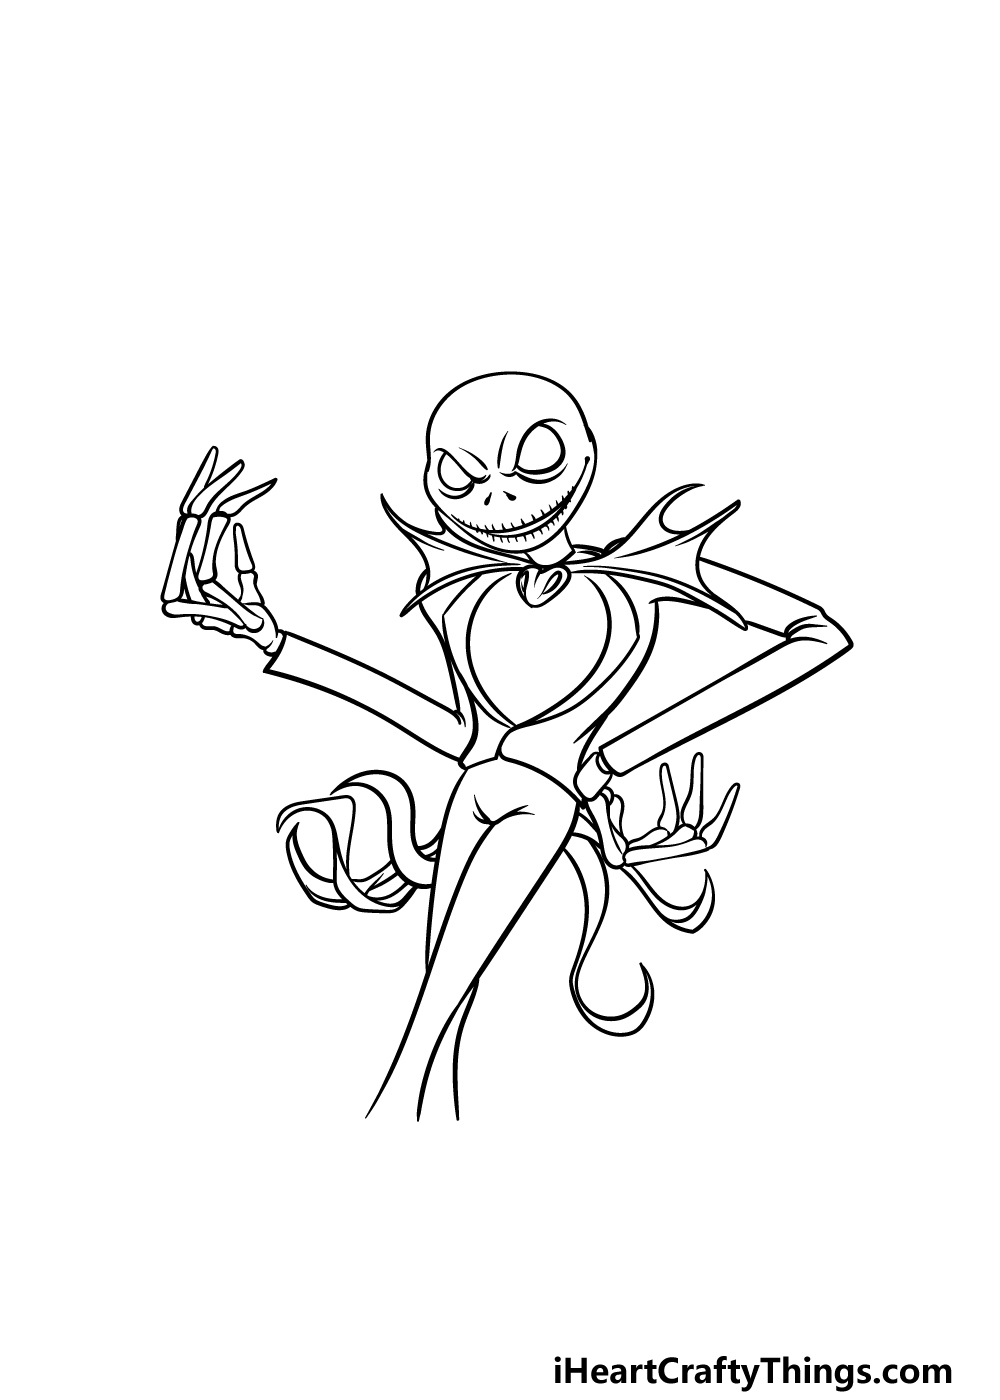
Before we add some color to your picture, we have a few final elements to add in this part of our guide on how to draw Jack Skellington.
First, we will be drawing his legs which will be crossed a bit. To draw the legs, you will be using some slightly curved lines to draw his legs as they appear in the reference image.
Then we will finish off by using some wavy lines for his coattails flowing behind him.
Then you can add some of your own elements and details to finish off your picture! You could draw some background details from your favorite scene of the film or add some more characters that you may love from the movie as well.
These are just a few ideas you could go for, but what else can you think of to finish off this image?
Bonus: Add A Border To Your Jack Skellington Drawing
One of the best ways to really add a new dimension to a drawing is by adding a border. There are a few different ways that you can go about doing this.
We think it would look great for this Jack Skellington drawing, and you could get really creative with it! One way you could add a border would be to keep it simple and elegant.
This could be a simple black bar design forming a square or a rectangle around the character. It would certainly be simple, but effective!
You could use a variety of colors as well, whether they relate to the film or not. If you want it to be a thicker bar border, then you could use a thicker pen to create a wider, darker line.
Using a ruler would also be preferable for this purpose, so we would recommend that. You could also make the border a lot more complicated to create a theme around your Jack Skellington drawing.
One way of doing this would be by making a border that captures the feeling of the film. Maybe you could have a border made of dark twisting vines with black roses growing from them.
Or, maybe you could make a border made up of lots of different bones and skeletons. It would also be possible to use the faces of characters from the film and then draw them forming a shape around him.
These are some simple ideas, but they show you how you can get a bit creative with it. We’re sure you can think of many more, and they could be inspired by your favorite scenes from the film.
How would you like to frame this drawing of Jack Skellington?
Step 6 – Finish off your Jack Skellington drawing with some color
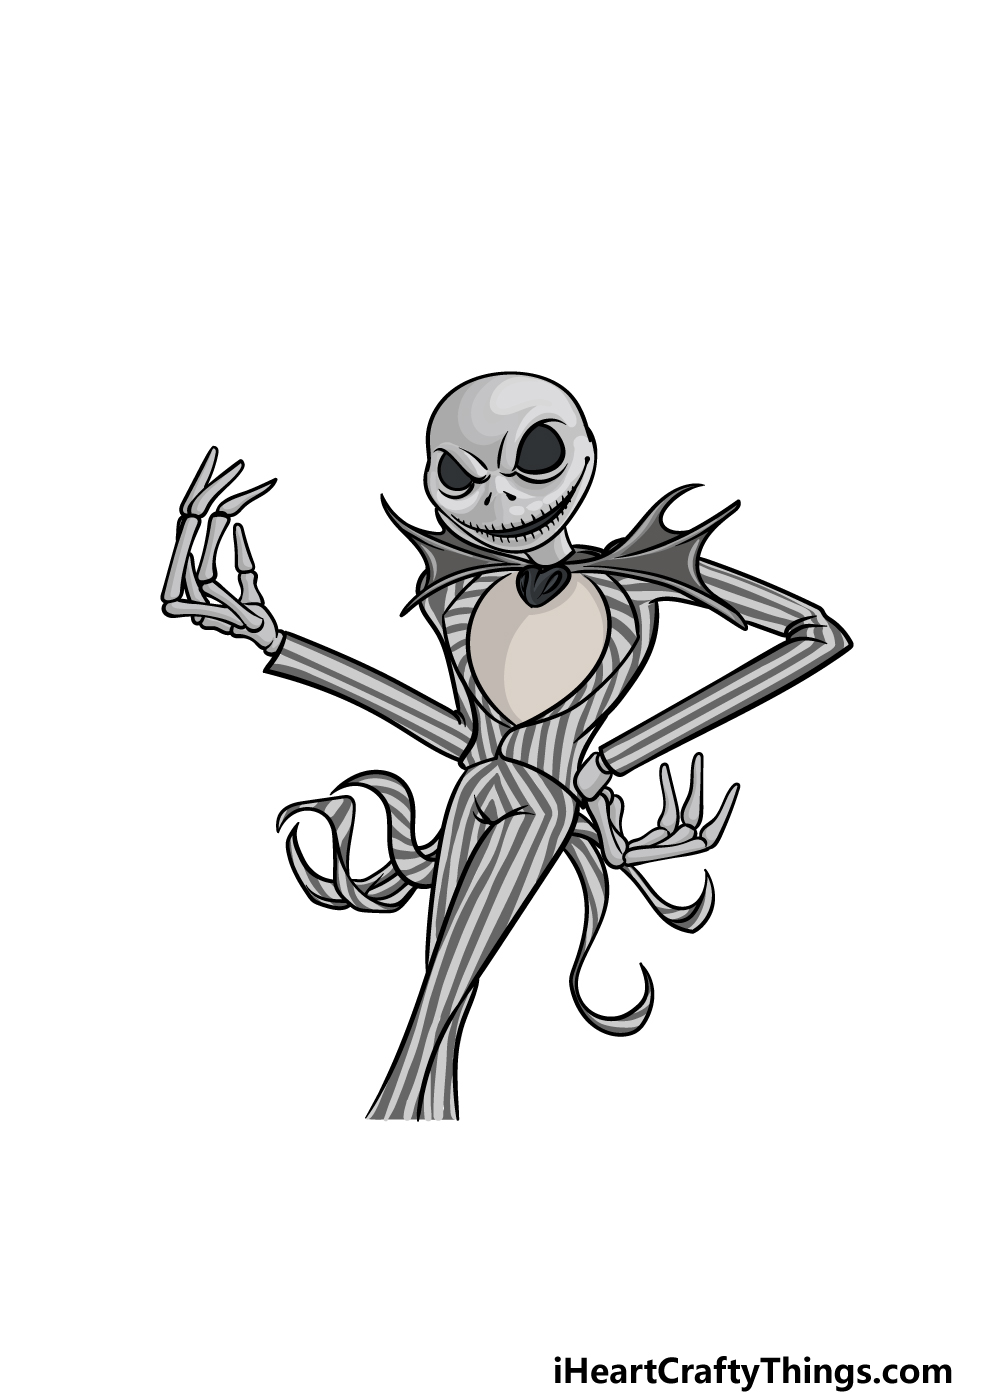
We will be finishing off your Jack Skellington drawing with some colors in this final step. As shown in our reference image, we will be using some shades of grey to color in Jack.
These are what we would suggest, but you can also add any colors of your own that you may love! If you drew any background elements or detail additions, then you can use these aspects with some more colors that you may love to finish it off.
You could also experiment with your favorite art tools and mediums to bring the colors to life. We can’t wait to see what colors and mediums you use to finish off your picture?
5 Tips To Make Your Jack Skellington Drawing Even Better!
Make this Jack Skellington sketch look even better with these 5 fun and easy tips!
This character is from a movie that features Christmas as a big element. That means that you could add some festive elements to this Jack Skellington drawing.
It could be simple such as adding a Santa hat on his head, but you could add lots of Christmas decorations! These are just a few festive ideas, but how else could you give this a Christmas spin?
We focused on just a portion of this character for this drawing of Jack Skellington. This looks great, but you could add a bit more to the design to finish him off!
This could include drawing the rest of his legs, but you could add as much as you like. How else can you finish off this pose?
When you have mastered this design, you could use what you have learned in order to draw him in some different poses.
This could be done by keeping some of the elements from the guide and changing a few others!
You could create a brand new pose, but you may also want to recreate some poses from the film. How would you pose Jack Skellington to finish this off?
Jack is far from the only iconic character from the film he stars in. Adding some more of these characters to this Jack Skellington sketch would be a great way to capture the spirit of the film!
One of the most obvious additions would be his love interest, Sally. You can find many pictures of her online or use the film itself as a reference.
What other characters could you add to this artwork?
Whether you used some of our tips or all of them, you could then bring it all together with a background for this Jack Skellington drawing. This could be simple or as complex as you like!
A common image for this character shows him with the moon big behind him. Or you could go for a complex recreation of your favorite scene for a few ideas.
Your Jack Skellington Drawing is Complete!
All six steps of this guide on how to draw Jack Skellington are complete, and you have recreated this iconic character!
We hope that this guide made it easy and fun for you to learn how to draw Jack, as we aimed to break it down into smaller steps to make it easier for you to take on.
Now you can take this drawing to the next level by adding your own details and elements.
We mentioned a few ideas such as drawing a background and more characters from the film, but there is a lot that you can do. You can also experiment with your colors and art mediums to really express your creativity!
Once you’re ready for your next drawing guide, be sure to visit our website. We have plenty of awesome guides and upload new ones constantly for you to enjoy!
We would love to see your completed Jack Skellington drawing, so please be sure to share your artwork on our Facebook and Pinterest pages for us to enjoy!