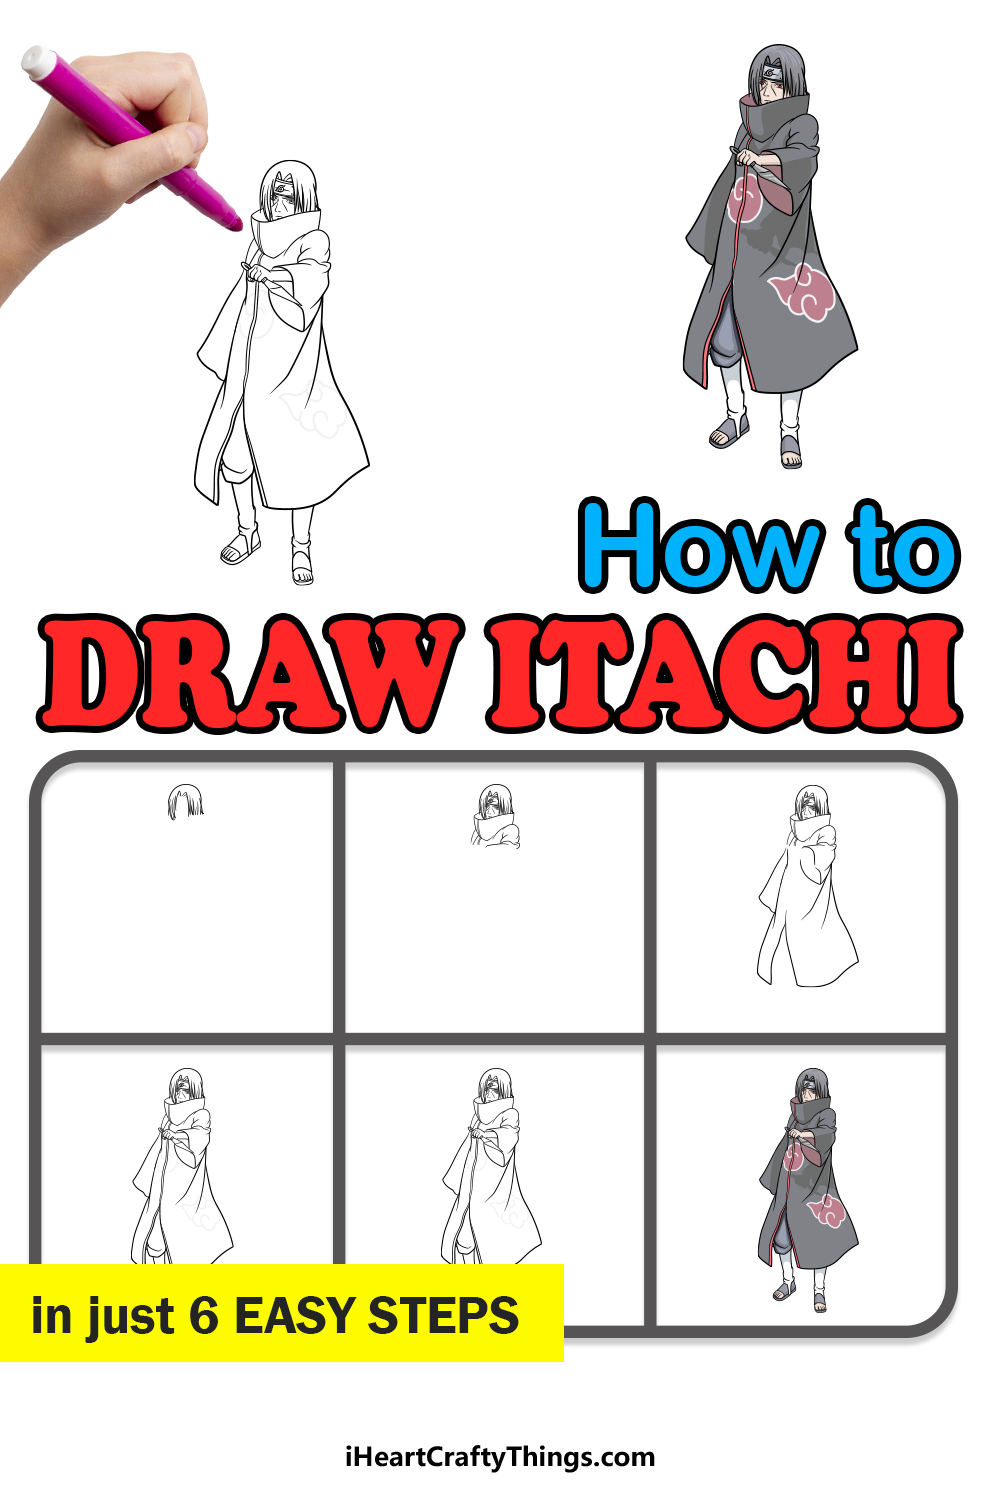
There are many unique characters in the Naruto manga and anime series. Of all of them, Itachi has to be one of the most complex and interesting of them all.
He has sometimes been seen as a villain and a hero, but one thing for sure is that he has many fans around the world.
He also has a cool and unique character design, and that can make it lots of fun to learn how to draw Itachi.
This can be easier said than done though, as there are some tricky details to his design.
Worry not though, as this step-by-step guide on how to draw Itachi will show you how it’s done!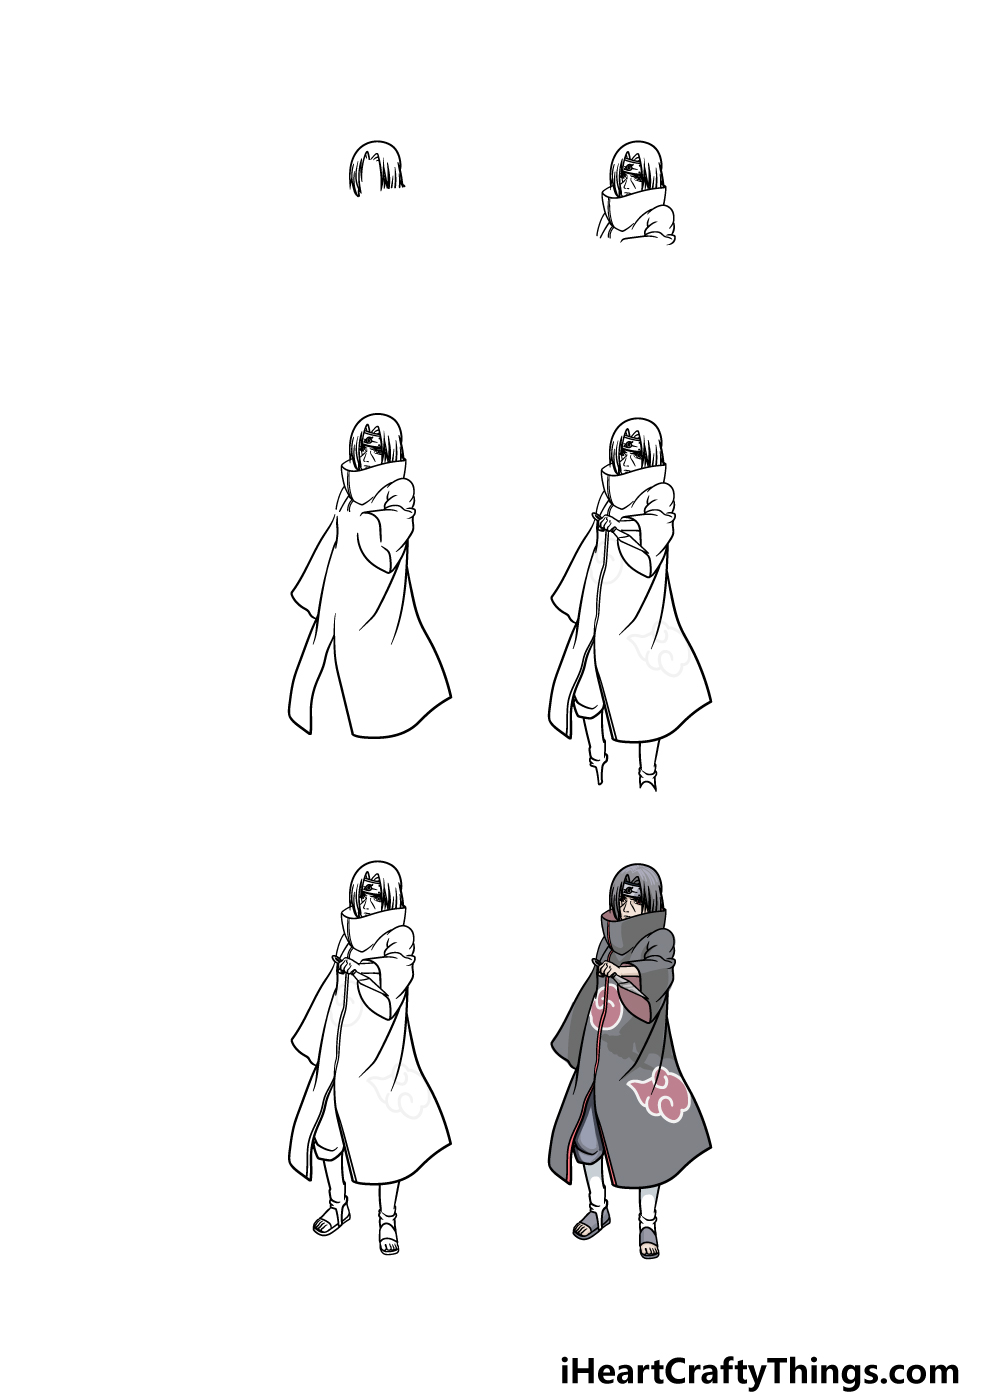
How to Draw Itachi – Let’s get Started!
Step 1

We will begin with Itachi’s unique hairstyle in this first step of our guide on how to draw Itachi. First, use a curved, solid line for the top of his head.
Once you have that, we will use lots of individual sharp lines at the bottom of the shape for his hair spiking over his face.
Once you have replicated the lines as they appear in the reference picture, you’re ready for step 2 of the guide!
Step 2 – Next draw the facial details and start his collar
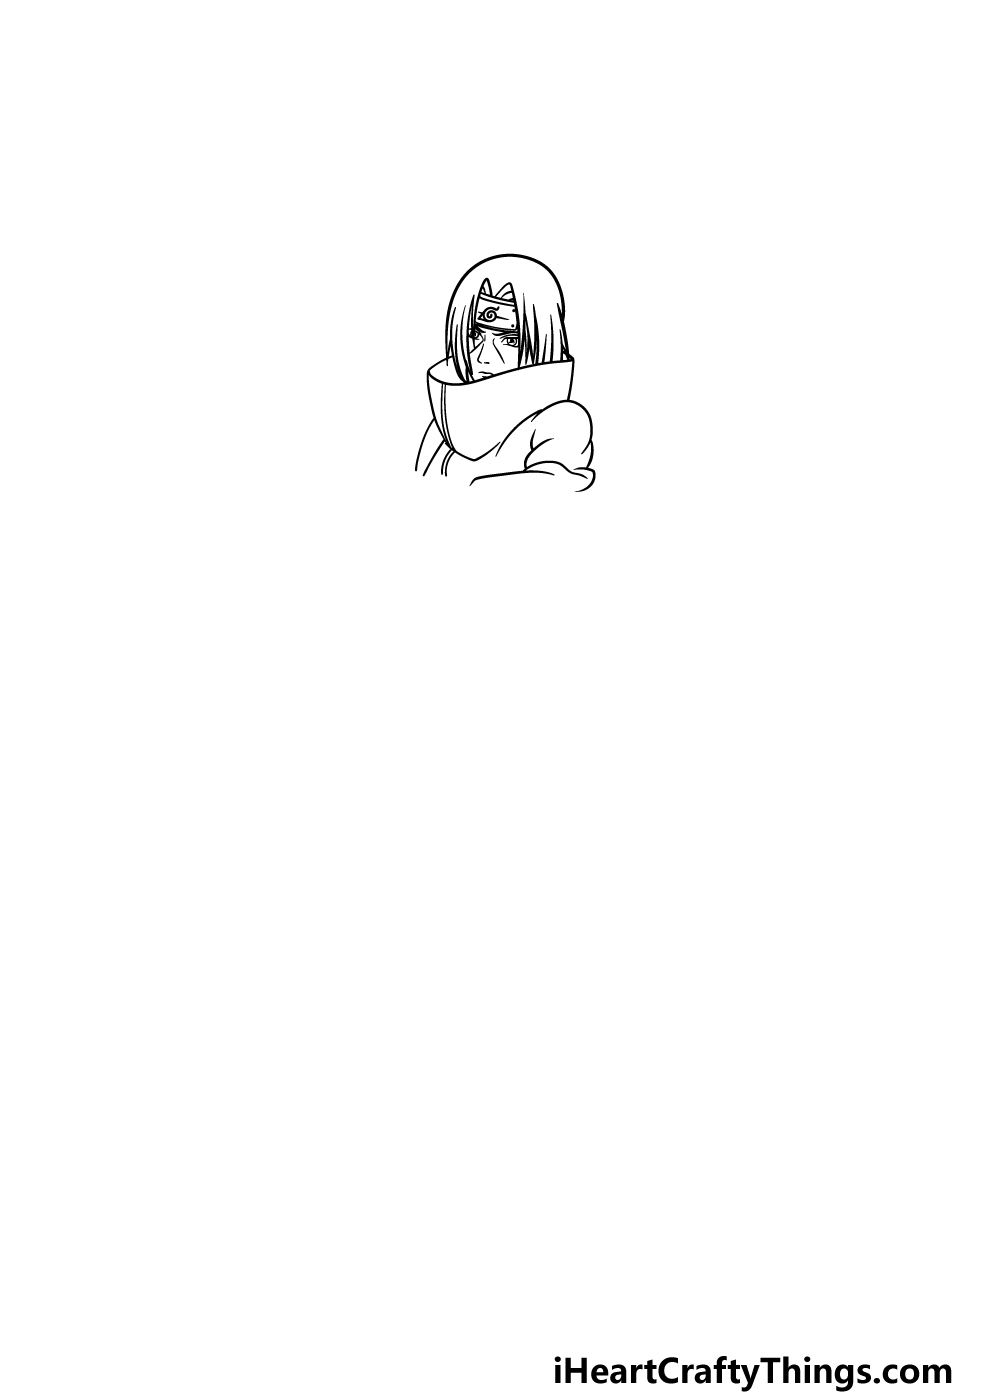
Now that you have his hair drawn, you can now start to draw his facial features. First, he has a headband on under his hair, and it has an insignia on it.
Then we will be drawing his face, and it will be drawn in such a way that we will be suggesting his complex character background.
Using some smaller lines, we will be drawing his eyes, nose and mouth to create his serious facial expression.
Then we can start to draw his outfit. He has a large collar around his neck, and that’s what we will start with for it.
Use a curved line underneath his head for the top of it and then use some more for the sides. There will also be some lines at the front of it to show where the opening is.
Then you can finish off this step by drawing the start of his shoulders using some more curved lines.
Step 3 – Draw the flowy cloak for Itachi
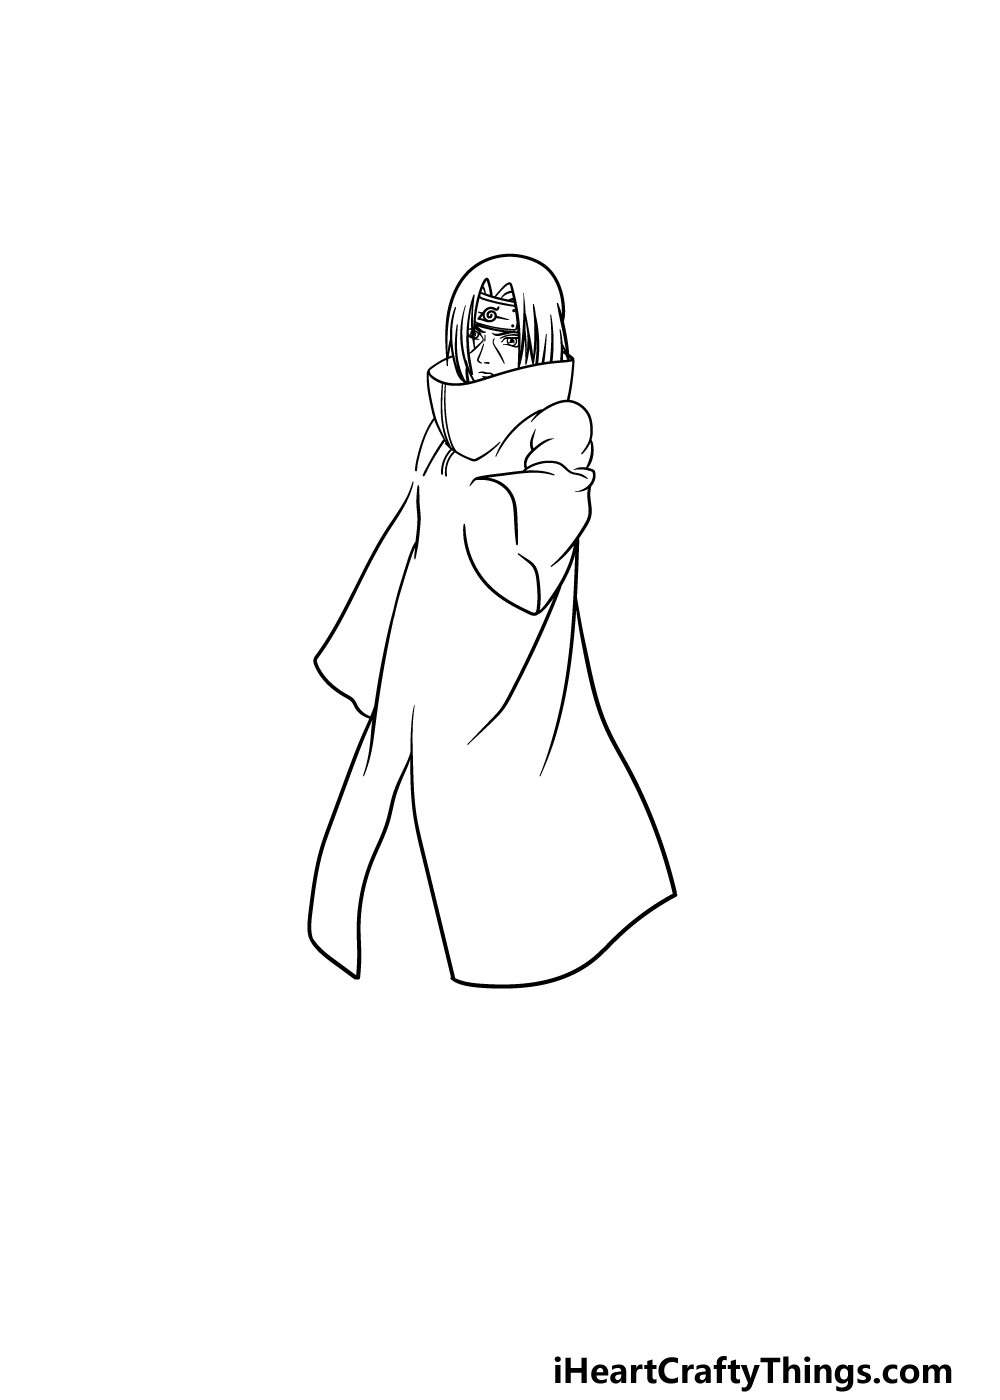
For the third step of our guide on how to draw Itachi, we will be drawing some more of the large, flowy cloak he’s wearing.
The lines we are using will be quite specific, because we will be adding some elements such as arms and hands later.
For that reason, you’ll want to follow the reference image closely as you draw! First, draw the large opening of his sleeve extending from the shoulder you drew on the right.
Then we will finish off the cloak by drawing some more curved lines for the sides of the cloak. These will meet at an opening in the front, and then you can finish off by drawing the sleeve on the left.
Step 4 – Now, draw his hand and start the legs
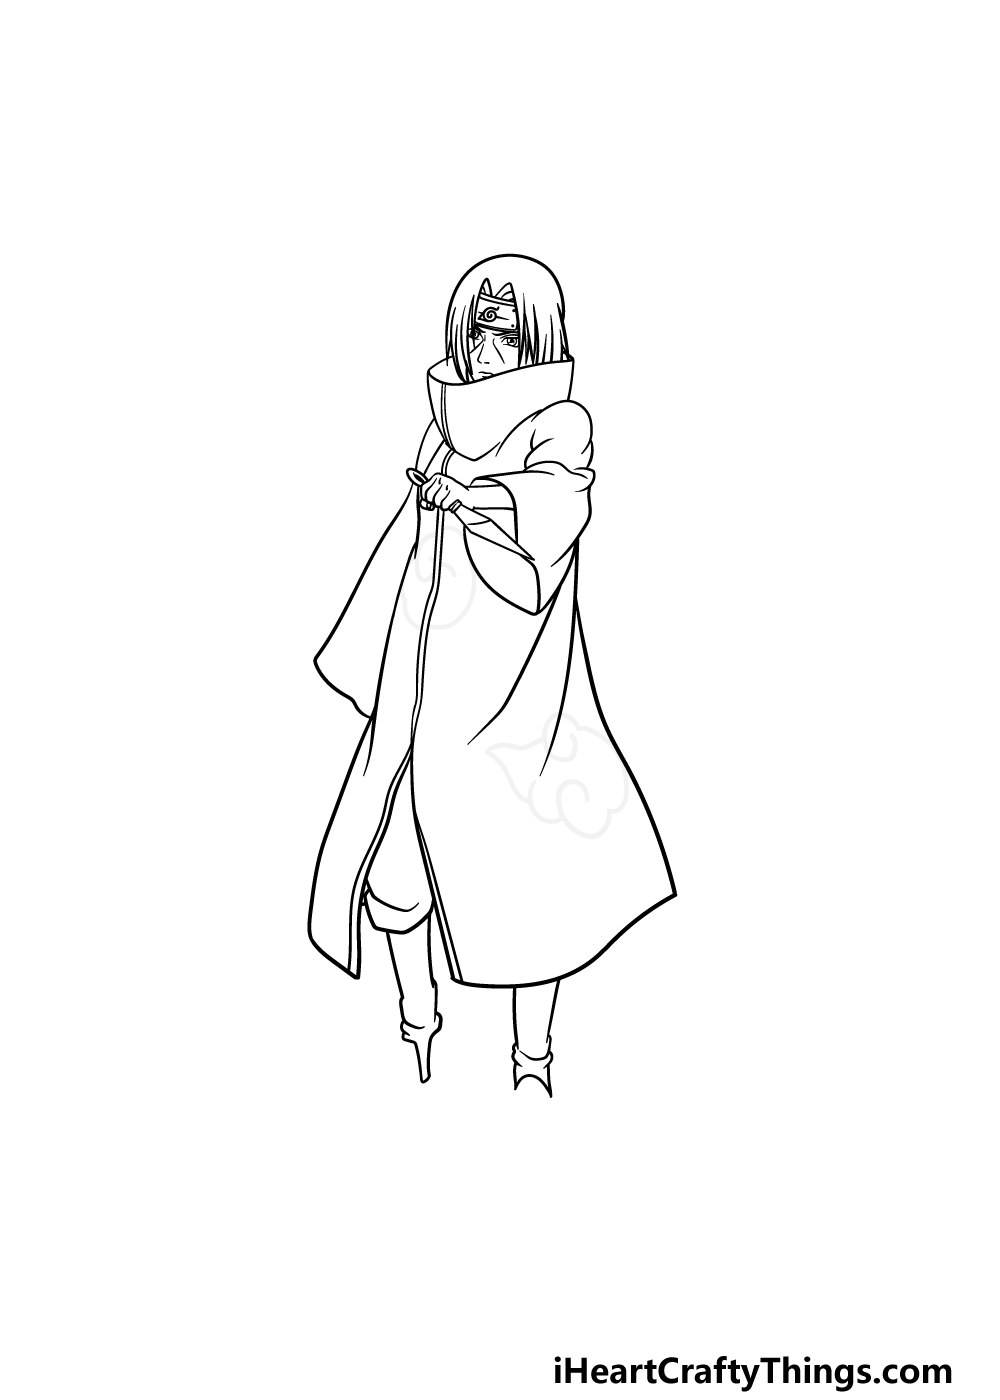
You will see why we left certain gaps in this part of your Itachi drawing, as we will be drawing the hand on the right grasping his bladed weapon.
Carefully try to replicate that hand coming from the sleeve and have him holding the blade.
Then, once you have drawn that hand you can start to draw his legs coming out from the bottom of his cloak.
Once you have drawn the start of the legs, we will be ready to finish them off in the next step as we add some final details.
Step 5 – Finish off his feet and the final touches
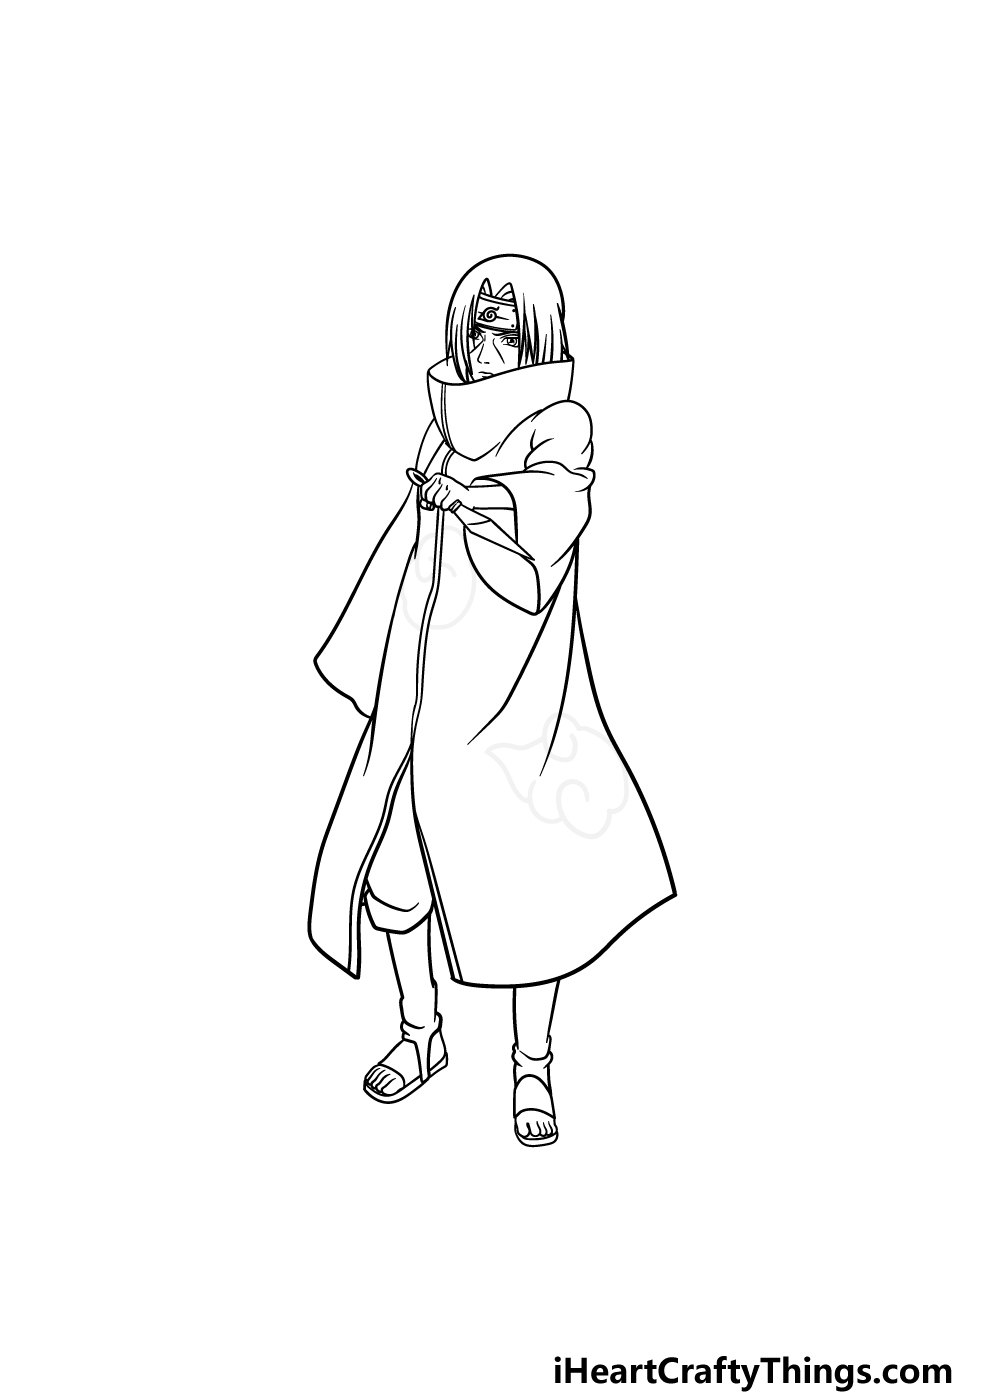
For this fifth step of this guide on how to draw Itachi, we will be finishing off his feet and adding some final details.
First, draw his feet poking out from the openings that you left at the bottom of his ankles earlier until it looks like our reference image.
Once you have drawn the feet, you are ready for the final step of the guide! You don’t have to do that just yet though, as this is your drawing and you can add some extra details of your own.
You could draw a background to show what your favorite Itachi scene is or you could draw him with your favorite Naruto characters.
Perhaps you could draw him with his brother Sasuke for one idea! How will you finish off this awesome drawing before the final step?
Step 6 – Finish off your Itachi drawing with some color
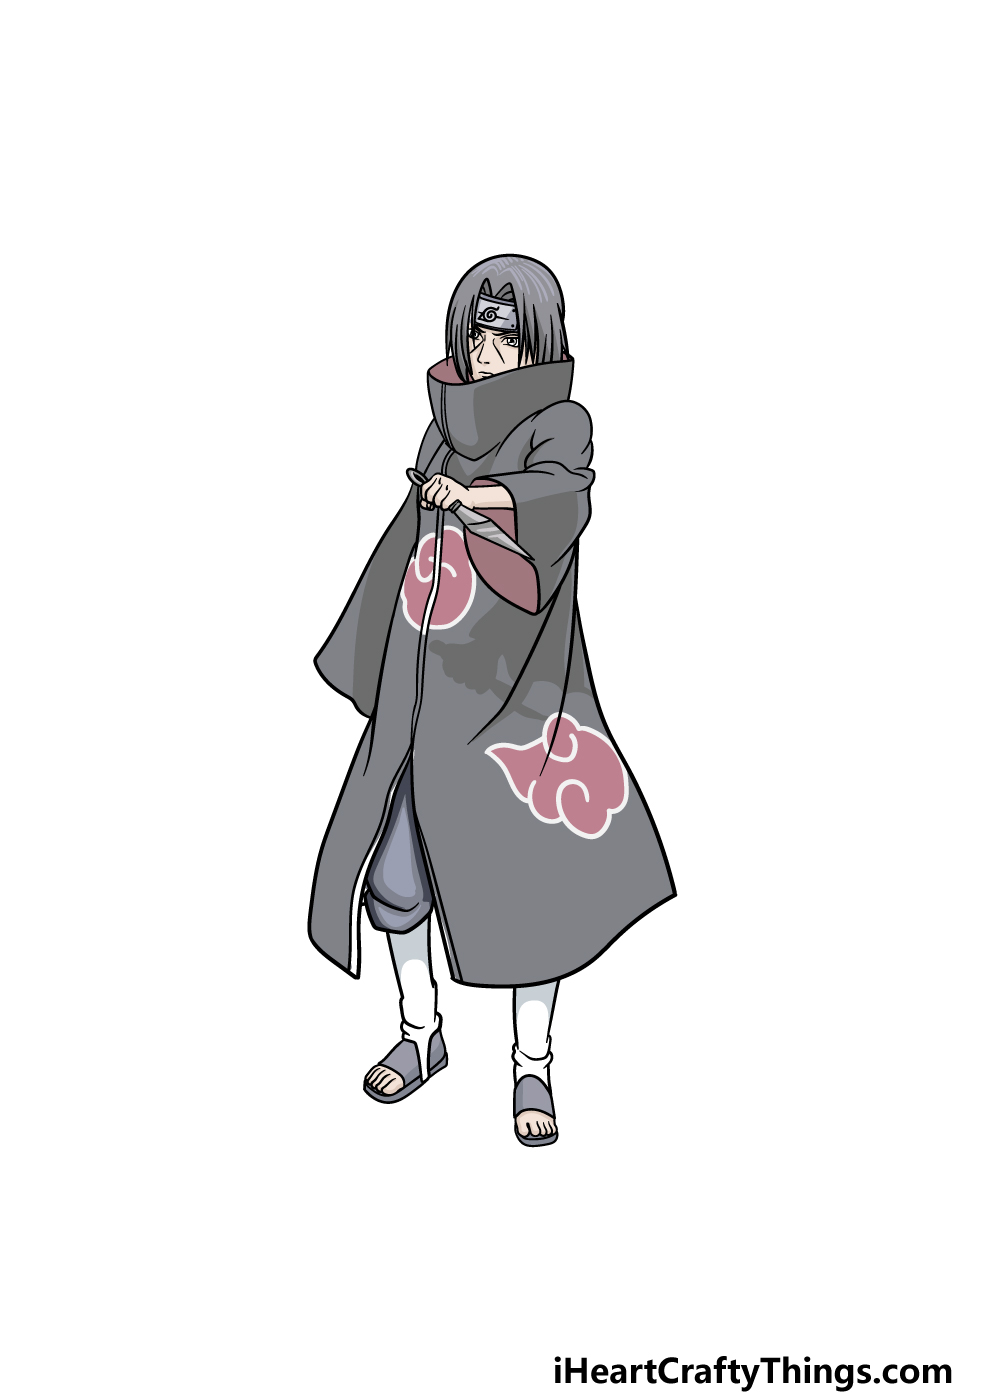
This is the final part of your Itachi drawing, and now you can finish it off with some amazing colors!
In our reference image, we showed you how he is typically, colored, and you can use this as an example if you would like to replicate his classic colors.
For this, we used a dark grey and red color scheme for his outfit with darker colors for his hair.
These are just an example, and you could also use some color choices of your own to finish it off.
Once you have decided on your colors, you can then pick which art mediums and tools you will use to bring them to life. It’s up to you, so how will you finish off this picture with your colors?
3 More tips to make your Itachi drawing easy!
Make this iconic character even easier to draw with these tips for your Itachi sketch.
In order to match the style of the manga and anime that Itachi appears in, he was drawn in a highly detailed style in this drawing of Itachi.
If you find this style of art to be difficult to draw, you could make it easier by adapting it to a style you find easier. For example, you may prefer to draw Itachi in a simpler cartoon style.
If that’s the case, you could still use the guide and the reference images we laid out and adapt it to your chosen style.
You could use any art style you like, and it could even result in a picture you prefer!
If you wish to retain the style of this Itachi drawing but need a bit more help, the best way to do that is by referring to the sources he is from. The more references you use, the better!
You can start by looking at a few of his appearances in various animes and manga to get some images to work with.
These can be used along with the pictures in our guide to help you have a better understanding of his design.
It can really help with the details, proportions and positioning. These could also prove handy if you want to make some variations on this design.
Even though Itachi is not a real person, you may be surprised how much it can help to get a real person to pose for this Itachi sketch.
First, find a friend or a family member who would be willing to help.
They don’t need to look exactly like Itachi, but if they have a relatively similar build to him then that would be great!
Once you have your model, get them to recreate the pose in the guide as best as they can.
This will help you to ensure that the proportions of the drawing look as accurate as possible, and could also help with additional poses.
Your Itachi Drawing is Complete!
You have completed this guide on how to draw Itachi, and you have an incredible depiction of this complex character at the end of it!
This was a potentially tricky drawing because of all the details and linework, but by following the steps and taking it slowly you can definitely do it.
Don’t forget that you can also add some of your own details, elements and extra touches to put your own spin on the drawing.
We mentioned a few ideas you could go for to do this, but this is your chance to show off how creative you can be. We can’t wait to see what you can come up with to put your own spin on it!
Once you’re ready for more, be sure to visit us on our website! You can find lots of amazing guides there, and we upload new ones often for you to enjoy.
Please remember to share your finished Itachi drawing on our Facebook and Pinterest pages, as we always love to see your artworks!