When the icy chills of Winter start rolling in, there are a few surefire ways to keep the chills at bay.
You can curl up in front of a fire with a puffy blanket, but while that will be close to getting the job done, there’s still one way to make it even better, and that’s with a mug of hot chocolate!
This warm beverage can be enjoyed in many forms and variations, but there are few better ways to bring some warmth to your day.
Learning how to draw hot chocolate is a great way to imagine your perfect version of this tasty drink!
This tutorial will be perfect for anyone who loves a cold, cozy night in.
Why not whip up a warm beverage and settle in to enjoy this step-by-step guide on how to draw hot chocolate in just 6 steps!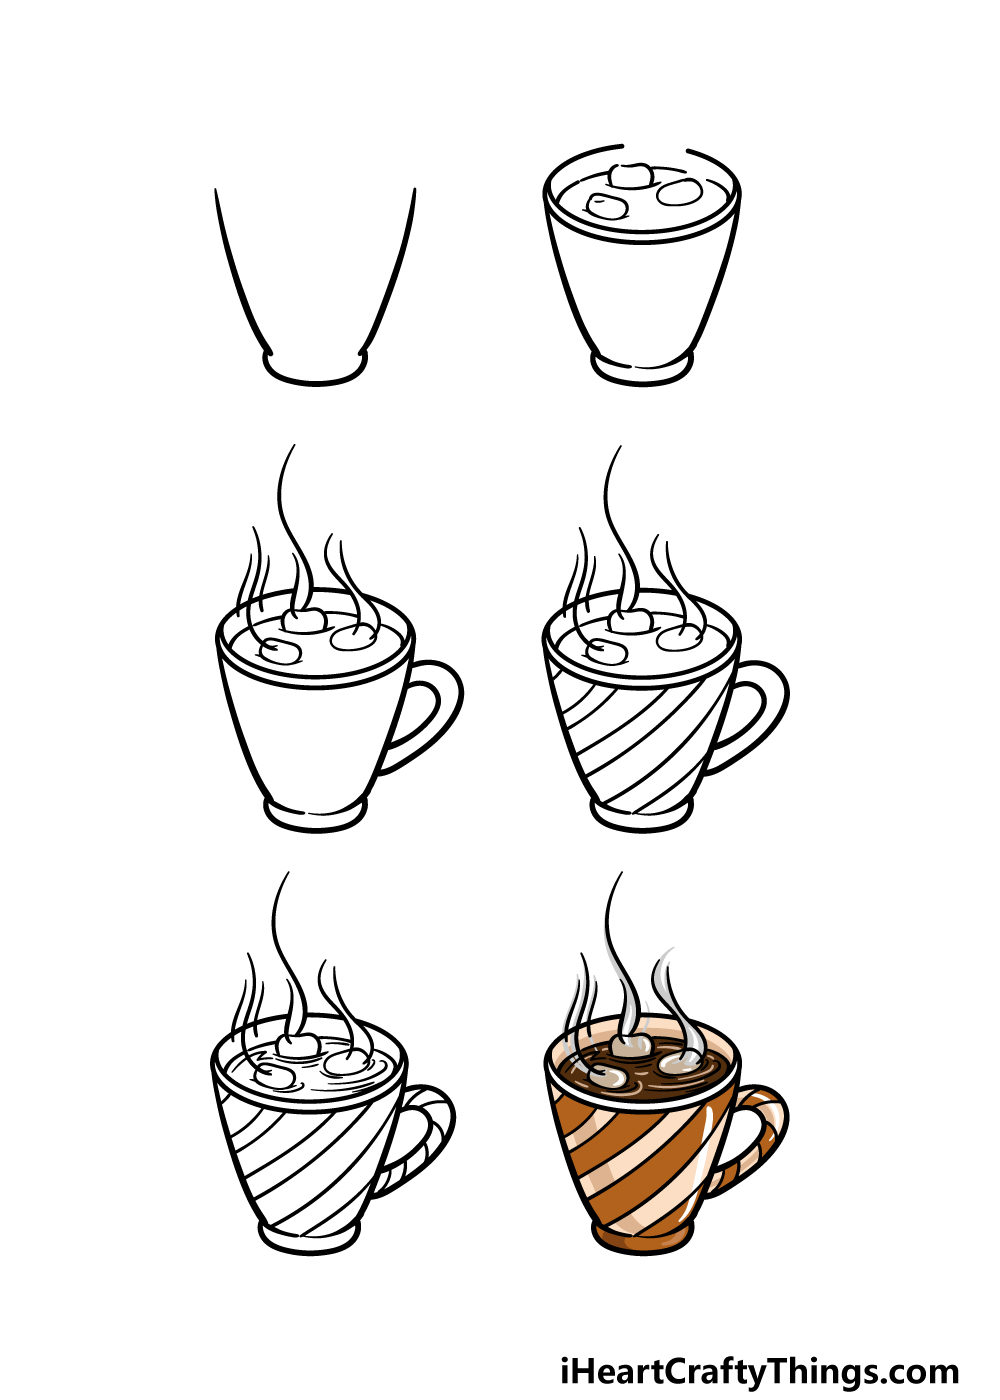
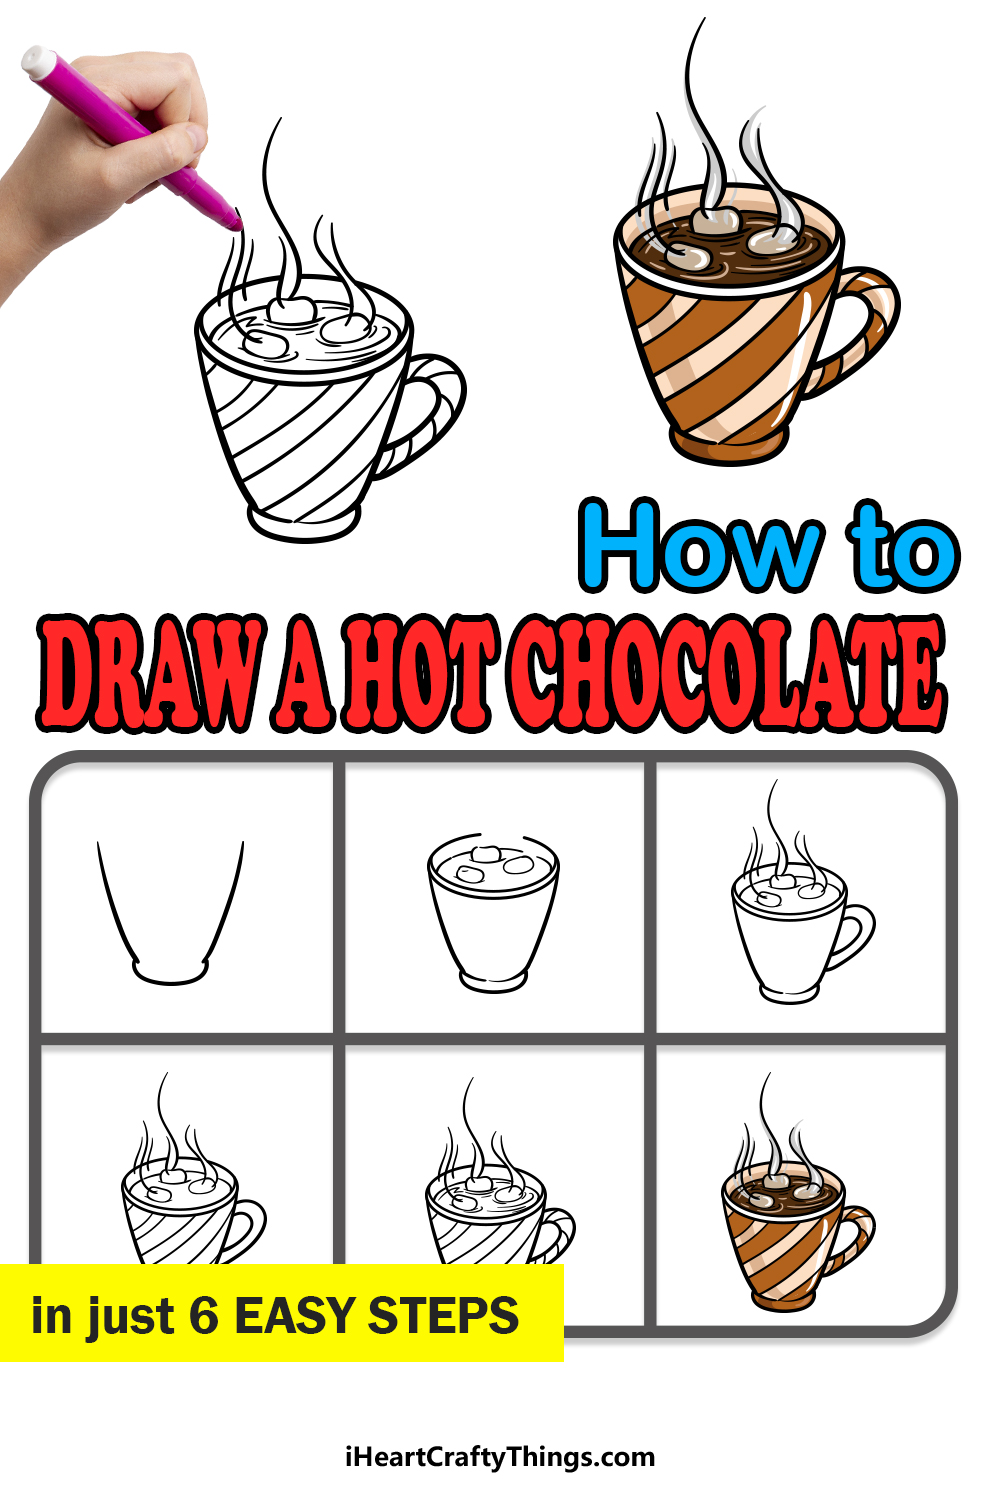
How to Draw Hot Chocolate – Let’s Get Started!
Step 1
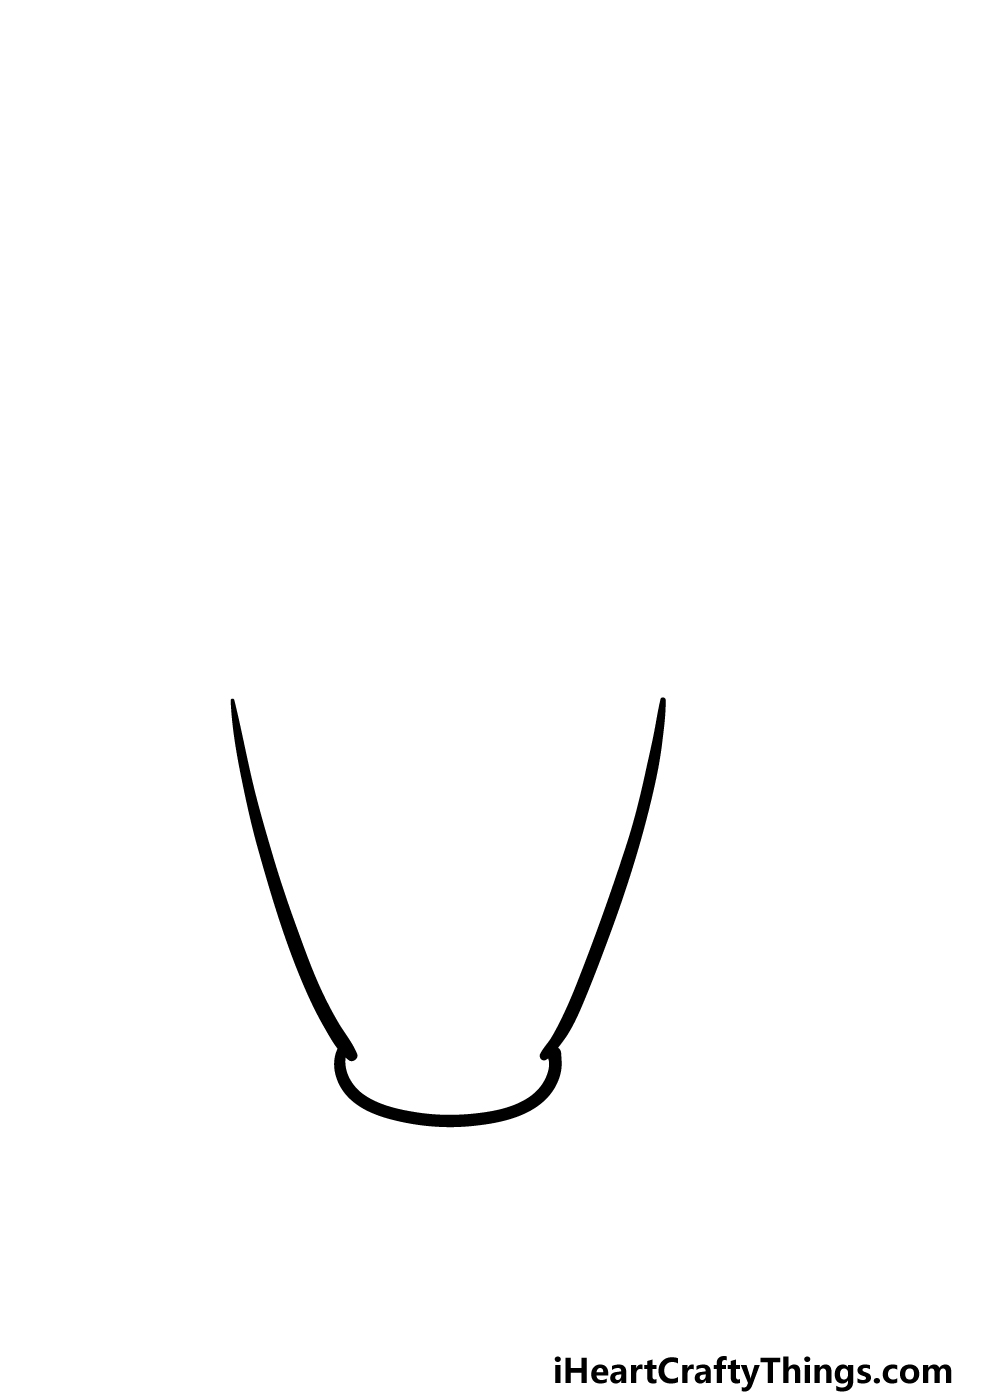
To get this guide on how to draw hot chocolate started, we will begin with the mug that the hot chocolate is in.
The sides of the mug will be drawn using some curved lines that angle outwards slightly. Then, for the base of the mug we will be using a curved, horizontal line.
That’s all there is to it for this first step of the guide, and we can move on to keep adding more to the image!
Step 2 – Now, draw the rim of the mug and some marshmallows
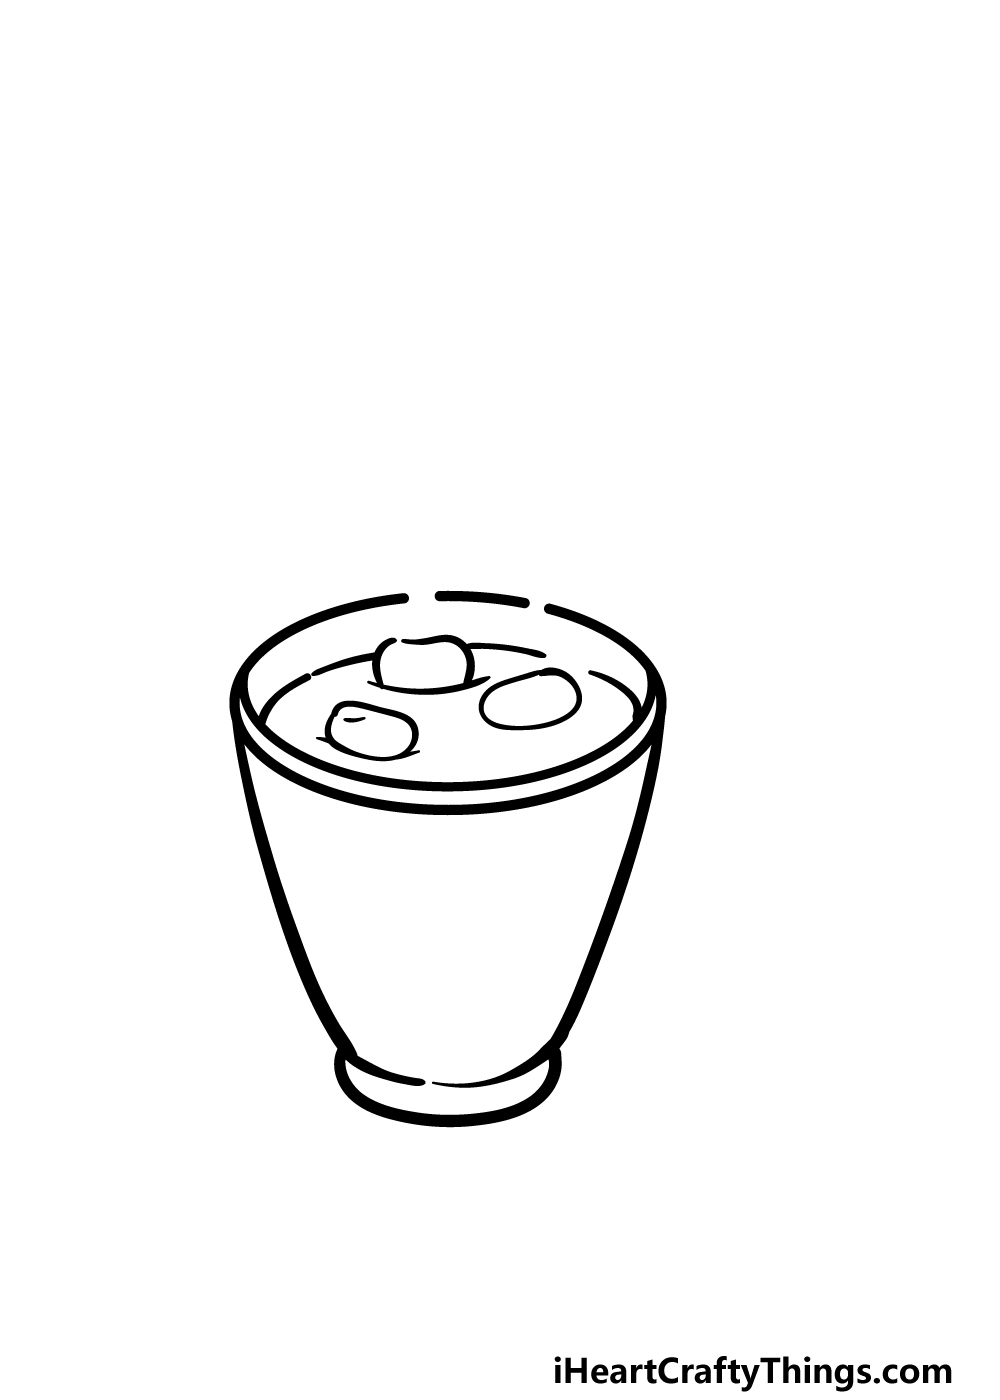
Now that you have the outline for the main section of the mug drawn, we can start adding some more elements to your hot chocolate drawing in this second step.
To start this process off, you can draw some curved lines for the rim of the mug. This will include the side of the rim on the opposite end of the mug.
You should leave some small gaps in this back line, as we will be drawing some steam there later.
Then, draw some rounded rectangular shapes onto the surface of the hot chocolate for some tiny marshmallows floating within it. Then we can proceed to step 3 of the guide!
Step 3 – Draw some steam and the handle
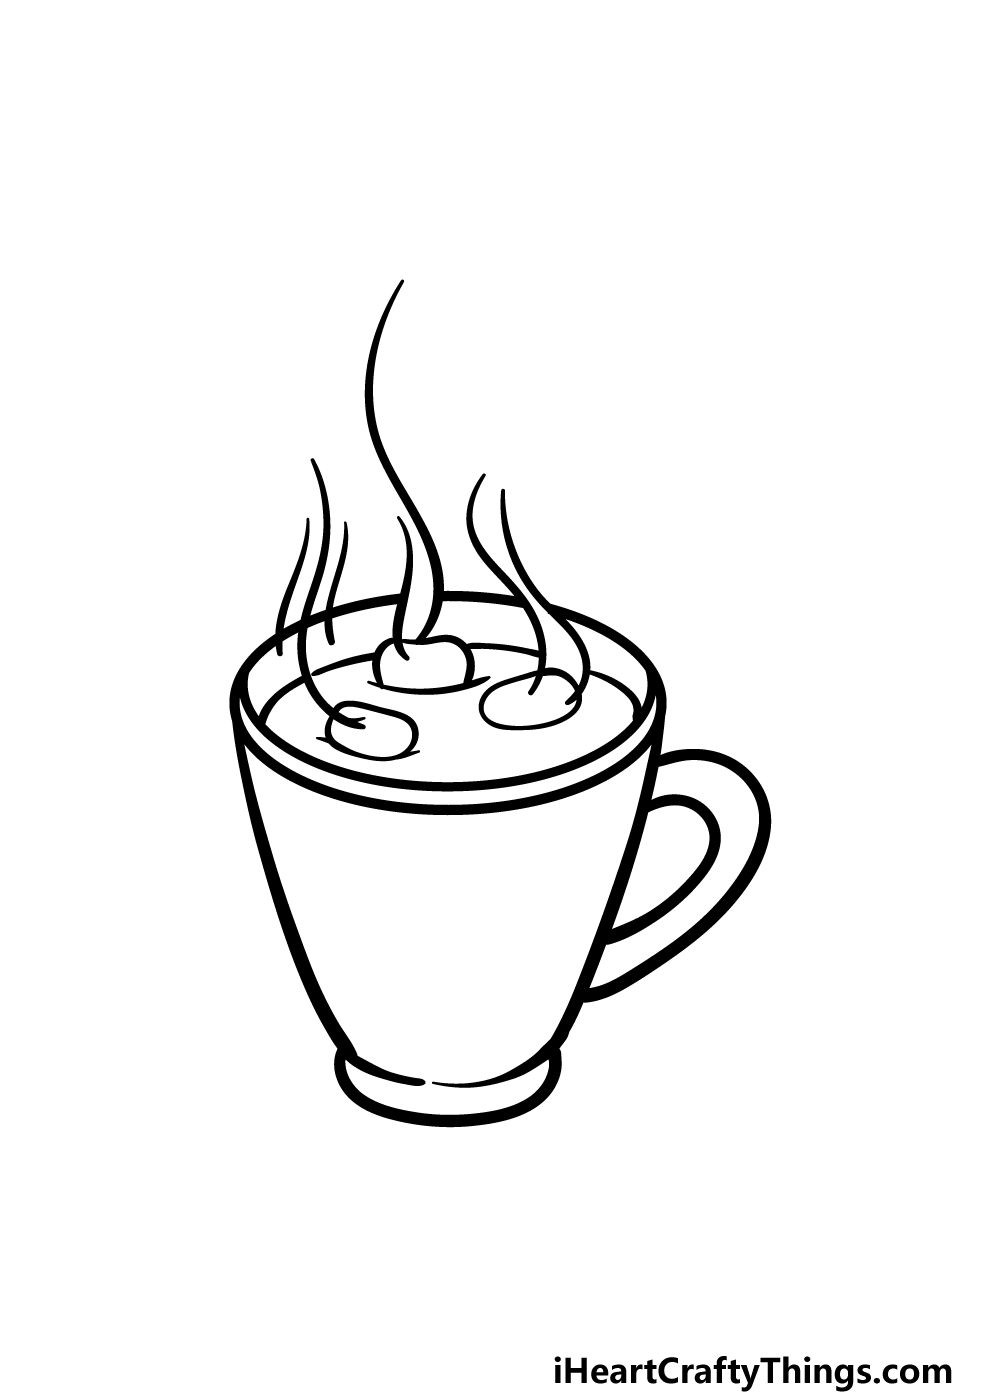
A mug would be pretty unpleasant to drink from without a handle, so we shall add one in this step of this guide on how to draw hot chocolate.
This should be a pretty simple element to add, and you can start by drawing a curvy line onto the side of the mug.
Then, draw another line running along the outer perimeter of the one that you just drew to finish off the handle.
Then, we will draw some steam coming up from the mug to show that this hot chocolate is nice and hot.
Use some wavy lines for this steam, and have some of them fill the gaps that you left in the rim previously.
You’ll then be ready for step 4, so let’s move on when you’re ready.
Step 4 – Next, start drawing some details for the mug
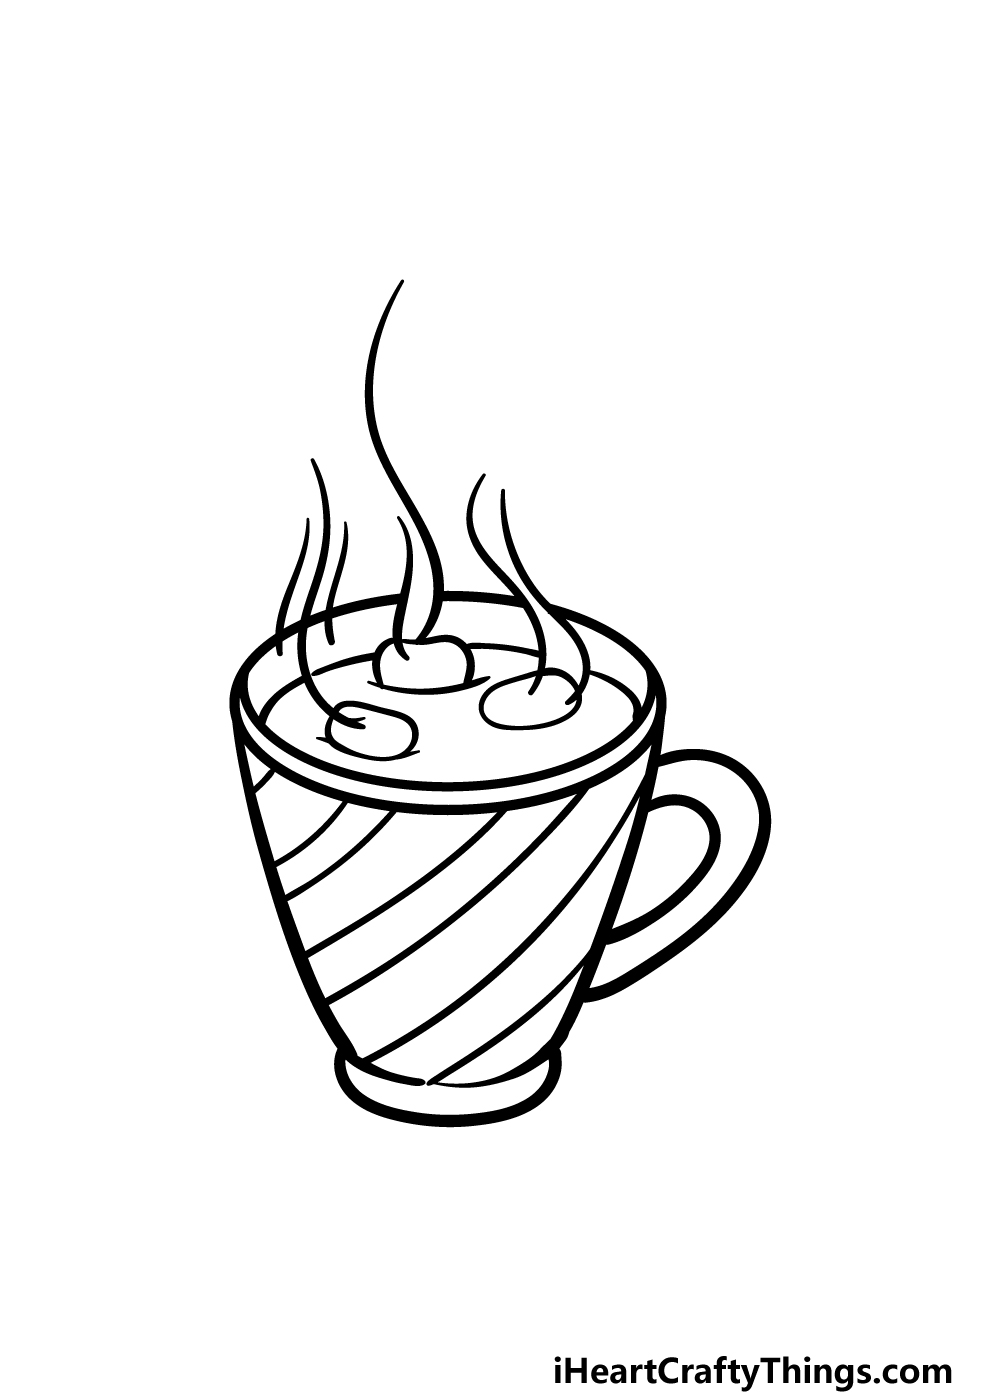
This step of your hot chocolate drawing will see you adding a bit of flair and detail to the mug itself. To do this, we will be drawing some diagonal stripes along the body of the mug.
This is just one design that you could go for, however! You should feel free to create any additional design that you may prefer to finish it off.
Will you go for the stripy design that we chose or will you use a pattern or picture design instead? Whichever approach you go for, we can then move on to some final details in the next step.
Step 5 – Add the final details to your hot chocolate drawing
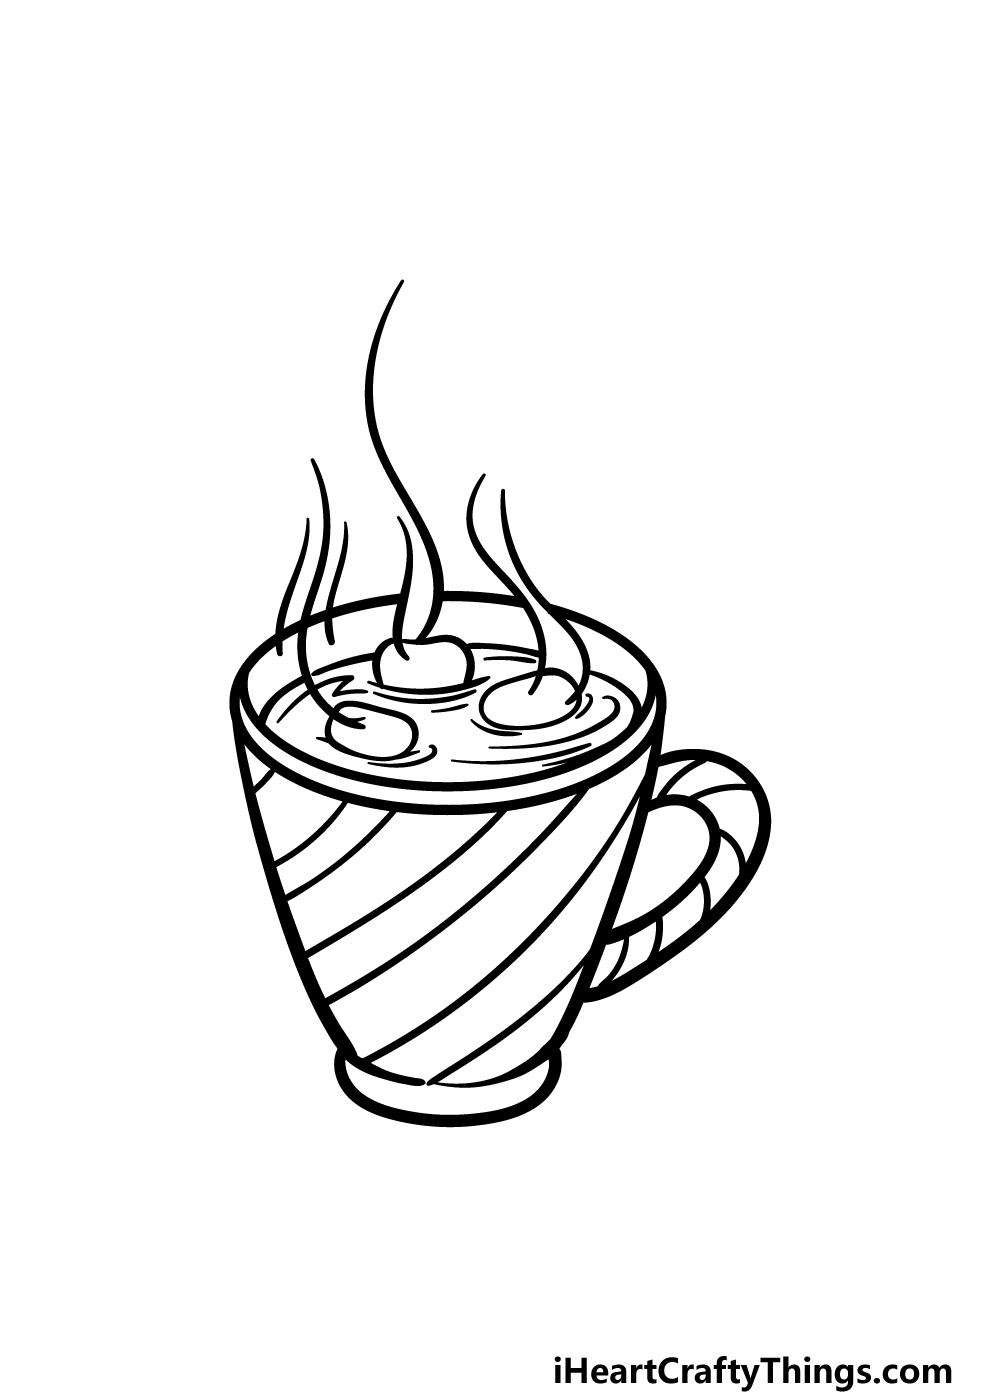
This fifth step of our guide on how to draw hot chocolate will be all about finishing the final details before you move on to the final step.
First, we will be adding some curvy lines into the hot chocolate itself to make it seem like it’s swirling around a bit.
Finally, we drew some slightly curved lines across the handle of the cup to finish off the stripy pattern that we used for the body of the mug.
Once you have drawn these details, you should feel free to draw any other details or additions that you would like!
It could be a lot of fun to draw a cozy background, and this would be the perfect way to show off where you’d like to enjoy this mug of hot chocolate if it were real.
Step 6 – Finish off your hot chocolate drawing with color
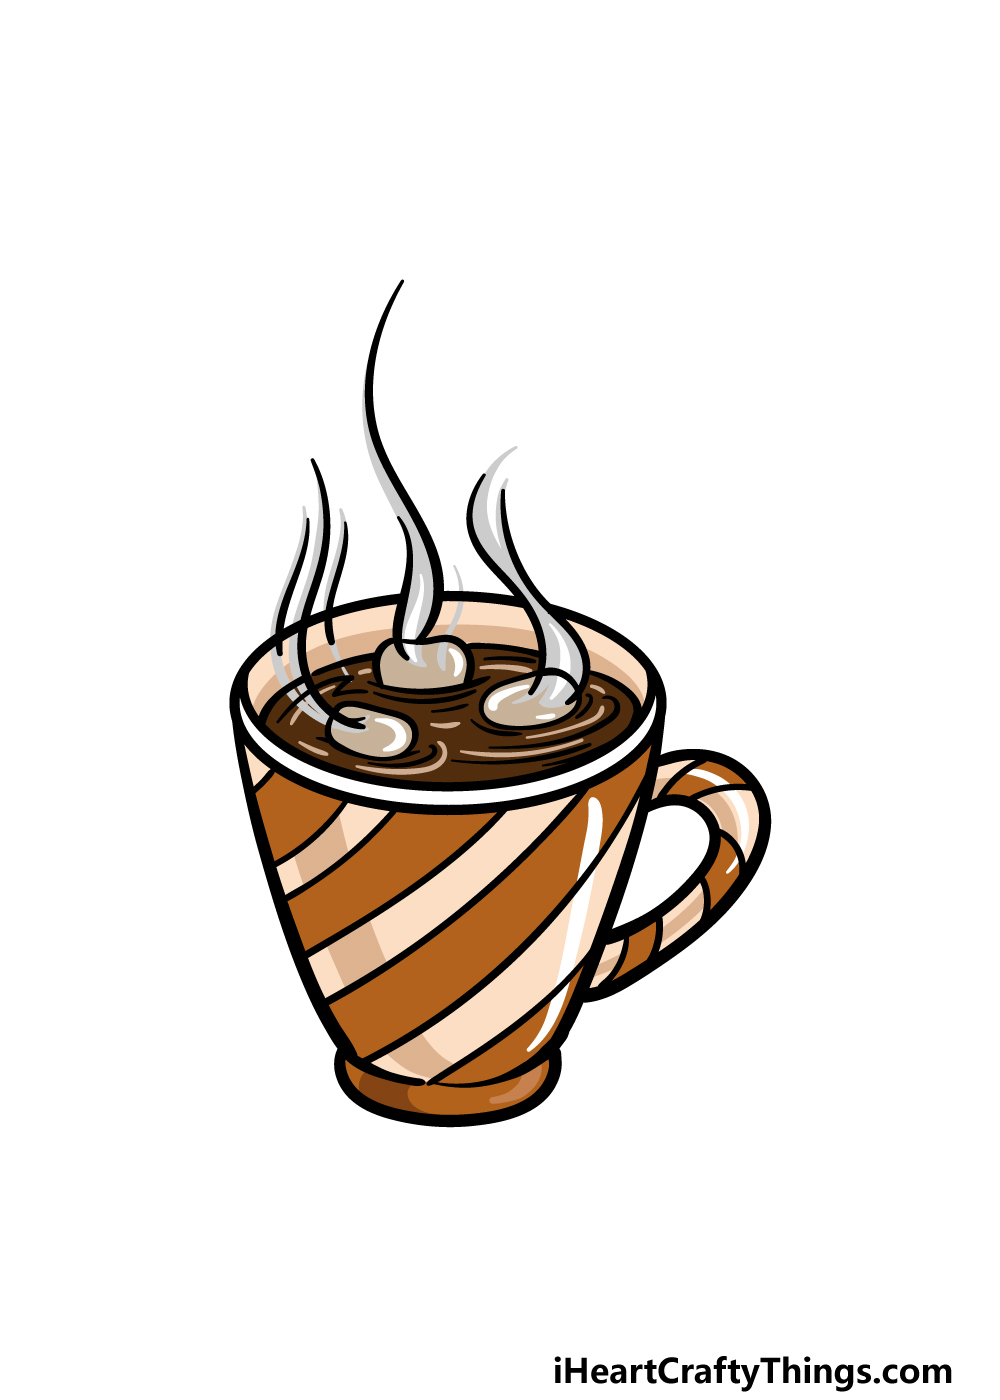
Now it’s time to finish off this hot chocolate drawing as you add some color to the image! In our reference image, we show you the colors that we would choose to finish off this picture in style.
For the hot chocolate itself, we naturally went with some rich, dark browns. For the cup, we colors some of the stripes with a lighter brown and then used some light beige for the other stripes.
When coloring your own picture, you should be sure to use any other colors that you think would suit it!
This is all about designing your own perfect mug of hot chocolate, so let your creativity flow as you finish it off!
4 More Ways To Make Your Hot Chocolate Drawing Unique
Drink in these amazing tips we have for making your hot chocolate sketch even better!
When it comes to hot chocolate, people not only have a favorite way of making it but also a favorite mug they like to use.
You could customize the mug in this drawing of hot chocolate to show what yours looks like!
This could be as simple as changing the colors, but you could also add shapes, text or even pictures to the mug. What would your ideal hot chocolate mug look like?
This mug of hot chocolate has a few marshmallows floating in it, but you can never have too many marshmallows in a mug. For that reason, you could add some more marshmallows to the drawing!
You aren’t limited by real physics here, so you could add an unwieldy amount of marshmallows if you wanted.
Some people will also add something like a candy cane to their mug, so that would be a fun detail as well.
How many marshmallows would be enough for this yummy treat?
Making the perfect mug of hot chocolate is one thing, but someone needs to enjoy it. For that reason, you could add a human character to your hot chocolate drawing!
Not only could you add a character, but they could even be based on yourself or someone you know. That would be such a great way to add a personal touch to the image.
Who would you like to add to this drawing to make it even better?
When enjoying a mug of hot chocolate, it can be great to find the perfect spot to enjoy it. You could show what your perfect spot would look like by adding a background to your hot chocolate sketch!
This could be anywhere from a room in your house to an imaginary location that you would imagine while sipping from your mug. There are no wrong answers when it comes to different backgrounds.
Where would you choose to set this drawing that you have created here?
Your Hot Chocolate Drawing is Complete!
That takes care of all 6 steps of this guide on how to draw hot chocolate! We hope that working on this guide was as fun as enjoying a steaming mug of hot chocolate on a cold day or night!
As long as you follow all of the steps in this guide then you’ll be drawing this cozy picture in no time.
Now that you have mastered this drawing, you can keep it going with some additional details.
We mentioned drawing a background to show the cozy setting you’d like to be in as you enjoyed this hot chocolate, but what else can you think of to finish this off?
There are also many more awesome drawing guides for you to enjoy on our website, so you’ll want to swing by soon!
We also have many more that we intend to release soon, so be sure to visit us frequently!
You can then show off your awesome hot chocolate drawing by sharing it on our Facebook and Pinterest pages.