When it comes to various themes and subjects depicted in art, landscapes have been one of the most popular ones for many centuries.
No matter where you are in the world, there is some kind of natural beauty to be found, so it makes sense that artists would want to capture this beauty.
It can be hard to know where to start when wanting to draw something even as common as a hill, however. Learning how to draw a hill is a great way to get you going in this drawing quest, however!
If you’ve always wanted to know how it can be done, then this is certainly the right tutorial for you.
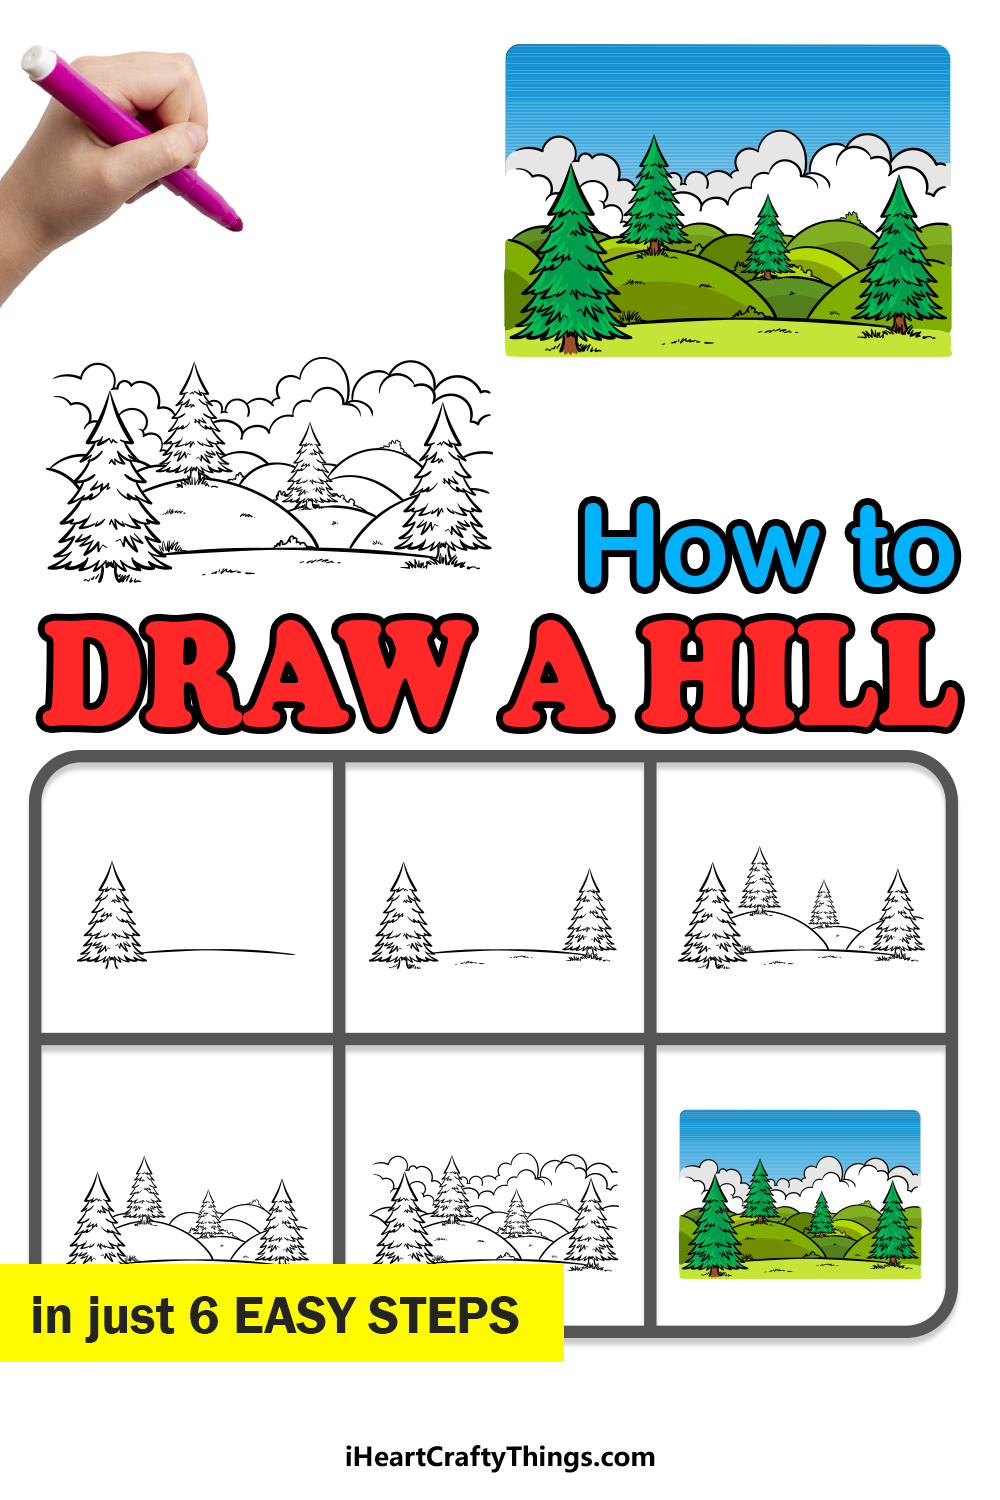
Our step-by-step guide on how to draw a hill will show you everything there is to know about recreating this beautiful scene.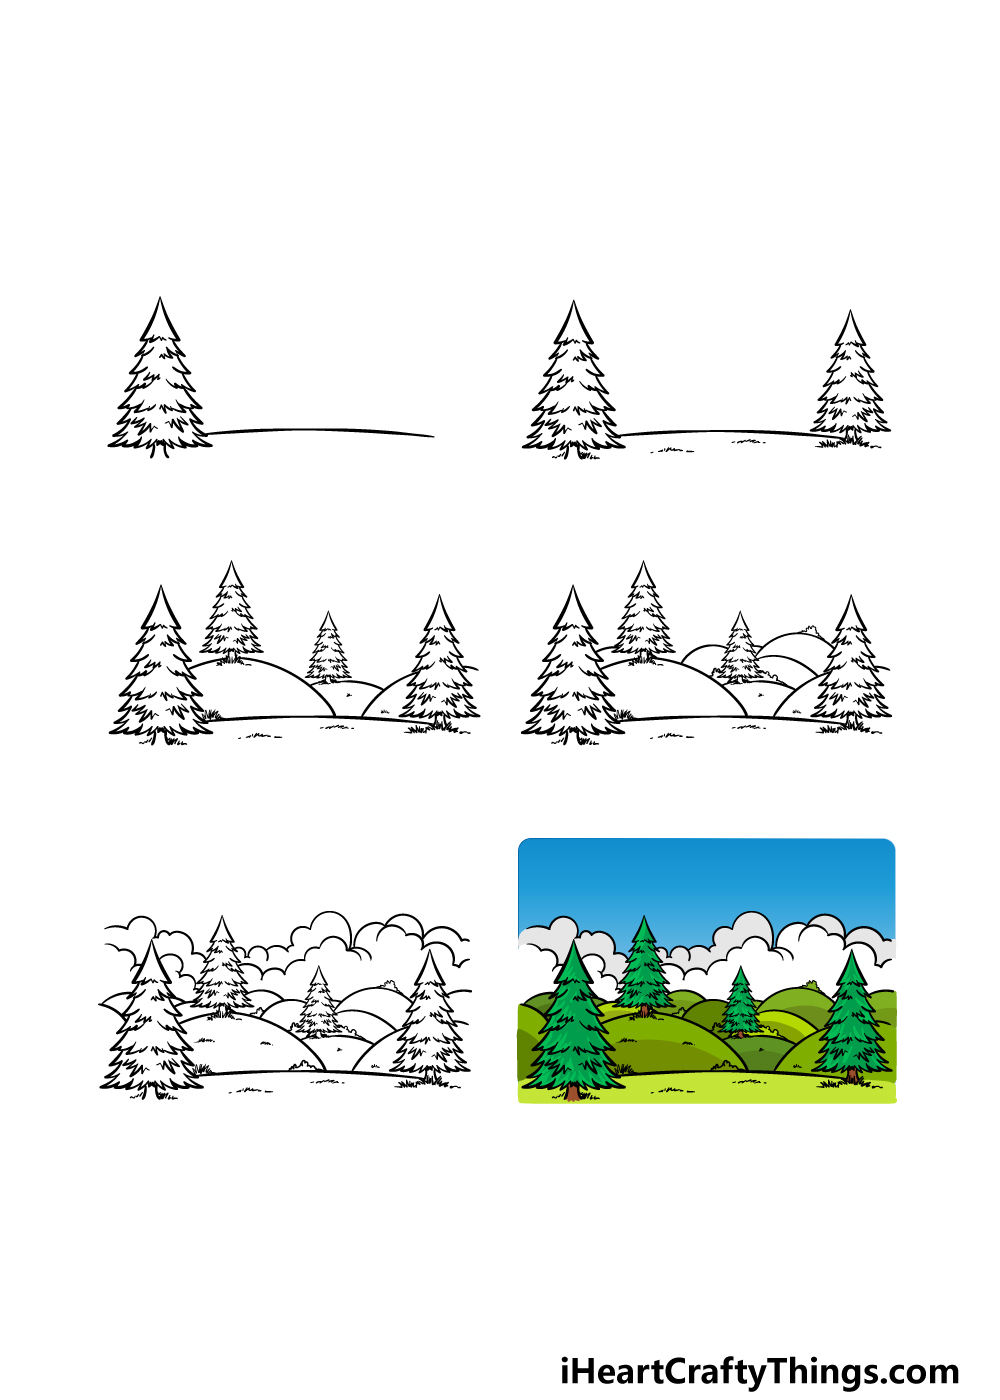
How to Draw A Hill – Let’s Get Started!
Step 1

The key to creating a great landscape is to build it up slowly with smaller elements.
That is the approach that we will take during this guide on how to draw a hill, as we will slowly add various elements to build up the scene as a whole.
In this first step of the guide, we will be drawing a pine tree for the scene as well as the first hill itself.
For the pine tree, we will be using lots of smaller curved lines that have sharp points at the ends of them. The tip of the tree will start off thin, but then lower sections will get progressively wider.
Finally, you can finish off this first step by drawing a large, curved horizontal line behind the tree. Once these elements have been drawn, we can move on to the next step!
Step 2 – Now, draw another tree and some grass details
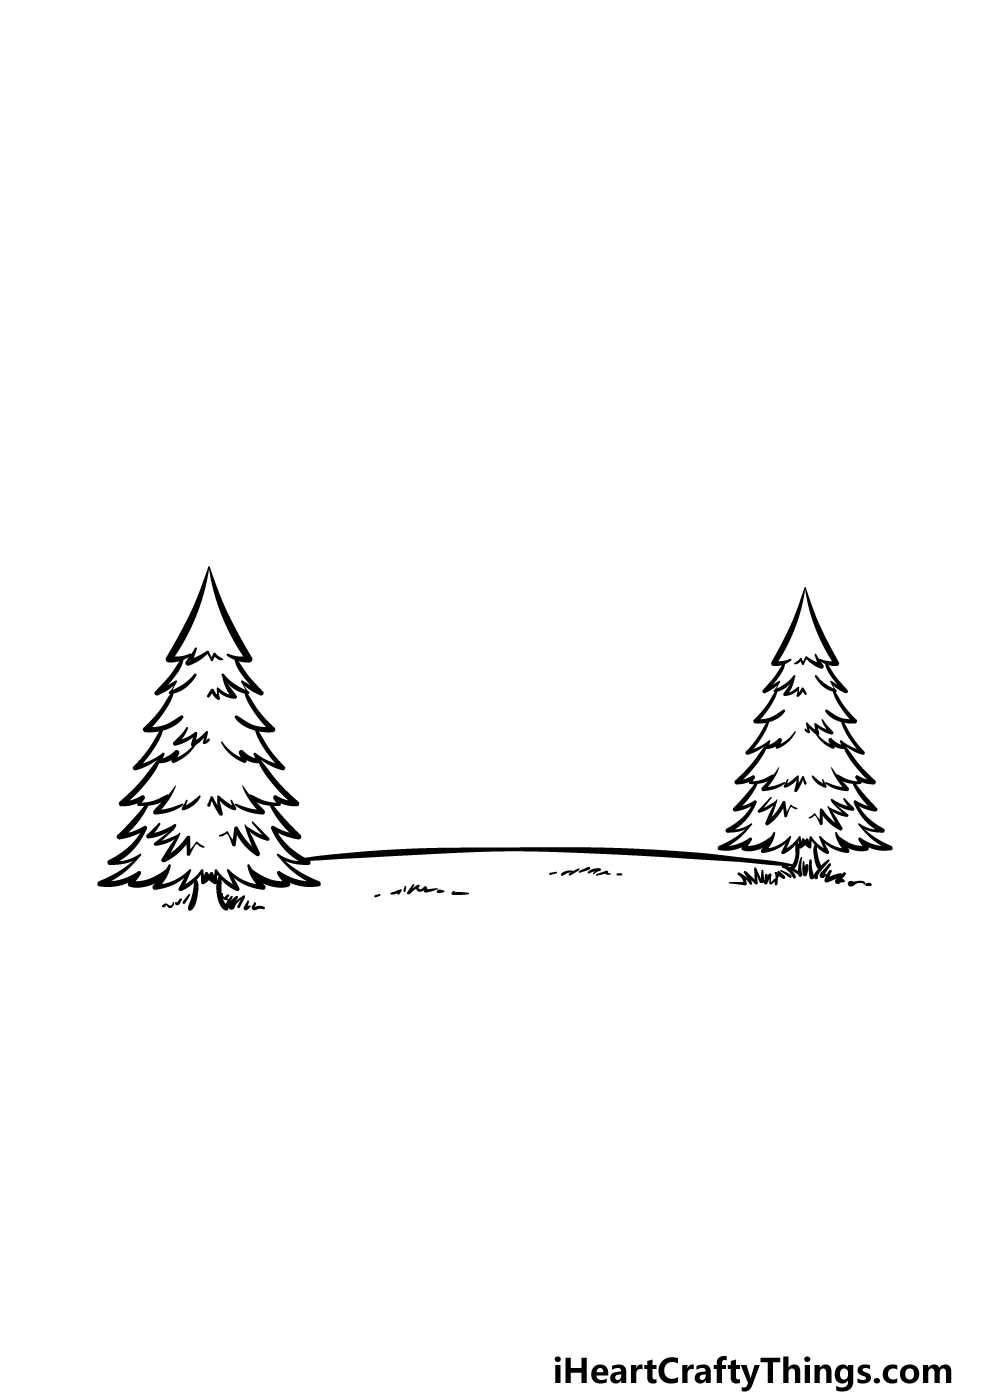
The first step of this hill drawing saw you adding a single pine tree to the scene, and this second step will have you adding another one along with some smaller details.
This second tree will look rather identical to the first one in terms of how it’s structured. The main difference is that it will be slightly smaller to show some perspective.
To finish off this step, you can then draw some small jagged lines onto the grassy expanse to give it some texture, and then it’s time for step 3.
Step 3 – Draw some more hills and trees
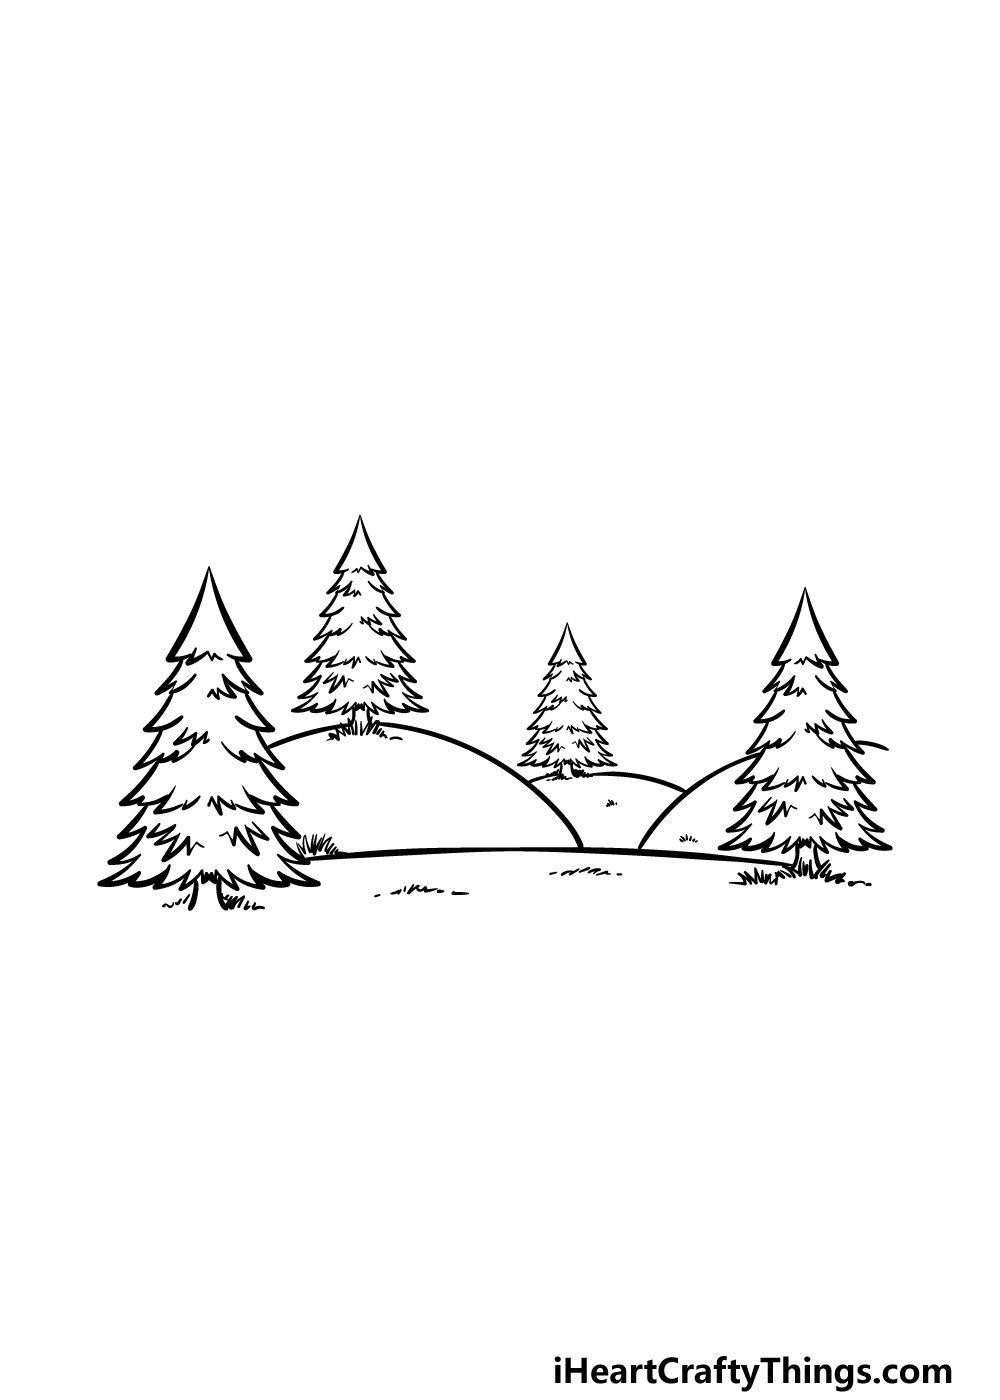
Now that you’re getting the hang of this drawing, we can start adding larger pieces of the scenery in this step of our guide on how to draw a hill.
First, we shall draw some rolling hills in the background. These will be drawn using some big rounded lines that layer over one another.
You can then draw another tree onto the two left hills, and once again they will get progressively smaller to show perspective.
You can add some more of those small grass details to these hills as well before we move to the next part.
Step 4 – Next, draw some more hills for the scene
Before we start adding some final details to this hill drawing, we will be finishing the actual hills. To do this, you can essentially keep doing what you started in the previous step of the guide.
That means that you can draw some more of those rounded lines to add some more hills to the background behind the first ones.
Much as we did with the trees, these hills will get smaller the further back you go to show that they are further in the distance.
Then, it will simply be a matter of filling in the final details and touches in the next step!
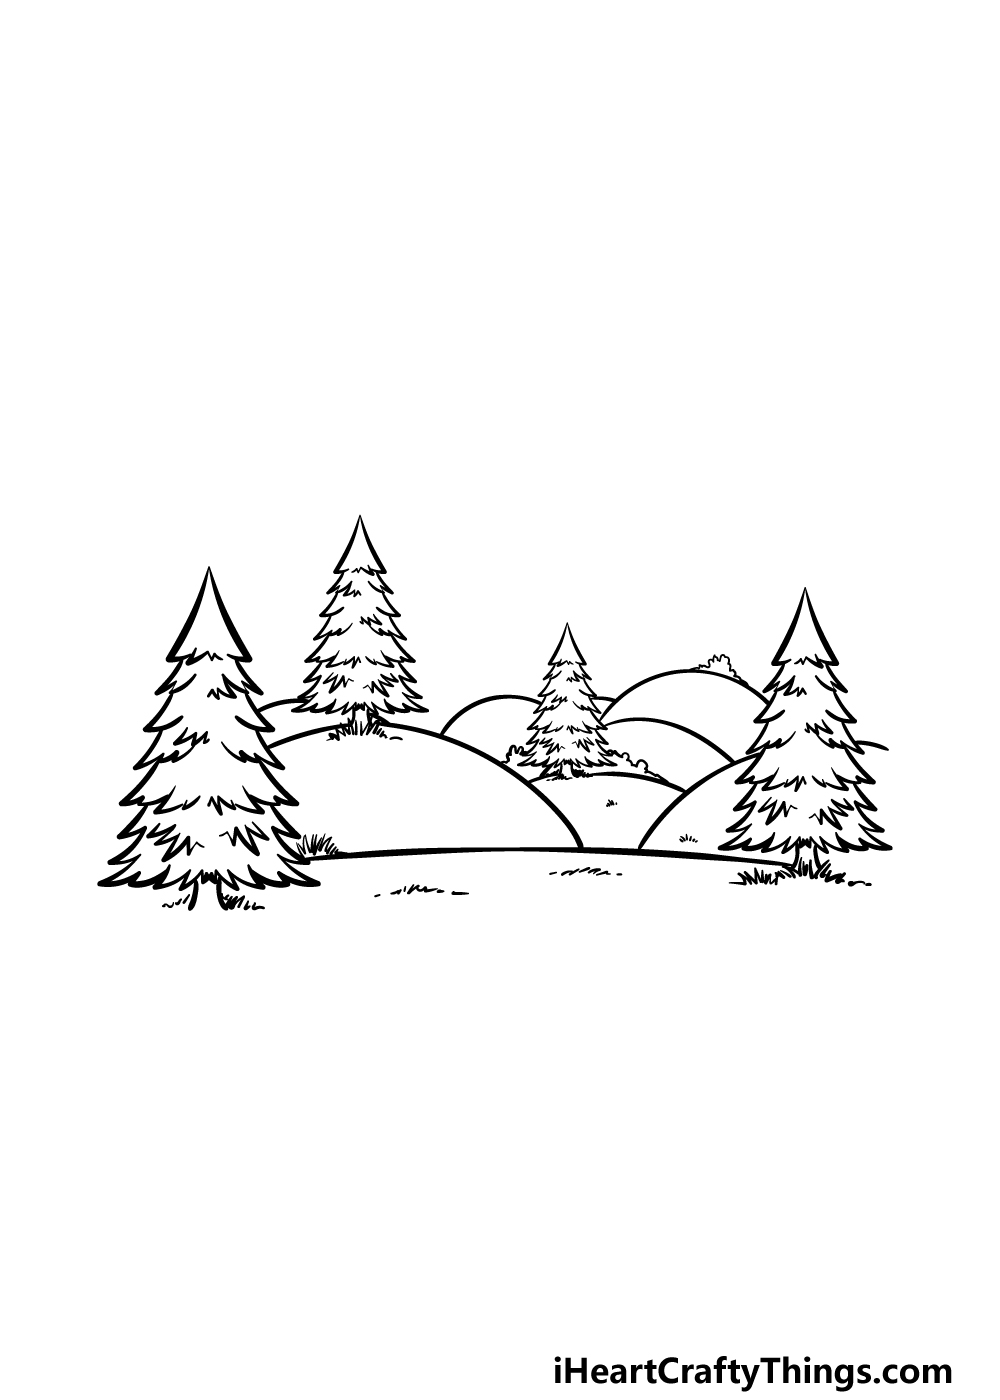
Step 5 – Add the final details to your hill drawing

The landscape of this composition is complete, and now we shall add the finishing touches before the final step of this guide on how to draw a hill.
In this part, we will be adding lots of majestic clouds above the hills to finish off the image nicely.
To draw these clouds, we will be using a great deal of smaller curved and rounded lines connecting to one another to create the large mass of fluffy clouds.
These clouds will also be layered in a similar fashion to how you layered the various hills.
Once the clouds are drawn, you can finish off with your own final details! Will you add some weather effects or maybe some structures or people and animals enjoying this tranquil scene?
Bonus: Use The Real World As Inspiration For Your Hill Drawing!
Now that you have reached the end of this guide on how to draw a hill, you already have an amazing drawing to be proud of! This guide is also intended as a starting point that you can use to create your own unique artwork.
There are a few ways that you could do this, and one great method would be to use some real landscapes. If you have a nice view from your yard, then you’re ready to go.
If not, maybe you could drive out to a scenic location that’s nearby you and make a day of it. No matter where you choose as a location, you can take some photos from various angles.
Then, you can use these pictures to change some of the details in your hill drawing. This way, you could combine the drawing we created in this guide with the real world setting to make something unique.
It could be as simple as the trees that are on the hill, or you could replicate the weather that you experienced at the real place. With a few simple changes, you could add them to the drawing.
Another fun idea would be to add some characters to the drawing. If you visited a real life location with someone, then you could add them and yourself to the drawing.
This would be a great way to commemorate your adventure and will serve as a nice reminder! If you don’t want to use a real location, then you could rely on your imagination and create your very own unique landscape to admire.
Do you have some favorite locations that you could use to make this drawing even more special?
Step 6 – Finish off your hill drawing with color
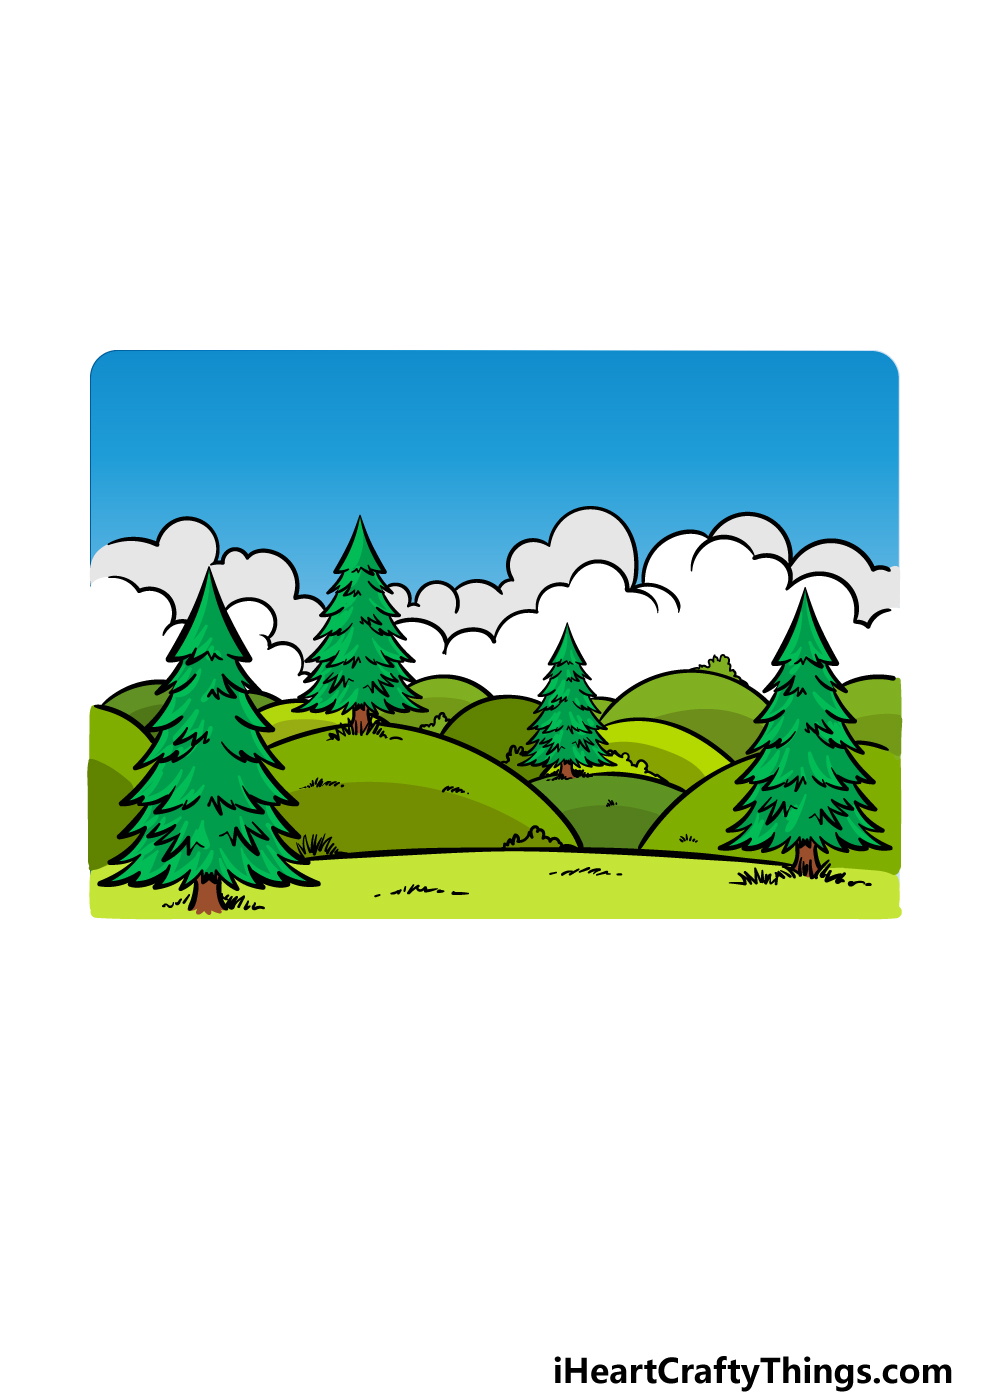
Your hill drawing is already looking amazing, and in this step we will make it look even better with some colors!
In our reference image, we showed you one way that you could go about coloring this peaceful scene. We kept the image looking bright and happy by using vibrant greens for the grass and trees.
While you could go for a similarly bright and vibrant look, you could also create a more muted image by using darker shades.
The mediums you use will also contribute to the feel of the image, for example you could use some watercolors for milder colors or mediums such as acrylic paints for more vibrant tones.
These are just some of the mediums and color choices you could use, so how will you finish it off?
4 More Ways To Make Your Hill Drawing Unique
Make this peaceful hill sketch even better with these 4 fun tips!
This hill drawing has many hills, but who is to say that there couldn’t be even more? If you really want to make this a hill extravaganza, you could add a great deal more hills to the image.
They could be similarly shaped to the ones already there, but you could also include a few more in different shapes.
It’s up to you to decide how many hills you would like to add, and adding a lot more could really make this even cooler to look at!
If you like the number of hills we have in this drawing of a hill, you could add other elements to it to populate it. For example, we have a few pine trees in the picture.
There are only four, but you could add many more if you liked! You also don’t have to stick to pine trees, and you could add any other kinds of trees you like.
There are also details such as bushes and smaller plants that could look great!
For this hill sketch, we created a lovely day with some puffy clouds. This is one of many different kinds of weather conditions you could create, however.
You could go for a darker, rainy day or make the day even more beautiful with a rainbow. These are just two examples, but changing the weather can drastically change the design.
What are some weather conditions you would like to portray?
Finally, you could finish off this hill drawing nicely with some more details in the background. There are so many features that you could add to the background behind the hills.
One idea would be to add some tall, snowy mountains towering in the background. Or, you could have a big city looming in the back of the image.
These are two ideas that you could try out, but we’re sure that you can think of other background settings you may prefer!
What are some other ideas you may have?
Your Hill Drawing is Complete!
Depicting landscapes is such a classic subject for art, and we hope that you enjoyed creating your own addition to this tradition during our guide on how to draw a hill!
Our goal with this guide was to show you just how fun and easy a drawing can be when you break it down into smaller, more manageable steps.
Now that you have completed our version of this drawing, you can keep it going by adding or removing elements or by changing certain parts entirely.
You could also change up the colors and art mediums you choose, so have fun getting creative with it!
If you enjoyed this guide, you can keep the fun going by checking out more of our drawing guides on our website! We have a huge selection with more on the way, so keep checking in to never miss out.
It would be amazing to see how your hill drawing turned out, so you can share your finished picture on our Facebook and Pinterest pages!