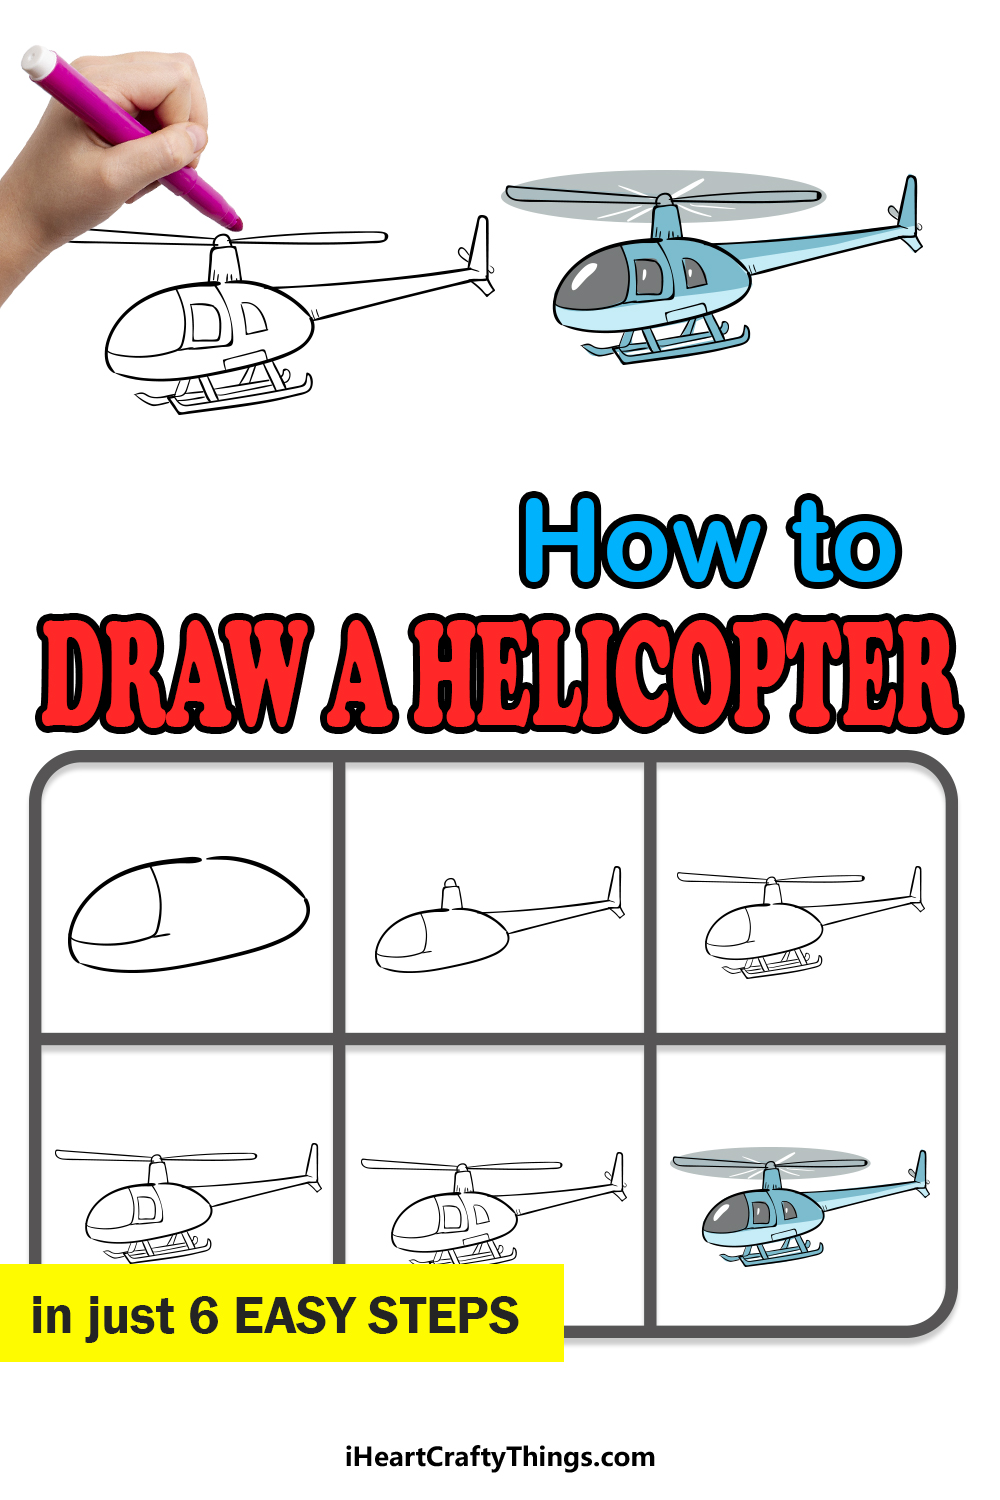
There are many different vehicles for getting around and helping us in our everyday lives.
Cars get us where we need to go, planes get us where we need to go much quicker and helicopters are there to provide many different functions.
These technological marvels are used for rescues, transportation and even just joyrides!
Their distinctive look and design make them popular among people wanting to learn how to draw a helicopter.
This guide on how to draw a helicopter in just 6 easy steps will show you how you can create your very own helicopter design in no time!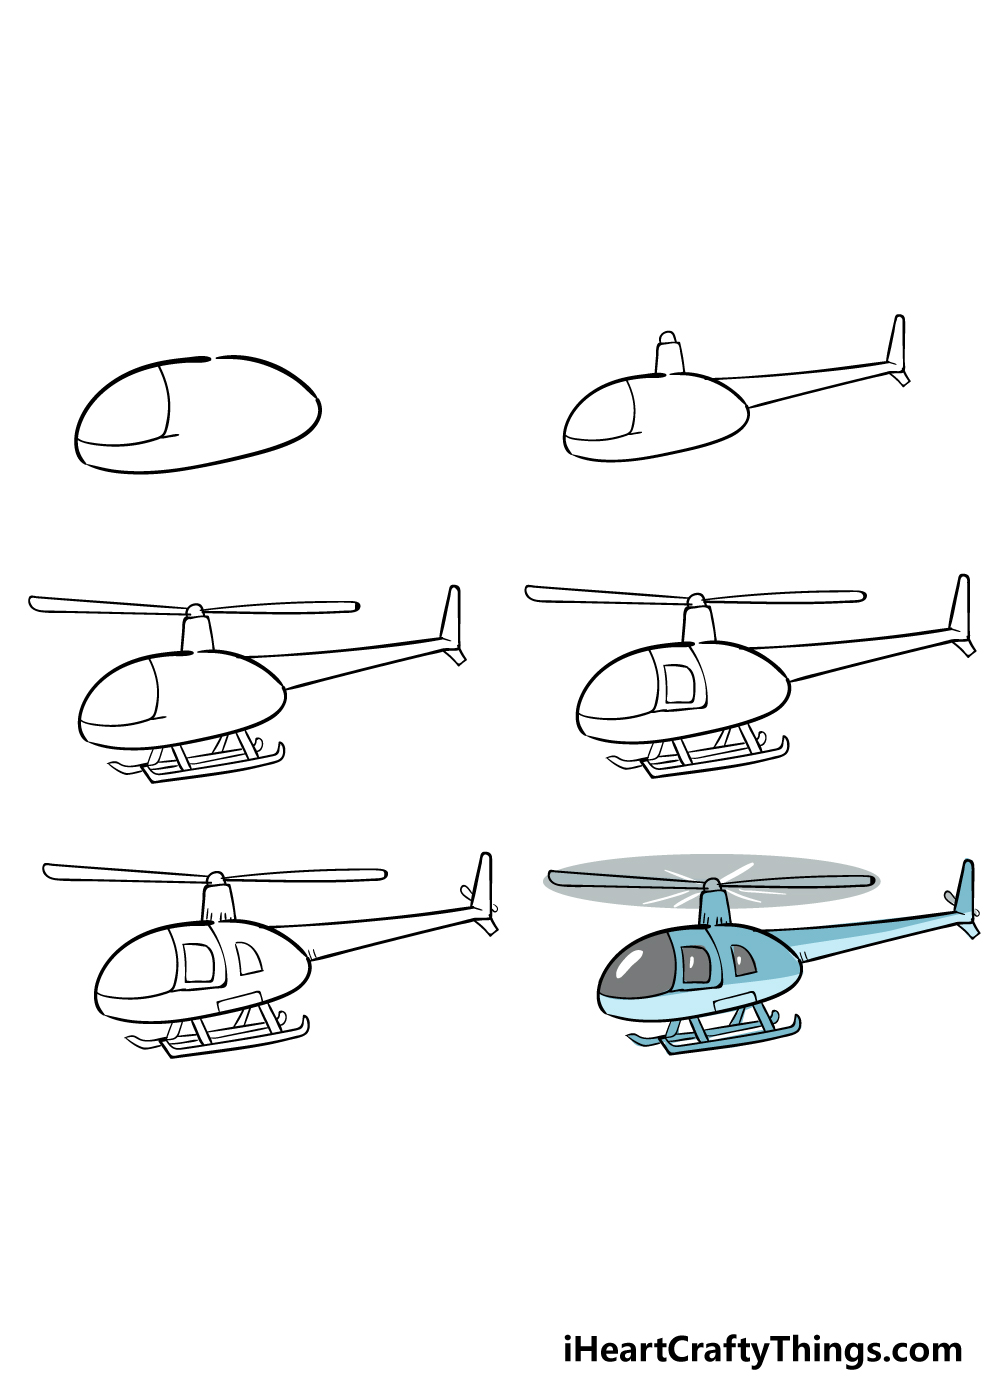
How to Draw A Helicopter – Let’s get Started!
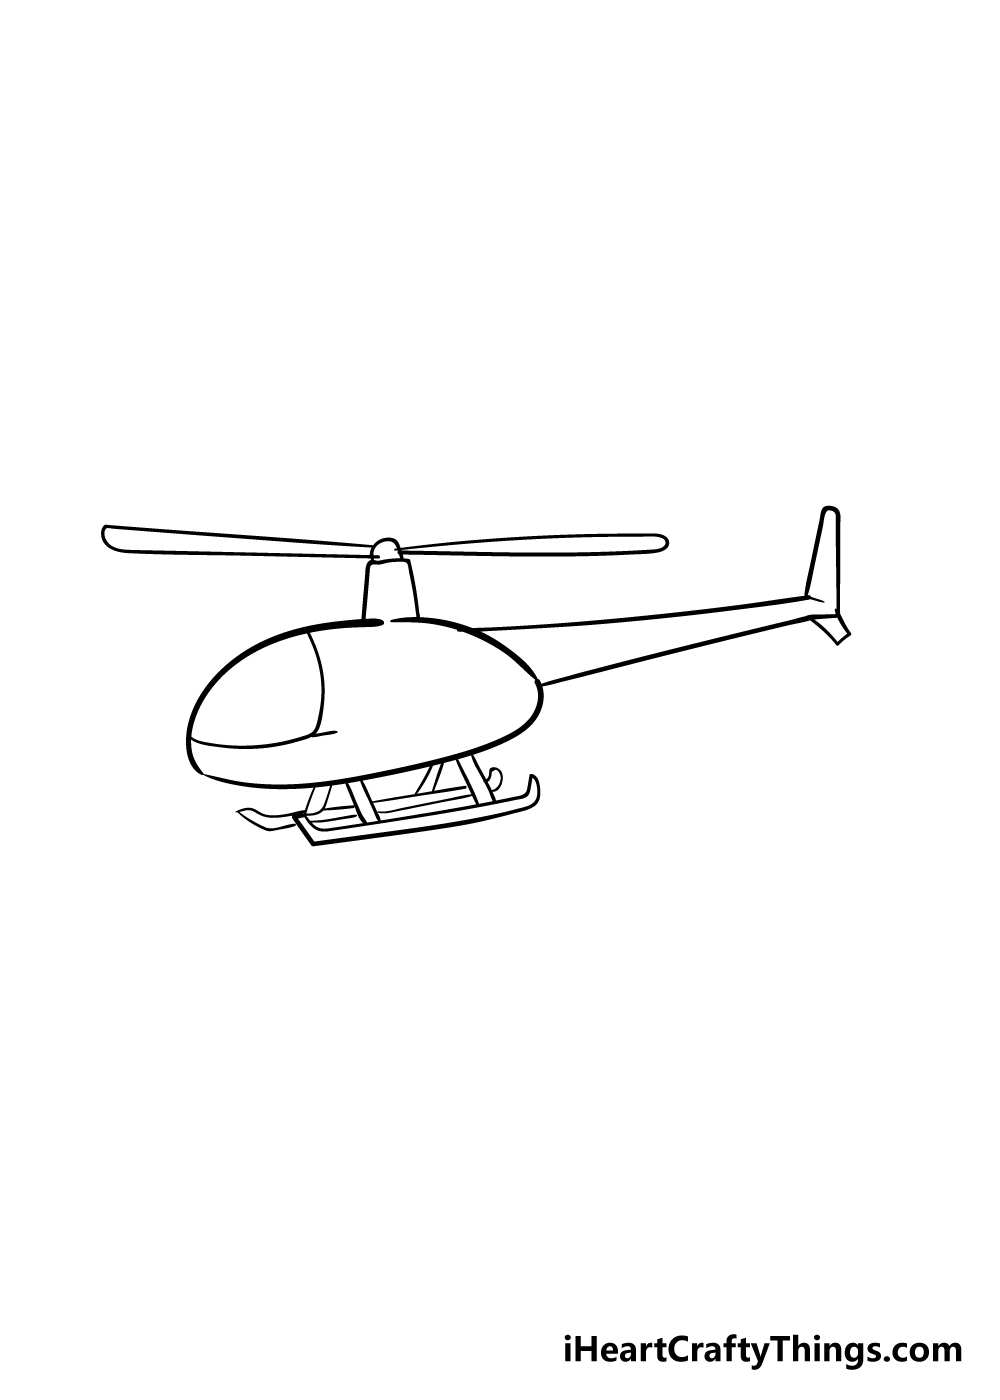
Step 1
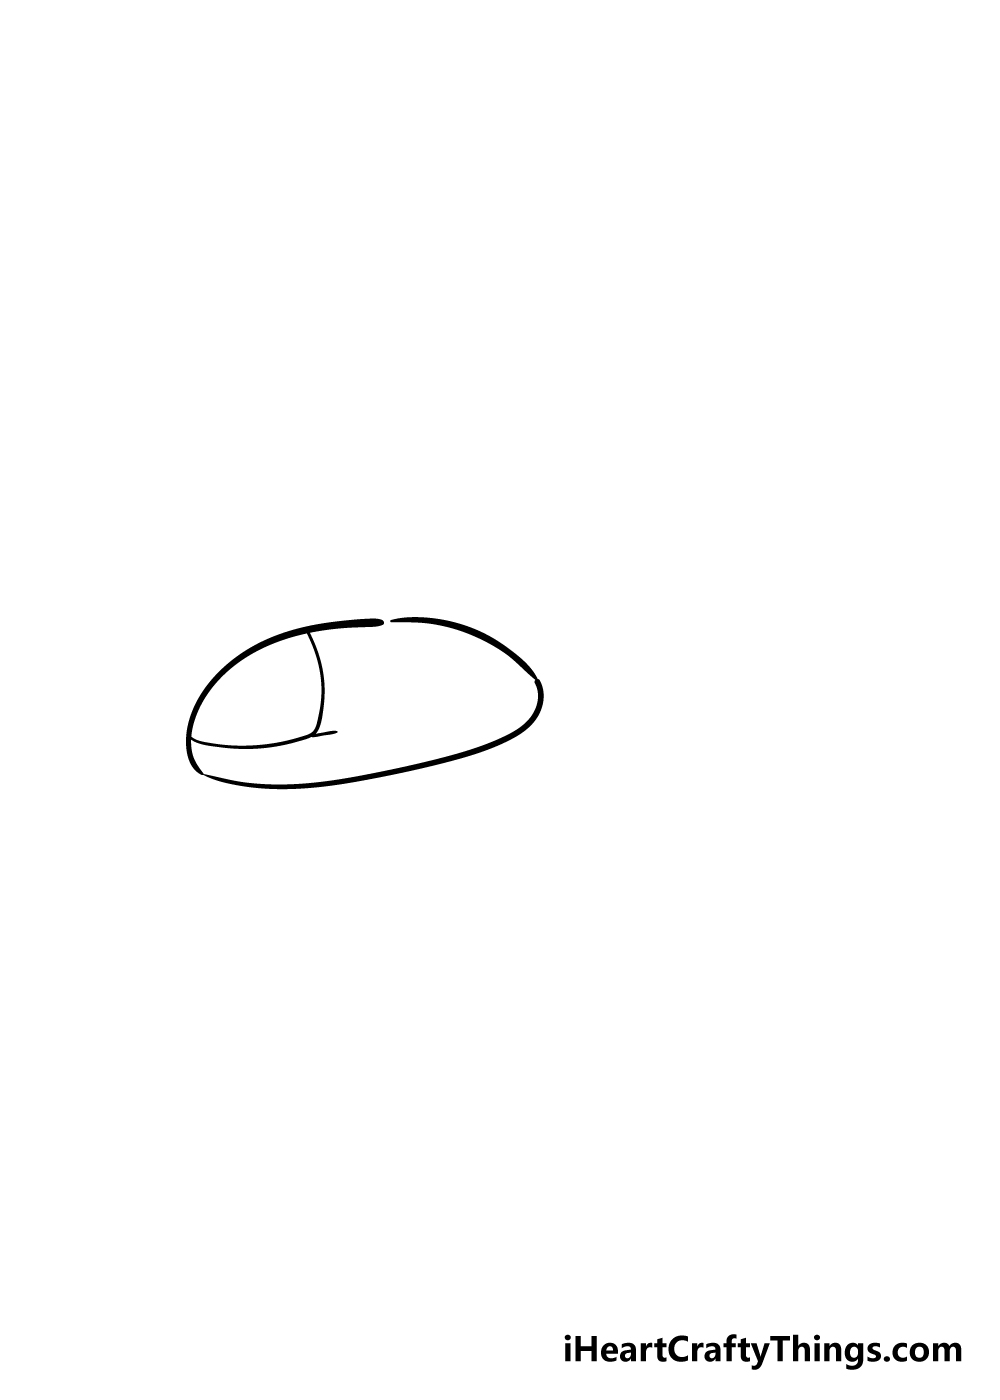
We will be starting with the body of the helicopter in this first step of our guide on how to draw a helicopter.
To do this, you can draw a rounded oval shape to form the outline of the helicopter’s body. Once you have that outline, you can then add a window over the cockpit.
This will go on the left-hand side of the helicopter body.
Once you have the outline and window looking as it does in our reference image, you’re ready to proceed to the next step!
Step 2 – Draw a tail for your helicopter
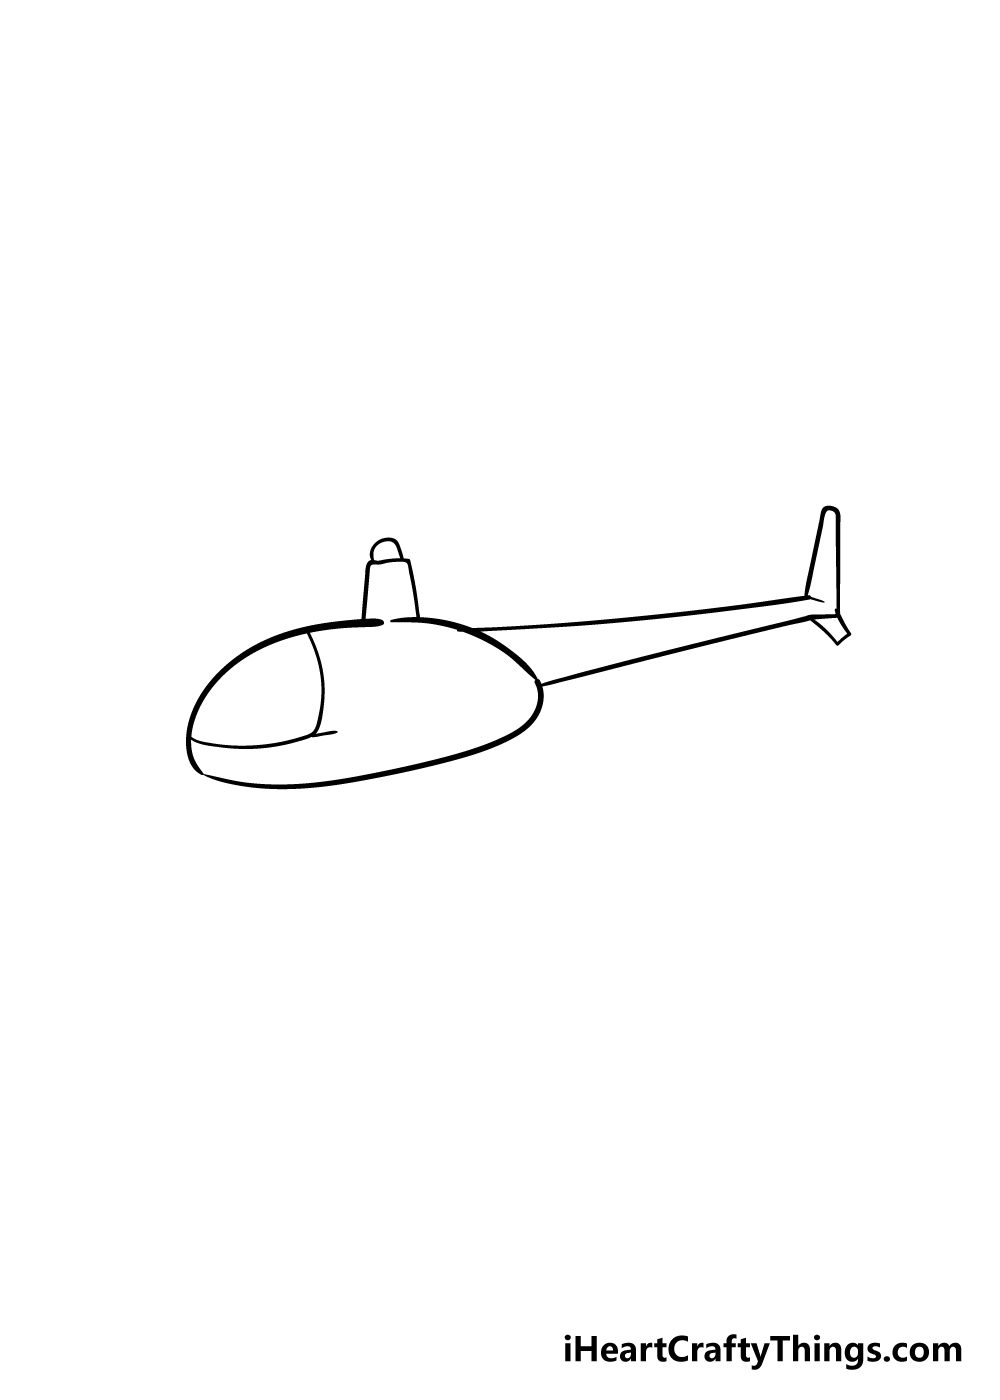
You have the main outline of your helicopter drawing ready to go, so we shall start building the other components in the next few steps.
For now, we shall add a tail to your helicopter. To do this, you can use a ruler to draw two lines from the back of the helicopter.
They should be angled in such a way that they get closer together the further they go. Then, you can use some more straight, vertical lines to create the end of the tail.
Before you move on, you can add a rectangular shape to the very top of the helicopter. Then, you can add a small rounded section to the top of it.
This will be the part of the helicopter called a drive shaft, and the rotors will be drawn onto it soon.
Step 3 – Now, draw some rotors and landing skids
Without rotors, a helicopter would be an expensive lawn ornament and little else! We don’t want that for your one, so let’s add some rotors in this step of our guide on how to draw a helicopter.
The rotors will go on top of the drive shaft that we mentioned earlier. They are pretty simple to draw, and you can use some straight yet slightly rounded lines to draw them.
Before moving on, we shall be adding more to the bottom of the helicopter. These structures are known as landing skids, and as you may guess from the name they are used to aid in landing.
You can use your ruler to draw some diagonal lines coming down from the helicopter. Then, you can draw some straight horizontal lines to create the bottoms of the landing skids.
This sounds more complicated than it is, and if you refer to the reference picture you should have no problems!
Step 4 – Add some window details
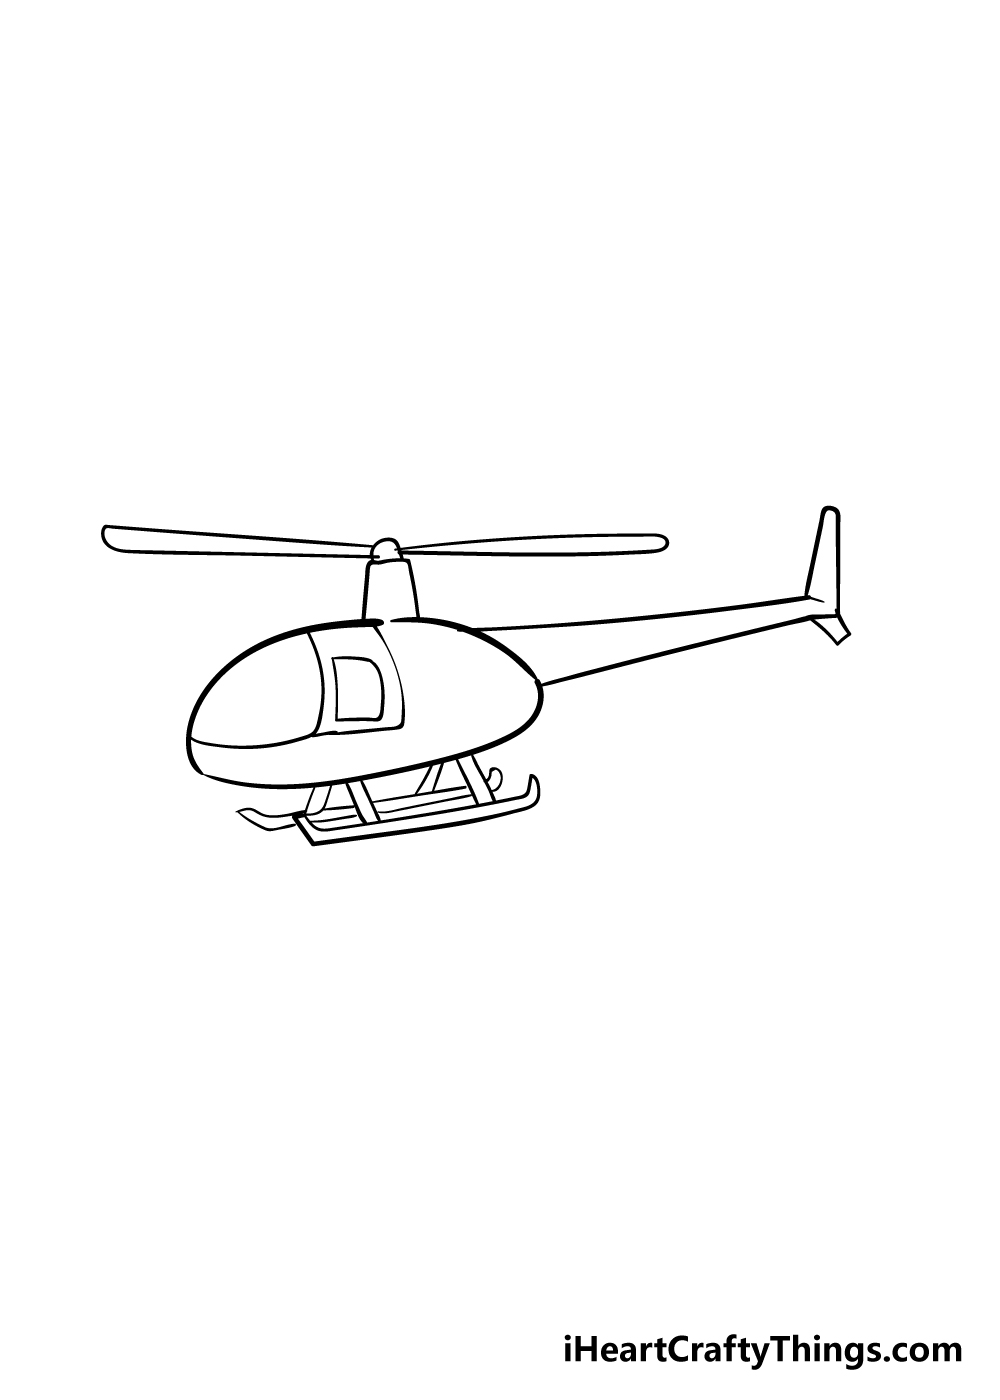
We will be building onto the details of your helicopter drawing in this step. For this step, you can use some lines to extend the window of the cockpit a bit further back.
Then, you can draw a small, rectangular shape inside this extended area as you can see in the reference image.
Step 5 – Now, you can add the final details of your helicopter drawing
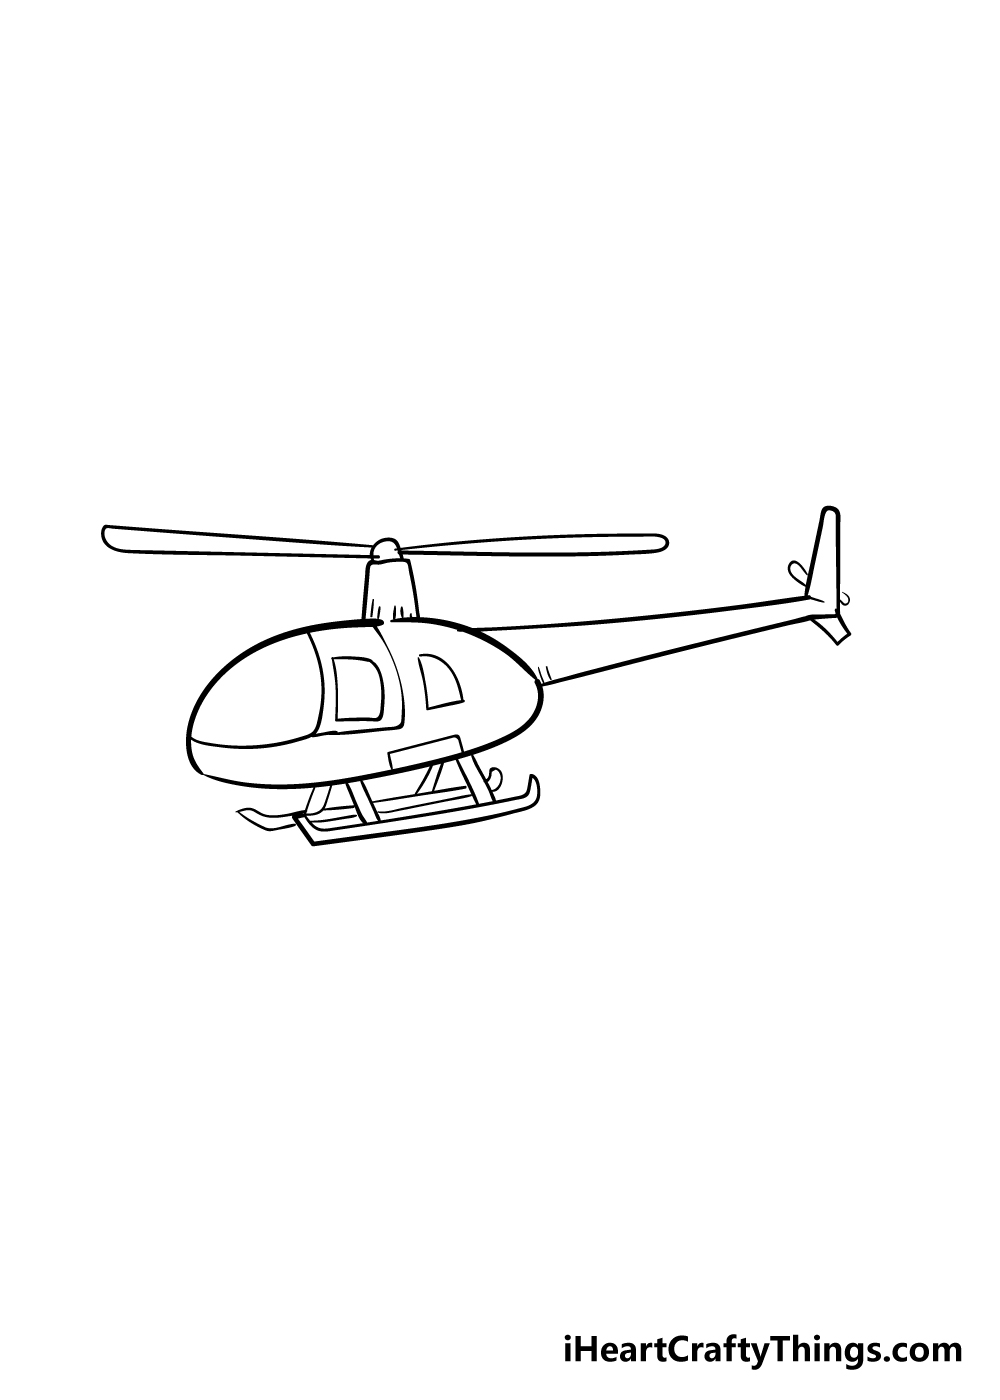
Before we move on to the coloring stage of this guide on how to draw a helicopter, we first have some final details to add.
These are mostly pretty subtle, but they will help a lot with making your helicopter look even better!
You can add some small lines throughout the helicopter to give it a bit more texture to it, as shown in our reference image.
Then, you can draw one more small window behind the cockpit window, and then add a rectangular shape underneath it.
These are the details that we have added for our example, but you should also feel free to add any of your own!
Perhaps you could draw someone in the cockpit or draw some clouds behind the helicopter. What details can you think of to add to your helicopter drawing?
Step 6 – Finish off your helicopter drawing with some color
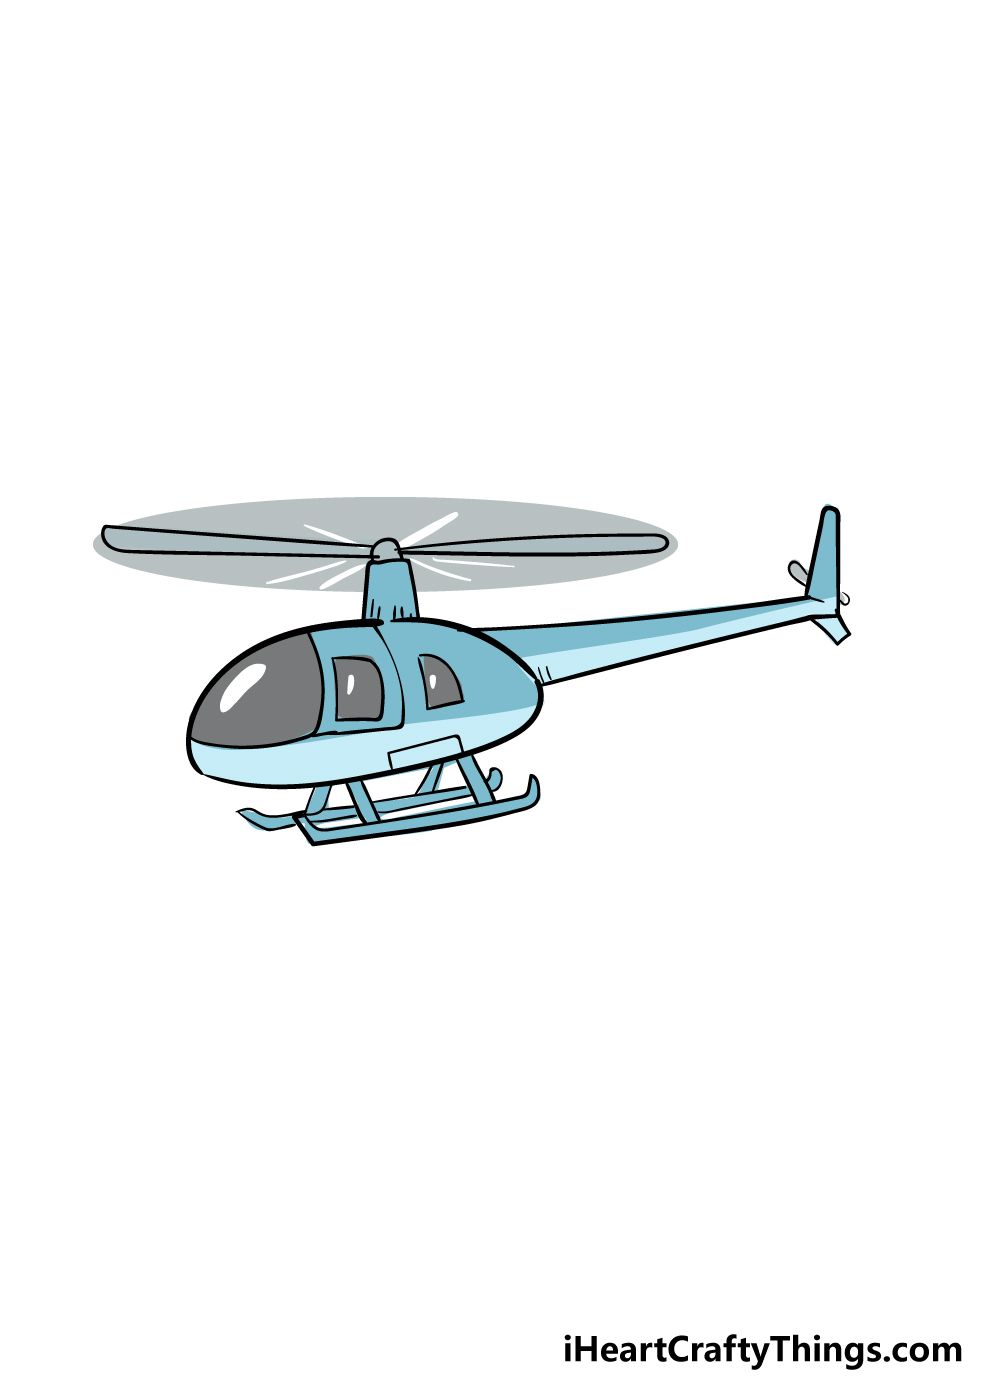
Now that you have finished your helicopter drawing, you can finish it off with some great colors!
We used a range of blues for our example, but you should use any colors you love, as a helicopter can come in any manner of different colors.
You can also see in the reference image that you can use colors to create the illusion of the rotors spinning.
To do this, you can simply create a grey oval around the rotors with some white lines coming out from the center. This simple trick is very effective in creating a sense of movement for the rotors!
If I were coloring this in, I would use some colored pens and markers to make the colors pop!
There are many different art mediums you could use depending on whether you want a brighter or more muted look to the picture. How will you finish off this drawing with your colors and art tools?
Here’s how you can make your helicopter drawing even better…
Take flight for some drawing fun as we make your helicopter sketch even greater!
A helicopter can be used for many purposes, from transportation to search and rescue. These are just a few things they can be used for, but you could show what you think the one in this helicopter drawing is being used for!
For instance, if it is a medical helicopter then you could show this by drawing a red cross on the side. That’s one idea, but what else could you imagine this helicopter is being used for?
Not only can helicopters perform many duties, but they also come in many shapes, sizes and variations. If you have a favorite type, then you could use it for this drawing of a helicopter!
Once you have this design mastered, you could turn it into a different make with ease by changing just a few details. Using photos of your chosen helicopter would also help to make it so much easier.
What kind of helicopter would you choose to turn this one into?
Another great way to turn this helicopter sketch into a scene would be by drawing a background. This would be especially great to do if you followed our previous two tips!
Helicopters can fly through pretty much any condition or environment, so you could choose any background setting you like. Once again, you may want to look up some reference photos to help you out.
Do you have an idea for where this helicopter could be flying?
For the design of this helicopter drawing, we left a lot of empty space with the windows. We colored them in with grey to make them look reflective, but you could leave them blank instead.
That would allow you to add some human characters sitting inside of the helicopter. If you were to add some humans, you could even draw yourself and your friends or family riding inside of the helicopter!
That’s one idea, but who else would you like to have inside this helicopter?
Your Helicopter Drawing is Complete!
That brings us to the end of this step-by-step guide on how to draw a helicopter!
We really hope that this guide helped to show you that when you have steps to follow taking on a new drawing can be much easier.
Most of all, we also hope it was a lot of fun for you to work through as you learned!
Now that you have mastered this guide, the fun can continue with how you finish off your drawing.
Whether you add some extra details, create a stunning background or get experimental with colors, we know you’ll do an amazing job!
When you are ready for more drawing fun, be sure to check out some of the many awesome drawing guides we have for you on our website.
We upload new guides covering a wide variety of subjects all the time, so be sure to log in often!
We would also love to see your finished helicopter drawing, so sharing it on our Facebook and Pinterest pages is the best way for us to get to see your artwork!