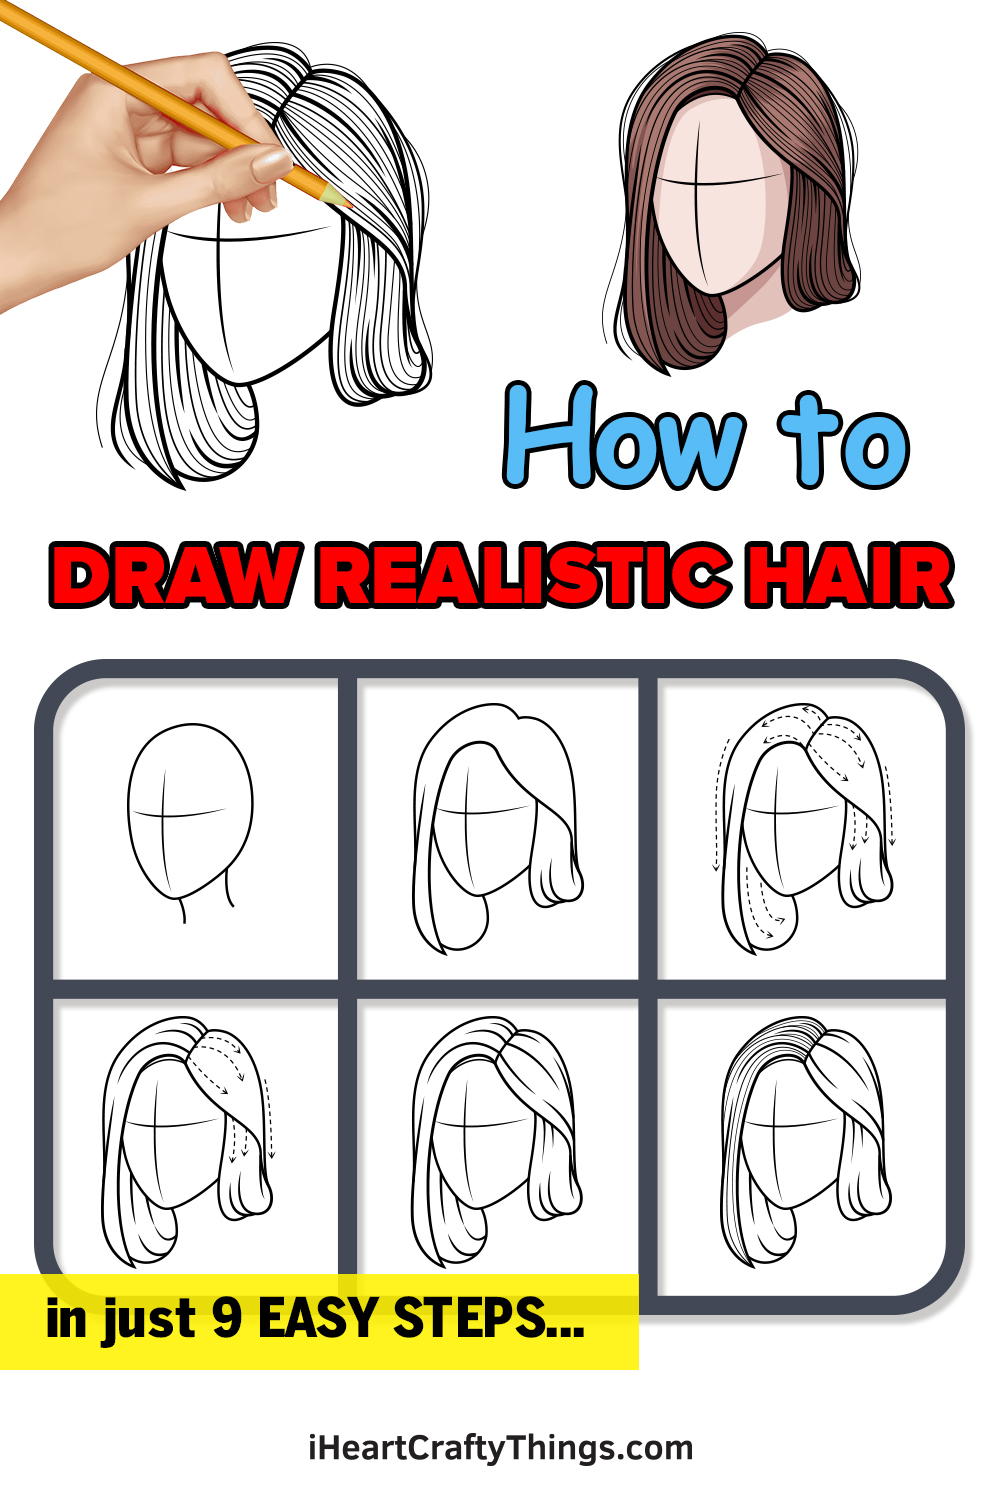
If you asked a group of artists whether realistic hair is easy to draw, it’s doubtful that many would answer yes to that question.
There are many reasons that hair is hard to draw, yet the main one is pretty obvious: it’s made up of thousands of individual hairs!
While having to draw this tricky subject can have you pulling your hair out in frustration, we have a guide that will show you that it can be as easier than you would imagine!
This step-by-step guide on how to draw realistic hair in just 10 steps will show you how to have fun while learning to draw realistic hair easily.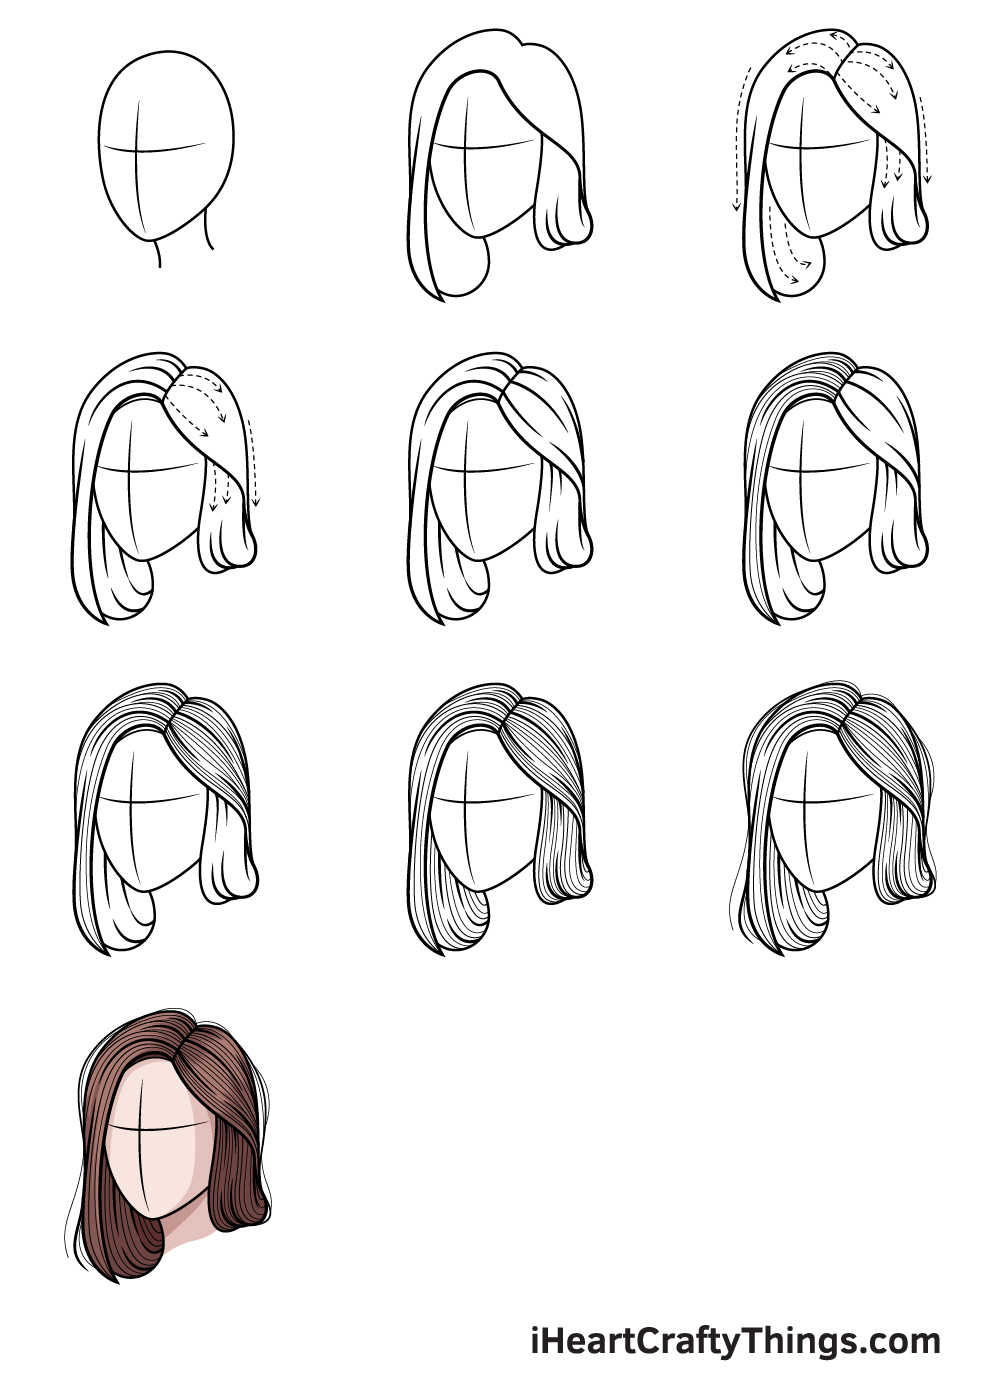
How to Draw Realistic Hair – Let’s get Started!
Step 1
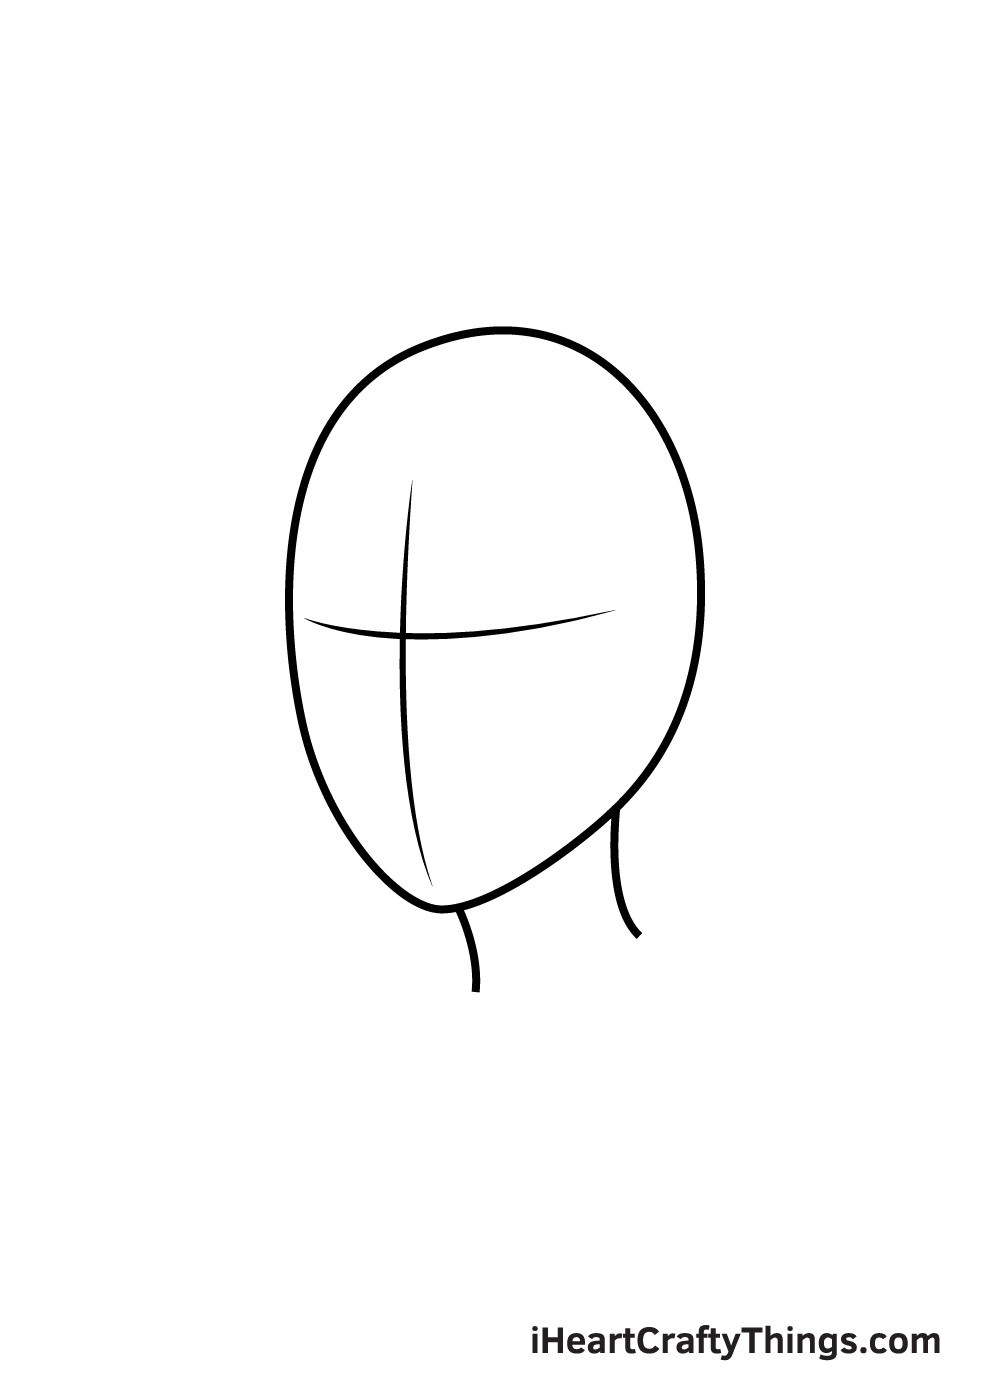
The best way to make the process of learning how to draw realistic hair easier is by preparing properly for it.
To do this, you will need a light pencil for this first step, as you will be drawing somewhat of a mannequin head that you will draw the hair onto.
Using our reference image as your guide, carefully draw the head outline sitting on a neck using your pencil.
Step 2 – Start drawing the hair outline
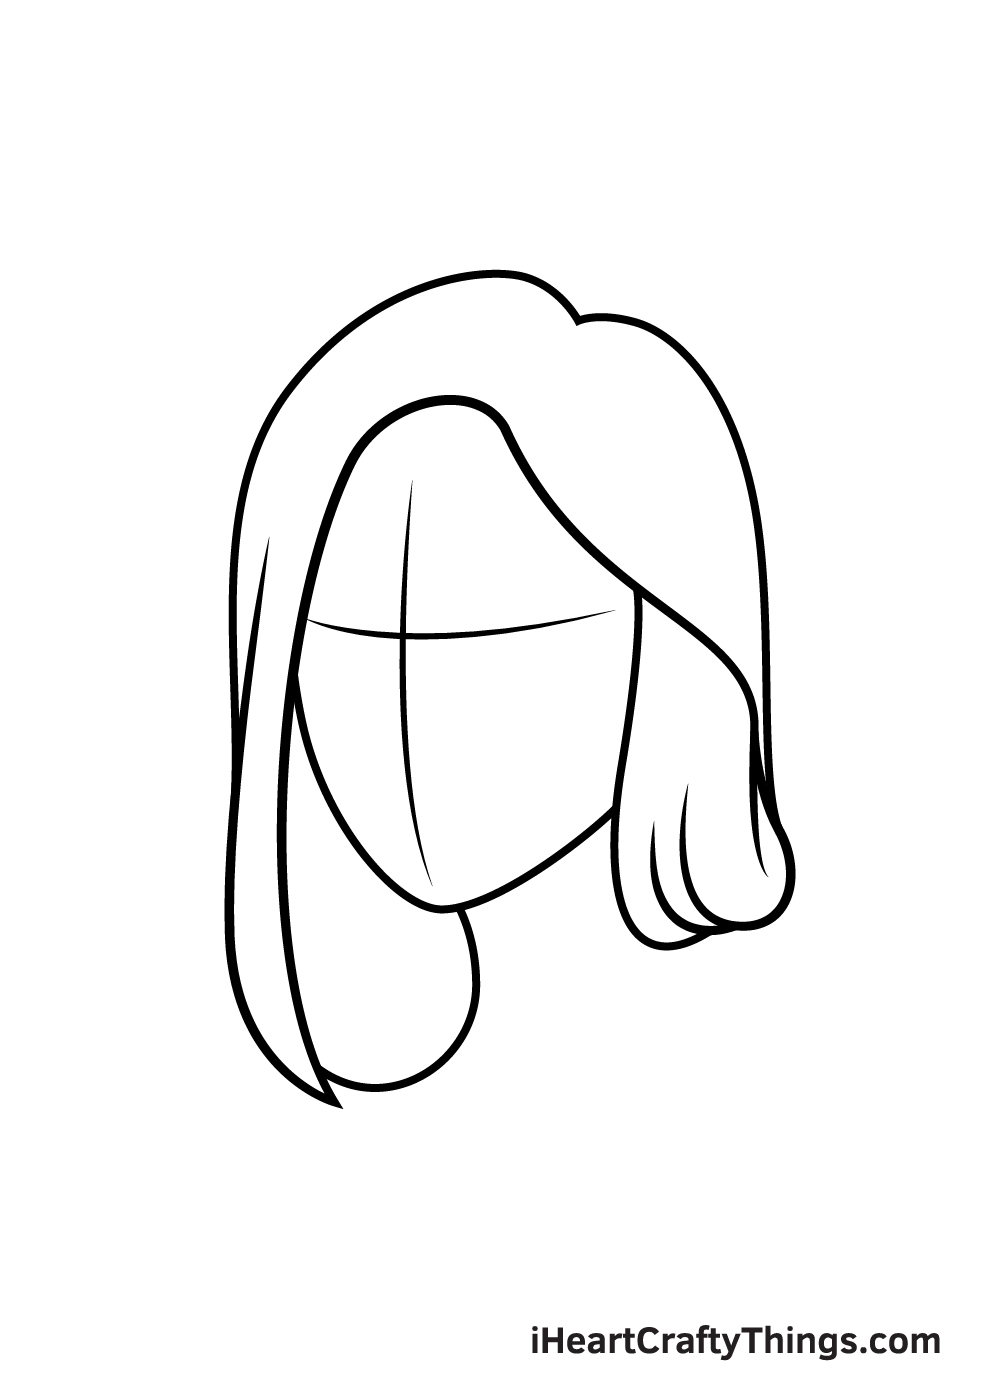
For step 2 of your realistic hair drawing, you could technically start drawing with a pen, but I would recommend using a pencil for now as this step can be quite tricky.
This is a part where you will want to refer very closely to the reference image as you draw. Try your best to draw the hair outline as it appears in the picture.
Then, carefully erase any part of the head outline that would be hidden by hair.
Step 3 – Refer to the image to plan the next steps
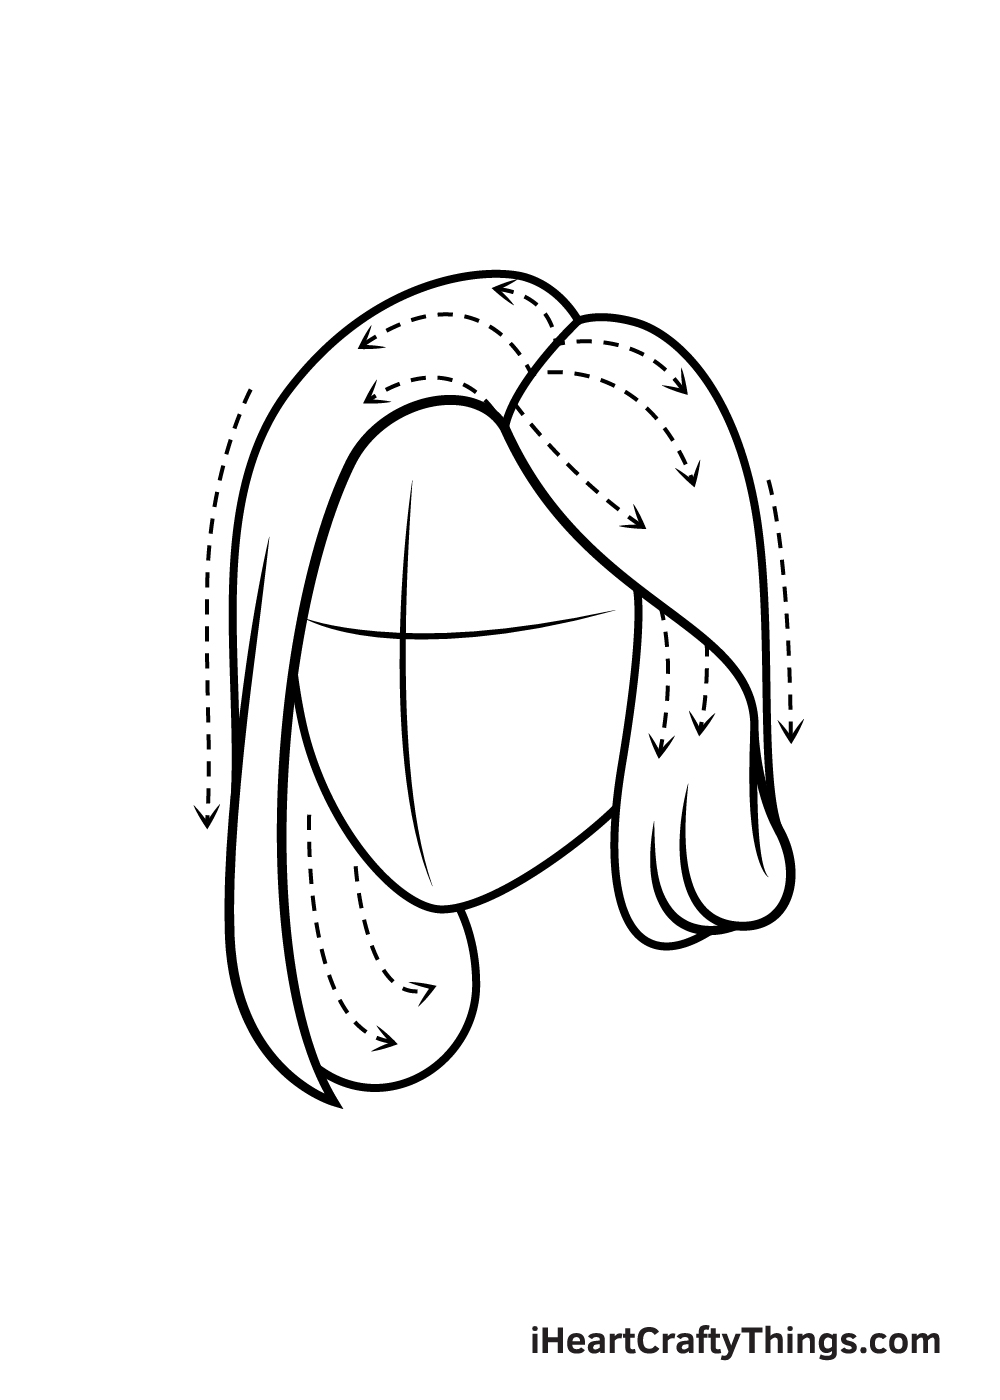
The reference image for step three has arrows to show you the direction that the hair will be flowing in the next few steps.
You don’t need to draw these arrows onto your picture, but this image will help a lot in getting the flow right. You could draw them with a very light pencil if it will help, though!
Step 4 – Start drawing the flow of the hair
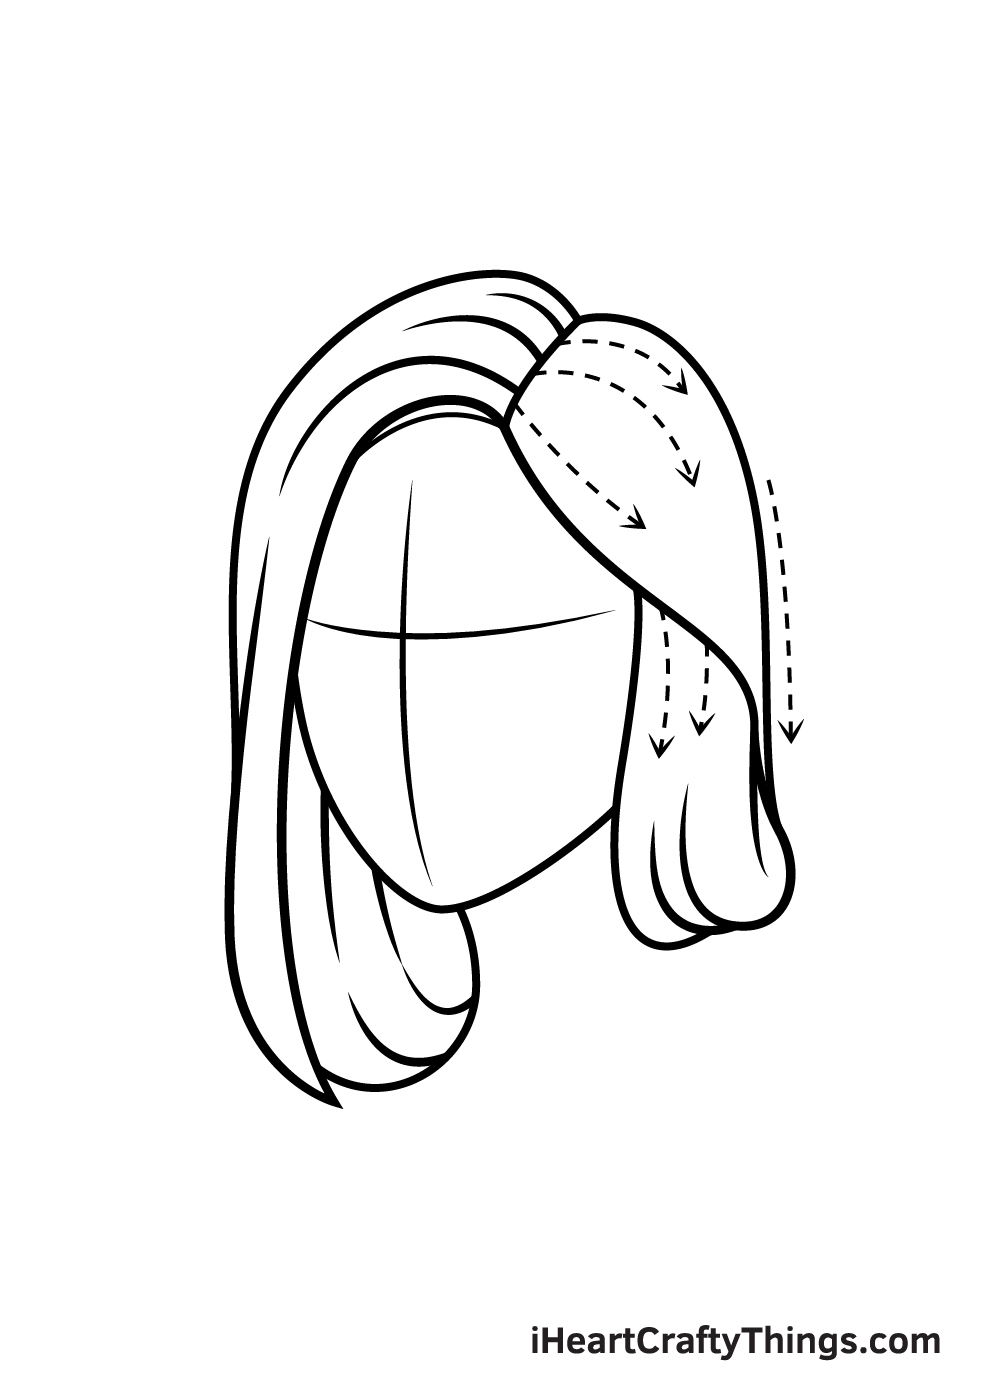
Referring closely to the image in step 3, you can start drawing thicker lines to the left side of the hair.
To do this, start drawing in some thicker lines as they appear in the reference picture, using the flow arrows as your guide to make sure they sit naturally on the hair.
Step 5 – Finish drawing the thicker lines
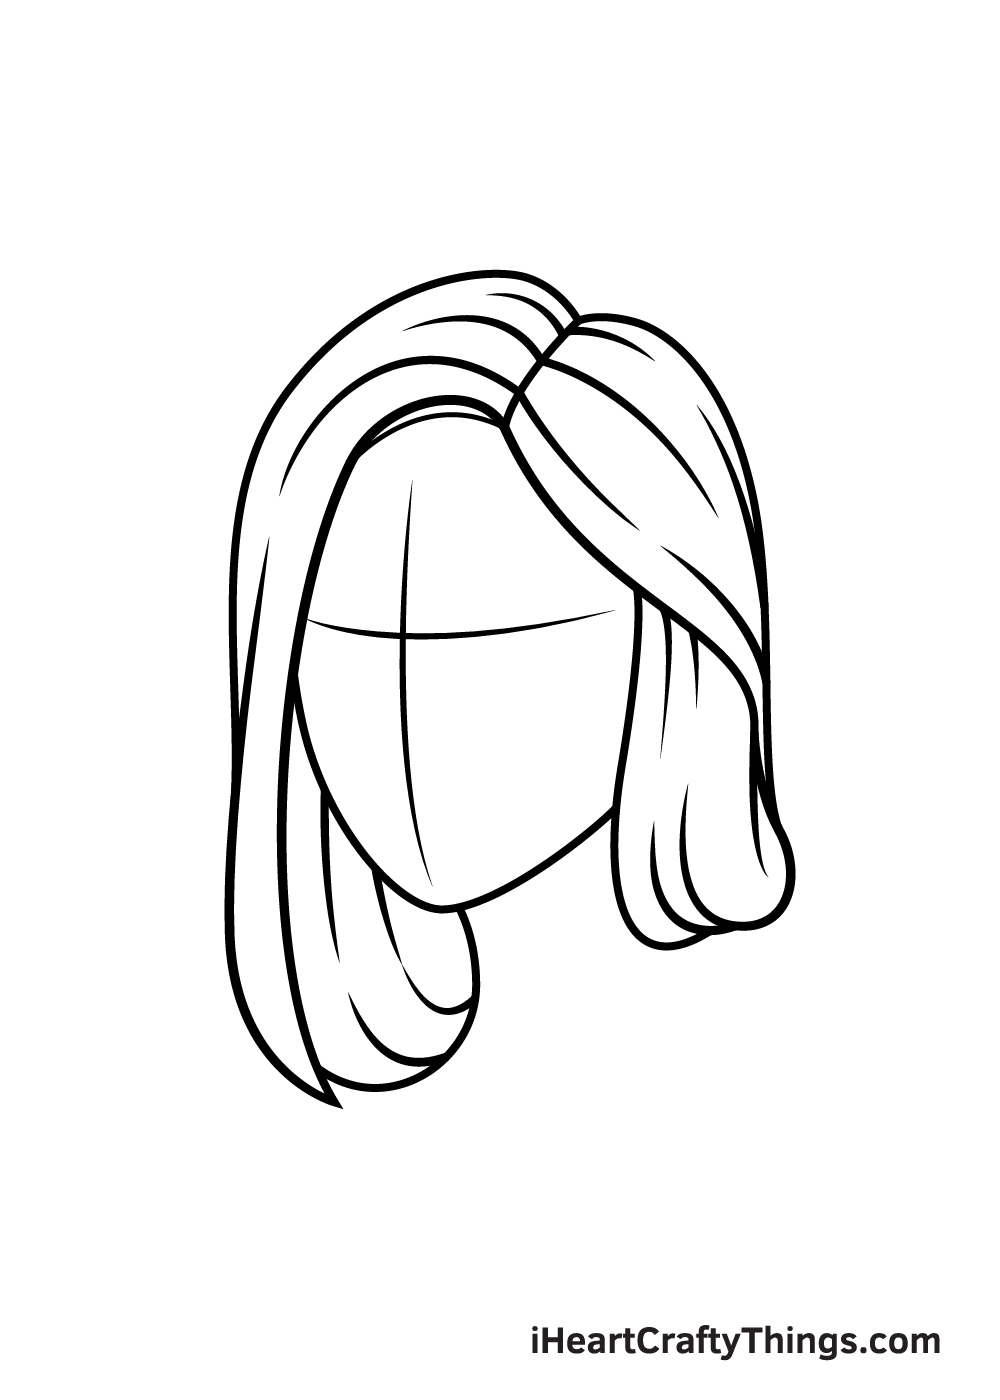
Continuing on from the previous step, we shall draw more thick lines on the right-hand side of your realistic hair drawing.
Once again, carefully follow the arrows in the reference images to get the flow looking good.
Step 6 – Start drawing some smaller lines
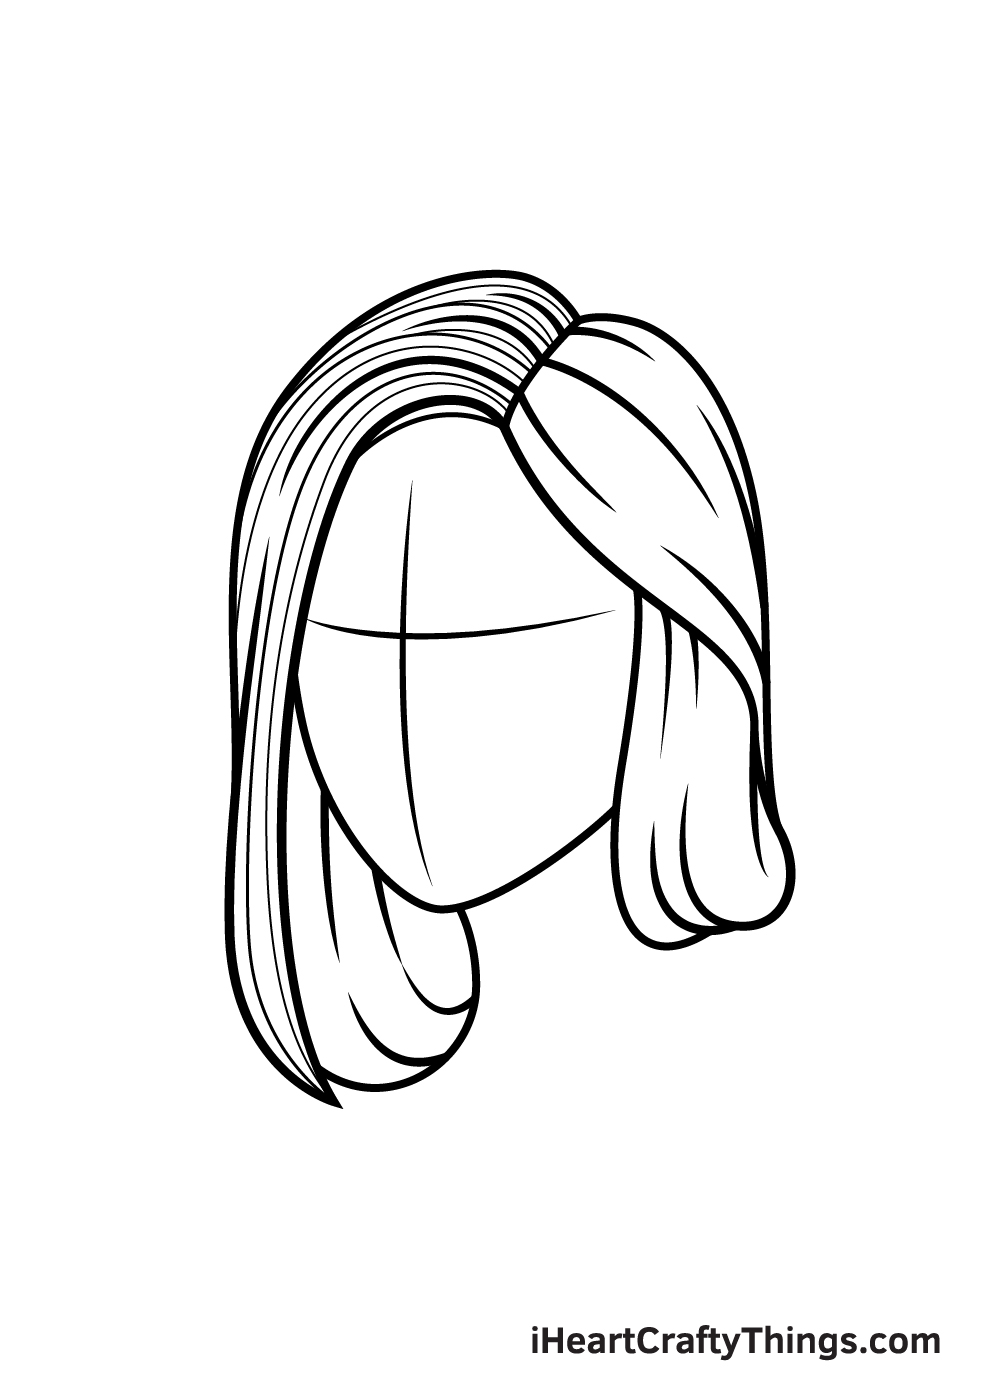
The thicker lines you have drawn will provide some depth and volume to the hair, and in this step of our guide on how to draw realistic hair we shall draw some thin, small lines.
You should try to use either a thin-tipped pen or a very sharp pencil for these lines. The arrows from earlier will guide you with these lines as well, so be sure to look closely at it!
Step 7 – Keep drawing some thin hairs
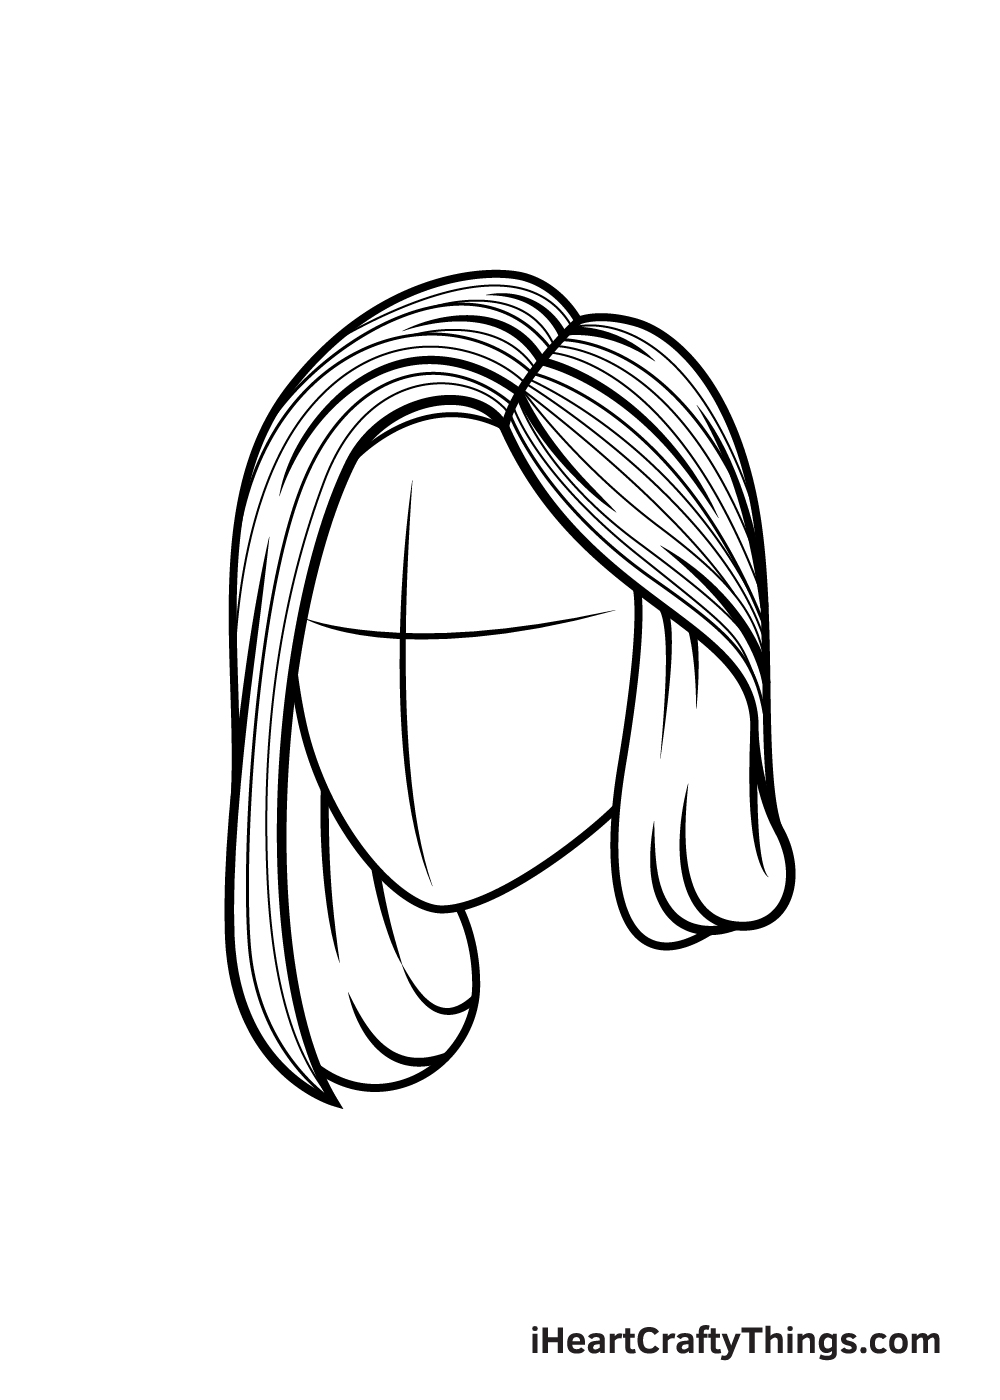
You’re getting the hang of it now!
For this part of your realistic hair drawing, simply keep drawing more thin lines to the upper right section of the hairstyle.
Step 8 – Finish off the thin lines
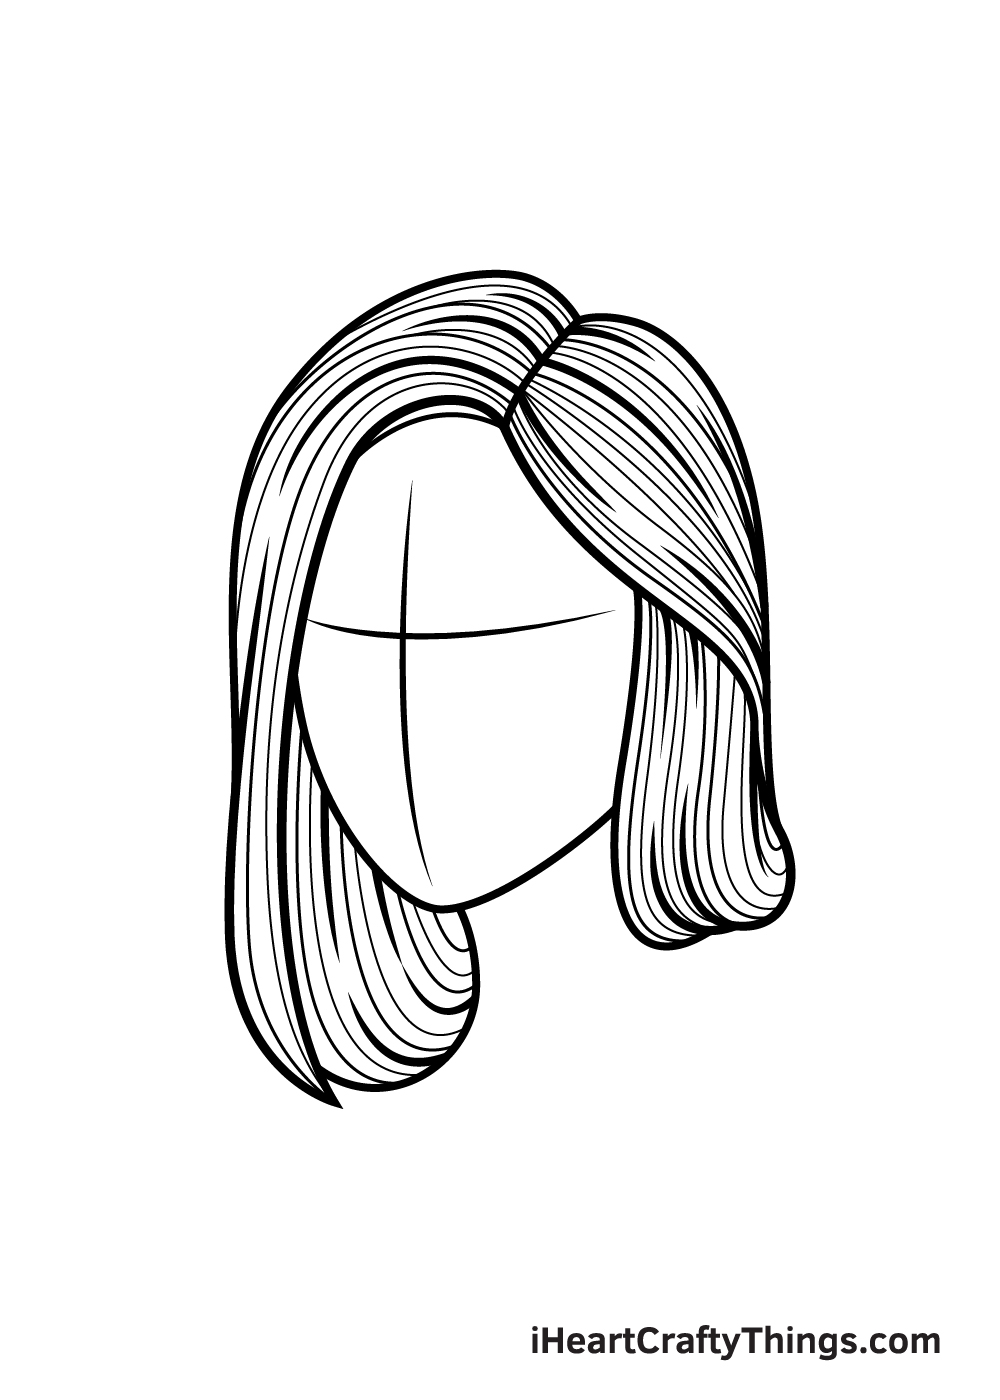
You’ve almost finished drawing the thin lines for your realistic hair drawing, and in this step you can finish this element off.
Simply keep drawing these lines to the final sections of the hair, following the guide arrows and reference images.
Once that’s done, you could add more lines as you wish, but just remember to keep the flow consistent!
Step 9 – Draw some stray hairs
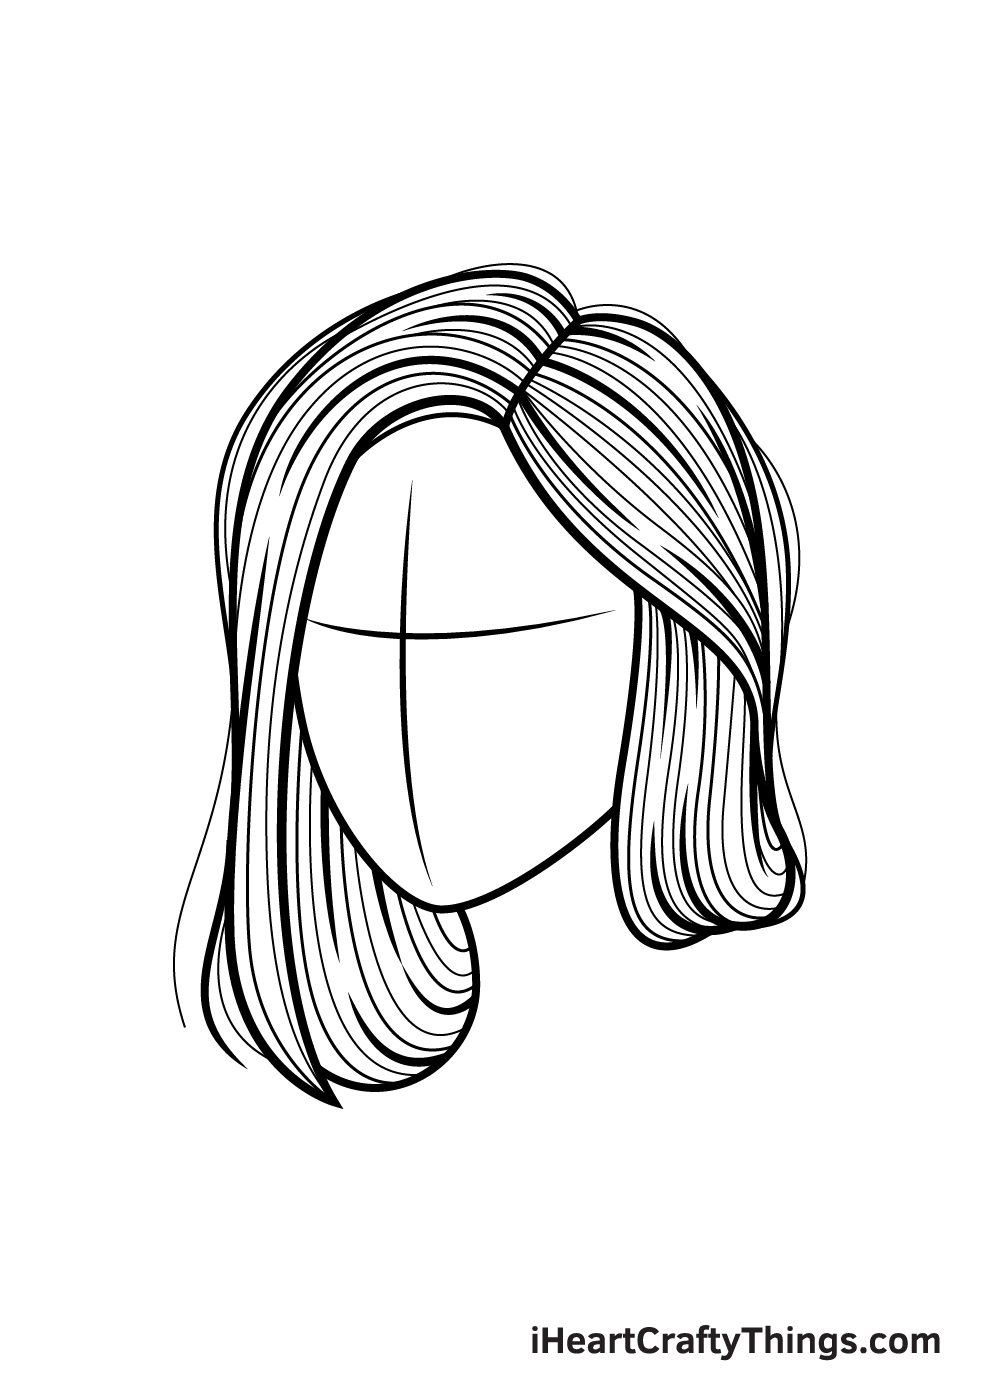
Before you start coloring in your drawing, we shall add some final details in this step of our guide on how to draw realistic hair.
First, draw some thin, stray hairs coming out from the hairstyle. This part is fairly optional, as while these hairs create a more realistic look, you could use less or none at all for a neater appearance.
Finally, be sure to go over all the final lines with a pen and then erase all leftover pencil lines.
That was a tricky drawing challenge, so now you can let your hair down with some coloring fun! This is a step where you can unleash your creativity on your realistic hair drawing.
You could choose any colors that you love to finish up, and you have so many options at your disposal.
Will you color it in to look like your own hair, or will you create your dream hairstyle using your colors?
You can also have lots of fun using your favorite art mediums to make the colors pop. whether you use paints, watercolors, crayons, colored pens or anything else, we know it will look amazing!
Here’s how you can make your realistic hair drawing even better…
You won’t need a brush or hair products to make this realistic hair sketch look even better!
For the hair in this realistic hair drawing, we kept the colors to a minimum, opting for some flat browns.
Many hairstyles will incorporate some highlights and other color features, and you could do that for this hair as well!
You could easily color smaller strands and sections of the hair in order to add some great highlights.
This can really elevate the look of the hair, so you should definitely feel free to have fun experimenting!
Next, you may want to change the look of this realistic hair drawing by changing the style of the hair. This could be subtle and incorporate some of the existing stylings.
These subtle changes could include small braids or maybe some bangs. These are just a few suggestions, but you could also completely change the design of the hair if you prefer!
Do you have some hairstyles in mind that you could alter this design to look like?
Another way that people customize their hairstyles is by adding small accessories. These could include anything from fun hair clips to Alice bands and other simple accessories.
Not only that, but you can also elevate the hairstyle by adding jewelry around the hair itself. This could go on the ears, neck and face of the person featured in this realistic hair sketch.
Matching the colors to the hair colors can also make it look even more interesting! What accessories could you add?
Finally, you could finish off this character by adding a face to it. We kept the face of this realistic hair blank to make it look like a mannequin.
This also kept the focus on the hair itself, but you could still make this look even better with some facial details! This could be based on someone you know or maybe even the face of a celebrity.
Using your own face would also be a great way to put a personal touch on this image!
Your Realistic Hair Drawing is Complete!
Your drawing is now finished and you have successfully completed this guide on how to draw realistic hair!
Drawing realistic hair can be quite a challenge, so you should be very proud of reaching the end of the guide.
We hope that having this guide helped to show you that even though it’s a difficult subject that it can be easy if you know what to do. We also hope that it was lots of fun for you!
Now it’s up to you to really make this realistic hair drawing your own. There are some fun touched you could add.
For example, you could change the hairstyle a bit or add some accessories such as a bow or hairclip. If you’re feeling extra artistic, you could even draw a face for your picture!
This guide is one of many step-by-step drawing tutorials that we have in store for you, so be sure to check out our site often! We will be bringing out more like this frequently, so be sure to join the fun!
We would love to see how you conquered this realistic hair drawing, so once it’s finished we hope that you will share it on our Facebook and Pinterest pages for us to enjoy!