The cartoons and films created by the Disney company have become embedded within pop culture.
Everyone can recognize the core classic Disney characters, whether it be Mickey Mouse, Donald Duck or Goofy.
Goofy made his film debut in 1932, and many decades later he still delights audiences young and old throughout the world. He is a visually distinct character, and that makes learning how to draw Goofy a lot of fun!
It can be a challenging task though, and that’s why we curated this guide for you!
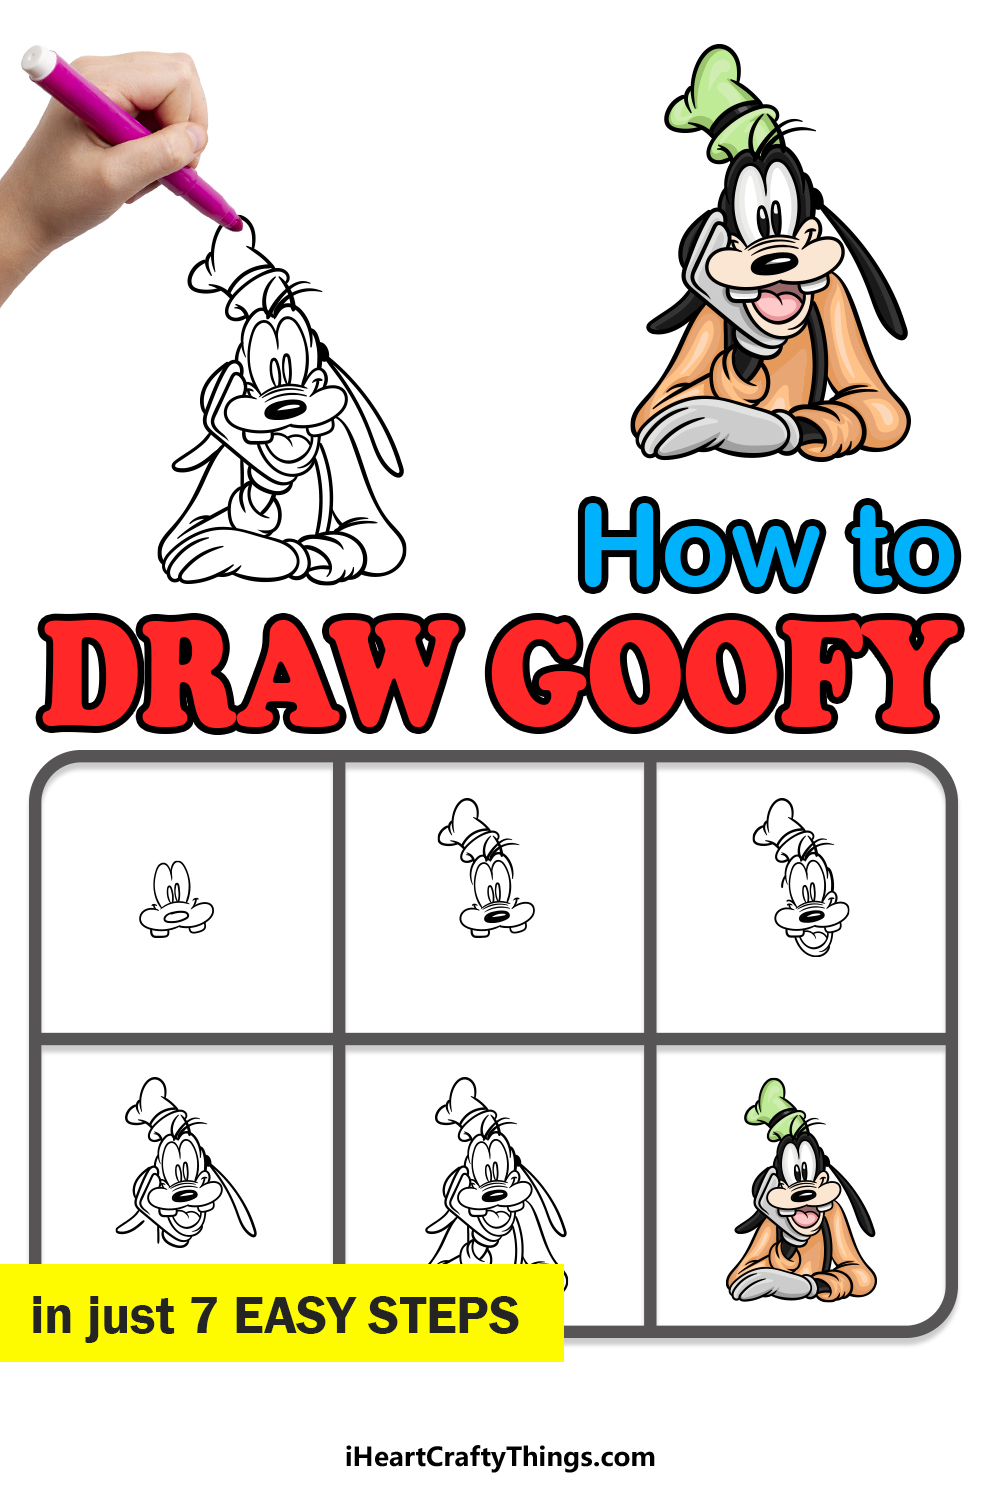
For fans of this lovably dim-witted character, this step-by-step guide on how to draw Goofy in 7 steps should be a lot of fun!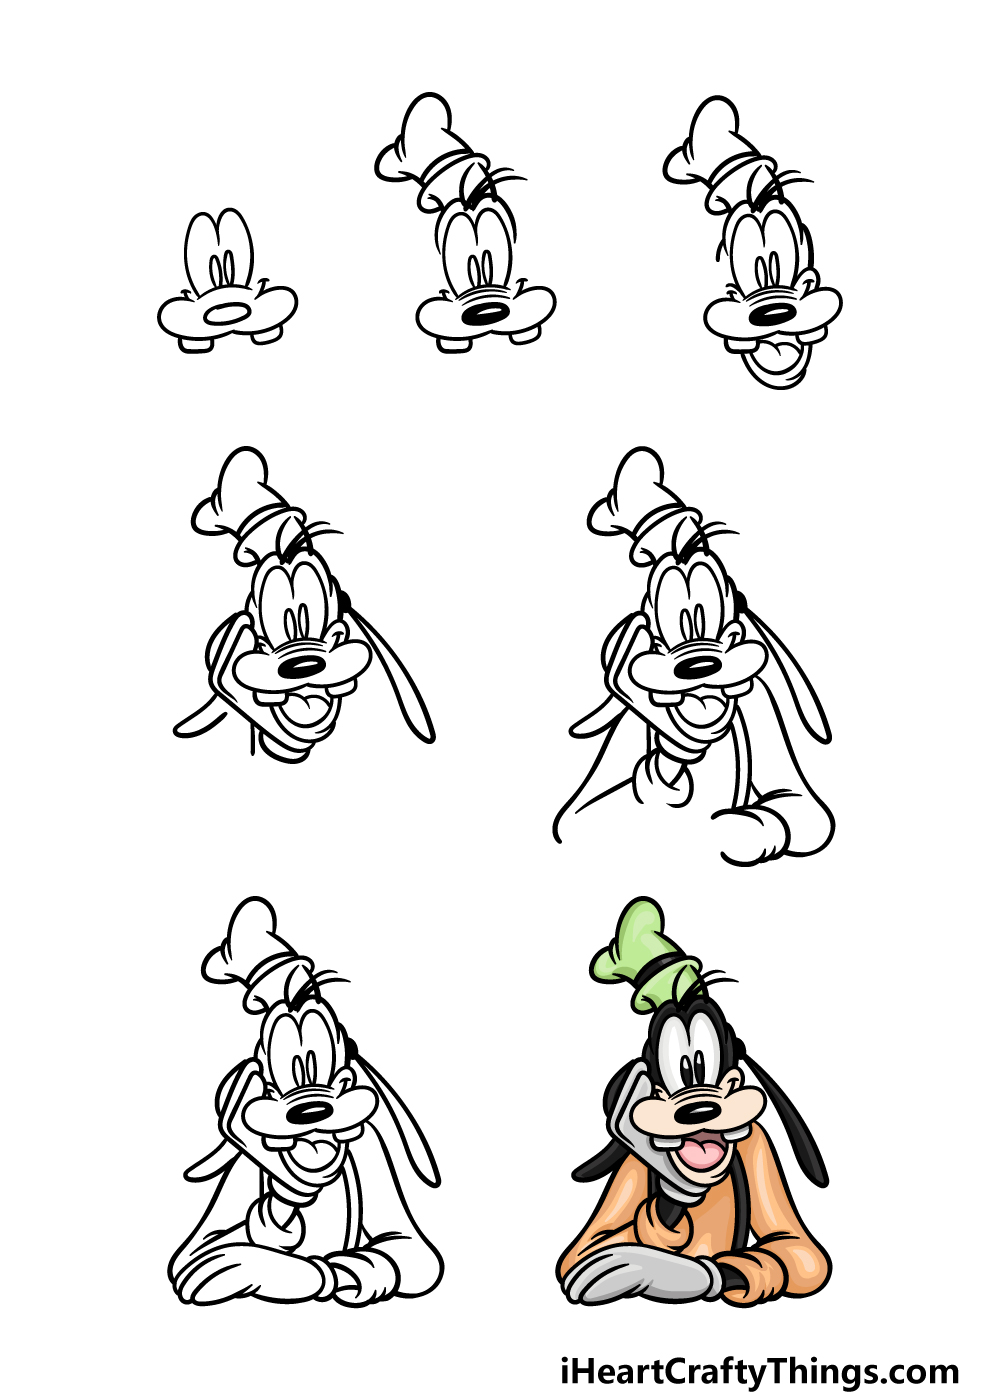
How to Draw Goofy – Let’s get Started!
Step 1
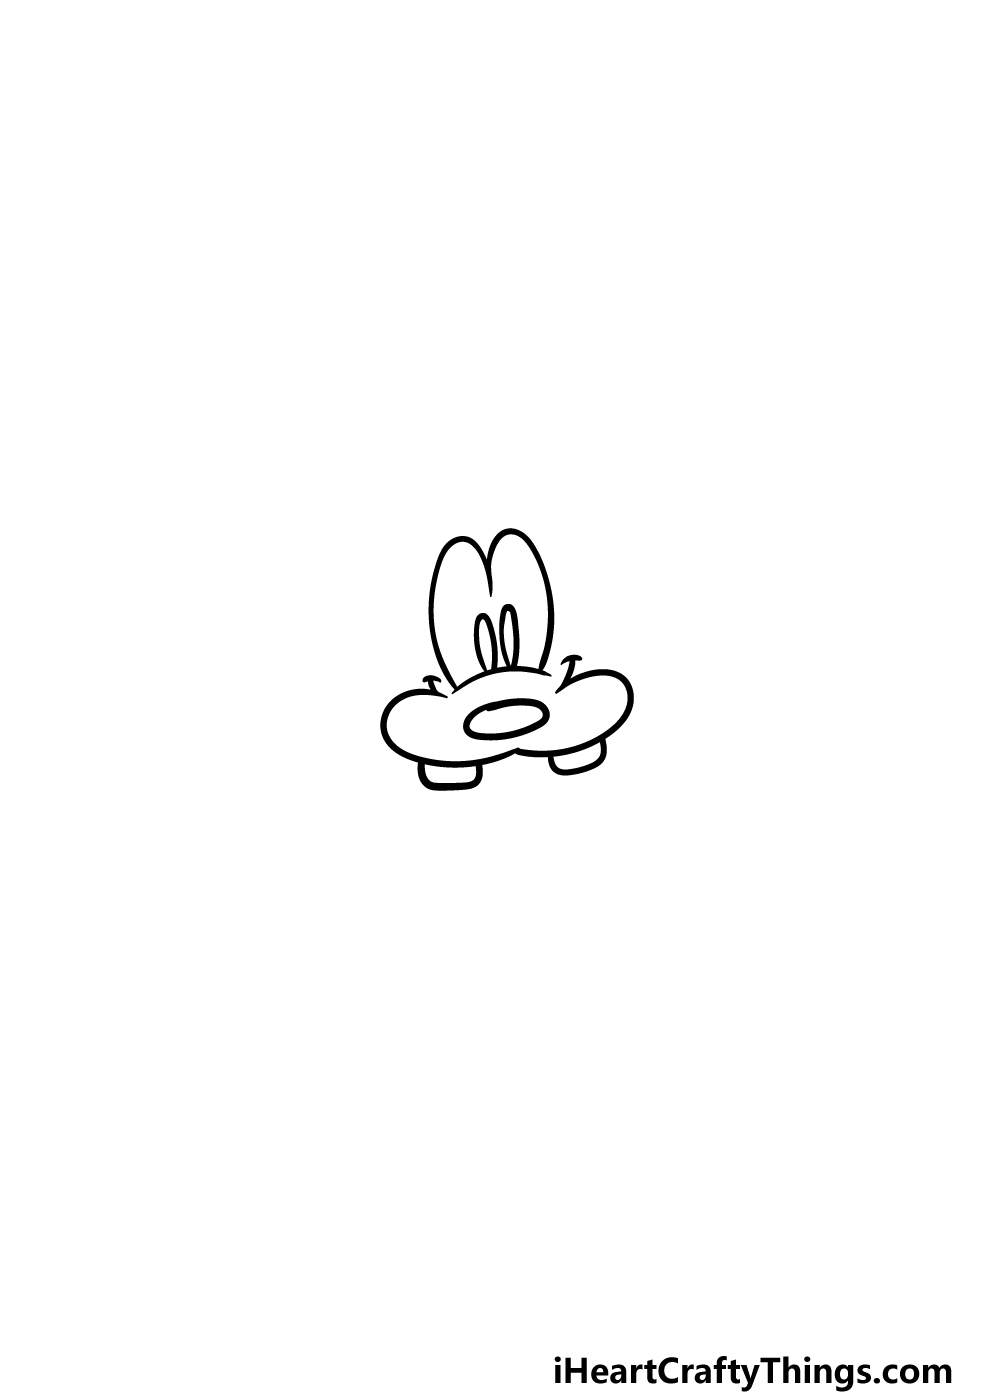
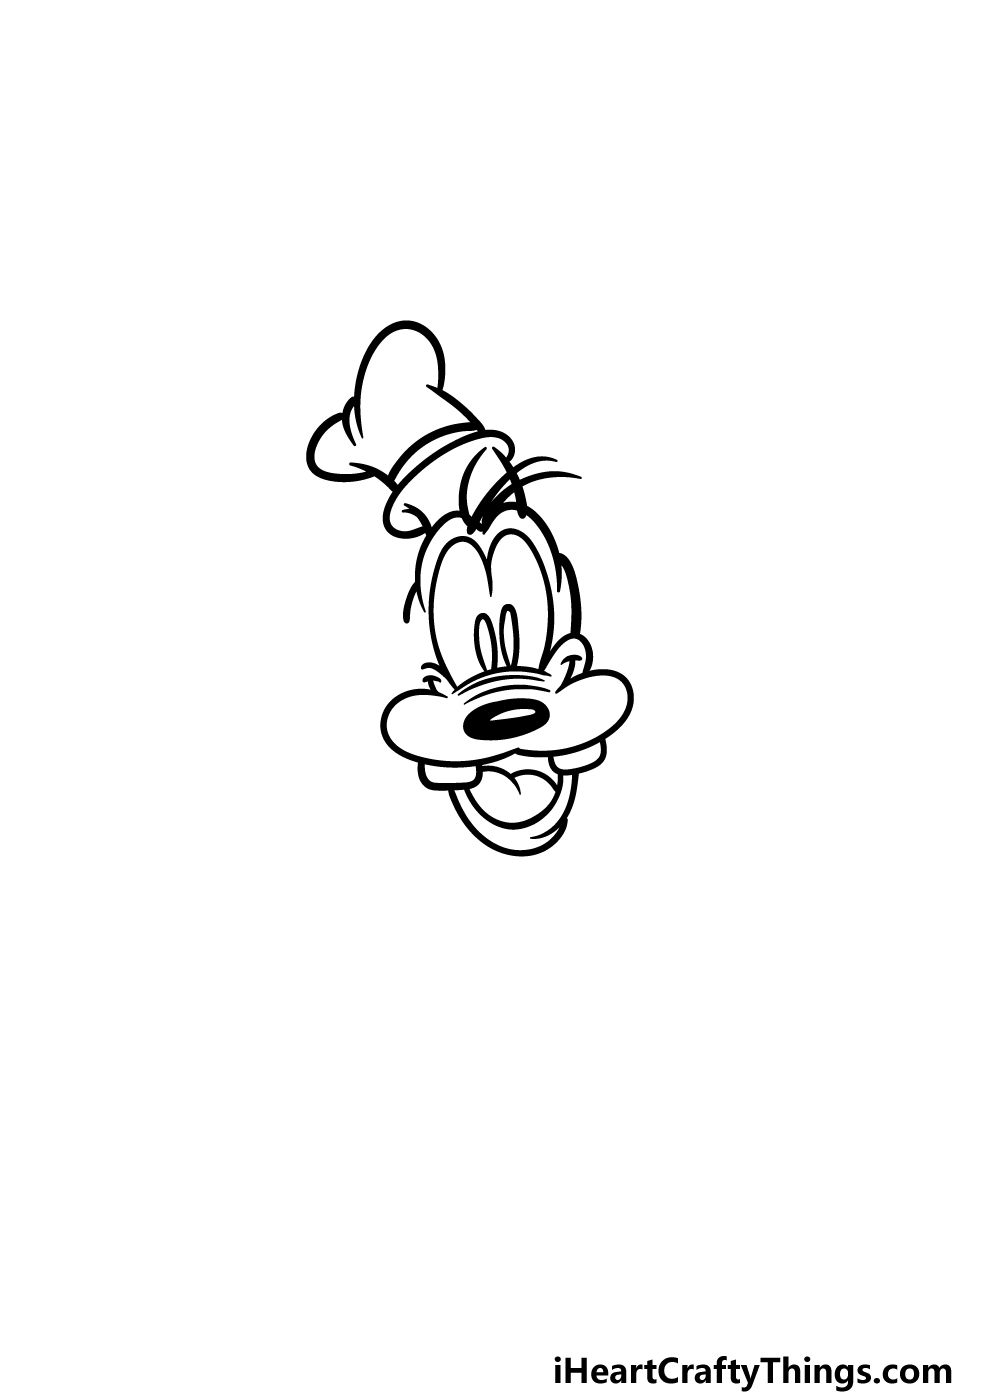
For this first step of our guide on how to draw Goofy, we will be starting with some facial details.
Using two rounded lines connecting to one another, you can draw his two eyes that have no line in the center of them. You can then draw two small oval shapes for his pupils.
The base of his eyes will have another curved line beneath them, and then you can add another horizontal oval for his nose.
Beneath his nose, you can then draw two more rounded lines for the two sections of his muzzle. Don’t forget to draw some squared teeth poking from under it!
Then, when you have drawn these parts you’re ready to move on!
Step 2 – Draw his hat in this step
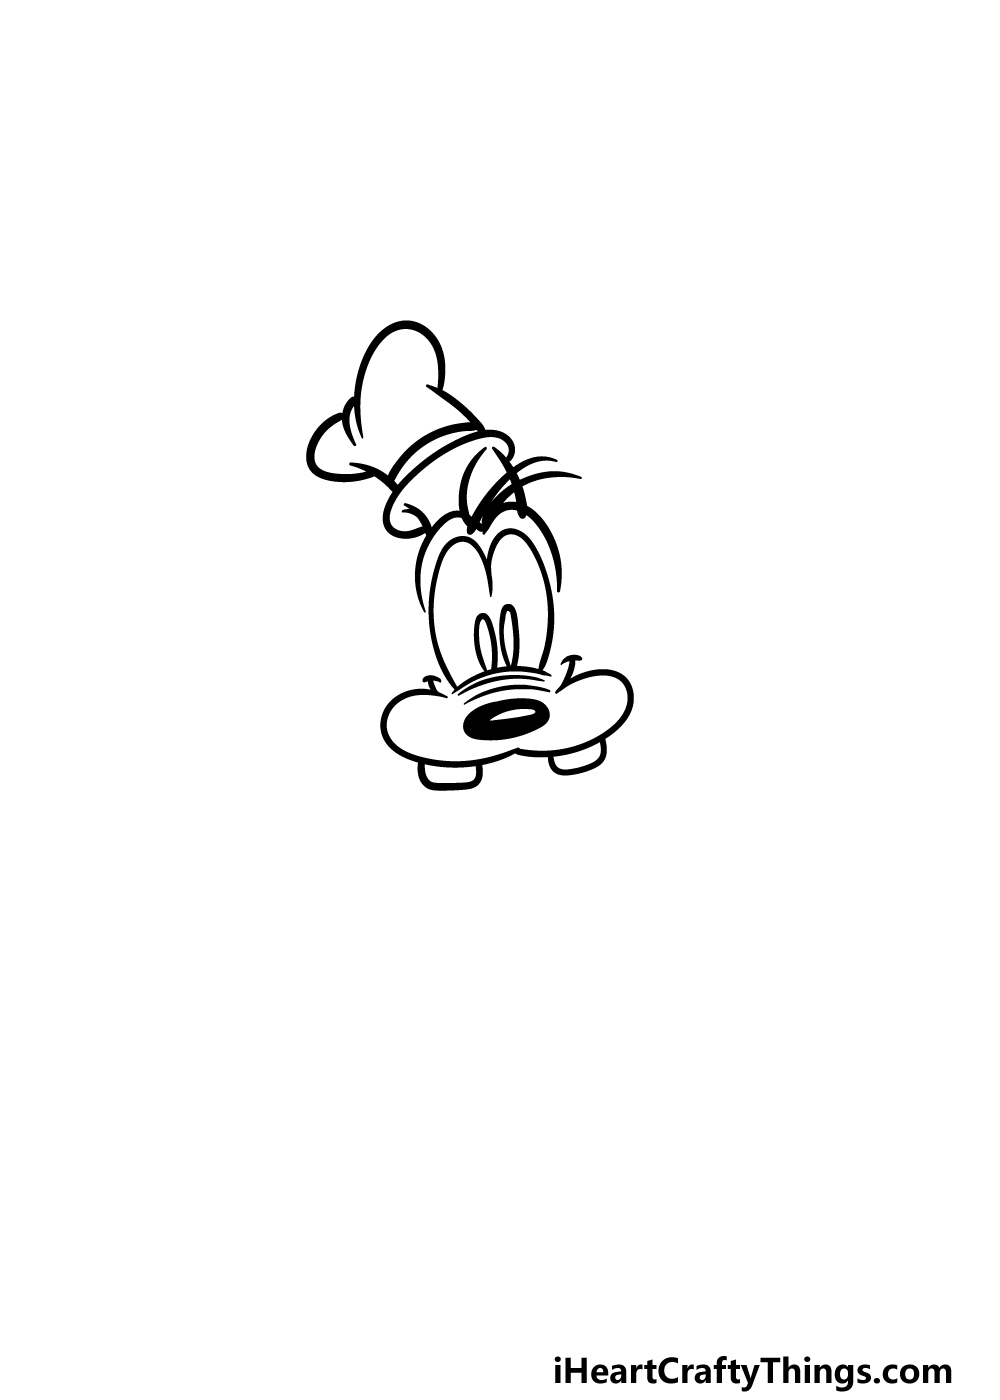
Goofy is rarely seen without his signature hat, so this Goofy drawing definitely wouldn’t be complete without it! You can start this section by drawing two lines above his eyes.
Then, using some more curved lines you can then draw his hat drooping over to the side. He will also have some hairs poking out from the base of his hat, as shown in the reference image.
You can also fill his nose in with some black, leaving a small white oval for the shine on his nose.
Step 3 – Draw the bottom of his mouth next
We will be adding some more to Goofy’s smiling mouth in this step of our guide on how to draw Goofy. To do this, you can draw an outline for the bottom section of his mouth.
You can then put another outline around that, and then draw his round tongue inside of his mouth. Finish off this step by then drawing some more outlines around his eyes for the sides of his face.
Step 4 – Now draw his hand and his ears
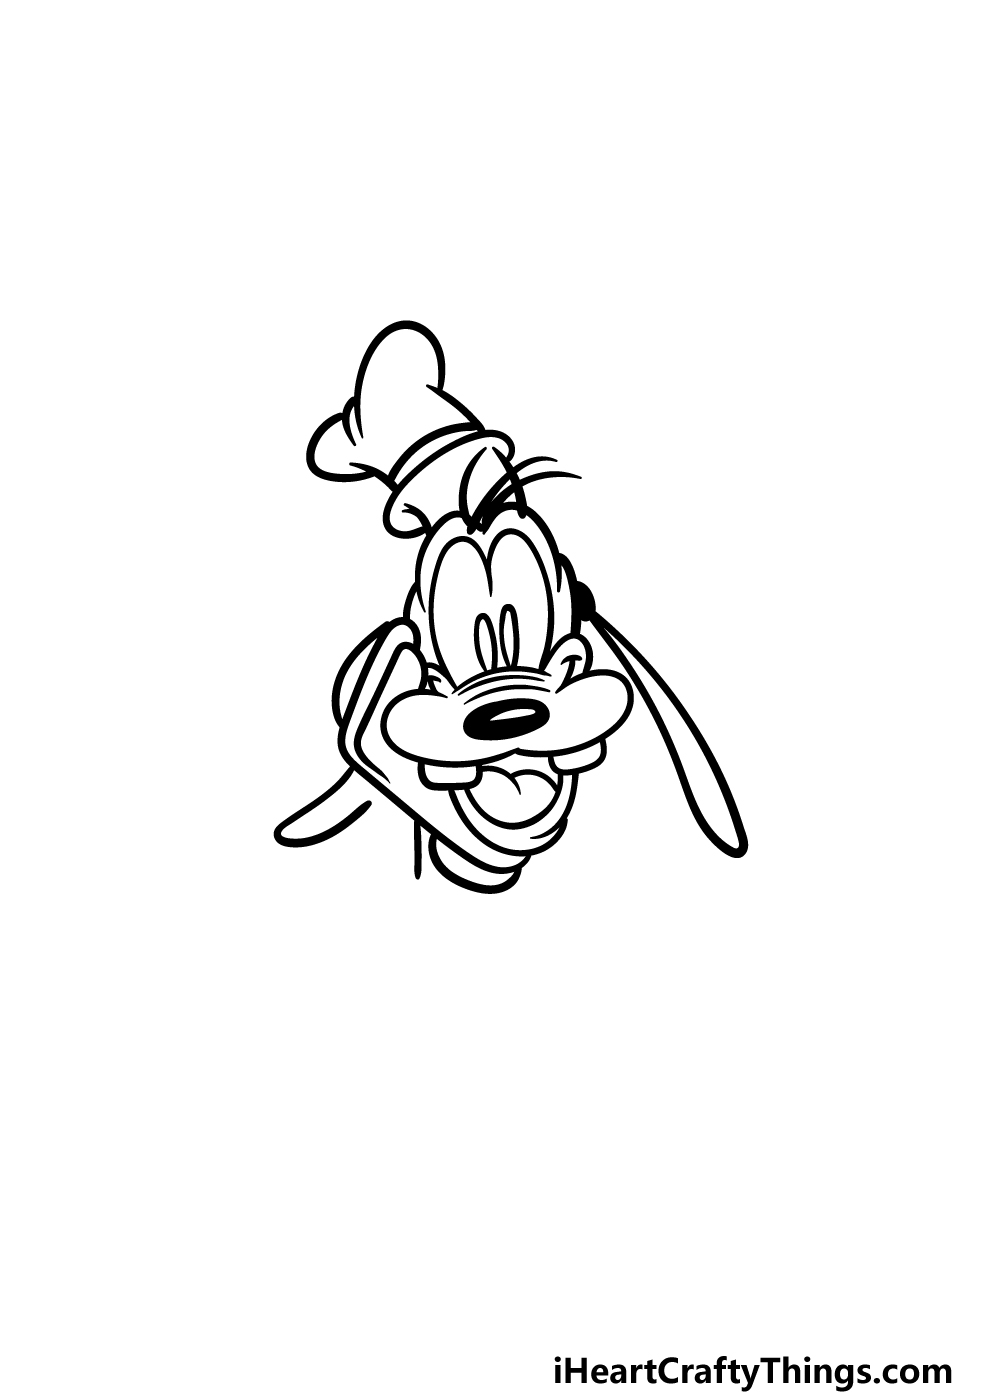
We have Goofy in a rather relaxed pose for this Goofy drawing, so in this step we will have his face resting on his hand.
Much like the other classic Disney characters, Goofy wears a big white glove. You can use some curved lines for his hand and fingers, as shown in the reference image.
Then, we will be drawing another iconic aspect of Goofy, and that is his thin, floppy ears.
You can draw some long, thin shapes dropping down from the sides of his head to do this, and you could change up the positioning of them if you wish. That’s all for now, so let’s move on!
Step 5 – Draw his arms and shoulders in this step
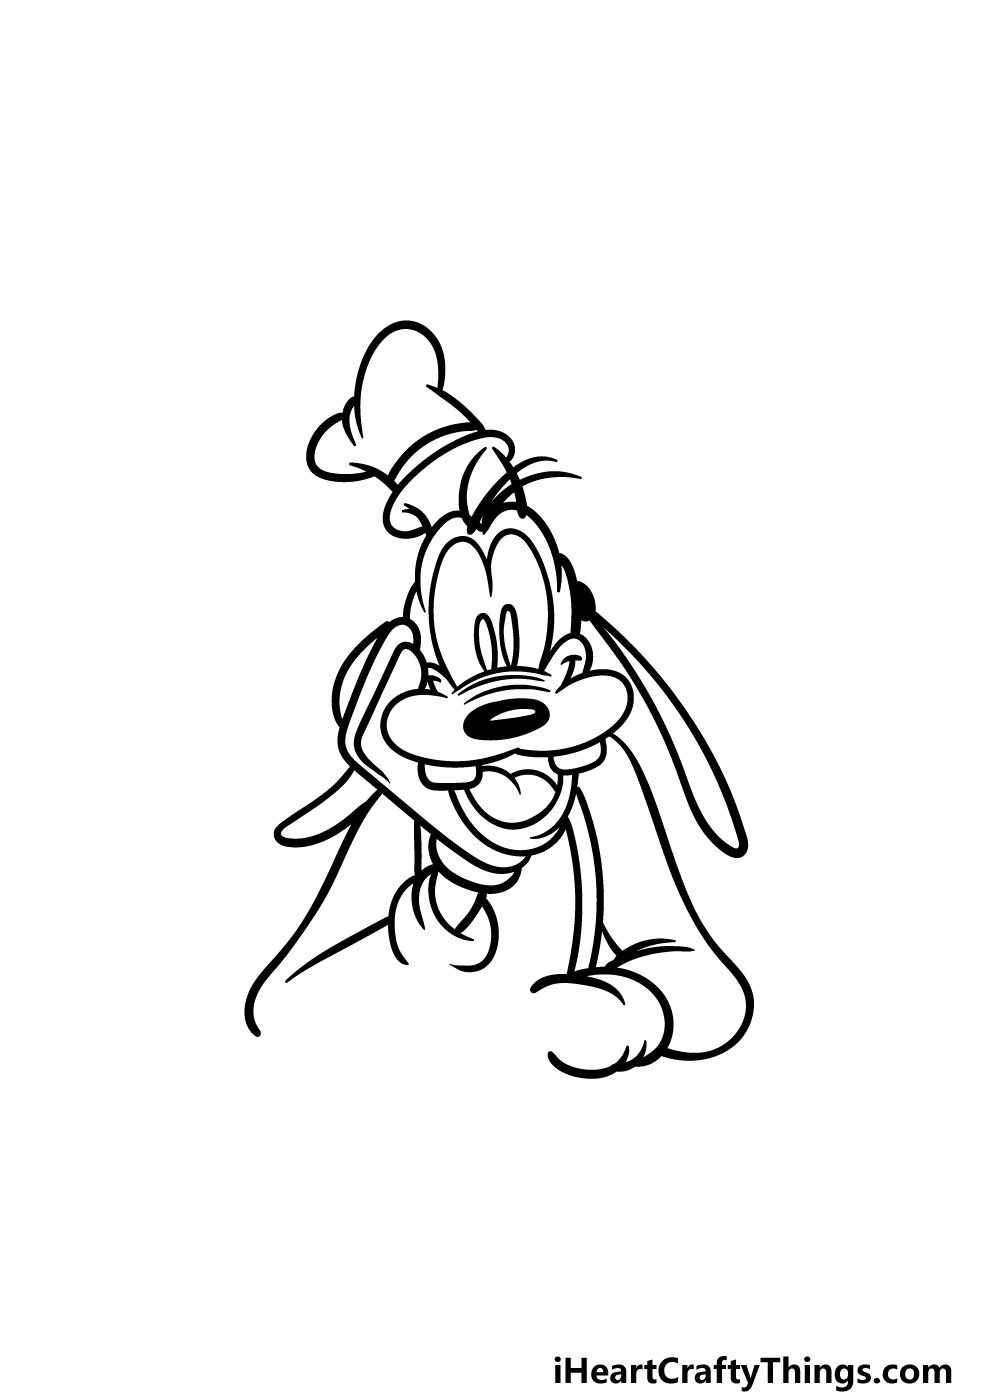
Now you’re ready to start drawing his arms and shoulders in this step of our guide on how to draw Goofy.
You can use some curved and rounded lines to create the sleeves of the sweater that he is wearing, and our reference image will show you how to position his arms.
The arm on the left will connect to the hand underneath his face, whereas the one on the right shall be resting on the table. You can also draw his suspenders dropping down from his shoulders in this step.
Then you’re ready to add the final details in the next step!
Step 6 – Now, add some final details for Goofy
We will be finishing off your Goofy drawing in this step, and that will leave you ready to add some colors in the final part.
The main aspect we have left to add will be his second hand, and this one will be resting on the table as well. Like the other hand, this one will be gloved, and so you can draw it in a very similar style to the first one.
Before you proceed to the final step, you could also add some background details or additional elements!
It could be fun to draw his pals Mickey and Donald beside him, or you could show what kind of setting Goofy is hanging out in. what will you do to finish off this drawing?
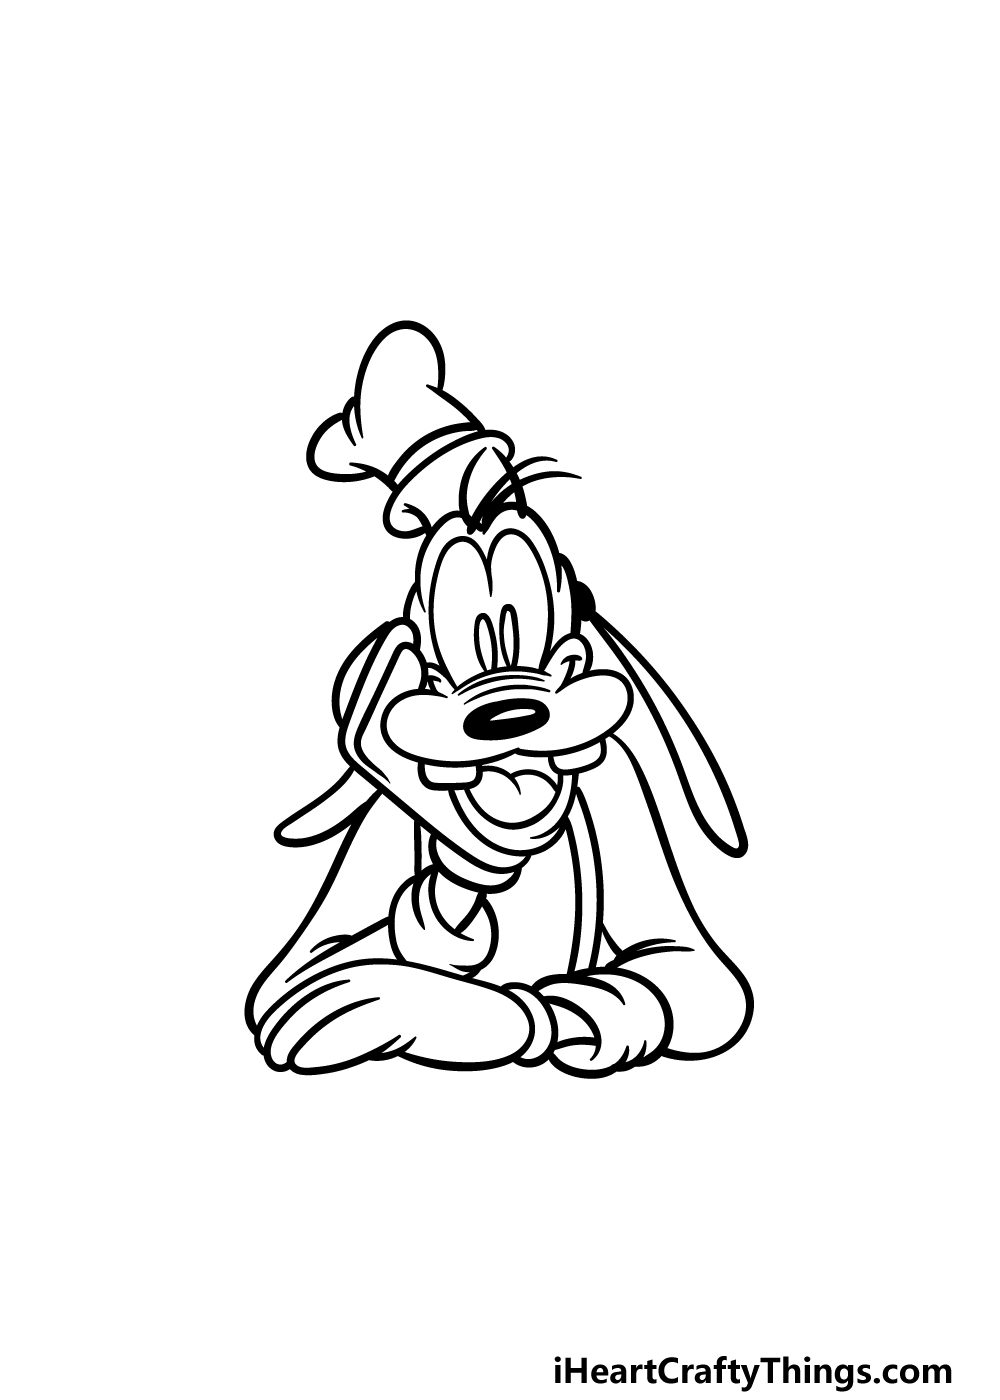
Step 7 – Finish off your Goofy drawing with some color
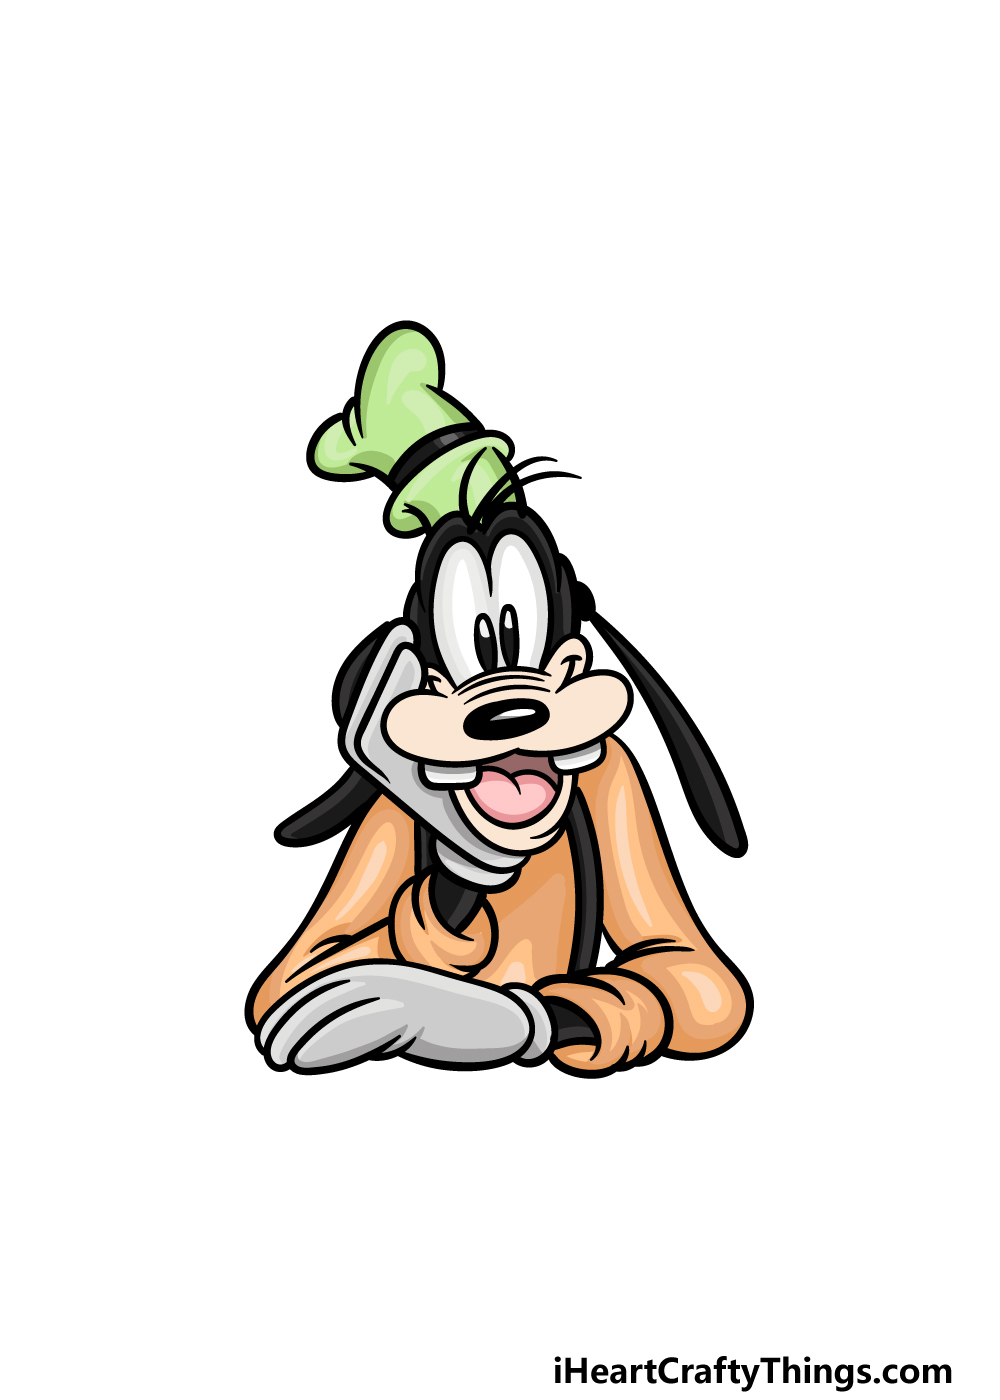
The final part of our guide on how to draw Goofy will be about finishing off with some colors. In our reference image, we went with the classic color scheme for Goofy’s clothing.
That means some bright orange for his sweater along with green and black for his floppy hat.
You could use the reference image as your guide if you would like to replicate these colors, but you should also feel free to use any of your own color choices!
Which colors will you pick, and also which of your favorite art mediums will you use to achieve them?
Do this to take your Goofy drawing to the next level
Make your Goofy sketch the best it can be with these fun and easy tips!
For this Goofy drawing, we focused on his head and arms for the pose we wanted to make. You could draw more of his body if you wanted, however!
The way he is posed would mean you might need to change how his arms look, but that would be easy enough to do. If you need some help or inspiration, then you could look at various movies or shows starring Goofy.
What kinds of poses would you like to create for this famous character?
Even if you wanted to keep the pose we created for this drawing of Goofy, you could still build a scene around him. For example, you could show him leaning on various surfaces.
These could include a piano, a desk or maybe a table at a party. These are just a few ideas, but they show that you have lots of options for how to display him.
What are some settings you could create for Goofy?
Goofy is one of many iconic Disney characters, and you could add a few to this image you have created. You would have so many options if you wanted to try this!
Some examples would include Mickey Mouse, Donald Duck or maybe Pluto. These are far from the only characters you could go with, and you could even try out non-Disney characters,
Which characters can you think of for your drawing that would finish off the scene?
For this Goofy sketch, we went with his classic color scheme. That means that he is wearing his classic green hat and orange sweater.
This is his standard look, but he has had many other looks throughout his long history! You could show some of his different looks by changing up the colors and art mediums that you use.
This could even be taken a but further by changing details such as the hat and clothes that he is wearing. Do you have a favorite Goofy look you’d like to replicate?
Your Goofy Drawing is Complete!
Goofy is such a classic character that pretty much everyone is familiar with, so we hope that you enjoyed creating an artwork featuring him in this guide on how to draw Goofy!
Our main goal in this guide was to make sure that drawing this lovable character was not only easy for you to manage but also that it would be lots of fun! Hopefully we achieved both of these goals for you during this guide.
Now you can finish off this Goofy artwork by adding your own touches. We mentioned adding some more Disney characters or a background, but what kinds of settings and situations can you think of for Goofy to be in?
You’ll want to check out our website as soon as you’re ready for your next drawing challenge. We have lots for you to enjoy, with more on the way soon!
When your Goofy drawing is all done, we’d love it if you would share your artwork on our Facebook and Pinterest pages for us to see!