The planet Earth that we all live on is a truly incredible place filled with many countries, species and biomes to marvel at.
The planet is often marked in the form of maps for navigation and reference. One of the most popular forms these maps can take are in the form of a globe, as they portray the planet in its realistic shape and orientation.
Globes can be great for education, and learning how to draw a globe can be lots of fun as well!
This is the guide to be on if you would like to know how it’s done.
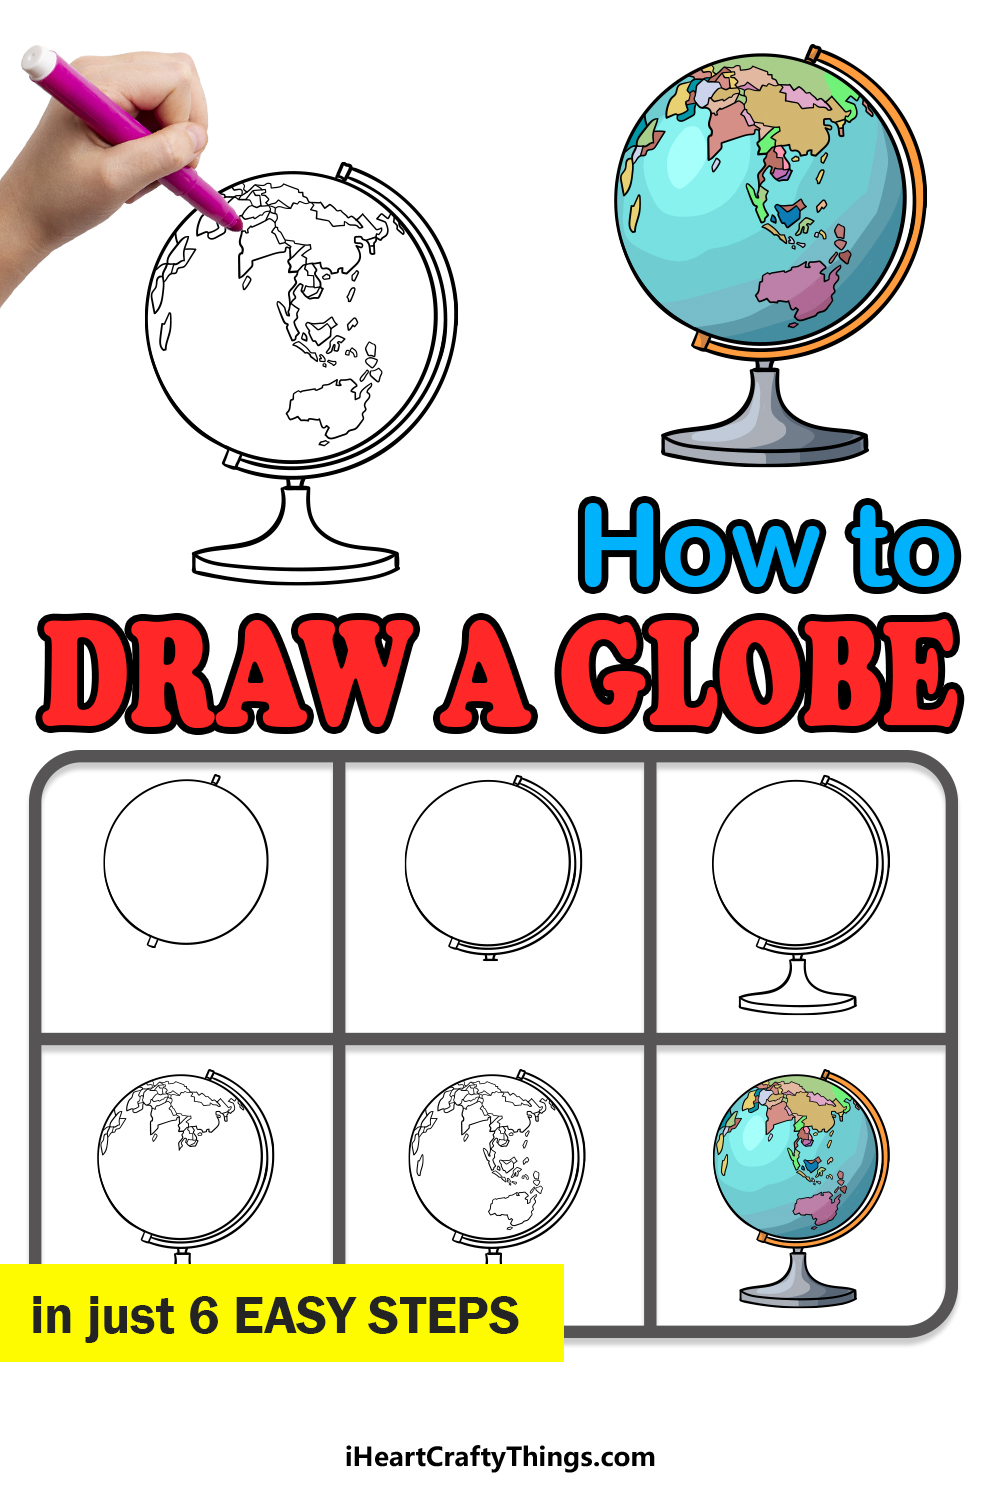
Go around the world and back with this step-by-step guide on how to draw a globe!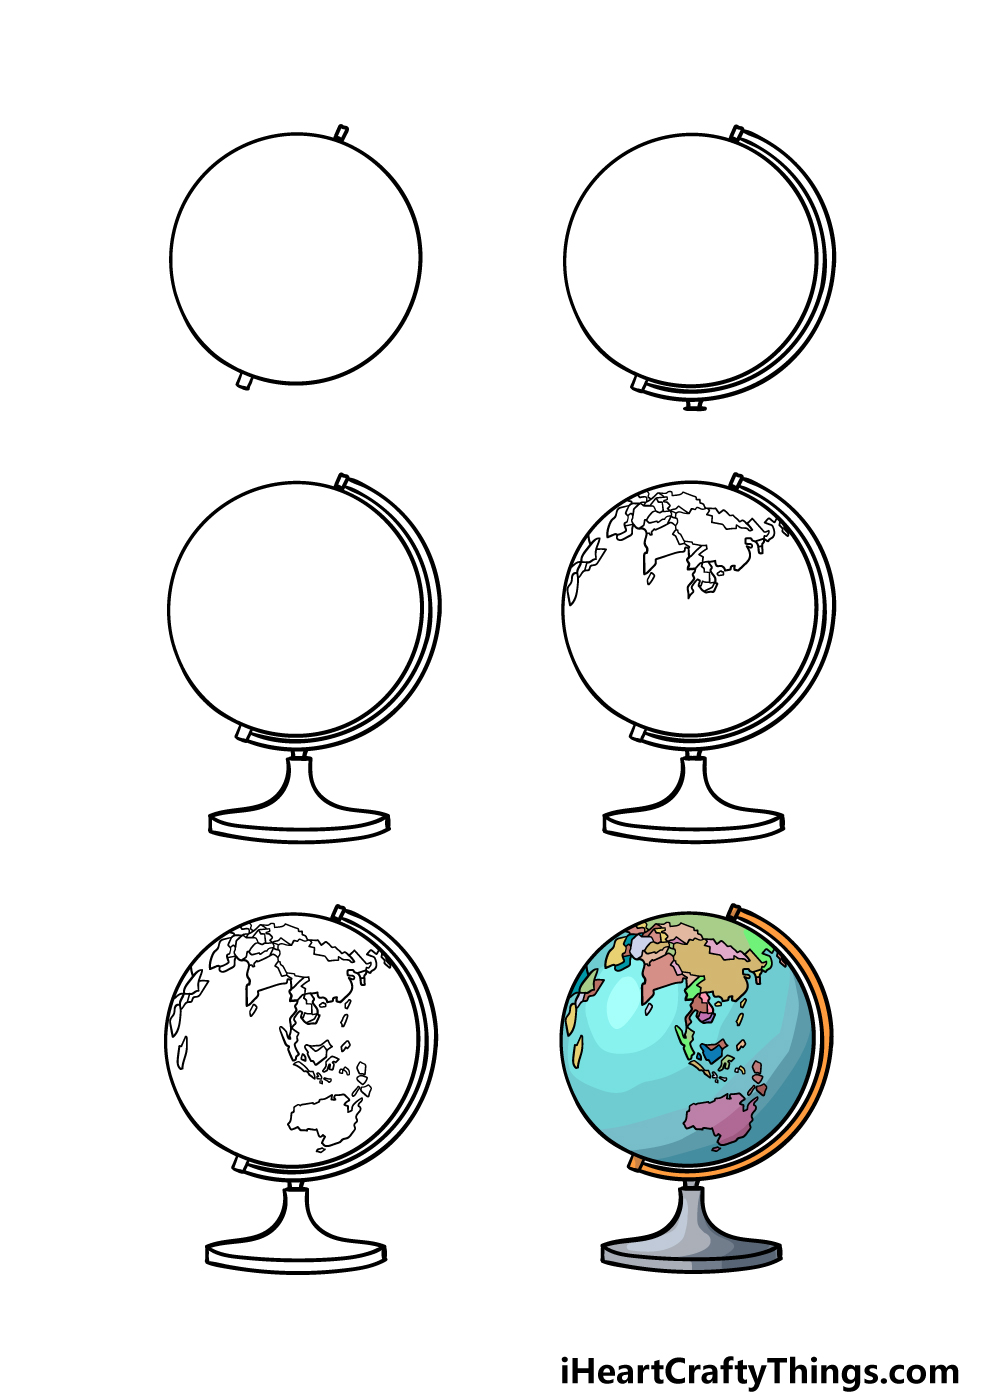
How to Draw A Globe – Let’s Get Started!
Step 1

We will start simply in this guide on how to draw a globe. Globes are almost always perfect spheres, so we will begin with a perfect circle.
Drawing a perfect circle isn’t easy to do, but luckily there are some tools you can use that will make it easy.
The best tool to use is a drawing compass, and you can use this little gadget to easily draw circles with your pen or pencil.
You could also use a stencil, or if no drawing tools are available then you could trace around a flat round object. However you go about it, once you have drawn the circle, you can add two small rectangular shapes onto opposite ends of the globe.
These will be the pegs that attach to the frame of the globe later. When you’re happy with how your drawing matches the reference image, you’re ready to press on to step 2!
Step 2 – Next, start drawing the frame for the globe

Now that you have the sphere of your globe drawn, you can start to add the frame that holds it and lets it spin.
To add this aspect to your globe drawing, we will draw a thin, curved structure extending from one peg of the globe to the other.
This will essentially be like drawing a very thin crescent moon shape, and it could be just as tricky as drawing the initial circle for this globe!
You could even use the same method that you utilized to draw the globe itself to draw this support frame.
If using a compass, for example, position it so that you are drawing a portion of a circle from peg to peg. You can then finish off this step by drawing another small peg at the base of the frame.
Step 3 – Draw the base of the globe
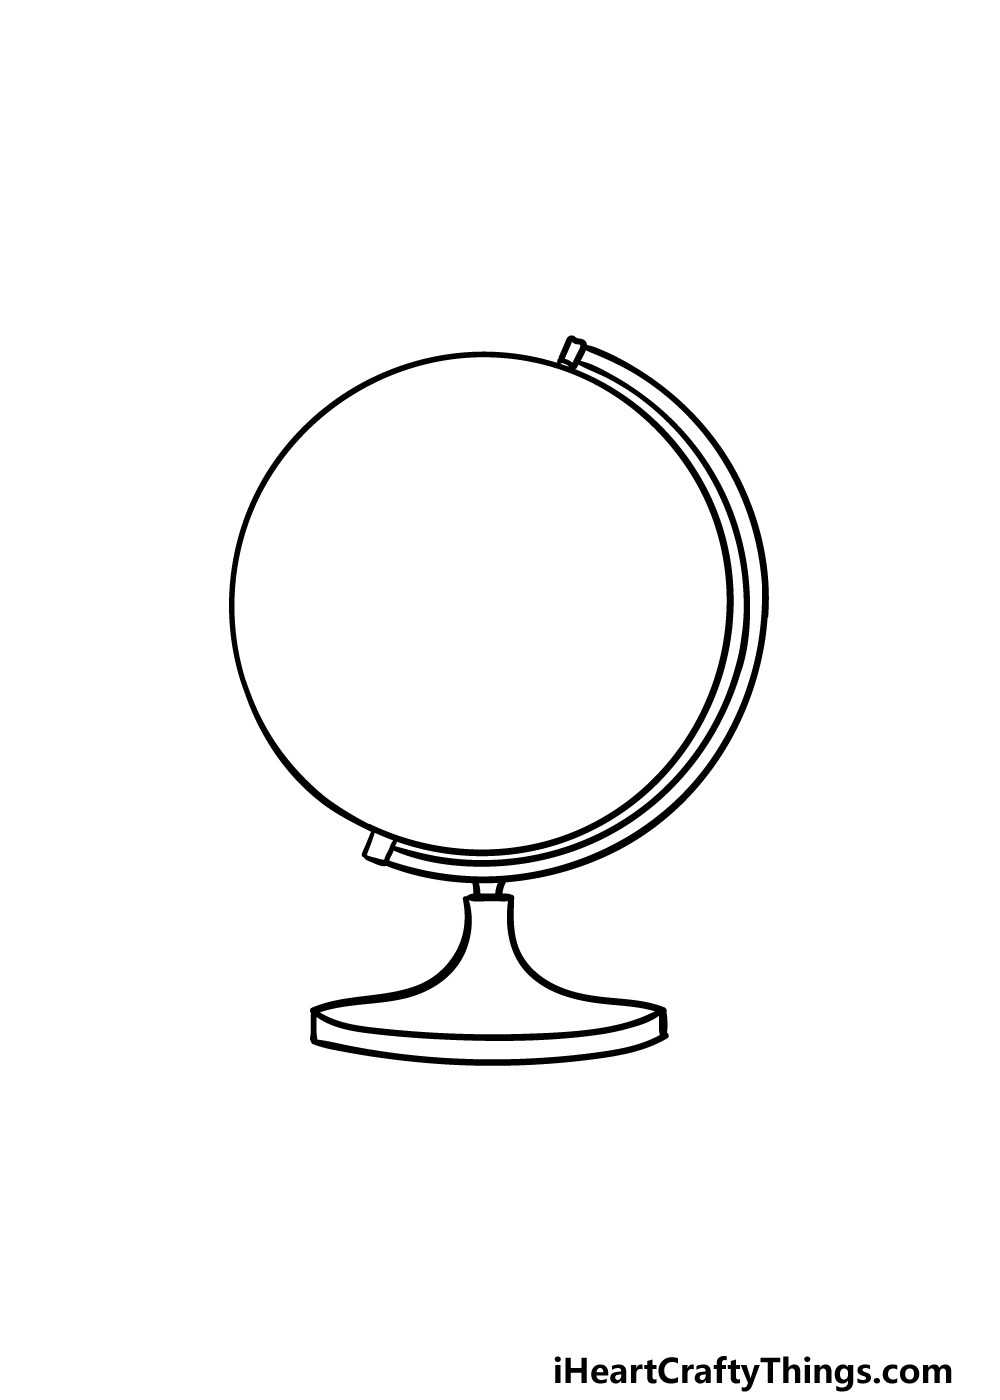
This step of our guide on how to draw a globe will be all about adding a base to it. First, start by drawing a small horizontal line underneath the pin at the bottom of the side frame.
Then extend some curved lines moving outward from this horizontal line for the sides of the base.
Finally, finish off the base by drawing two more curved lines on the underside of the base that connects the two sides.
Step 4 – Start drawing some continents
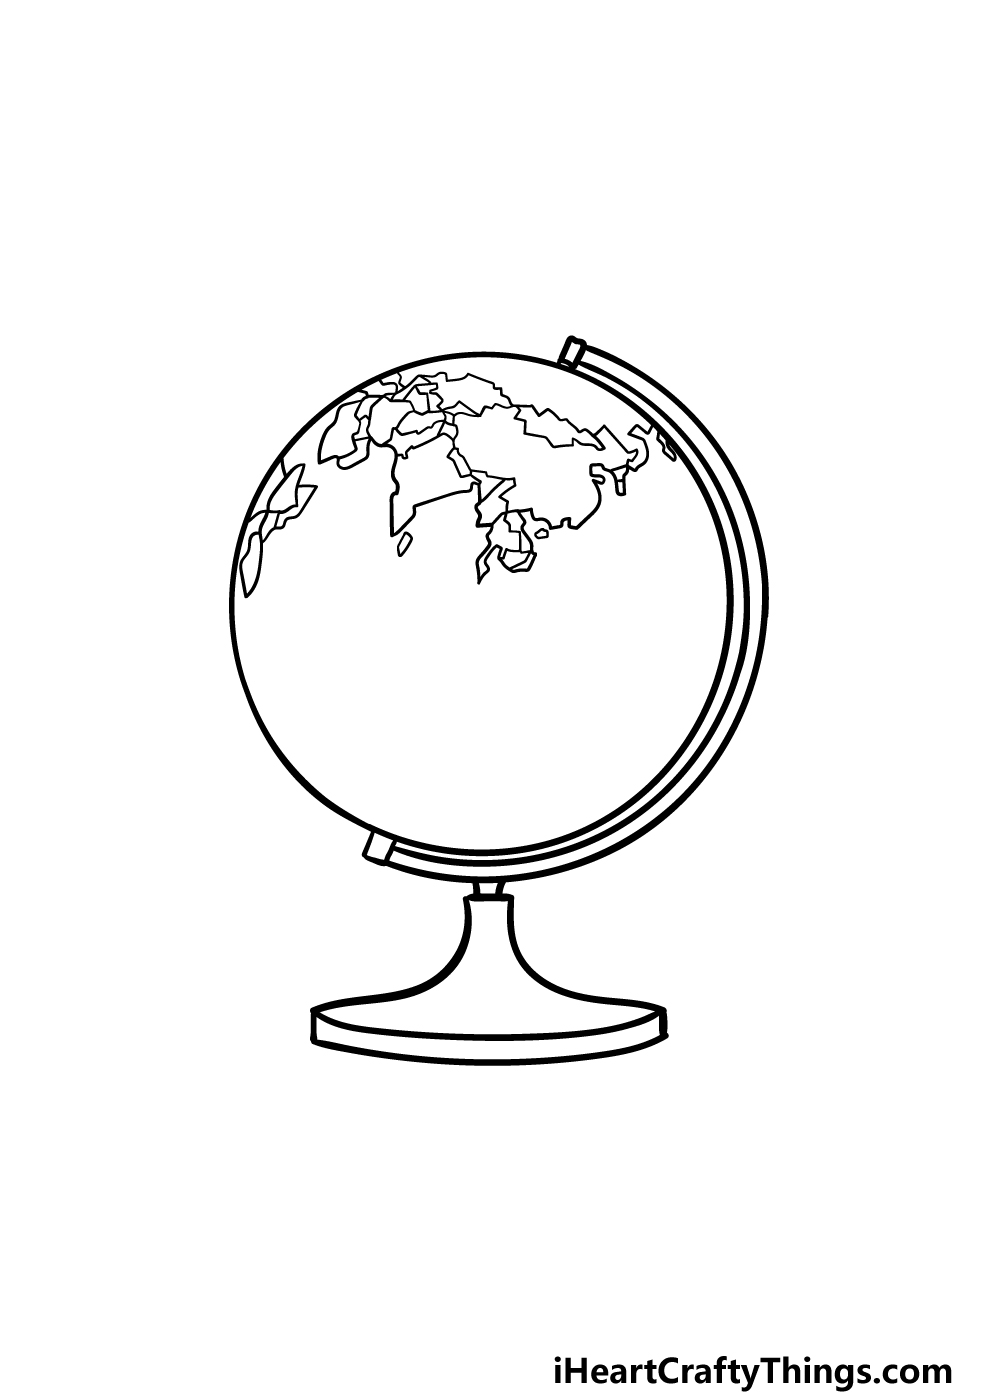
A globe without any continents on it would just be a ball on a stand, so let’s add some continents to your globe drawing in this next step!
The continents that we will be drawing in this step will primarily be focused on Asia.
We used some more jagged lines to create the divides of the various countries, but you could also go for a smoother look to the lines if you prefer.
Once you have drawn the shapes of the continents in the style of your choice, we’re ready for some final details in the next step.
Step 5 – Finish off your globe drawing
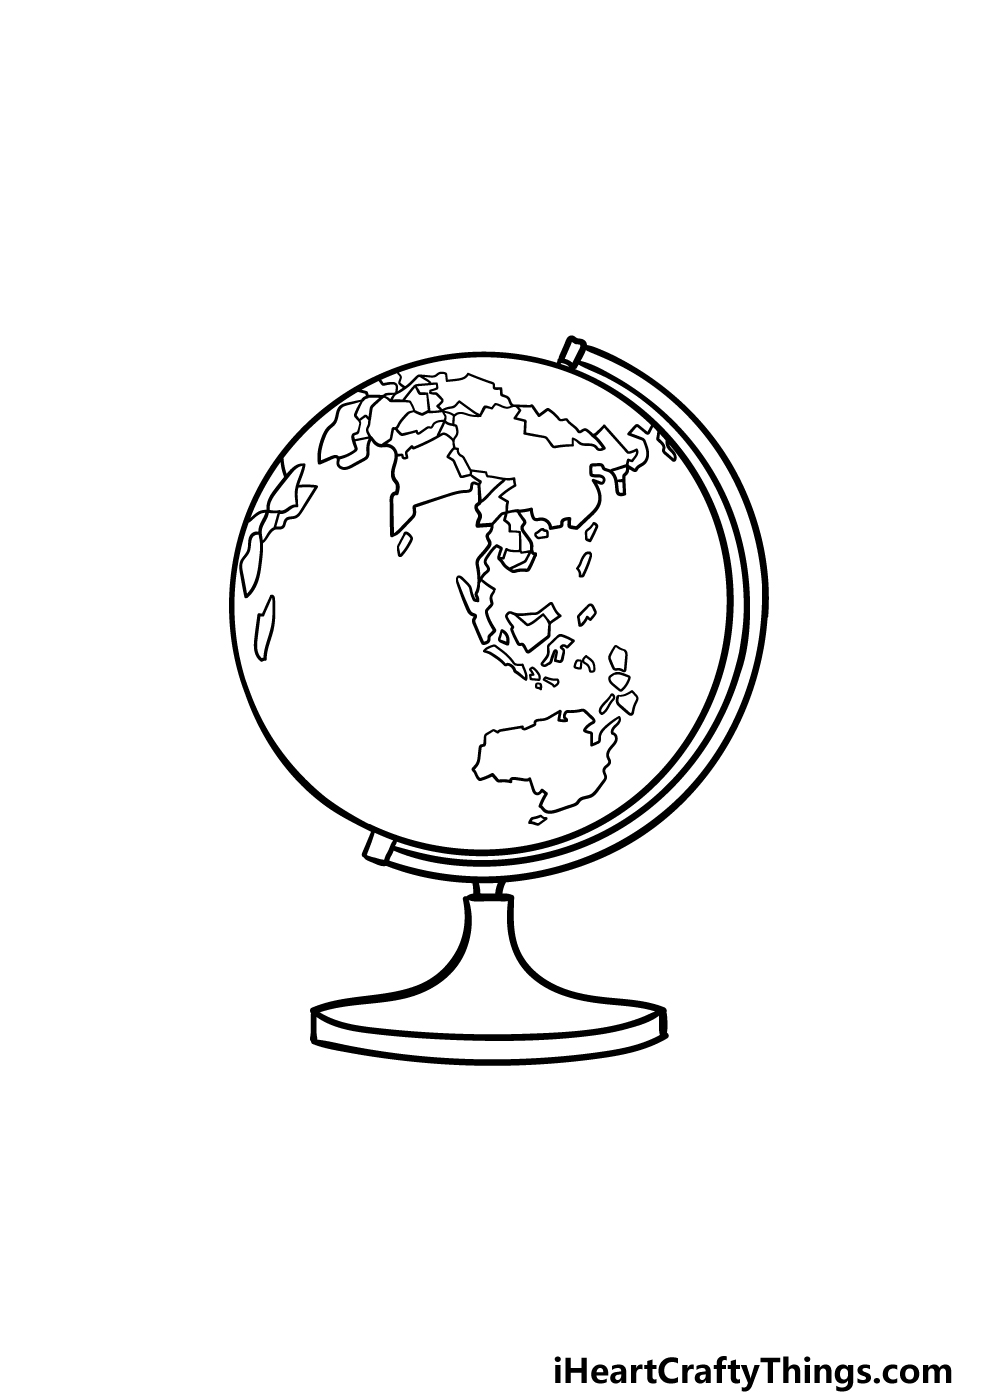
We will be finishing off some continents in this step of our guide on how to draw a globe. To finish off our design, we will be drawing the continent of Australia along with some smaller islands near it.
Then you have finished this drawing once that is added! There are also some ways that you could put your own spin on the drawing as well.
One thing that you could do would be to replicate different areas of the globe. You could look up some maps and draw continents such as Africa or the Americas if you prefer, and it’s totally up to you!
Once you’re happy with the globe itself, it could also be fun to draw a background for the image.
Globes can be found in many different kinds of settings, so perhaps you could draw a background showing a bedroom with toys and other objects beside it. Or maybe it could be in an academic setting with other educational tools around it.
These are just some ideas, so if you decide to draw a background what else can you think of to complete it?
Step 6 – Finish off your globe drawing with some color
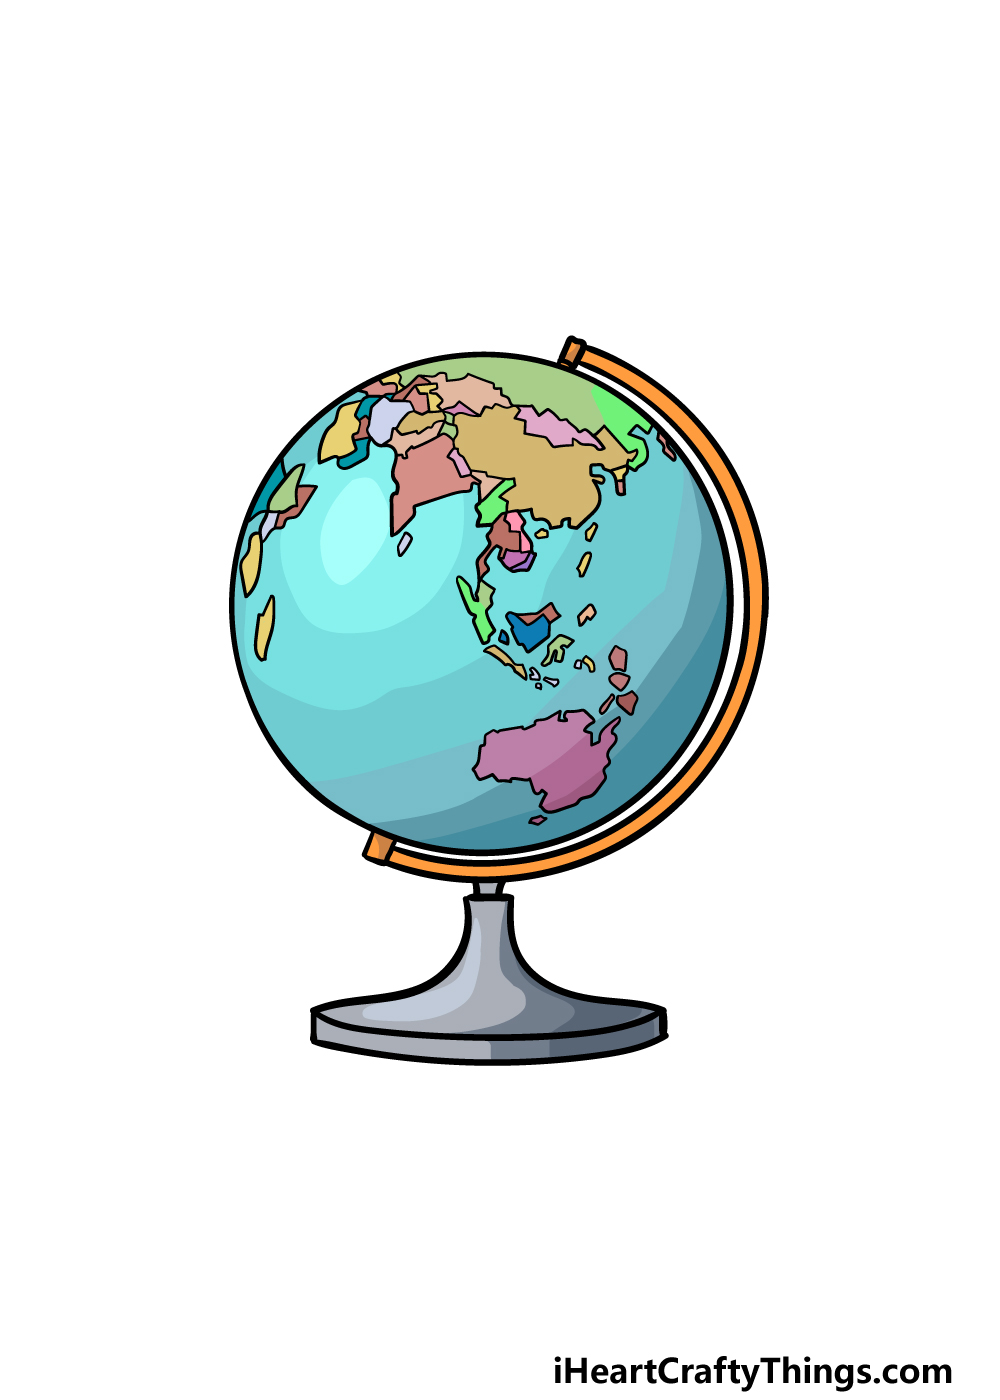
This is the part of your globe drawing, where all the drawing is complete and you can unwind with some coloring fun!
In our reference image, we used shades of blue for the ocean portions of the globe with some golden yellow for the side frame.
Then we used some greys for the base, and we finished off with lots of different bright colors for the countries on the continents.
These are the colors that we chose, but you could use any colors you love for it!
When coloring in more intricate details such as the individual countries, you may want to use colored pens or pencils for more control.
The colors and mediums you use are completely up to you though, so have fun experimenting and see what happens!
Here’s how you can make your globe drawing even better…
Show the world your art skills as we show you how to make your globe sketch even better!
Globes will usually be stored on a table surface, and that means that they will be surrounded by objects. We think that it would be great ti make a background scene for this globe drawing.
You could do this by drawing the globe sitting on a table or any other surface and then you can show what you think would be next to it.
There are so many objects you could use, and you could use some from around the house as models.
For this globe sketch, we showed just one angle that shows off a specific set of continents. If you wanted to shake things up, then you could maybe show a different side of the globe.
This idea would be much easier to do if you have a physical globe to use as a reference. If not, they can be bought pretty cheaply at many stores.
Otherwise, you will find many pictures online that could help you!
Another way to make your drawing of a globe even better would be to draw some more planets around it. You could do this while sticking to the theme of it being a globe instead of a real planet.
One idea would be to have the other planets of our solar system on similar structures to the globe’s stand.
This would make it look like someone made a solar system display using globes of the various planets!
It would also be interesting to zoom closer to the object to add a different spin to this globe drawing. For example, you could zoom in quite close to show a section of the round globe and a bit of the stand.
That way, you could also label the various countries now that we can see them better. This is another tip that would be much easier if you have a real globe as a reference to use.
This is just one way a small change in perspective can alter the whole scene!
Your Globe Drawing is Complete!
You’ve reached the end of this guide on how to draw a globe, and in doing so you have replicated this awesome educational tool!
By breaking down this drawing into some smaller steps, we aimed to make sure there would be no frustration and only the joy of creating as you worked on it!
Once you have finished this drawing and have added your final touches, be sure to check out our website for more drawing guides to enjoy! Be sure to check in often as we upload new ones all the time.
Please remember to share your completed globe drawing on our Facebook and Pinterest pages for us to enjoy as well!