When working in hazardous conditions, there are various pieces of equipment that you can use to make sure that you are kept safe.
Gas masks are one of the most important pieces of equipment that you can use in any kind of environment where you are going to be around some hazardous chemicals and fumes.
Even though they have a very specific use, they also have a pretty cool design, which can make it fun to learn how to draw a gas mask!
By the end of this guide you have before you, you will know how to do just that.
We hope that this step-by-step guide on how to draw a gas mask will be fun, easy and rewarding for you to work through!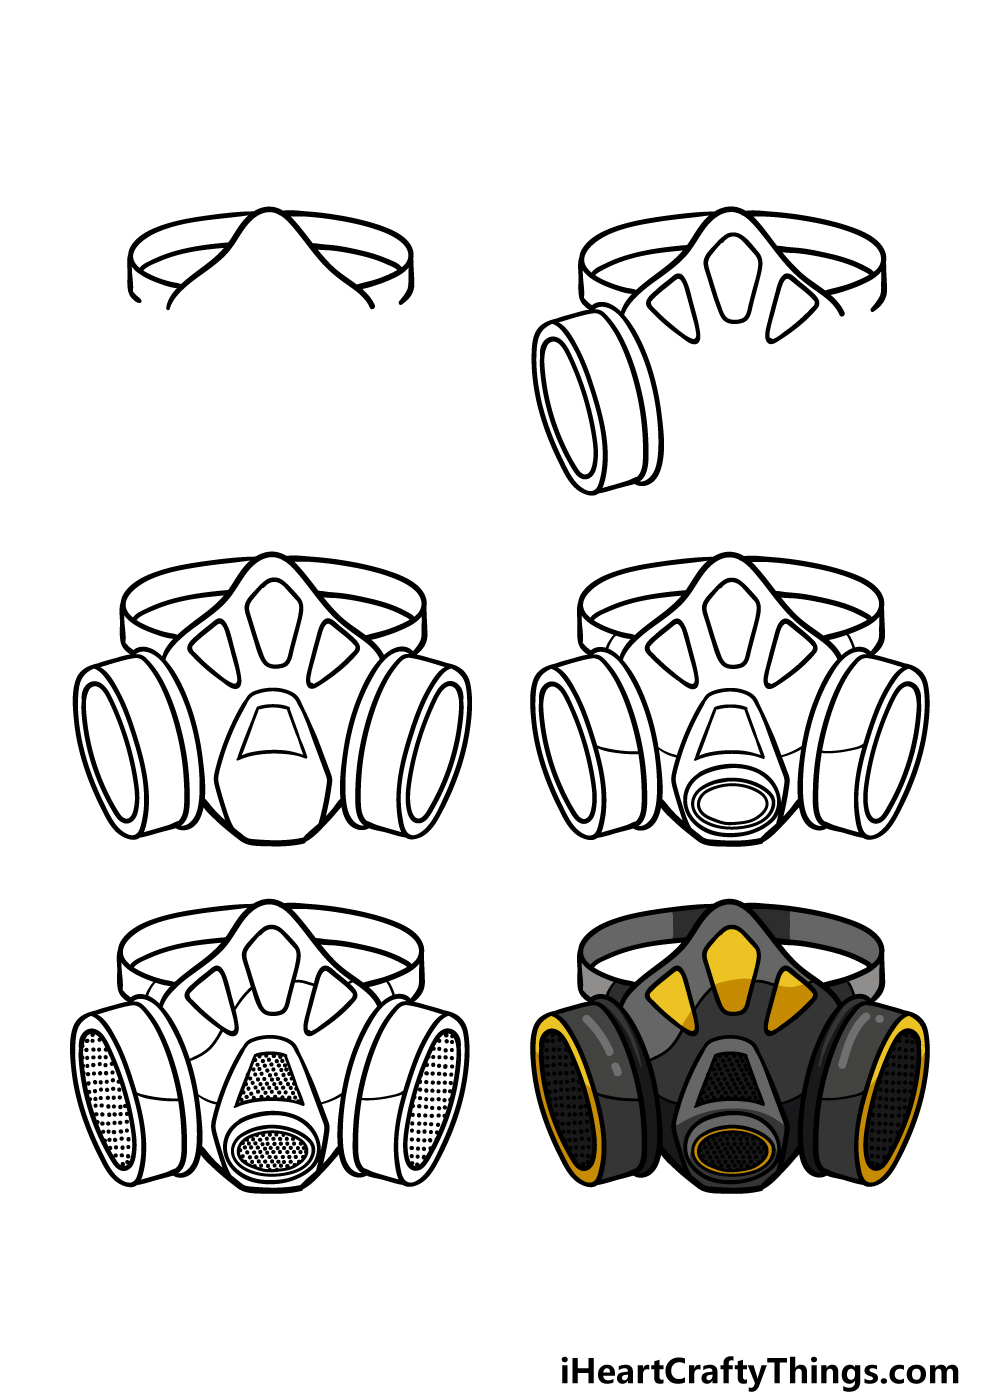
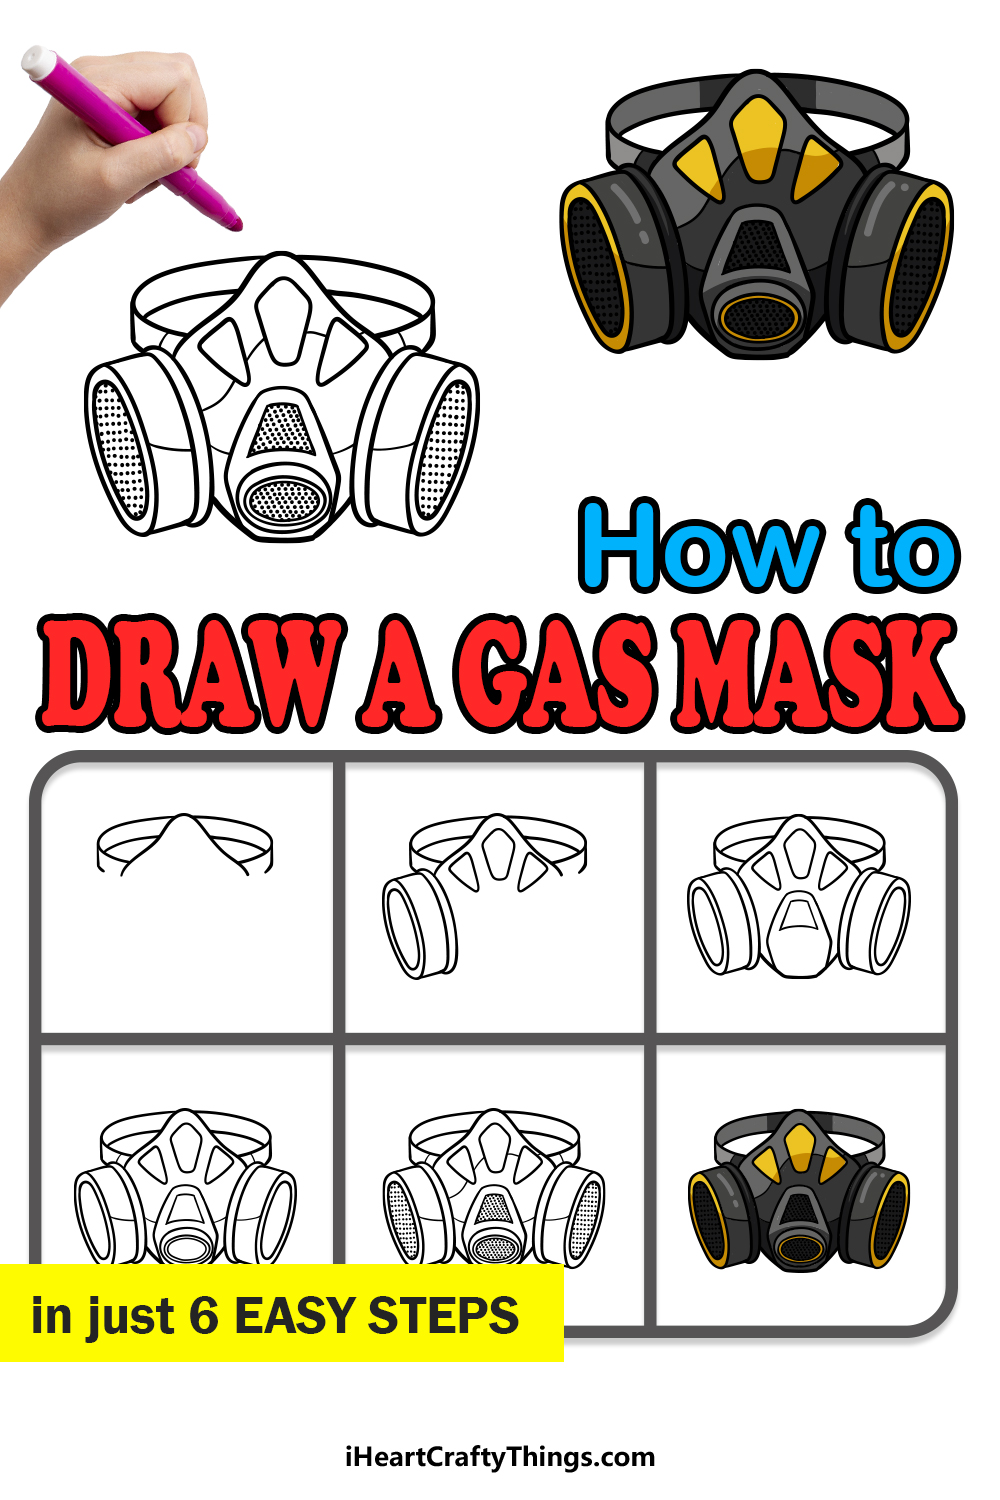
How to Draw A Gas Mask – Let’s Get Started!
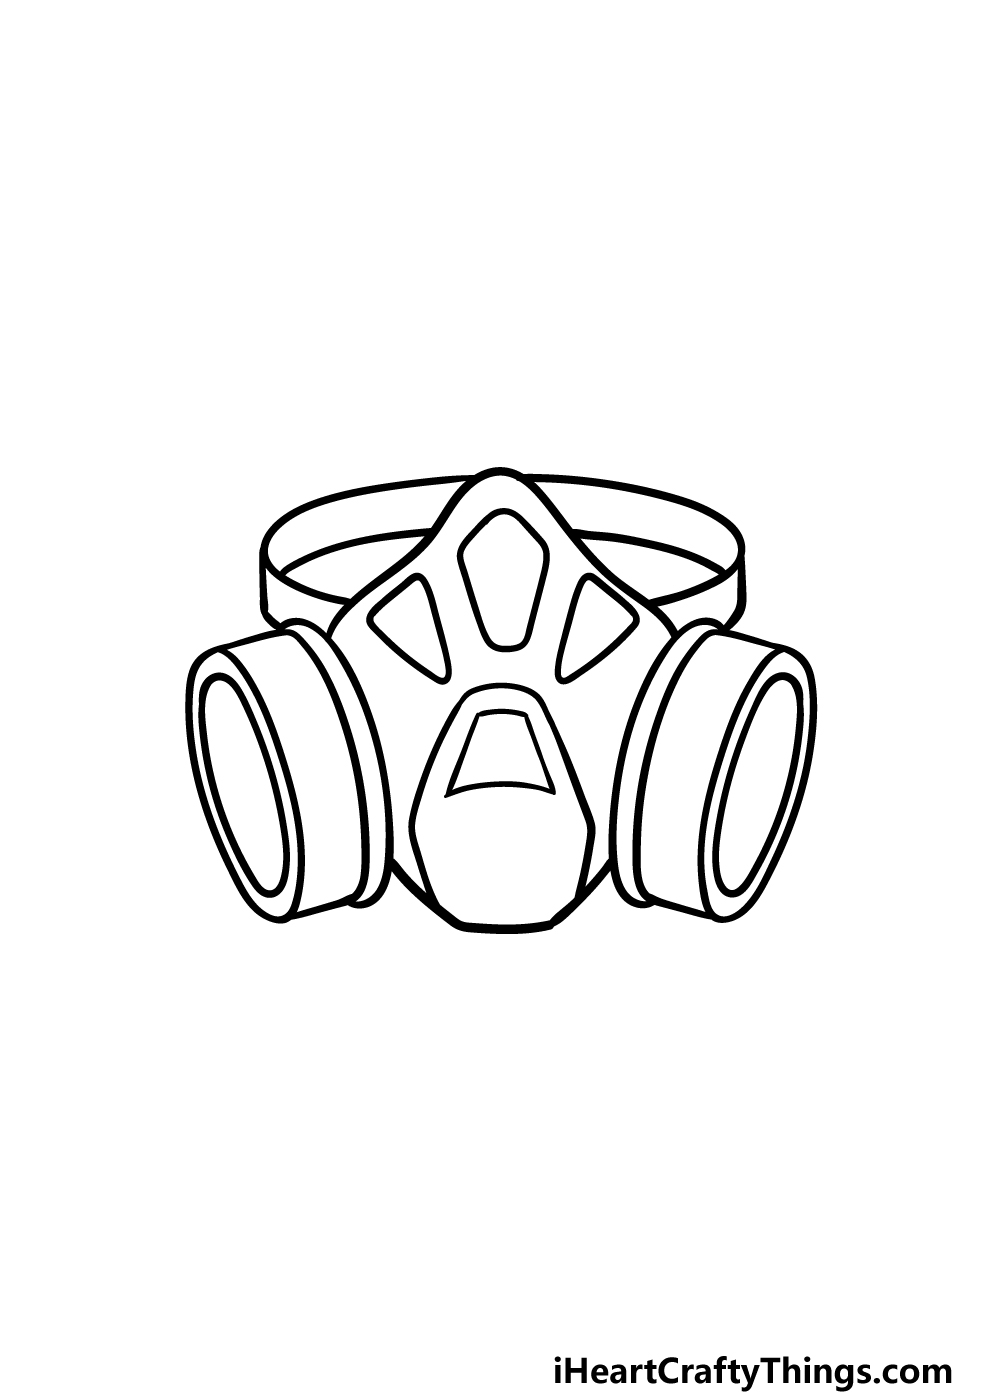
Step 1
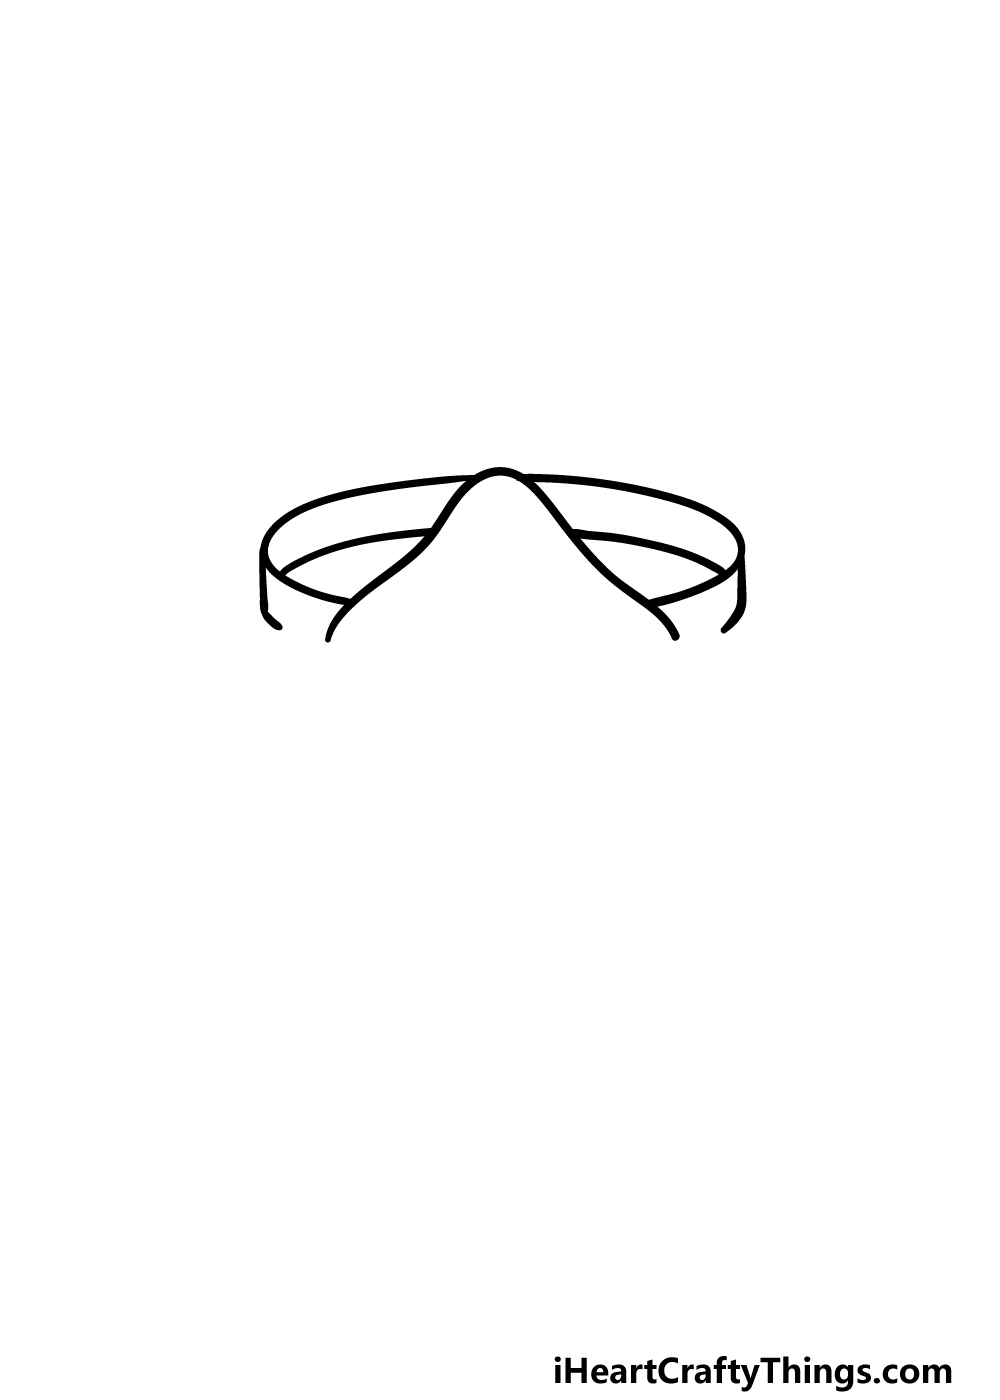
For the first step of our guide on how to draw a gas mask, we will be starting with the front of the mask. You can start off with a curved line that rises into a rounded tip at the center.
This will form the front part of the mask that will go over the nose and mouth of the wearer.
Then, draw two curved lines running parallel to one another from near the bottom of this front section and have them loop around to the back of the mask.
These lines will form the strap of the gas mask, and once you have finished drawing these lines you’re ready to move on to the next part.
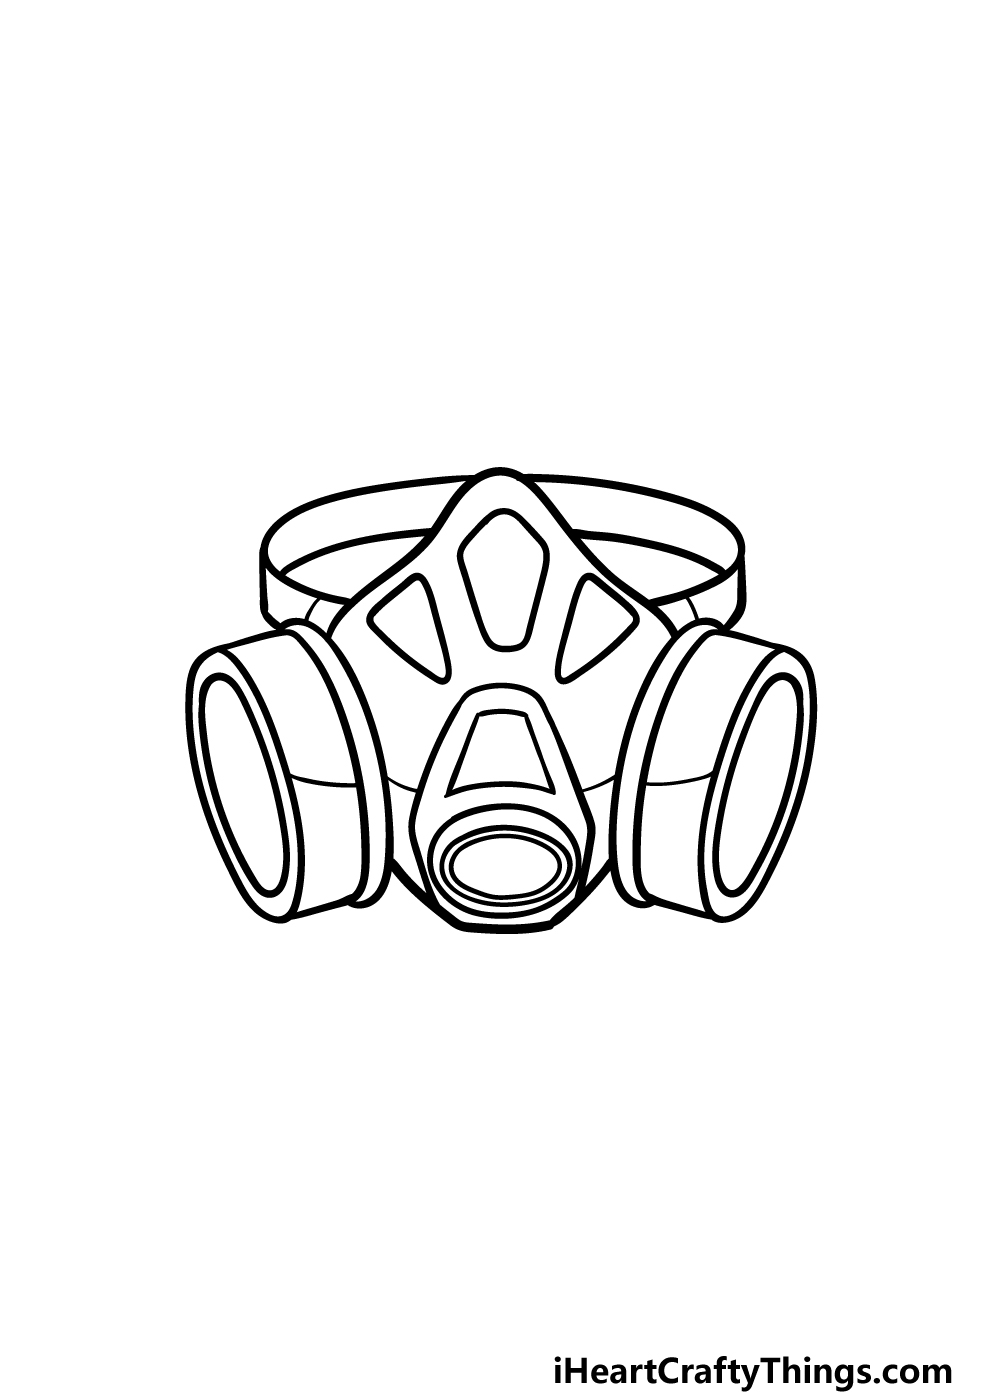
Step 2 – Next, draw the filters and start the details for the gas mask
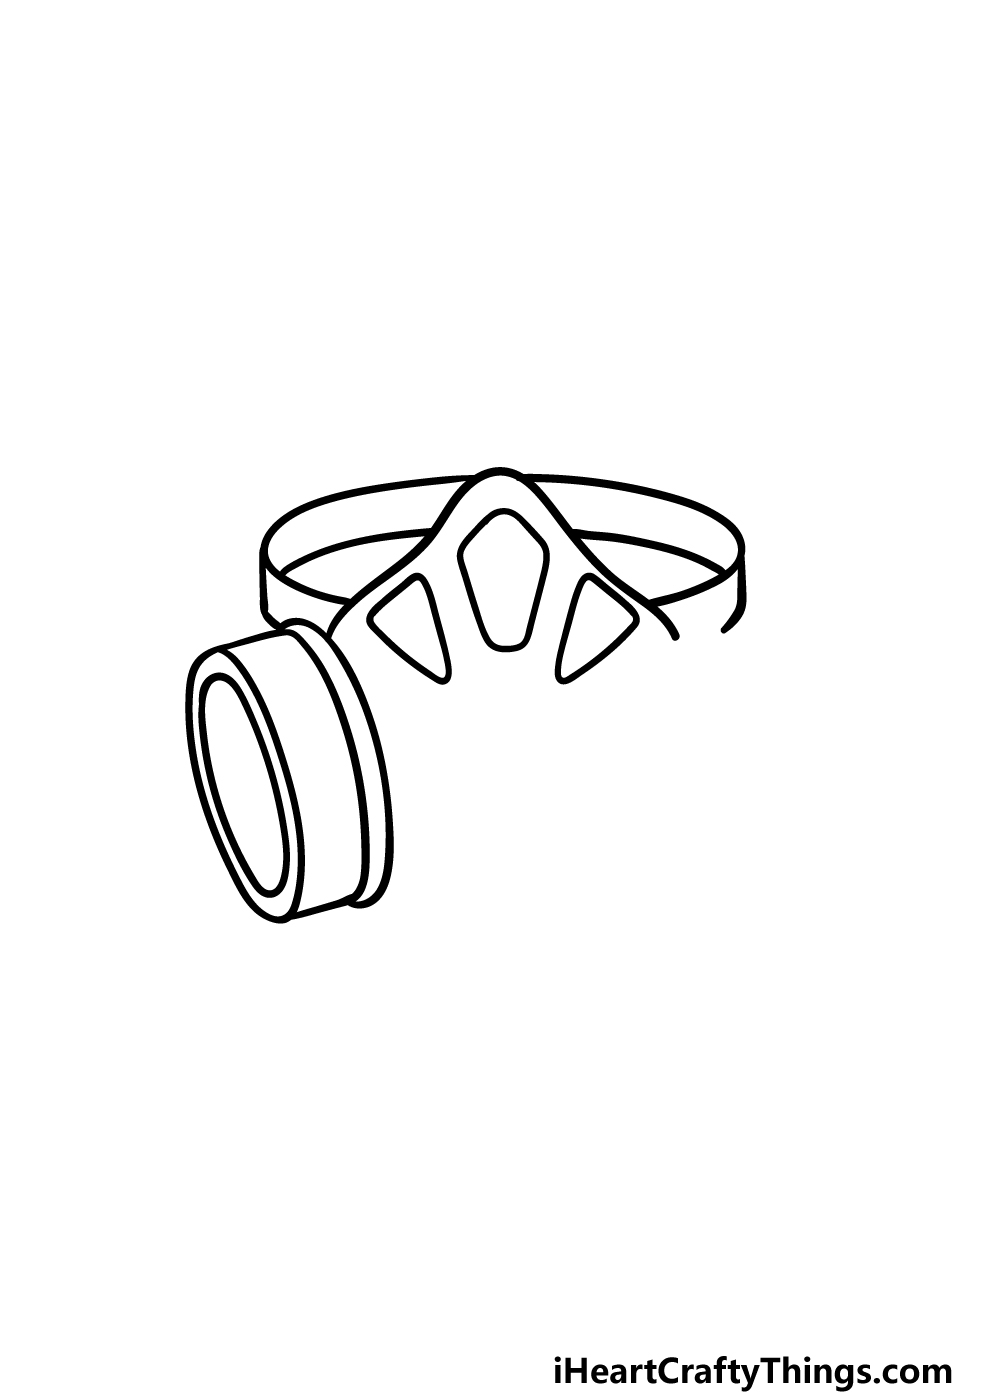
A gas mask would just be a cool-looking mask without the filters that protect the wearer from noxious fumes and chemicals, so we will add the first of these filters in this part.
Try to think of the filter as a squat cylindrical object, and it will be at a bit of an angle on the side of the mask to create the shape you see in the reference picture.
There will be some rounded lines for the base of this filter, and on the outer edge there will also be a circular shape.
Finally, draw three rounded triangular shapes onto the area of the mask that would be going over the nose. We will add more details to these shapes very shortly!
Step 3 – Now, draw the other filter and facepiece
In this third part of our guide on how to draw a gas mask, we will be adding the other filter of the mask.
The good news is that it will look identical to the other one that you drew, except it will be reversed.
The more symmetrical you can make it the better, so you could maybe measure the size of the first one to make sure that the second one is the same size.
Then we will be drawing a rather angular shape over the front of the mask that would be going over the mouth.
In the next few steps of the guide, we will be finishing off the final details of the mask.
Step 4 – Now, draw some finer details for the mask
We will be starting with some of the detailing for your gas mask drawing now that you have the general outline for it.
You can start off by drawing a circular shape into the area that goes over the mouth. Then draw two more circles within it, as shown in the reference image.
Once you have that section drawn, you can add some linework to the front areas of the mask to show where the pieces of the mask are joined together.
Once you have drawn these details, we have just a few final touches to add in the next part.
Step 5 – Next, draw the final details of your gas mask drawing
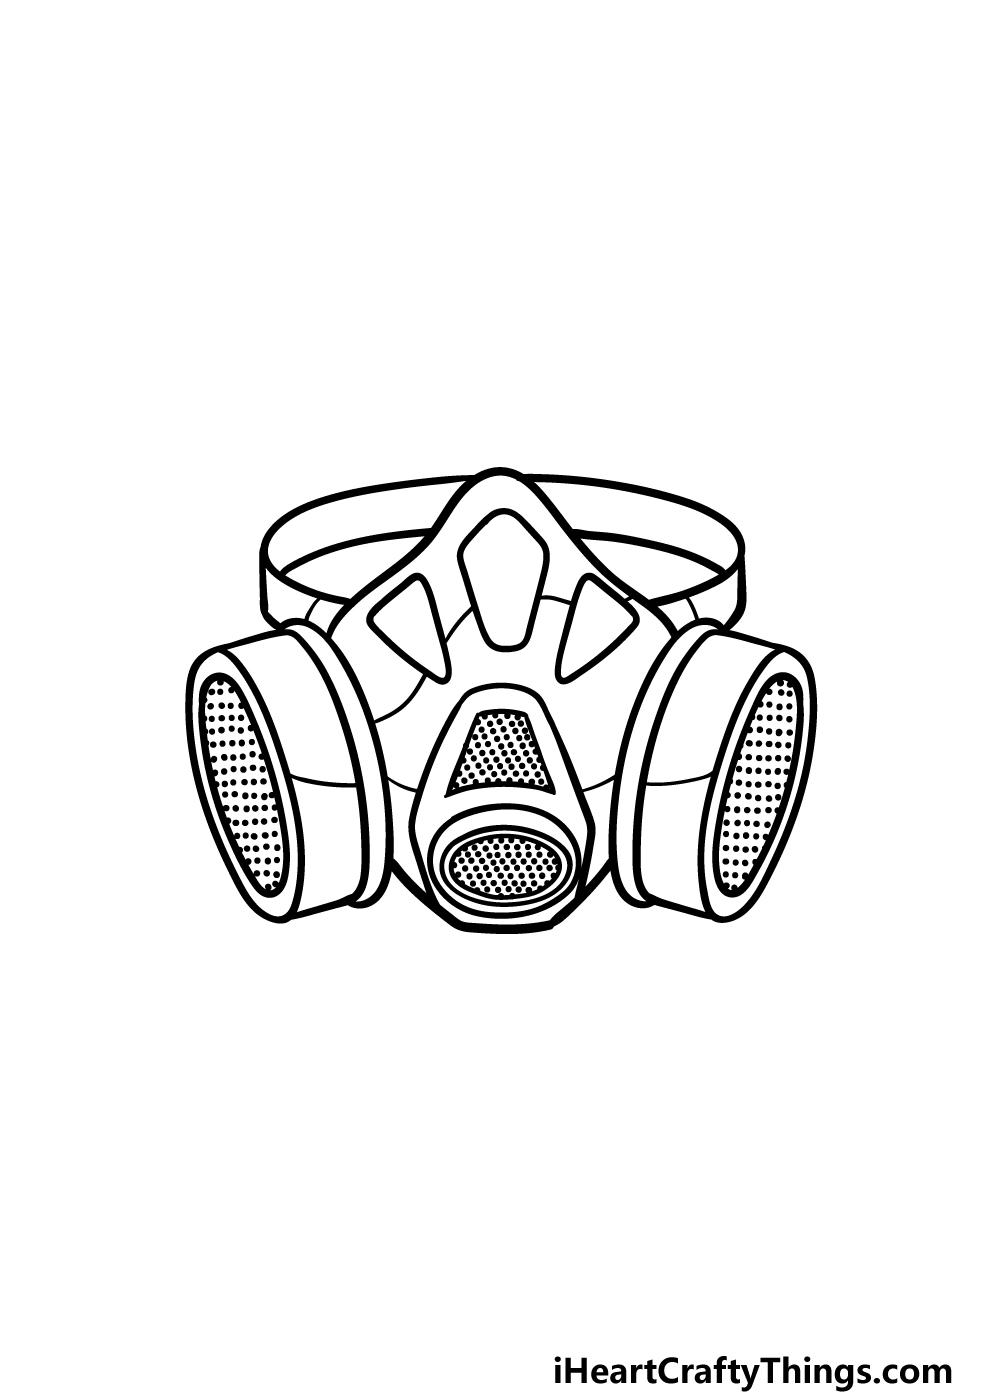
The filter of a gas mask will have lots of small holes on it to allow for air to go in and out for purification.
These holes are what we will be adding in this step of our guide on how to draw a gas mask. To add these, you would find it easier if you can find a pen with a fairly large tip, and then make lots of dots on the surface of the filters on the sides and front.
It may be tempting to just go wild with dots, but you should try to keep it evenly spaced. It can take a bit of patience but it will be worth it in the end!
Then you can finish off with some of your own details! One fun idea would be to draw a head wearing the gas mask.
You could even use your own face as inspiration to imagine what it would look like if you were wearing this mask. How will you finish off the details of your gas mask drawing?
Step 6 – Finish off your gas mask drawing with some color
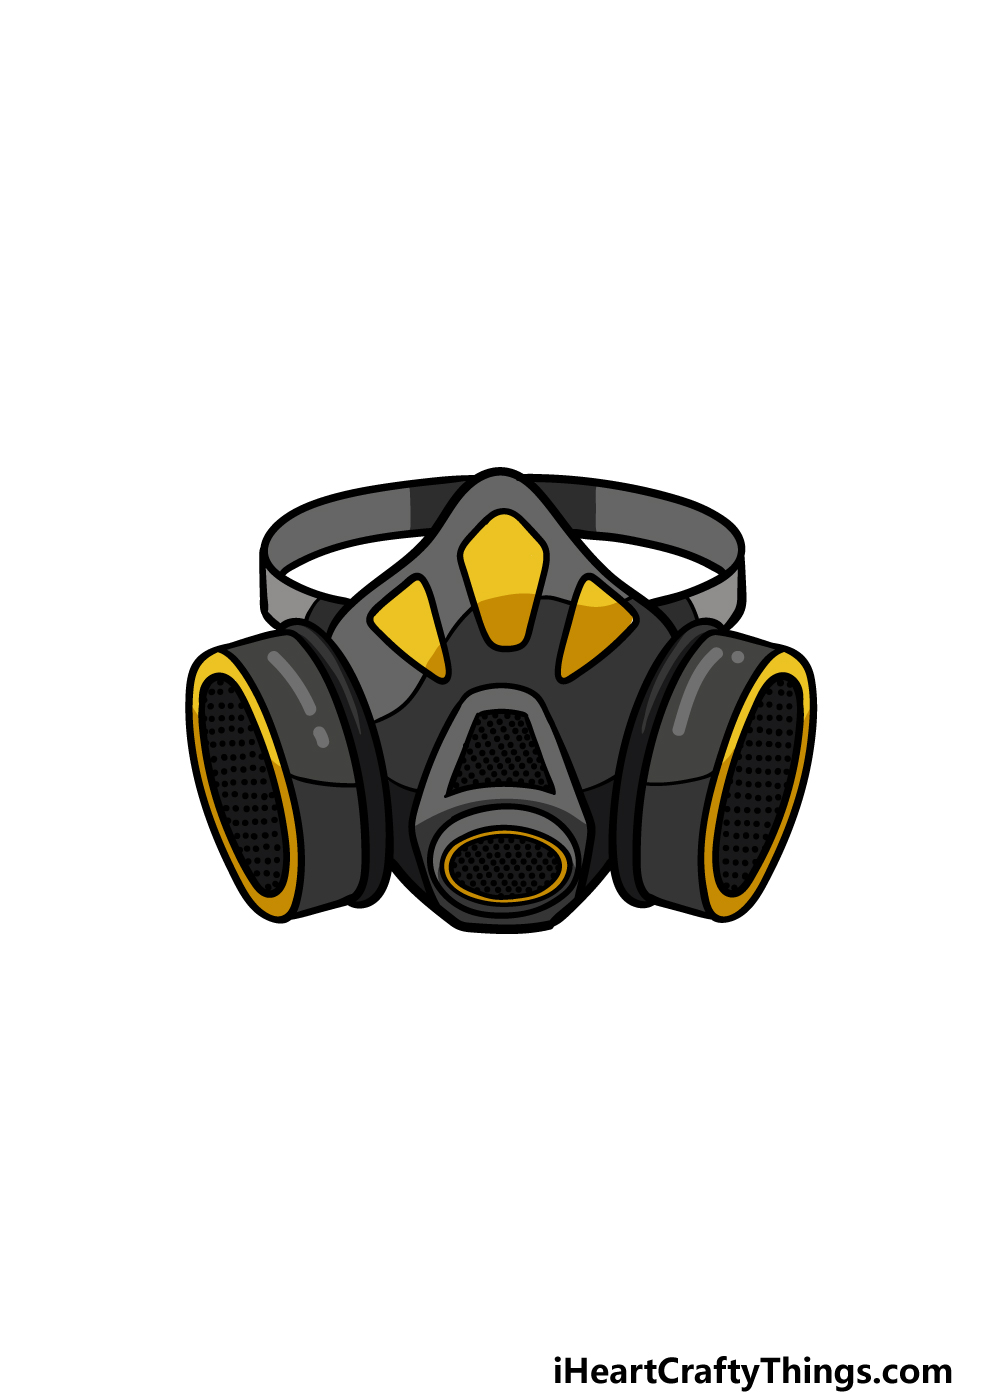
This is the final step of this gas mask drawing, and in this step you can finish off with some colors! In our reference image, we used grays and yellows for the mask to give it an industrial look.
These colors are just a suggestion however, and you could also choose some more colors of your own that you could use.
Gas masks can come in many different variations, so there are many options you could go for as you color. Which colors and art mediums will you pick for your drawing to finish it off?
Do this to take your gas mask drawing to the next level
Let’s look over a few ways you can make your gas mask sketch even better!
A gas mask can be used to help keep your lungs safe in a variety of different environments. They will usually be used with other equipment, and you could add some of this to your gas mask drawing.
For example, people will often wear goggles with a gas mask to protect their eyes from whatever dangerous substance is in the air. This would be easy enough to add to this drawing!
You could also draw a hard hat for another idea. These are just a few suggestions, but what else could you add?
Once you’re done adding extra equipment, you could then add a human character to this drawing of a gas mask. We probably won’t get to see much of the face, so that makes it easier!
Even so, if you add a human face to the image you could model it after yourself or someone you know. That would be a fun personal touch to this artwork!
Next, you could change up the colors and markings that are on your gas mask sketch. We stuck to a black and yellow scheme for our example, and this does look good!
If you wanted something more unique, you could definitely change it in a few ways. By looking up some real gas masks online, you could get some inspiration on how to customize it.
How would you like to make this gas mask look?
Once you have covered all of our suggestions, you could finish off your gas mask drawing with a background. As we mentioned, gas masks can be used in a wide variety of environments.
This means you would have many options for a background setting! It could be as simple as someone spraypainting something, in which case the mask would help protect them from the fumes.
You could go for something more imaginative and have someone investigating an alien-infested facility! What other scenarios can you think of?
Your Gas Mask Drawing is Complete!
Hopefully this guide on how to draw a gas mask was not only easy for you to work through but lots of fun as well!
By breaking down a drawing into several stages, you can make it much easier for yourself so that you can focus on the fun of drawing with no frustration.
Don’t hesitate to add any cool background elements or details that you may want, and have fun experimenting with various art mediums and techniques to put your own spin on it!
Once you have finished this guide, you can check out our website for more drawing guides. We upload new ones constantly, so be sure to visit often!
We would be interested to see how you finished off this gas mask drawing, so please be sure to share it on our Facebook and Pinterest pages!