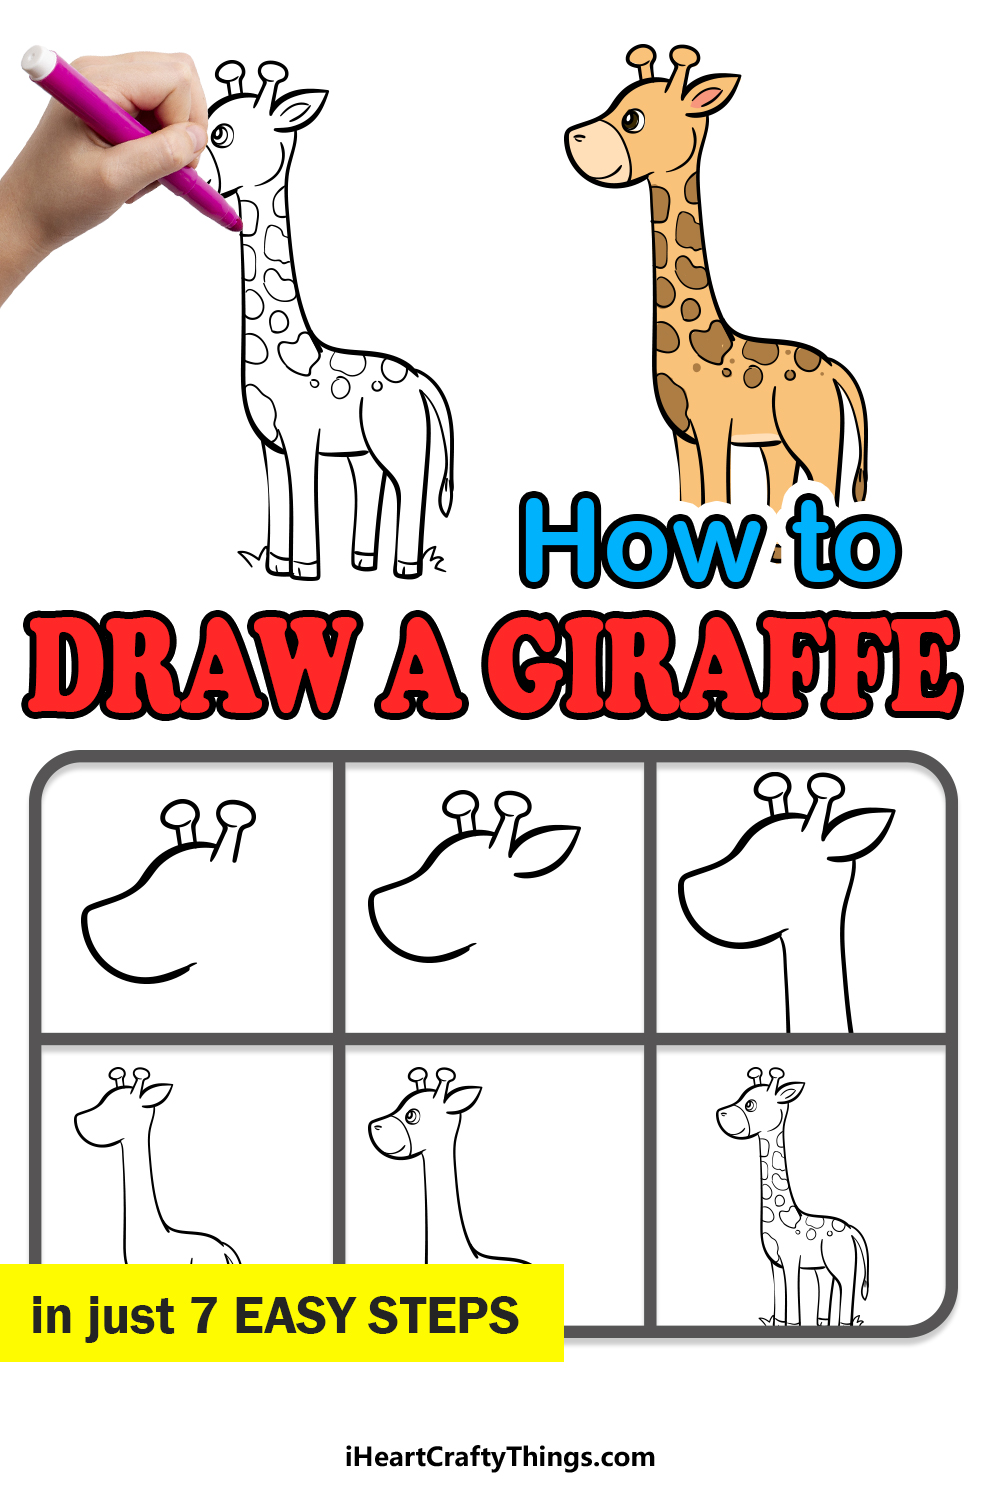
Are you ready to learn how to draw a giraffe? This simple guide for kids will show you exactly how it’s done in just a few steps!
Giraffes are some of the most unique-looking animals in the animal kingdom, and while this draws us to them it also makes them harder to draw.
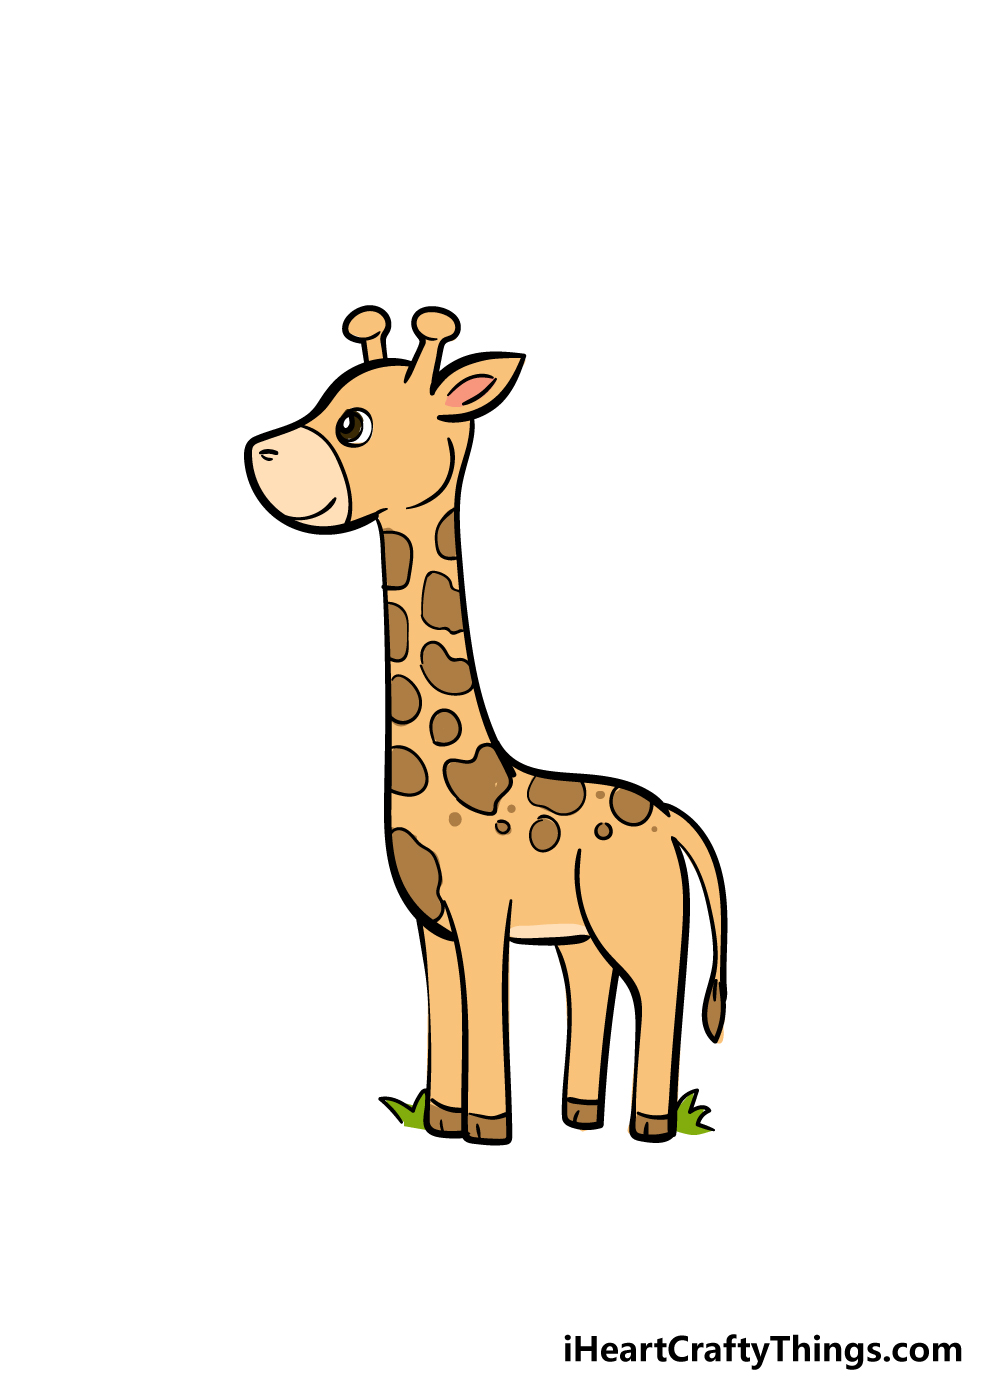
For this guide, I went for a simple cartoon style that captures the spirit of this animal while making it a bit easier. All the details you would expect are here, such as the little horns, long neck and brown spots of the giraffe.
By slowly building up the drawing, you will soon find that it makes sense and isn’t so difficult. Then, you can work on drawing an African-inspired background with some other animals you would expect to find in that environment.
This is your chance to see how it’s done, so let’s work on it together!
Find Out How To Easily Create A Cute Giraffe Drawing!
How to Draw A Giraffe – Let’s get Started!
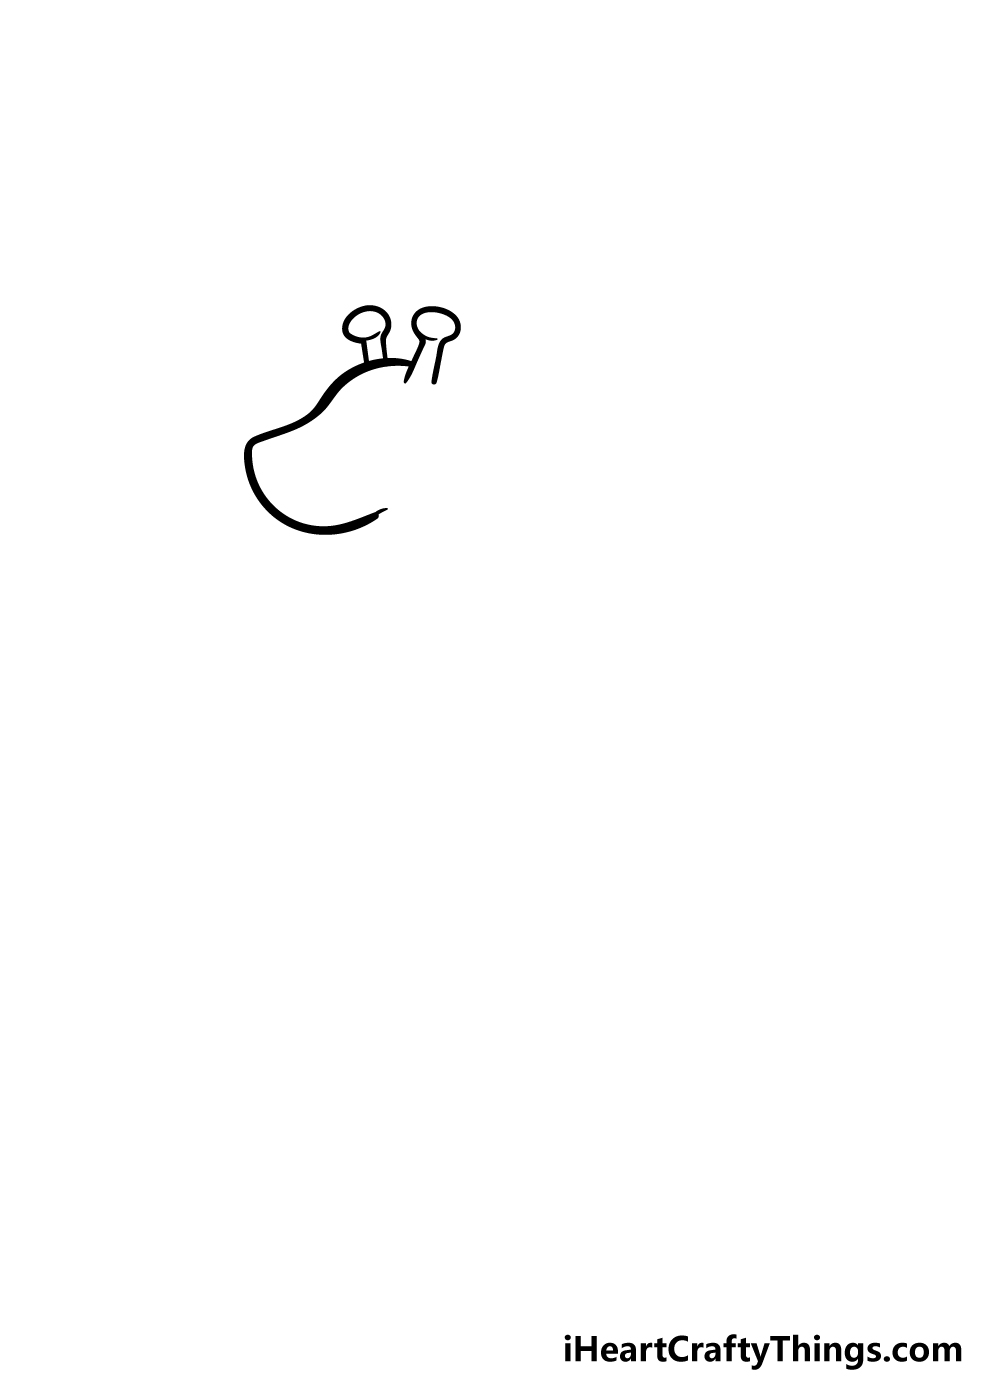
Step 1
In this guide on how to draw a giraffe, we will be breaking it down into several steps to make sure that you can take it slow and end up with a drawing you will be proud of!
To begin with, we shall begin with the head of the giraffe. To draw in the face of the giraffe, carefully draw in a curved line like the one you can see in the image.
Once you have the face drawn in, draw in some straight lines with small circles at the end to make the little horns.
Step 2 – Add in an ear for your giraffe
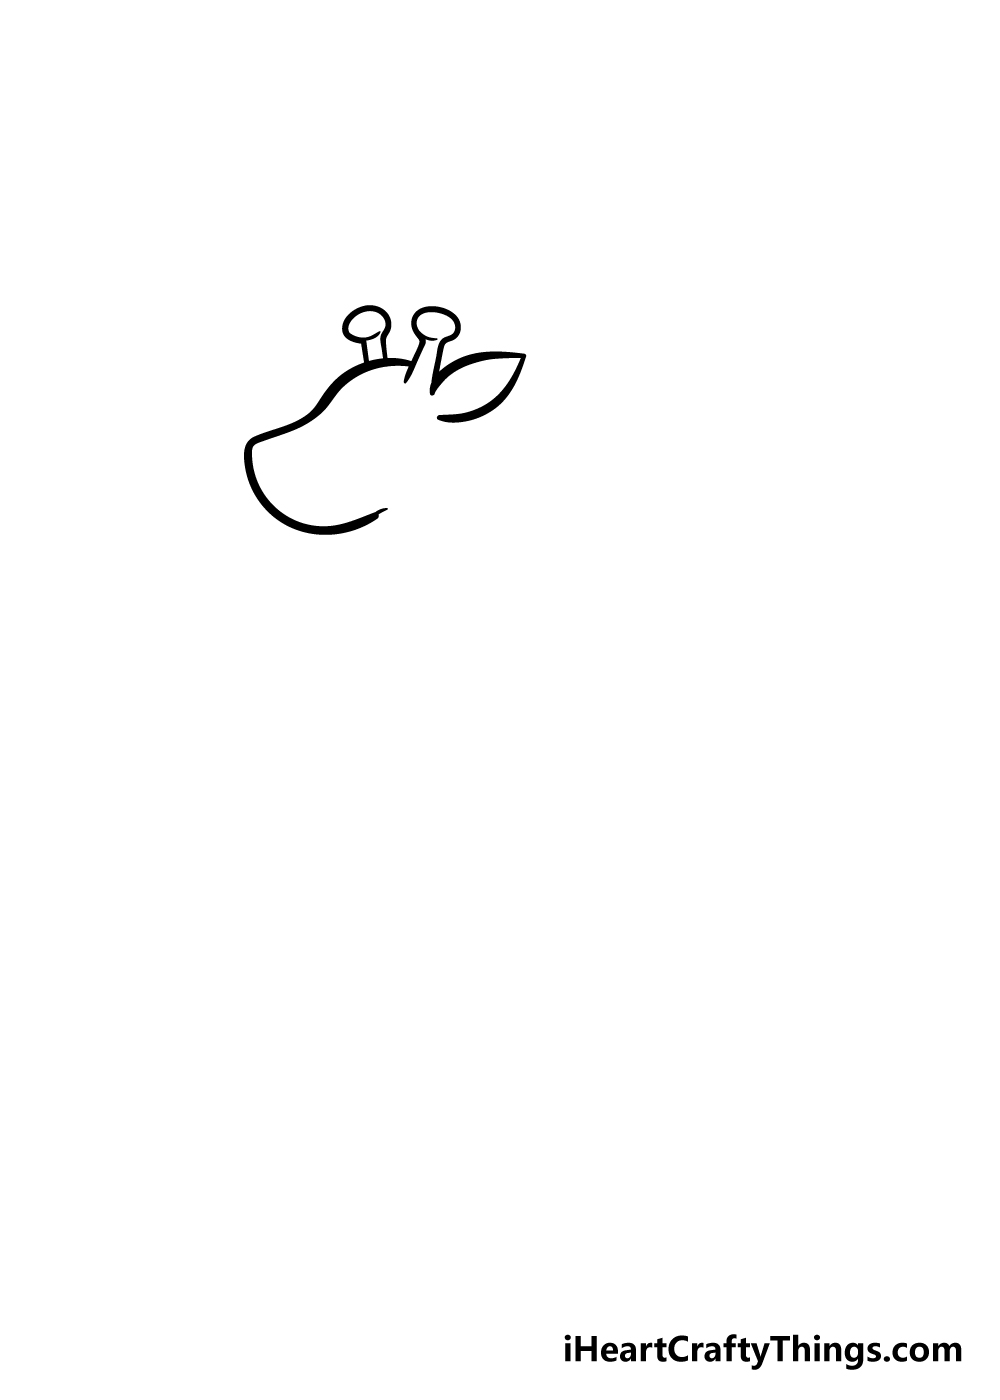
This next step of your giraffe drawing will be a simple one.
Giraffes have pretty big ears, so for this step, draw in a curved line with a point to form the ear of your giraffe.
Once you have the ear drawn in, you can move on to the next step!
Step 3 – Draw in a neck and back for your giraffe
When someone says the word “giraffe,” the first thing that most people will think of is the absurdly long neck these animals have.
Therefore, your giraffe needs a long neck too, and we will add it in now in step 3 of our guide on how to draw a giraffe!
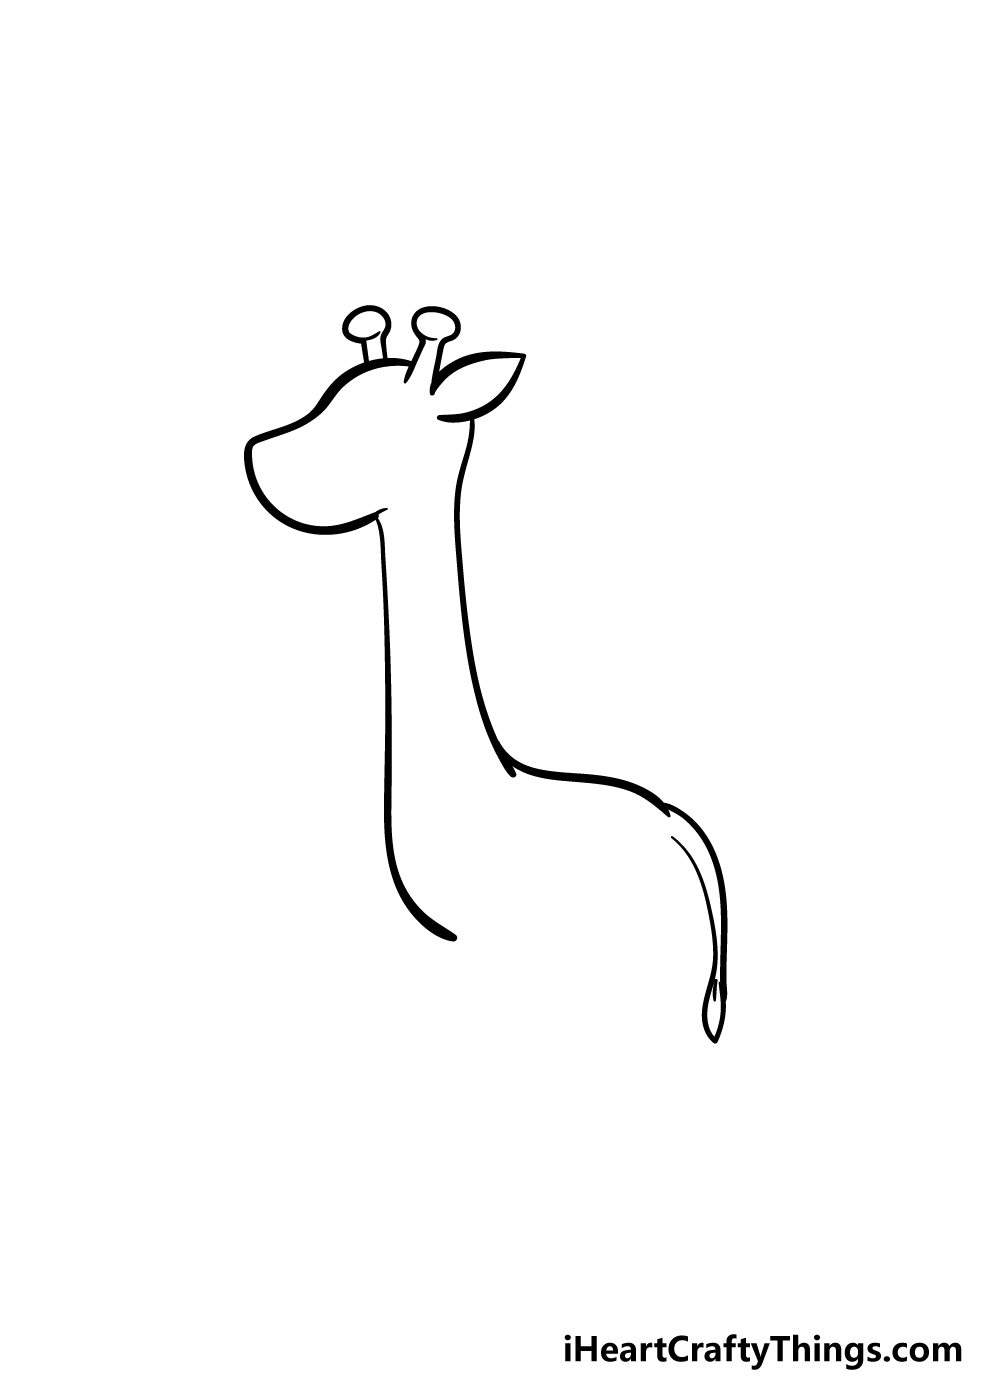
Starting with the chin of your giraffe’s head, carefully draw in a curved line. Then, you can draw another curved line from the back of the head.
Once you have the neck drawn in, the back of your giraffe will be a very slightly curved horizontal line with a tail as you can see in the image.
Step 4 – Give your giraffe some legs
The long neck is just one distinctive aspect of the giraffe, and the long legs are another that your giraffe drawing needs.
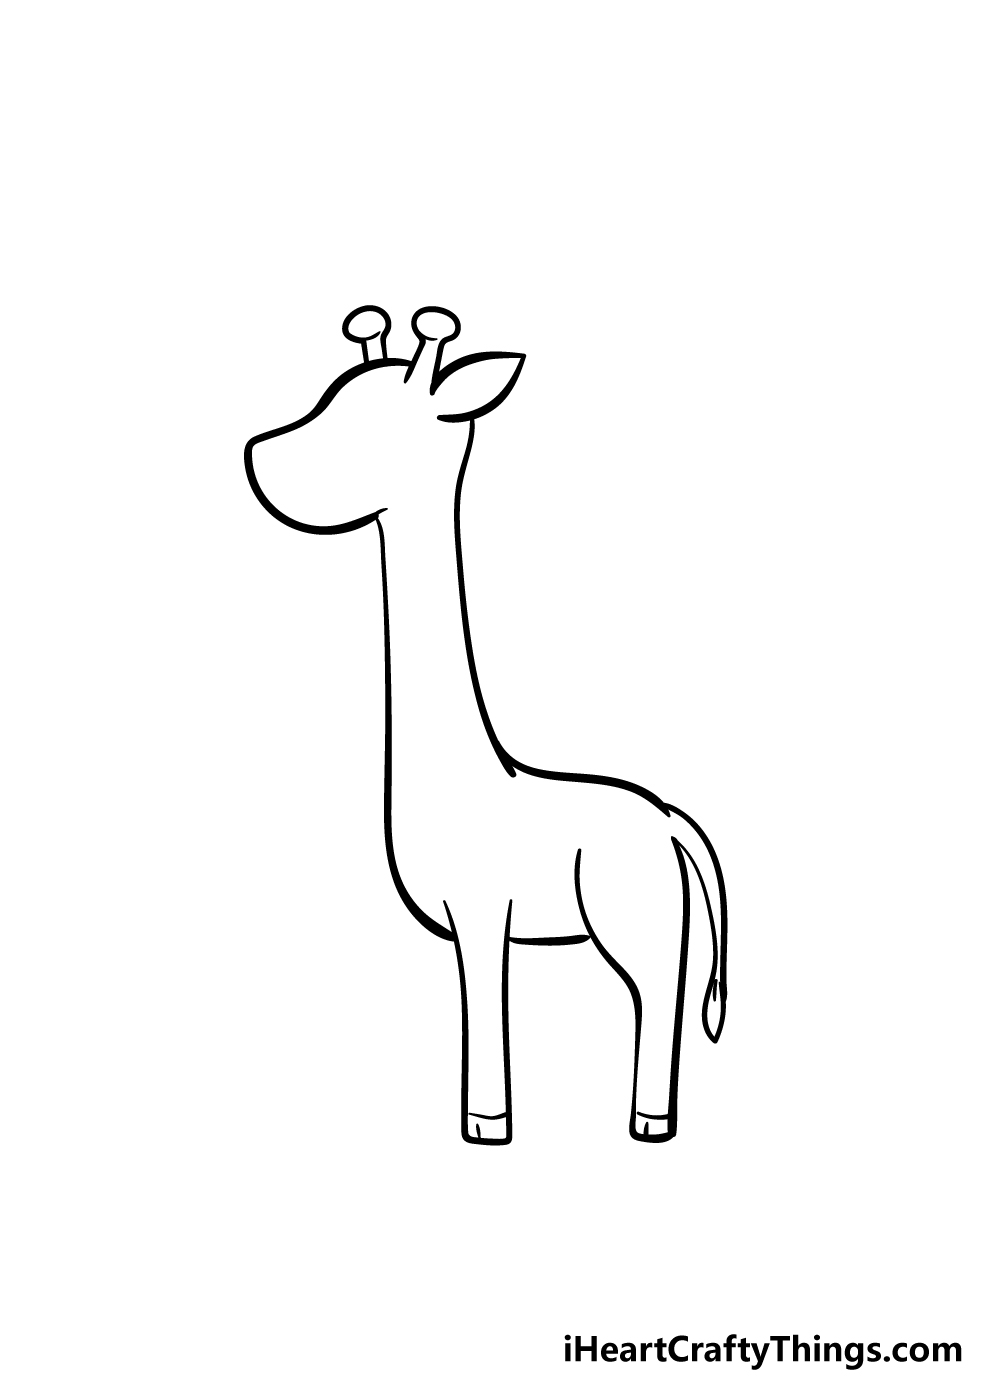
The leg on the left, which will be the front leg, is mostly made up of two fairly straight lines with a flat bottom. Using a line near the bottom, you can then draw in a hoof.
The back leg will look a bit different, as there is a hip muscle near the top of the leg. Then, simply add in a hoof for this leg as well before moving on to the next step.
Step 5 – Add in the other legs and facial details
In this step of our guide on how to draw a giraffe, we will be adding in some more important elements of the drawing.
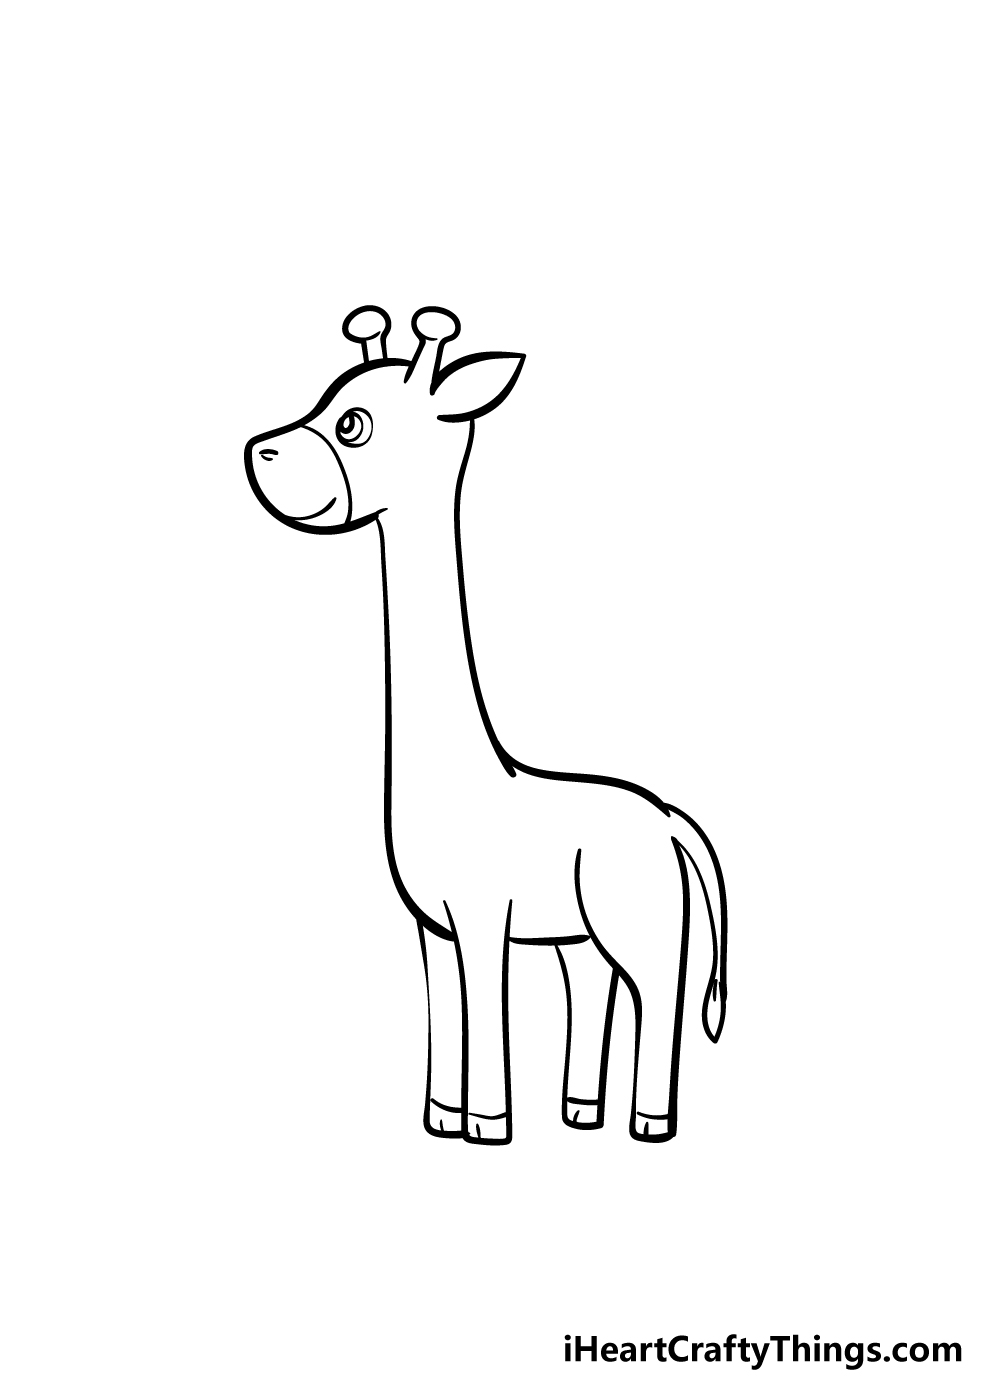
First of all, we shall start with the legs that are on the other side of the body. These should be easy for you to draw in, as they will be mirror images of the other legs you drew in the previous step.
Now the legs are drawn, and you can add in a face for your giraffe drawing. Using some circles within one another, you can add in the eyes.
You could also use a simpler circle with a dot within it for a simpler look if you prefer.
Finally, draw in a curved vertical line to make the muzzle of the face, and then a nice curved line for the smiling mouth.
Step 6 – Draw in some final details
You’re very close to finishing off your giraffe drawing now, and it needs a few more final details before you can complete your drawing with some colors.
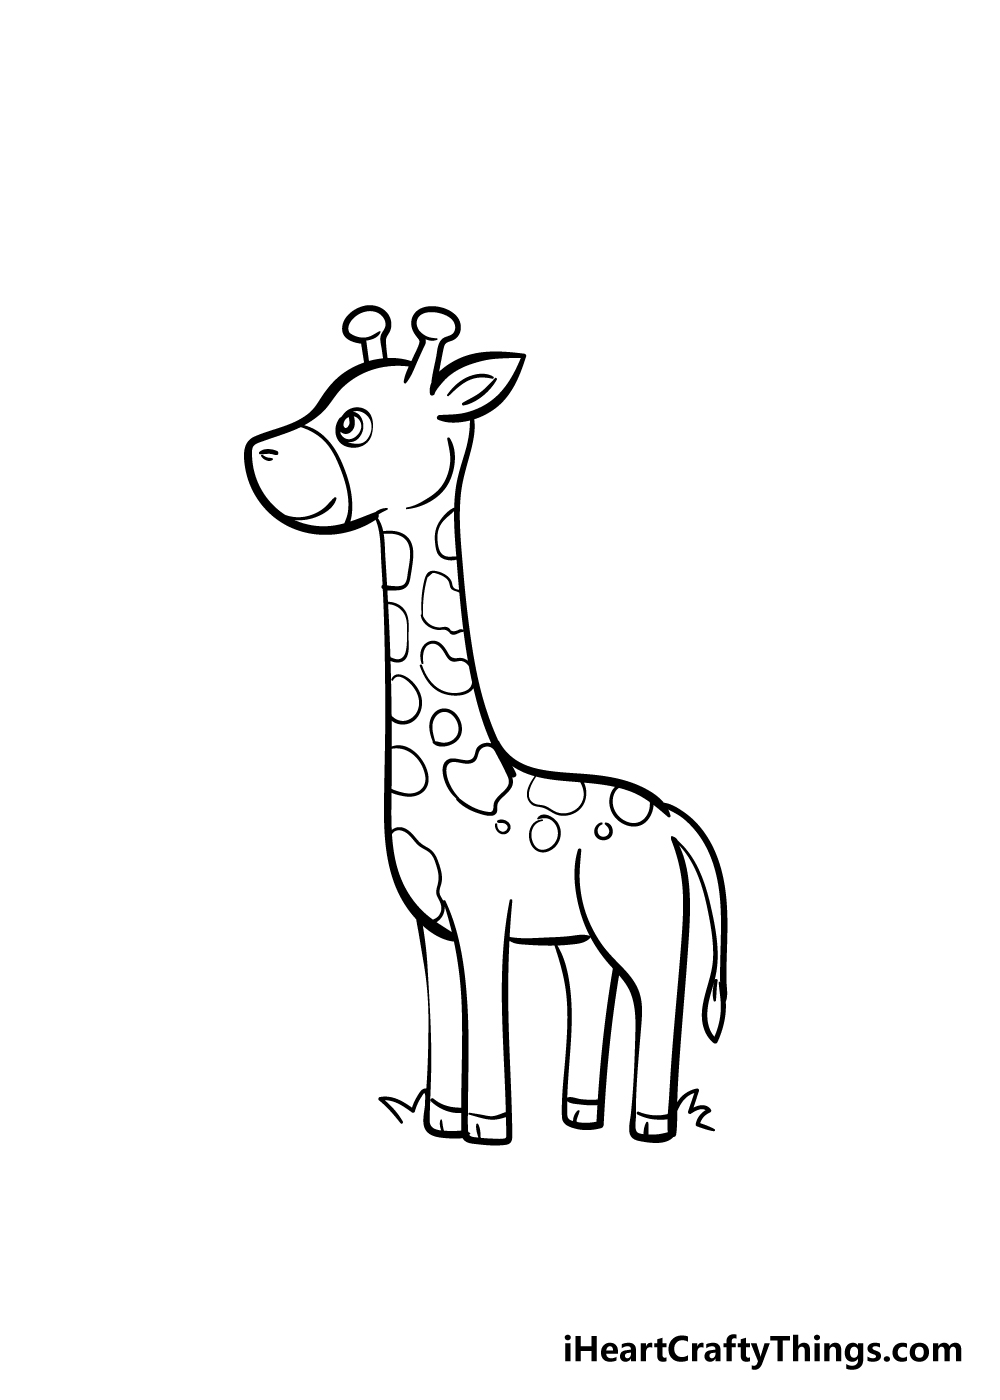
Giraffes have a lovely spotty pattern on their bodies, so we shall add them into the giraffe drawing using some rounded shapes in a way that looks good to you.
Then you can have some fun with more little details, for example the line in the ears to add some depth and some grass by the feet.
Once you’ve finished drawing your giraffe, maybe you could draw in a background for your giraffe!
Bonus: Try Out A Different Style For This Giraffe Drawing
In this guide on how to draw a giraffe, we went with an adorable cartoon style for this famous creature. Now that you have mastered this particular version, we thought it would be fun to try out some other styles.
You would still be able to follow the steps of the guide, but there are a few ways that you can adapt them to a more realistic style. The first way would be to look up some photos of real giraffes.
Try to find some that are posed similarly to the ones in our reference image, if you can. Then, pay attention to the posing and the proportions of the realistic giraffe.
You can then adapt these to the drawing, changing the more cartoony style to something more detailed and realistic. This can also come down to subtle details such as the fur and facial features.
It doesn’t need to be photo realistic, as the main goal is to try out a unique style. It could be fun to draw this new version next to the one we created in this guide.
Then, you can compare how they look and how many differences they have. Using photos, you could also work on different poses, such as the giraffe lowering its head to drink water.
If you wanted to add a background to match the realistic style, then you could look up some realistic African landscapes to use in the background.
You may be surprised by how much a few simple details can make a big difference! If you have any other styles you would like to portray, then you can use other reference images or simply stick to your imagination.
Whether you go for a new style or stick to ours, we can now move to the final step.
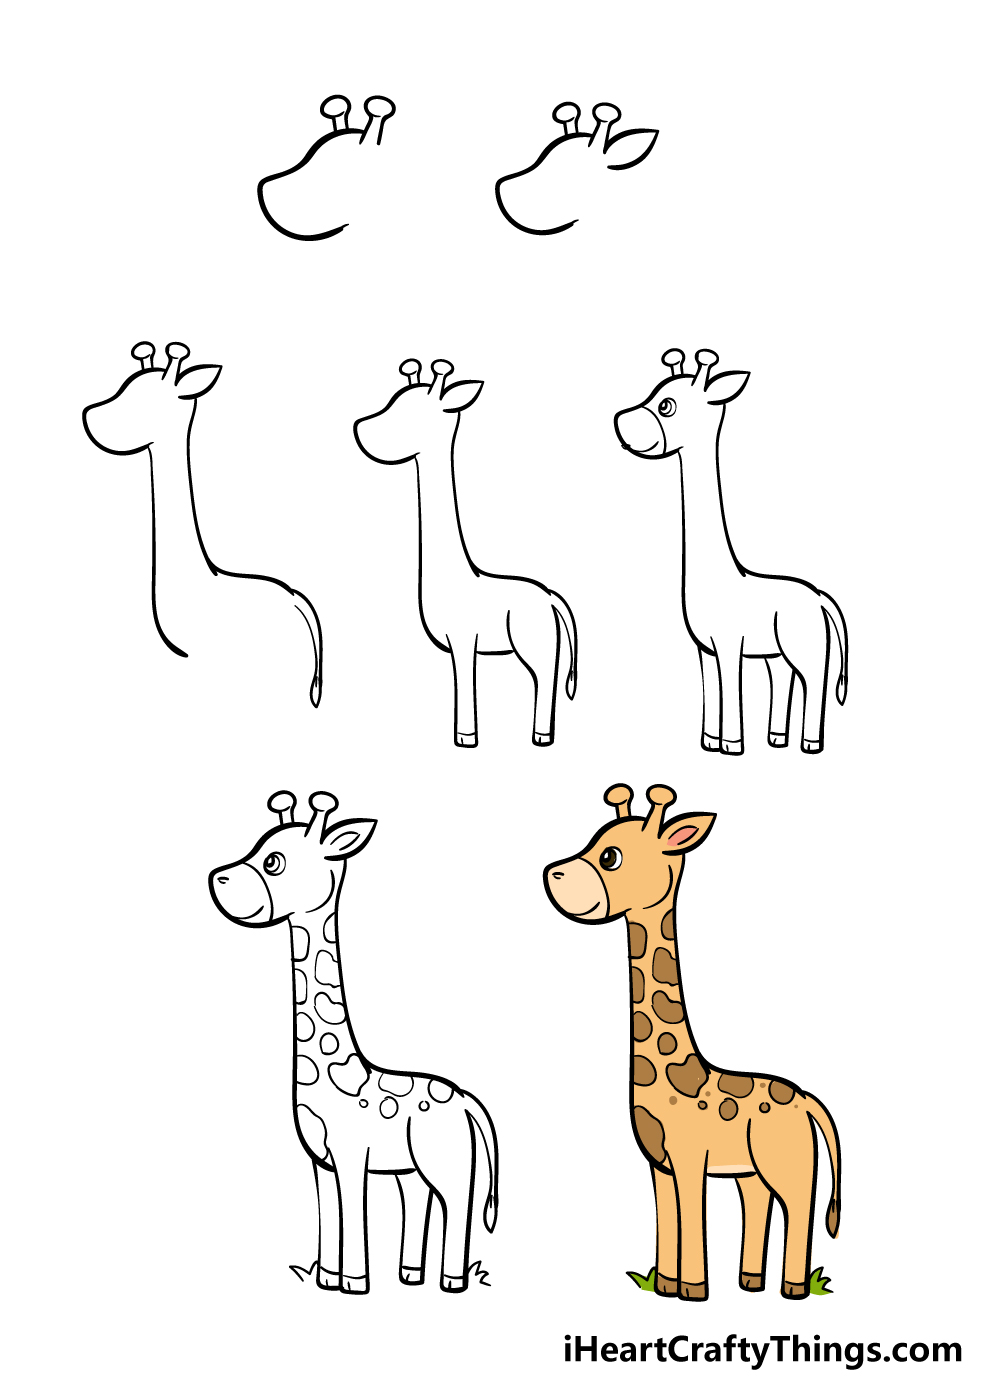
Step 7 – Finish off your giraffe with some coloring
Your amazing giraffe drawing is almost finished now, but there’s still one more fun step before you’re really done!
For this reason, we shall add some colors in this final step of our guide on how to draw a giraffe.
Giraffes have a distinctive color scheme with tan yellows and browns, as you can see in our example image.
You could follow this color scheme to make a more realistic-looking giraffe, but you could also get creative with your favorite colors!
No matter what colors you choose for your giraffe drawing, you can also try out some new art mediums to color it in.
Whether you use acrylic paints, watercolors, colored pens, pencils or crayons, there are no wrong answers and you can get some incredible colors.
How will you finish off your drawing using details and colors?
5 Tips To Make Your Giraffe Drawing Even Better!
Have some wild drawing fun as we make your giraffe sketch even better!
Giraffes are found in the wilds of Africa, and this is a great starting point if you would like to add a background!
There are so many different kinds of settings you could create for this giraffe drawing even if you stick to the Africa theme.
You could look up some pictures of the African savannah online if you need some inspiration for a great background.
Another way you could emphasize the African wildlife theme is by adding some other animals you would find in Africa. There are so many examples that you could use!
There are lions, cheetahs, leopards, elephants and buffalo to name just a few examples. Which wild animals do you think would look the best in this drawing of a giraffe?
We went with a cute cartoon style for this giraffe sketch, but once you have the hang of it you could try out some different styles. For instance, maybe you would like to make it look more realistic!
As with the background, you could make this easier by looking up some photos of real giraffes to help. That is one example of a style you could use, but what other styles could you try?
Once you really have the hang of this drawing, you could also try out some different poses. This could be done whether you stuck with the style we showed or tried a different one.
You could make the poses realistic to how giraffes would be in, but you could also go for something more fun! What kind of poses would you choose for this giraffe?
Finally, you have a few options for how you could color this giraffe drawing. We kept to a realistic color scheme for our example, but you could even change that up a bit!
By making the tones darker or lighter, you can achieve a different look entirely. Or, you could go for entirely stylistic colors to create something totally unique!
Your Giraffe Drawing is Complete!
When you first saw the picture you would be drawing for this guide, you may have thought it would be challenging, but we hope that this step-by-step guide showed you that it doesn’t have to be!
We created this guide to show you that it can be easy to take on a new drawing challenge when you take it step by step, and we hope that you had fun while learning how to do it!
Once you can draw a giraffe using this guide, it’s up to you to add your own personal touches to the drawing.
You could change the facial expression, patterns on the giraffe or the colors to make your drawing even more unique. Drawing in a cool background is also a great way to personalize it!
We’re going to be bringing out so many awesome step-by-step drawing guides like this one, so be sure not to miss out by checking out our site frequently to see what we’ve been creating for you!
Lastly, we would love to see your amazing giraffe drawings, so we hope you’ll share them on our Facebook and Pinterest pages for us to enjoy!