The moon is quite an incredible celestial body that graces our skies every night.
As well as being a wondrous sight when leaving the smog of the city, it also provides functions for things here on earth, such as controlling the tides of our oceans.
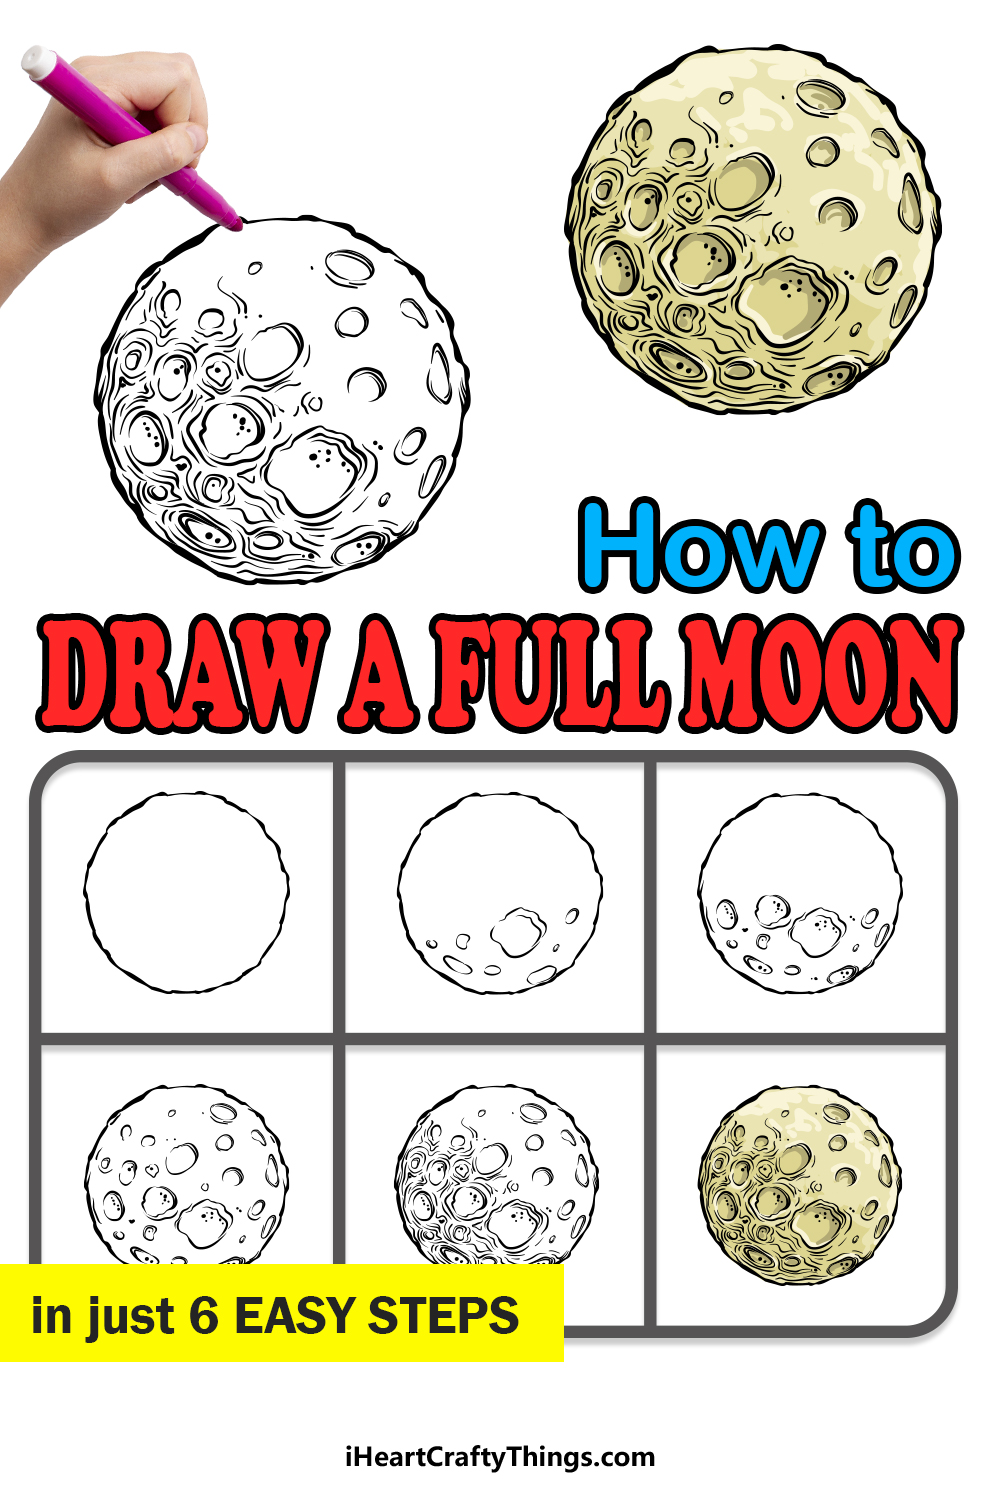
The full moon is often represented in various forms of media as well, and learning how to draw a full moon is a great way to work it into some amazing artwork.
This tutorial you have in front of you will show you how you can learn to draw a majestic version of a full moon!
We hope that you will be over the moon as you work on our step-by-step guide on how to draw a full moon in just 6 easy steps.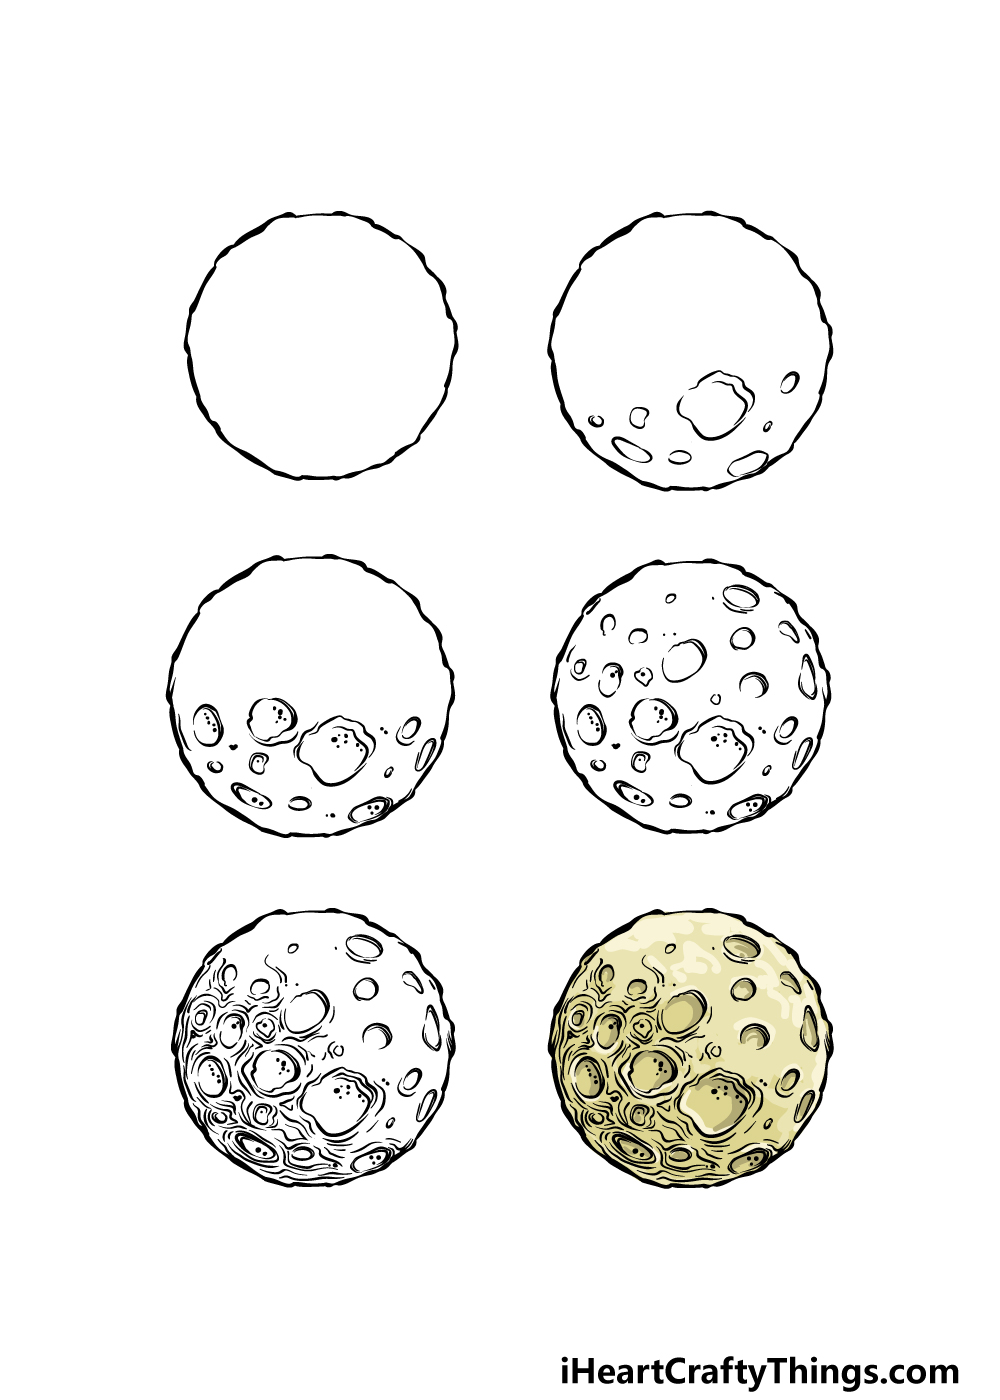
How to Draw A Full Moon – Let’s Get Started!
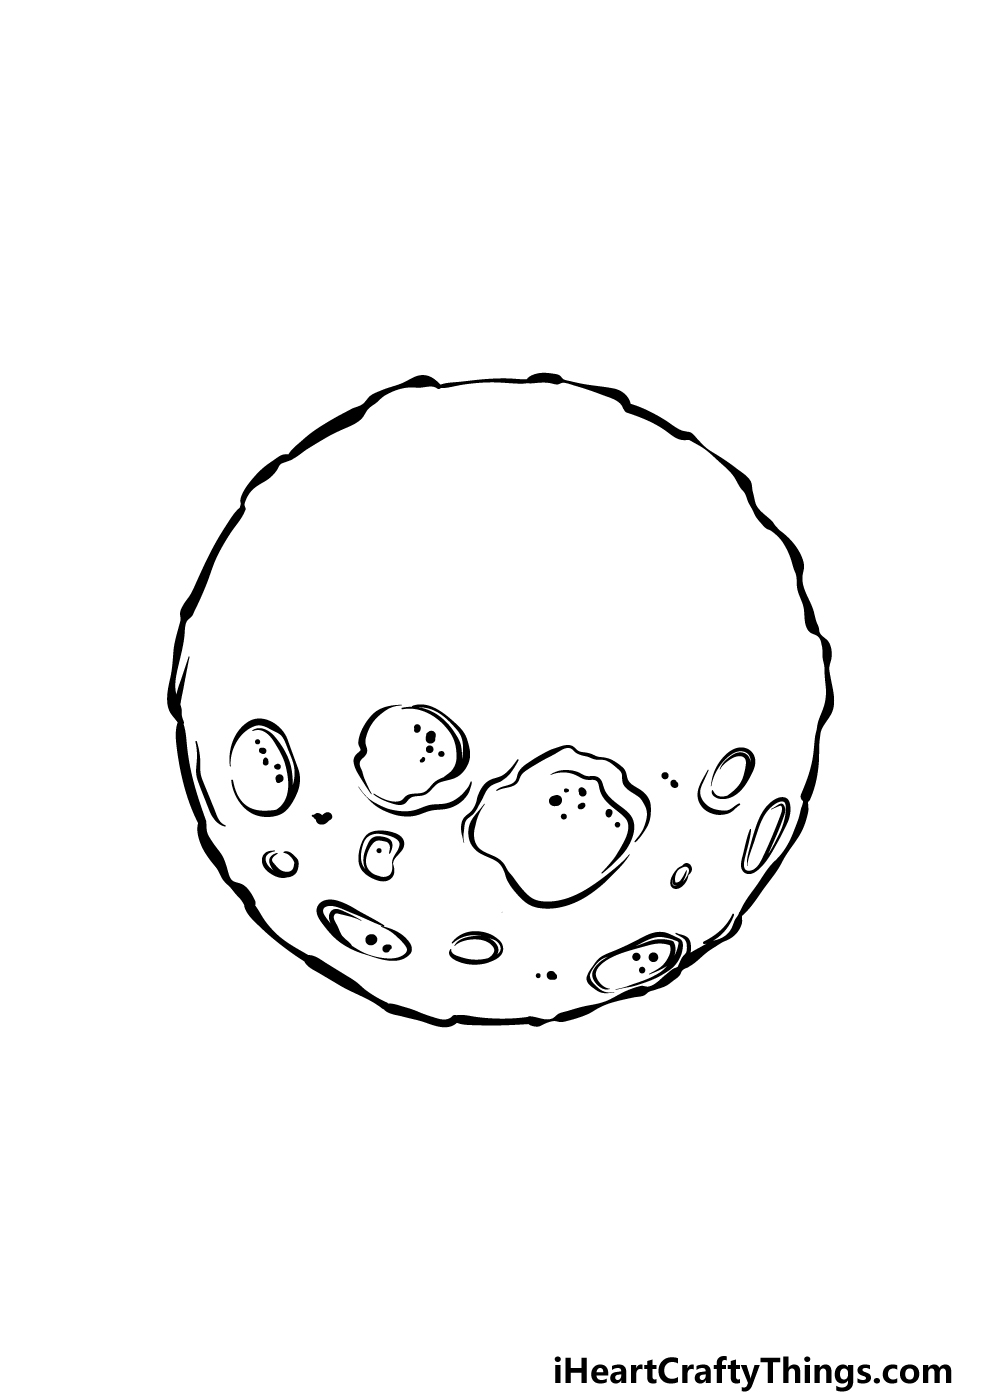
Step 1
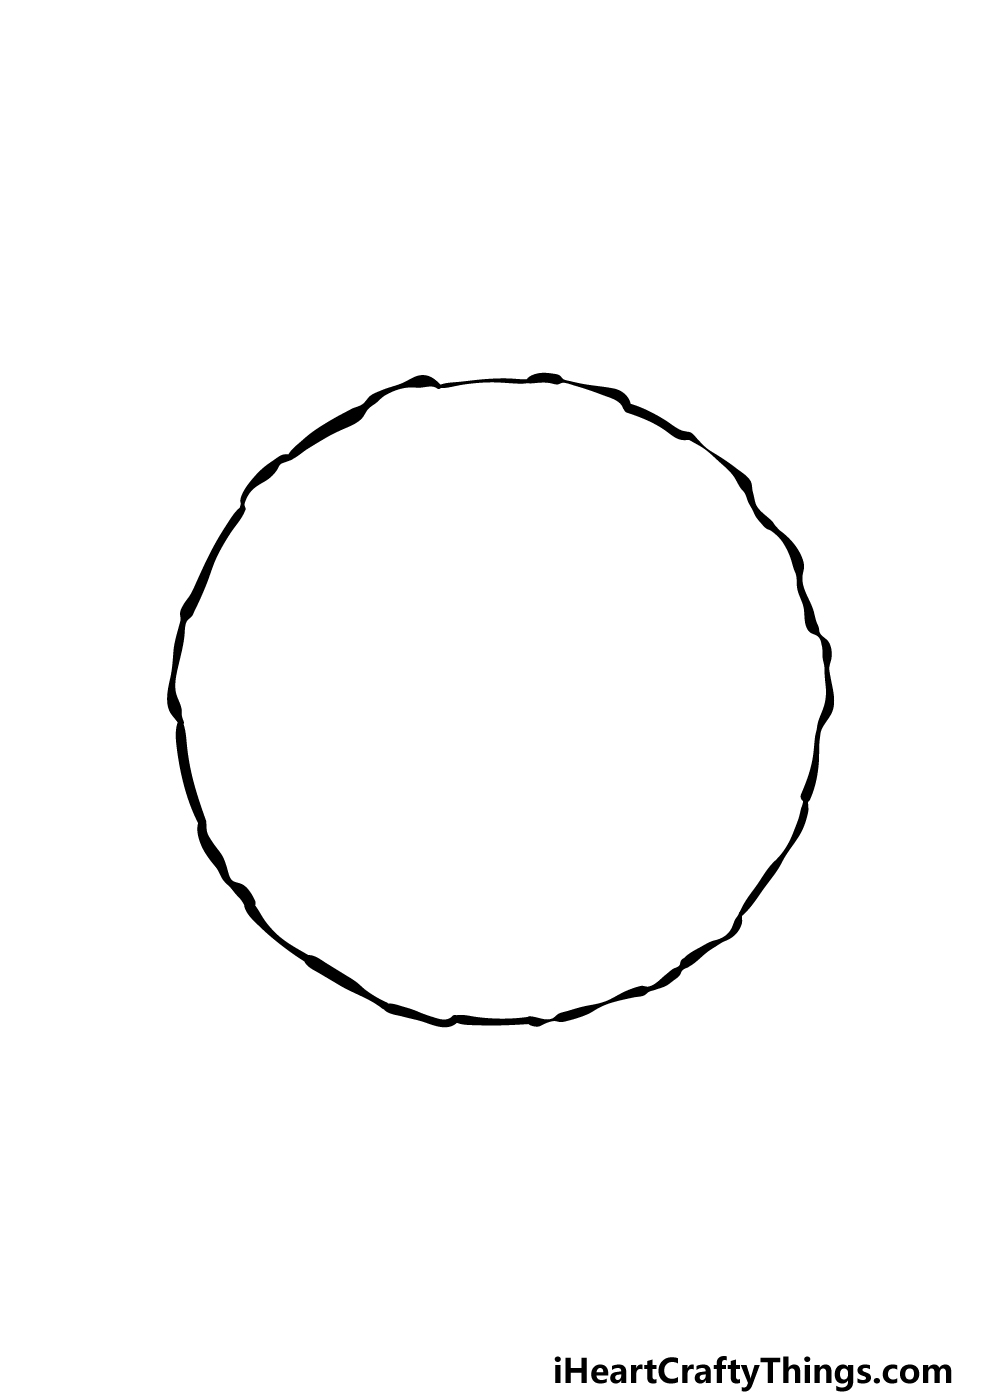
For this guide on how to draw a full moon, we will start by drawing a circular shape. As you can see in our reference image, we used a rather bumpy line to give the moon a bit more texture to its surface.
There is a way that you can make this easier on yourself, however. Our suggestion would be to use a light pencil with a drawing tool such as a drawing compass to draw a smooth circle.
With that circle to guide you, you can then use your pen to create a rougher surface for the moon. The reference image will show you how we recommend the line to look!
Once it is drawn, we can then start adding some details to it in the next few steps.
Step 2 – Now, draw some details for the moon’s surface
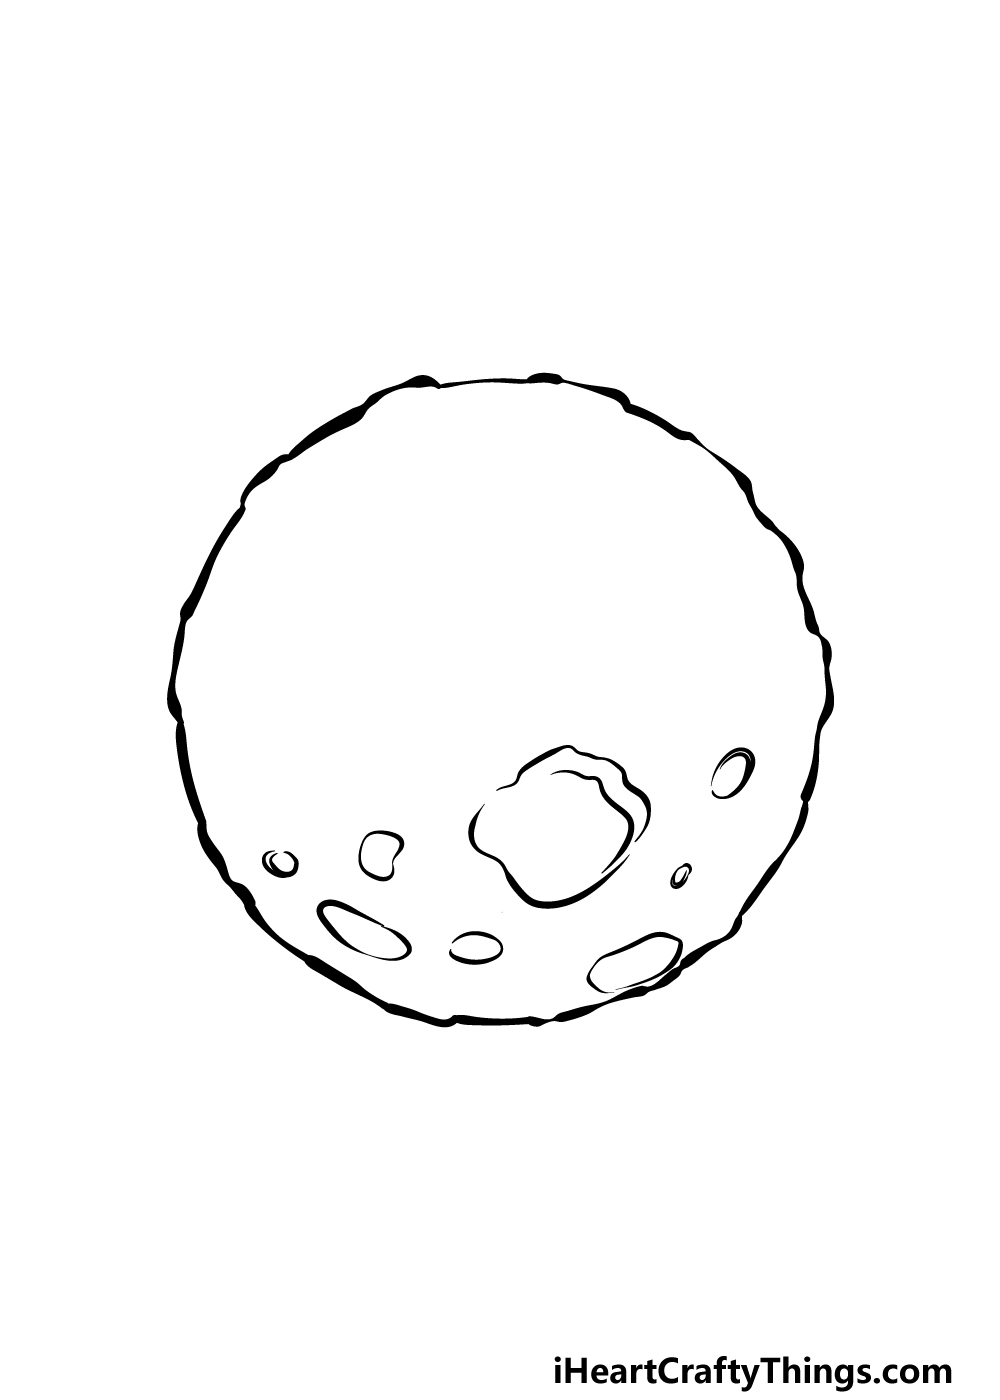
The moon is by no means some kind of smooth orb in the sky, and it is marked by many features and craters.
We will start adding some of these feature details to your full moon drawing in this next step of the guide. For now, we will be drawing some crater details for the bottom portion of the moon.
These craters can be drawn using some irregular round shapes, and as shown in the reference image they will be of varying sizes.
They will also be bare with the details for now, but we will add some texture and dimension details to each crater as we move on in the guide.
When you’re ready to proceed to step 3 of the guide we can head on to the next part!
Step 3 – Next, draw some more craters and details
This third step of our guide on how to draw a full moon will see you not only adding some more craters to the surface of the moon but also adding some more details to the existing ones.
First, draw some more rounded shapes for the new craters filling in the central part of the moon.
Once these new ones have been added, we will then add some dots and curved line details to the existing and new craters to make them look a bit more dynamic.
Step 4 – Now, keep adding some more craters
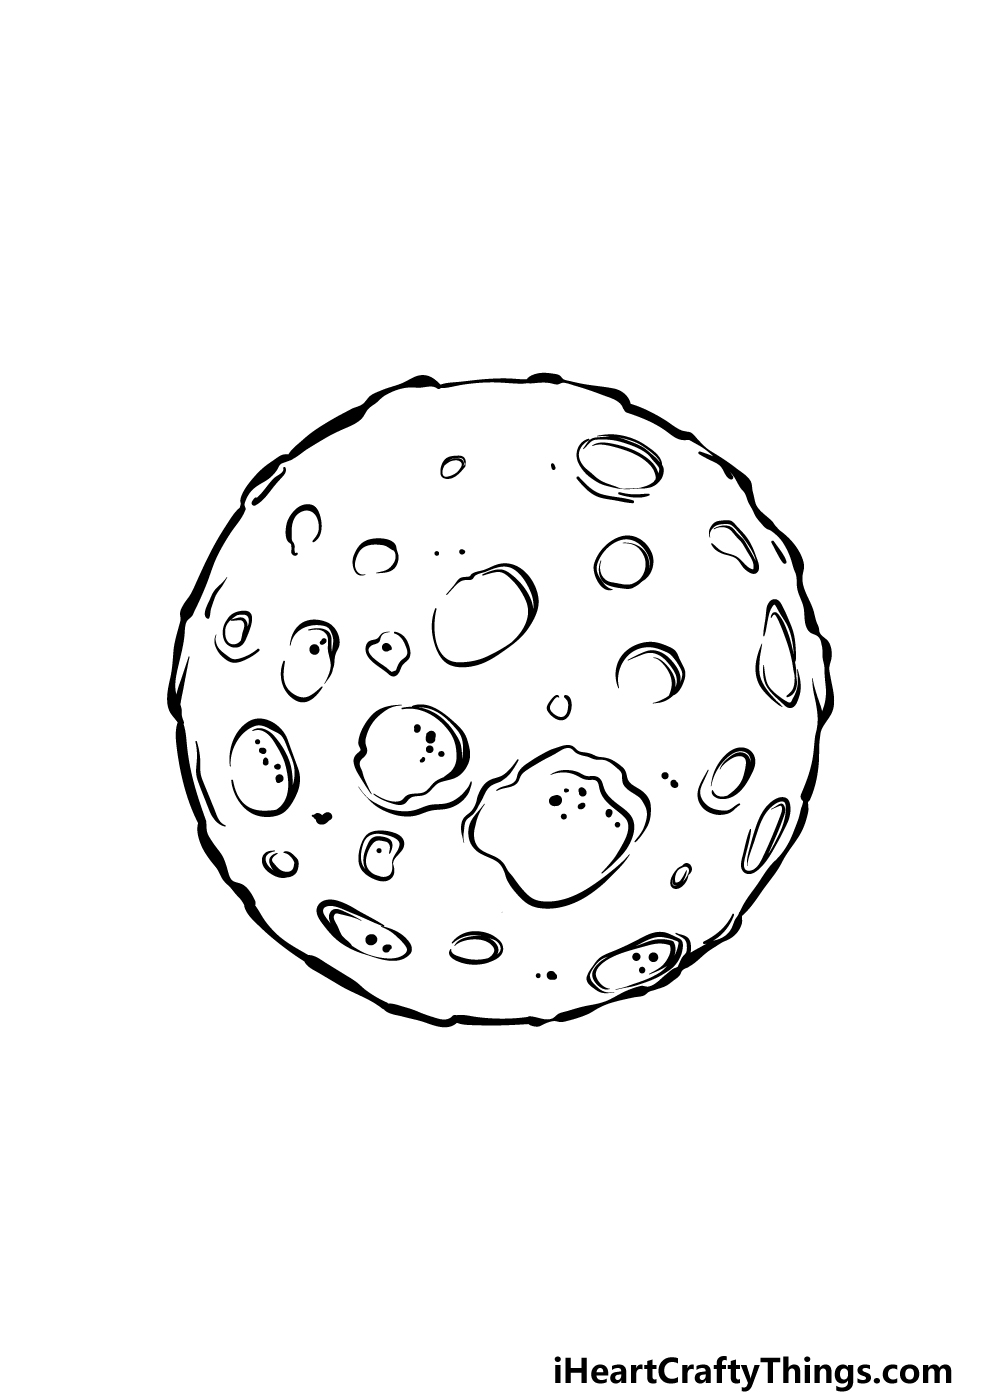
We can now focus on adding the final features and craters to the moon before we move on to the last details in the next step.
To do this, you can simply keep on adding craters in the same ways that you have been doing so up to this point.
That means creating some rounded shapes and then adding the same dot and line details that you have been.
These kinds of details are also ones that you could change up a bit depending on your own preferences. Once these are all added, it will be on to those final details that we mentioned!
Step 5 – Add the final details to the full moon drawing
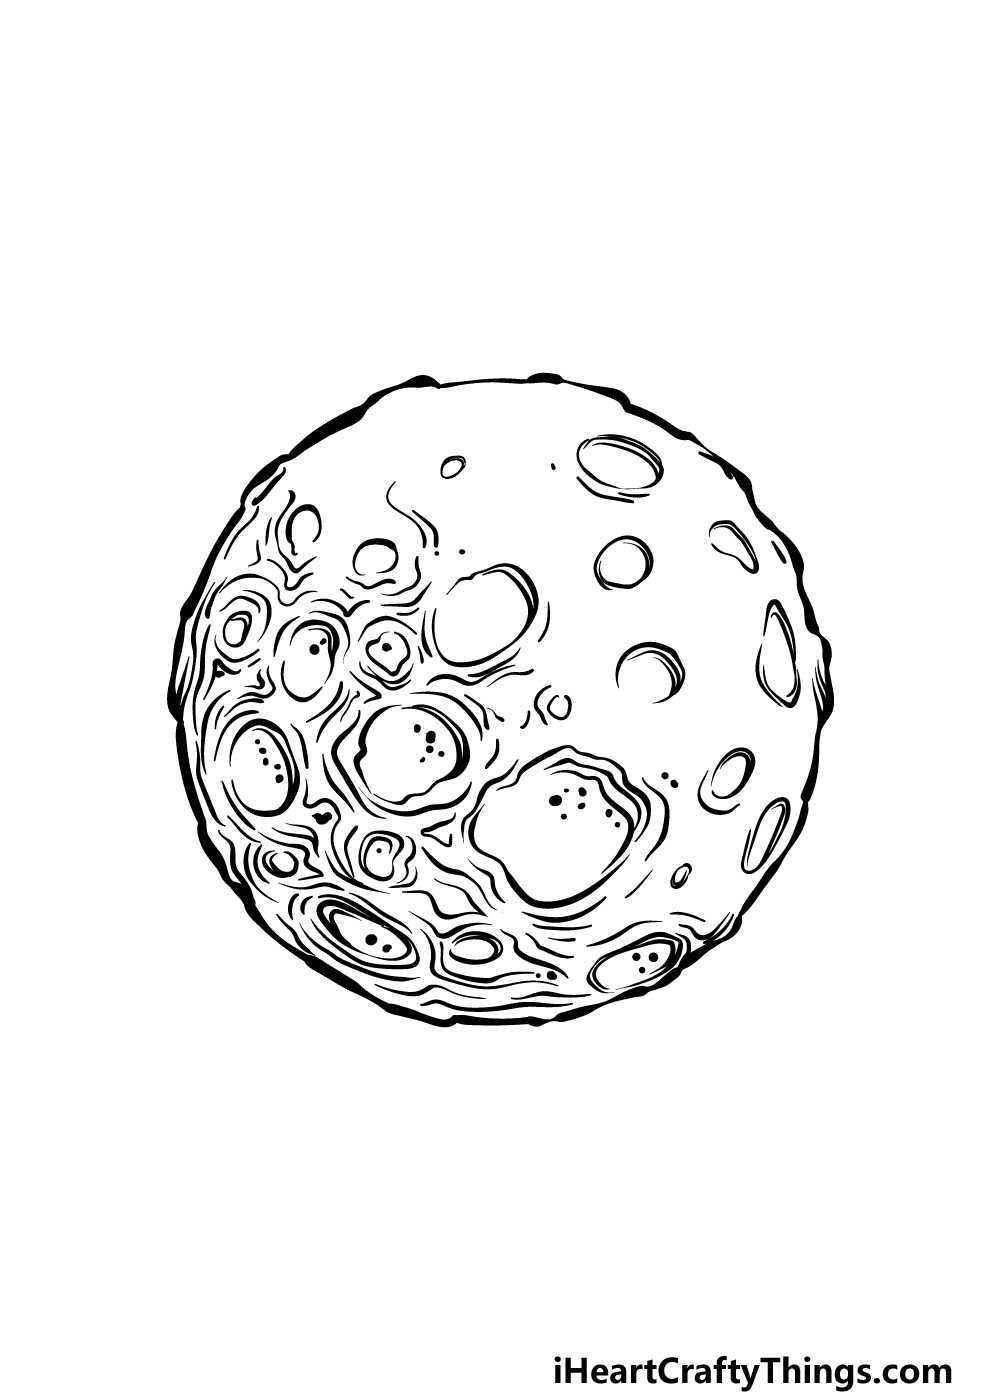
In this step of our guide on how to draw a full moon, we will be adding some different kinds of details to the image.
The moon will often be half obscured by shadow depending on its position, and we will depict this with the details that we will be adding in this step. For this image, we shall be focusing on the lower left-hand side of the moon primarily.
To create this dark side of the moon effect, you can use lots of curved and twisty lines in between the craters and other details that you have been drawing so far.
These will be drawn quite densely to create this effect.
Once you have drawn these lines, you can also add some details of your own!
You could maybe draw some planets and stars in the background, or even add something fun like an alien spaceship landed on the surface. What can you think of to finish off this picture?
Step 6 – Finish off your full moon drawing with some color
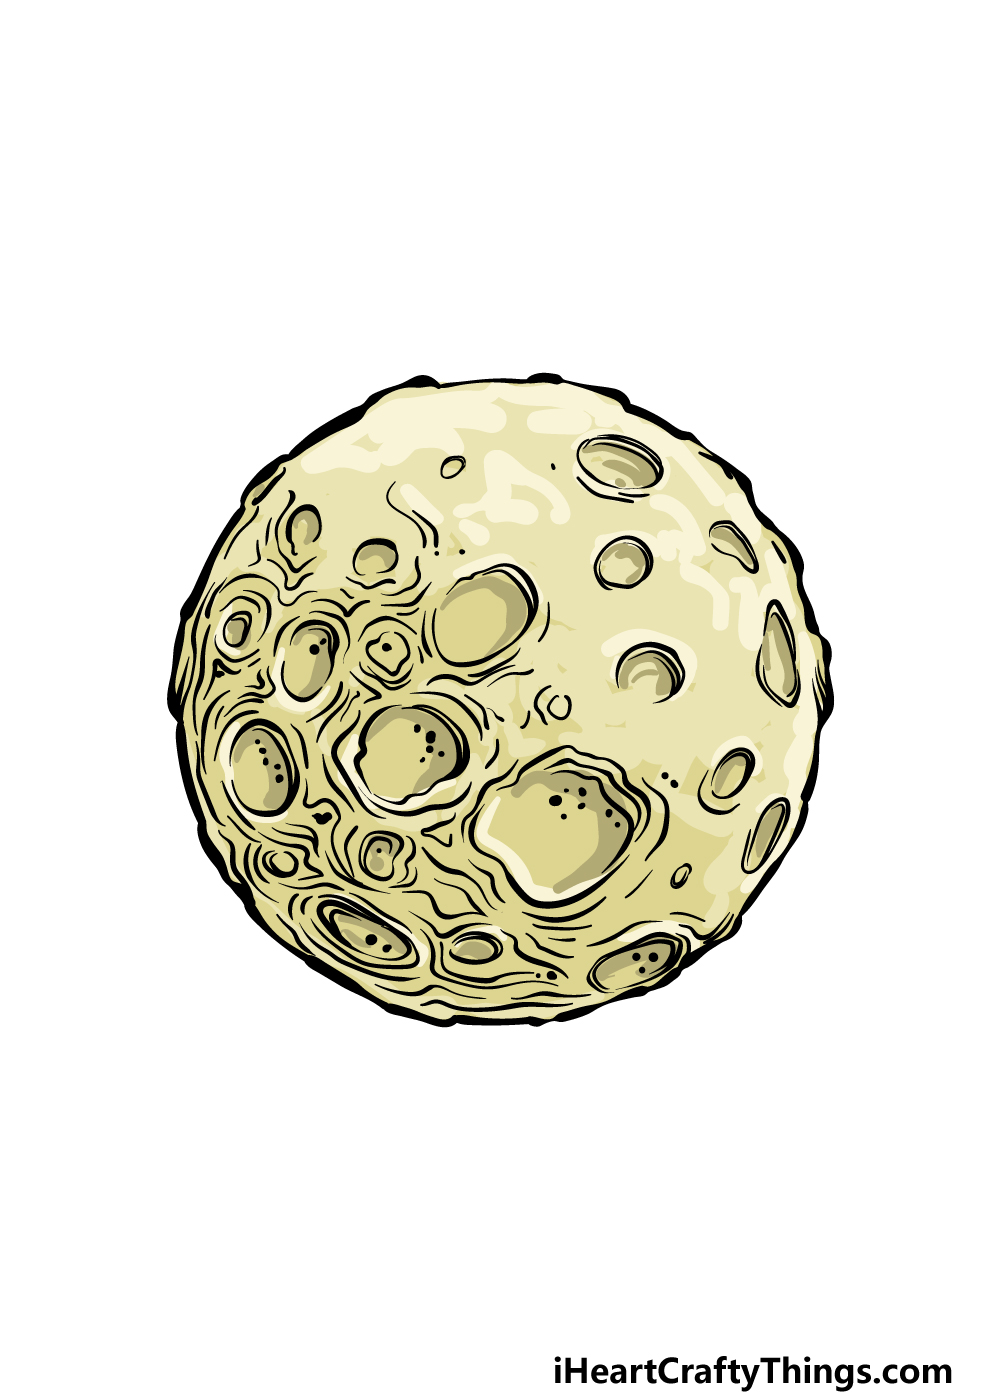
Now you’re ready to complete your full moon drawing by adding some color to it. In our reference image, we used various shades of yellow and beige on the surface in a gradient.
This further helps to highlight that some sections of the surface are more illuminated than others.
You could use similar colors and shades for your own image, but you should also feel free to use any other colors that you like as well!
If you drew a background or any additional details then be sure to have fun coloring those aspects in as well.
Do this to take your full moon drawing to the next level
Rise to the challenge with these tips on making your full moon sketch even better!
When you look at the moon up in the night sky, it is surrounded by stars and other celestial bodies. These become even more visible with the use of a telescope.
These details would be great to add to your full moon drawing! The drawing zooms in heavily on it, so you could make these extra details quite detailed.
They could be stars, planets or maybe some comets for a few ideas! What else would you add to the night sky?
Adding details that would be found in the night sky is one idea for this drawing of a full moon, but you could also add some less natural elements.
For example, you could show some rockets zooming around the moon. Or, maybe you could design some fun alien spacecraft and have them hovering around!
There could also be satellites or drones for a few more other ideas. What else do you think could be around the moon?
Once you have added details surrounding this full moon drawing, you can then focus on adding some details to the moon itself. For a few ideas, maybe there could be some astronauts exploring the surface.
Or, there could be some aliens checking it out! It could even be as simple as a flag poking out of the surface.
This is a step that will pair really nicely with the previous steps, and you can create some really fun and imaginative scenes.
Lastly, you can play around with the colors that you use. If you want this drawing of a full moon to look more mild and mellow, you could use some light colors done in some watercolors or colored pencils.
Or, maybe you want the moon to look bright and vibrant! In this case, you could use bolder colors done with mediums like colored pens, markers or acrylic paints.
You don’t have to color it with the colors our moon comes in either, and you could make your very own unique moon.
Your Full Moon Drawing is Complete!
That will finish off this awesome guide on how to draw a full moon! Drawing something like a moon can be trickier than expected, especially when you want it to look a bit more detailed.
That’s why we focused on making it easier for you by breaking it down into smaller, more manageable steps!
Now that you can draw this great full moon, you can show us what you can do by adding your own details and ideas to it. These along with the colors and art mediums that you use can really help to make this drawing your own!
You can then head on over to our website for more drawing fun when you’re ready for more. Please do check in often, as we have more guides on the way soon!
We hope that you will share your finished full moon drawing on our Facebook and Pinterest pages for us to admire!