


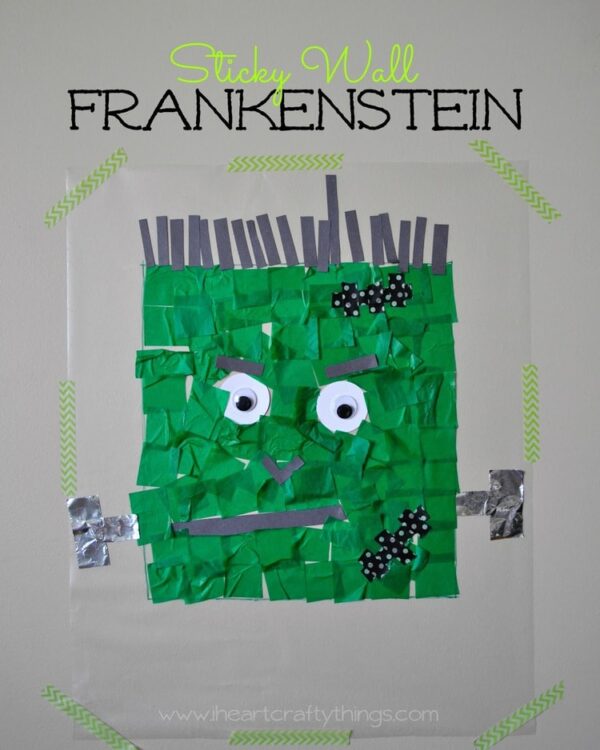
It’s been a while since we’ve made contact paper sticky wall art. Since I’ve had Halloween on the brain, I came up with this idea to use different materials to create a Frankenstein. My daughter had so much fun and ended up with a unique looking, spooky creature.
This post contains affiliate links, read our Disclosure Policy for more information.
Supplies you will need:
- clear contact paper
- green or black permanent marker
- washi tape
- green tissue paper squares
- foil
- black construction paper
- 2 large googly eyes
- 2 white cardstock circles
- black washi tape(for the scars)
Directions:
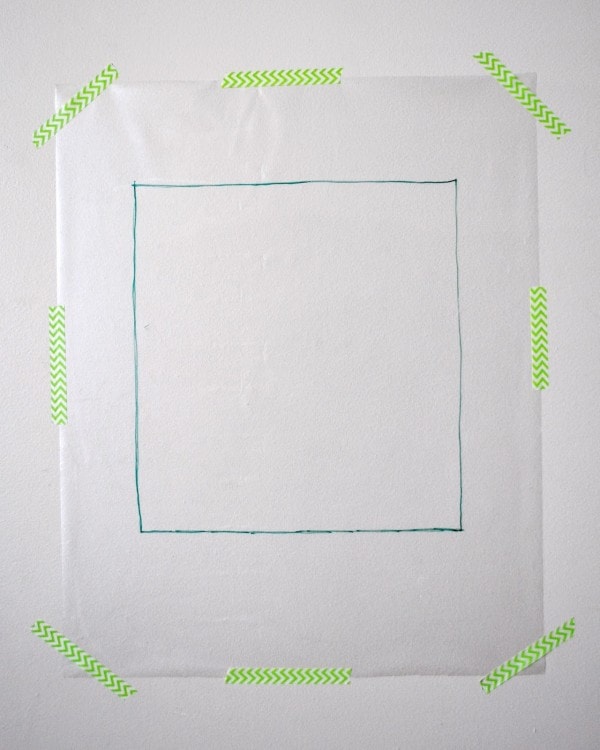
1. Draw a rectangle on contact paper, then tape it to wall with sticky side facing out
Start by cutting a piece off of your contact paper roll for your Frankenstein. Use your permanent marker to draw a rectangle shape on your contact paper. Peel the backing off the contact paper and tape it to your wall with the sticky side facing out. Directions:
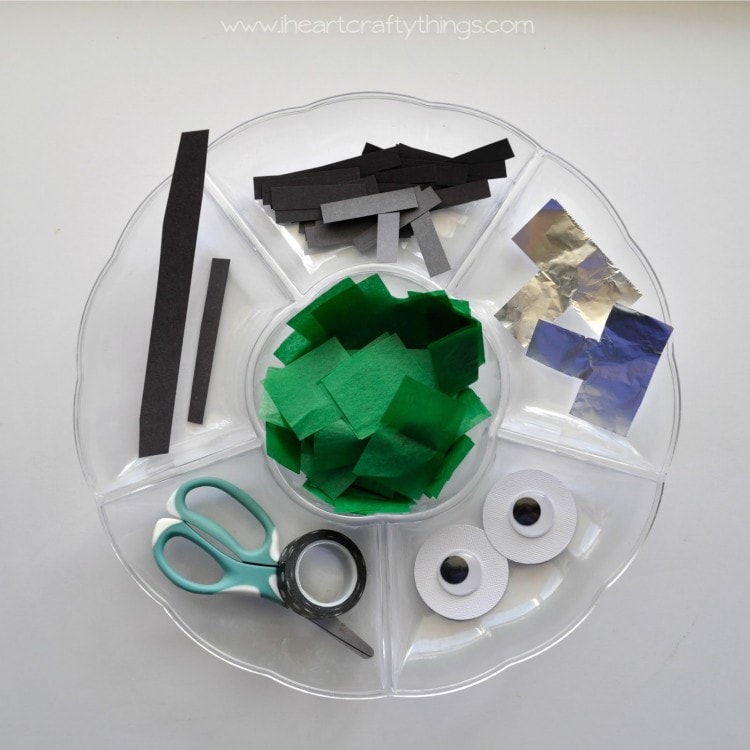
2. Gather materials for making Frankenstein
Gather your materials for making your Frankenstein. In my head I tried to envision how a Frankenstein could be put together, and I decided on these materials: green tissue paper squares, foil cut up into bolts, black construction paper cut into strips for hair and a straight mouth piece, two large googly eyes glued to 2 white circle, some black washi tape and a pair of scissors.
3. Create a Frankenstein
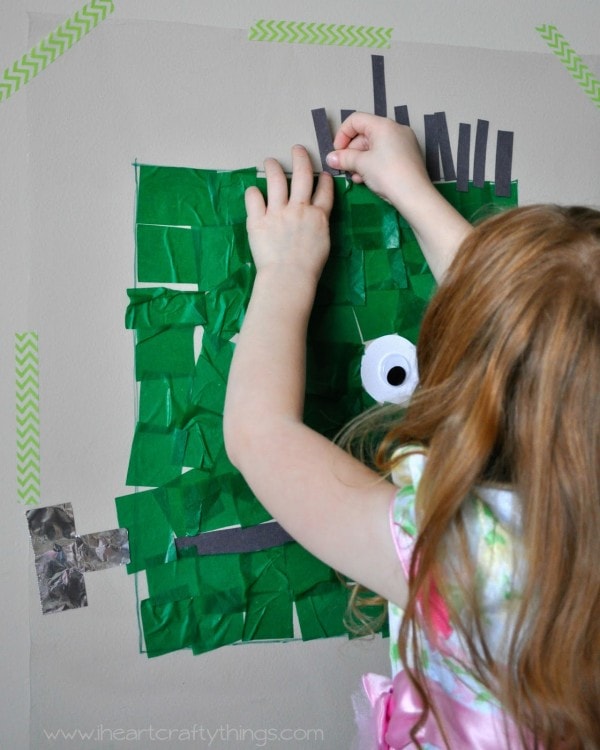
Set your child(ren) loose, creating a Frankenstein. I added the rectangle lines as a guide and my daughter chose to use them as a guide for her adding her tissue paper squares. We have made lots of contact paper art so she is pretty used to our projects. Don’t get discouraged if your child goes outside the lines or comes up with their completely own creation. This is really set up to be an open-ended art project and that is what is so beautiful about it….Just letting your child create what they want with the materials.
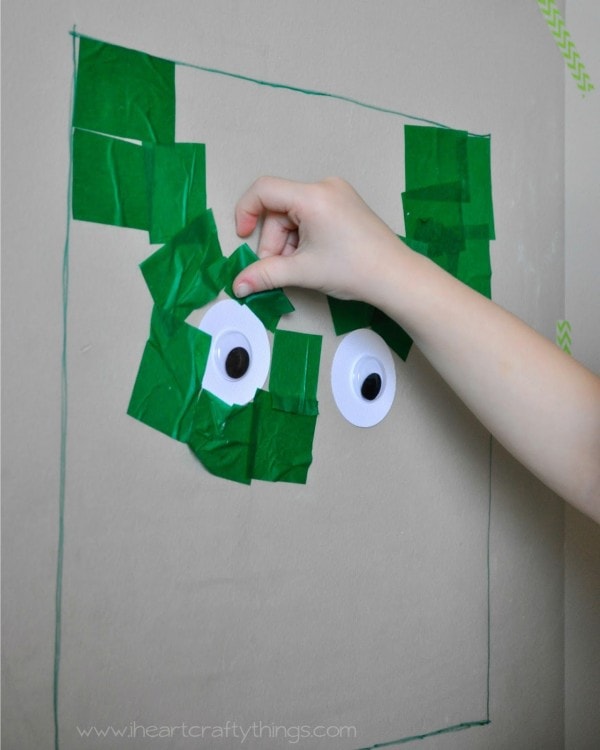
After adding a couple pieces of tissue paper my daughter grabbed for the eyes and continued adding tissue paper around them and on the face. As she got towards the bottom I reminded her about the mouth because I was worried she would forget and not have a sticky place to put it on the contact paper. (If your child forgets the mouth don’t fret, you can always just use a glue stick to add some glue to the back of your mouth and add it to your creation.)
4. Add hair, nose and eyebrows
Continue your Frankenstein by adding on the foil bolts, the construction paper hair and using some construction paper pieces to add eyebrows and a nose if you choose. Our nose and eyebrows were an after thought so my daughter used a glue stick to help adhere them to the tissue paper.
5. Create scars
For the scars my daughter cut and used pieces of black polka-dot washi tape.
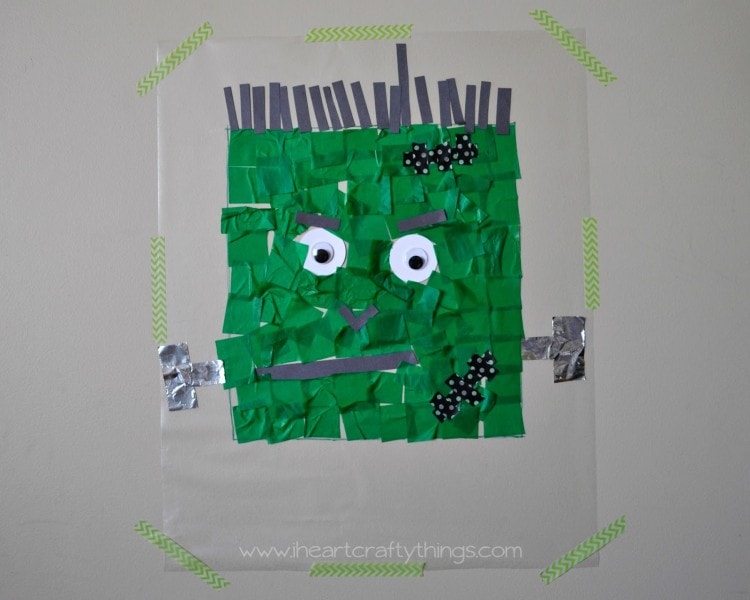
My daughter was pretty proud of her creepy Frankenstein creation! What other kinds of Halloween creations can you think of creating with a contact paper stick wall?