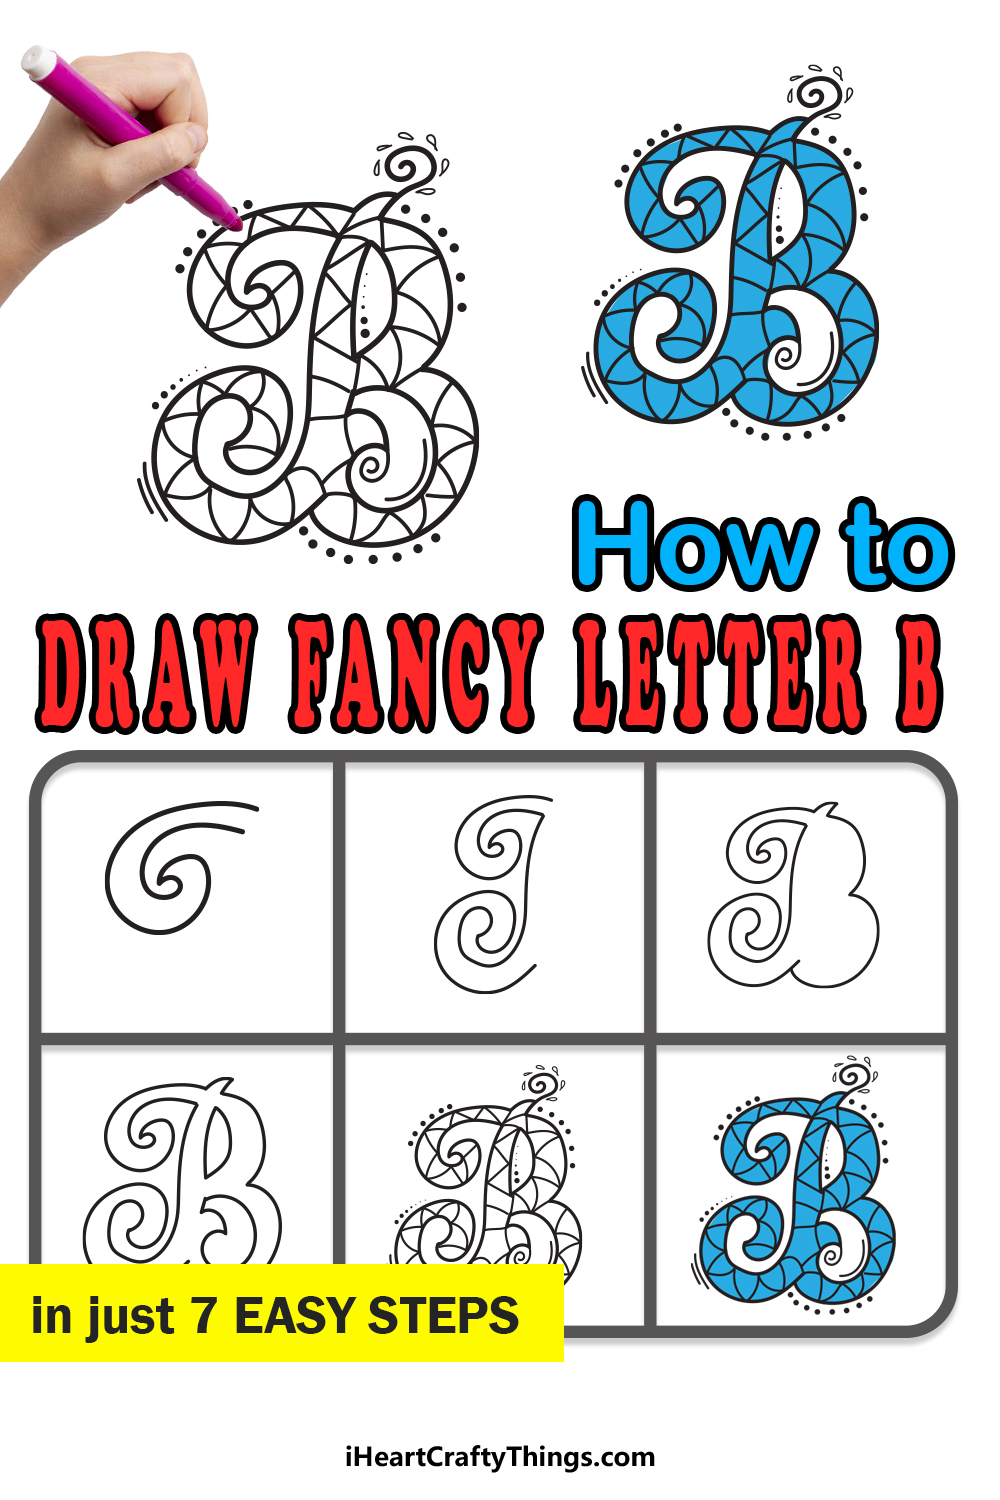
When we first learn how to write the letters of our alphabet, we will normally start from the beginning and work our way from there. For that reason, the letter B will usually be one of the first that we learn.
In terms of how it looks, it can be a slightly tricky letter to learn when you first start out. This is especially true for the capital version of the letter, but it can be quite fun once you get the hang of it.
It doesn’t get any easier when you make it more stylistic, but it can be rather rewarding when you take the time to do it!
That’s why we have prepared these 6 easy steps on how to draw your own fancy letter B. Once you have finished these steps, you will have everything you need to create a bold and beautiful version of this letter.
Let’s Get Started
STEP 1:

As we mentioned earlier, the letter B is not as simple as many other letters in the alphabet. For that reason, we think you should carefully look at the final images of this guide.
This will show you what we’re aiming for, and it could make it easier for you as we work through the steps in the guide. You could also draw out a rough version of the letter with your pencil.
This will help you as you add the final lines of the drawing, as you will have a general idea of the shape that we’re aiming for.
When you’re ready, we can draw the first portion of the design. To make this letter extra fancy, we will be adding twisty flourishes to the design.
We shall begin with the first of these, and it will go near the top of the letter on the left. The line will curve and twist in on itself, and there will be a pointy tip near the center.
Then, it will twist out and around until you have the shape you see in our reference image. Don’t be shy to draw this part in pencil first before committing to pen!
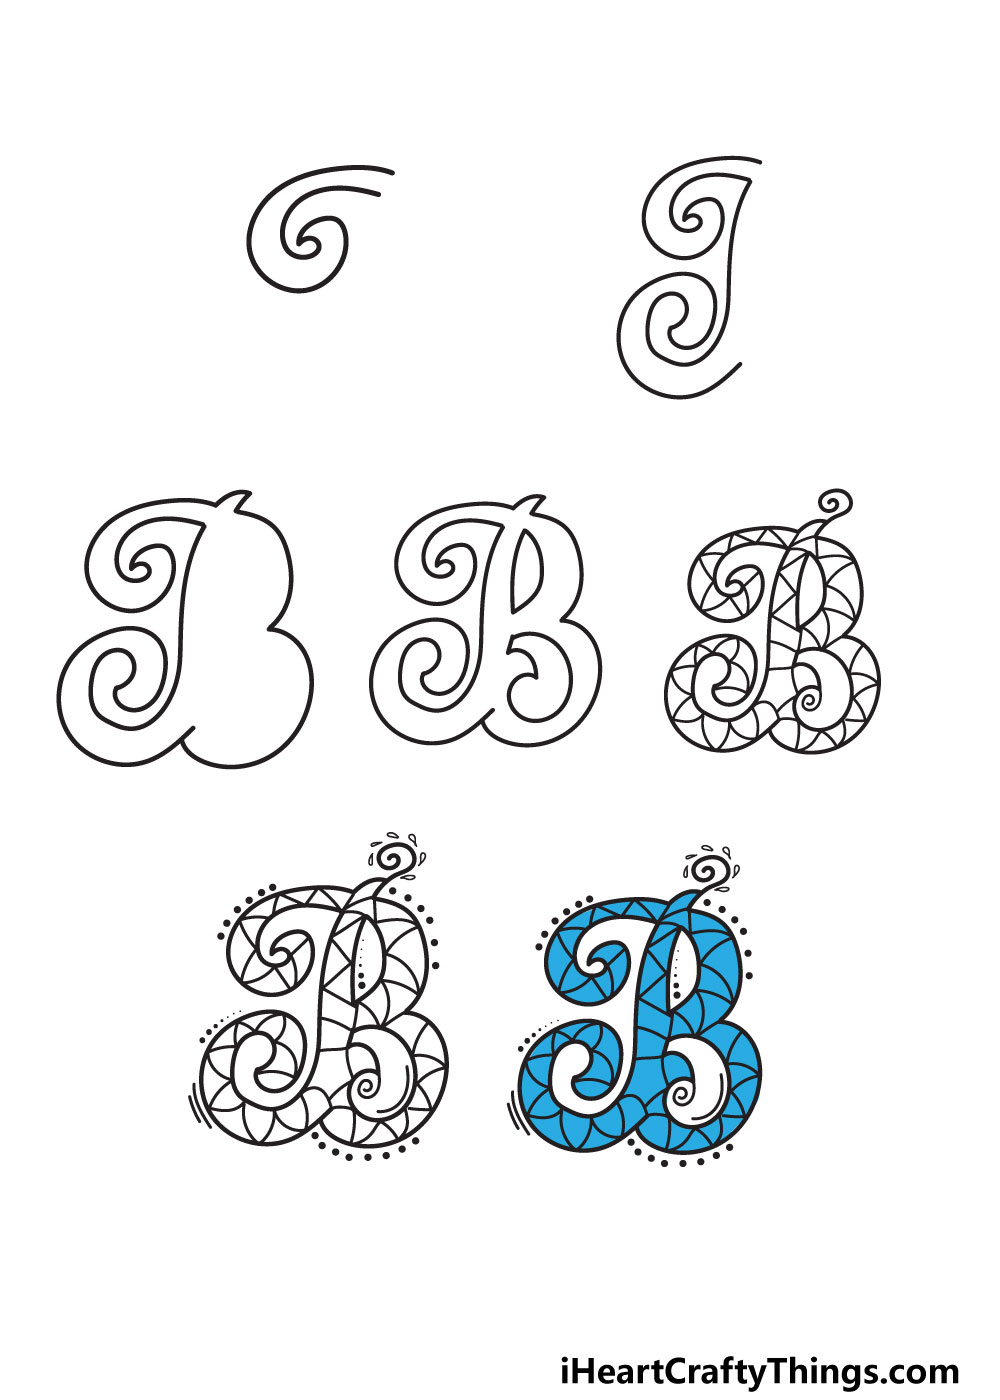
STEP 2:
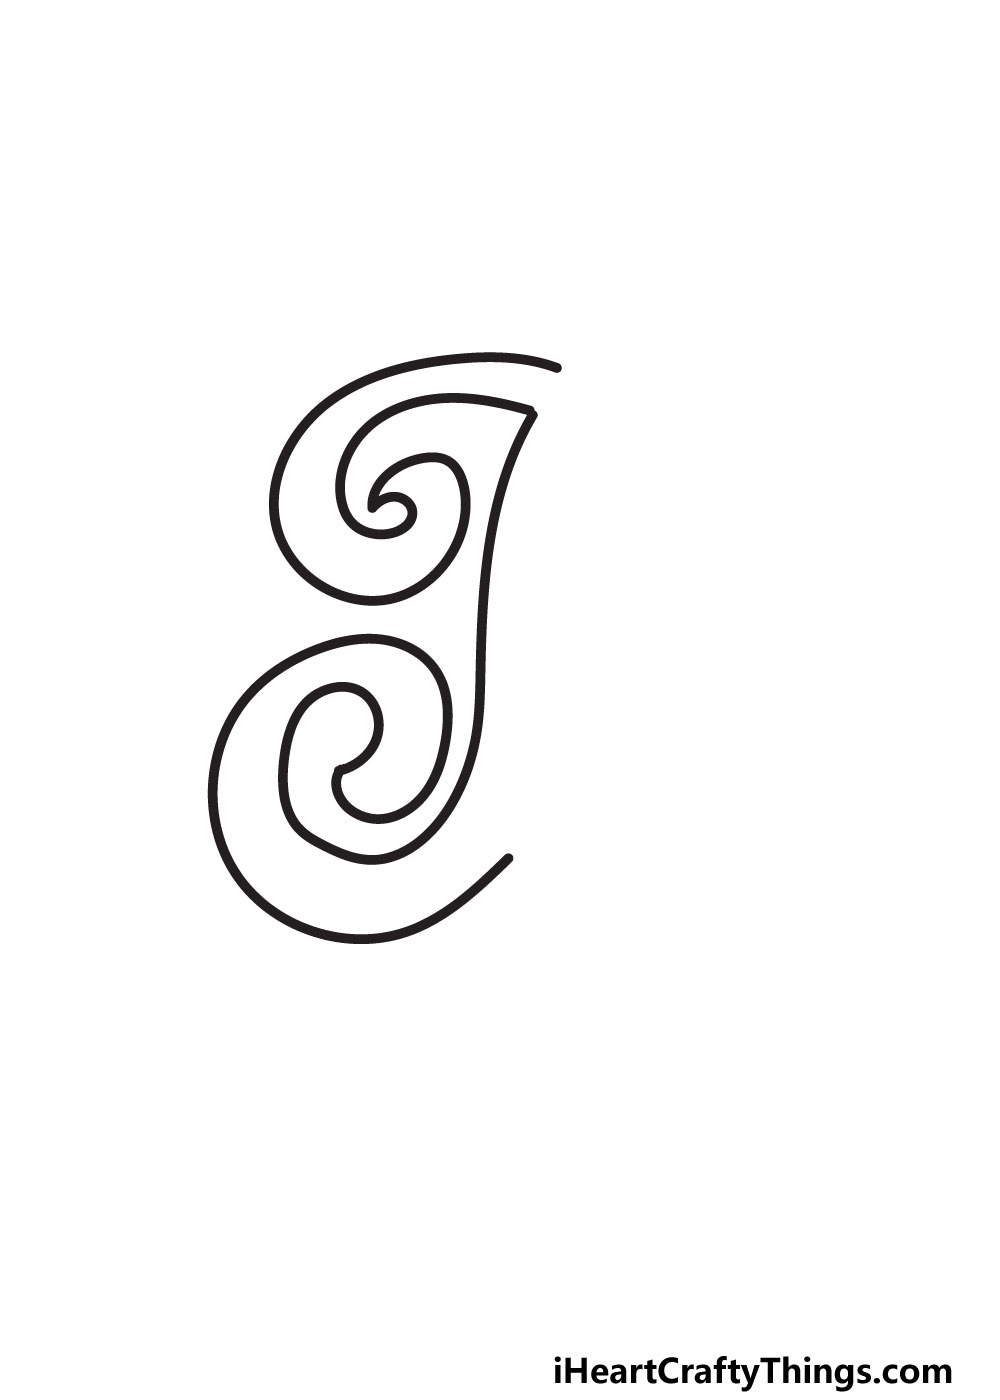
Next, you will be drawing the left hand side of the letter. To start this, we will be drawing a vertical line with a slight curve to it.
This vertical line will extend down from the shape that we drew in the previous step. As you can see in our example, the bottom of this vertical line will extend into another swirling shape.
It will be shaped rather similar to the previous one, but it will be quite a bit larger. You will also notice that this second swirling shape will be swirling in the opposite direction to the first one.
This is another step where we think you may benefit from drawing the swirling shape out with your pencil before using your pen or darker pencil.
With this second shape done, we can then move on to the third step of the guide where we will finish off the outline of the letter.
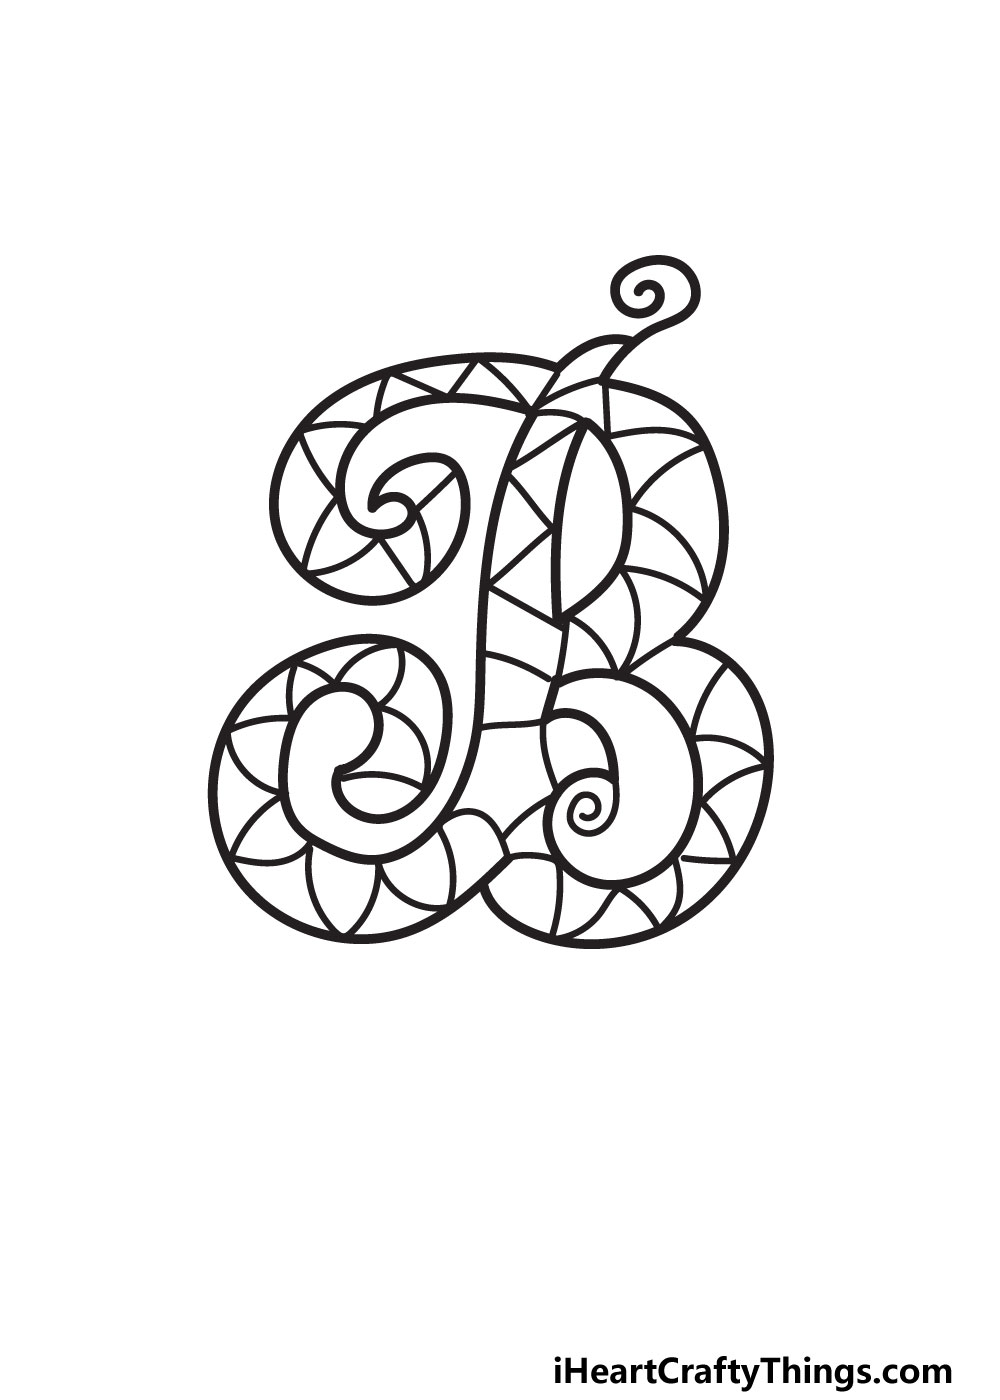
STEP 3:

We shall be adding quite a lot to this fancy letter B in this third step. Even though we will be drawing quite a lot, it may be a bit less complicated than the first two steps.
Let’s start simply with the small pointy part you see at the top of the outline. This will start where the first swirling shape ended, and it will be drawn using some small, curved lines.
Once that is drawn, we will then extend a slightly rounded line down for the first bump of the B. This bump will end around the halfway point of the letter.
Then, we will be drawing the larger bump on the lower half of the letter. It will begin at the central point of the letter where the smaller bump ended.
Finally, it will curve in and finish the outline of the B, as you see in the example. If you drew out a rough B shape with a pencil to prepare, you may as well erase it now.
STEP 4:
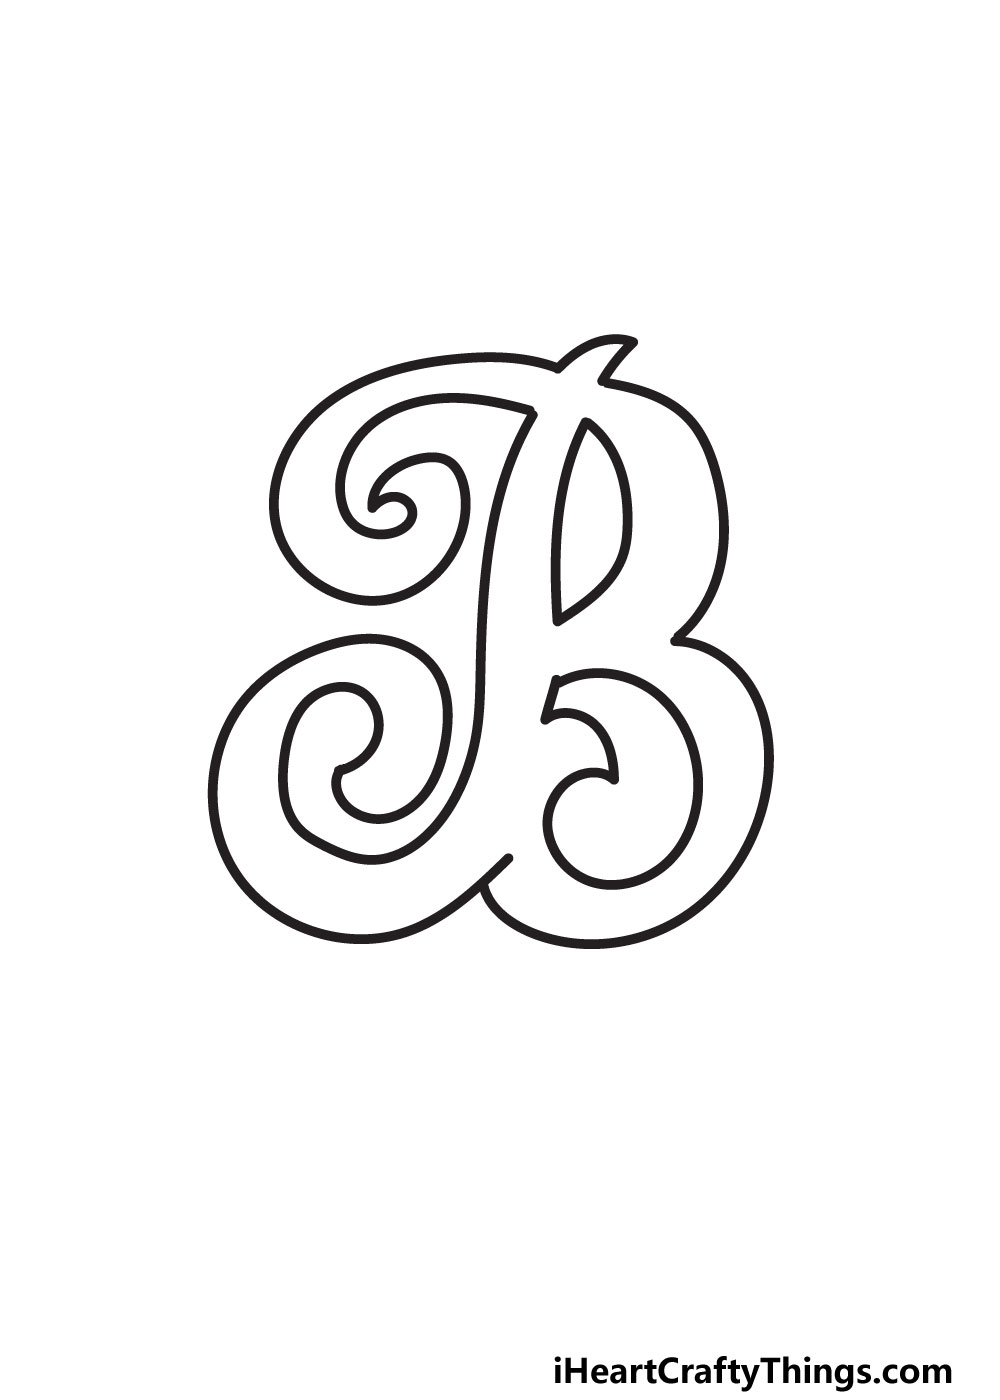
The outline is complete, and now we can draw the two holes inside the outline of the letter. In a regular letter B, these are simple rounded shapes.
But we’re not drawing a regular letter B, we’re drawing a fancy one! That’s why we will make the holes look a bit cooler, starting with the upper one.
As you can see in the example, it will be shaped a bit like a shooting bow with curved lines on all sides. This one is fairly simple, but the second one will be a bit more complex.
It looks a bit like a comma that has been flipped upside down. There is a thinner curved part on top with a rounded section beneath it.
Try to follow our example closely as you draw this part, as it can be a bit tricky. Now, we can add some inner details in the next few steps!
STEP 5:
It’s time to decorate this letter a bit, and there are so many fun possibilities for how you can do this! In our example, we show you just one of many ways you could decorate it.
You can replicate what we have done if you like the look of it, but feel free to fill the outline with any patterns or details you like!
We created a bit of a zigzag pattern by crossing the interior of the letter with slightly curved lines. You’ll also notice that we added a swirling line near the top of the letter.
We think this design looks great, and it will give you a lot of coloring opportunities later on in the guide.
No matter what you chose for this decoration, we can move on to some final details in the next step.
STEP 6:
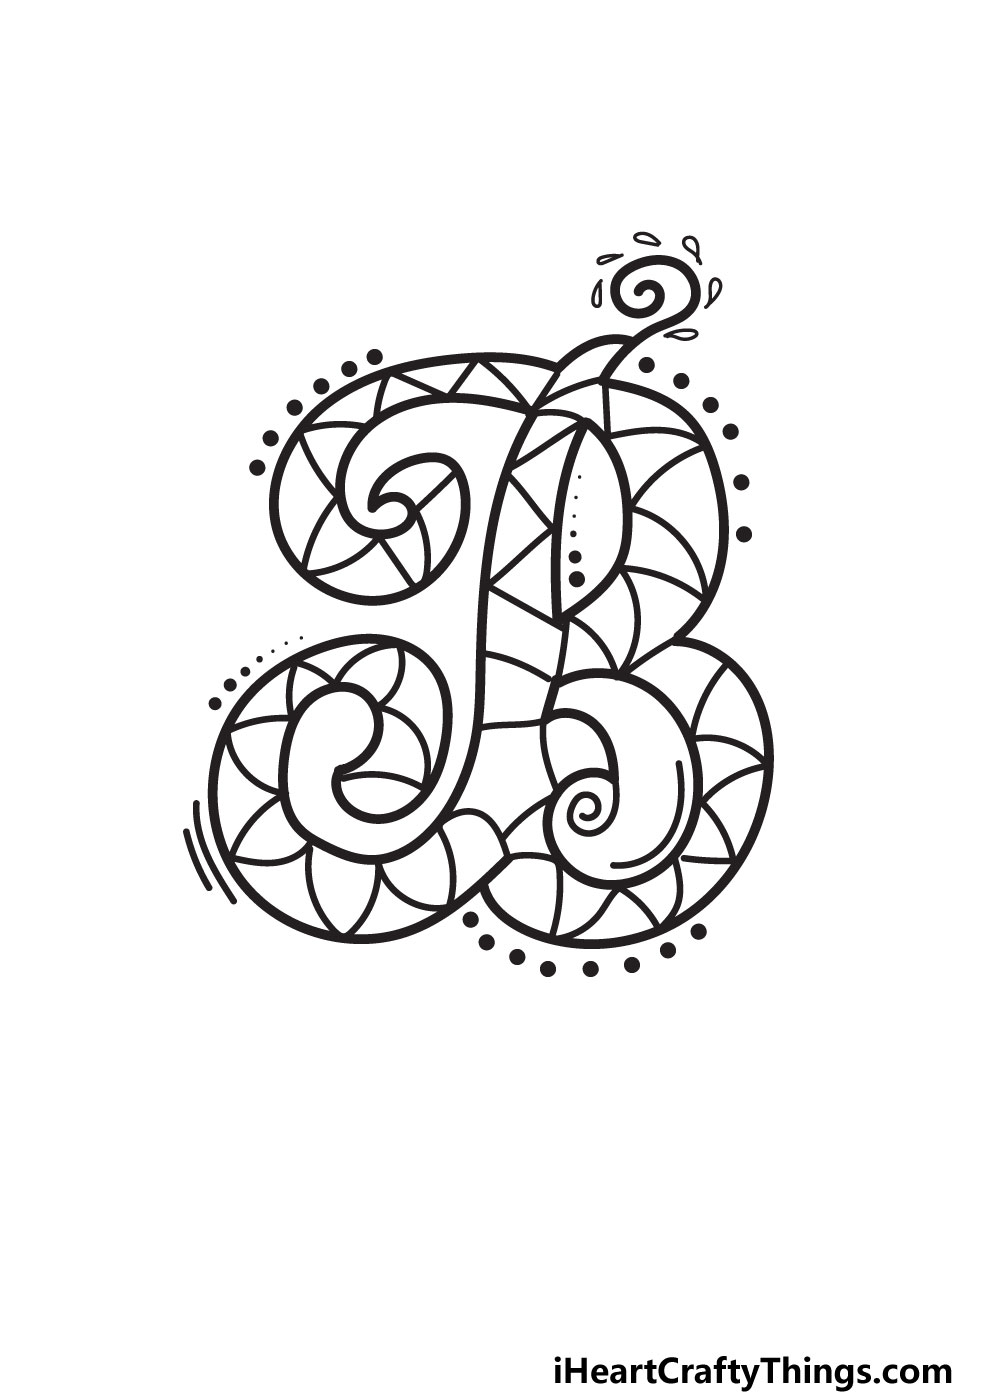
This is the second to last step before we will add some color to your drawing, and it’s another step where you can get creative and put your own spin on it.
For our version of the design, we chose to surround the letter with dots of varying and increasing sizes. It’s a simple addition, but it helps to make it look more dynamic.
We also drew some simple, slightly curved lines near the bottom left side of the drawing. Finally, we added some small leaf-like shapes near the top of the letter.
Again, you can try to add these details to your own drawing, or you could take it in a wholly unique direction. This could include different shapes and line details around the letter.
Or, you may want to draw a detailed background, add other letters or any other ideas you can think of. We will come back to this after the final step and add some more ideas you can try out!
STEP 7:
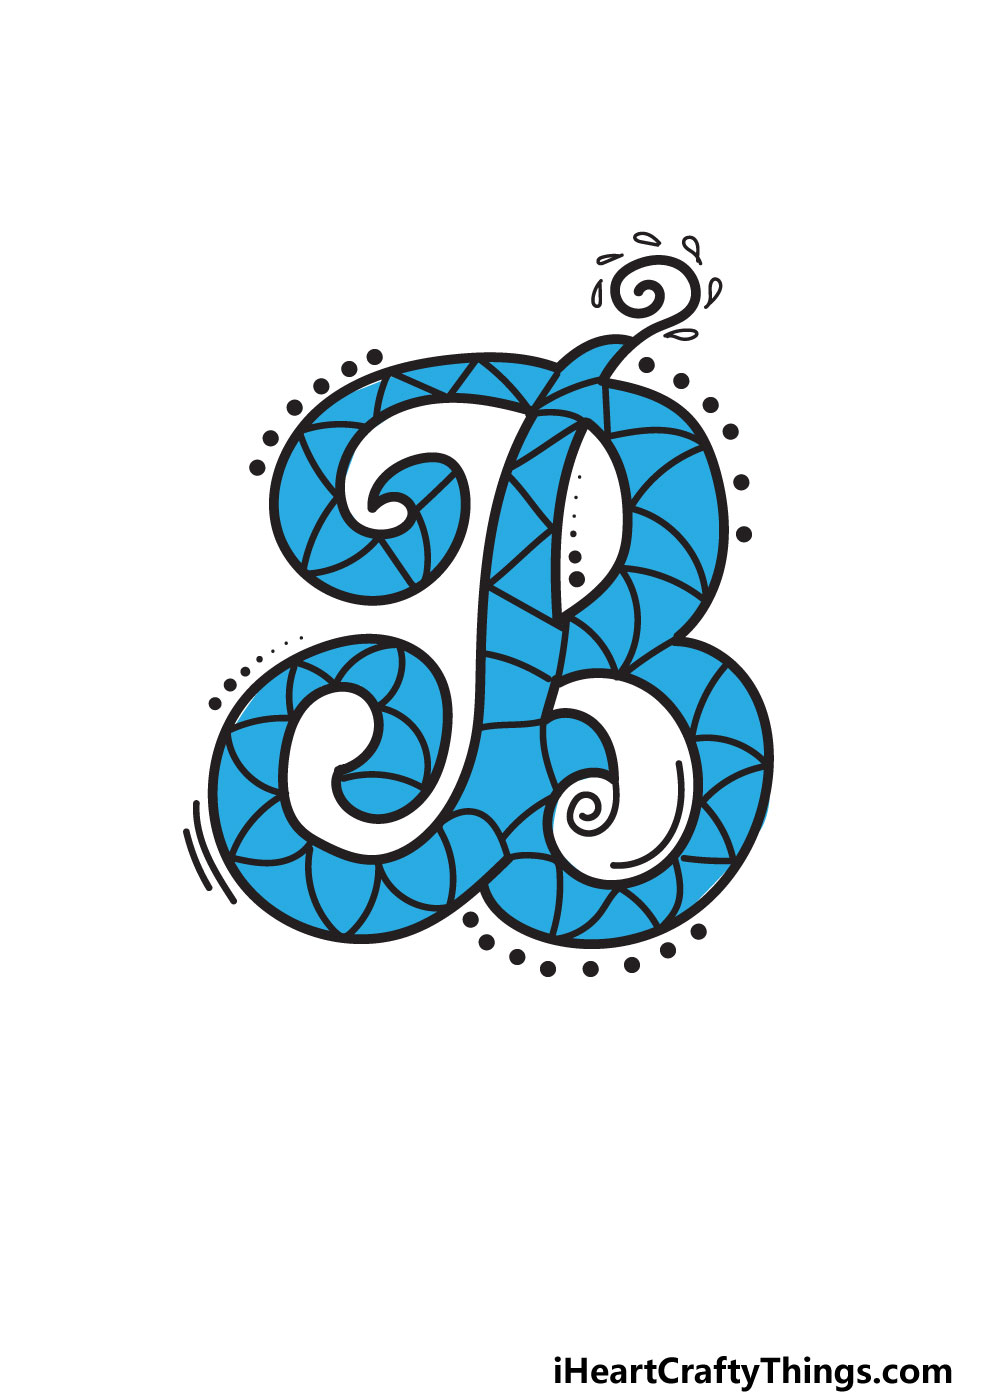
Coloring is a great way to relax and have some calming fun, and that’s especially true when you’ve worked hard on a drawing like this.
So it’s a good thing that’s what this final step is dedicated to! Now you can show off your artistic skills by coloring in your drawing in any way that you like.
In our reference image, we show you just one of the countless ways you can color your drawing.
The letter B is the first letter of the word blue, so it seems appropriate that we chose blue for this letter.
We think this looks great, and if you agree then you can color your one in with similar colors. You should feel free to use any colors you like, though!
You don’t need to stick to just one color, either. You can use different colors for all the sections, alternate different color schemes or play around with various art tools and mediums.
Which colors will you choose to finish off your creation?
My Final Tips To Make Your Fancy Letter B Drawing Even Better!
With this design, we wanted to leave it open enough that you can bring your own personality and ideas to the drawing, and we hope you will do just that!
Now that you have finished the guide, you can do all sorts of fun things with the design. One way to have fun with it is to spell out a name or word in this fancy style.
Many names start with B, so you would have many options, especially if you know someone with that kind of name.
It could also be fun to spell out a fancy word like Bordeaux or something fun like bacon. If you spell out a word, then you could create a themed background that relates to that word.
What will you choose for your drawing?