Easter is one of the most fun and beloved holidays that we celebrate. It’s a time of Easter bunnies, colorful decorations, tasty treats and of course some colorful Easter eggs.
When planning out how you will be decorating your Easter eggs, it can be very helpful to know how to draw an Easter egg.
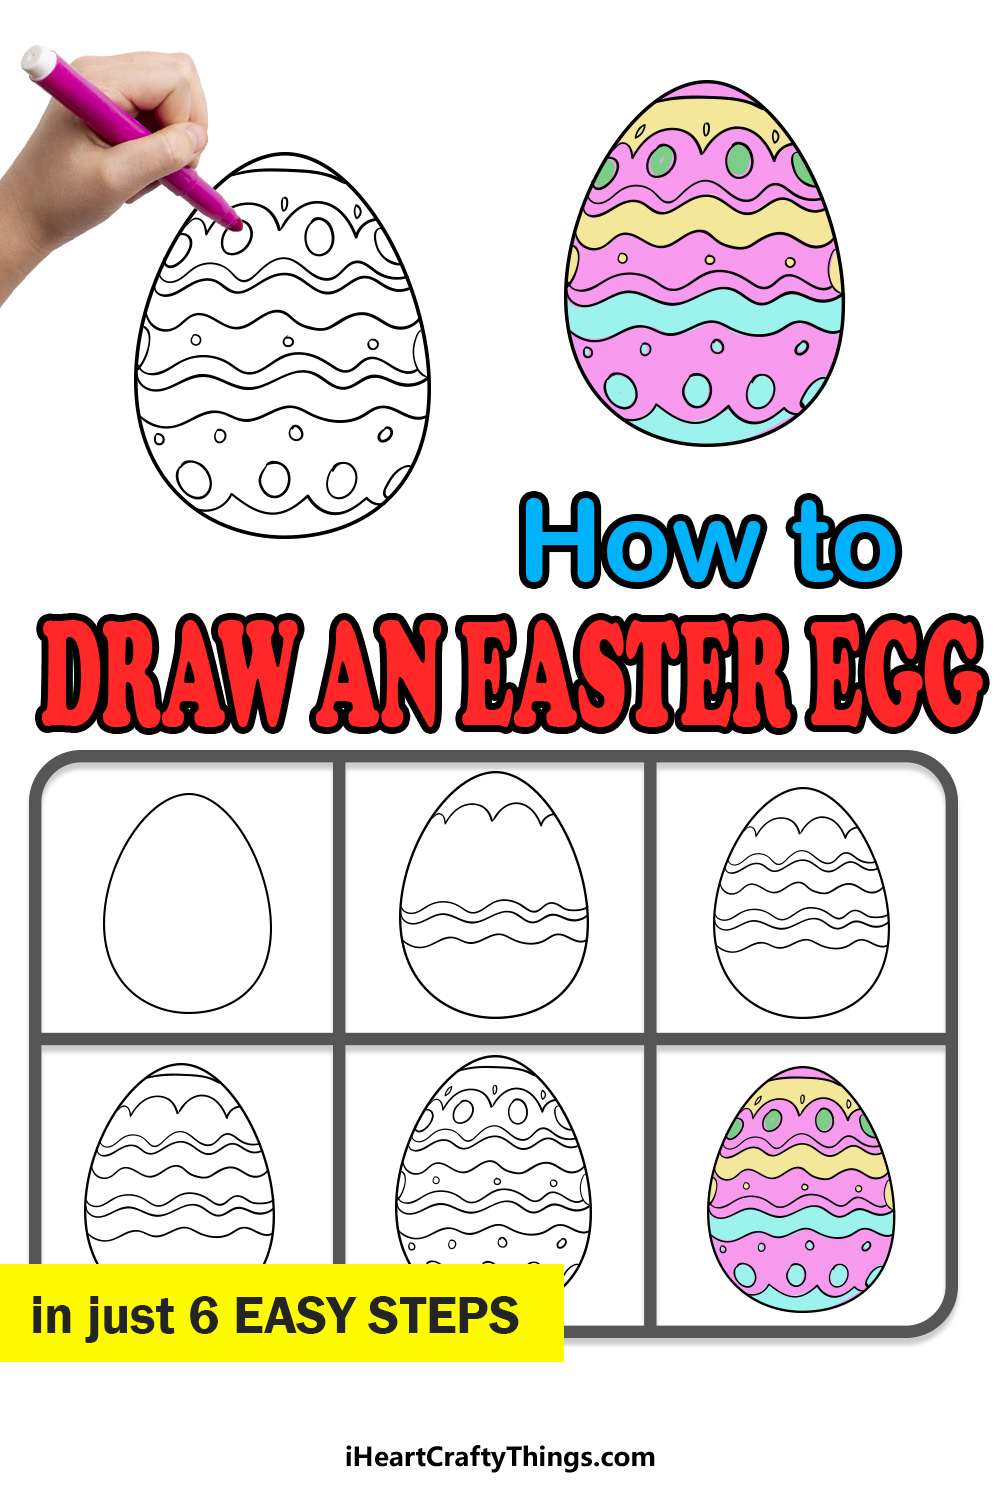
The guide you’re about to go through will show you how you can draw and design your own eggs, so be sure to read on to see how it’s done!
We hope you enjoy this step-by-step guide on how to draw an Easter egg in just 6 easy steps!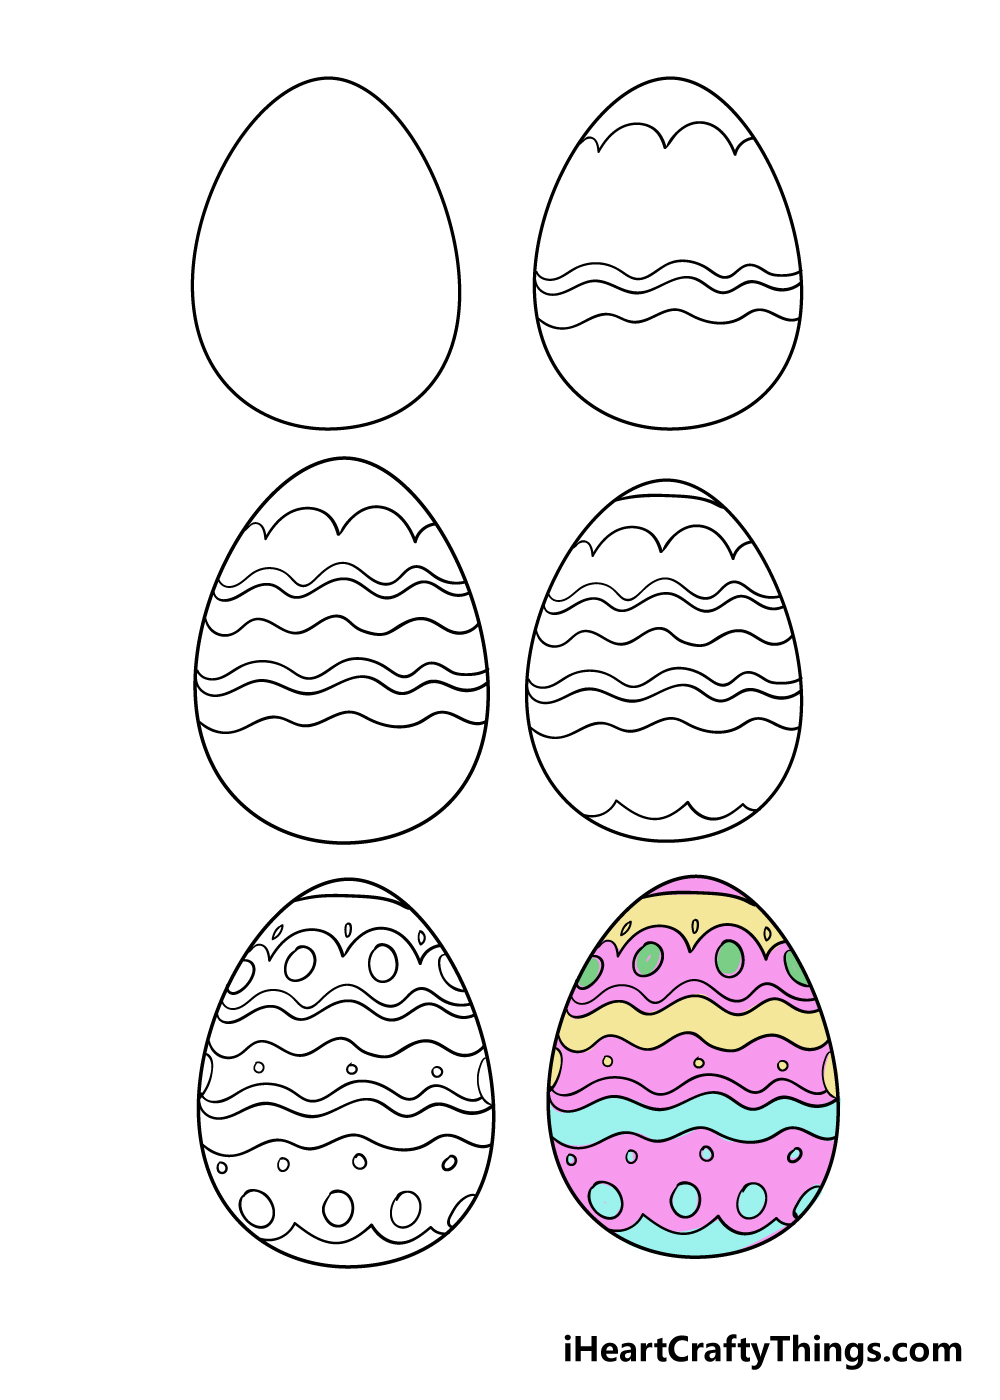
How to Draw An Easter Egg – Let’s get Started!
Step 1
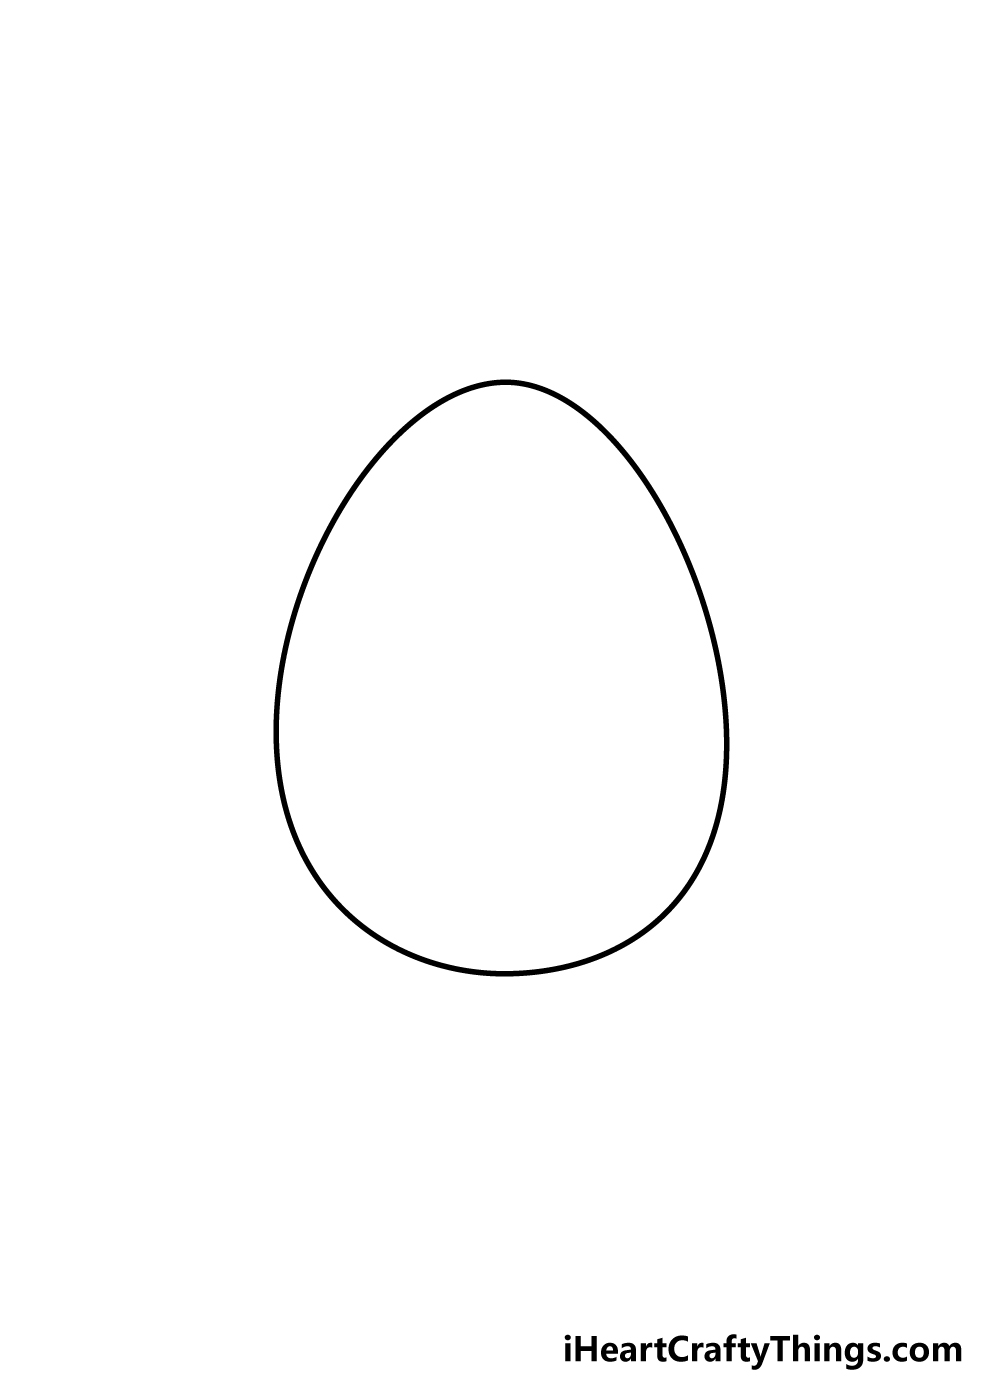
To begin this guide on how to draw an Easter egg, we shall be starting with the egg shape itself.
If you have a steady hand, then you can try to draw the rounded egg as it appears in our reference image.
It can be tricky to draw a perfect oval egg, however, so there are a few options at your disposal that you could try if you’re struggling.
You could print out the first step of this guide and either use it to trace over or even draw the decorations inside of it if you’re really struggling.
However you draw the egg, once you have the shape we can start decorating!
Step 2 – Draw in the first lines of decoration
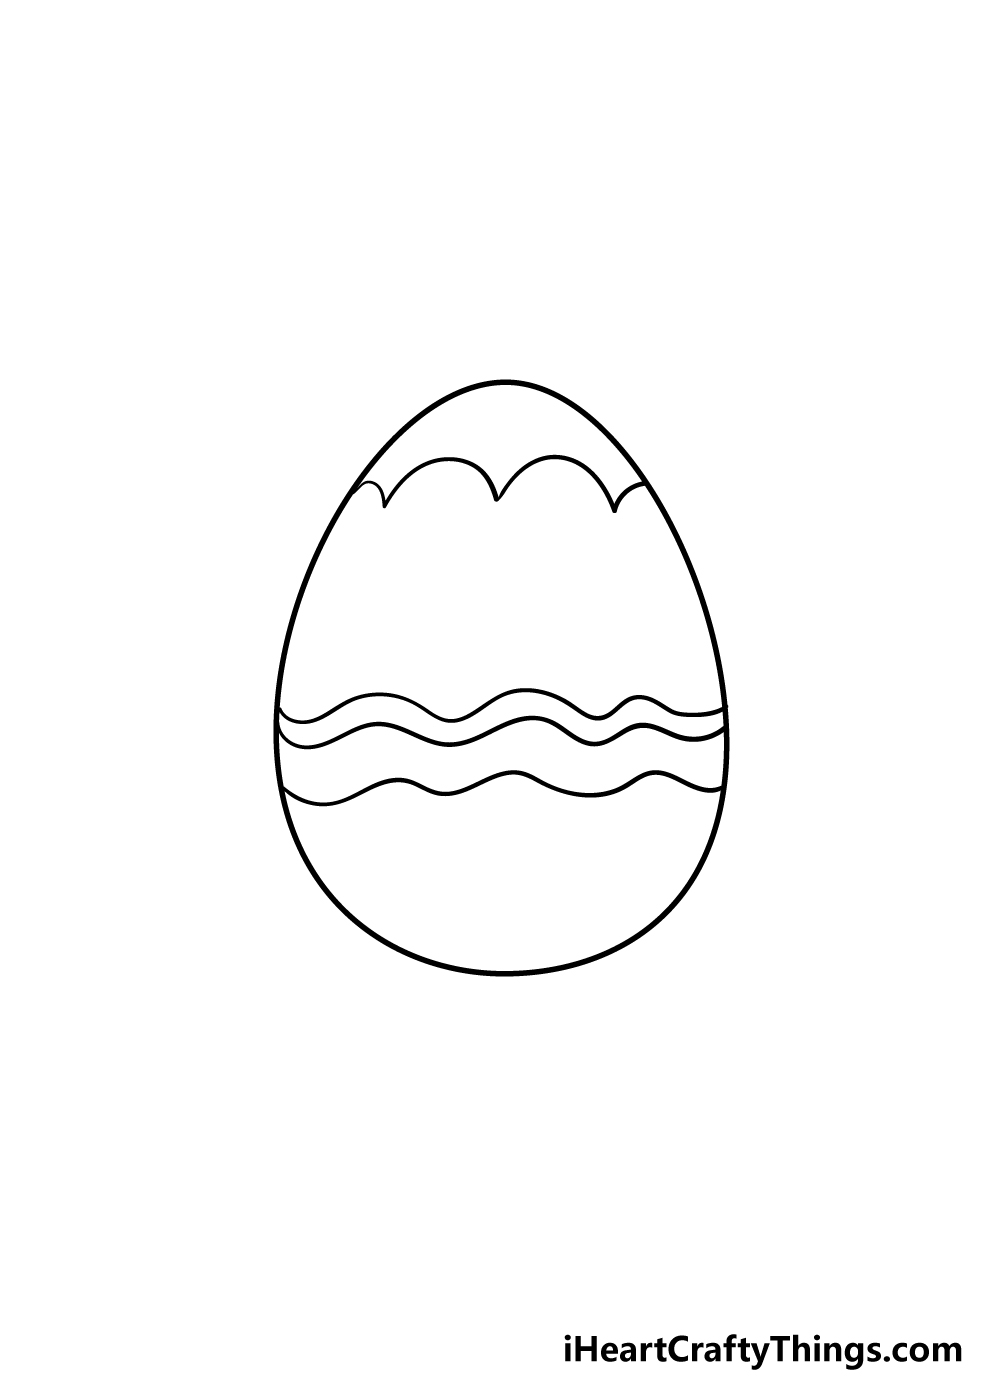
Now that you have the egg outline, it’s time to start decorating! We have a specific guide that we shall be working on in this guide, but once you have the design ideas mastered you could also apply what you learn to your own designs.
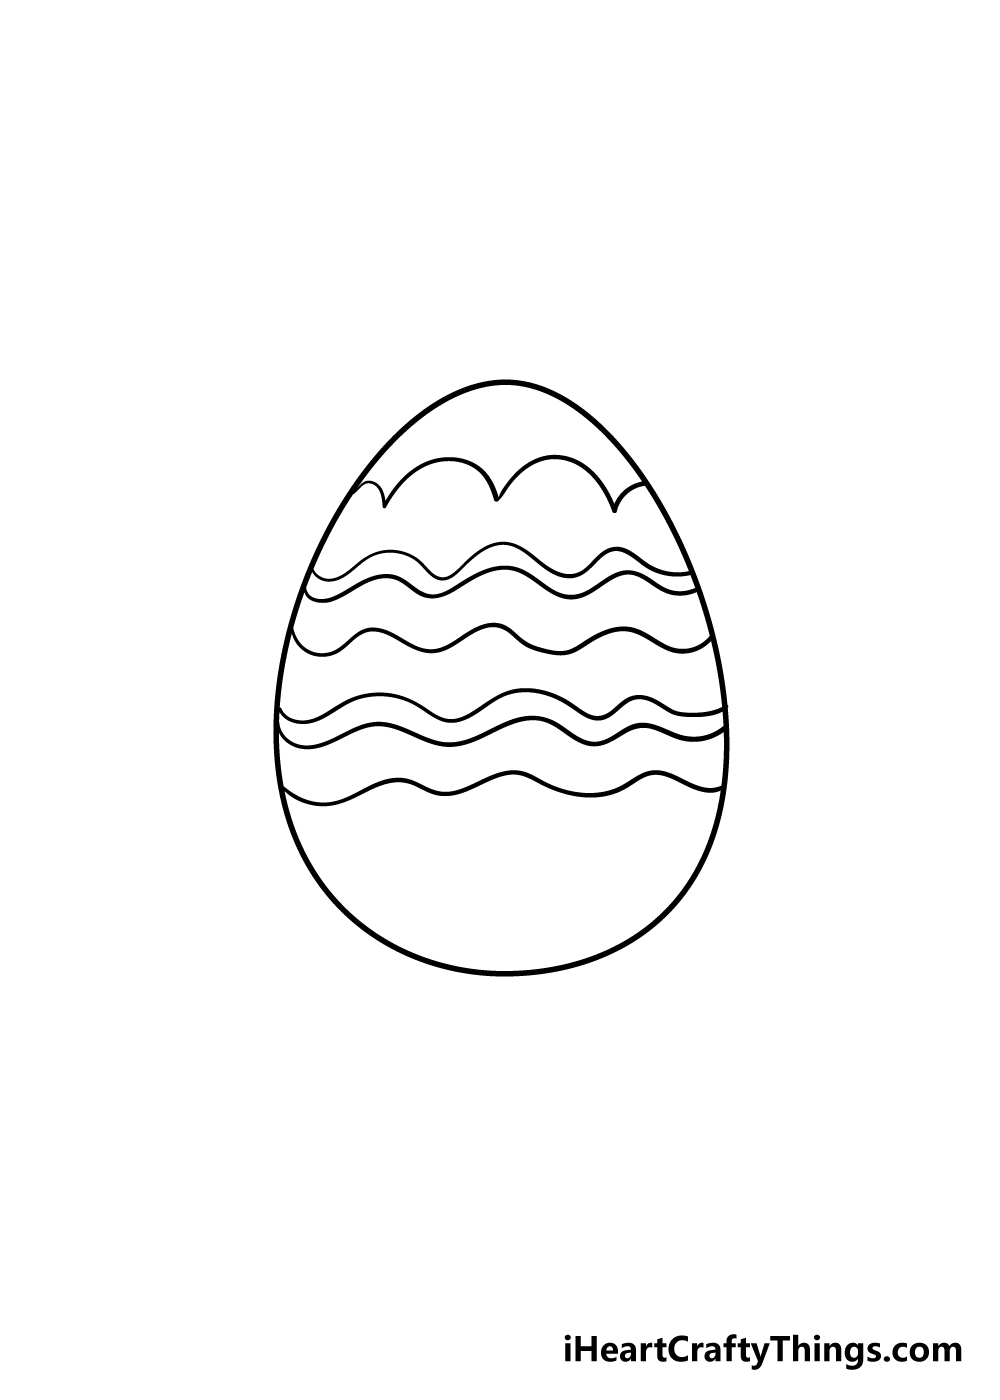
To start, you can start the decoration for your Easter egg drawing near the top where you can use some sharply curved lines for a wavy pattern.
Then, near the midpoint of the egg you can draw three wavy lines across the egg to continue the pattern.
The first two wavy lines will be a bit closer together with the third one being a bit further away from those two lines
Step 3 – Now, we shall add in more line details
In this part of this guide on how to draw an Easter egg, we shall be replicating the line details in the last step again.
These three lines will go above the previous ones, however. Much like you did for the previous step, the first two lines will be a bit closer together, whereas the third one will be a little further away.
Once you have it looking like our reference image, you’re ready for step 4!
Step 4 – Add in some more of the egg
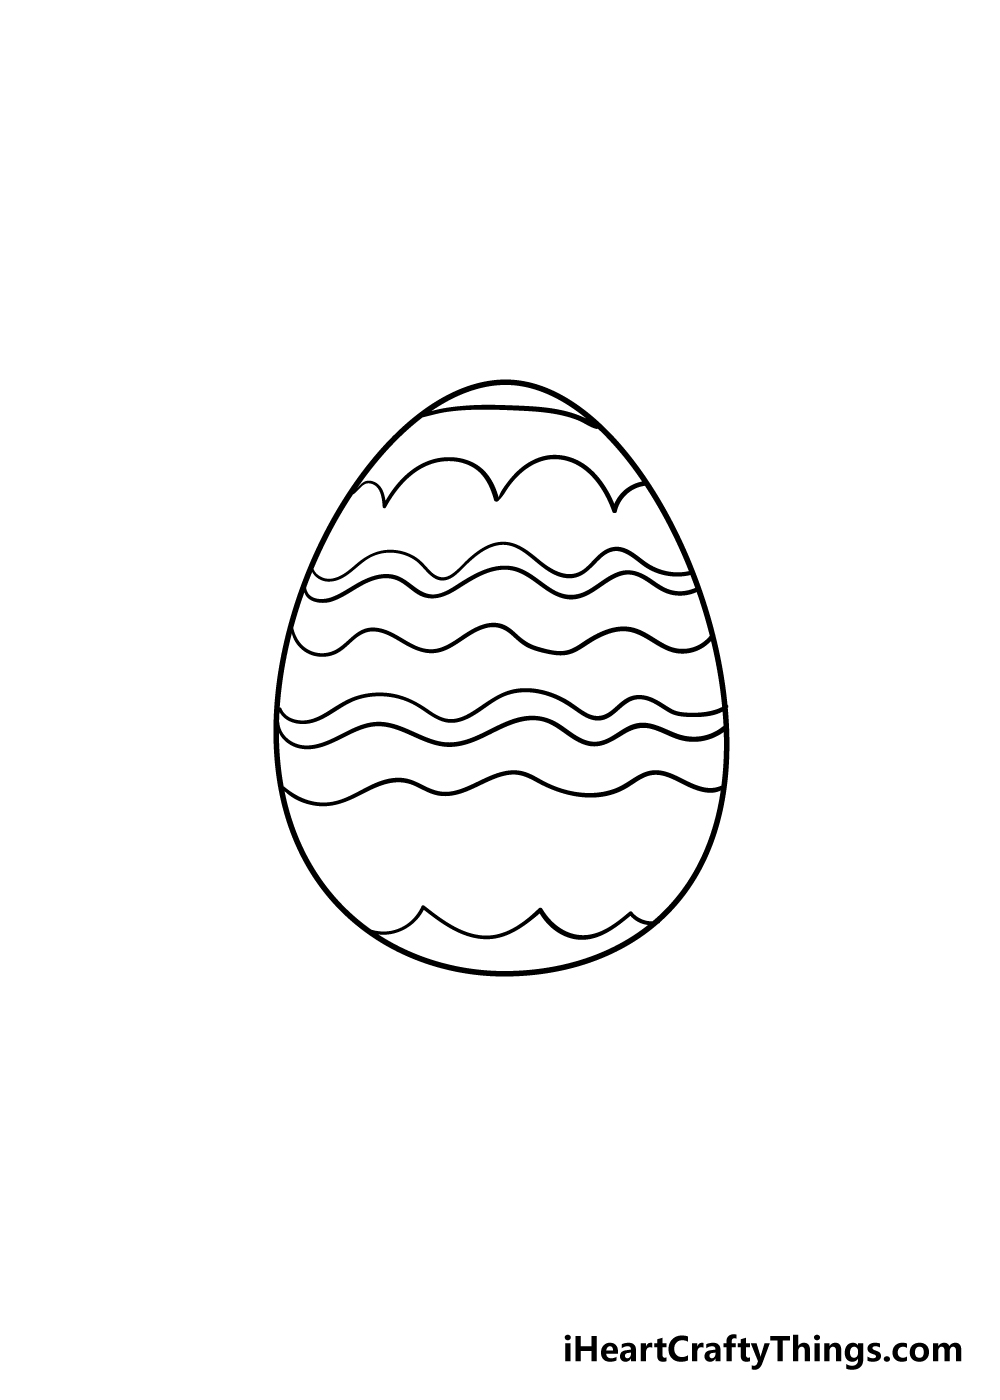
This fourth part of your Easter egg drawing will be a nice and simple one. For this step, all you need is to draw a curved line near the top of the egg.
Then, you can add another wavy line near the very bottom of the egg.
You can add any extra line details that you would like before moving on to the more circular final details in the next step!
Step 5 – Now, you can finish off with some final details for your Easter egg
Before we move on to the final step of this guide on how to draw an Easter egg, we shall add some final details into the mix.
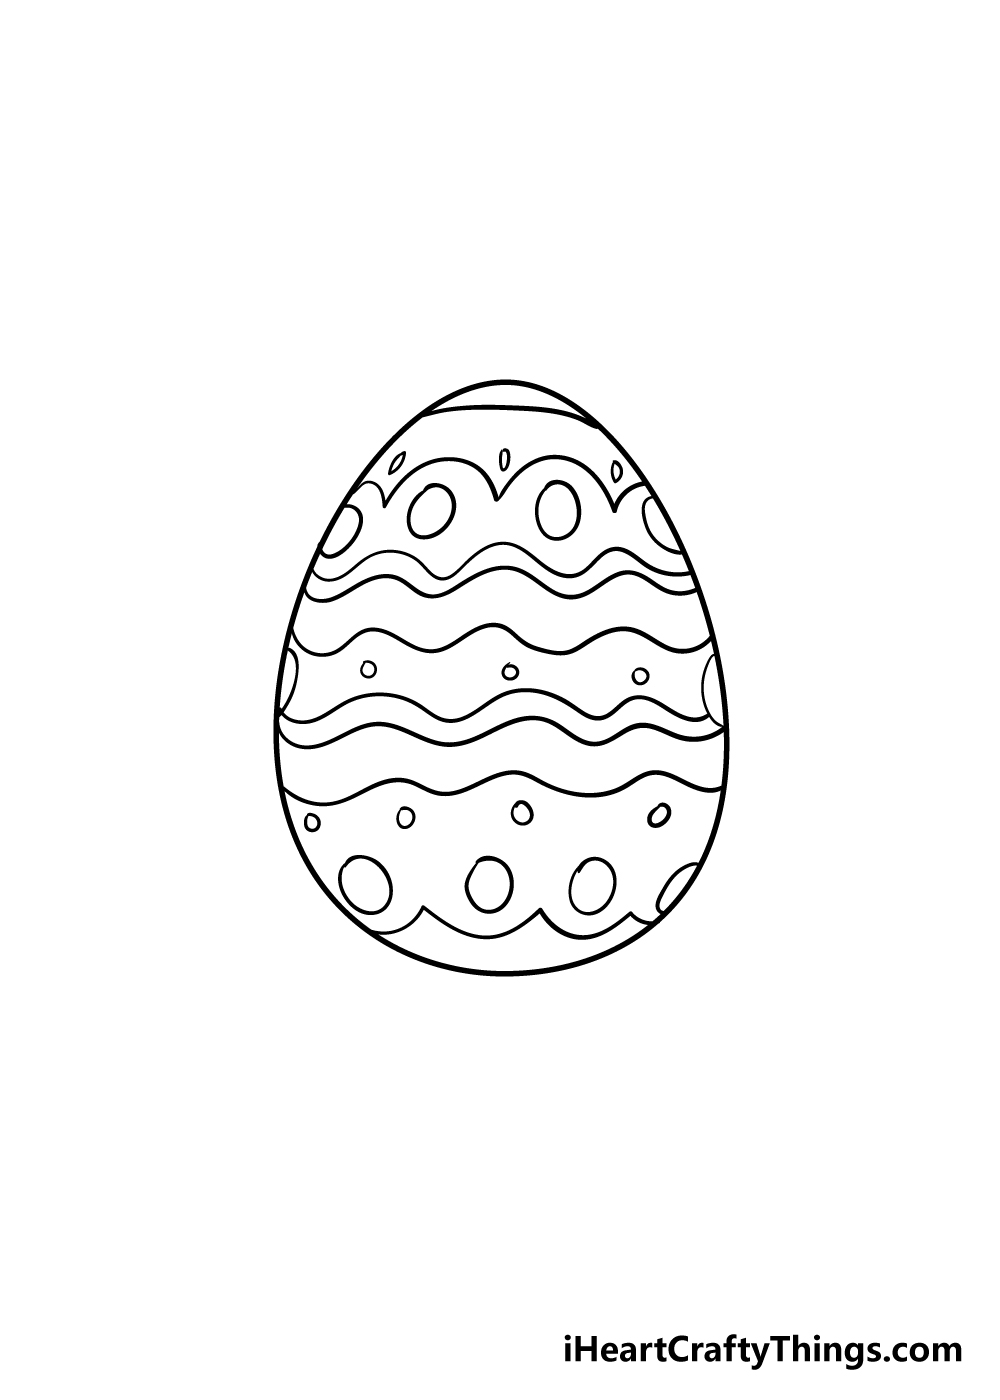
The previous details that we have added have all been line details, and in this one we shall be adding some circular details.
You can add some small to medium circles in pretty much any area that has a large gap between lines.
As you can see in the reference image, some of these circles will be very small, while some will be quite a bit larger.
These are the details that we added, but before you move on you should feel free to add any extra details that you would like as well!
These could be more lines, more shapes or even some small pictures. How will you put your own spin on this Easter egg drawing?
Step 6 – Finish off your Easter egg drawing with some color
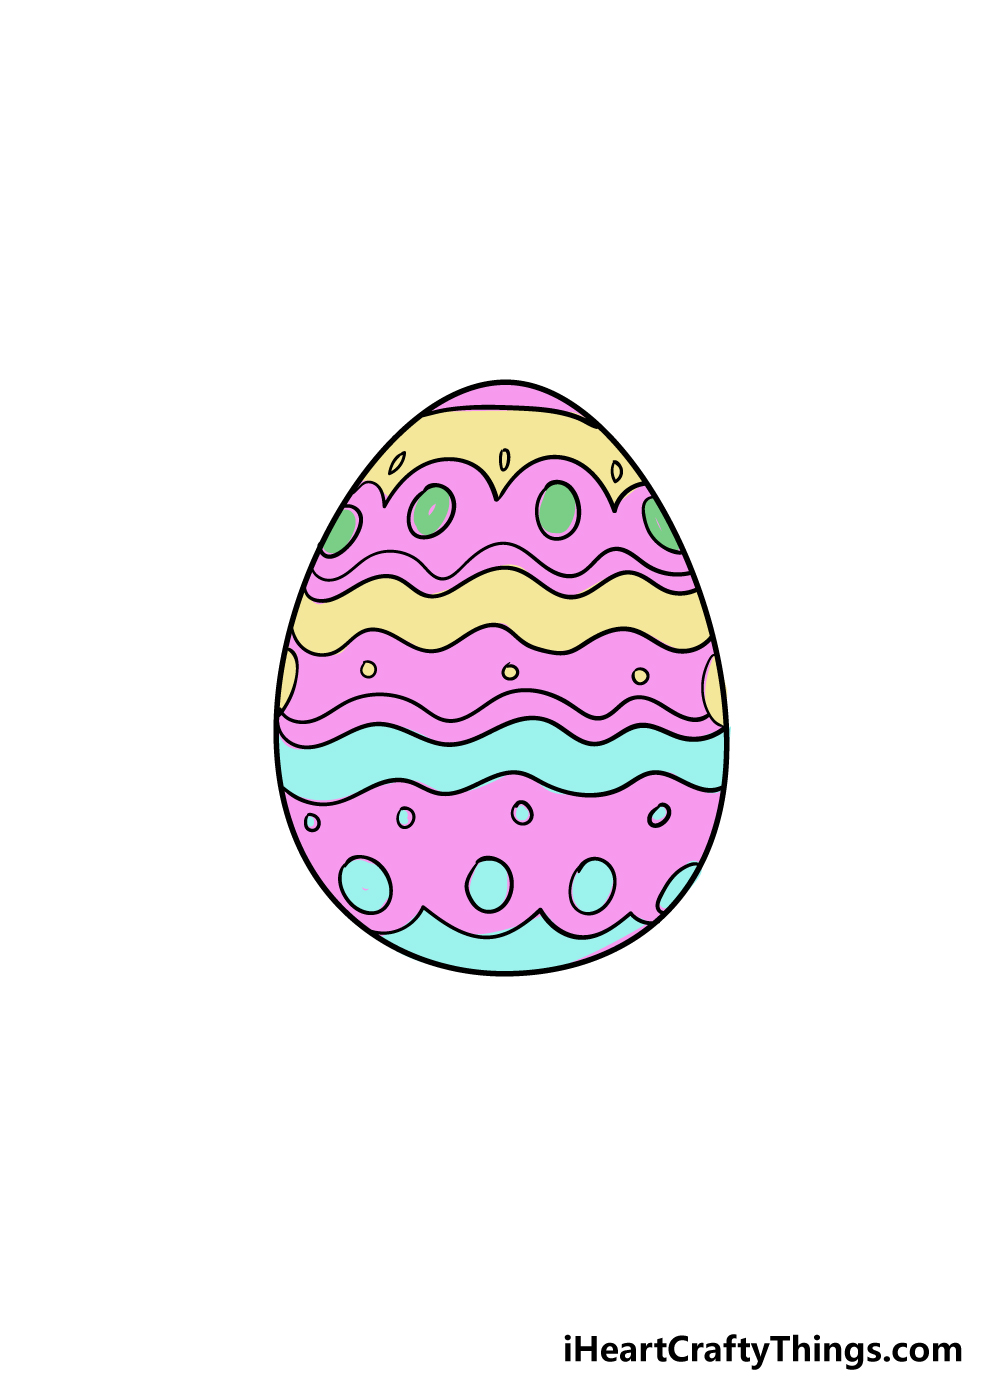
Now that you have drawn and decorated your Easter egg drawing, you can finish it off with the most fun of all the steps!
Much as you would paint an Easter egg in real life you can color in your drawing! We used a blue, yellow and purple color scheme for our example, but this is a step where you can really unleash your creativity.
You should feel free to use any colors that you love for your own Easter egg, and seeing as Easter eggs can come in all manner of colors there are no wrong ways to color in this picture.
Once you have decided on the color scheme for your Easter egg, the only thing left to decide is which art mediums you will use to bring it to life.
If I were coloring this image in, I would use some lovely bright acrylic paints to replicate the feeling of painting a real Easter egg.
Any mediums you use will look great, though!
Do this to take your Easter egg drawing to the next level
Make this Easter egg sketch one to remember with these handy tips and suggestions!
It’s so much fun to decorate Easter eggs in different ways in the lead-up to the holiday. We showed you one way of decorating this Easter egg drawing, but now you can show us how you would like to do it!
Easter eggs can be decorated in any way you can imagine, so you can really let your imagination run wild. These decorations could include patterns, shapes, pictures or even text!
You may want to stick to a certain theme or let your creativity take over and see what happens.
You’re unlikely to see just one Easter egg around the holiday, so adding more eggs to this drawing of an Easter egg could be a great idea!
Adding more Easter eggs would not only make the image look fuller, but would also allow you to try out different designs. If you follow the steps again and change the angles and decorations, you will have some unique eggs to make a great bunch.
The Easter egg is one of many different symbols of the holiday, but there are others that you could add to this Easter egg sketch. One obvious example would be to add a cute Easter bunny!
You could also maybe add an easter chick or two to make it even cuter. These are just a few examples of more Easter cheer, but what else do you think would suit this Easter artwork?
When it comes to coloring your Easter egg drawing, you may feel limited to more traditional mediums. Colored pens, markers and paints are all great to use, but why stop there?
You could also use crafts like glitter and beads to make the patterns and shapes really pop. Even if you think a certain craft or art tool wouldn’t work, it can be fun to try it anyway.
You never know what kinds of discoveries you can make if you experiment! What crafts and art tools will you try?
Your Easter Egg Drawing is Complete!
We really hope that you had a great time getting into the Easter spirit with this step-by-step guide on how to draw an Easter egg!
Now that you have mastered how to do this design, you can get ready for some Easter fun no matter the time of year!
This design that you just drew alongside us is just one of an infinite amount that you could design, so now you get to take over.
Taking what you learned in this guide, you could design some of your own incredible Easter eggs.
When you have come up with some designs, you could also experiment with different art mediums and styles for some incredible looks. Be sure to get creative with it and see what happens!
We have lots of incredible step-by-step drawing guides like this one on our website just waiting for you to enjoy!
Be sure to check in often to catch the many guides we will be releasing soon.
Once you have finished drawing and designing your Easter egg drawing, we would love to see it! Please be sure to share it on our Facebook and Pinterest pages for us to admire!