It’s easier than ever to learn how to draw an ear thanks to this guide for kids! Learn how to draw this complicated organ in just a few steps.
We all have ears and see them every day. Considering they’re such a present part of our lives, you may assume they would be easy to draw, but the opposite is true!
Due to their complex design, making a convincing ear drawing is difficult even for experienced artists. At least, that’s the case when you don’t have the right steps to follow!
I have broken down this drawing into its simplest elements that you can follow one step at a time in order to get the hang of it. Then, you can impress everyone with your drawing skills!
You can even take it further by adding some ear rings or perhaps even the rest of the face that this ear is a part of.

Watch This Guide To Easily Create An Ear Drawing
How to Draw An Ear – Let’s get Started!
Step 1
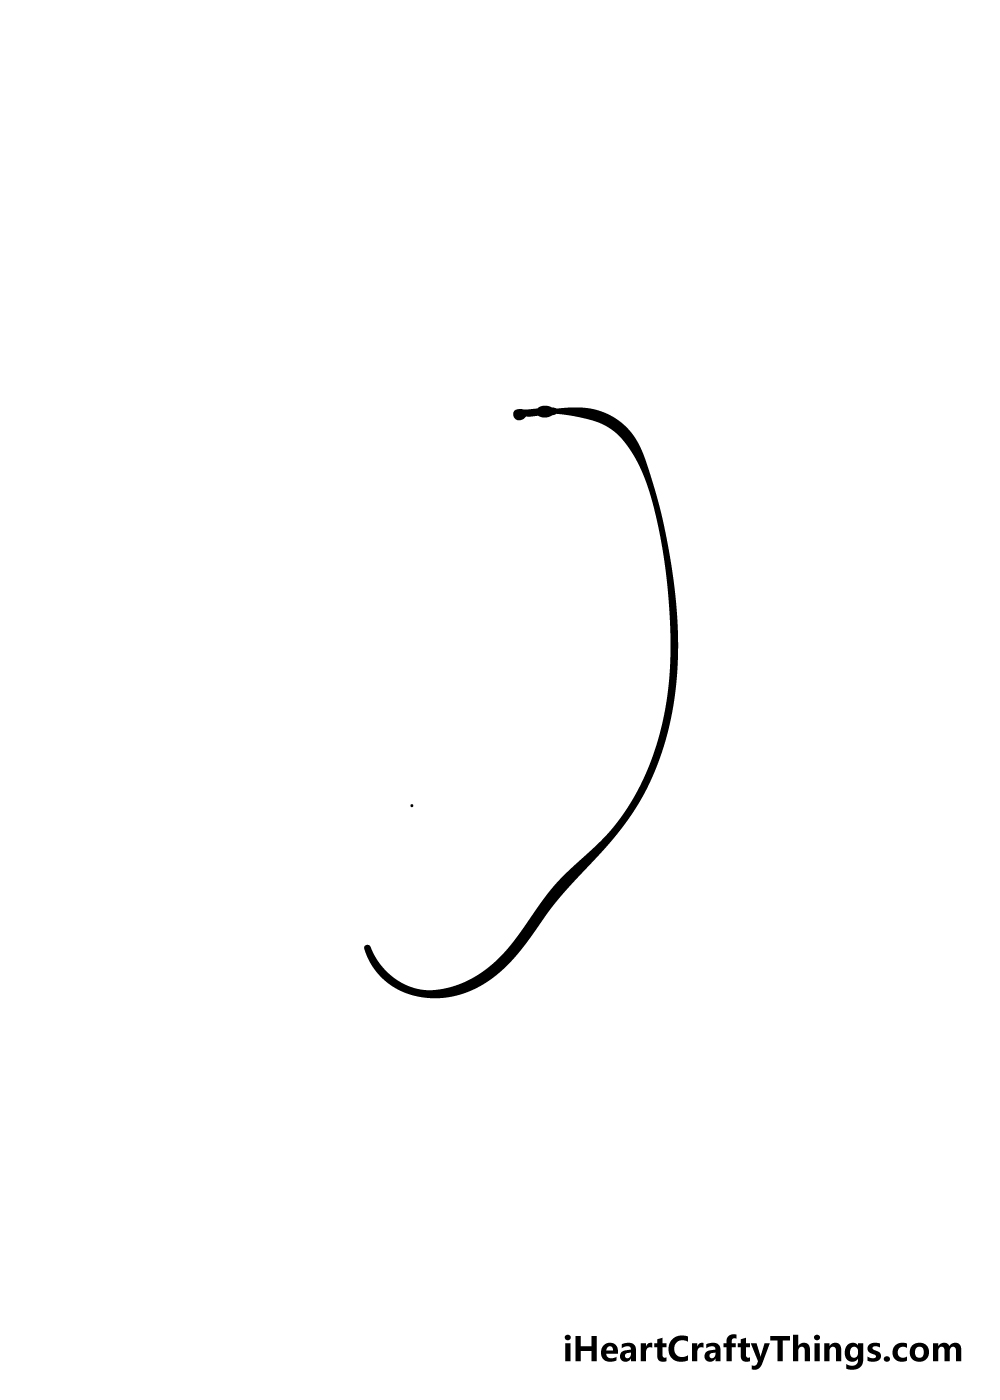
For the first step in this guide on how to draw an ear, we will start fairly simple. Using the reference picture as a guide, we shall start by drawing a curvy vertical line.
This will form the outer edge of the ear, and once you have it drawn we can move on to the next part!
Step 2 – Add more to the edge of the ear
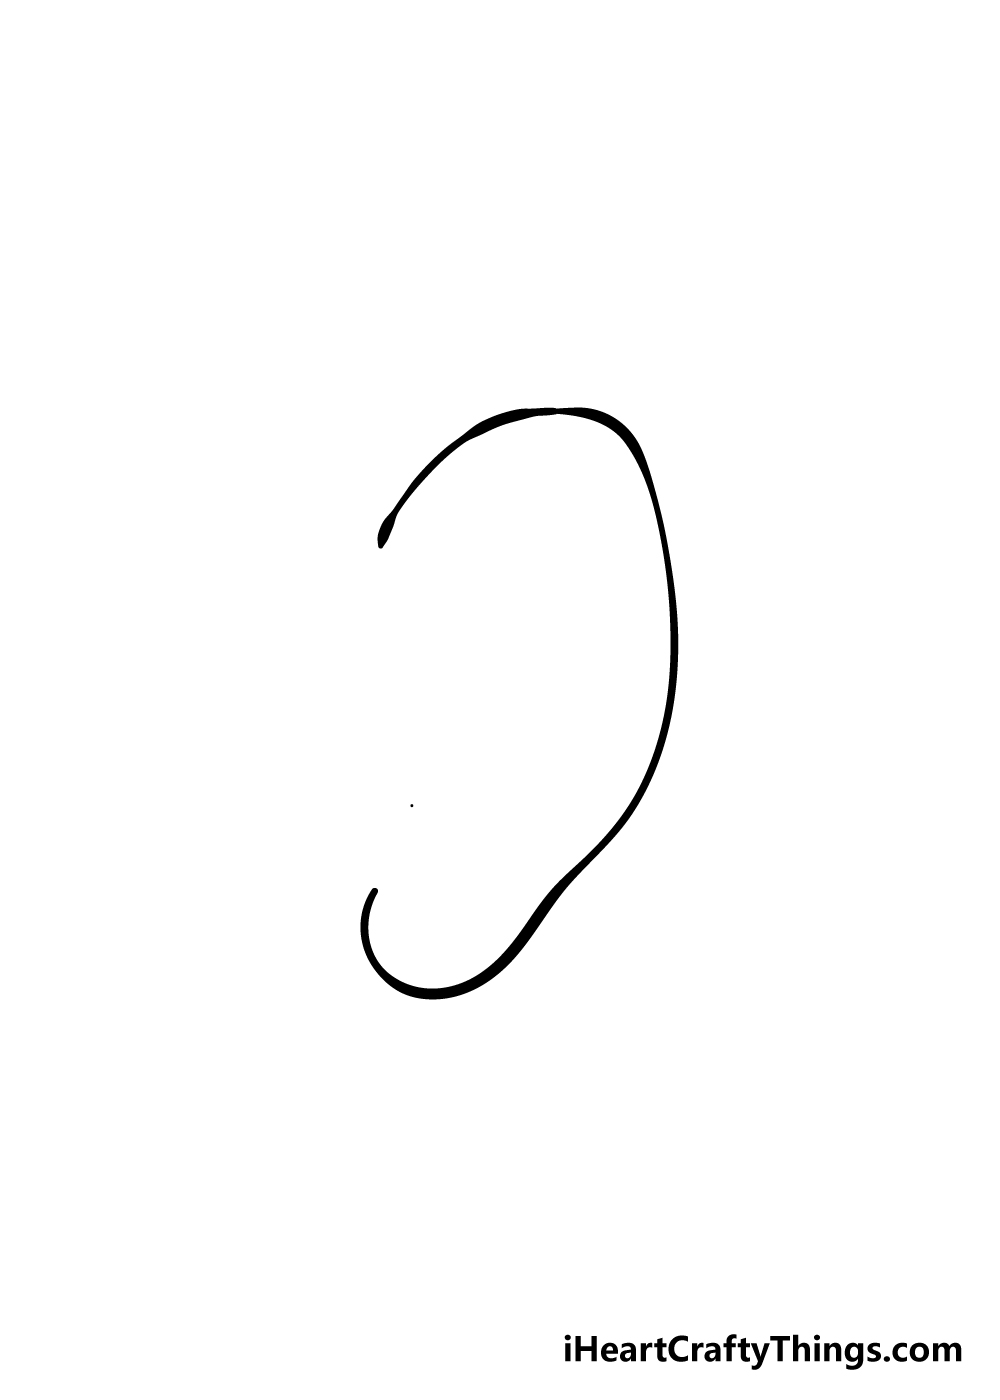
Now that you have the outer edge of your ear drawing, you can extend it a bit more in this next step.
All you need to do for this step is extend the lined so that they curve more inward to the inner ear. The reference image will give you a great idea of the length this should be.
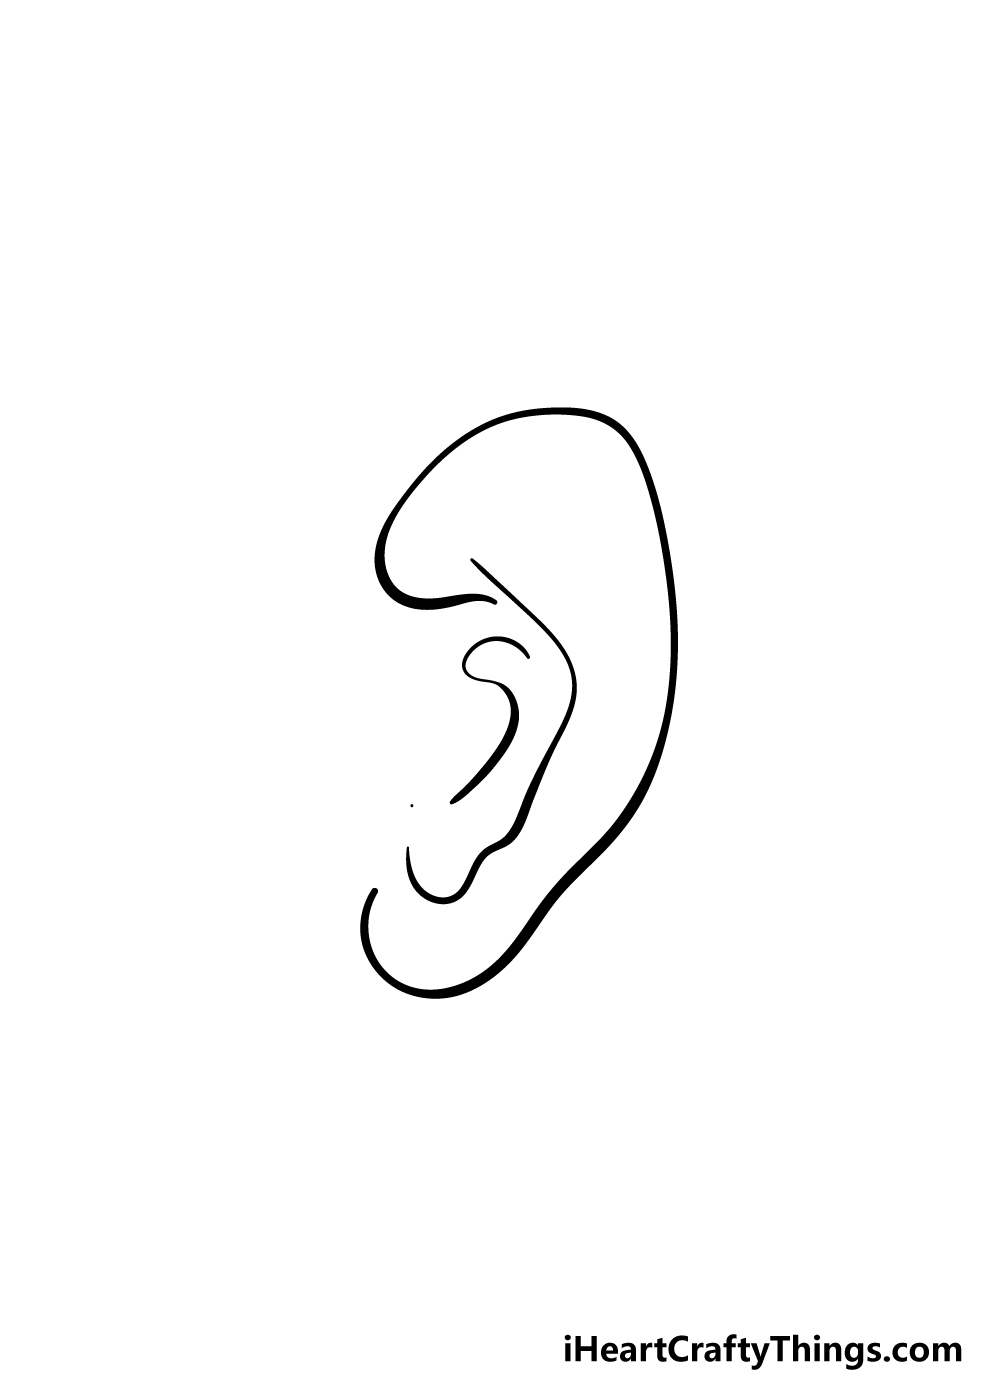
Step 3 – Start to draw in the inner part of the ear
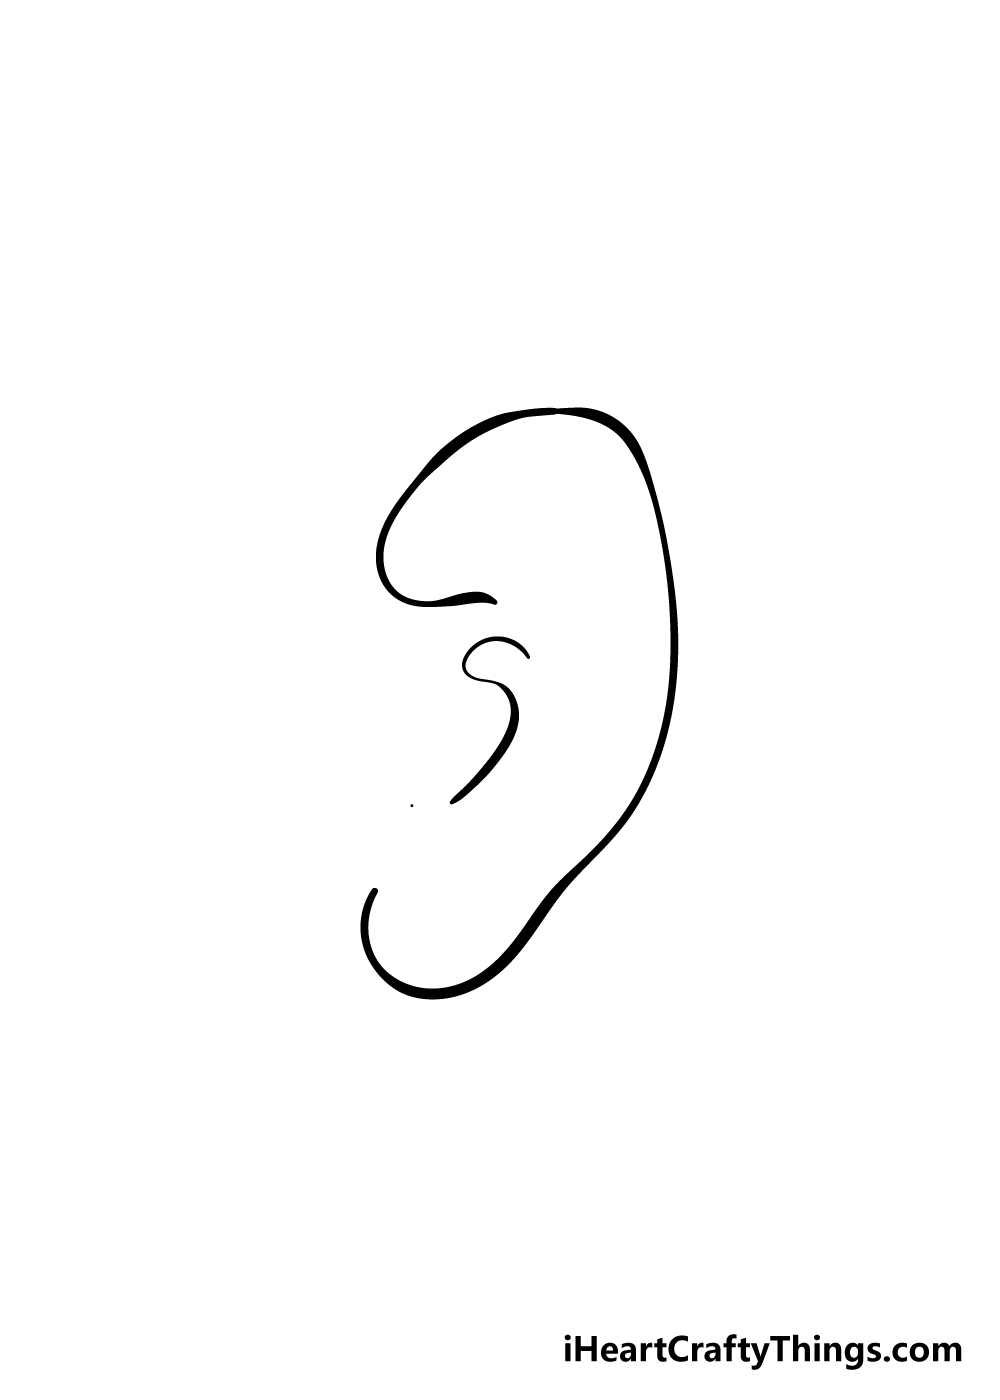
In step 3 of this guide on how to draw an ear, we will start to move away from the outer ear and begin with the inner part of the ear.
The inner ear is the most intricate part of the drawing, so we will focus on how to make it easier to draw in the next few steps.
To start with, simply extend the line coming from the top curve of the ear even more towards the center. Then, you can add a very curvy line near to the center of the ear as it appears in the picture.
Step 4 – Now you can add in more of the inner ear
To draw in more of the inner ear, for this step of your ear drawing you should simply add in another curved line near the center.
This line will start near the bottom loop of the ear and then extend up toward the top loop.
It’s got a few little curves and twists to it, so don’t be afraid to closely refer to the reference picture for help as you draw it!
Step 5 – Draw in some more lines for the inner ear
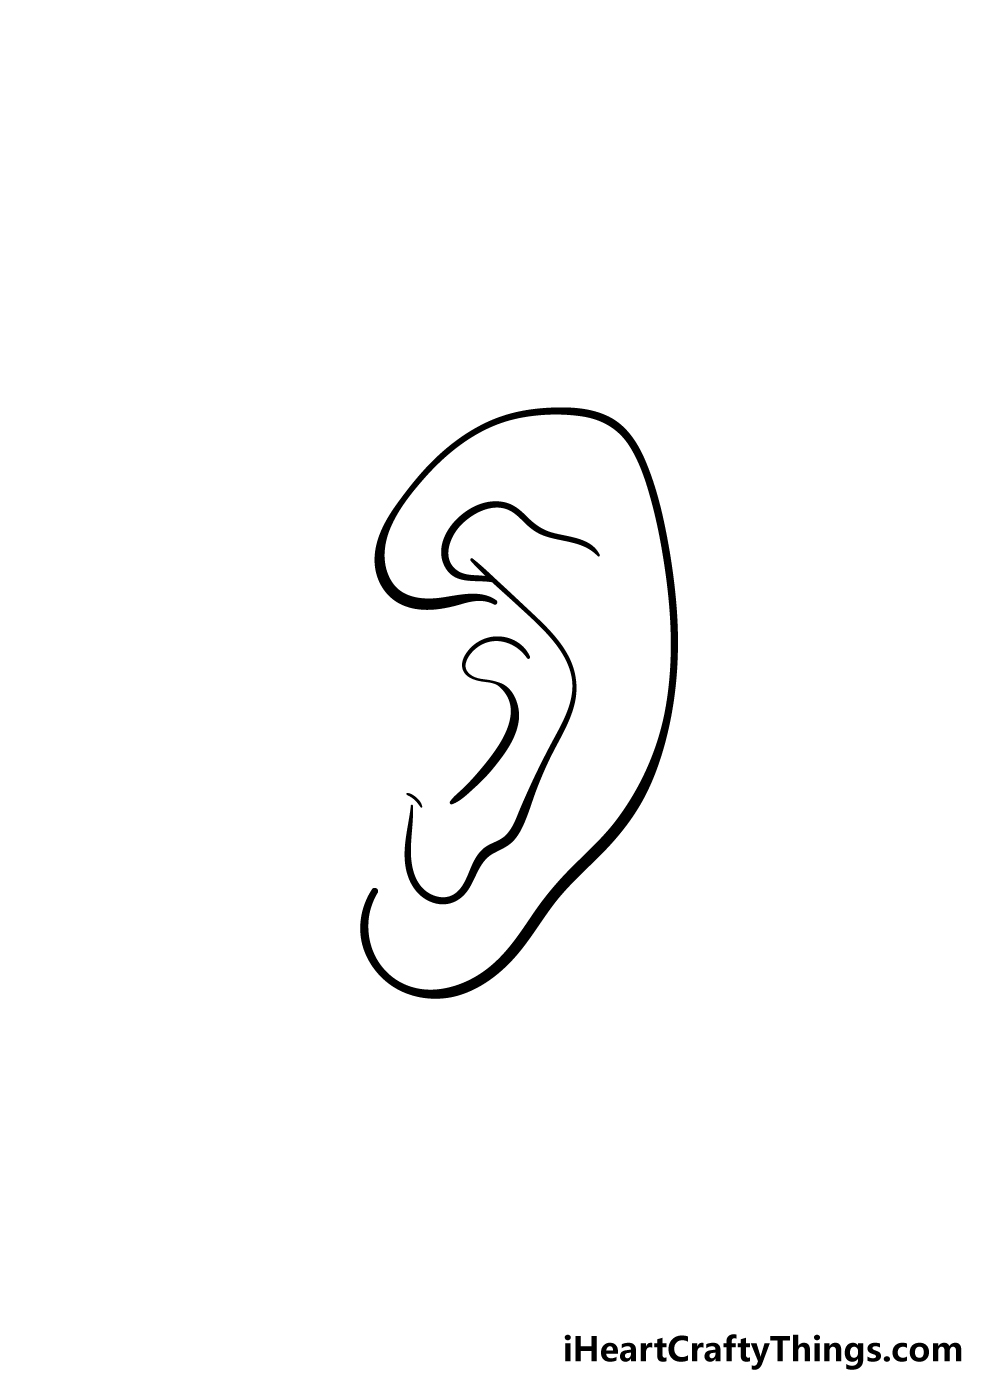
Your ear drawing is starting to really take shape now!
For this step, simply draw in a sharply curved line from the top of the line that you drew in the previous step and extending slightly to the far end of the ear rim.
Step 6 – Finish off the final details of your ear
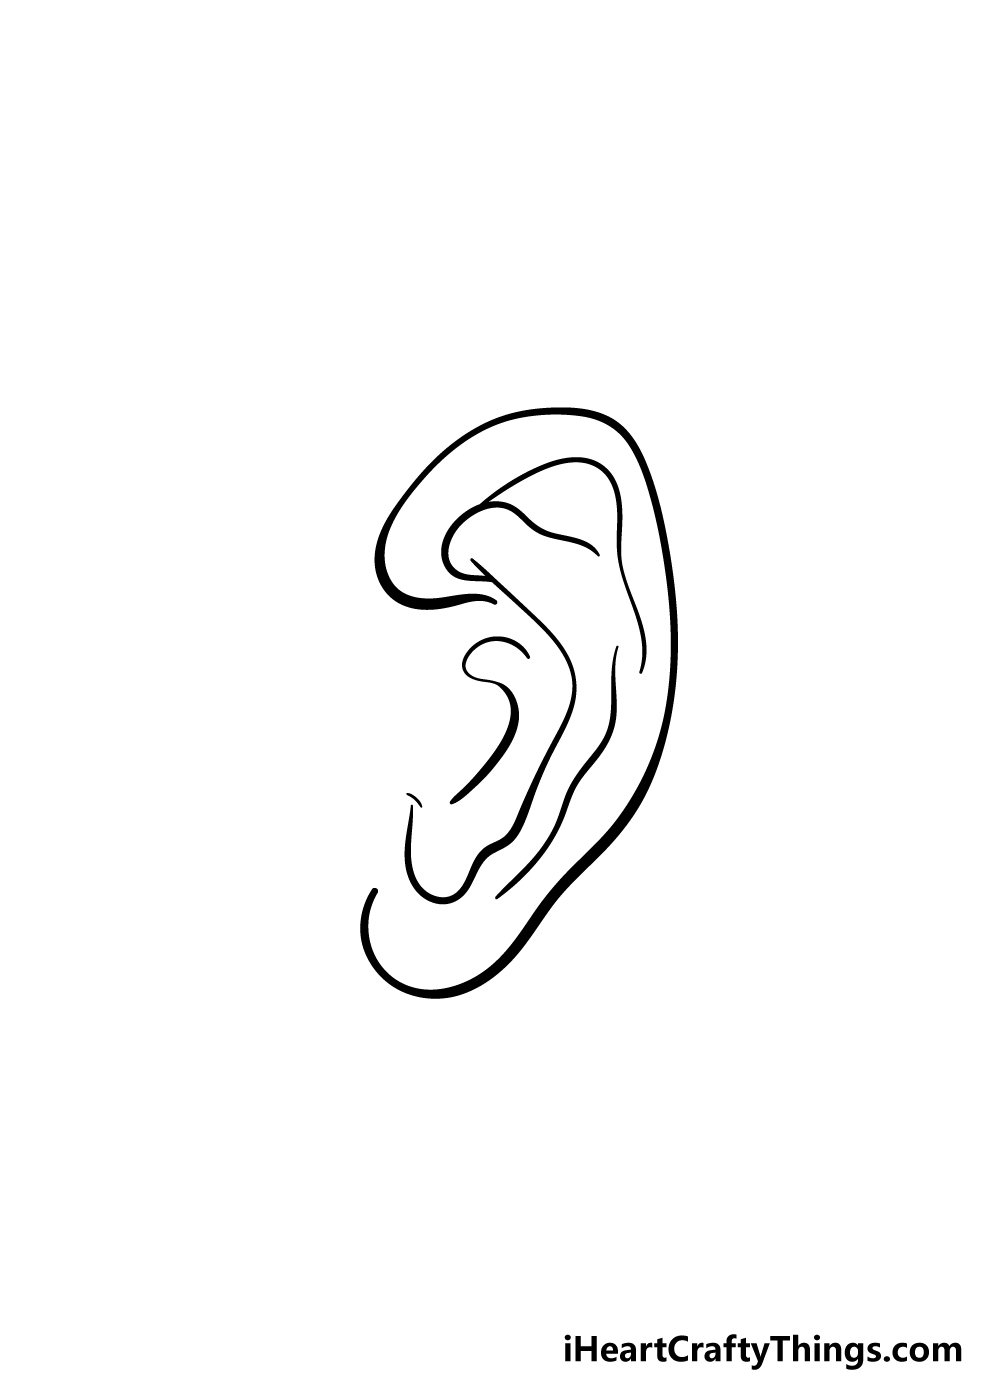
With this 9th step of our guide on how to draw an ear, you’re very nearly finished! As you can see from your drawing, the many lines we’ve been adding are suddenly starting to look like an ear.
We just need two more lines to finish off your drawing, so let’s go ahead and add those in now.
For the first line, simply start a line from the top curved one you drew in the previous step and bring it down towards the bottom of the ear.
Lastly, add in one more slightly curved line going up the inner edge of the ear as it appears in the picture.
With these lines added, your ear drawing has only one more step until it’s finished!
Bonus: Make This Drawing Easier With These Tips
We’re almost at the end of this guide on how to draw an ear where we will add some color to finish it off. Even though we laid out the process of creating this drawing in the guide, we know this could be a really tough drawing for some people.
If you found yourself having a hard time with this drawing, then there are a few ways that you can make it easier on yourself. One way would be to use some real ears along with this guide.
How you go about this could be done in a number of ways. You could use a real ear of someone you know, for example.
They could pose for you and let you see how their ear compares to the reference images. It could make any aspects of the design that you struggled with easier to draw.
It would also allow you to customize and tweak the drawing a bit if you wanted to. If you don’t have anyone willing to pose their ear for your drawing, you could even use your own!
This could be done with a mirror, or you could take a picture with your phone and use that. If all else fails, you can find some pictures online to use as a reference.
When you have your references, we would recommend doing the drawing with a pencil before you draw the final lines. Performing rough sketches and attempts can also help you to get the hang of it.
As long as you take your time and try your best, you will be able to do it! You could also change the style of the drawing to something simpler that you would find easier.
Hopefully, these tips will help to make this ear drawing a bit easier for you.
Step 7 – Finish off your ear drawing with some color
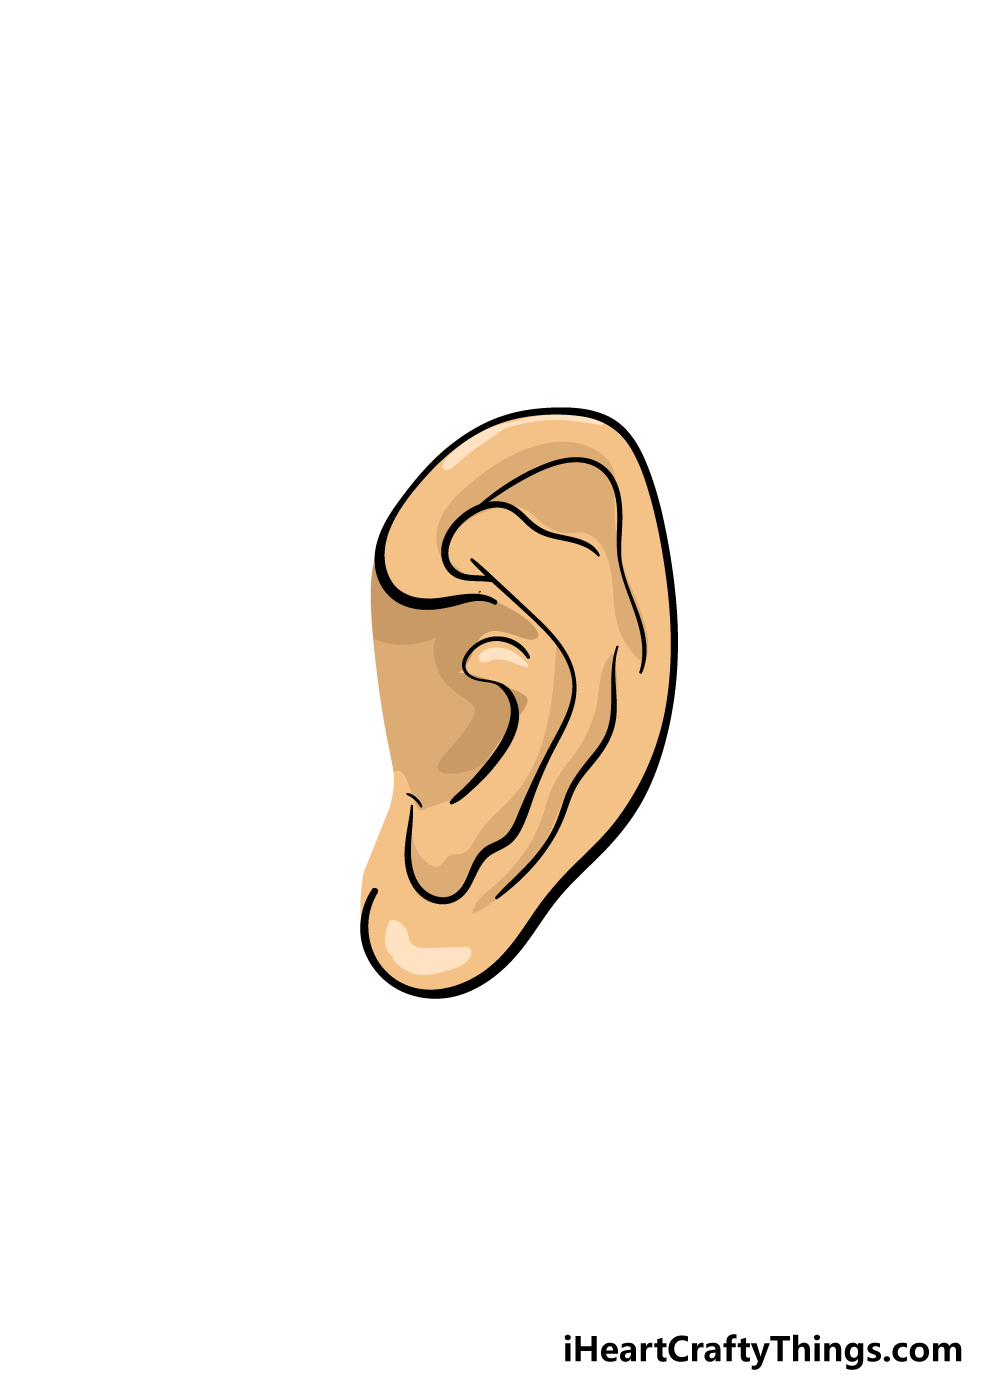
Ears can be tricky to draw, but at this step you have successfully managed to do it! While that is quite an accomplishment already, there’s one more thing to do before you’re properly finished, but luckily it’s a fun step!
Your ear drawing needs some color, and this is your chance to show us how creative you can be!
We’ve shown just one way of coloring in your ear, but you should feel free to experiment and use any colors you would like!
Choosing the color is just one way to personalize your ear drawing, and there is more you can do as well.
One fun thing you could try is to add some jewelry onto the ear. If you have some earrings that you love, you could draw them onto this ear!
Or, you could let your inner jewelry designer loose and design some awesome earrings for it!
You can also have a lot of fun trying out different art mediums to color in your ear. My suggestion would be to use watercolor paints, as the softer look they produce would look great for the skin.
This is just one suggestion though, and you can have a great time using any of your favorite art tools and mediums to finish off your drawing!
Do this to take your ear drawing to the next level
Let’s listen to some fun tips on how to make your ear sketch even better!
One way you could easily make your ear drawing even better would be by drawing more of the head that it is attached to. If you were to do this, you could draw as much or as little of the head as you please.
It would also be made much easier if you got a friend or a family member to pose for you. Doing that would make it so much easier to get the details of the head and face looking good.
Another interesting way you could make this drawing of an ear more interesting would be by labeling the various parts. You could consult a textbook in order to see what the different parts of the ears are called.
If you want to take this idea even further, you could use these diagrams to draw a cross-section of the ear to show what it looks like inside.
That way you can create your own educational ear diagrams and have a cool picture!
If you want to leave this ear drawing as is, you could also customize it in the same way that people may do so in real life. One of the most common ways to do this would be by adding an earring or two.
Some people will have multiple earrings, and you could put as many as you like on this ear. What kinds of earrings would you like this ear to wear?
The final suggestion we have for your artwork is to try out some interesting colors and art mediums to enhance it. In the guide, you saw a few ways in which you can color the ear.
We definitely encourage you to get creative with it and try out some different ideas for colors and mediums.
Don’t be shy to try out something a bit more stylistic and unusual, as it can help you to make your drawing even more unique.
What will you try for this image?
Your Ear Drawing is Complete!
With your ear drawn and colored in, you have reached the end of this guide on how to draw an ear!
As we’ve mentioned before in this guide, ears are very complicated looking, so it may have seemed like an impossible task when you set out.
However, by using this guide we hope that you came to find out that it can not only be easy but also fun to learn to draw an ear!
Once it’s drawn and colored, that’s not the end of the fun, though! Now you can show us your amazing creativity by choosing some colors and art mediums to your drawing. Will you draw in some extra details like some jewelry for the ear?
Perhaps you could also draw in some locks of hair around it to make it seem part of a head! We can’t wait to see how you put some personal touches on your drawing.
This step-by-step guide is one of many that we will be bringing out soon! If you would like more free, awesome drawing guides like this one, be sure to check out our site frequently to never miss out!
We would love to see your finished ear drawing, so we hope you will share it on our Facebook and Pinterest pages for us to admire! We can’t wait to see what a great job you did on this tricky drawing.