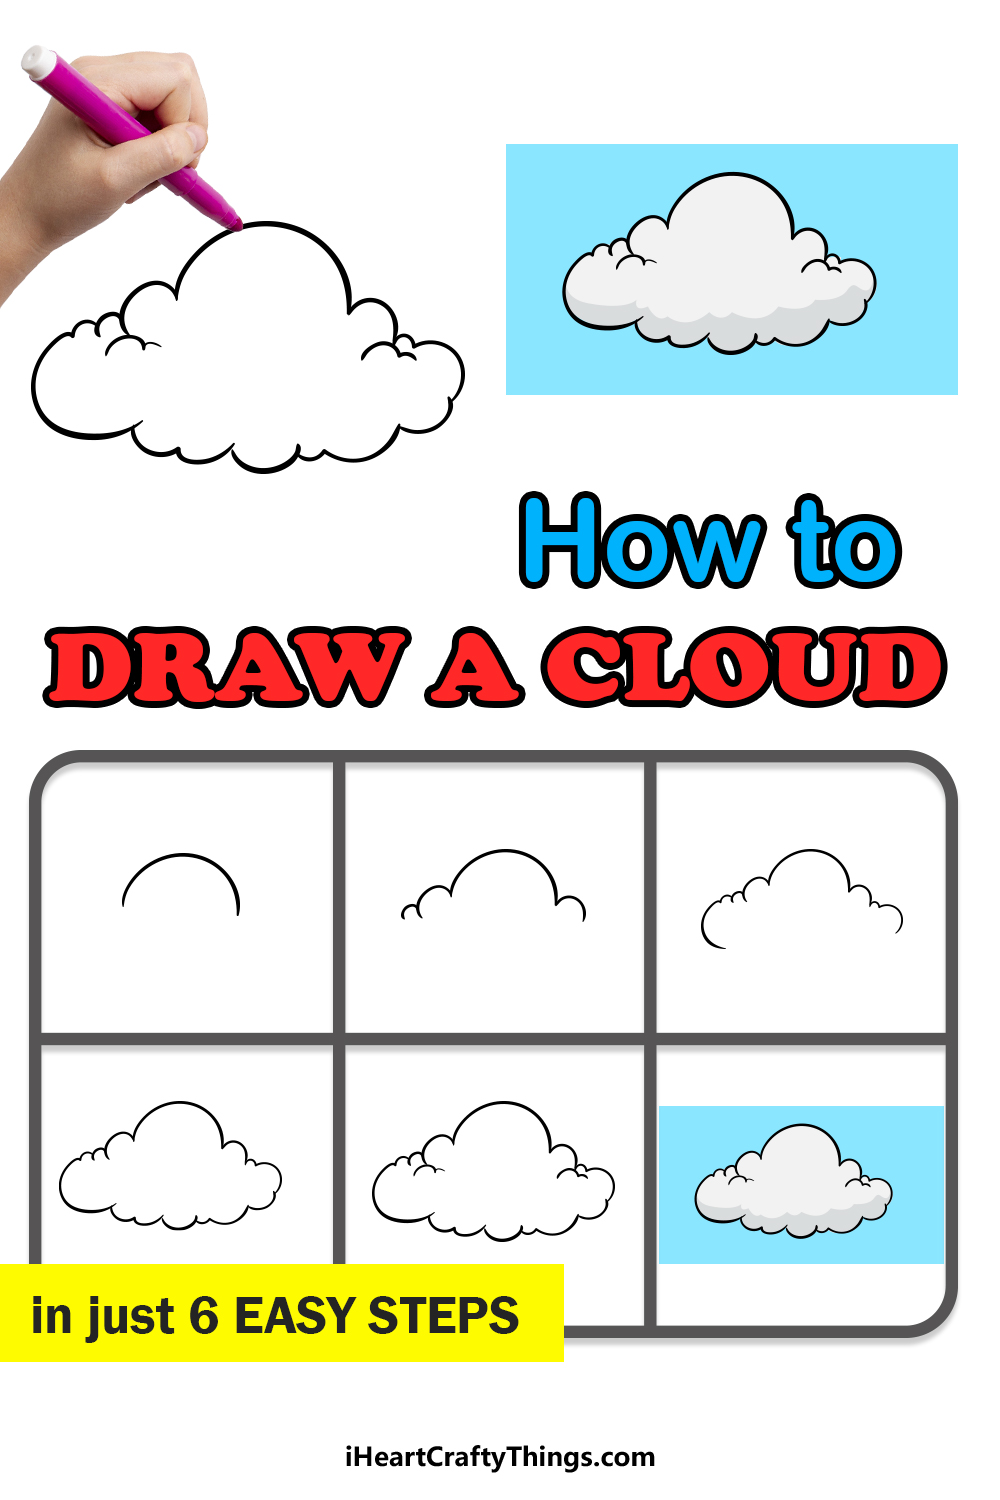
It’s easier than you thought to learn how to draw a cloud thanks to this intuitive guide for kids! Join the fun and see how it’s done by following each step.
I love to sit outside and admire clouds, and it often makes me want to sit and draw them. I’ve had people tell me that they find it surprisingly hard to draw convincing clouds, and that’s why I wanted to make this guide.
In this tutorial, I will take you through each step until you can easily create this design yourself. Then, you could use what you learn to create some different cloud variations and styles of your own.
It could even be fun to draw the clouds over a scene and add some birds or the sun in the background! It’s easier than you thought, so allow me to take you on this drawing journey so you can see how it’s done.
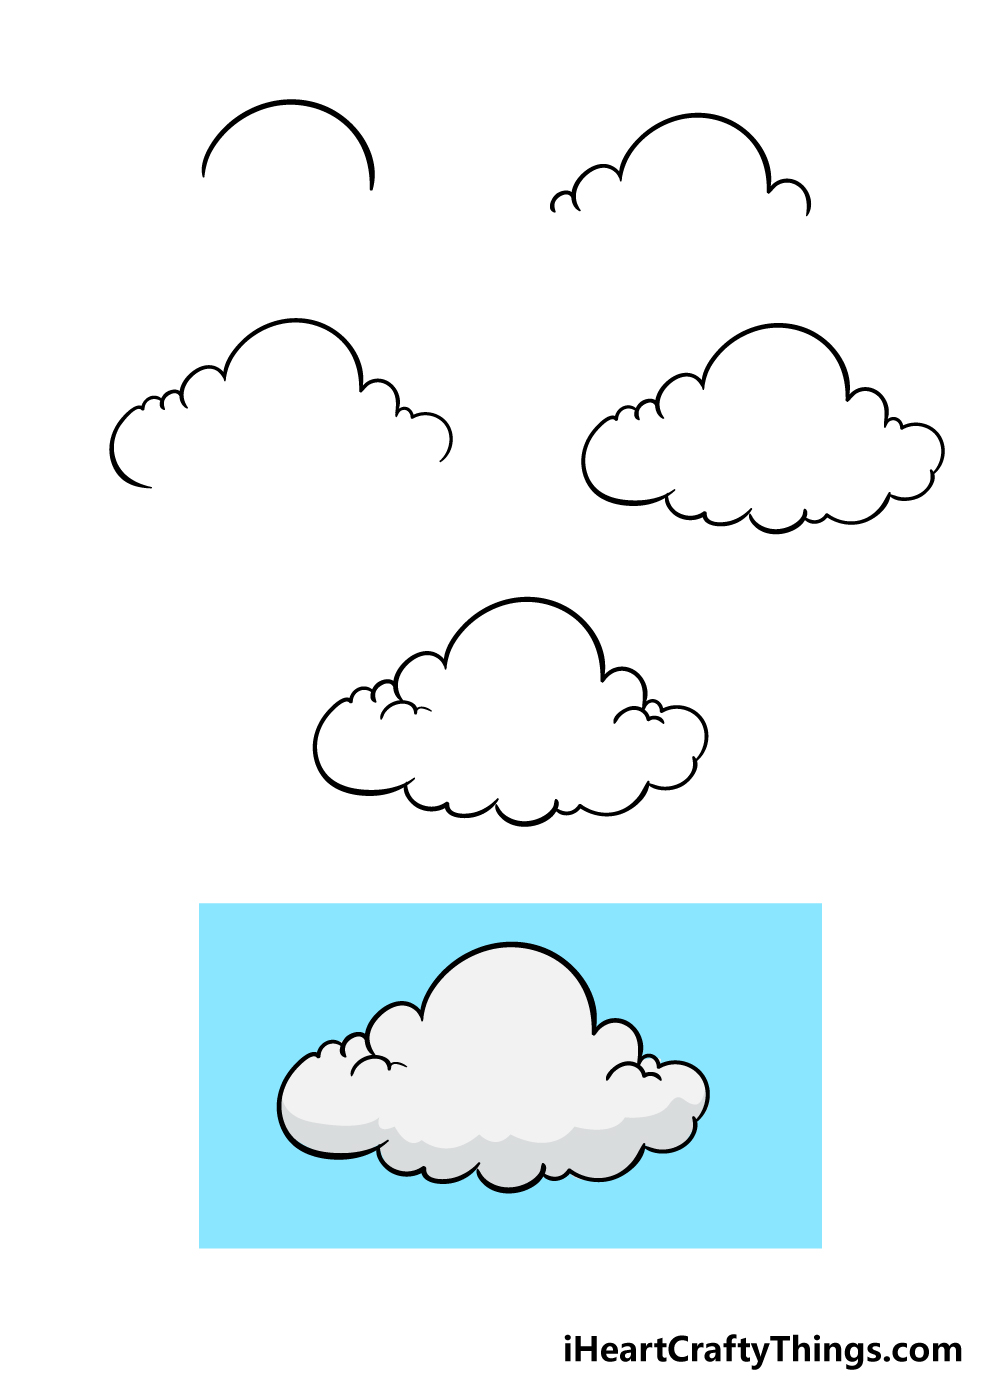
Find Out How To Make Your Cloud Drawing With These Steps
How to Draw A Cloud – Let’s get Started!
Step 1
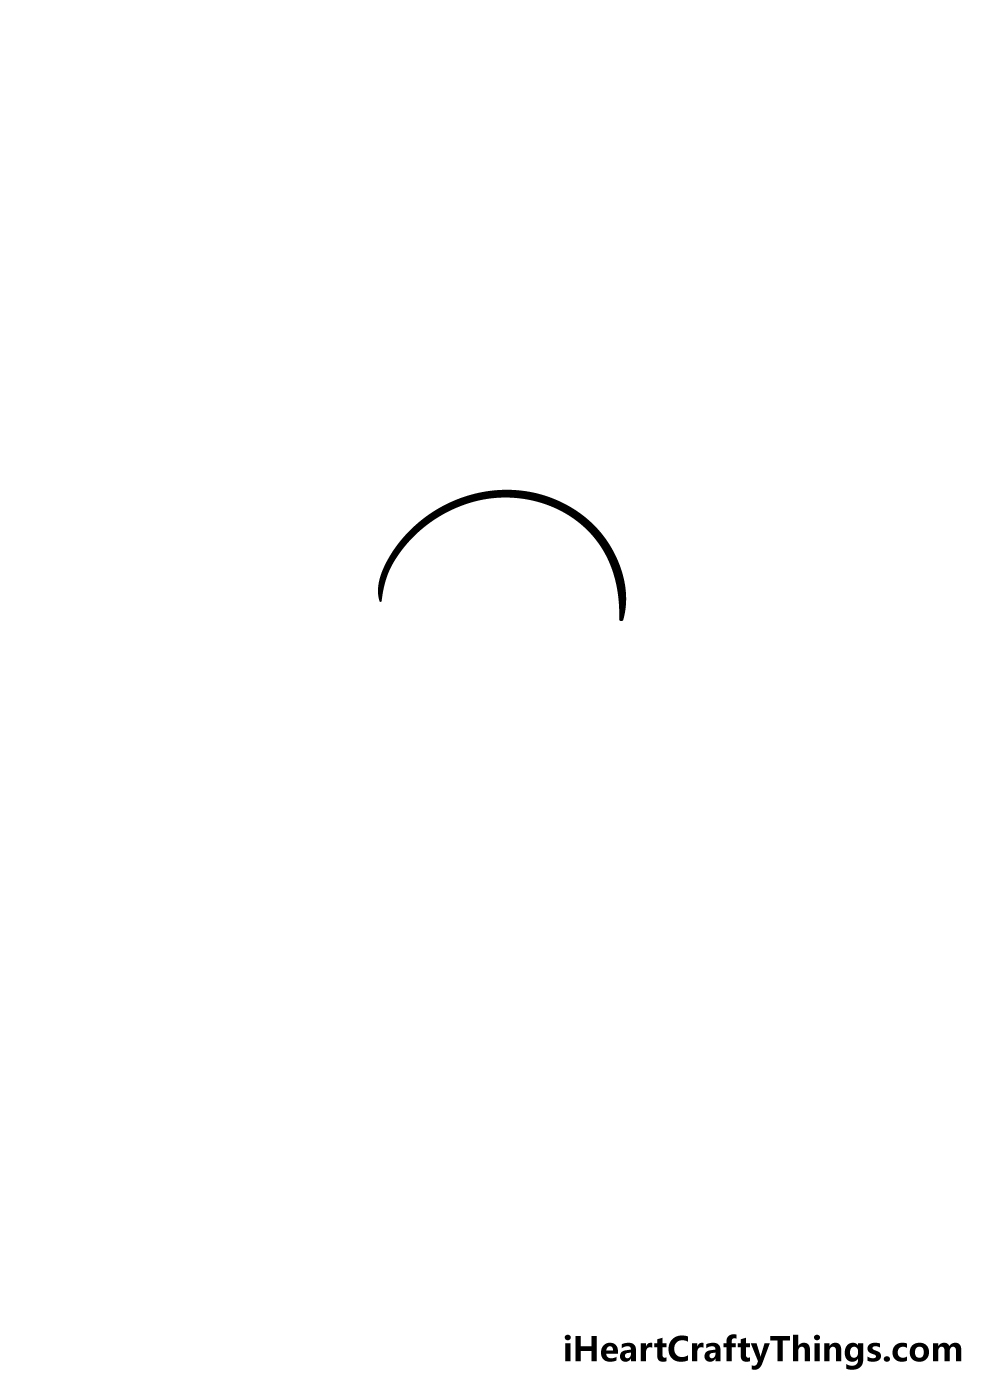
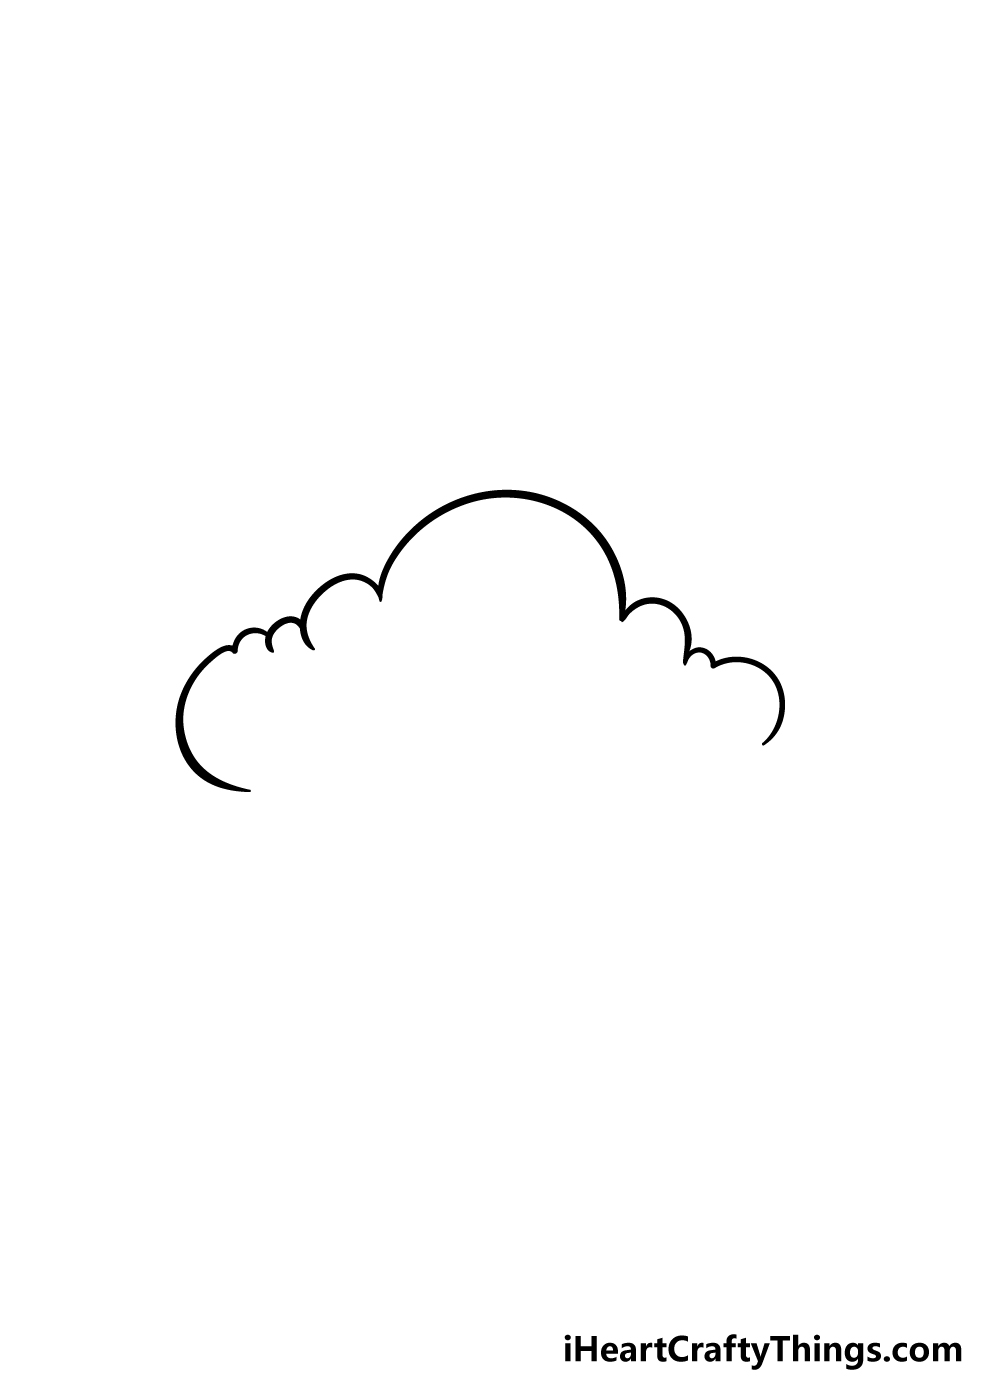
In this first step of our guide on how to draw a cloud, we will start simply. Carefully draw in a very curved horizontal line as you can see in the reference image.
We will be building on to this line in the following steps, so once it’s drawn we shall move on to the next step!
Step 2 – Add in some more lumps to your cloud
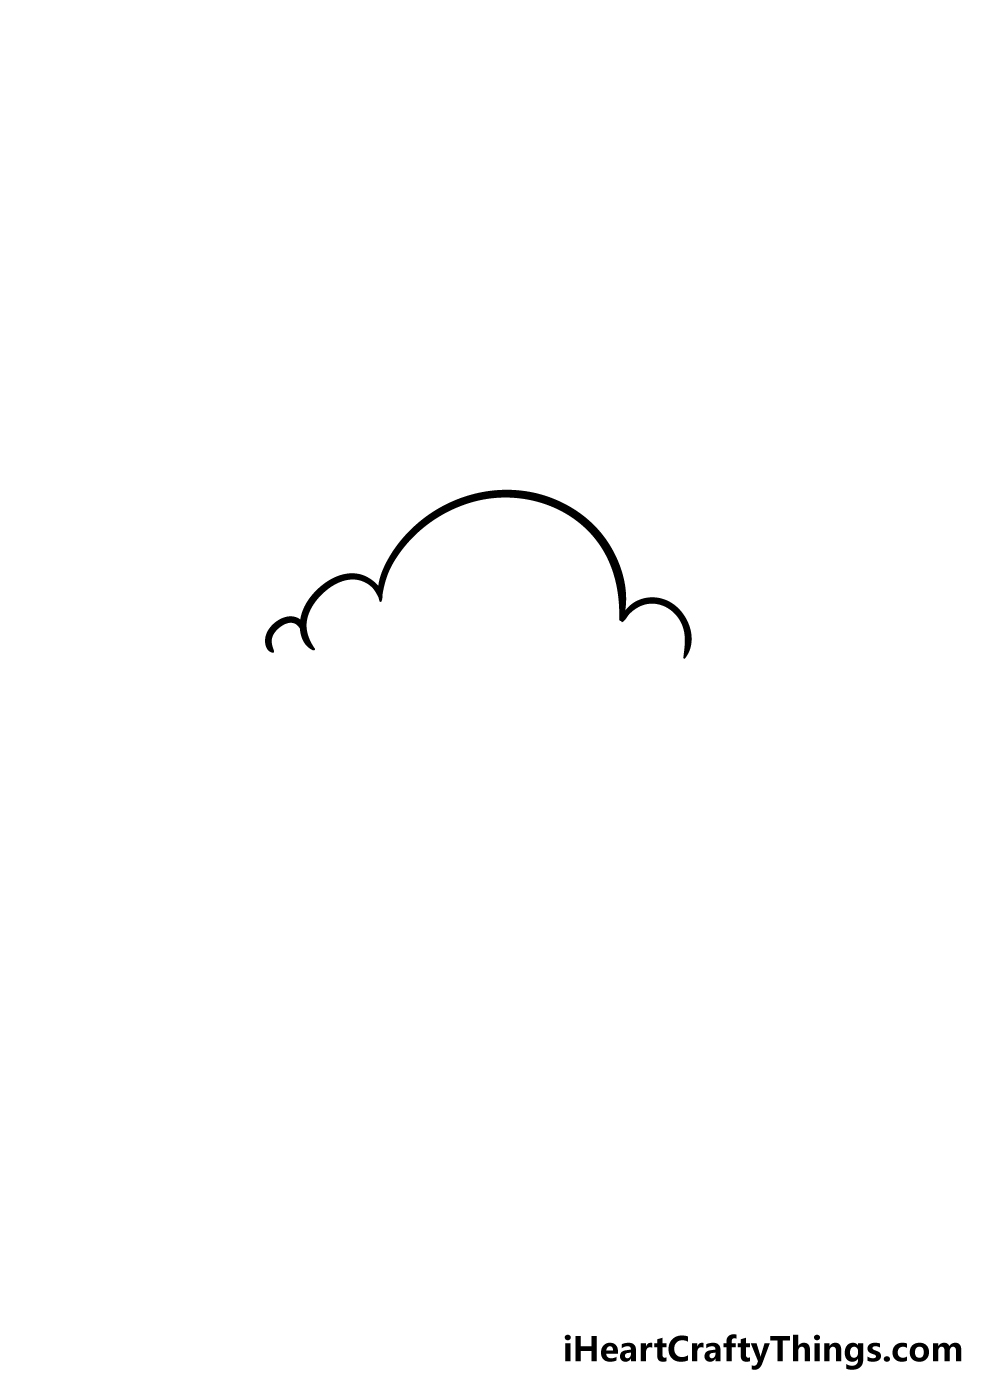
Now that you have the first curved line that will make up a big part of your cloud drawing, you can start adding more fluffy sections to it.
Simply draw in three or four smaller lumps coming off from the part you drew in the previous step.
We added two lumps to the left and one on the right in our image, so you could replicate that or change it up a bit to get a unique look!
Step 3 – Now, draw in the sides of your cloud
Carrying on from the last step, we shall continue adding on to your cloud drawing. Using some more curved lines, add in a few small lumps angling downwards from where you left off last time.
Then, use two larger curved lines, one on each side, to form the sides of your cloud.
As you can see in our reference picture, the curved line for the left-hand side is a bit bigger than the one on the right.
This is to make the cloud look a bit more irregular, and you can change up the sizes of the various lumps in a way that looks good to you!
Step 4 – Next, draw in the bottom of the cloud
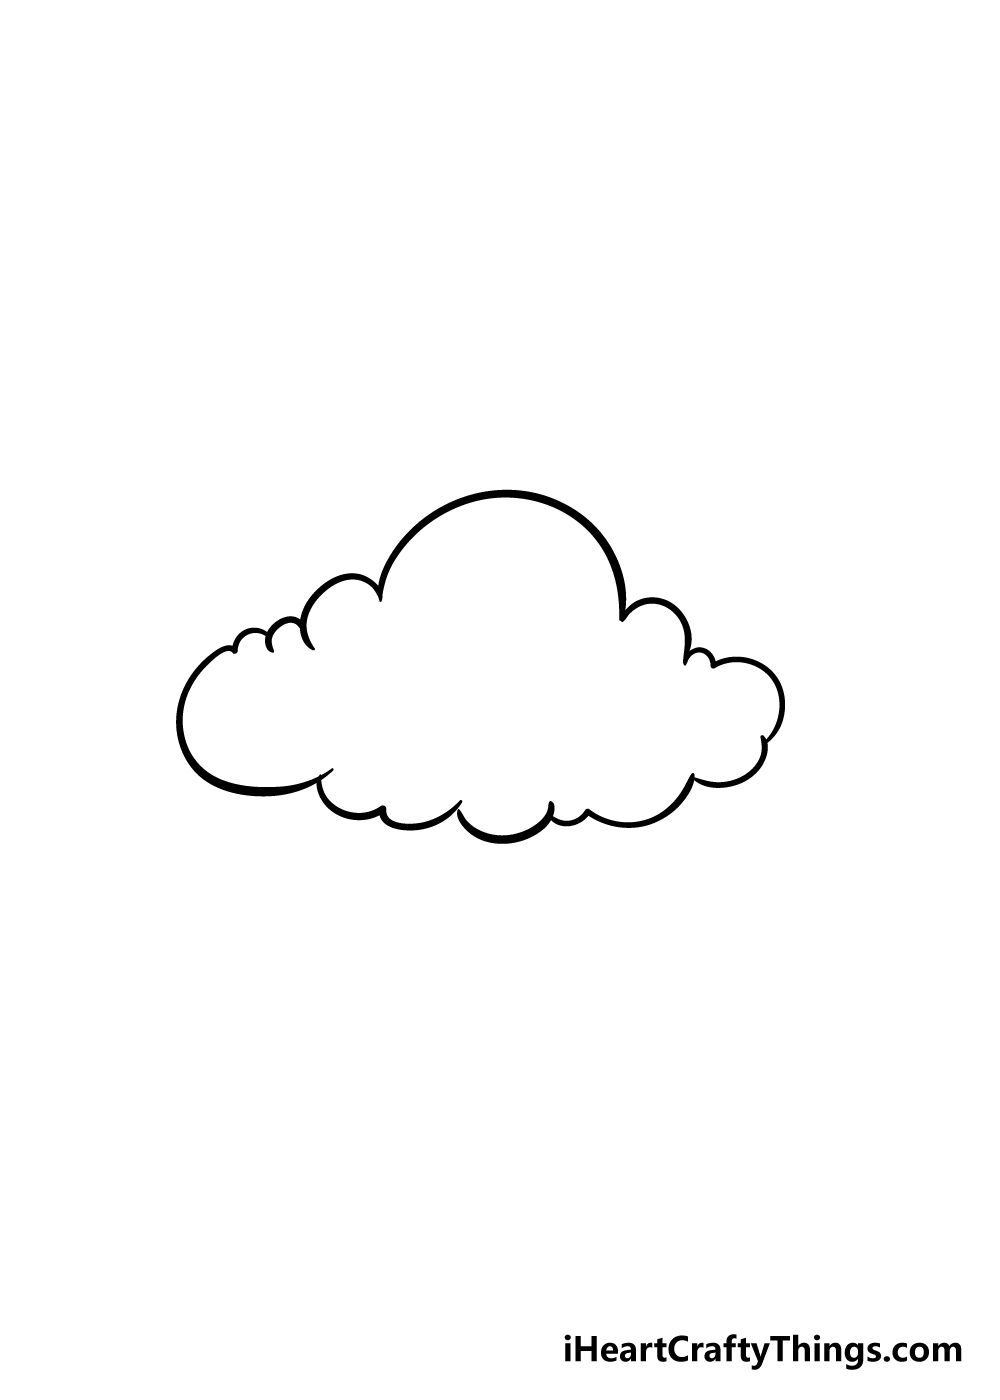
We will add in a bottom for your cloud in this step of our guide on how to draw a cloud.
To do this, make a continuous line made up of lots of the smaller curved, lumpy lines that you have drawn previously.
Make this line extend from one side to the other to form a complete cloud shape. For this step, you could also vary the sizes of the lumps as you see fit so that it looks exactly as you like it!
Step 5 – Now, you can give your cloud some final details

Your cloud drawing is just about done and ready for coloring now! Before we move on to the final step, we just have a few small details.
We added a few wavy lines inside the cloud to give it some extra puffiness. You could replicate these lines, add in some variations of your own or even draw in different parts to this picture!
There is a lot you could do to personalize your drawing.
You could draw in a few more clouds around this one or draw in details like flying birds or the sun shining down to give it even more personality! What details will you add to finish off your cloud drawing?
Step 6 – Finish off your cloud drawing with some color
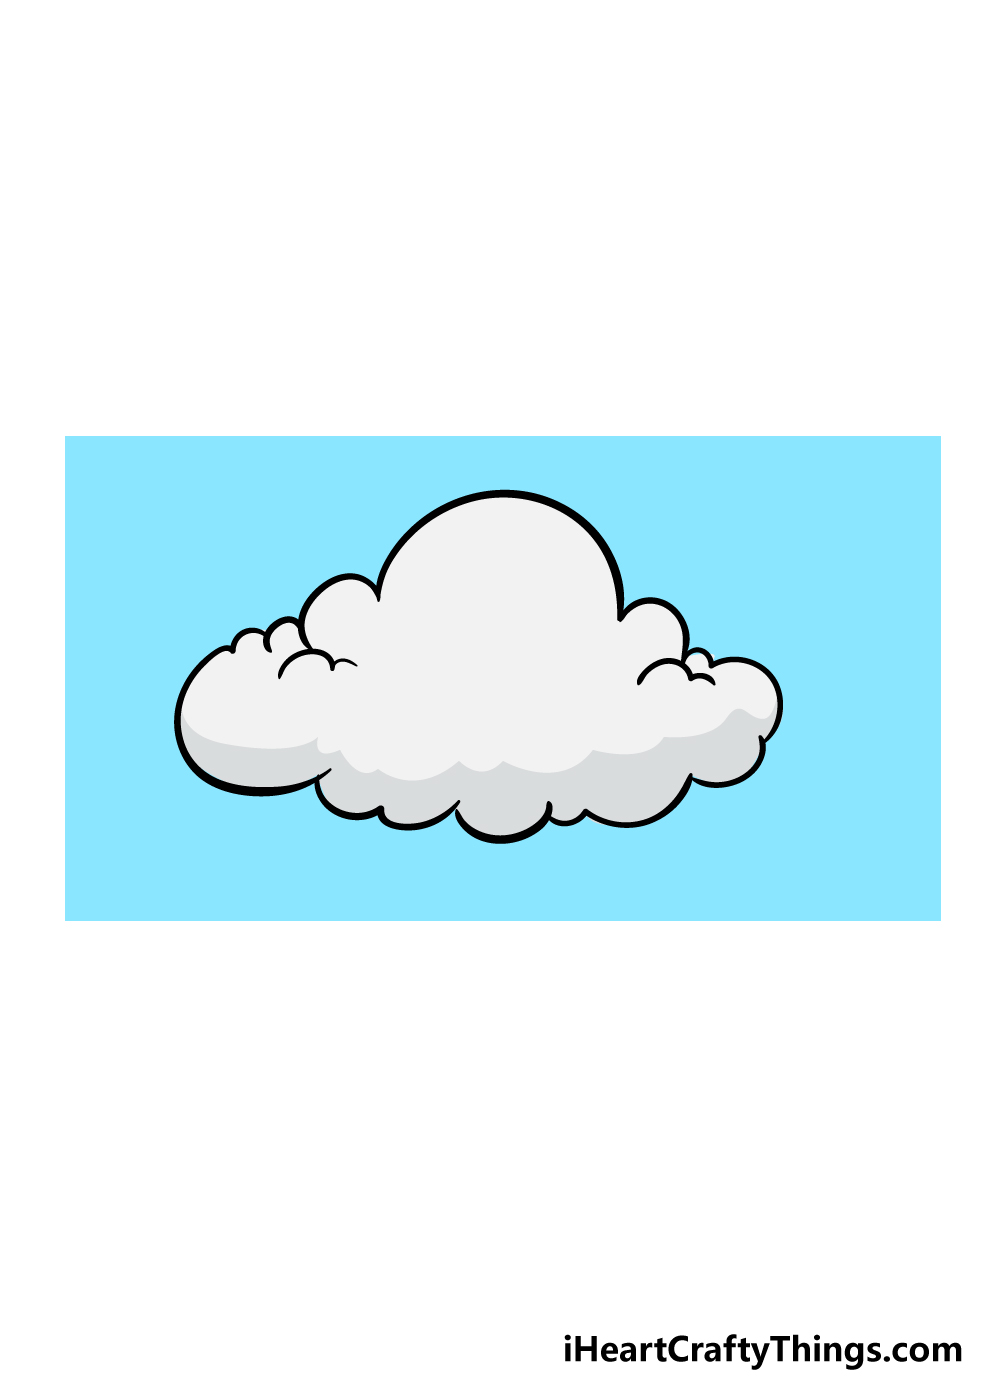
Now that you’ve drawn your cloud and added in some final details, you’ve almost reached the end of this guide on how to draw a cloud!
Before it’s done, it will be needing some beautiful colors, and this is where you can have some great fun showing off your creativity.
If you’ve drawn in some fun additional details, you can color them in as well to add some wonderful dashes of color detail to your drawing.
You can also decide what kind of color you want for the background to suggest what kind of day it is in your cloud drawing. You could use a beautiful orange to make it feel like a sunset or sunrise setting.
A brilliant blue with a bright yellow sun would make it look like a beautiful Summer day, whereas a more grey color scheme would make it look more overcast.
You could even draw in a whole lot of raindrops coming down from the cloud and color them in with a light blue for some wonderful color variation.
Once you’ve decided on the colors you want to use, you can have even more fun with the art mediums you choose to finish off your drawing.
Ones like acrylic paints and colored pens can give a sharper and brighter look to the colors.
On the other hand, watercolor paints, colored pencils or crayons can give a lovely softer look to these colors. What do you think you will use to finish off your beautiful cloud drawing!
Bonus: Use Crafts To Make Your Drawing Look More Dynamic
We covered some of the colors and coloring tools you can use to make your cloud drawing look even more amazing, but you don’t have to be limited to traditional coloring methods.
It was a simple drawing that we worked on in this guide, and using less conventional craft supplies can really take it to the next level. You can start by walking around your house looking for things you could stick to the page.
Just make sure it’s nothing that belongs to anyone that they wouldn’t be okay with losing! For one example, you could use some lumps of cotton wool.
You could stick these over the cloud to make it look like it’s actually a cloud sticking off the page. You also don’t have to stick to the cloud.
Maybe you would like to have something to represent the sun near the clouds. You could use a yellow bottle cap or maybe a button and then stick that to the page for a 3D element.
These are just a few examples of how you could use whatever you can find to elevate the drawing. Going into your yard, finding a stick and then making a tree out of it would be another idea.
Get creative with it and you may surprise even yourself with what you’re able to come up with. There are no wrong answers, and the wilder your idea the more your drawing will be even more unique!
We’ve given you a few examples, but now it’s up to you. Can you think of any crafts or household objects that yoou could use to make this drawing even better?
We can’t wait to see what cool ideas you can think of!
Here’s how you can make your cloud drawing even better…
These fun tips on making this cloud drawing even better are sure to put you on cloud 9! We kept the details on this cloud sketch fairly simple, but you could change it completely with a few details.
We think that it could be fun to create a cartoon character out of this cloud, for example. You could do this easily by drawing a simple face onto the cloud.
Then, if you wanted to take it even further then you could add some limbs or accessories. These are just a few ideas, but we’re sure you can think of some more!
Clouds will produce rain and lightning during storms, and you could add some of these effects here.
Adding some raindrops could be as simple as adding lots of small lines, or you could draw each one individually.
Then, you could add some jagged lightning coming down to make it even more dynamic! These are also just a few examples of some extra elements that you could add to the drawing.
This drawing of a cloud was kept fairly small to make it a bit easier, but you could also make it much larger!
When the weather is very rainy, clouds can take up the entire sky, so you could fill the page with this cloud.
Or, you could draw many smaller clouds bunched together to also create a really cloudy day. Now that you know how to draw a cloud, it should be easy for you to add more to the one we created here!
Depending on how heavy the rain will be, clouds can come in many different colors. They can be white and fluffy or so dark that they appear almost pure black.
This gives you many different colors to use for this cloud sketch! You could even use crafts such as cotton wool that you can glue over the drawing to give it a 3D effect.
You can use food coloring to color the cotton wool if you want the effect but also would prefer a darker cloud.
Your Cloud Drawing is Complete!
With step 6 complete, you have accomplished your mission of learning how to draw a cloud!
A cloud is the kind of drawing that can be trickier than you would expect when you set out to draw it.
Because of this, we made this guide to make sure that you’ll have the opposite effect and find out that it can be easier than you think too!
As long as you follow this guide and take it slow, you’ll not only be able to draw a cloud with ease but you’ll also be able to create your own variations.
Once you can draw a cloud, what will you do to make the drawing unique to you?
Your drawing journey doesn’t have to end here, though, as we have many more wonderful drawing guides like this one coming out constantly for you to enjoy!
You won’t want to miss out on them, so be sure to check our site frequently!
We would also love to see your amazing cloud drawing creations, so please do share them on our Facebook and Pinterest pages so we can marvel at your creativity!
Here Is A Cute Cloud Drawing To Inspire You!
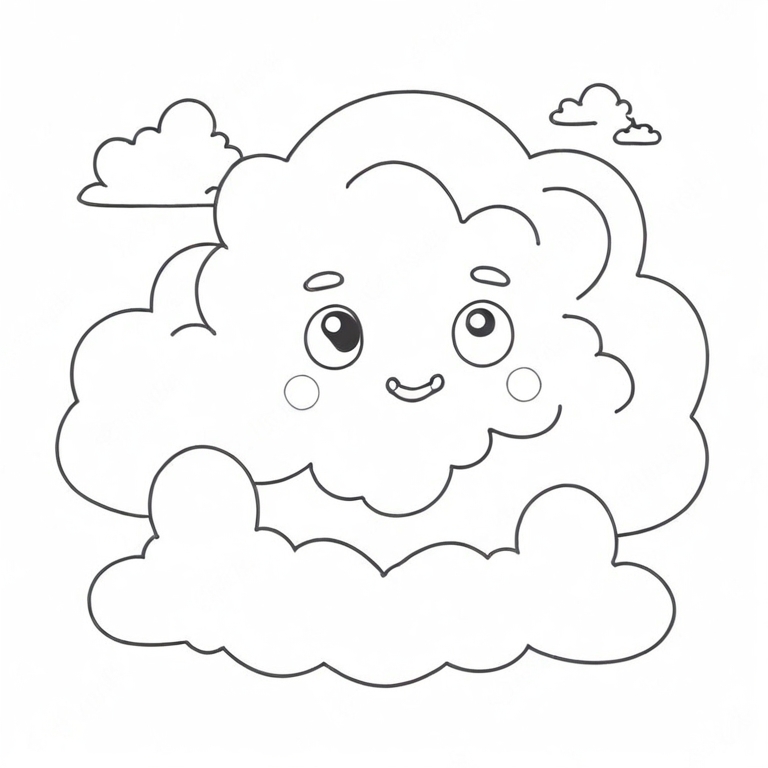
You have seen all of the steps in this guide, so now creating this design is hopefully a bit easier for you. If you need a bit of extra inspiration, our artist Freddy has you covered!
He created this cute cloud drawing for kids to make it easier for you to visualize the end result.
The cloud is drawn with some simple lines and details, and he added some cartoony facial features as well.
This gives the cloud so much personality. By changing these facial details even a little bit, you could make endless variations of the design.
Then, if you want to make it even more unique, then you could add more clouds and other details as well.
Making a detailed background can be another way to make this cute cloud sketch even more unique to you.