


Flowers are always a beautiful addition to any setting they’re introduced to. Flowers usually symbolize life and prosperity, but there is also a kind of dark beauty to a dead flower.
When a flower is shrivelling and dying, it can bring a whole different kind of mood to the setting it’s in than when it was alive.
This can also be a great subject to recreate in some artwork, and learning how to draw a dead flower is a great way to go about doing this.
If you would like to know how you can create artwork like that, then be sure to read all the way to the end of this tutorial!
Our step-by-step guide on how to draw a dead flower in just 6 easy steps will show you how fun and easy it can be!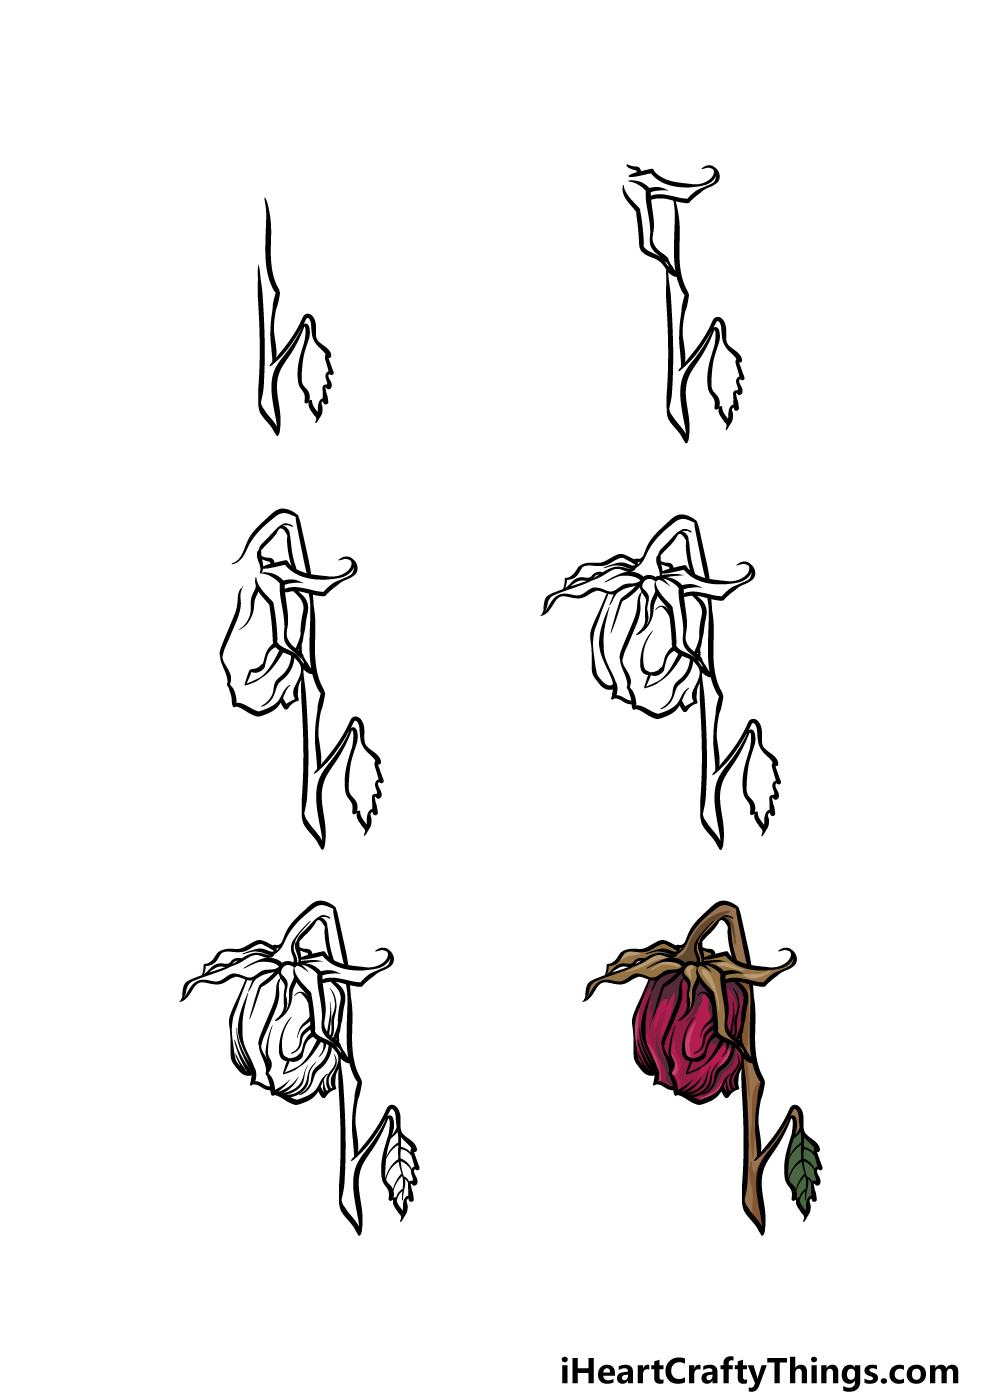
How to Draw A Dead Flower – Let’s Get Started!
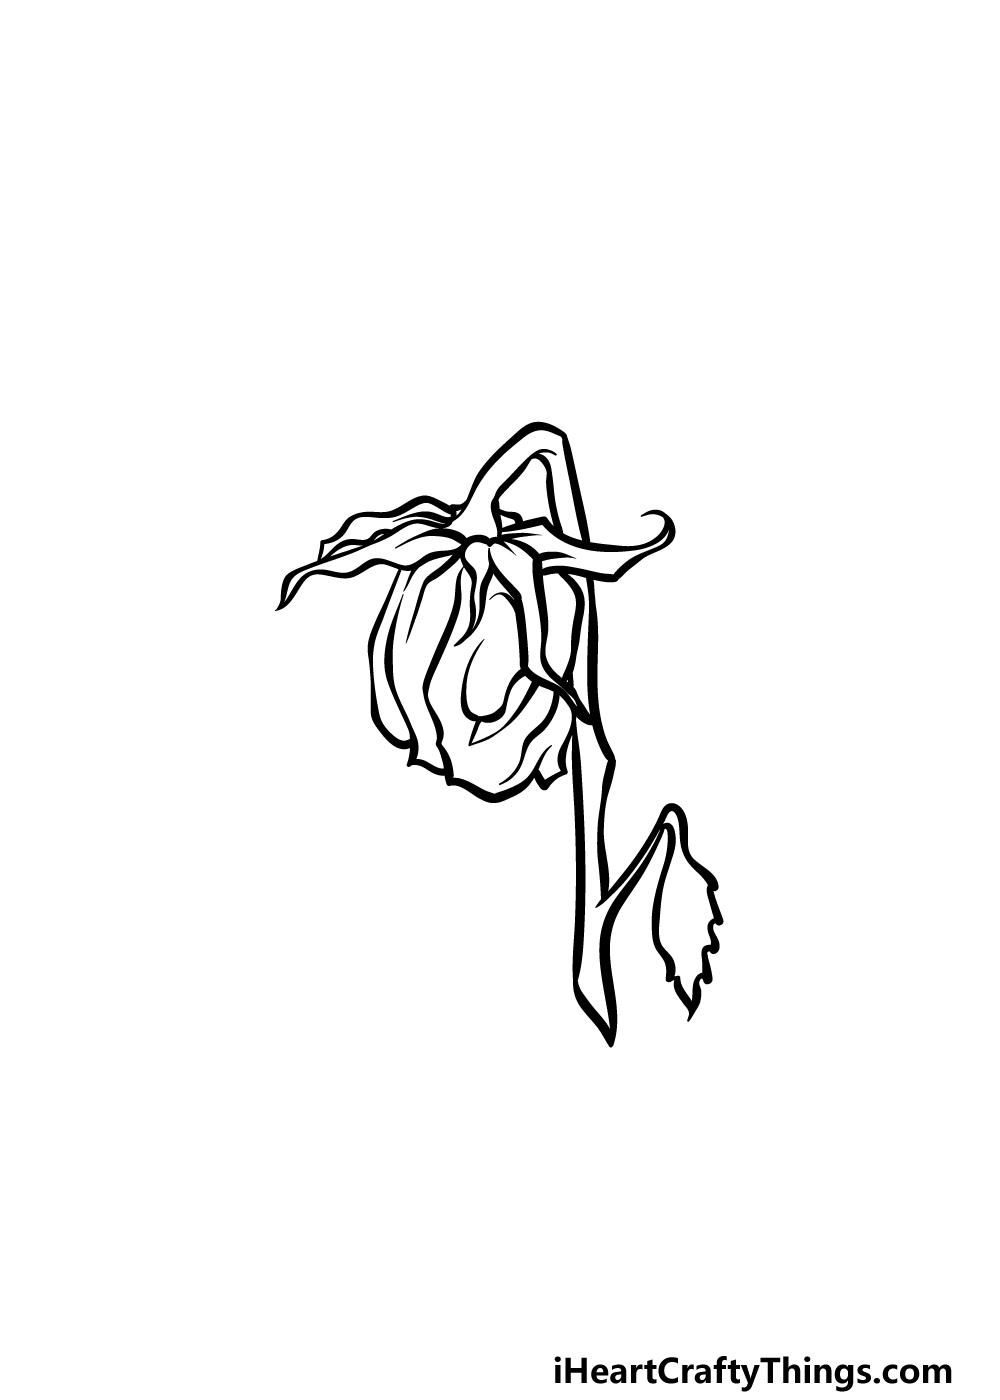
Step 1
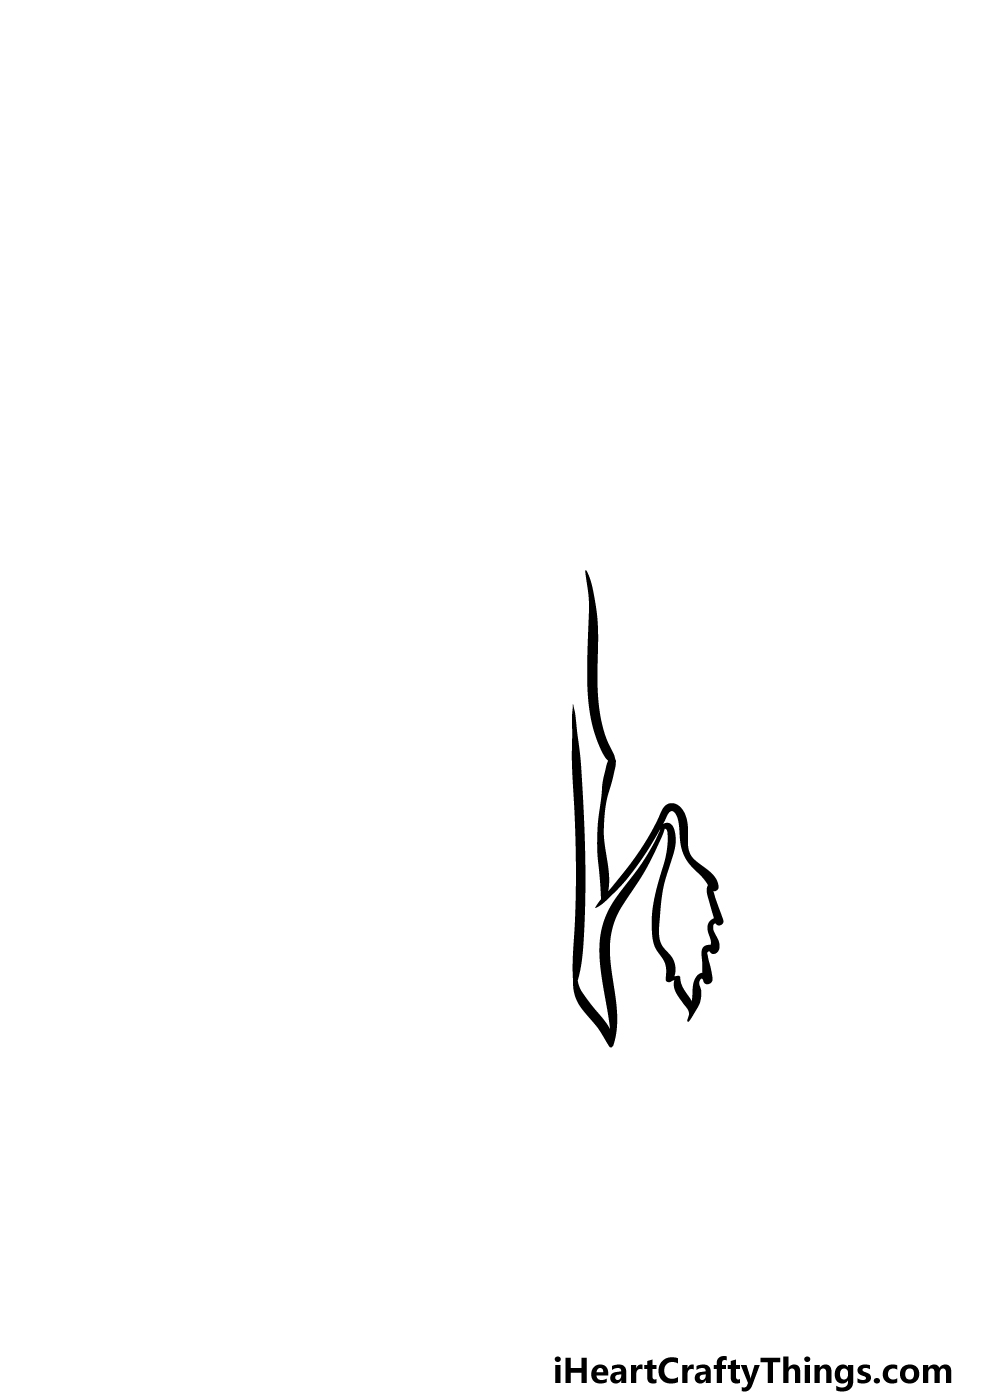
To get this guide on how to draw a dead flower started, we will start not with the flower itself but rather the stem.
The stem will be drawn with some slightly curved lines with minor little dulled pointy parts sticking off of it.
These dull points will make the stem look a bit more mangled and twisted, further emphasizing the look of being a dead flower.
You can also draw a leaf coming off of the side of the stem, and this will be on a very bent little stem.
The leaf will be drawn with some pointy lines and will be looking a bit droopy to make it look dead as well. Once all of these aspects have been drawn, we can continue to step 2!
Step 2 – Now, draw the shriveled sepals of the dead flower
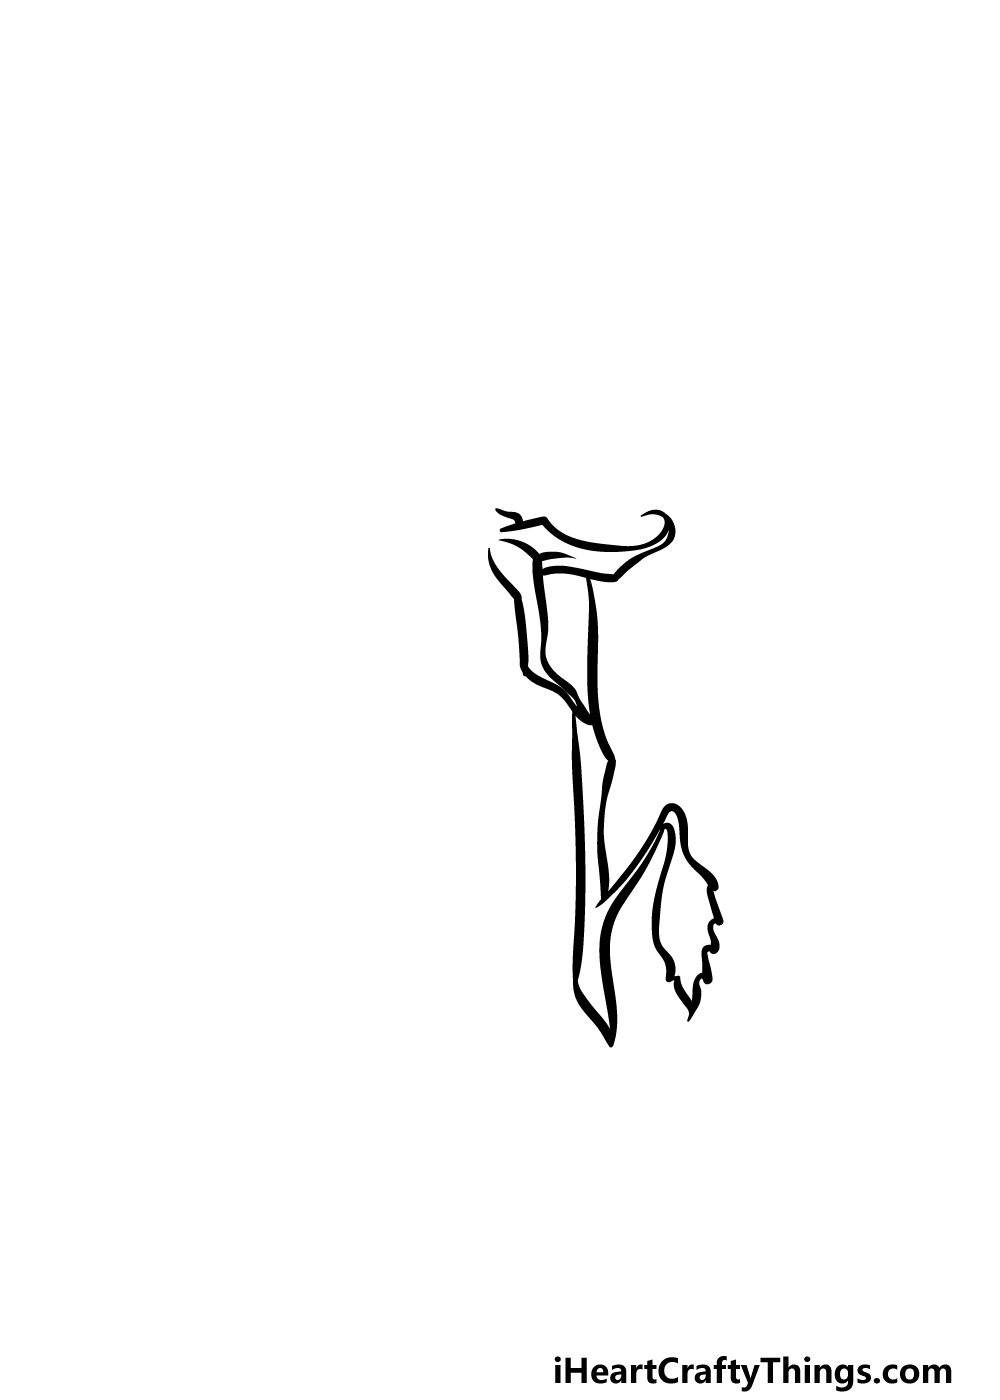
Flowers will often have small, thin leaves at the base of the petals that poke out. These are called sepals, and we will be drawing the first ones for your dead flower drawing.
Much like the rest of the parts of the flower, these sepals will be drawn to look a bit mangled and twisted. You can do this by using some more angular lines for the outline.
You can draw two of these sepals in this step, and then you will be ready to move on to the third step of the guide.
Step 3 – Draw more of the stem and add the first petals
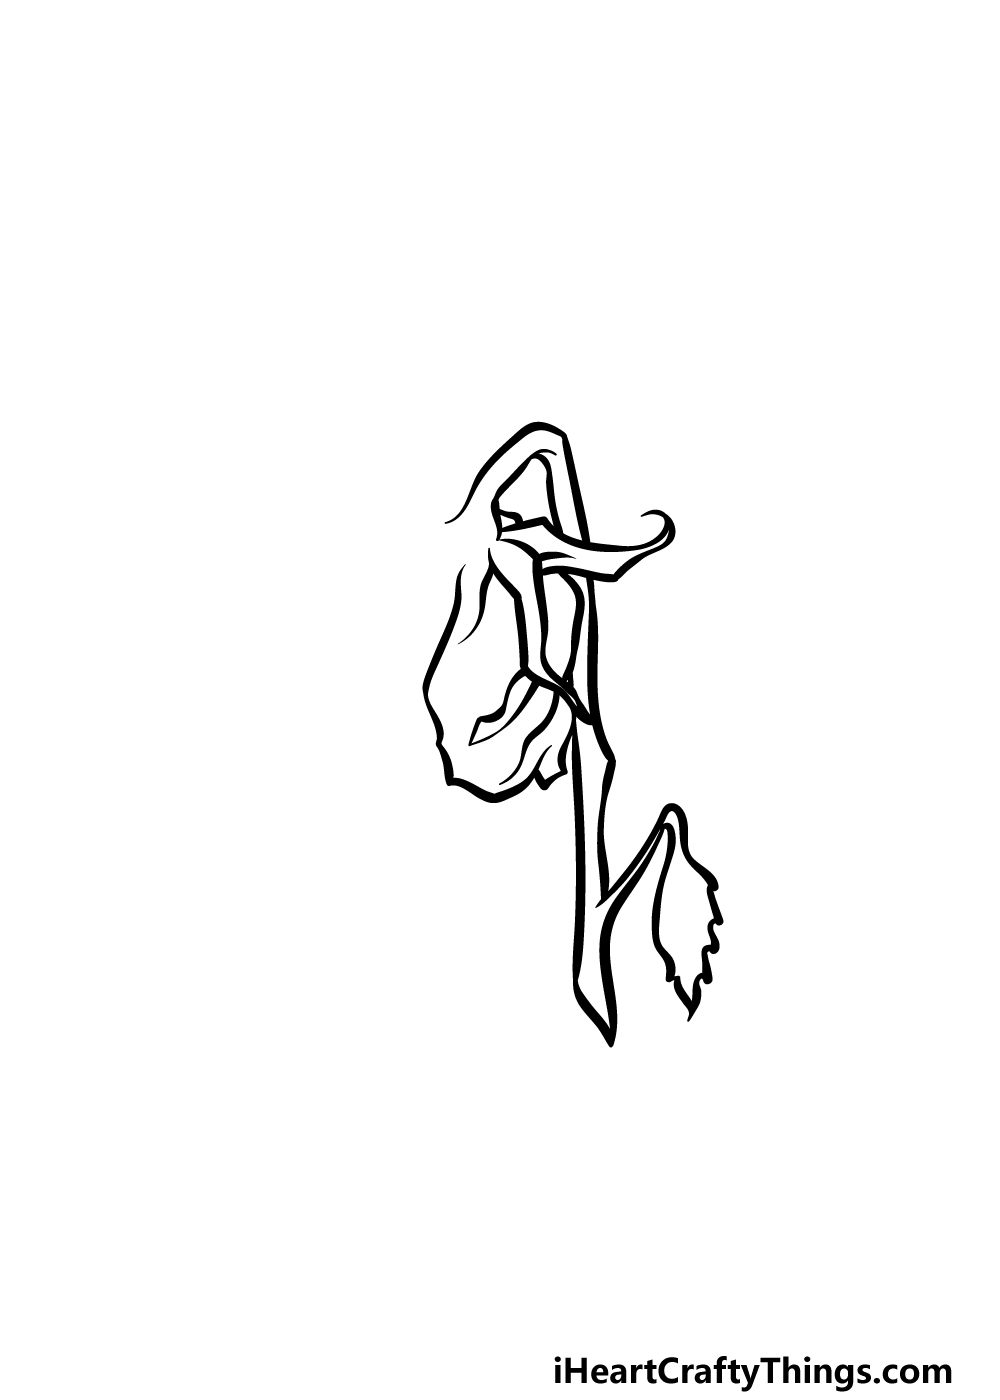
Continuing on with this guide on how to draw a dead flower, you can now add more of the stem and the first petals for the flower. First, draw some more sharply curved lines on top of the stem.
The stem gets weaker as the flower dies, so it will struggle to support the weight of the flower itself. Then, once you have drawn this bent section of the stem we will draw the petals.
Once again, we will be using some more angular lines to create the outline for the petals to also make them look a bit shrivelled up.
Finish them off by adding some curved line details in the interior of the petal outlines to make them look more textured.
Step 4 – Next, draw some more sepals and petals
You’re doing a great job on this dead flower drawing so far! In this part we will be adding more of those sepals and the next portion of petals.
For the sepals, use some more bent lines to show them poking off of the flower. These ones still have a bit of structure to them, so they will be poking out fairly sharply.
Then, you can add some more petals on the left-hand side of the flower and add the same texture details that you did for the other ones.
Once these are drawn, you will be ready for the final details in the next step!
Step 5 – Add the final details to your dead flower drawing
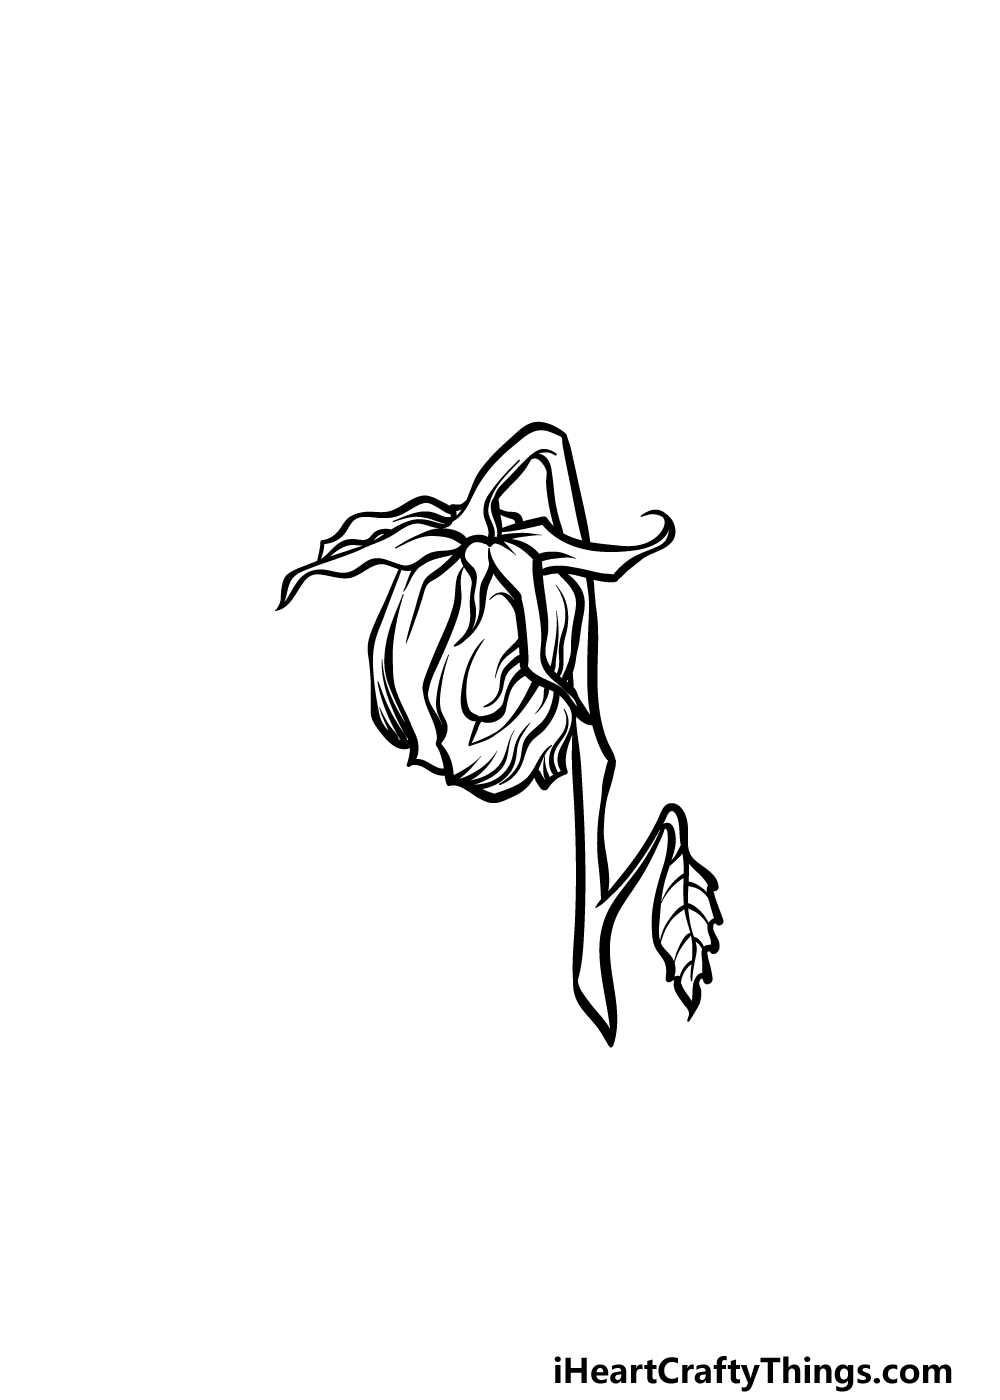
This step of our guide on how to draw a dead flower will be all about finishing it off with some final details before you color it in.
These details will mostly be some texture details, and you can start by adding some more of those texture lines to the petals.
Then, you can finish off the details by adding some vein details to the leaf. You don’t have to stop there once you’ve finished our details, as this is your chance to add some of your own!
You could draw a background or even create some of your own dead flowers to go with this one. These are just a few ideas, but what else can you think of to add to it?
Step 6 – Finish off your dead flower drawing with color
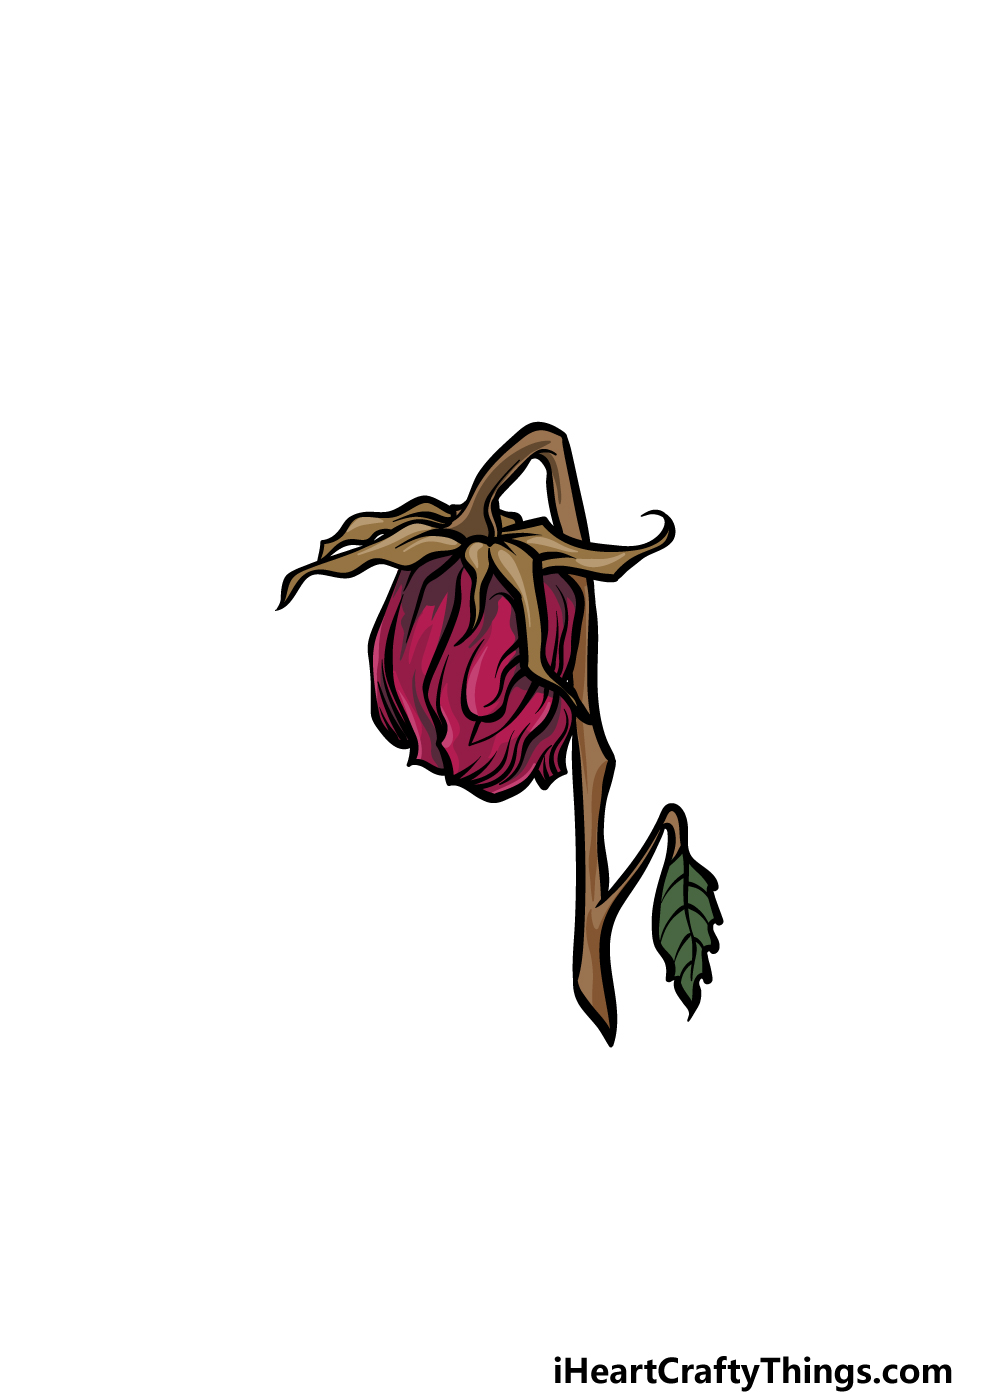
Now you’re ready to finish off this dead flower drawing by adding some colors to it.
When flowers die, their colors will often get a bit darker and more faded, so we used some more muted color shades for this image.
We used some browns for the stem and sepals and then some dark green for the leaf with some dark purple for the petals.
You could use some similar color shades for your own image, but you should also feel free to use your own color choices as well!
We would recommend using some watercolor paints for a more muted look, but there are tons of great mediums you could use that would also look great!
4 More Ways To Make Your Dead Flower Drawing Unique
Make this darkly beautiful dead flower sketch even more incredible with these tips.
You’re unlikely to see just one single dead flower in life, so you could make this dead flower drawing even better with some more flowers. Now that you know how to create this drawing, it should be easy for you to do!
Simply follow the steps in the guide, and then change a few elements such as the way the dead flower is facing. This way you could easily create a great bouquet of beautiful dead flowers!
This next idea we have for you leads on nicely from the previous one. Here, we would suggest adding a more established setting for your drawing of a dead flower.
You could do this whether you kept it to one flower or drew a bouquet as we suggested. For one idea, you could have the flowers in a pretty vase to keep them together.
Or, maybe they could be shown at a grave or some kind of sombre setting. Where would you place these flowers?
Another way to make your dead flower sketch more interesting would be by adding some different kinds of dead flowers. These could go alongside the one that we worked on together.
If you want to know how different flowers would look, there are a few ways. You might have some dead flowers if you have a yard, but you could also look at some pictures online.
Doing this would make this an even more beautiful picture to behold!
Finally, the colors you use can really make a big difference to your artwork. We showed you some great colors you can use in our guide, but these are far from the only ones you could use.
You could make the colors even darker than we did, or maybe you’d prefer to have some brighter elements.
If you can find some dried leaves that are a bit withered, you could even stick them onto the image instead of drawing leaves. There are so many creative elements you can use for this dead flower drawing!
Your Dead Flower Drawing is Complete!
The subject we were creating in this guide on how to draw a dead flower may be a bit sombre, but we hope that it was still a lot of fun to work through!
When you take on a new drawing challenge, the best way to conquer it is by breaking it down into smaller steps, and that’s what we aimed to do for you in this guide.
Remember that you can also add your own ideas to it, and you can also have a lot of fun experimenting with various colors and art mediums, so have fun letting your creativity flow!
Then, you can check out our website when you’re ready for more awesome drawing guides. We upload new ones often, so you’ll want to keep checking in to join the fun!
We would be very interested to see how your dead flower drawing came out, so please be sure to share a copy on our Facebook and Pinterest pages!